
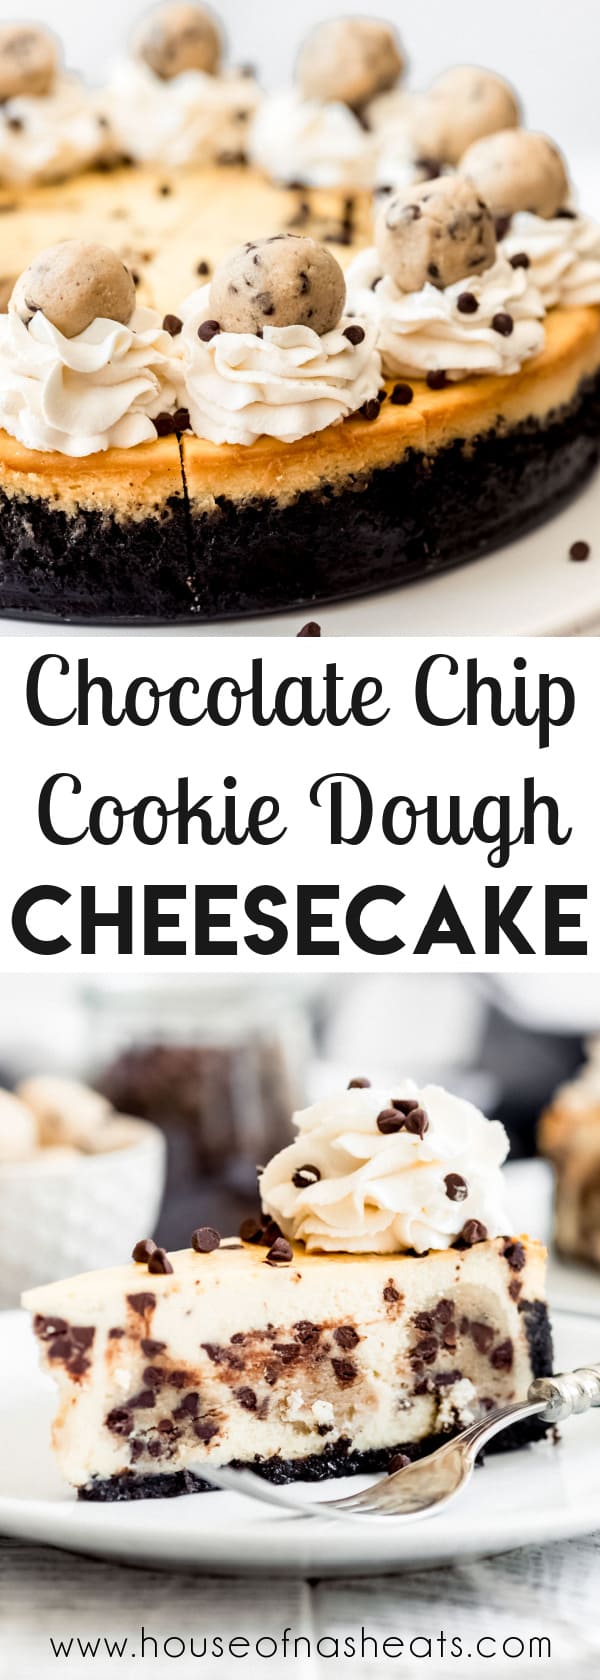
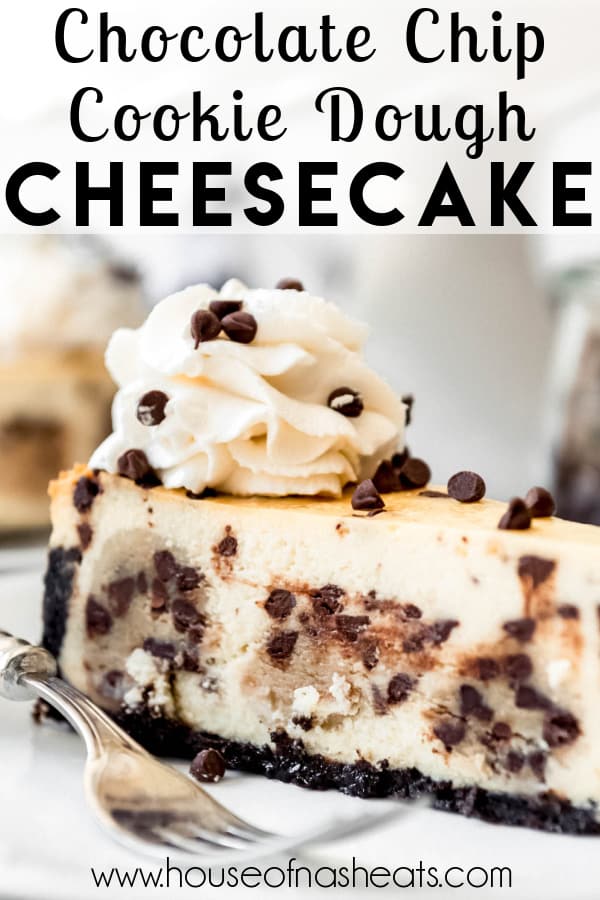
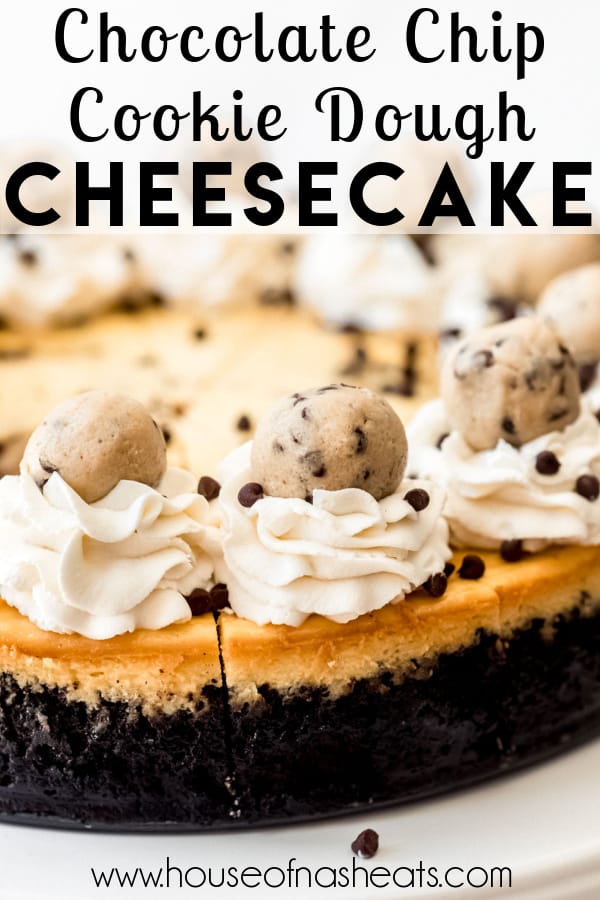
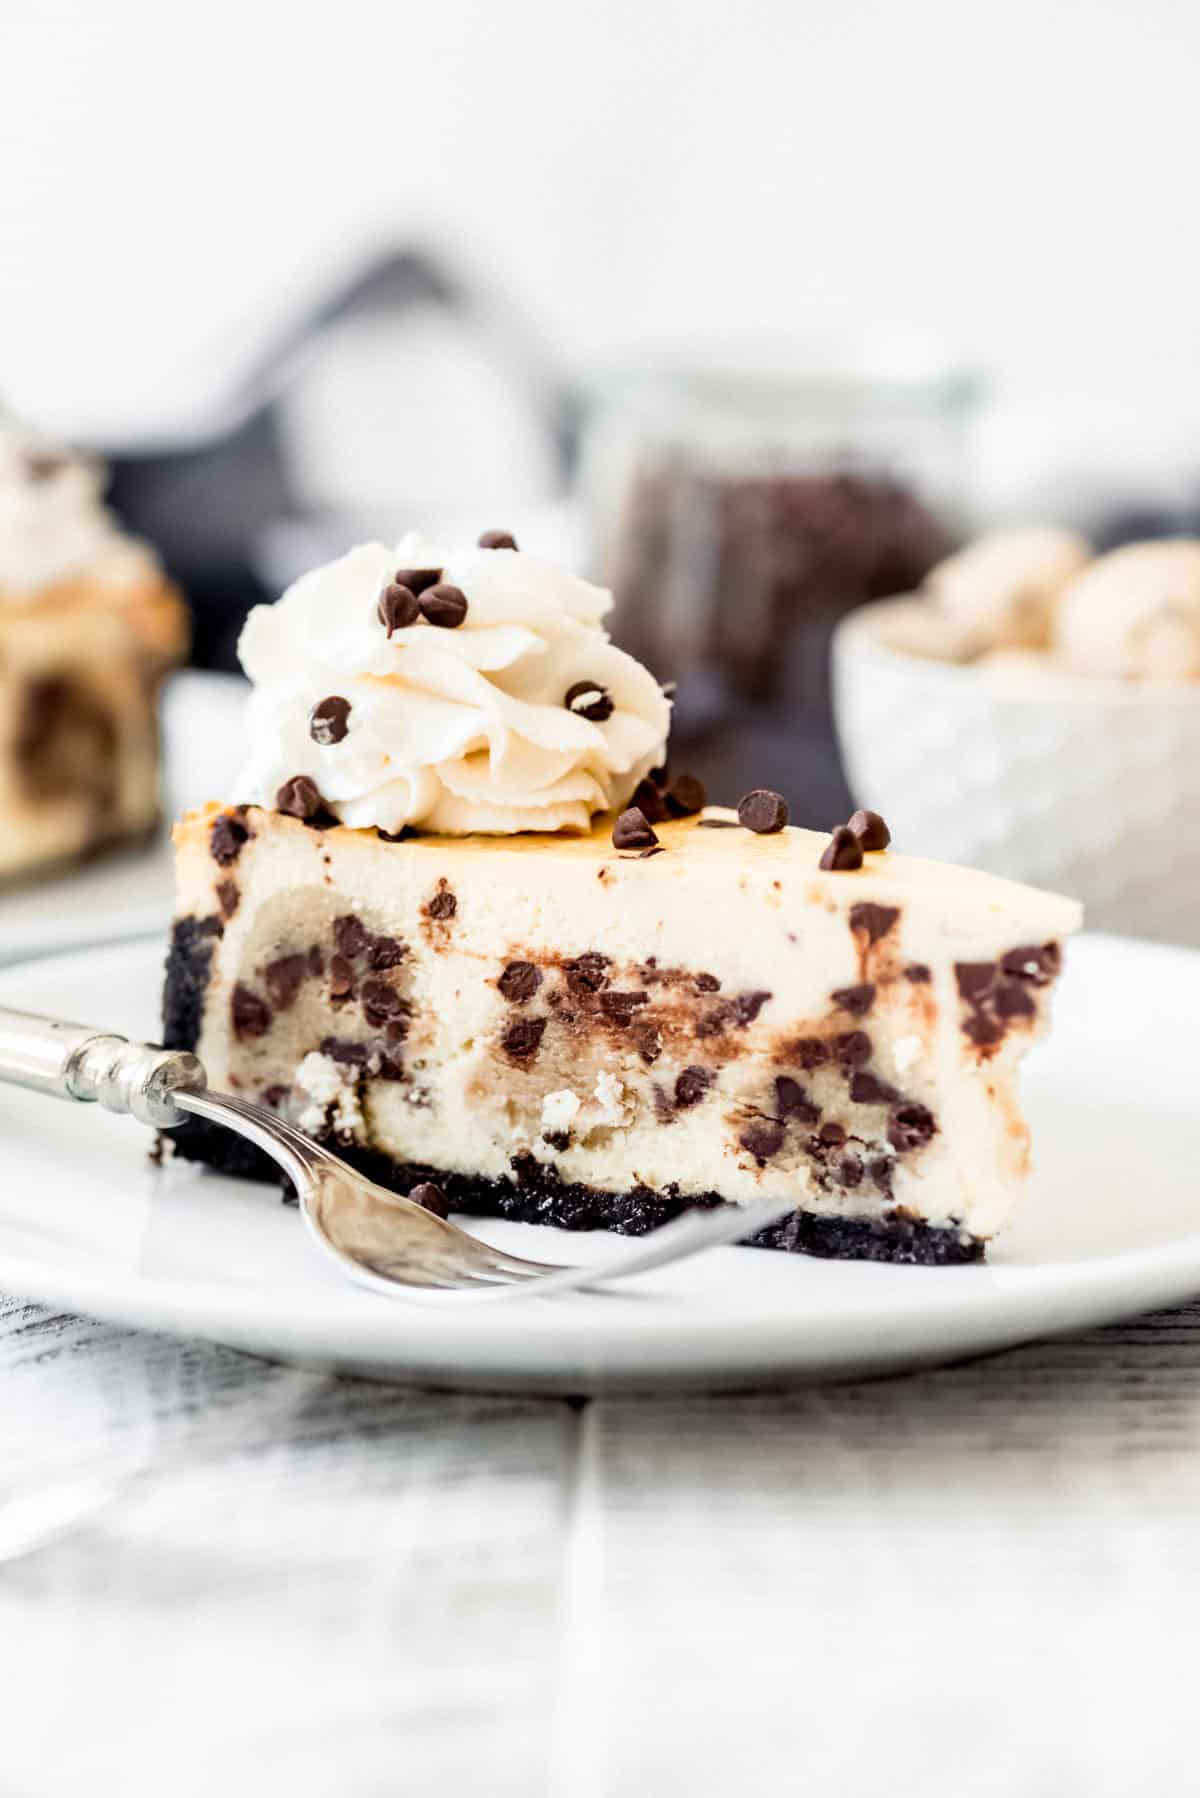
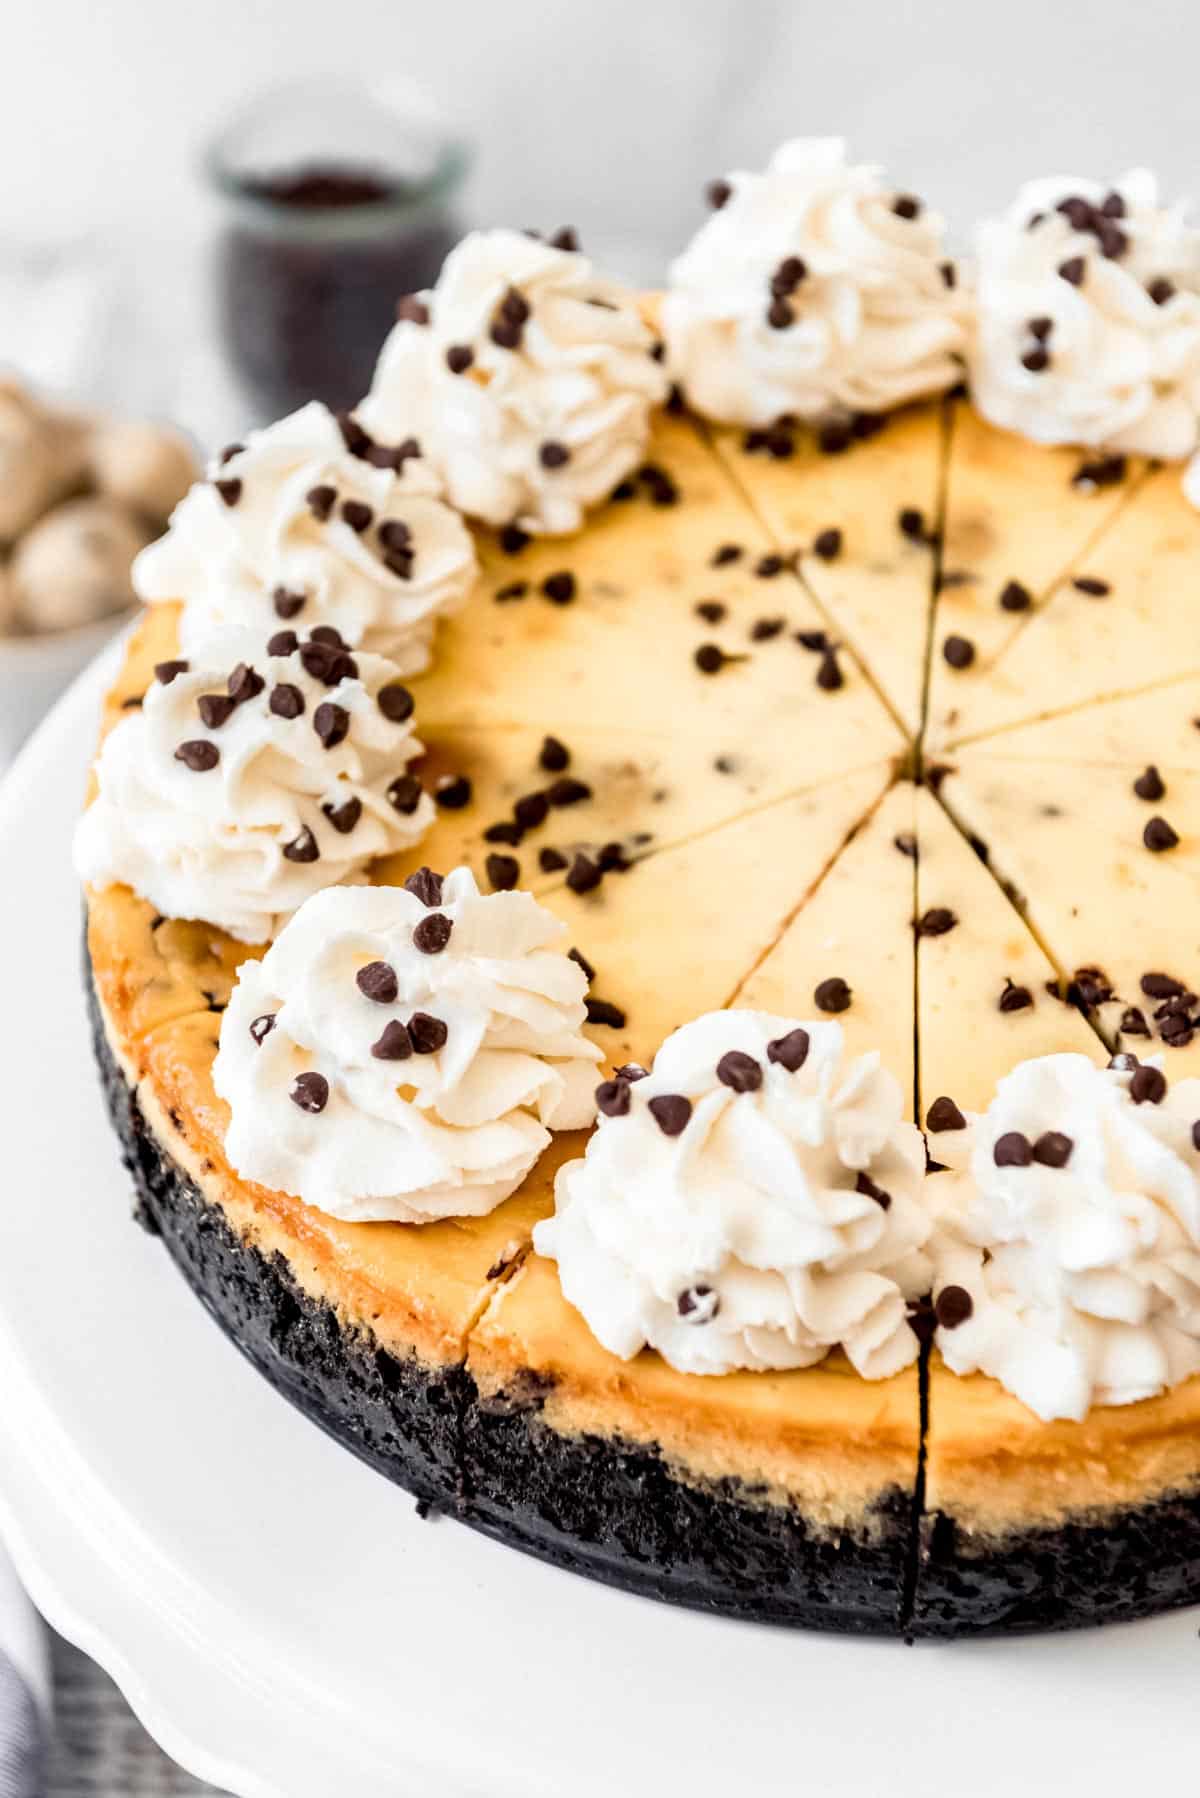
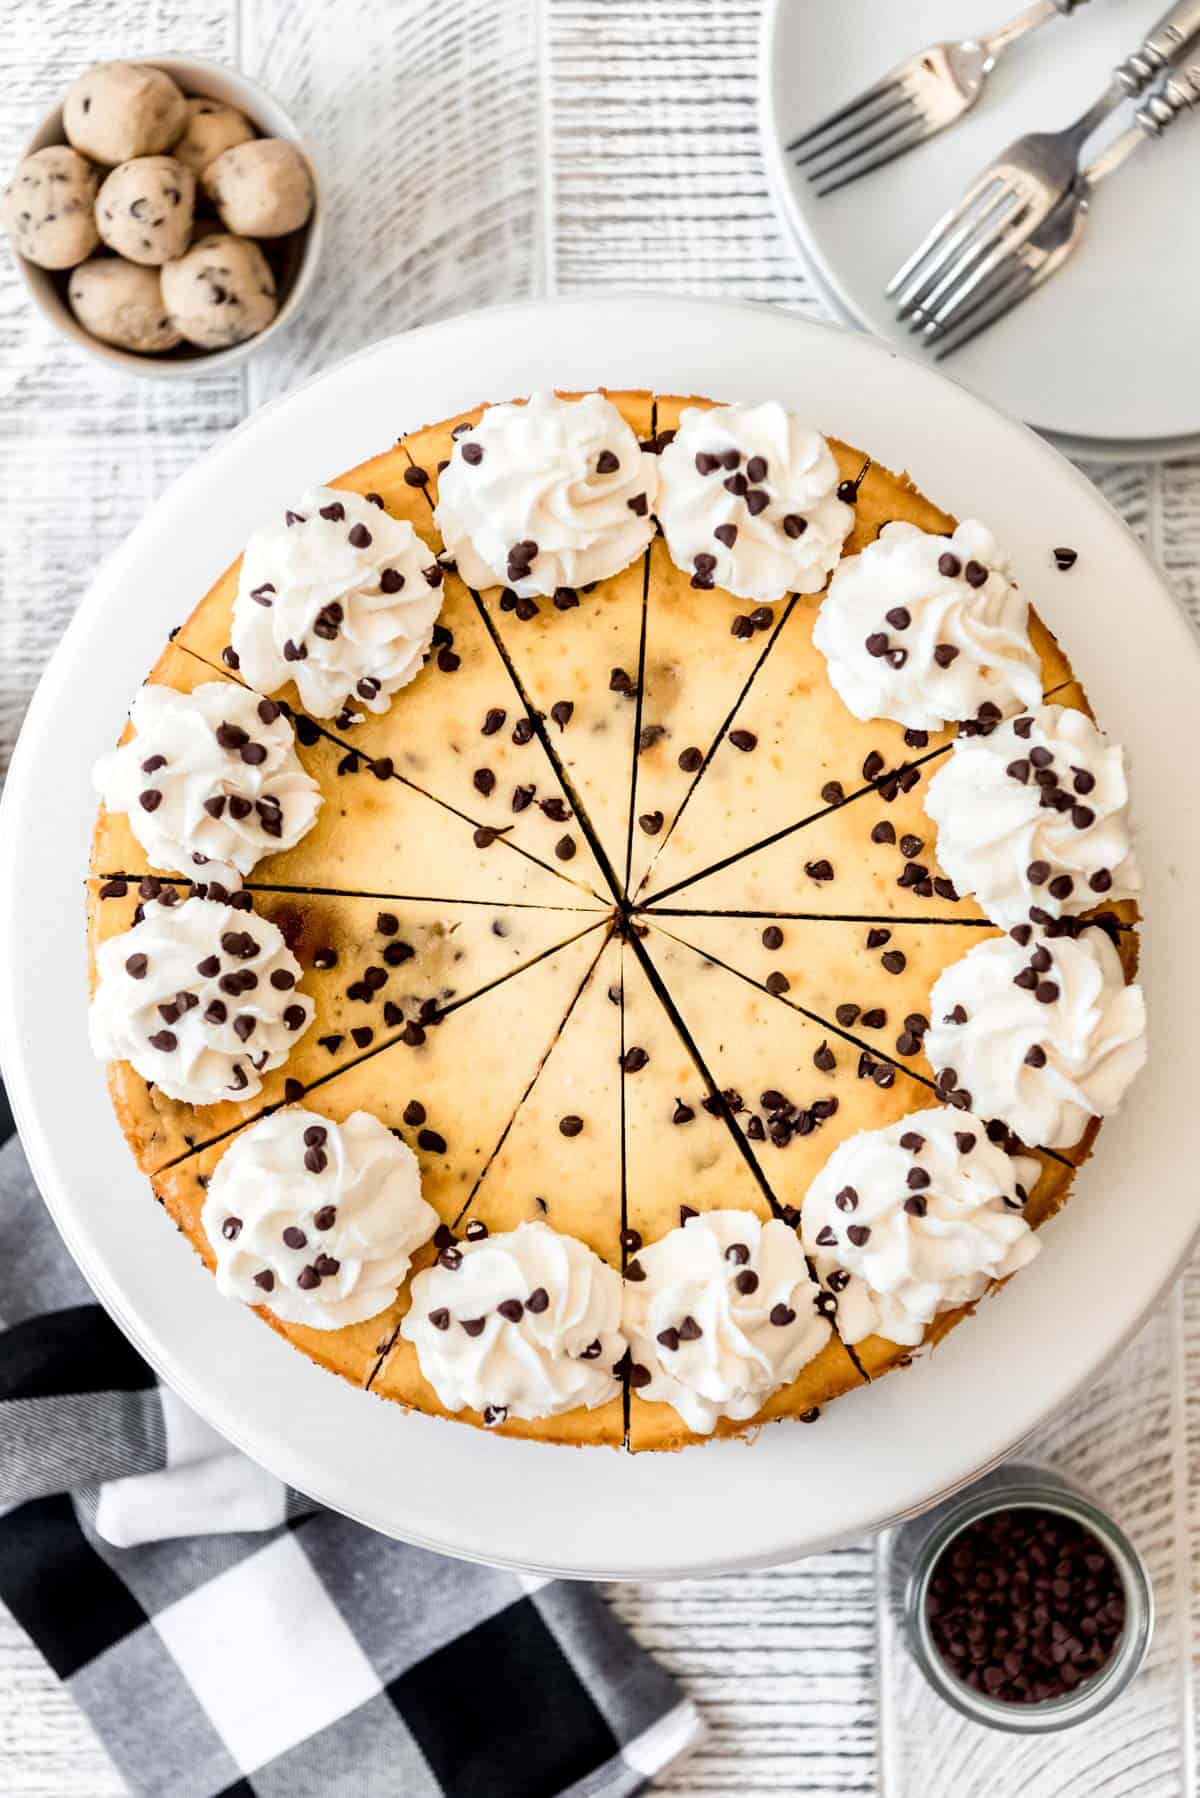
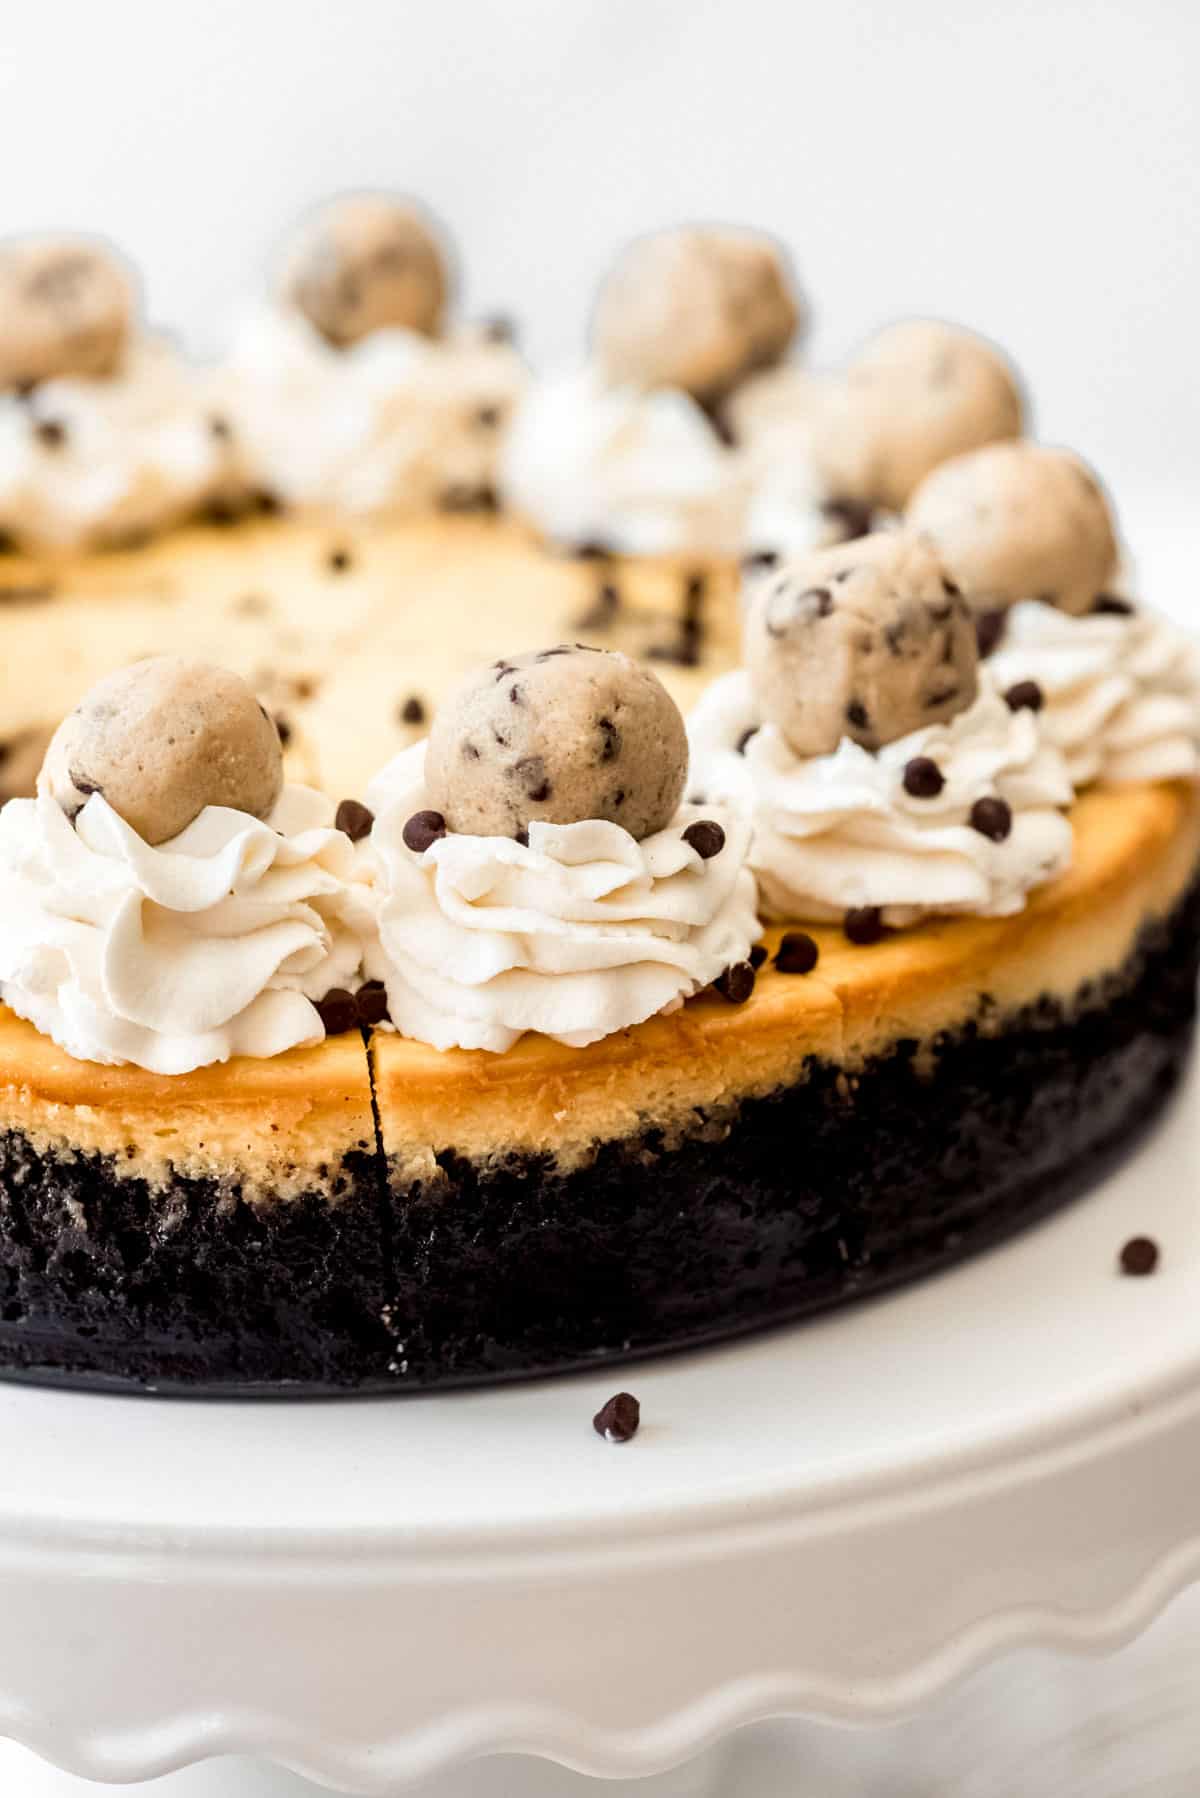
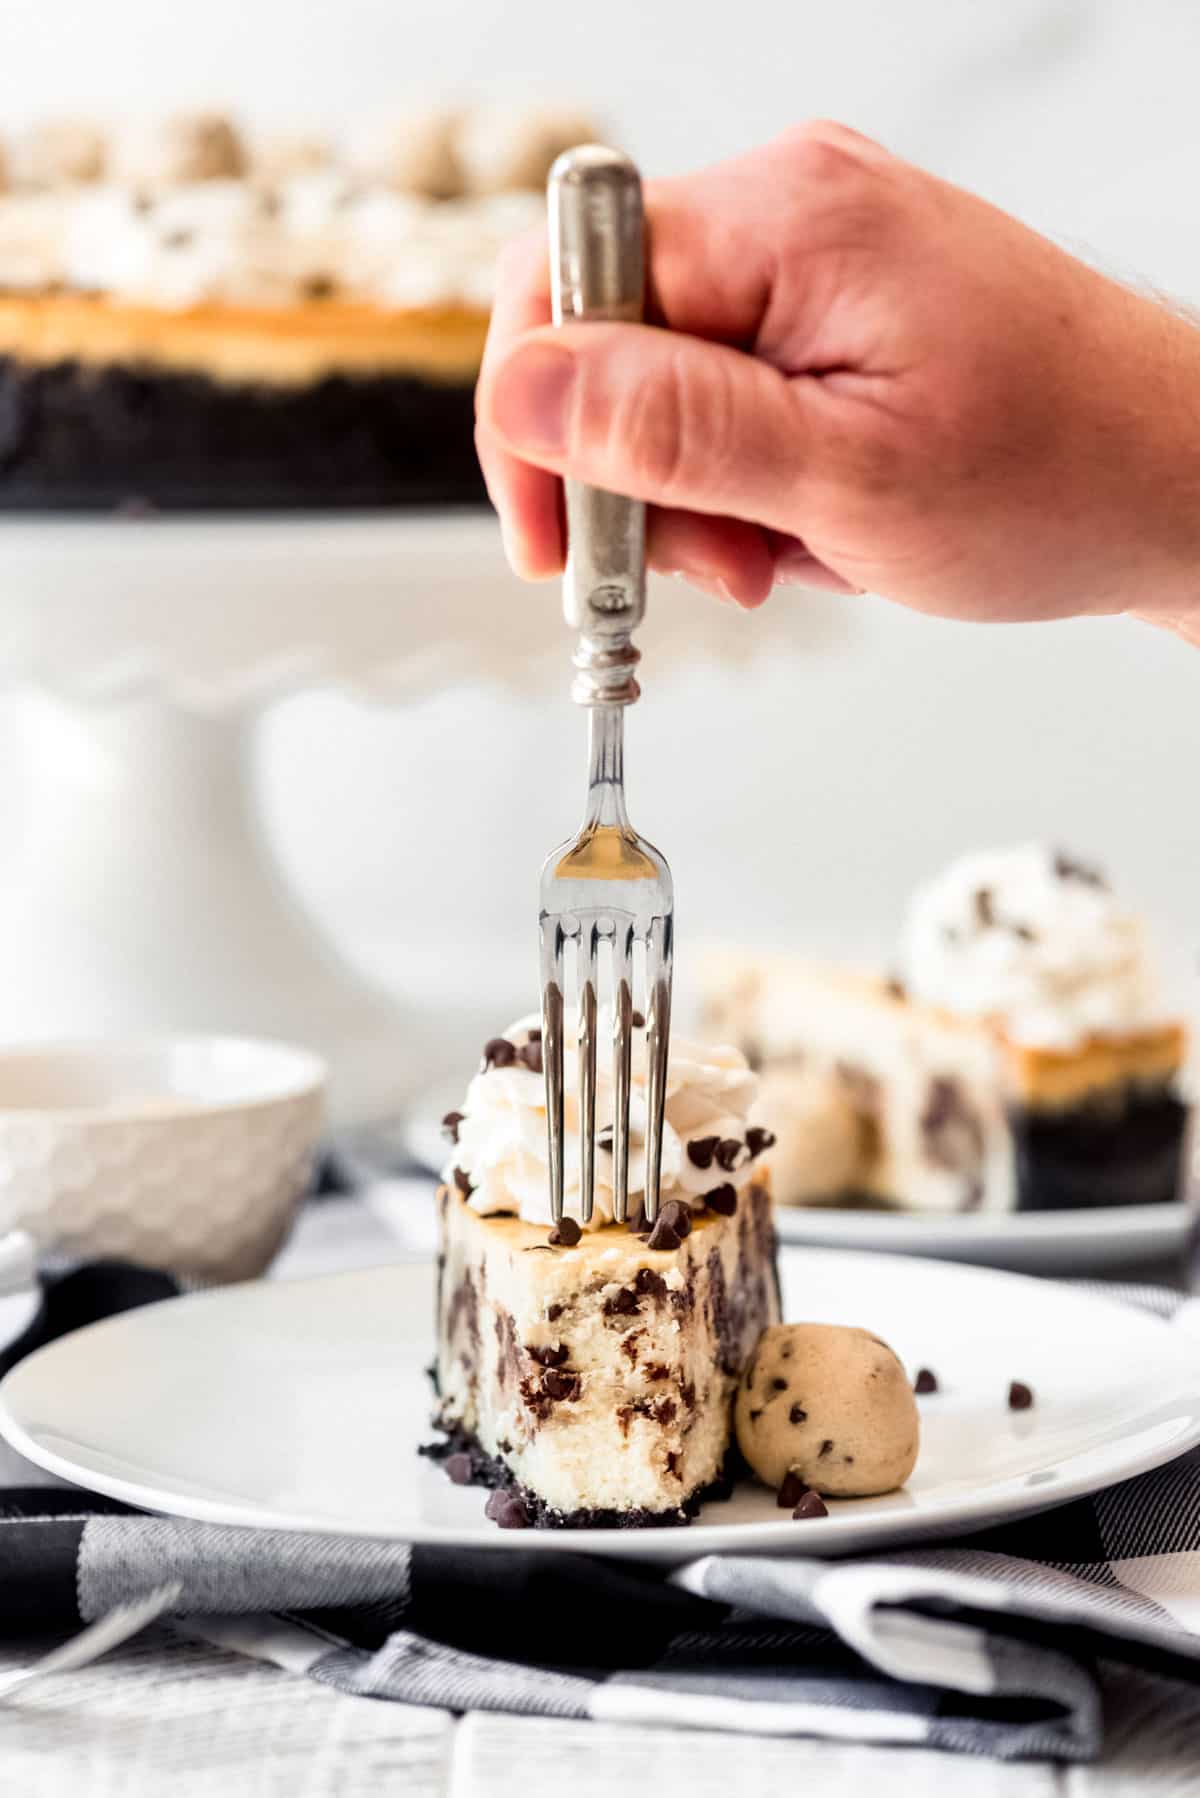
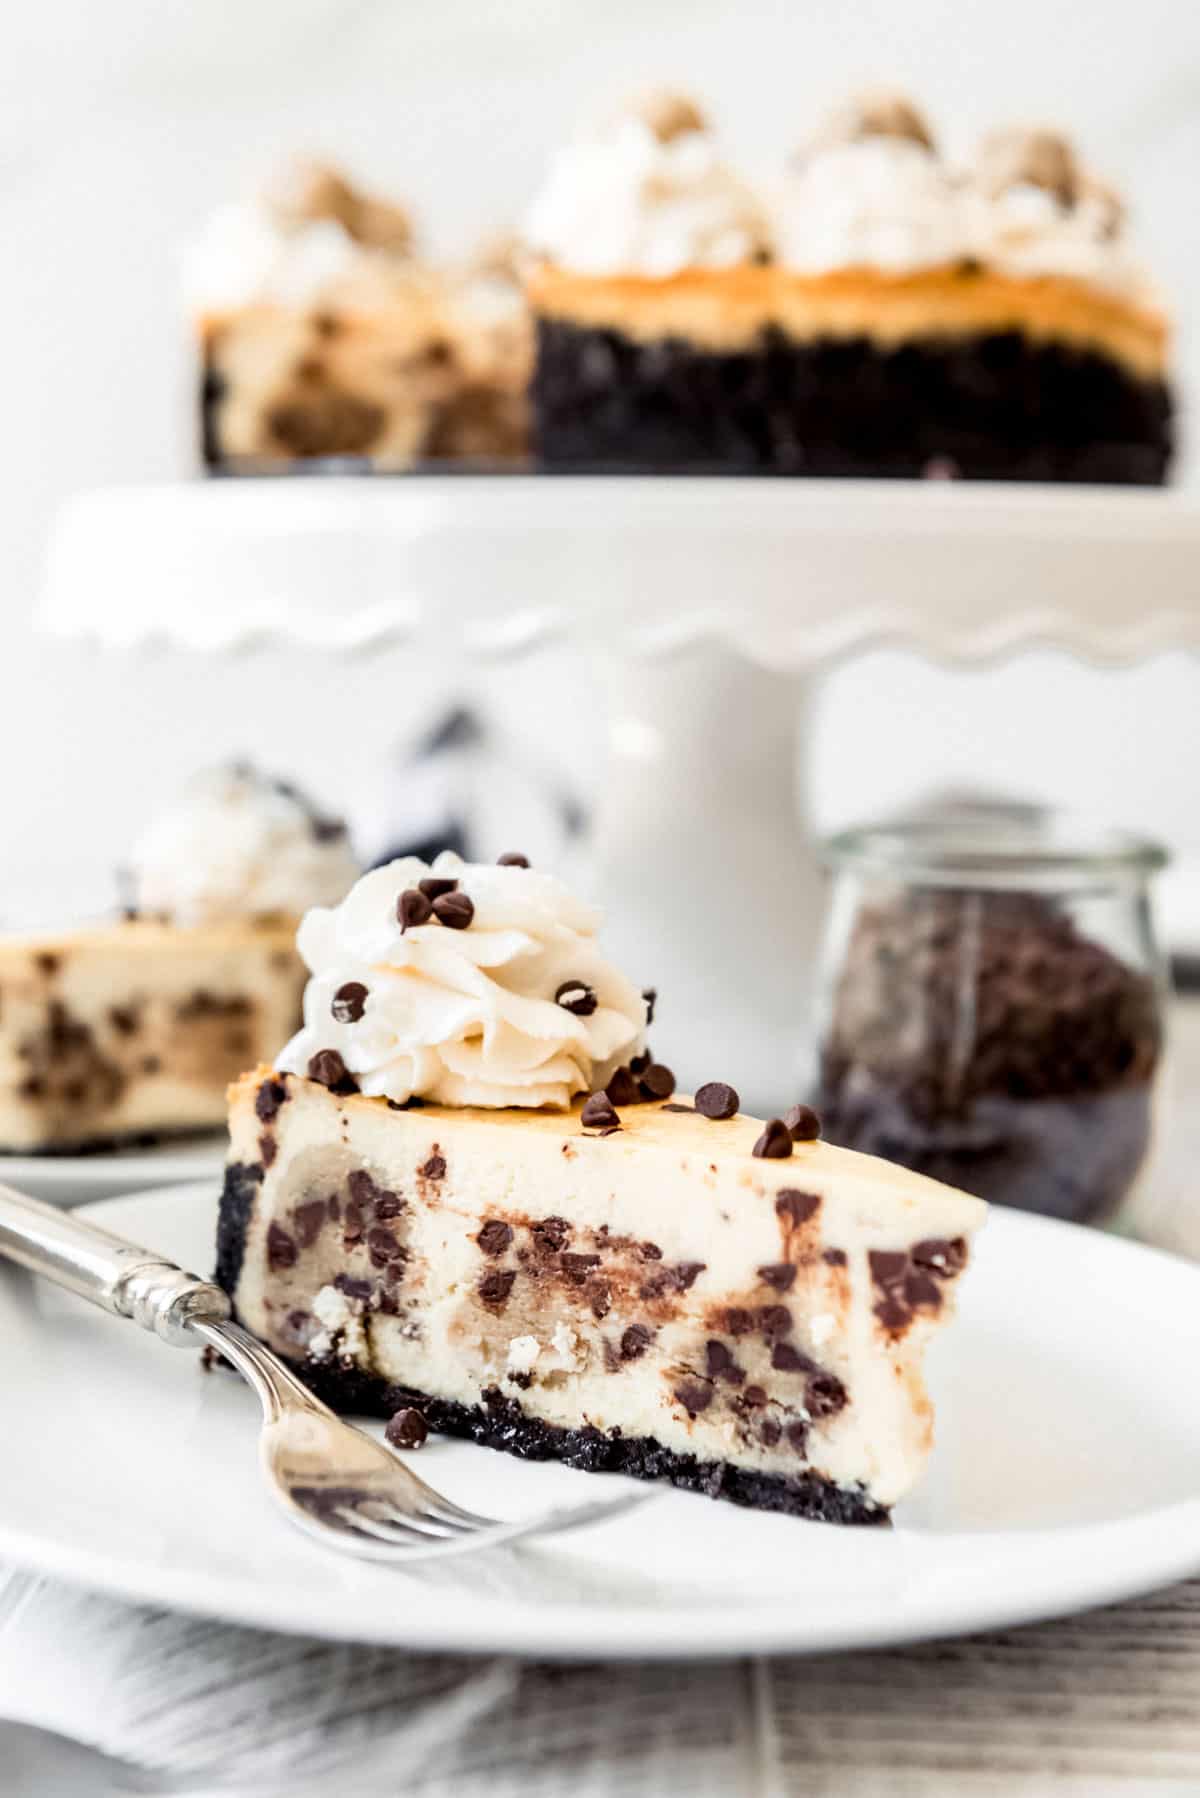
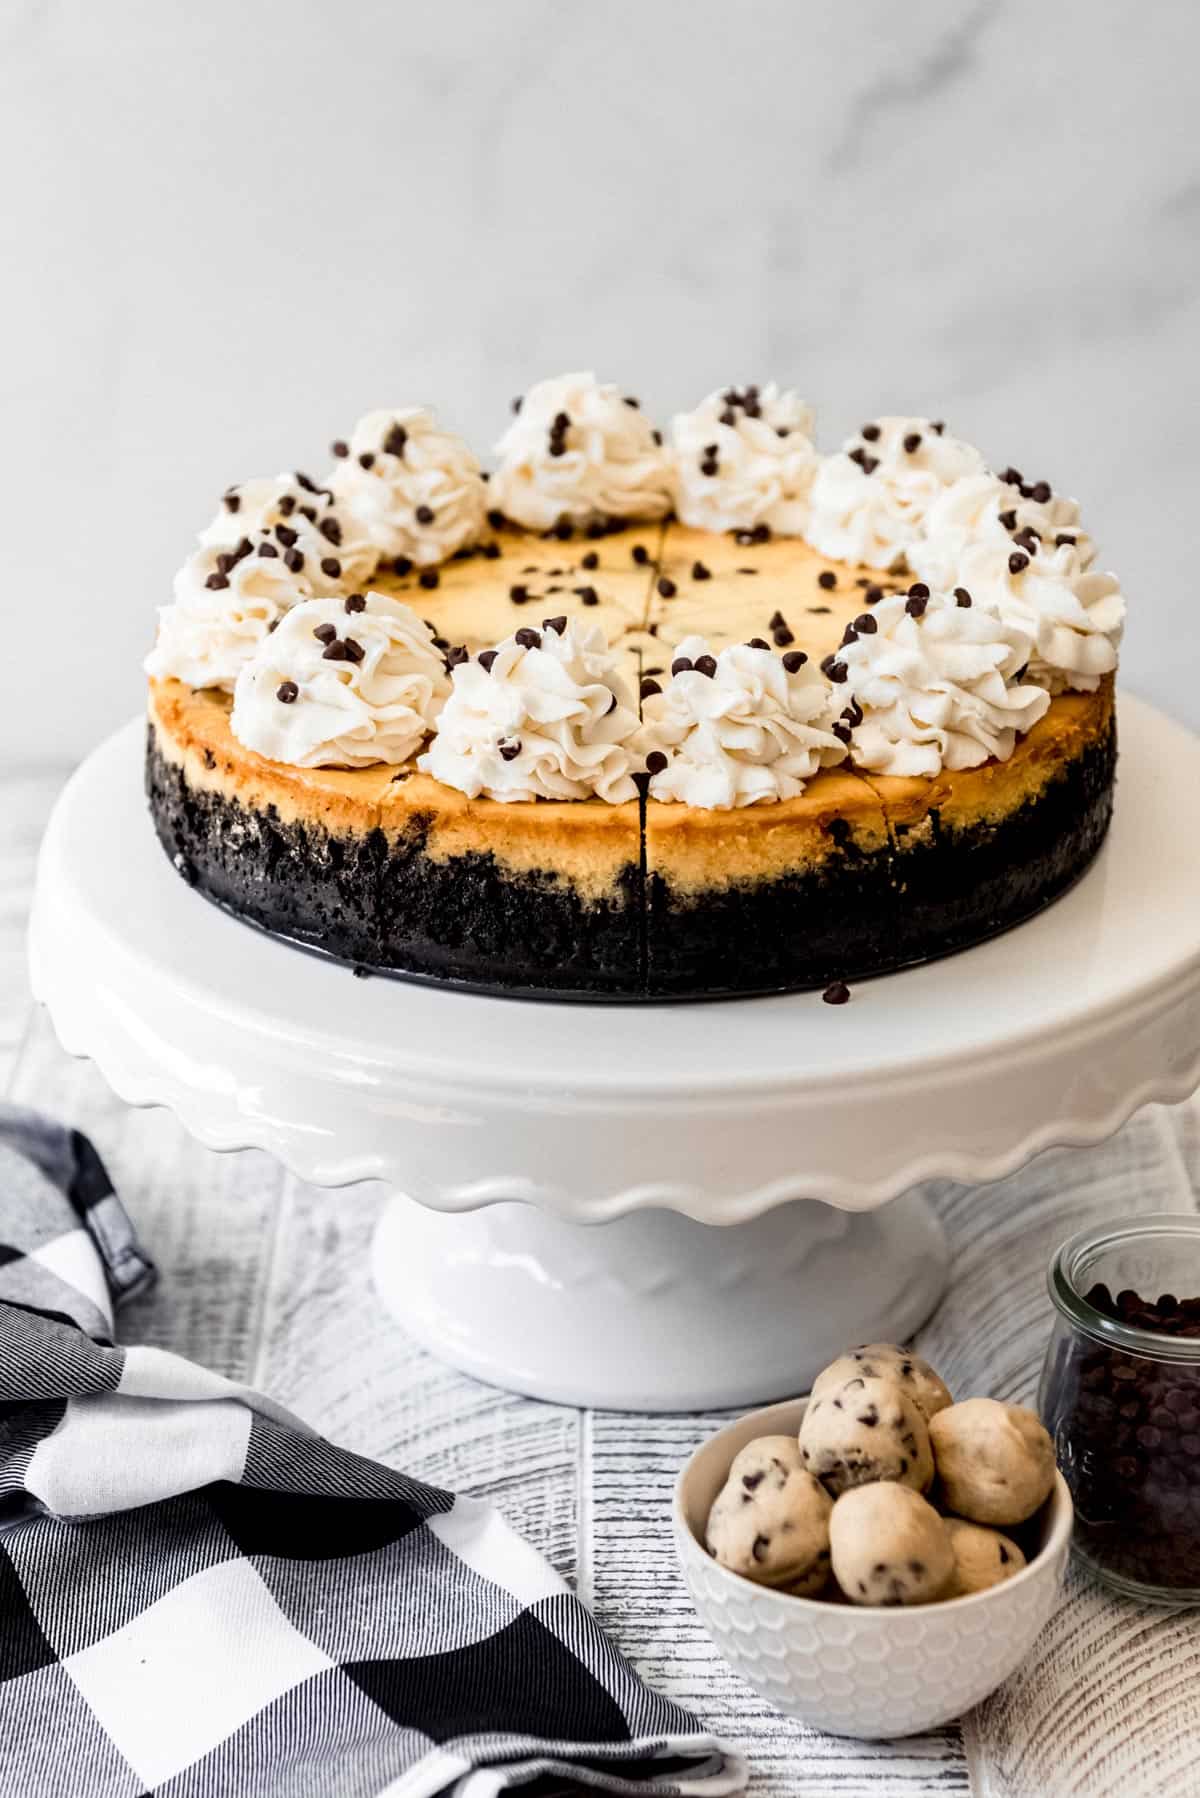
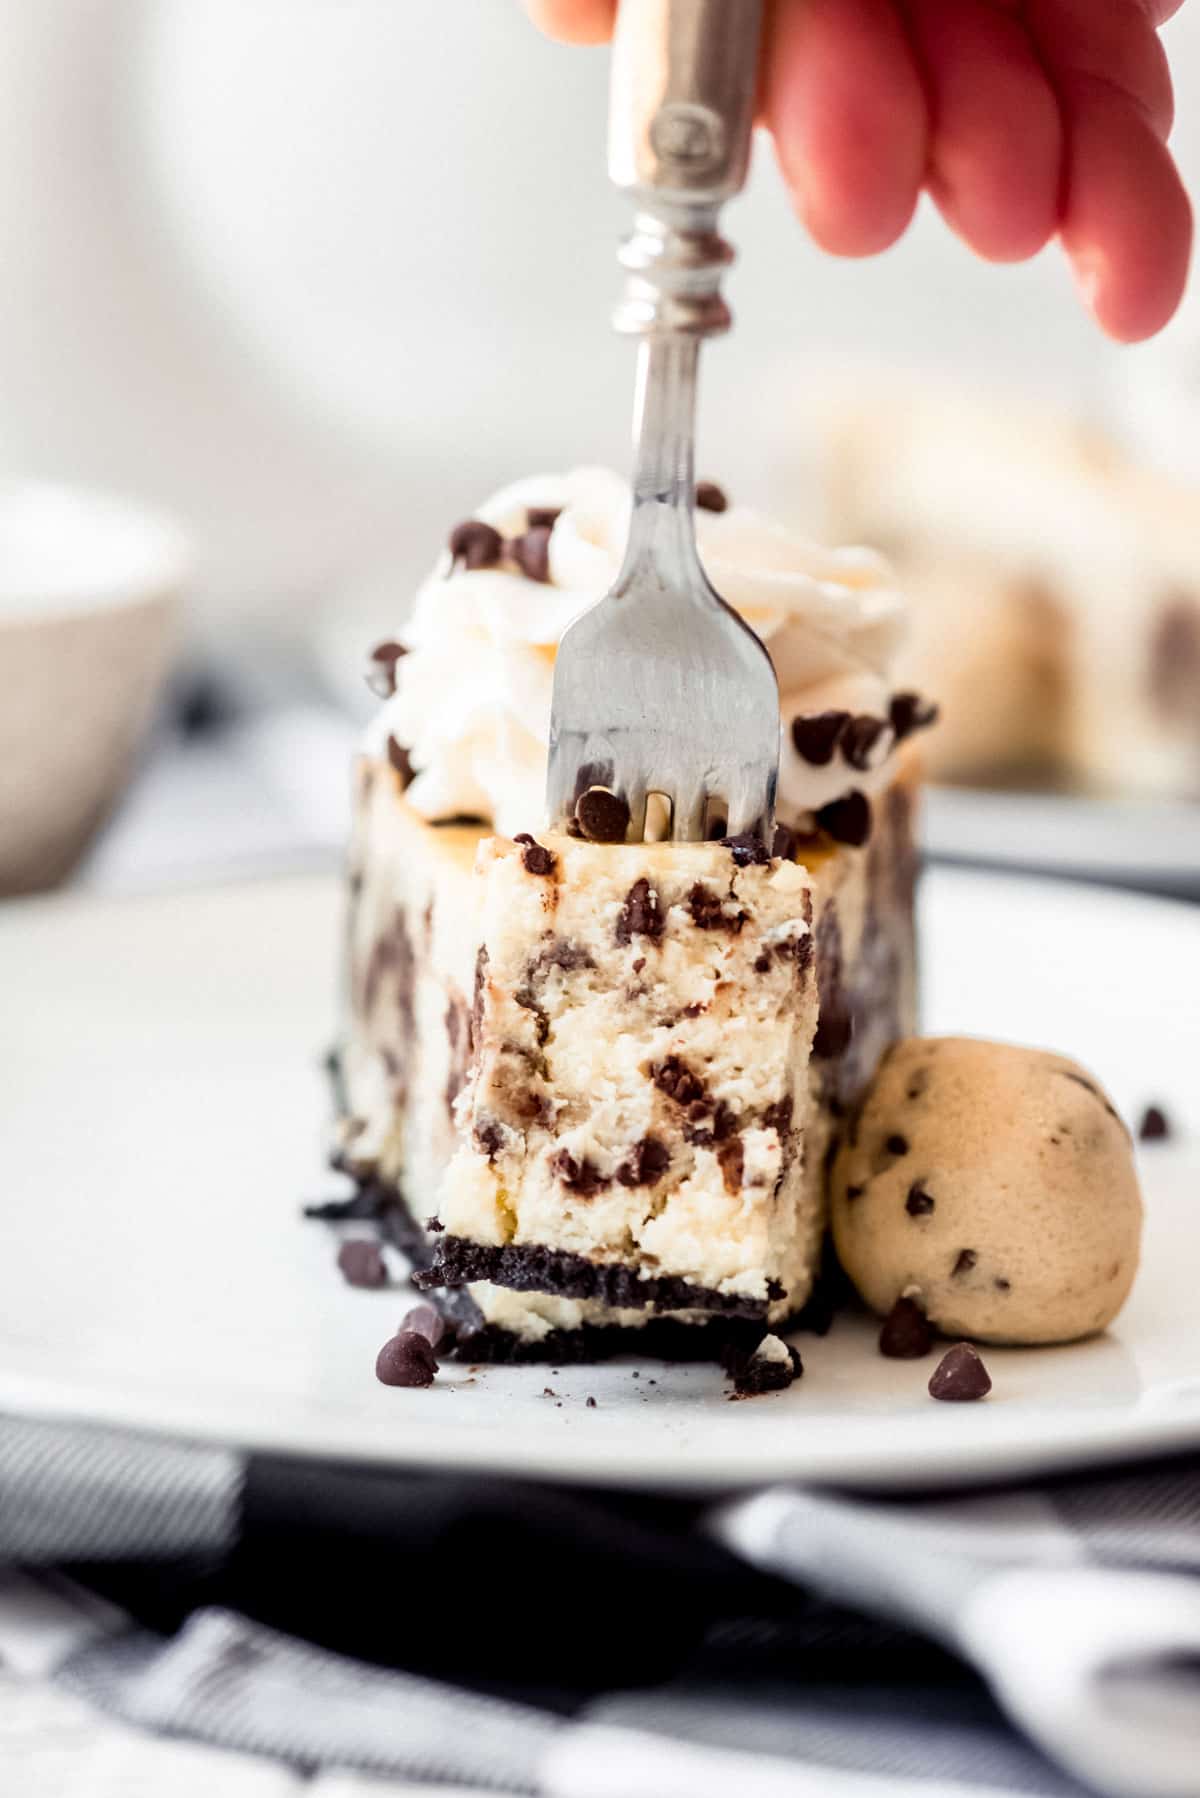
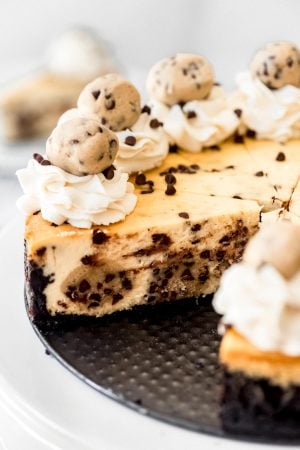
This Chocolate Chip Cookie Dough Cheesecake is a rich homemade cheesecake studded with generous chunks of cookie dough and mini chocolate chips, with an Oreo crust. Top it with some freshly whipped cream and more edible cookie dough bites for good measure!
Cheesecake always makes dessert feel like a special occasion. Some of our other favorite cheesecake recipes are Triple Chocolate Cheesecake, White Chocolate Raspberry Cheesecake, and Pecan Pie Cheesecake Bars.
Our family used to love going to the Cheesecake Factory for dinner. But the lines are always ridiculous and it hardly seems worth it when you can make your favorite versions of their dishes at home for a fraction of the cost. (And they even taste better homemade! Ssshhhhh, don’t tell anyone I said that.)
Chocolate chip cookie dough cheesecake is easily, hands-down one of my favorite cheesecake flavors of all time. I love all things cookie dough and have previously shared my Chocolate Chip Cookie Dough Ice Cream and Chocolate Chip Cookie Dough Fudge using the same Edible Cookie Dough that goes into today’s cheesecake.
Some of our other favorites are their Sweet Molasses Brown Bread (seriously, keep the bread basket away from me or I won’t be able to finish my dinner let alone order a slice of cheesecake at the end), Chicken Madeira, and Easy Creamy Chicken Marsala. But obviously you can’t forget dessert at a place like The Cheesecake Factory!
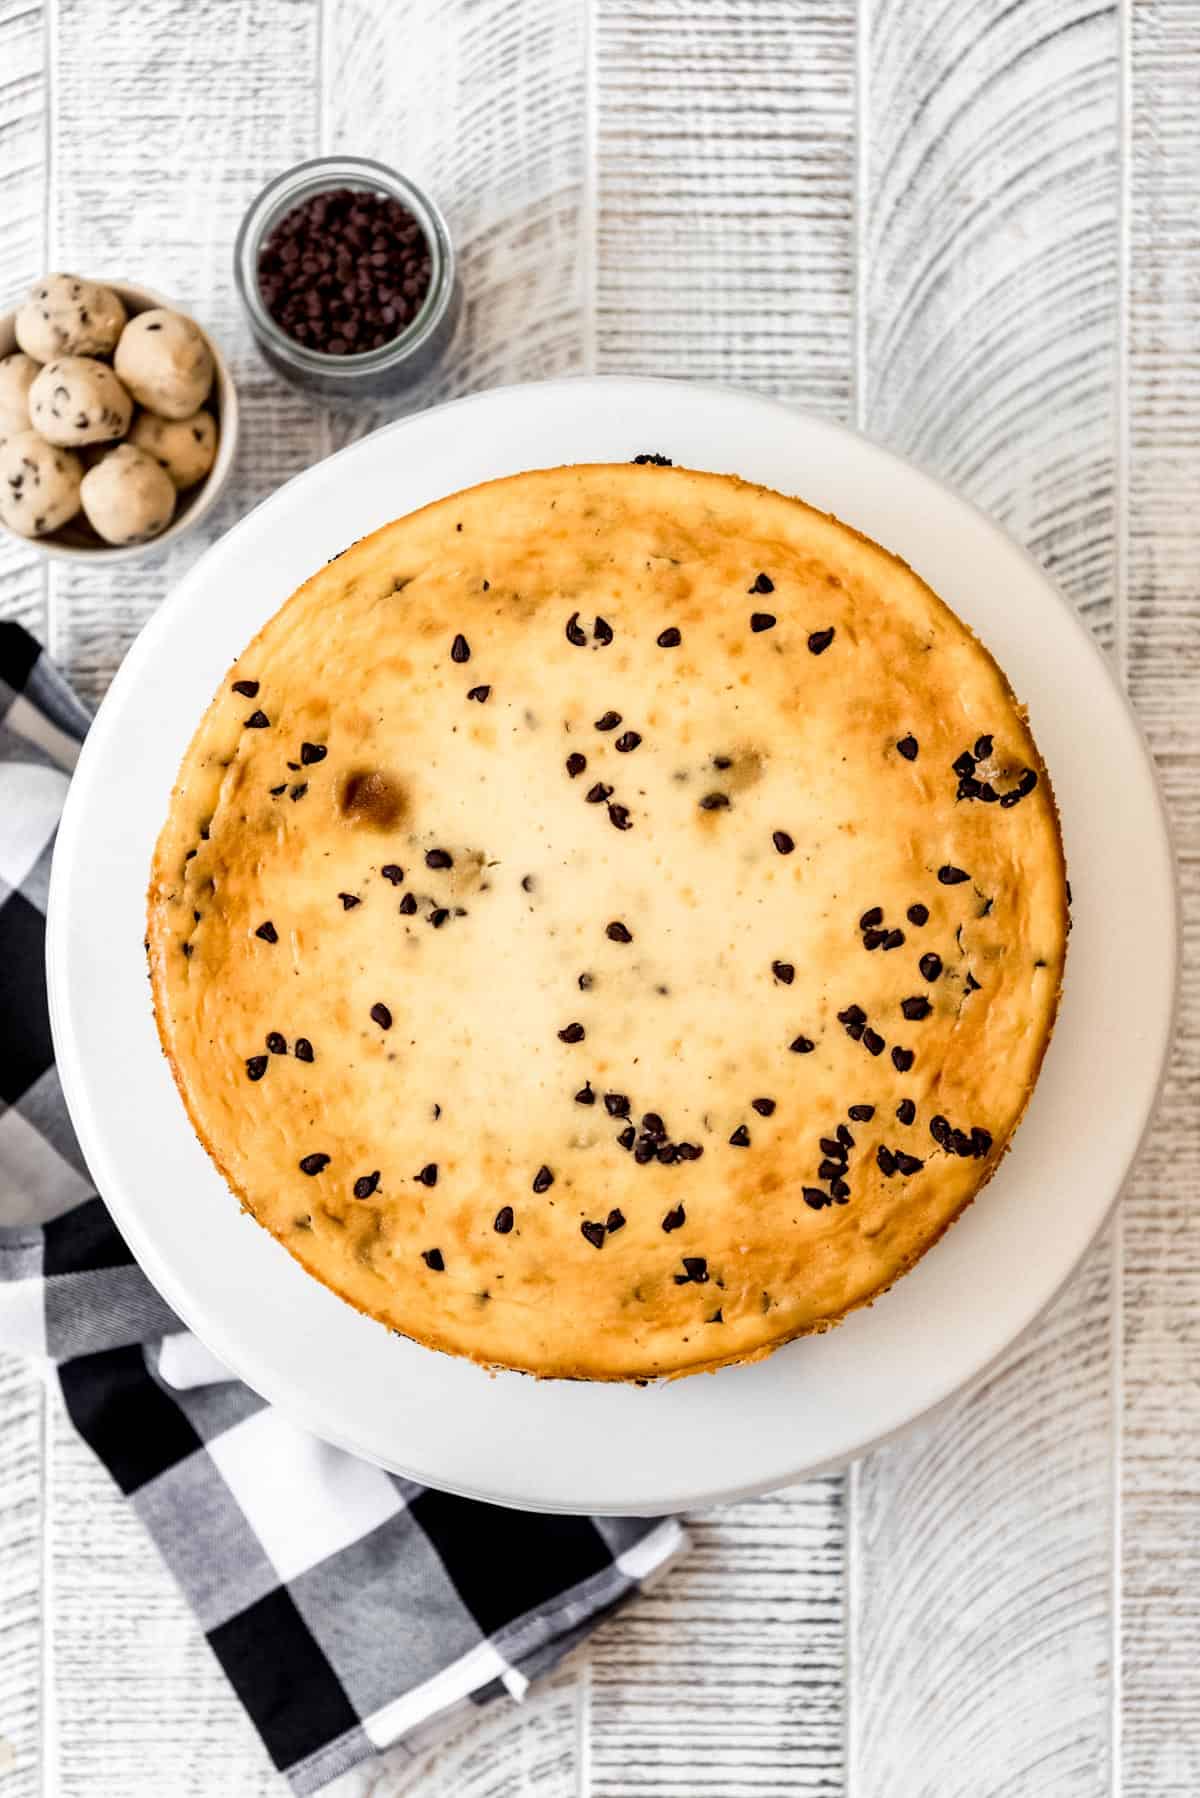
While you might think that the cookie dough balls would lose their unbaked quality once baked in the cheesecake, they actually stays nice and dense so that the cookie dough element is present in each slice of cheesecake.


Overcoming cheesecake intimidation
Cheesecake is an intimidating bake for many people (myself included!) because of things like overmixing, water baths, and the potential for cracks. Nobody wants to spend all the time and money it takes to bake a cheesecake only to have it sink in the middle and crack! That’s why I’m sharing all my best, most practical, real world tips with you about how to make cheesecake in this post!
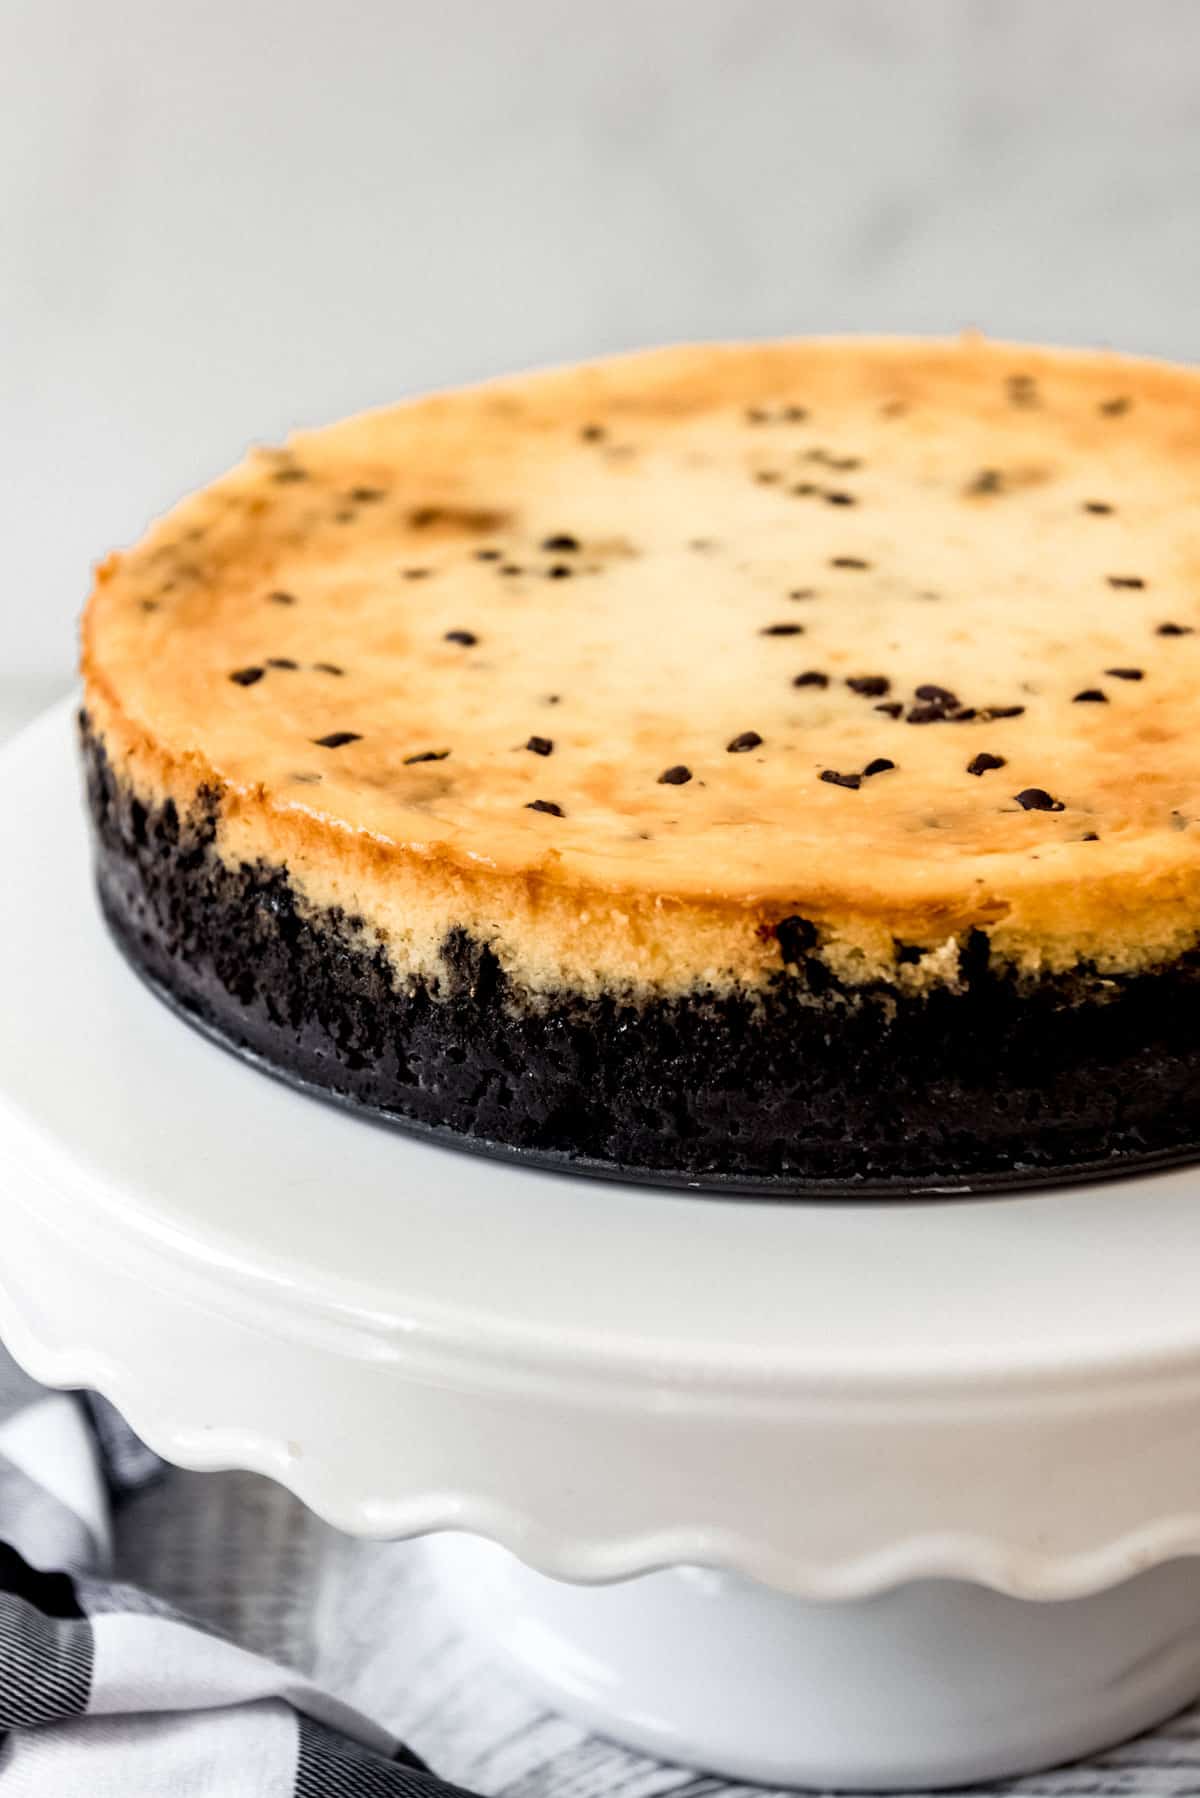
I don’t always have perfect results, but I definitely nailed it with this particular cheesecake. I went to the extra effort of a water bath using a new technique for protecting my pan from leaks this time and it definitely made a difference with a perfectly level top with no cracking anywhere.
But trust me when I say that you will still get a totally respectable, absolutely delicious cheesecake if you decide to forego the hassle of a water bath. While yes, it helps, it is by no means necessary for a delicious and beautiful cheesecake.
Chocolate Chip Cookie Cheesecake Ingredients
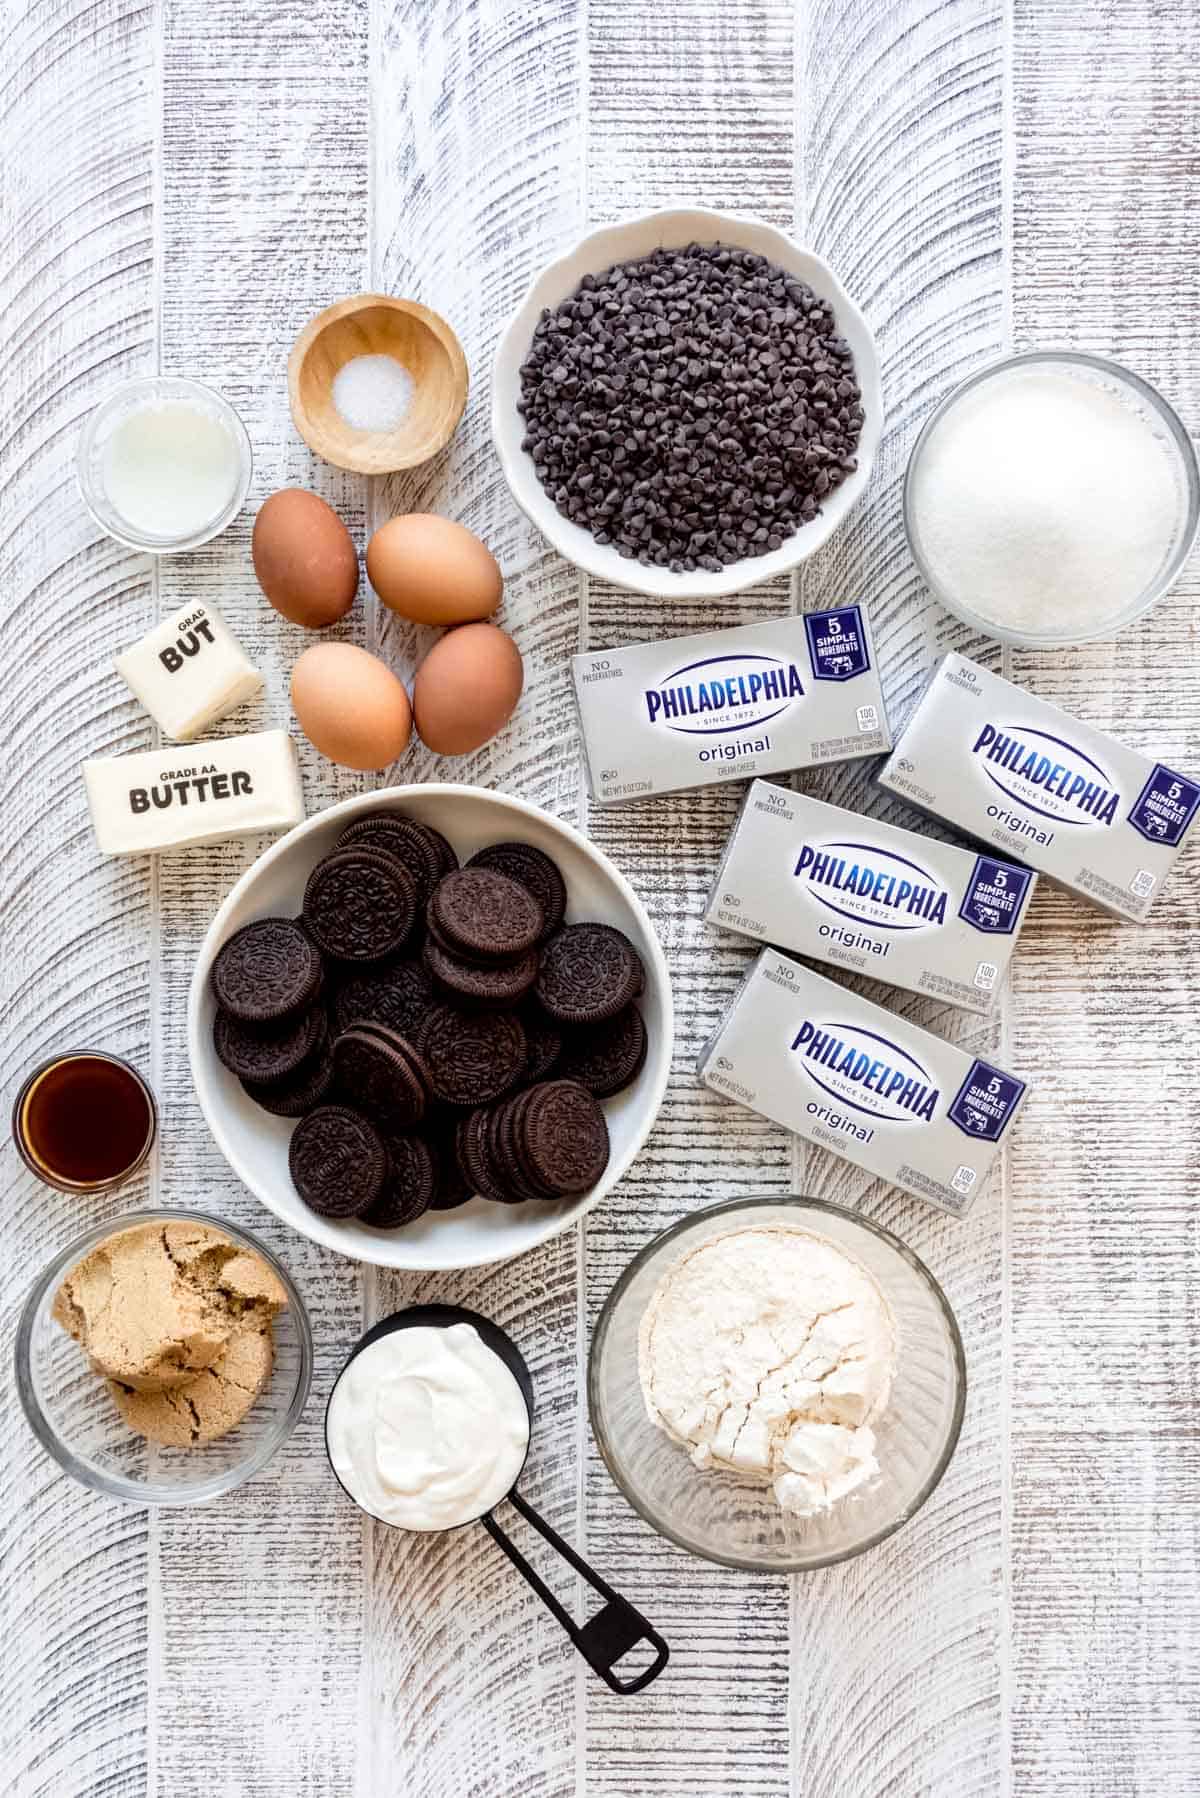
- Cream cheese: I have found that I have better results using full-fat cream cheese than if I try to save a few calories with neufchatel, which is a reduced fat cream cheese. Be sure to pull your cream cheese out of the fridge at least 30-60 minutes before you plan to start mixing your cheesecake batter.
- Eggs: This recipe uses four whole eggs. They should also be room temperature, although you can cheat a bit on this one by placing them straight from the fridge into a bowl and covering them with hot tap water for 10 minutes to warm them up a bit before using.
- Sugar: We want our cheesecake to be sweet, but not overly sweet, especially since we are filling it with chunks of chocolate chip cookie dough. Granulated sugar is our go-to choice for the cheesecake base, but we also need some brown sugar for the edible cookie dough.
- Sour cream: Most cheesecake recipes use either sour cream or heavy cream in the batter. This one calls for sour cream and it should also be pulled out of the fridge early to warm up a bit before adding to the cheesecake filling mixture.
- Mini chocolate chips: These get divided and mixed into the cheesecake base, and the edible cookie dough, plus I like to have a few extras on hand for sprinkling over the top of the cheesecake to decorate.
- Oreo cookies: We love an Oreo crust on our cheesecakes and this is one is no exception. However, you could absolutely make this crust by replacing the Oreo crumbs with finely crushed Chips Ahoy cookies for even more of a chocolate chip cookie element.
- Butter: A little melted, salted butter helps bind the crust so it holds together when you press it into your springform pan.
- Flour: There is a little bit of flour in the cheesecake itself, which helps stabilize the cheesecake while it bakes and gives it just enough structure. But you will also use flour in the chocolate chip cookie dough balls.
- Vanilla extract: Just enough to add dimension and sweet vanilla flavor to the cheesecake.
- Salt: A little salt helps bring out all of the other flavors in most recipes.
How to Make Chocolate Chip Cookie Dough Cheesecake
Make the edible cookie dough balls
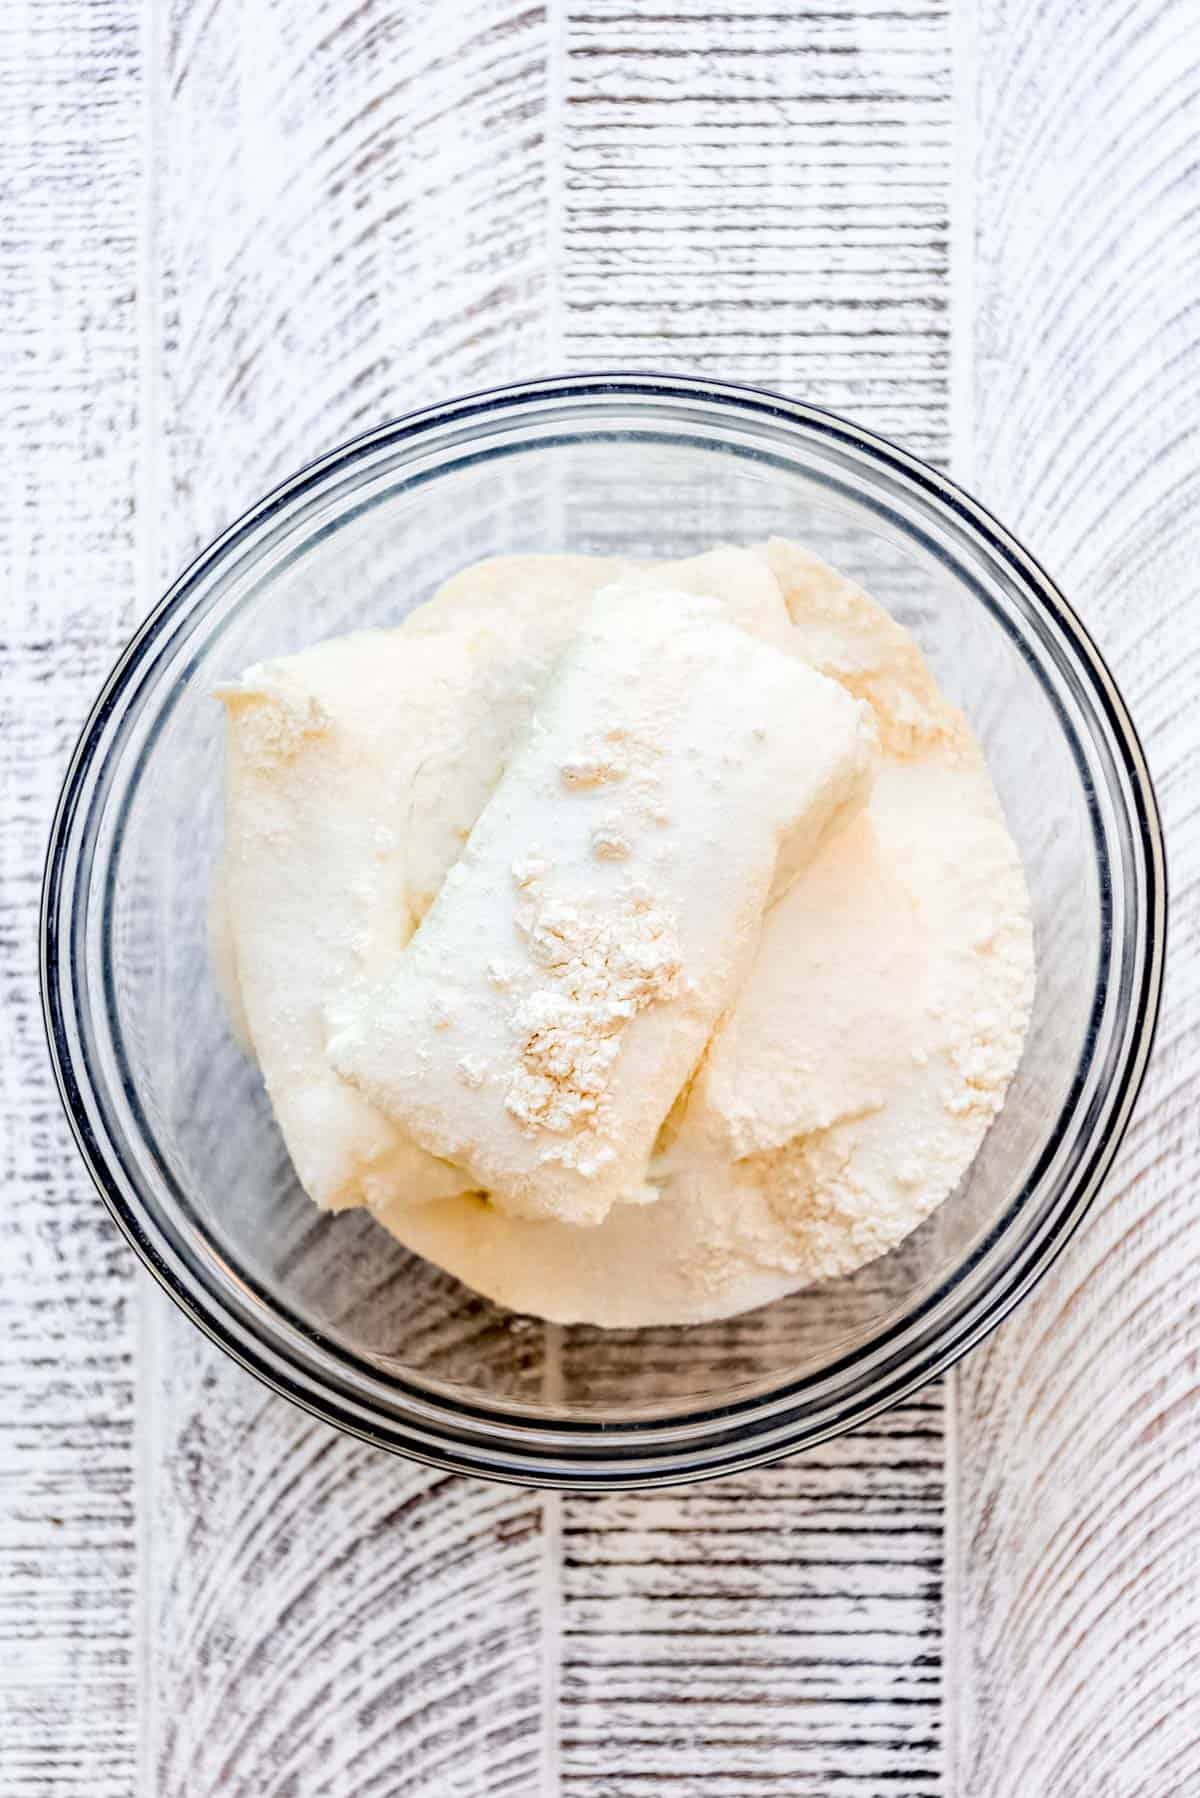
1. I have a whole post on how to make edible cookie dough, but the gist of it is that you heat treat the flour first (to kill any bacteria) in the oven or the microwave. Heat-treating the flour can be skipped if you aren’t decorating the top of the cheesecake with cookie dough balls and instead just baking them into the cheesecake itself.
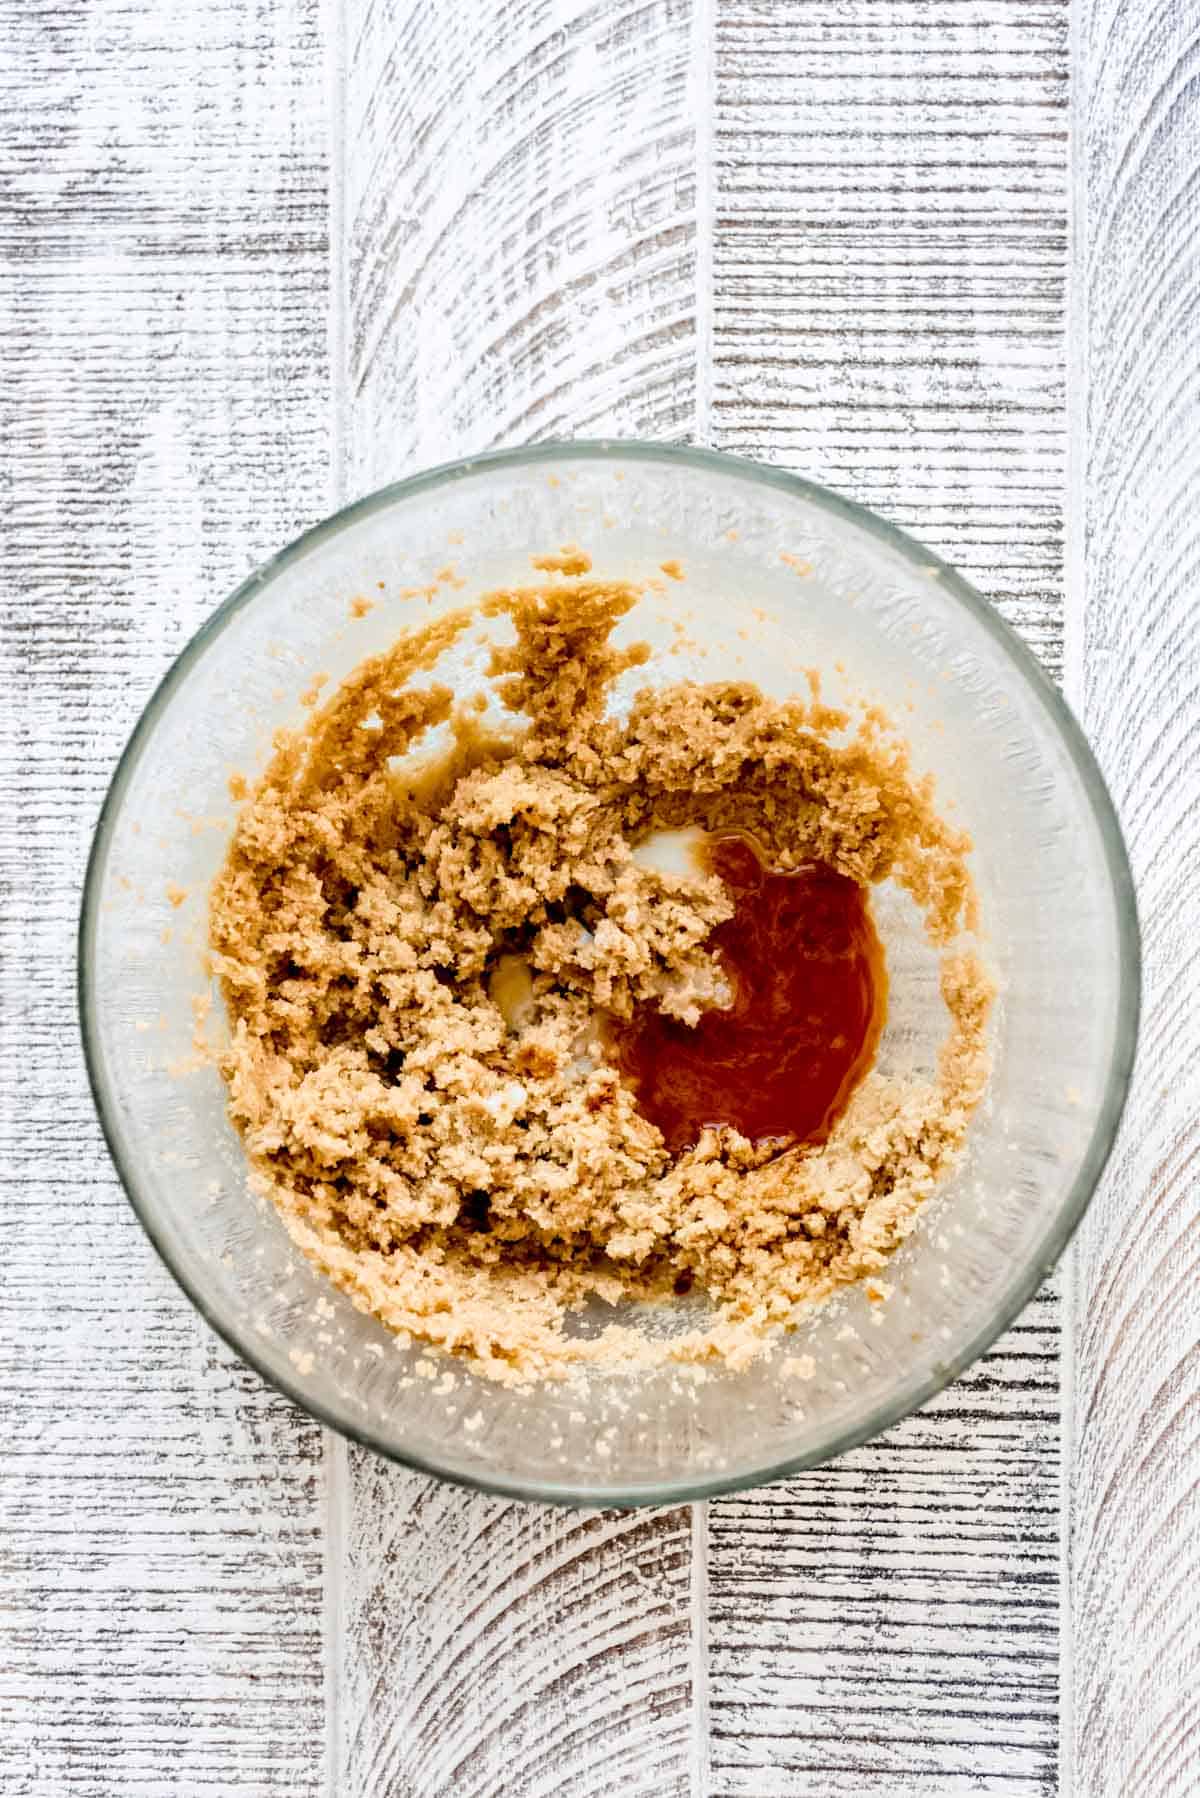
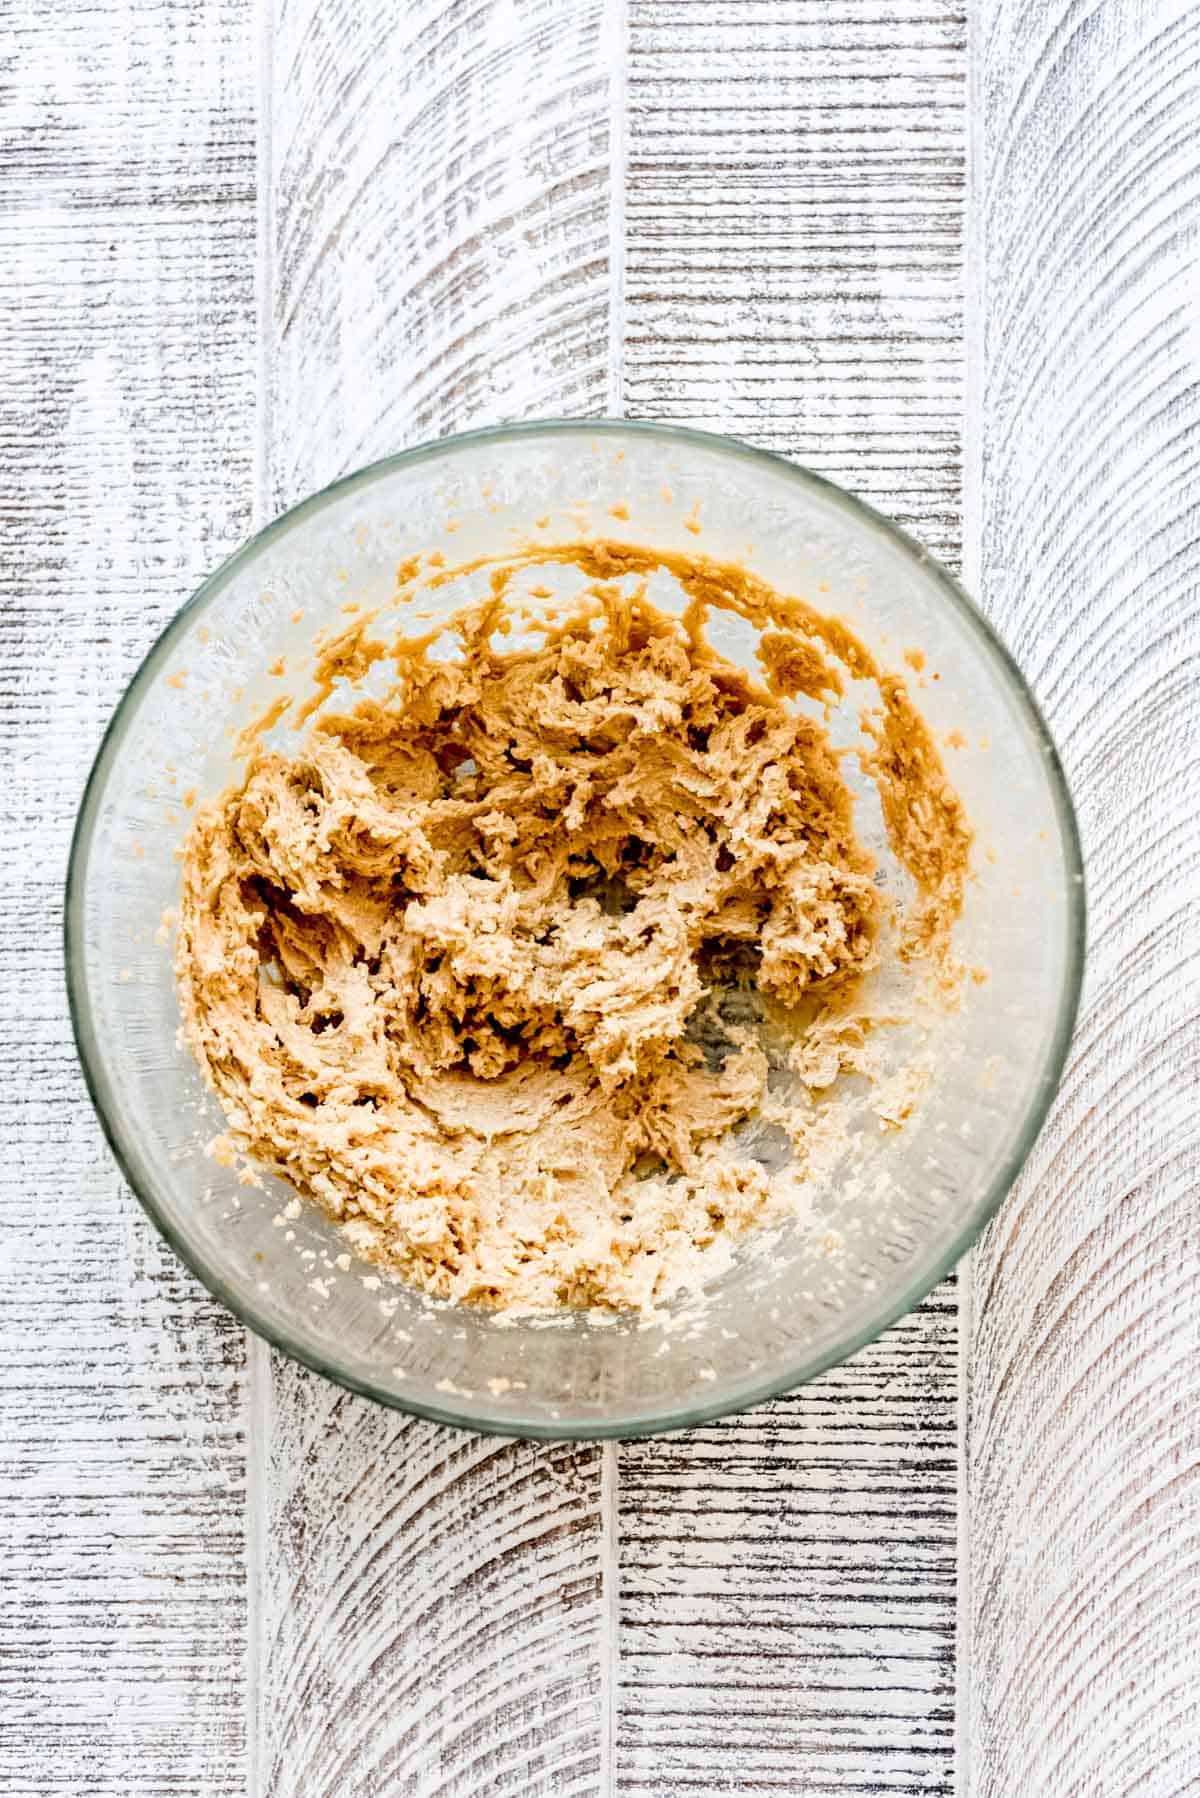
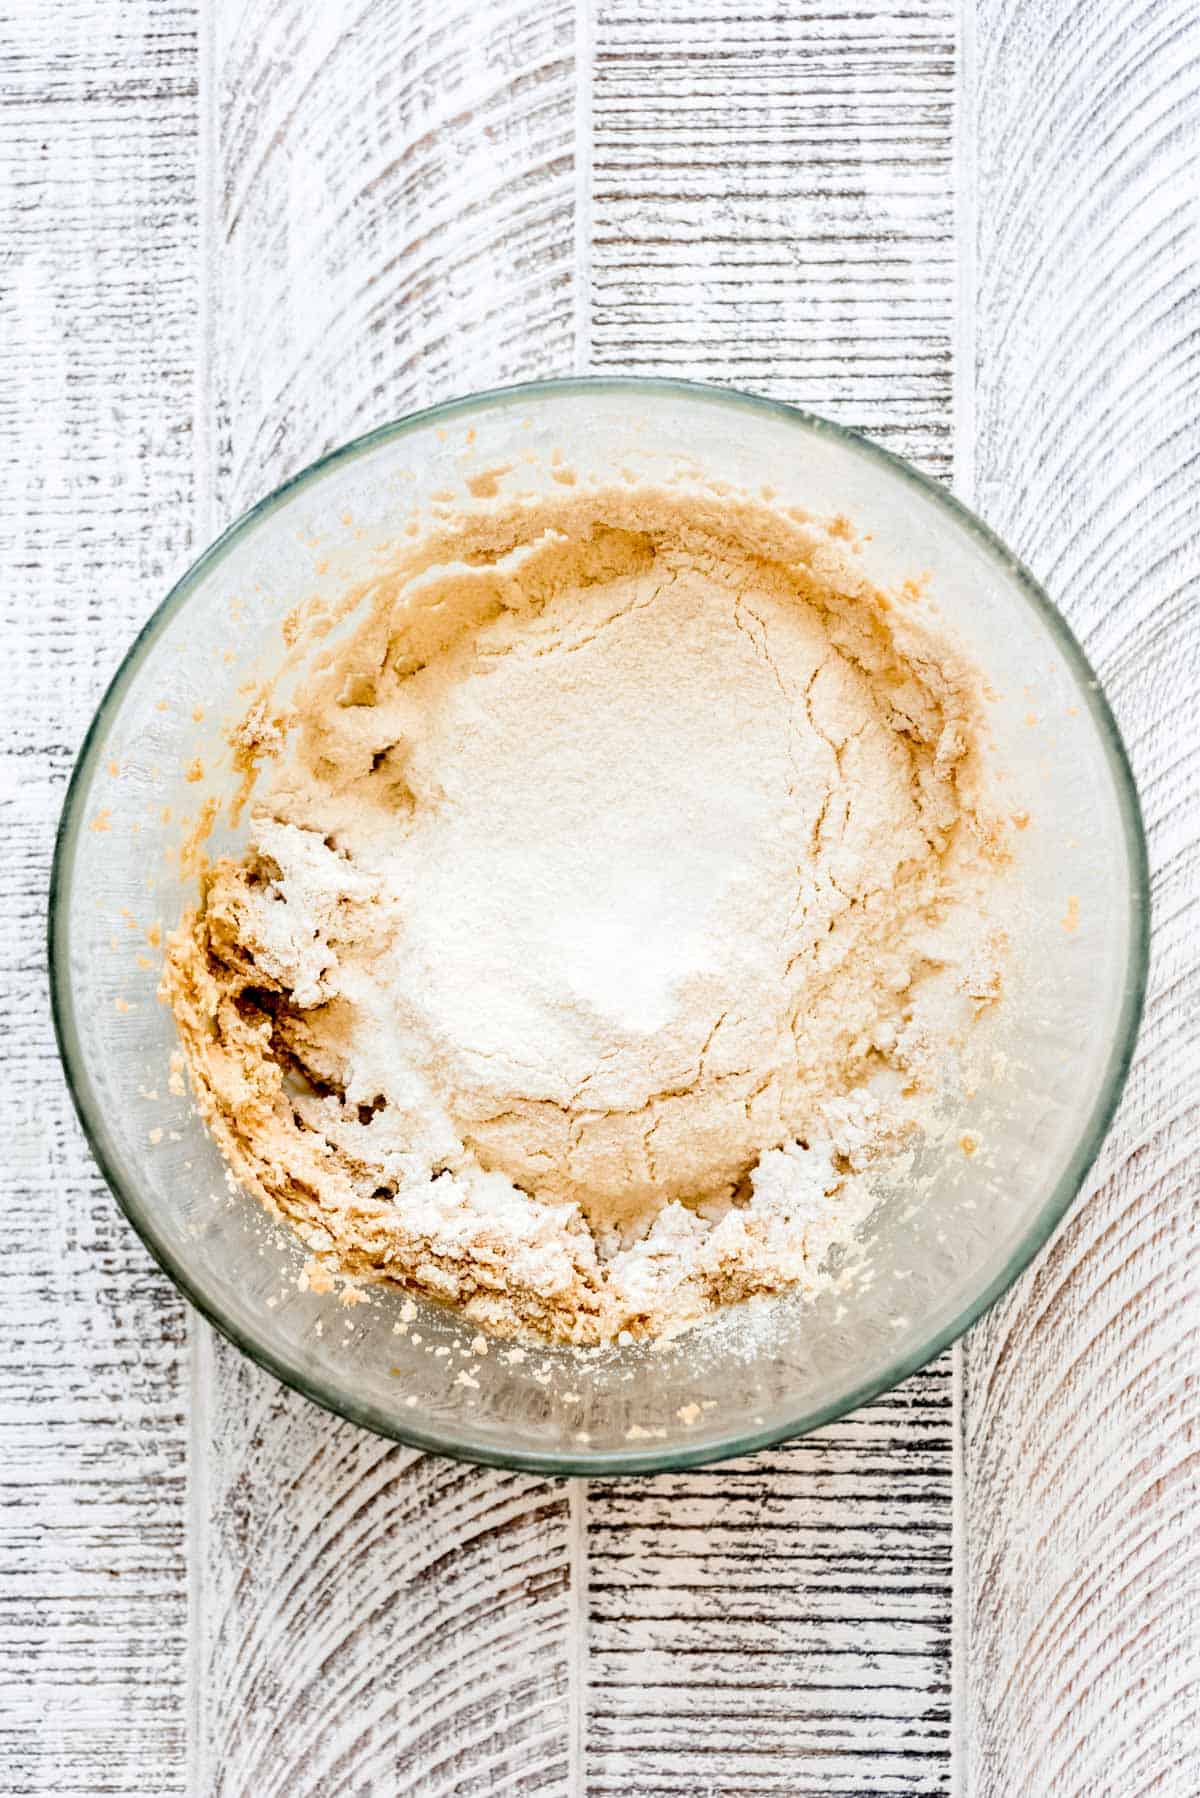
2. While the flour cools, blend sugars and butter together in a bowl, then add a little vanilla and milk. Mix in the heat-treated flour and salt.
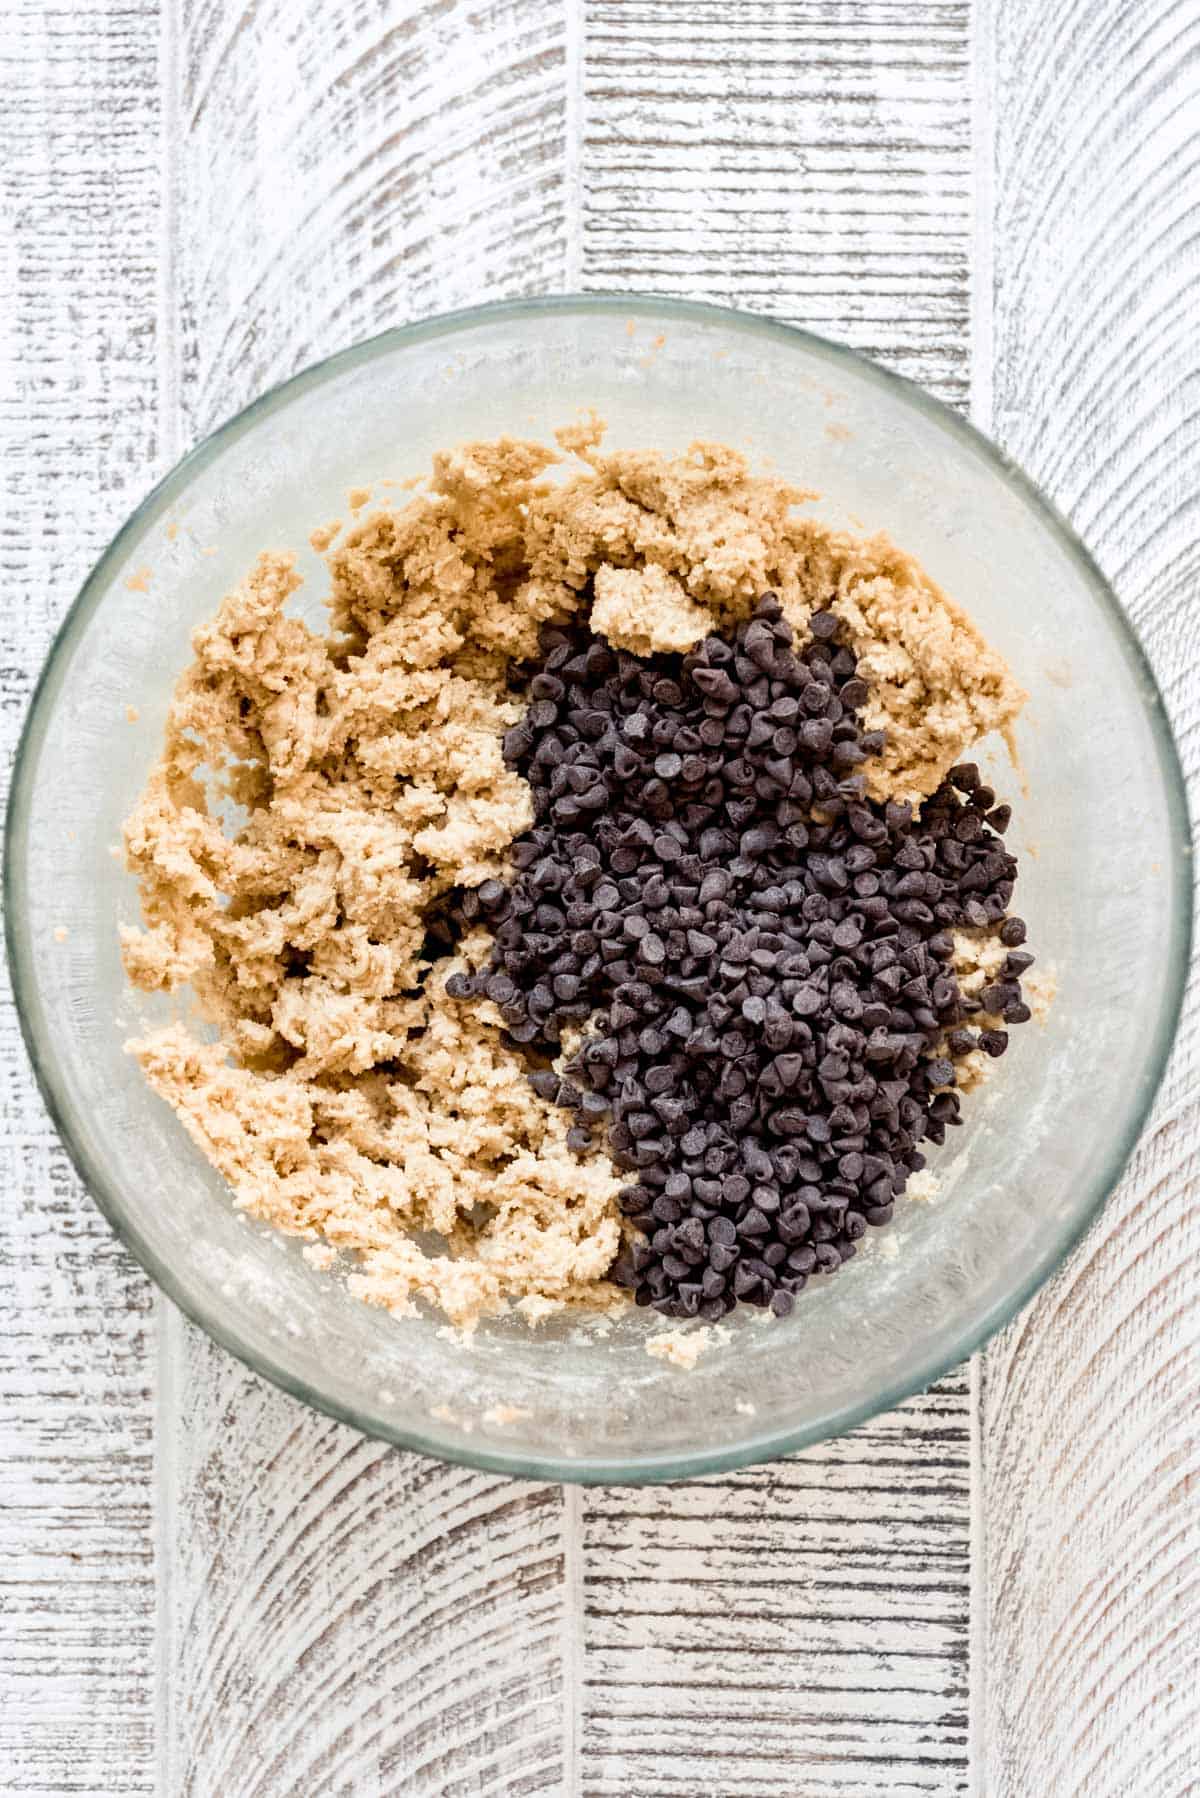
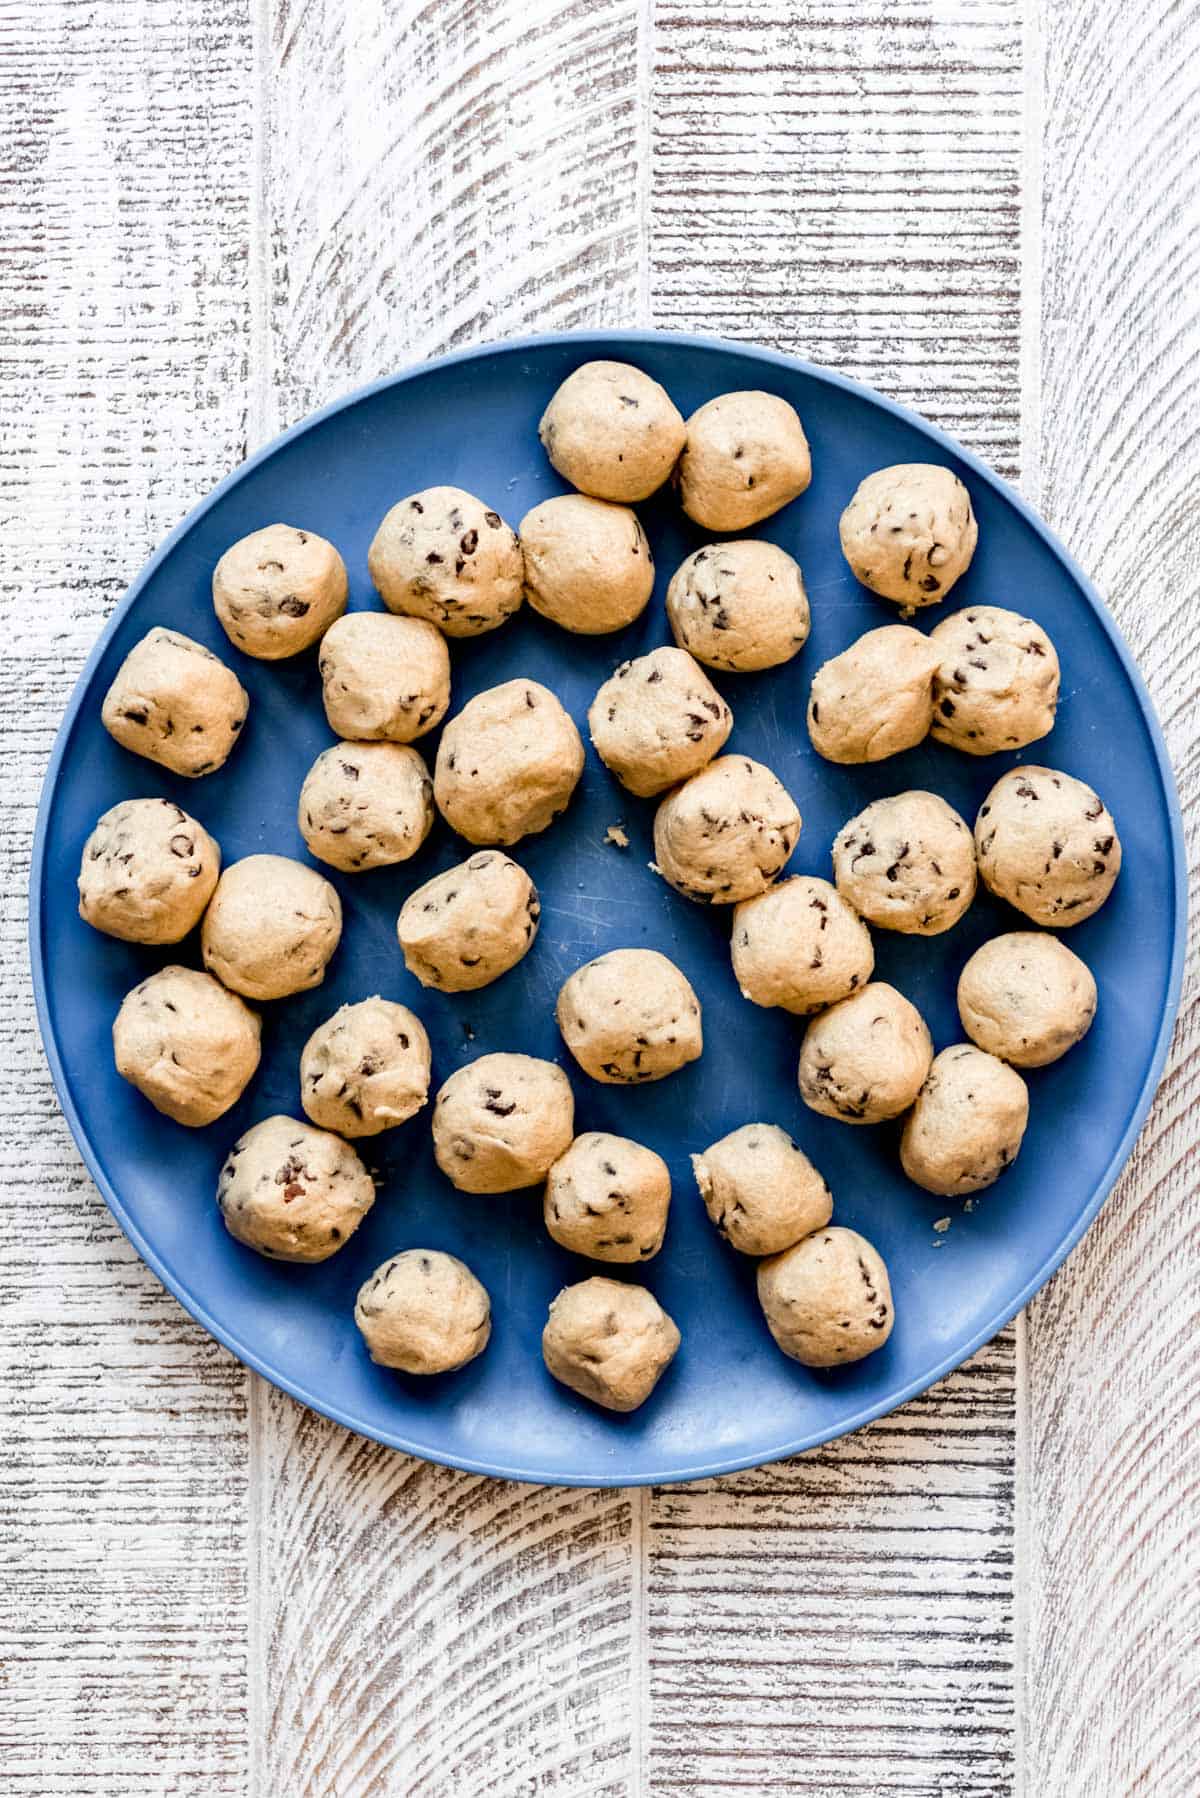
3. Stir in some mini chocolate chips (better for chocolate dispersion in these little bites than regular chocolate chips) and roll into bite-size balls. Stick these in the freezer while you work on the rest of the cheesecake.
I usually get around 34-38 little balls of dough if I can keep myself from snacking while I’m making them. You might just want to double the batch and freeze extras to have on hand for when the craving hits.
Make an Oreo crust
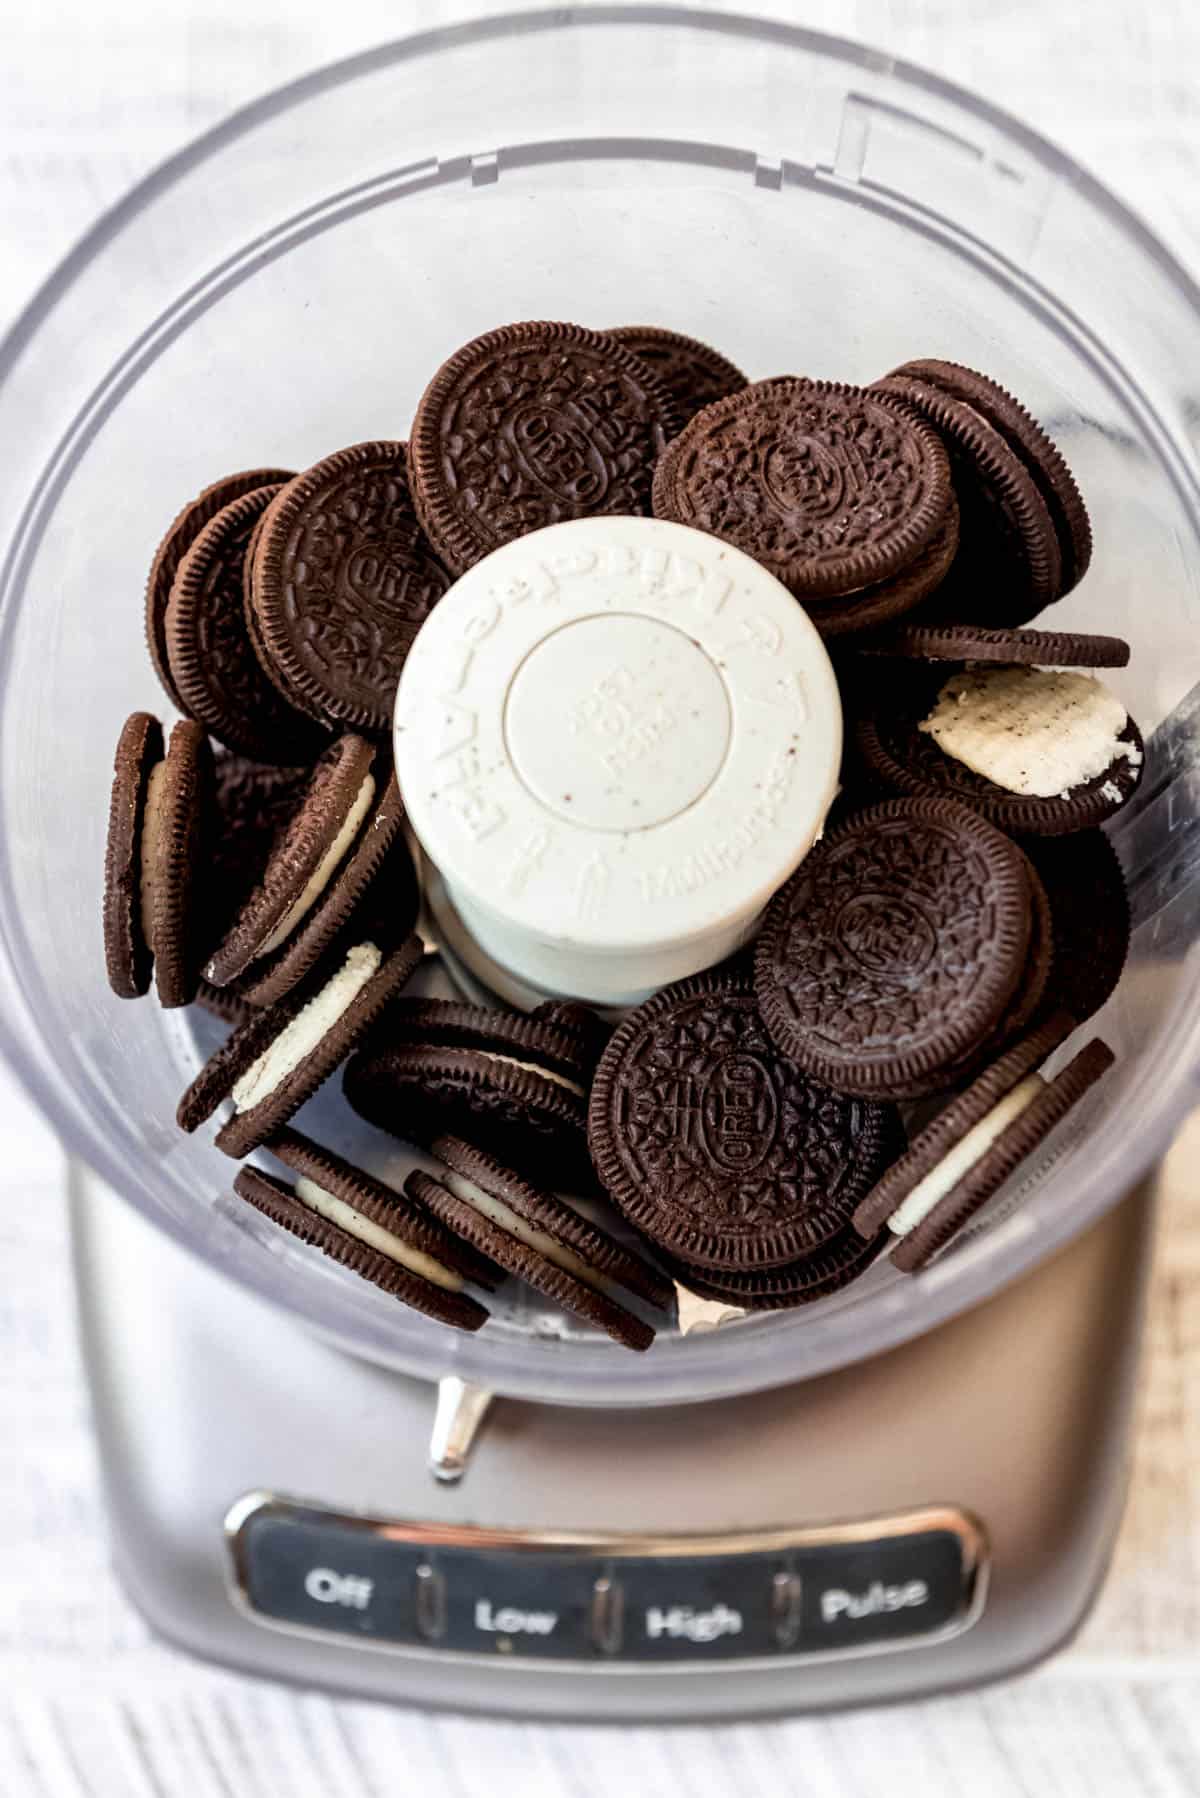
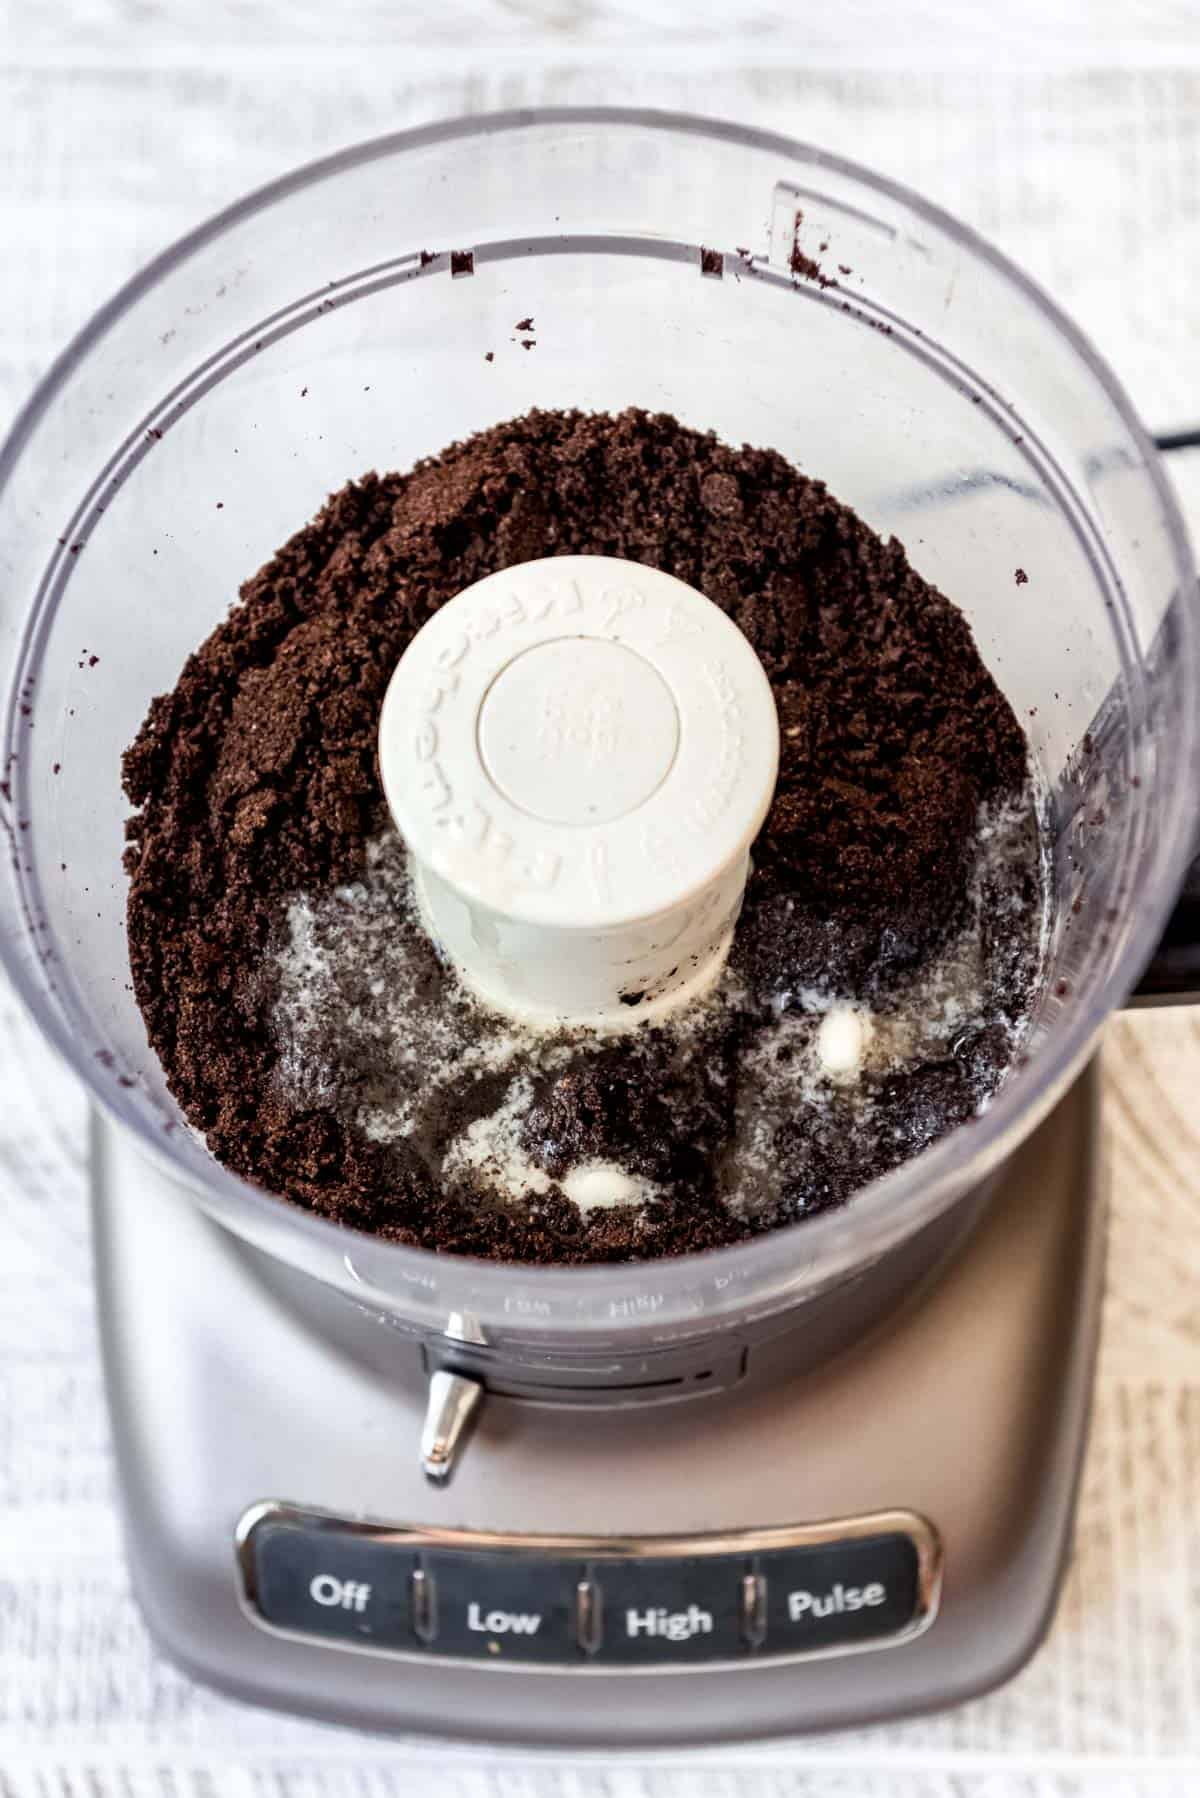
- To make your Oreo crust, start by crushing up a bunch of Oreos into really fine crumbs. You can do this with a heavy-duty ziploc bag and a rolling pin (affiliate link), or take the easy way out and just use a food processor (affiliate link) or blender if you have one. Don’t remove the cream from the Oreos before blending.
- Add a little melted butter (just enough to help bind the crumbs so they stick together).
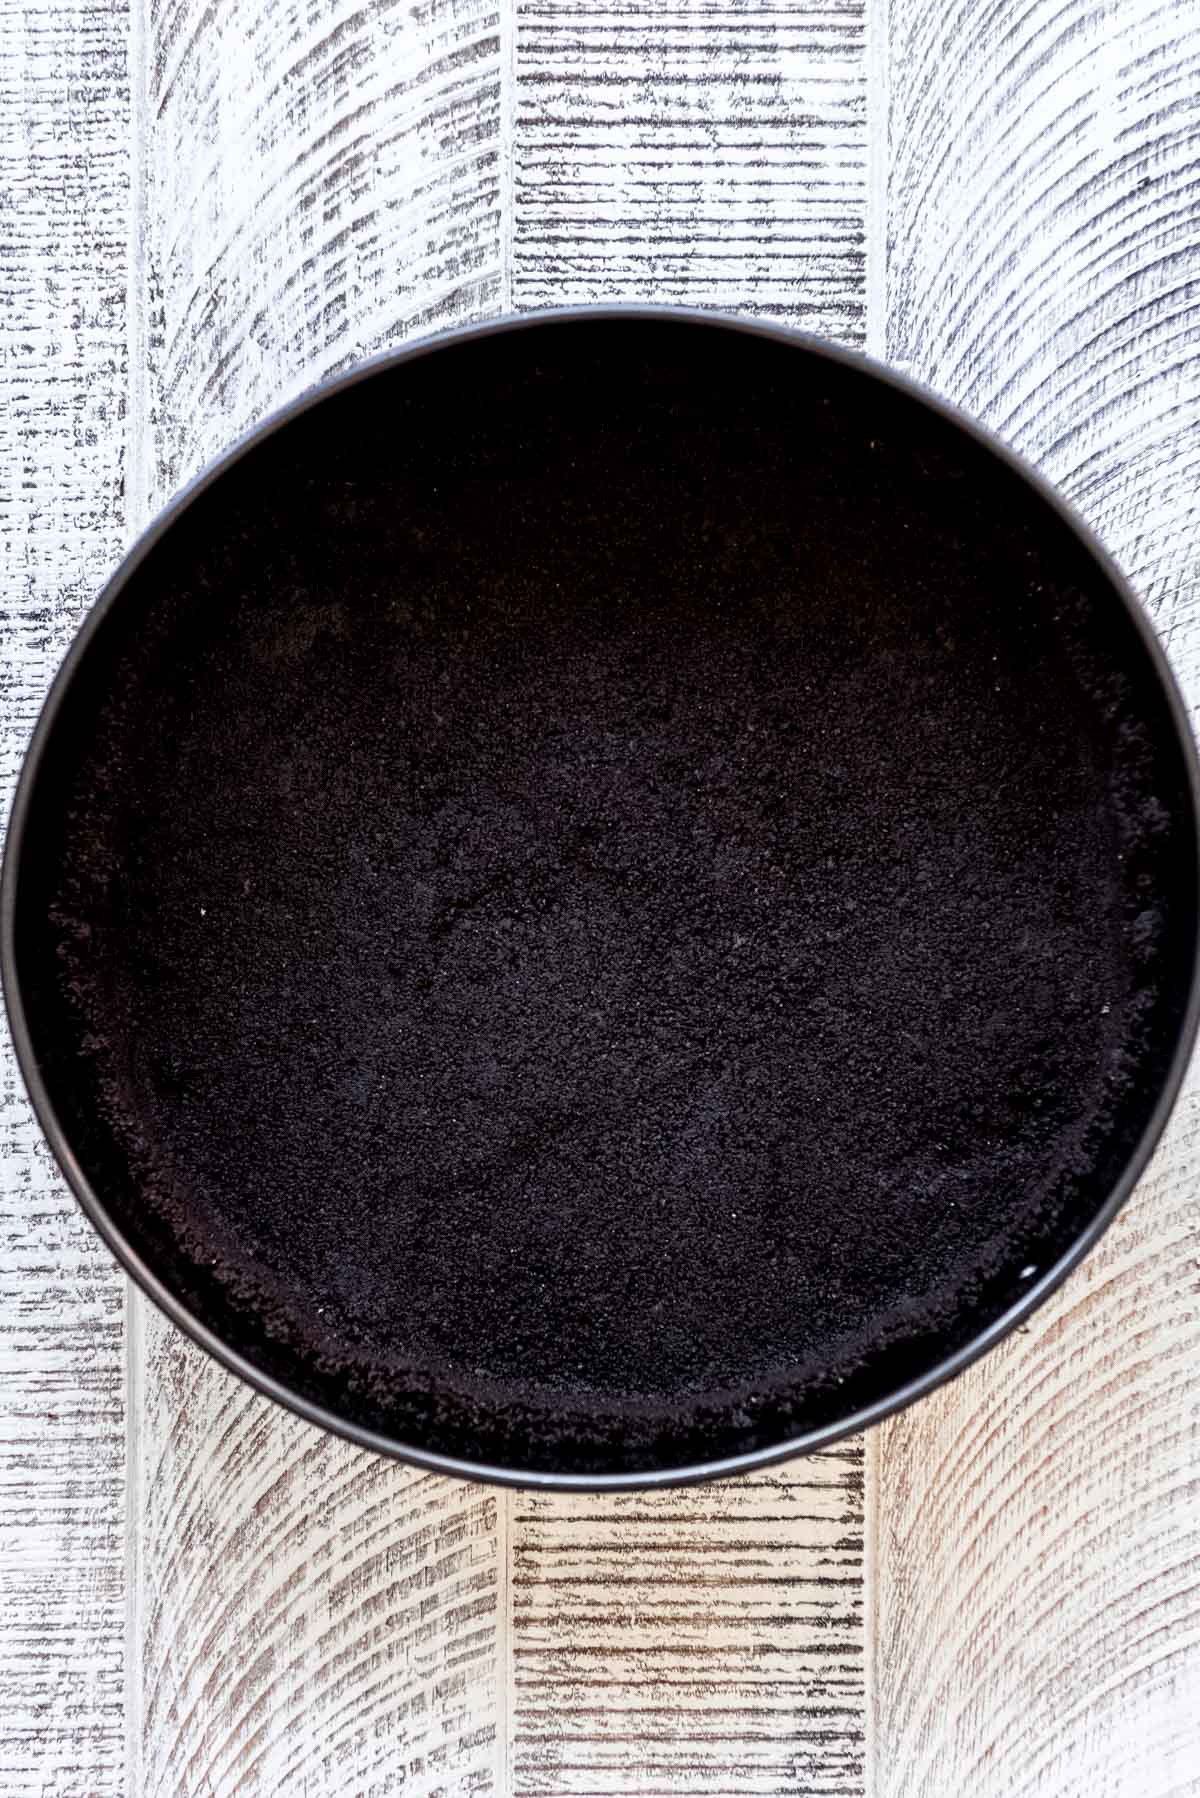
- Then press the mixture into a springform pan using a flat bottomed measuring cup or glass. You can use a 9-inch or 10-inch springform pan, although the 9-inch will take a little longer to bake.
- Press the crumbs partway up the side of the pan as well.
Make the cheesecake filling
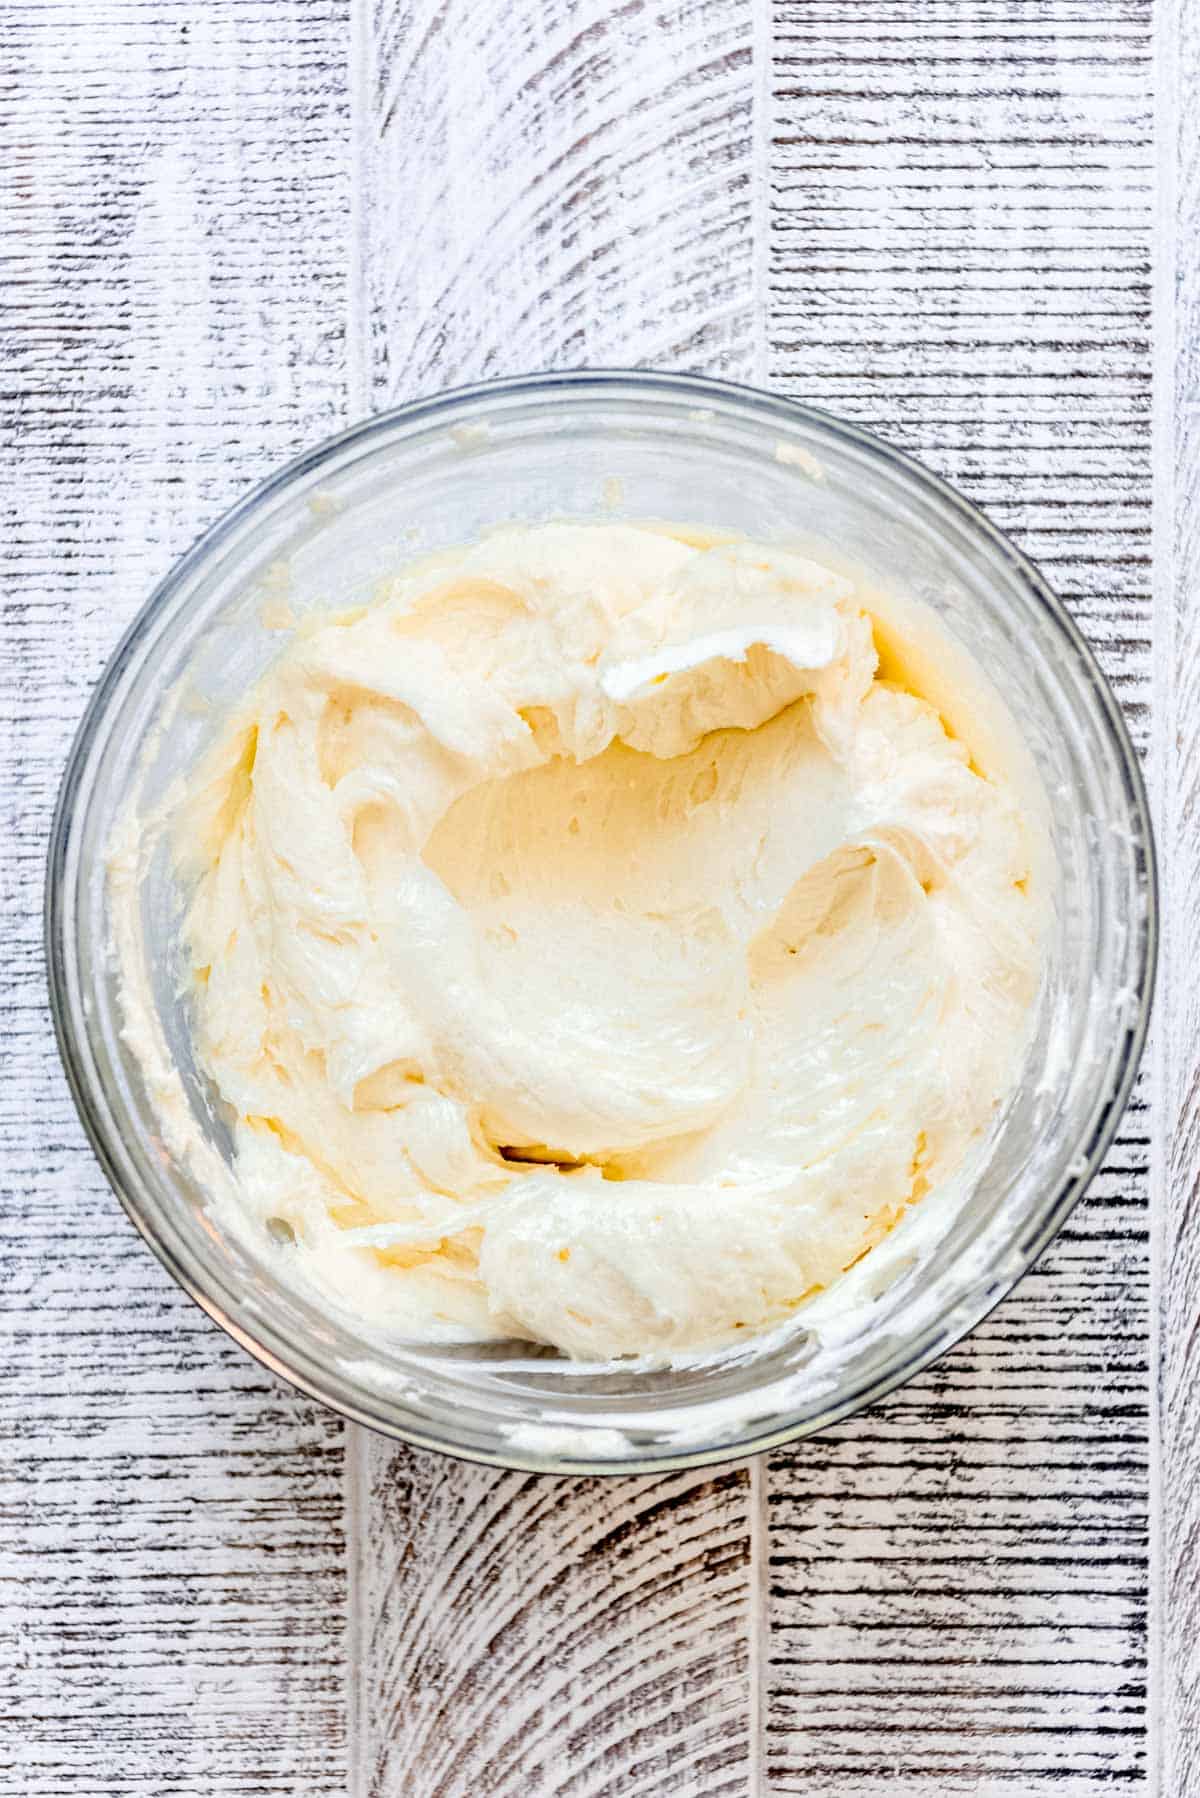
1. In a large bowl, combine the softened cream cheese, sugar, and flour. Beat until nice and smooth using a hand mixer. Get any lumps out now so you don’t feel an urge to mix more than you need to in the next step.
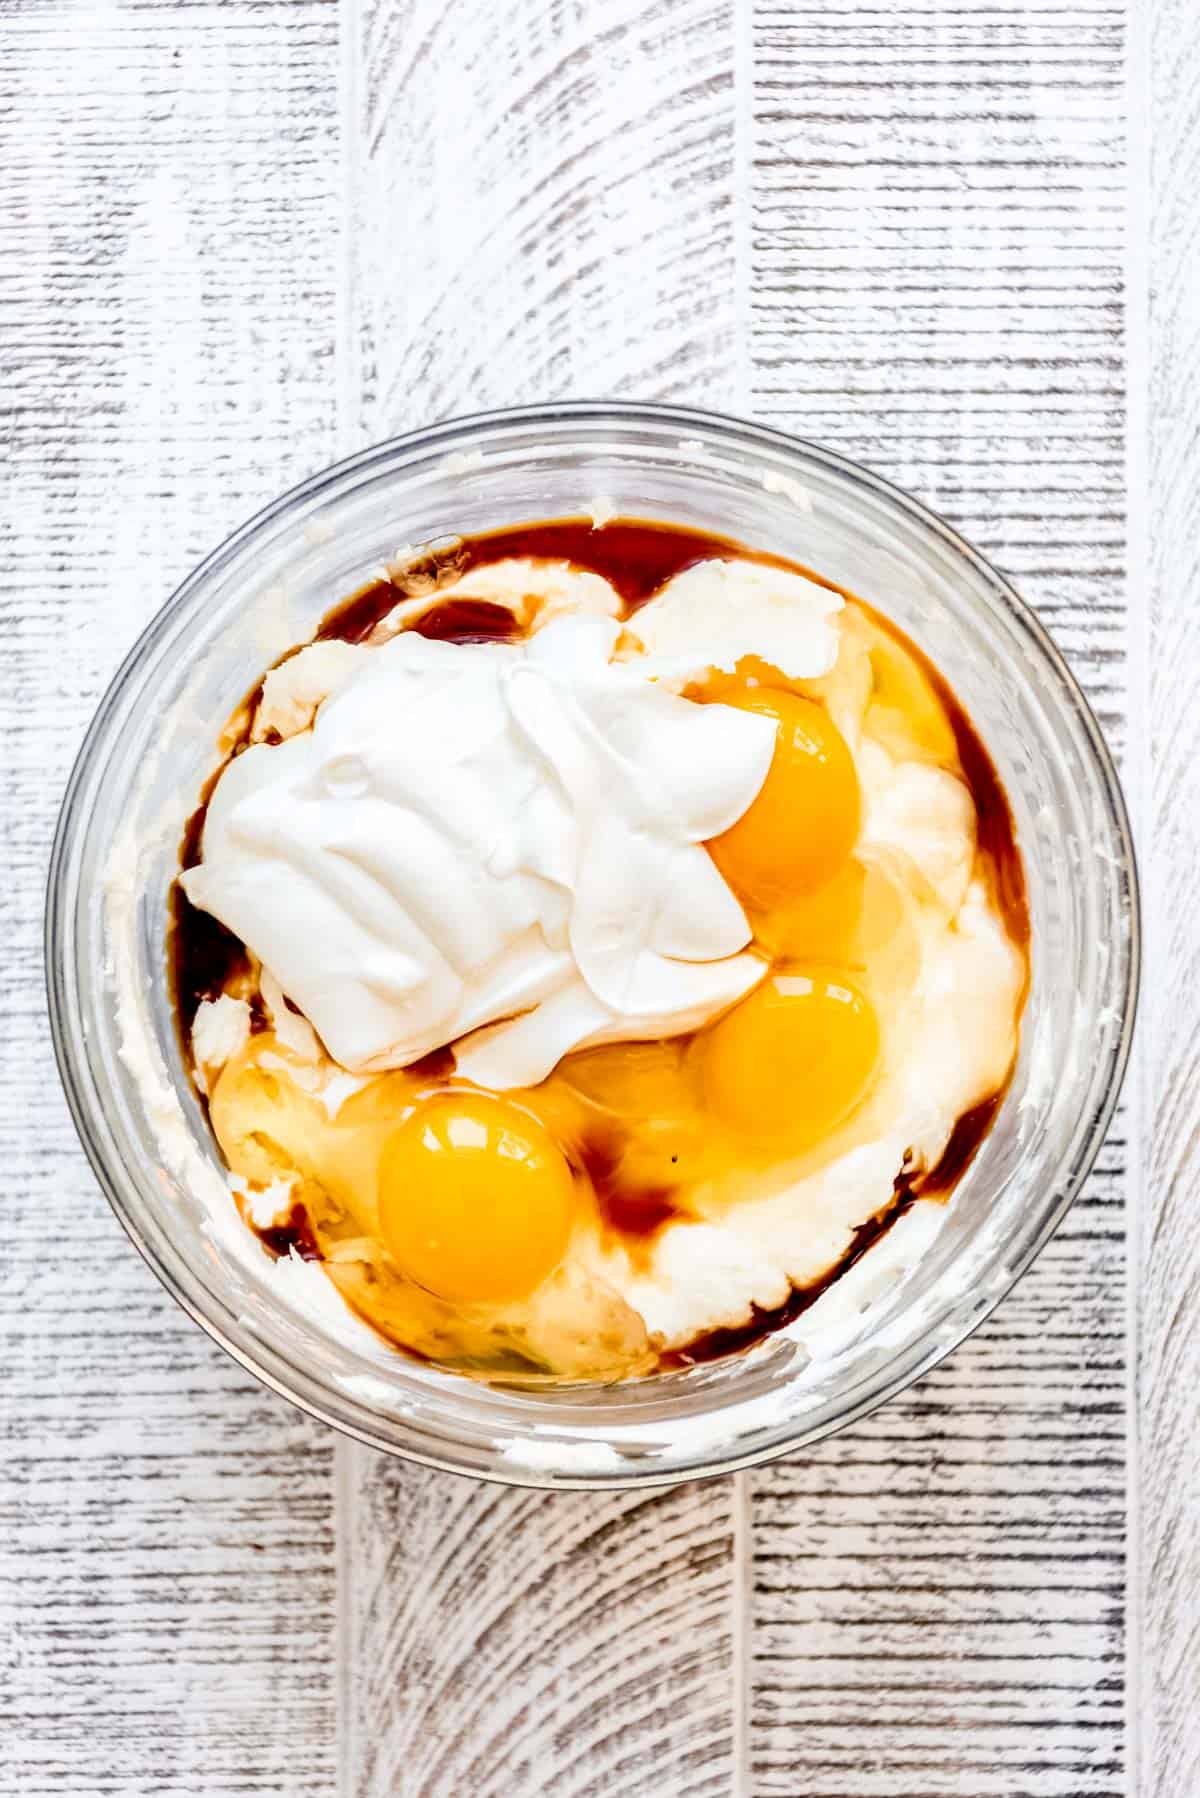
2. Next add the eggs, sour cream, and vanilla extract. I’ve said this elsewhere in this post, but it’s worth repeating that you will get better results from your cheesecake if these ingredients are all room temperature before you mix them in.
3. Mix in on low speed for 10 seconds or so, just until they start to combine, then stop and use a rubber spatula to really scrape the bottom and sides of the bowl. Start mixing on low speed again just until everything is smooth and combined.
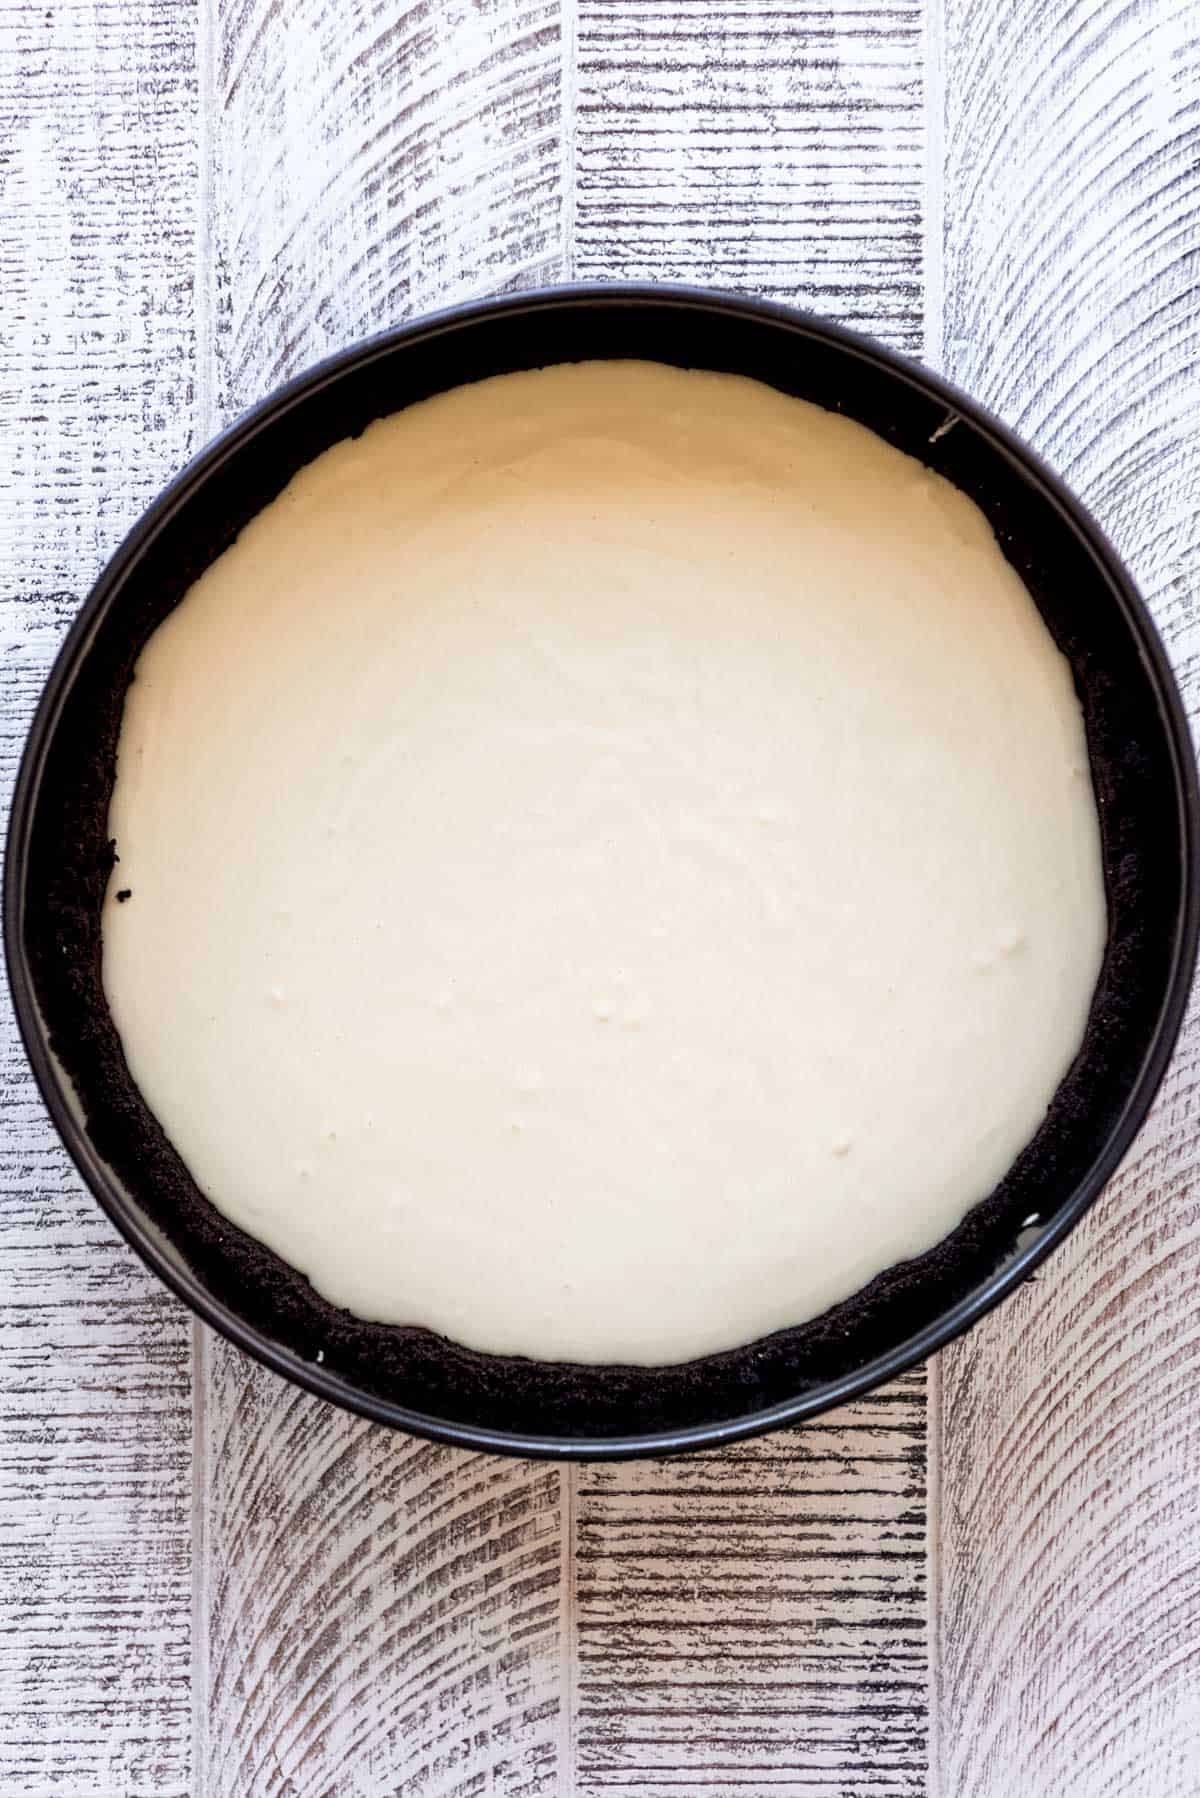
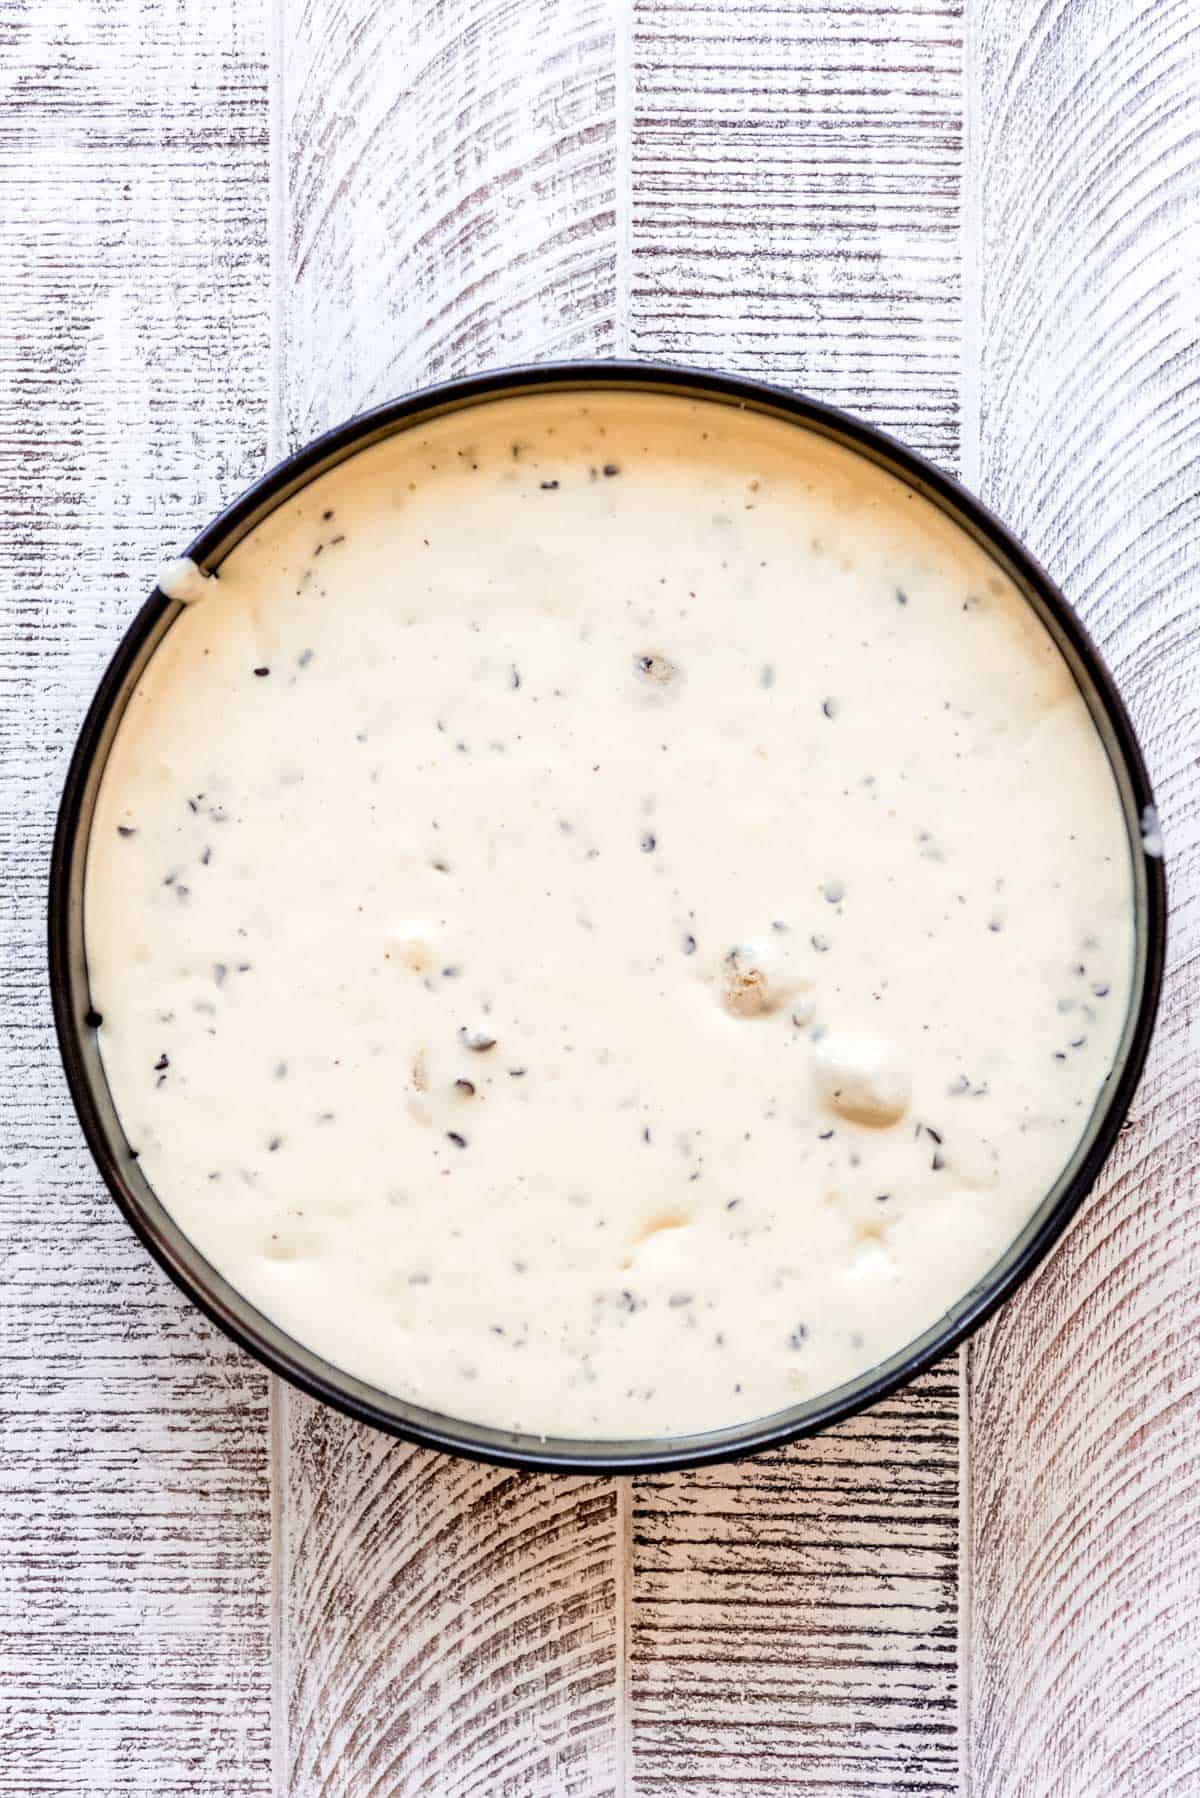
4. Pour half of the cream cheese mixture into the Oreo crust.
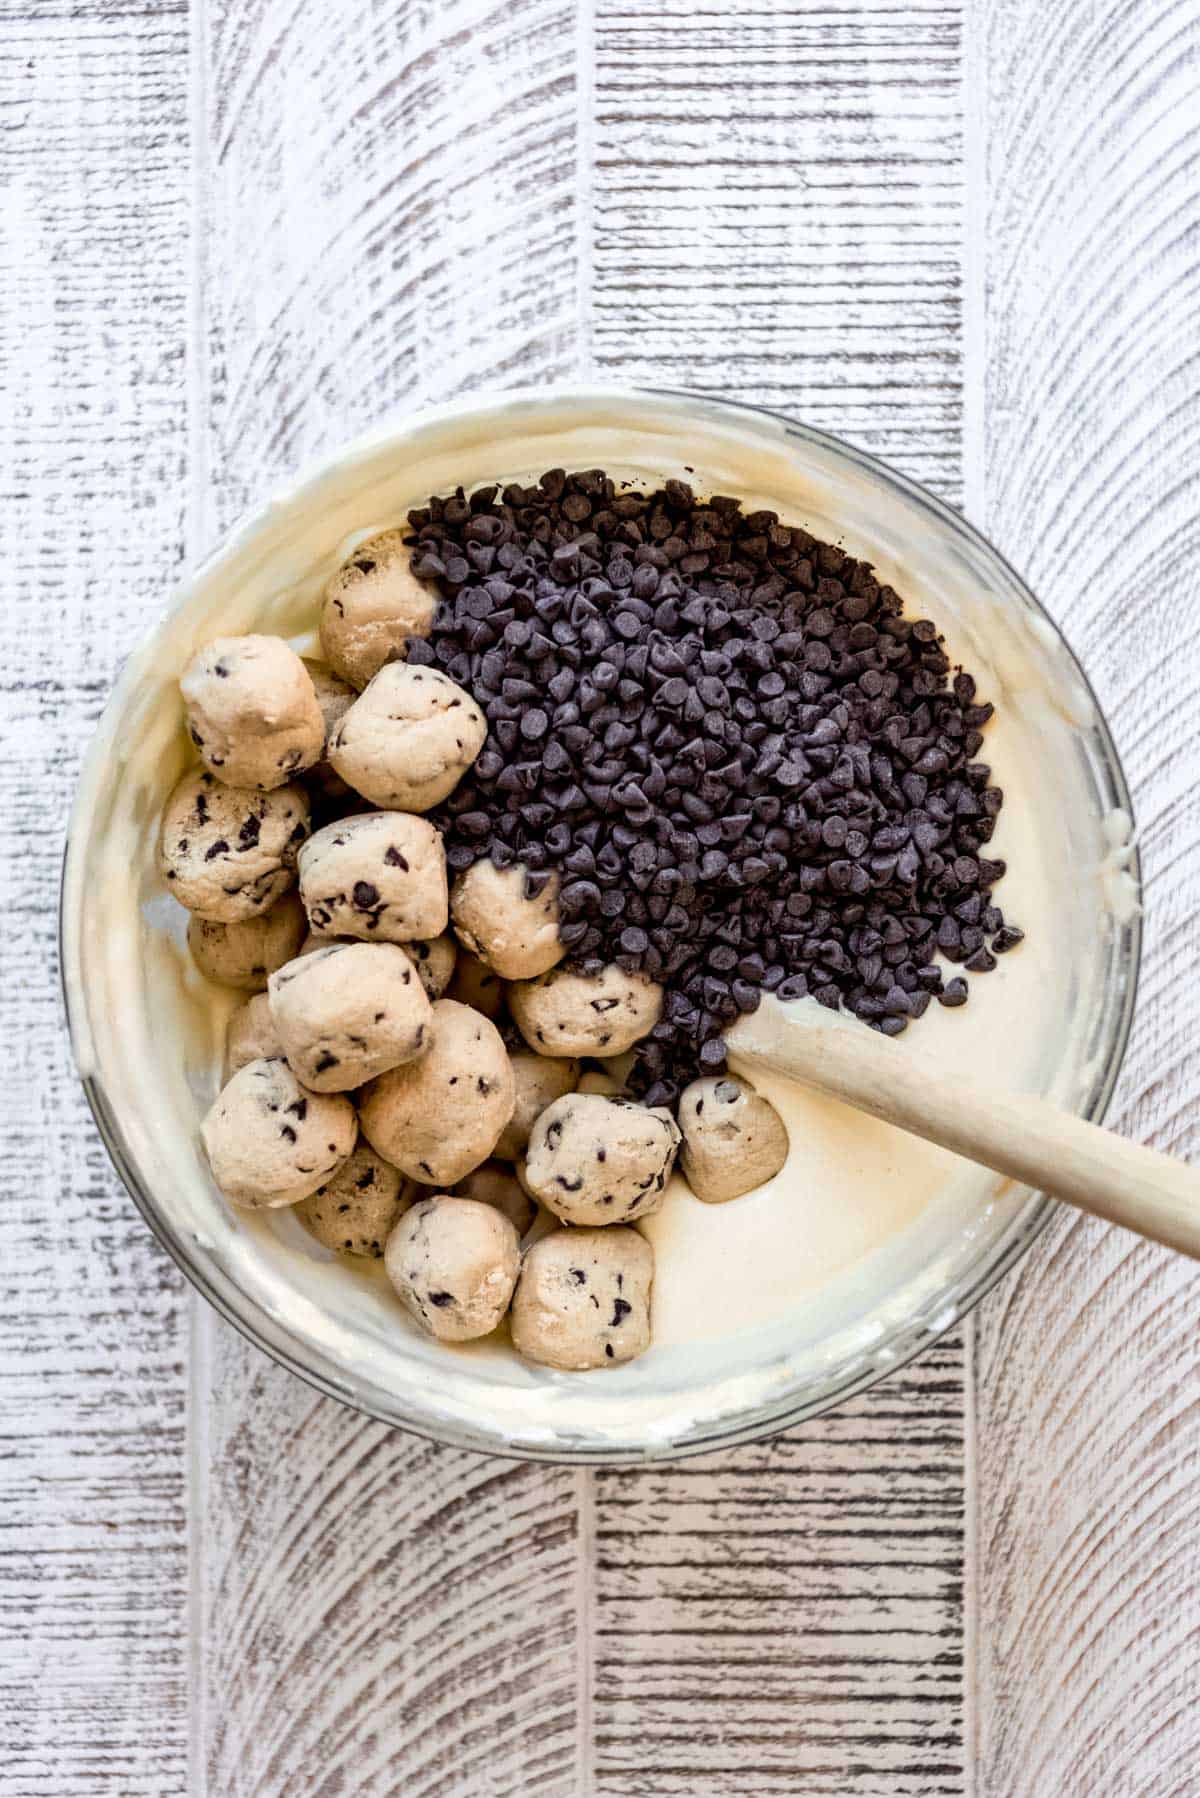
5. Add most of the chocolate chip cookie dough and mini chocolate chips to the remaining cheesecake mixture, stirring them in gently, before adding it to the pan. This helps prevent the balls of cookie dough from settling too much on the bottom of the cheesecake and creating a cookie layer instead of being more dispersed throughout the cheesecake.
I like to hold some of the cookie dough balls and mini chocolate chips in reserve for decorating the cheesecake at the end, but you could use them all now if you wanted to.
Bake the cheesecake
1. Depending on whether you use a water bath (or water bath alternative – more on that in a sec) or go with a straight bake in the oven, the cheesecake will take anywhere from 60-90 minutes to cook. It should look set around the edges and still wobble slightly in the middle. But if it looks soupy and it’s more than a jiggle, then let it cook a bit longer.
(If you are baking with no water bath at all, it should be 60-70 minutes. If using a true water bath, it will take about 30 minutes longer, so around 90 minutes. One of the alternatives I mention below will fall somewhere between those times.)
2. Now turn off the oven but don’t take the cheesecake out yet. Instead, crack the door open (you can always prop it open by sticking a wooden spoon in the door) and let the cheesecake cool for 30-60 minutes while the oven temperature goes down.
3. Once the cheesecake has cooled a bit, remove it from the oven and run a sharp, thin knife around the edges to release them from the pan if any of them are still sticking, then place the cheesecake in the fridge to chill completely.
Giving your Cookie Dough Cheesecake a water bath
You can absolutely make this cheesecake without a water bath and it will turn out fantastic. So if you are on the fence, don’t sweat it. It will bake a little faster (the cheesecake should be done right around the 60-70 minute mark) and it might dip slightly in the center, but by and large it’s going to be wonderful and amazing.
However, if you want to go the extra mile, here’s what I recommend when attempting a water bath: Skip the foil.
I have tried double wrapping my cheesecakes with foil, using heavy duty foil, etc. and nothing ever works! It always leaks on me. Then I remembered the Reynold’s slow cooker liners that I use for easier clean up when using my slow cooker. This time I stuck my cheesecake down in one of those before placing it in a large pan and adding water around the outside of the bag and it worked like a charm!
No leaks! I was seriously so happy.
If the foil wrap method works for you and you are a water bath pro, then by all means stick with what works. But if you, like me, have had difficulties in the past, I really recommend the plastic slow cooker liners.
A couple water bath alternatives
If you don’t want to deal with a water bath, but want a little extra protection for a gentler bake to your cheesecake, I have two recommendations.
Use a pan of water on the rack BELOW your cheesecake. This is my go-to approach when I don’t want to deal with a water bath. I just fill a large pan most of the way with water and put it on the bottom rack while the oven is preheating. The reason for this is that some ovens run hot or uneven. Water creates a moist environment for a gentler bake, which theoretically helps avoid cracks in your cheesecake.
My second recommendation comes from my friend Lynn at Fresh April Flours (who is the cheesecake queen, btw) and it works if you happen to hoard cake pans in all sizes, like I do. Make your cheesecake in a 9-inch pan. Then set it inside a larger 10-inch pan. Then nestle both pans in a 12-inch cake pan, Russian doll style. Or if you have a large enough roasting pan that would work.
Fill only the outside pan with water. The middle pan creates the barrier that protects the cheesecake from leaks. This method isn’t quite the same as a true water bath where the water surrounds the cheesecake and insulates it for a slower bake, but it’s a really good, safe, alternative.
Tips for making this Cookie Dough Cheesecake Recipe
- Use room temperature ingredients. This makes such a big difference! Cracks form in cheesecake from over mixing the batter and it’s much harder and takes a lot more mixing to get cold cream cheese and eggs to combine than if they are room temperature. The same goes for the sour cream. I know it’s a pain to remember to pull things out of the fridge when you just want to start baking, but I promise you will have better results if you follow this tip!
- Don’t overmix once you add the eggs. Prior to adding the eggs, go ahead and beat that cream cheese, sugar, and flour until it’s creamy and smooth! But once the eggs go in you want to mix on low speed, then stop and scrape the bowl (super-duper important here!) and mix again on low speed so everything gets evenly combined with as little mixing as possible.
- Don’t overbake. Cheesecake will not look set in the middle when it’s actually done! It should be set around the edges of the pan, but the center is still going to have some jiggle. Remember that it will continue to set up after you turn the oven off.
- Cool slowly. Once the cheesecake is done, turn the oven off and crack the door. I stick a wooden spoon in it to hold the door ajar. This allows the cheesecake to cool slowly instead of being shocked going from a hot oven to a regular temperature room. It also lets the cheesecake finish setting up before you stick the cheesecake in the fridge to chill.

Chocolate Chip Cookie Cheesecake Recipe FAQs
Yes! Cheesecake freezes really well. If you topped your cheesecake with whipped cream for presentation and have leftover slices, just scrape the whipped cream off because it won’t freeze well. Otherwise, I recommend freezing individual slices of cheesecake on a baking sheet lined with parchment paper for 3-4 hours, then wrap them in plastic wrap for longer term storage. Thaw in the fridge overnight before serving.
The key to knowing when cheesecake is done is to jiggle the pan a bit. It should be set around the edges but have a jiggle in the middle. If it’s set all the way, the cheesecake is overbaked and you will probably end up with a crack when it cools, if you don’t see one already.
Don’t despair though! Just cover up that crack with some whipped cream and chocolate shavings and no one needs to know. The cheesecake will still taste good and you will learn for next time how to avoid the same mistake!
More Chocolate Chip Recipes
- The Best Chocolate Chip Scones Recipe
- Chocolate Chip S’mores Cookies
- Brown Butter Chocolate Chip Skillet Cookie for Two (Pizookies)
- Bakery Style Chocolate Chip Muffins
Did you make this recipe?
Let me know what you thought with a comment and rating below. You can also take a picture and tag me on Instagram @houseofnasheats or share it on the Pinterest pin so I can see.
Cookie Dough Cheesecake Recipe
Ingredients
Cookie Dough
- 1 cup all-purpose flour
- 1/2 cup salted butter softened
- 2/3 cup light brown sugar packed
- 3 Tablespoons granulated sugar
- 2 Tablespoons cream or milk
- 2 teaspoons vanilla extract
- 1/4 teaspoon salt
- 1 cup mini chocolate chips
Crust
- 2/3 package Oreos about 2 ½ cups crumbs
- 4 Tablespoons salted butter melted
Cheesecake
- 32 ounces cream cheese softened to room temperature
- 1 cup granulated sugar
- 4 large eggs room temperature
- 2 Tablespoons all-purpose flour
- 2 teaspoons vanilla extract
- 1 cup sour cream room temperature
- 1 cup mini chocolate chips
Garnish
- 2 cups sweetened whipped cream
- Additional mini chocolate chips
- Additional balls of edible cookie dough

Instructions
- Preheat oven to 325°F.
Cookie Dough Balls
- Place flour in a microwave-safe bowl and heat for 1 minute. Cool.1 cup all-purpose flour
- In a separate bowl, beat butter, brown sugar, and granulated sugar until creamy and light. Add the cream or milk and vanilla and beat again.½ cup salted butter, 2/3 cup light brown sugar, 3 Tablespoons granulated sugar, 2 Tablespoons cream or milk, 2 teaspoons vanilla extract
- Add the flour and salt, mixing just to combine. Stir in the mini chocolate chips.¼ teaspoon salt, 1 cup mini chocolate chips
- Roll into small balls and place on a plate or baking sheet lined with parchment paper. Freeze for 10-20 minutes.
Crust
- Crush Oreos into fine crumbs with a food processor (affiliate link), blender, or ziploc bag and rolling pin (affiliate link). Add the melted butter and toss with a fork to evenly moisten.2/3 package Oreos, 4 Tablespoons salted butter
- Press into the bottom and partway up the sides of a 10-inch springform pan using a glass or measuring cup with a flat bottom. Set aside.
Filling
- In a large bowl, beat the softened cream cheese, sugar, and flour until smooth using a hand mixer.32 ounces cream cheese, 1 cup granulated sugar, 2 Tablespoons all-purpose flour
- Add eggs, sour cream, and vanilla. Mix on low speed for 10-15 seconds, then scrape the bottom and sides of the bowl. Mix again just until smooth, taking care not to overmix the cheesecake filling.4 large eggs, 1 cup sour cream, 2 teaspoons vanilla extract
- Add half of the filling to the prepared crust.
- Add most of the frozen cookie dough balls and mini chocolate chips to the remaining cheesecake batter, reserving enough cookie dough balls and mini chocolate chips for decorating the top of the cheesecake. Stir to combine, then spoon this over the top of the plain cheesecake filling.1 cup mini chocolate chips
- Wrap the bottom of the springform pan in a plastic slow cooker liner or two layers of foil, then place the cheesecake in a larger pan and carefully pour water around the edges for a waterbath, if using.
- Place the cheesecake in the oven and bake for 80-90 minutes (if using a water bath) or 60-70 minutes (if baking without a water bath), just until the edges are set but the center of the cheesecake jiggles a bit.
- Turn oven off and crack the door open (you may need to prop it with a wooden spoon). Let the cheesecake cool slowly for 30-60 minutes.
- Remove cheesecake and cool completely on a wire rack. Place the cooled cheesecake in the fridge to chill all the way before slicing.
- Decorate with sweetened whipped cream, reserved cookie dough balls, and mini chocolate chips, if desired.2 cups sweetened whipped cream, Additional mini chocolate chips, Additional balls of edible cookie dough
Notes
- Pan size: I used a 10-inch springform pan, but a 9-inch springform pan will also work. The bake time might be slightly longer because of the thicker cheesecake in this case.
- Freezing: Individual slices of cheesecake can be wrapped in plastic wrap and frozen for about 3 months. Thaw in the fridge overnight before serving.


Your recipes a divine! Cheesecake is our family favorite. Thank you for all the helpful tips and directions. It was so easy to follow and make this recipe. Loved the combination and will make a gain!
I know several people who would love this! Cookie dough is the bomb!
This is a gorgeous cheesecake. Looks better than the restaurants and bakeries.
Wow, what a gorgeous cheesecake! Great tips about how to make edible cookie dough too.
This looks amazing. I love chocolate chip cookie dough everything!
You had me at chocolate chip cheesecake! It looks awesome. I really like the chocolate chip cookie balls. Such a creative and great idea.
Thank you so much for this chocolate chip cookie dough cheesecake! So delicious and really easy to make! Loved it!
I love a good cheesecake recipe! I showed my kids the pictures, and a request to make the recipe this weekend was unanimous!
This was absolutely delicious! Dirtied a lot of dishes but each element was pretty simple. Stuck a pan of water at the bottom of the oven and baked for about 70 minutes. Would make again! It’s a very impressive dessert!
So glad it was a hit! Thanks so much for the review, Sarah!