There’s nothing quite like food cooked over real charcoal. Level up your summer grilling game by learning how to light a charcoal grill and in just 20 to 30 minutes, you can have your grill ready to go, creating the high heat and smoky flavor that simply can’t be replicated with a gas grill. If you’ve ever wondered how to light a charcoal grill the right way, I’ll show you the easiest method for getting perfectly hot coals every time.
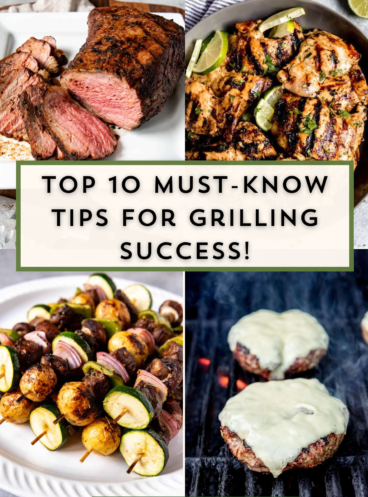
If you’re new to charcoal grilling, lighting your grill for the first time can feel really intimidating. I had Paul handle that task for the longest time until I finally decided I might as well learn for myself so I didn’t have to wait for him to get started cooking (typical oldest daughter energy).
When we first got our charcoal grill, I was blown away by how much more I enjoyed the flavor. For years I thought a gas grill was just as good. But I have definitely switched sides and we got rid of our gas grill three years ago and I don’t see us ever going back.
Here’s what helped me get over my fear of using a charcoal grill: charcoal grilling only feels complicated until you realize you’re not “starting a fire.” Instead, you’re just managing how air flows in and out of your grill. Once that clicks, everything starts to feel calmer, more predictable, and a lot more enjoyable. It’s not all that different from preheating an oven for my fellow bakers.
An inexpensive chimney starter is what makes all that possible. It removes the need for using lighter fluid, removes guesswork, and gives you one clean, repeatable way to get perfectly lit coals every single time.
Let’s walk through it step by step.
What’s Included in This Guide:
- How to prep a charcoal grill before grilling
- Why opening the vents matters
- The difference between direct vs. indirect heat
- Why indirect cooking is recommended for beginners
- How many briquettes to use
- How to fill and light a chimney starter
- Troubleshooting tips if the chimney keeps going out
- Signs the charcoal is fully ready
- How to safely dump and arrange the coals
- Beginner grilling tips for success
- A section explaining the reverse sear method and why it works so well
What a Chimney Starter Actually Does
A chimney starter is just a metal tube with a grate inside. But what it really creates is this:
- A strong upward flow of air
- Concentrated heat
- Faster ignition
- More evenly lit charcoal
As hot air rises through the chimney, fresh oxygen pulls in from the bottom vents and feeds the fire underneath the coals. That airflow is what makes charcoal light up surprisingly fast.
What You Need (and Why It Matters)
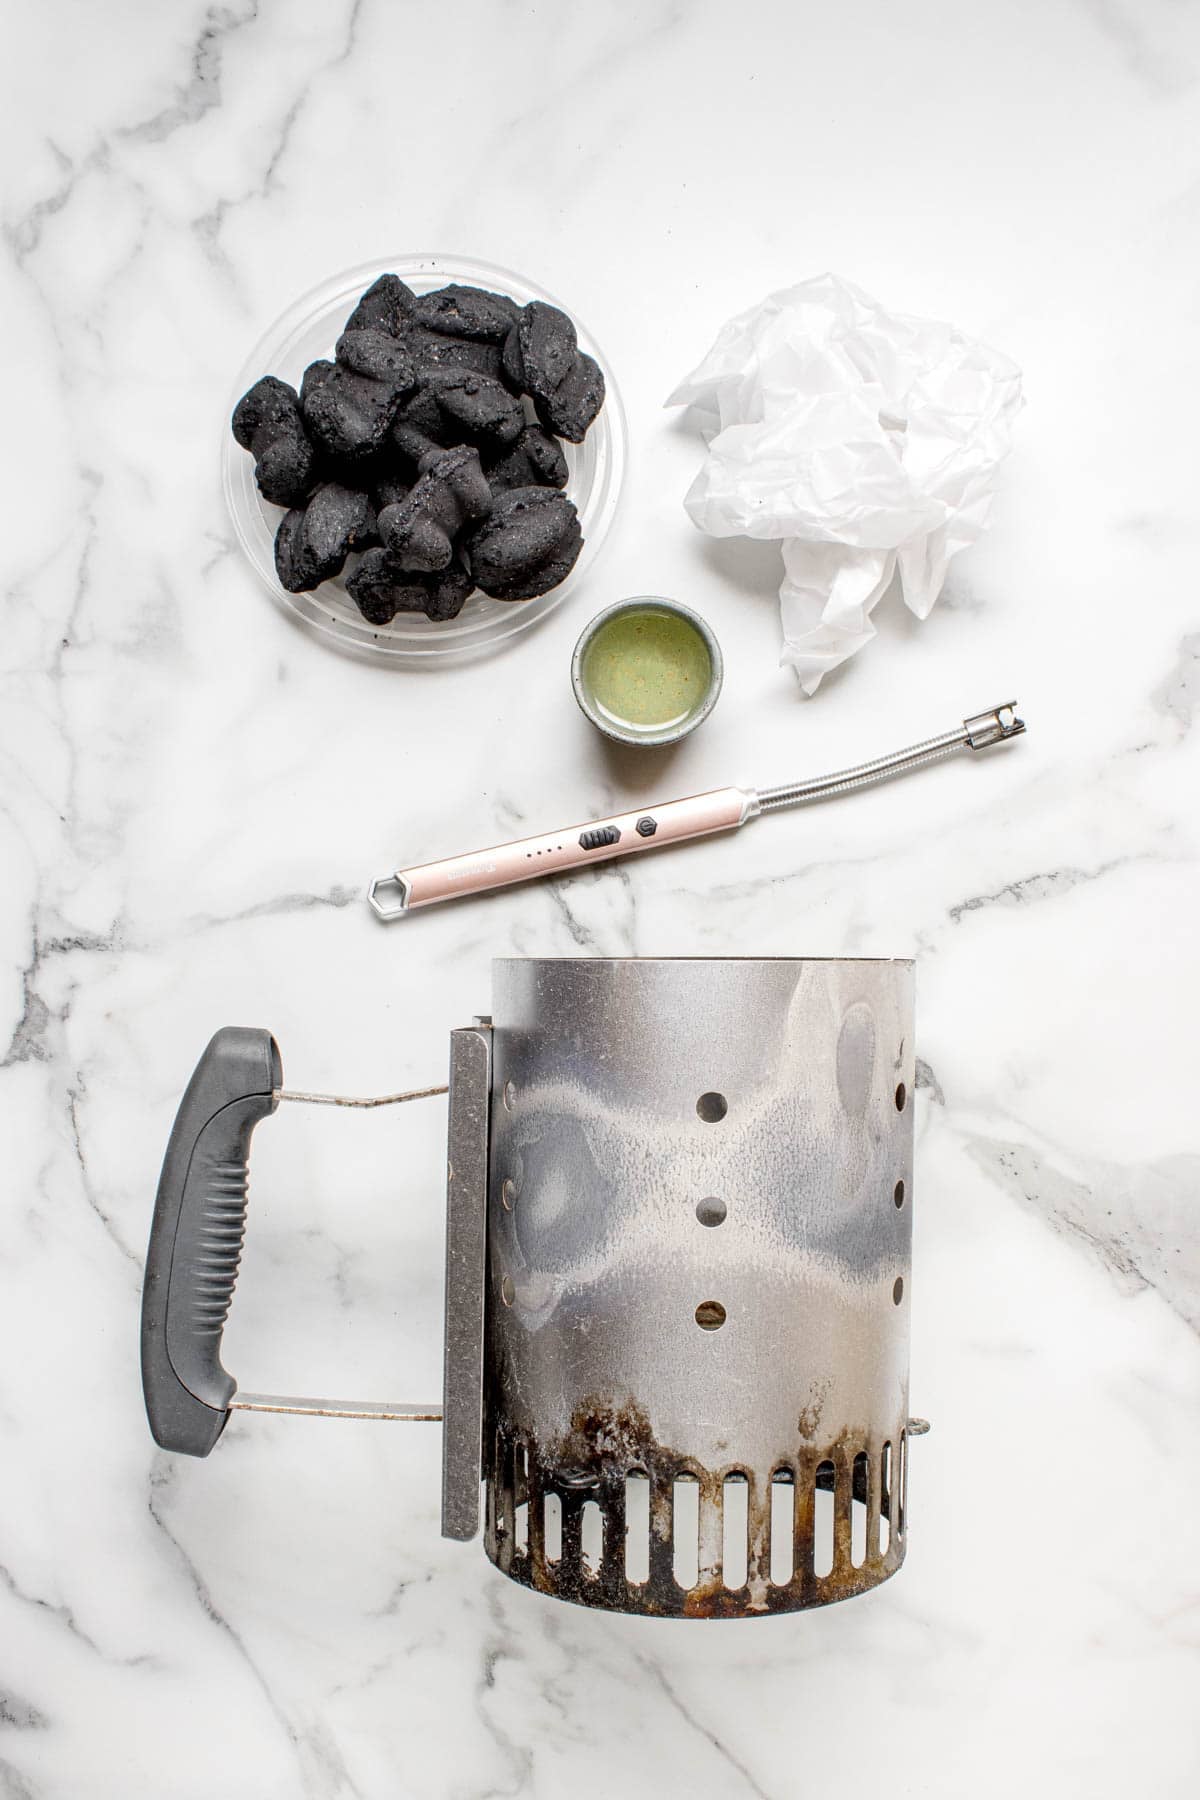
- Charcoal briquettes: I recommend briquettes over lump charcoal for beginners because they are uniform in size, burn more predictably, and are user friendly. We like using Kingsford, which is also the most widely available brand in our area.
- Chimney starter: This replaces lighter fluid completely. You can buy one online, at Walmart or at hardware stores.
- Paper: This is what ignites the charcoal. You can use newspaper, paper towels, or just rip off pieces from the charcoal bag as you use it up. Another option if you find yourself grilling a lot is to use starter cubes, which work great and are almost foolproof.
- Oil: A small amount of cooking oil helps the paper burn longer. Think of it as beginner insurance. This is a great place to start although recently we have been using the Weber lighter cubes and really like those as well. They are super convenient but not necessary if you are new to charcoal grilling.
- Long lighter: This keeps your hands safely away from the flame during ignition.
Quick Grill Prep Checklist
Before lighting your grill:
- Check to make sure the top grilling grate is clean.
- Lift off the top grilling grate and set aside until later.
- Remove old ash.
- Make sure your vents open properly.
- Have your charcoal and lighter ready before ignition.
Doing this beforehand makes the entire process feel much less stressful once the fire starts building.
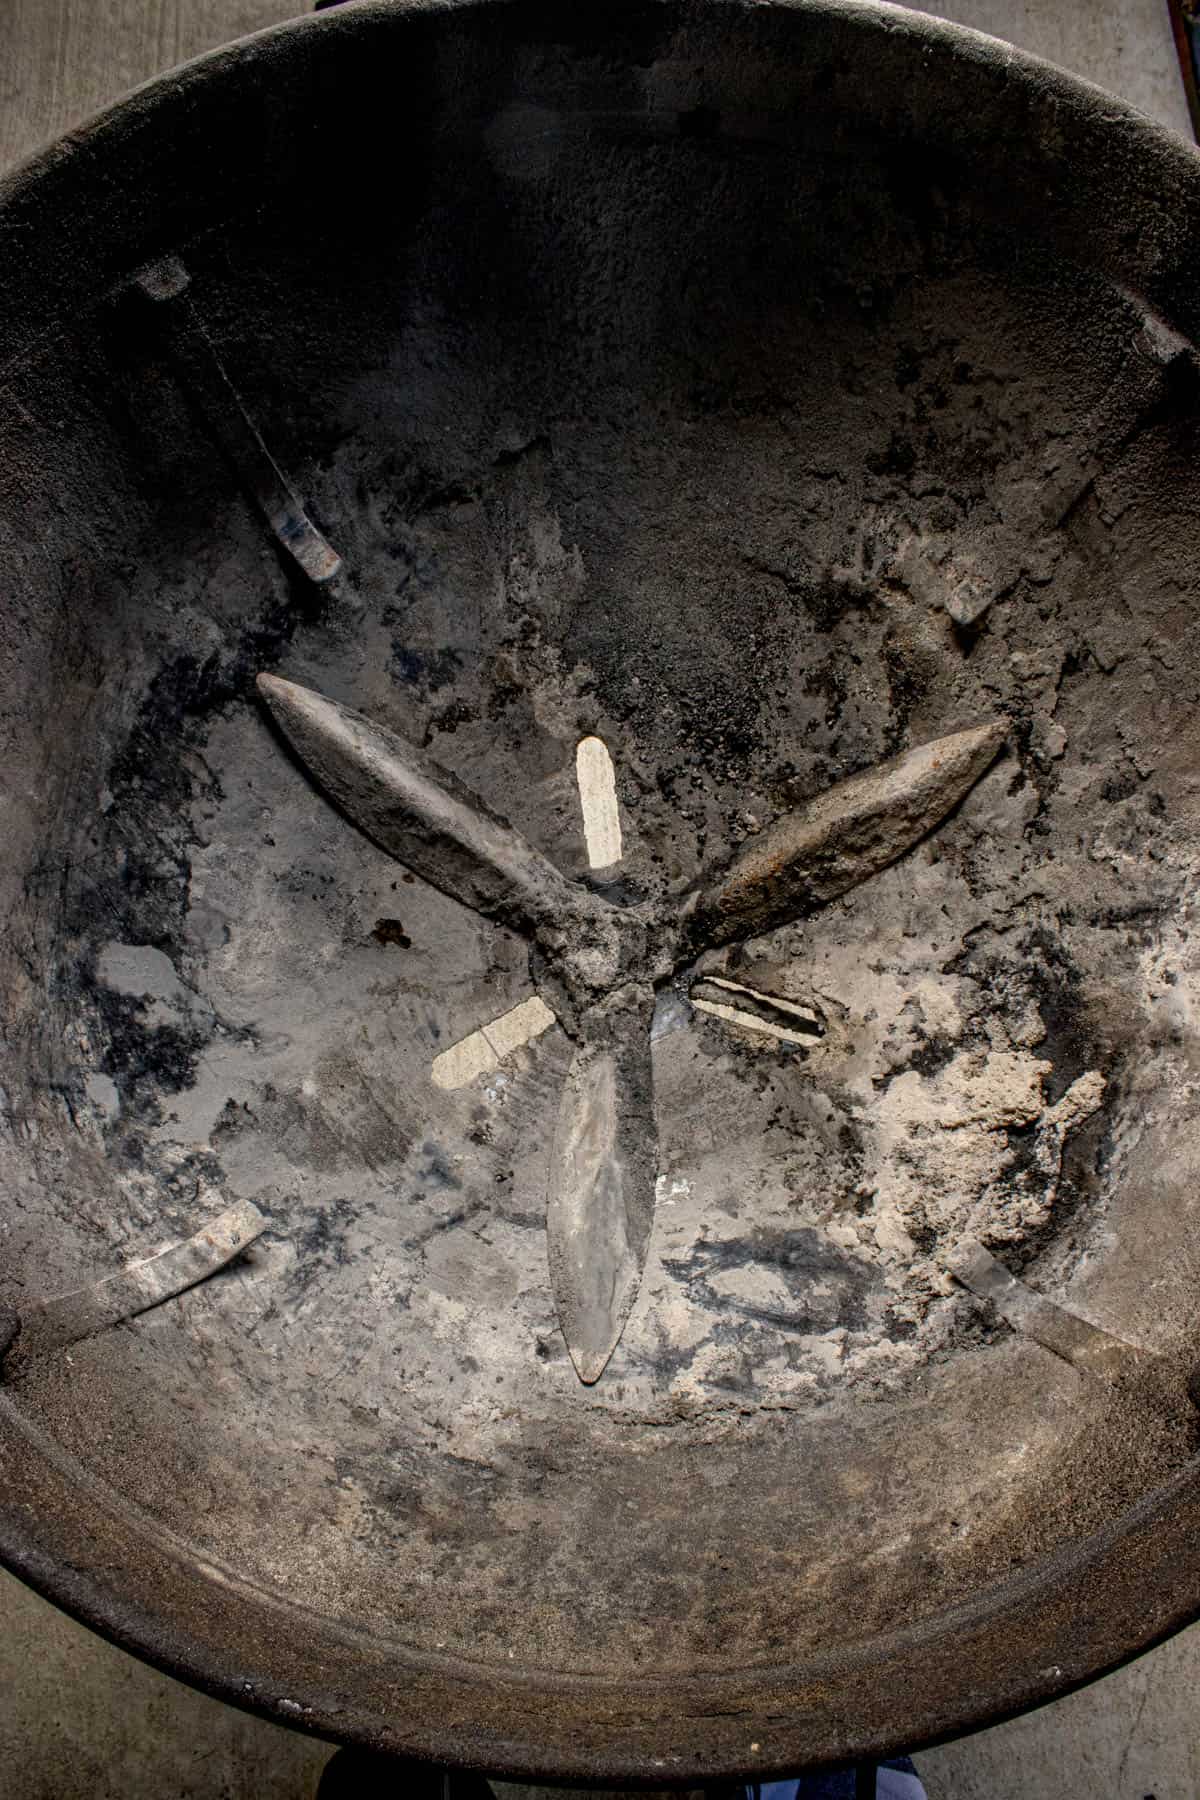
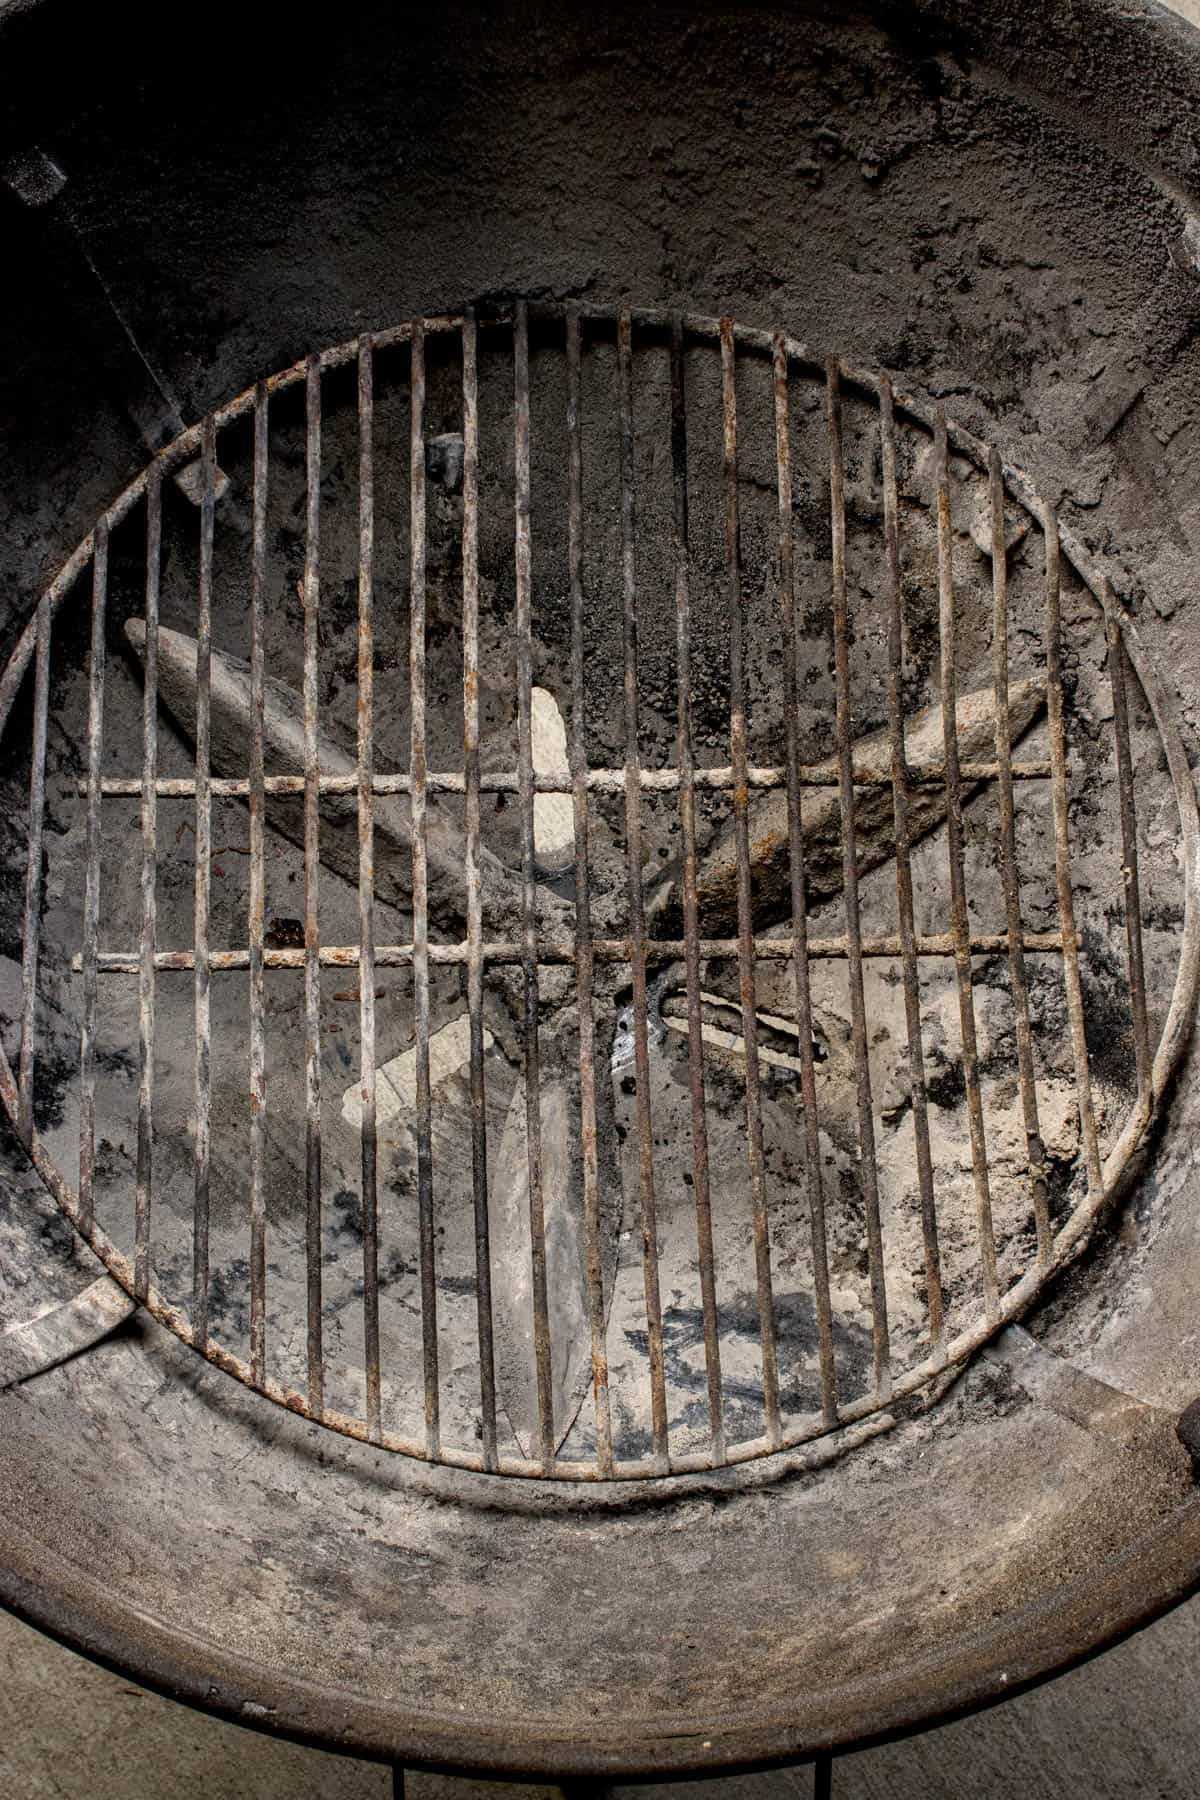
Step 1: Clean Out Old Ash (Don’t Skip This)
Leaving old ash at the bottom of the grill blocks airflow underneath your fire. To burn properly, charcoal needs oxygen rising from below. If ash clogs the vents or covers the bottom of the grill, your fire will struggle or die completely.
Weak airflow is one of the biggest reasons beginners have trouble lighting charcoal.
Step 2: Open the Vents Fully
Before lighting anything, open your bottom vents all the way. At this stage, you want maximum airflow. You’ll control temperature later by adjusting the top and bottom vents, but right now your only goal is helping the fire grow strong inside the chimney.
Think of the vents as the lungs of the grill: The more oxygen you let in, the stronger the fire.
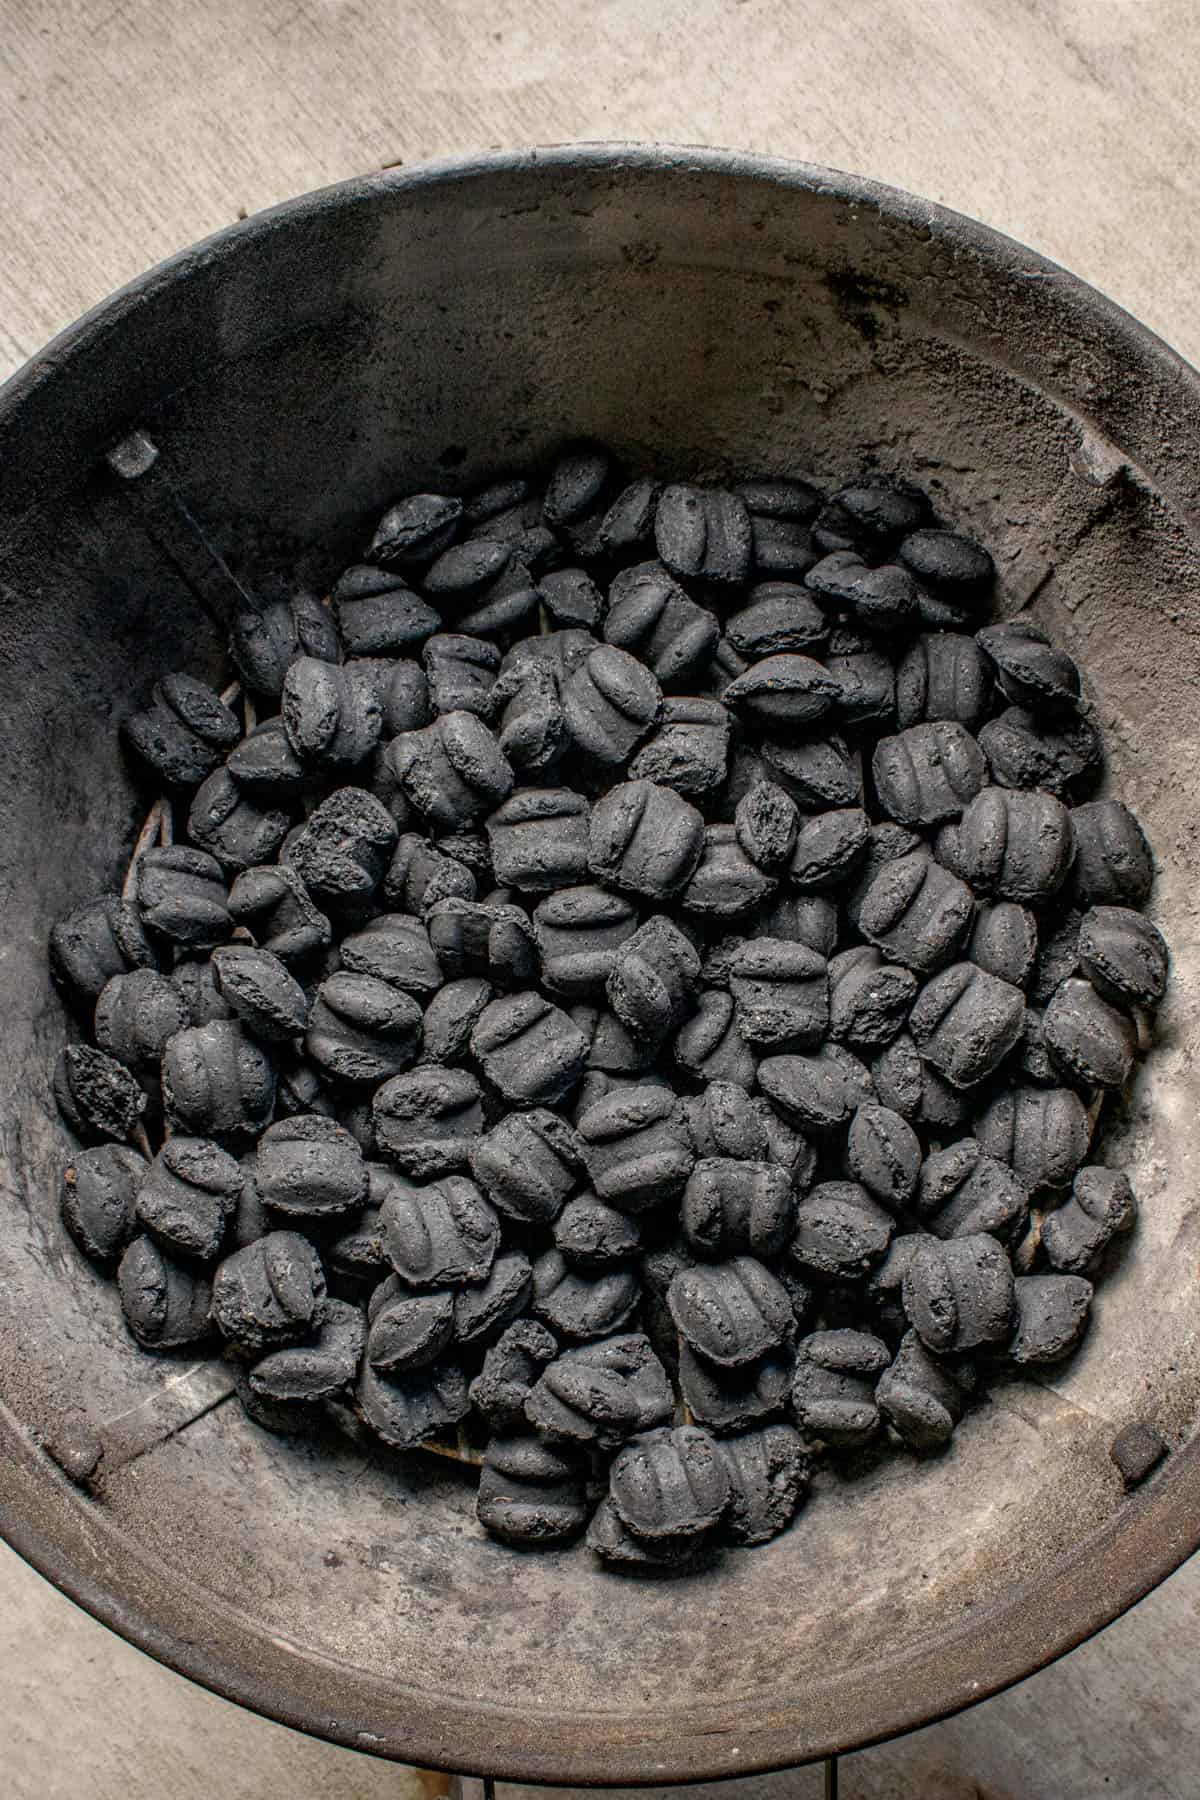
Step 3: Fill the Chimney (How Many Briquettes to Use)
Pour briquettes into the top of the chimney. How many you use depends entirely on what you plan to cook:
Full Chimney (approx. 80-100 briquettes): Best for high-heat, fast direct grilling (burgers, hot dogs, thin steaks).
Half to Three-Quarter Chimney (approx. 40-60 briquettes): Best for medium, indirect heat (chicken pieces, thick pork chops, reverse searing).
Note: If you are using a smaller chimney starter which only holds around 40 briquettes but need a full grill’s worth of heat, add approximately 40 unlit briquettes directly onto the bottom grate of your grill first. The lit coals from the chimney will slowly ignite the unlit ones afterward when you spread them on top.
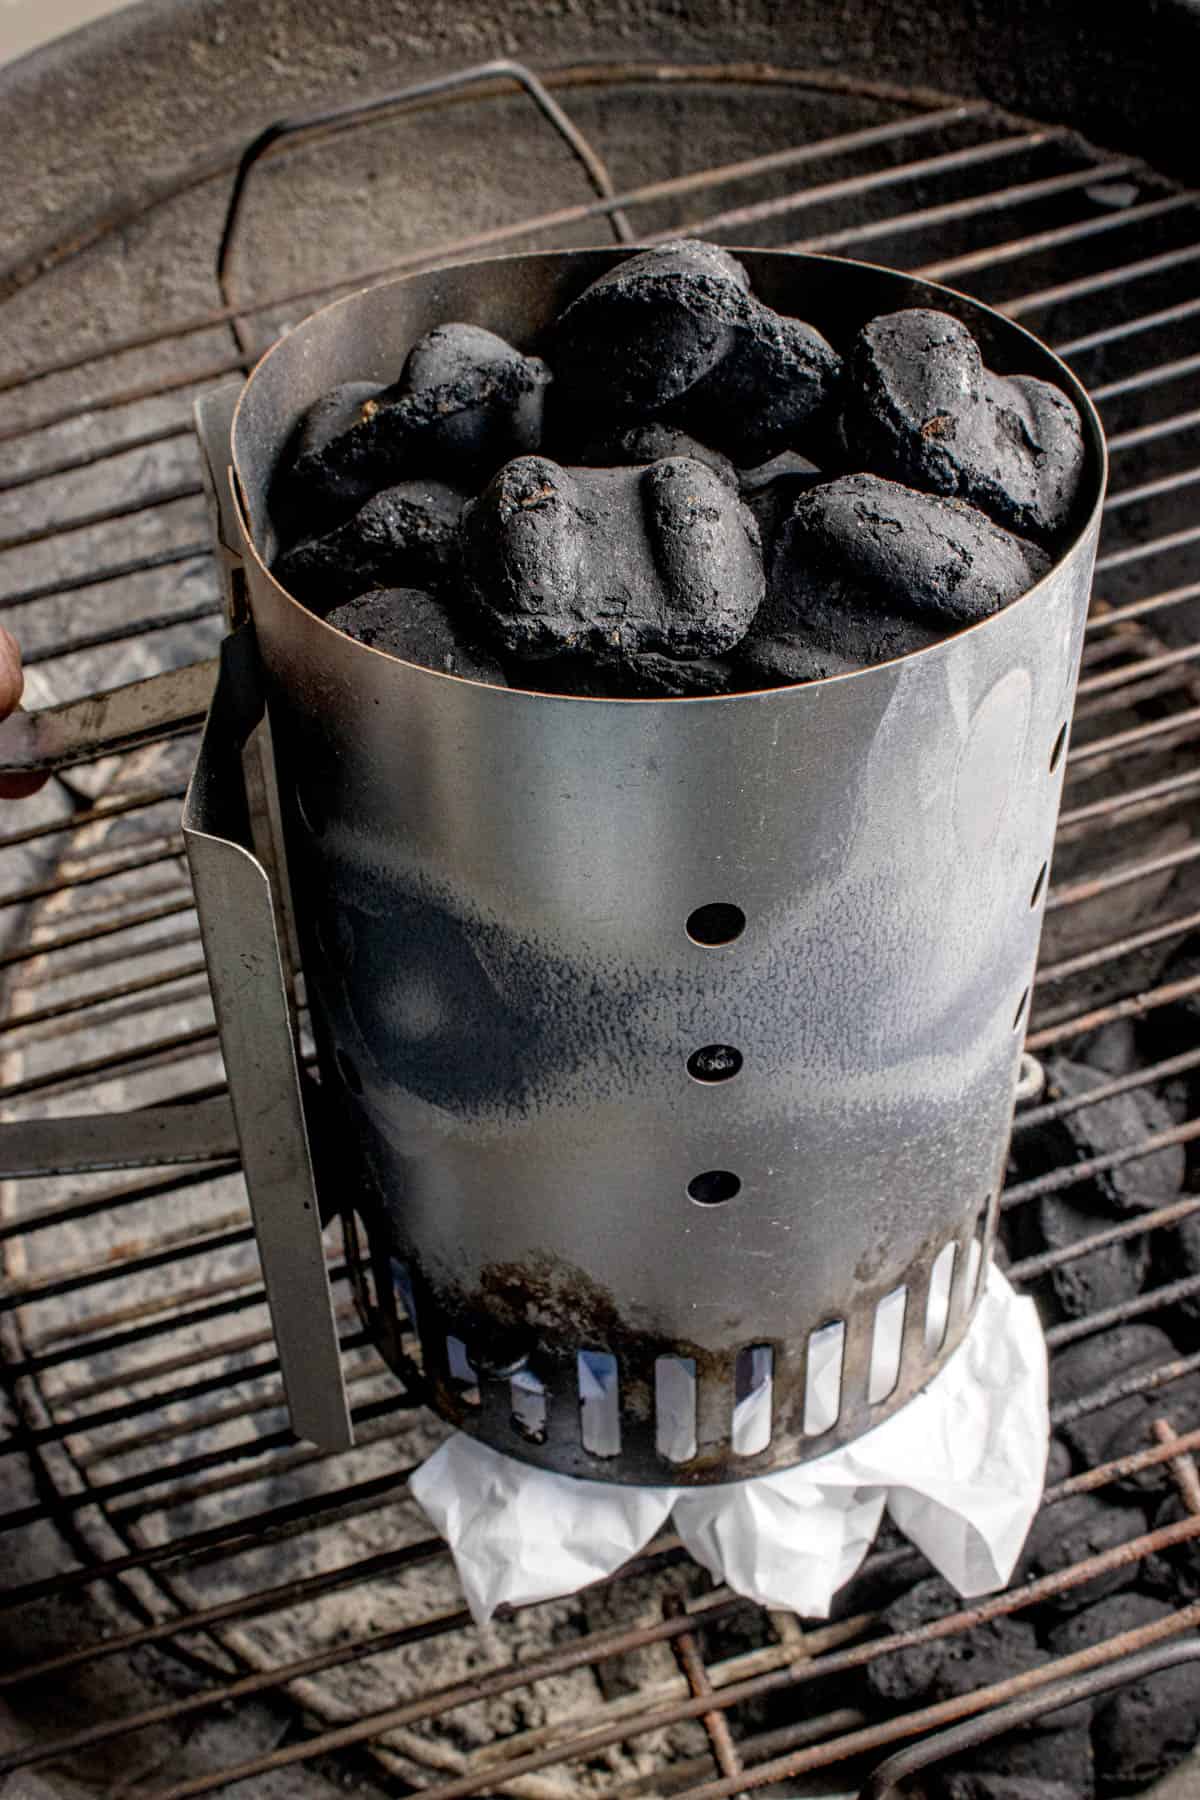
Step 4: Add and Light the Paper
Crumple your paper loosely and place it underneath the chimney grate. If the paper is packed too tightly, the airflow will get restricted and the fire will suffocate. If the paper is too loose, it will burn too quickly before enough coals ignite.
If you want a longer burn time, lightly drizzle a small amount of cooking oil onto the paper before lighting it or use a starter cube underneath the paper.
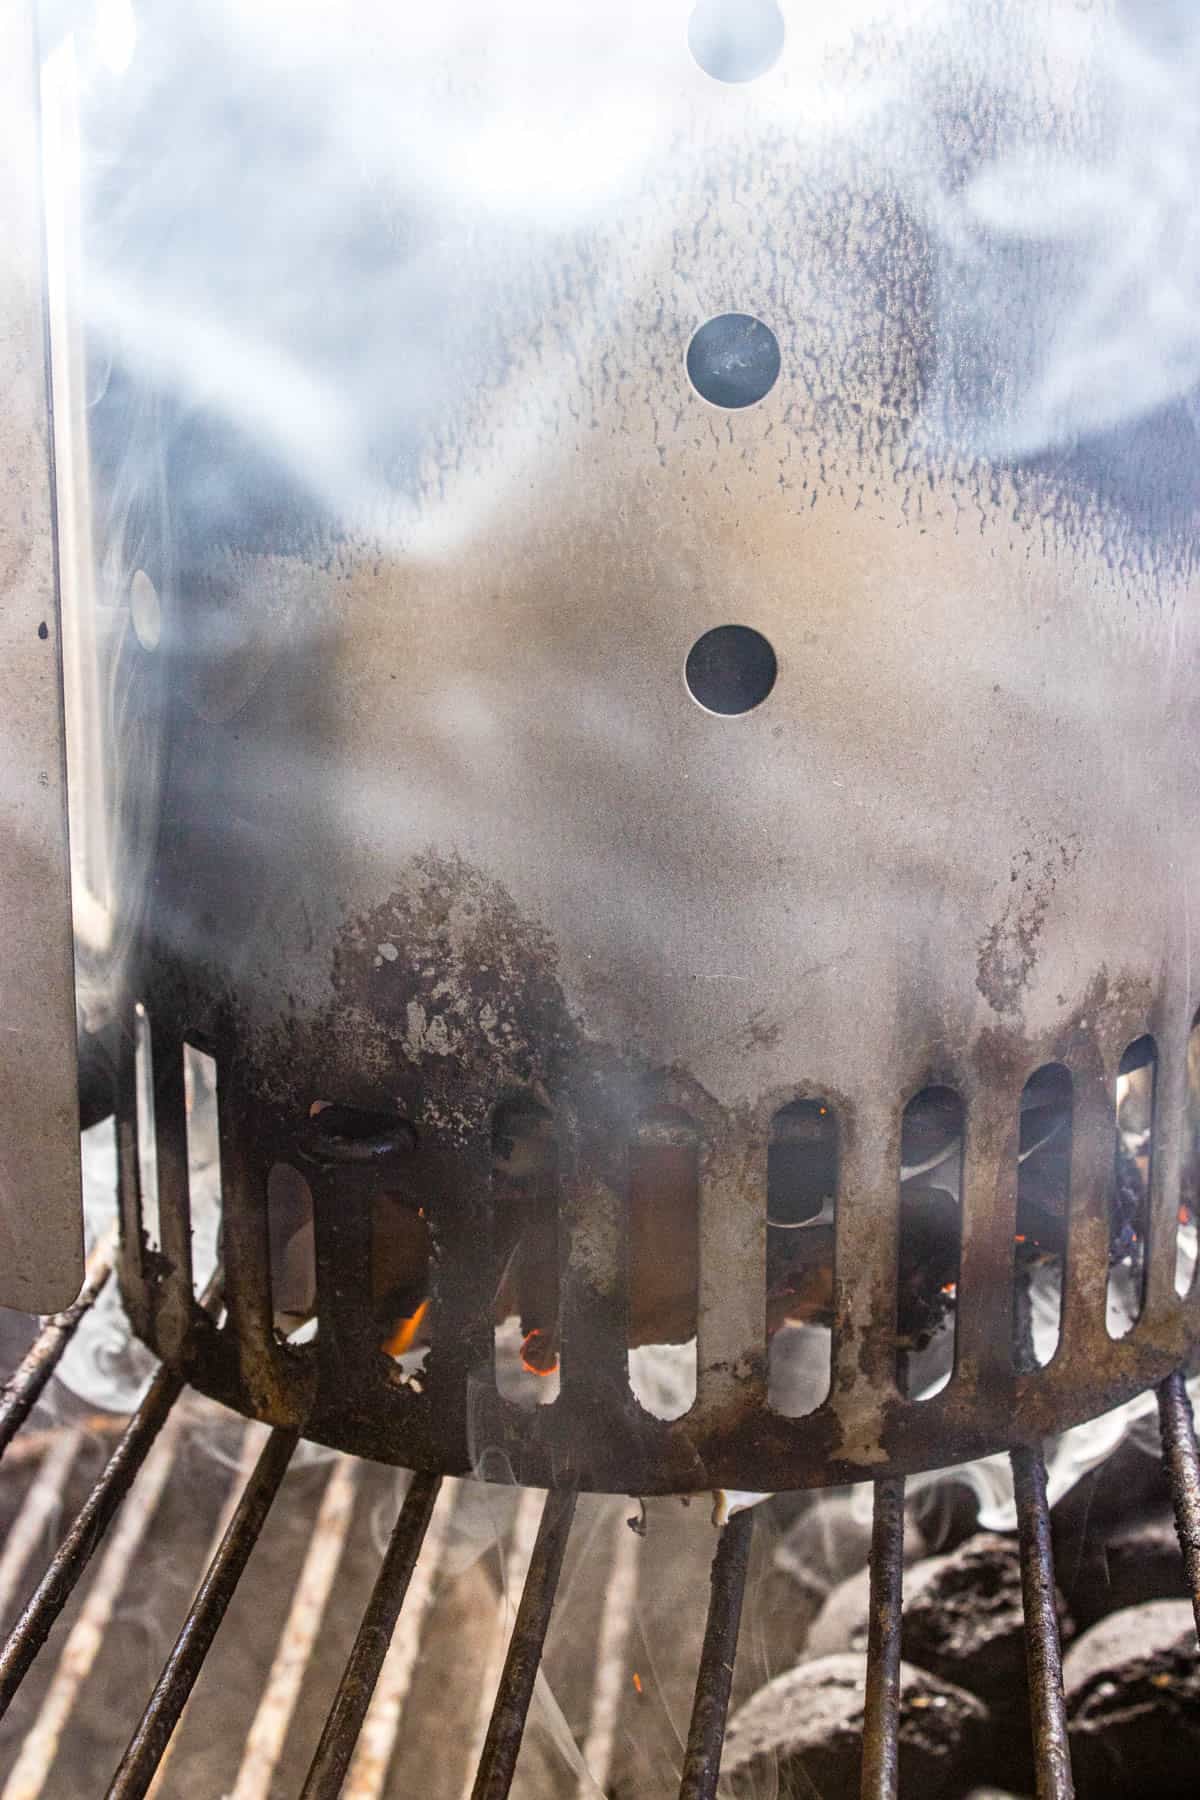
Place the chimney on the bottom grate over the crumpled paper, then light the paper through the bottom cutouts of the chimney. Within seconds, you should notice small flames at the base, smoke rising from the top, and heat beginning to build.
Step 5: Let the Fire Build
This stage is where patience matters most. Many beginners assume the charcoal is ready too early. Instead of watching the clock alone, learn to watch the coals:
First 5 minutes: You’ll usually see thick white smoke, flickering flames underneath, and small crackling sounds. This is the paper and early ignition phase. You will be able to hold your hand over the top of the chimney without feeling too much heat.
Around 5-10 minutes: The smoke starts thinning, the bottom coals have a red glow, and the chimney feels hotter when you hover your hand over the top layer of charcoal.
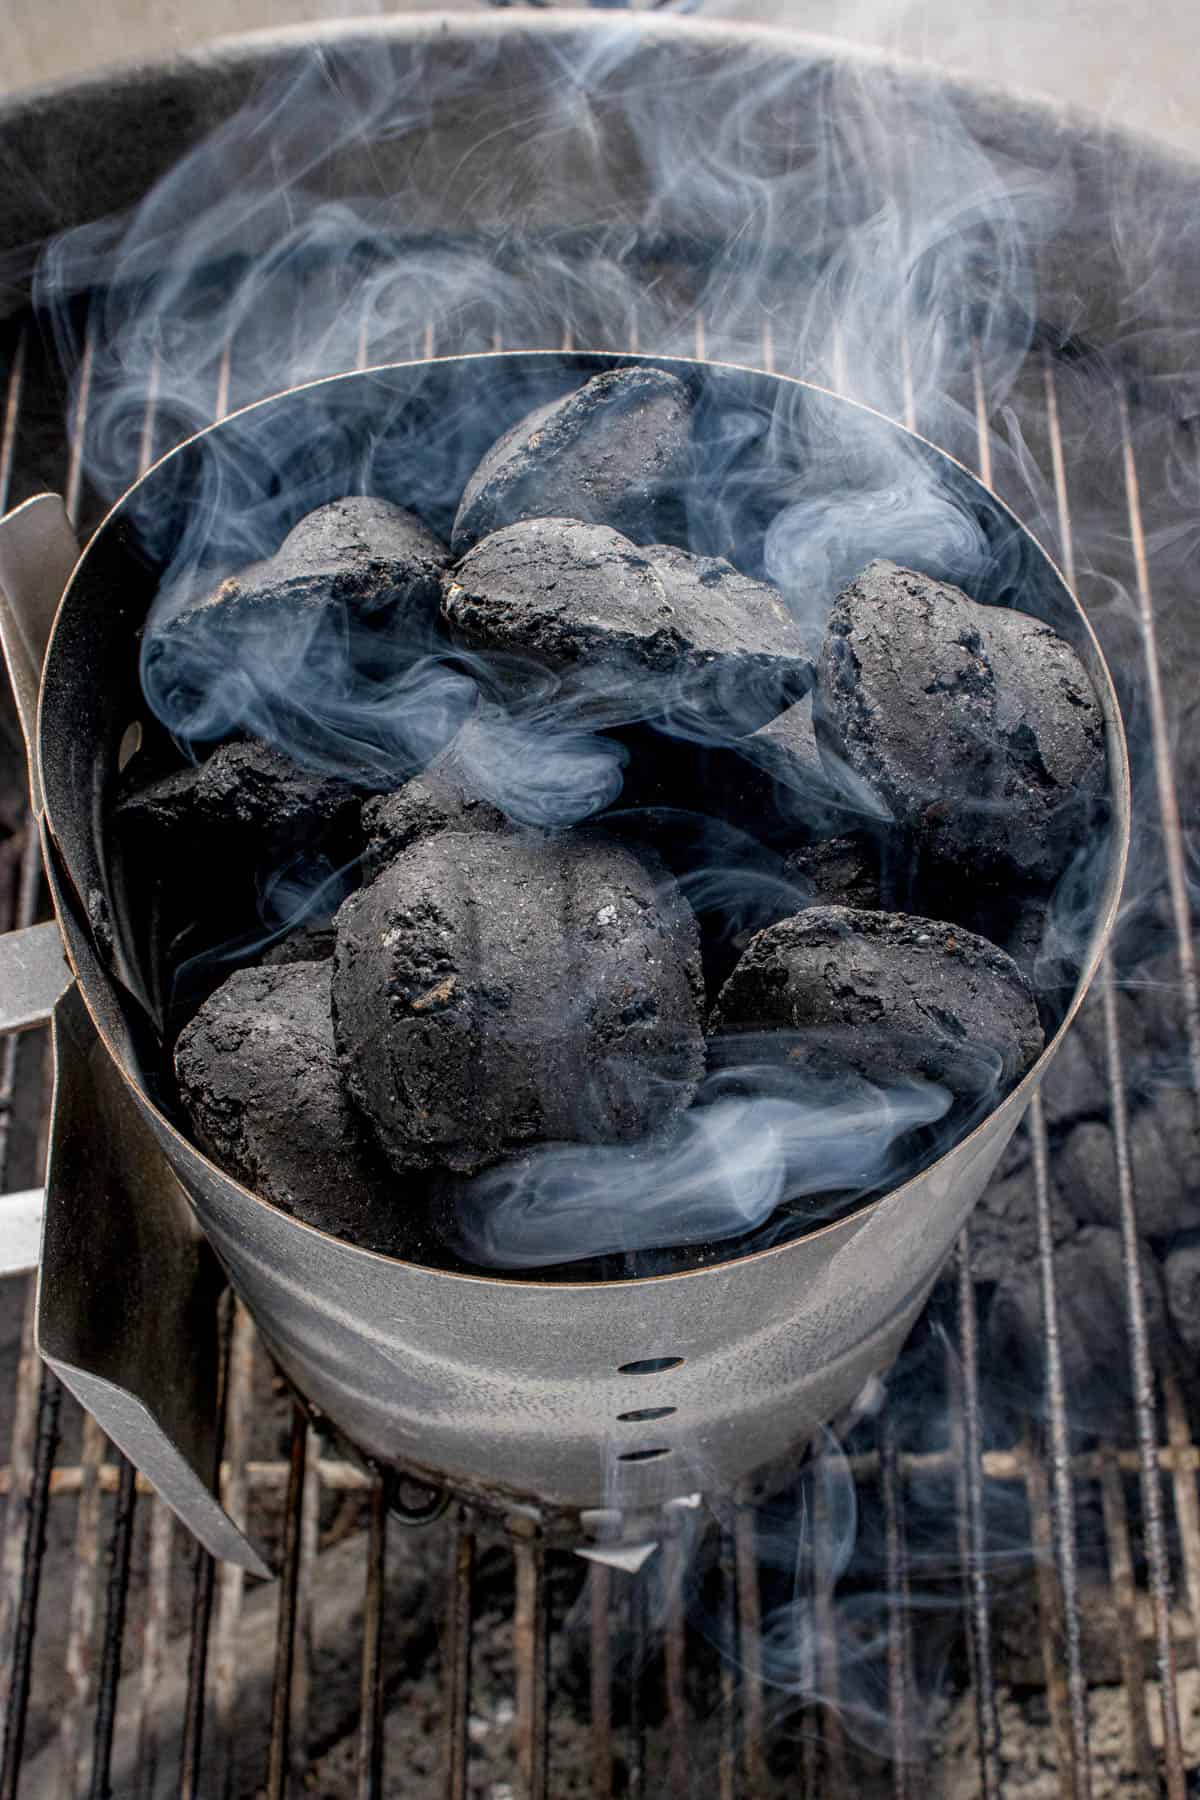
Around 10-15 minutes: More coals begin catching, crackling sounds increase, and gray ash starts forming around the edges of the middle coals.
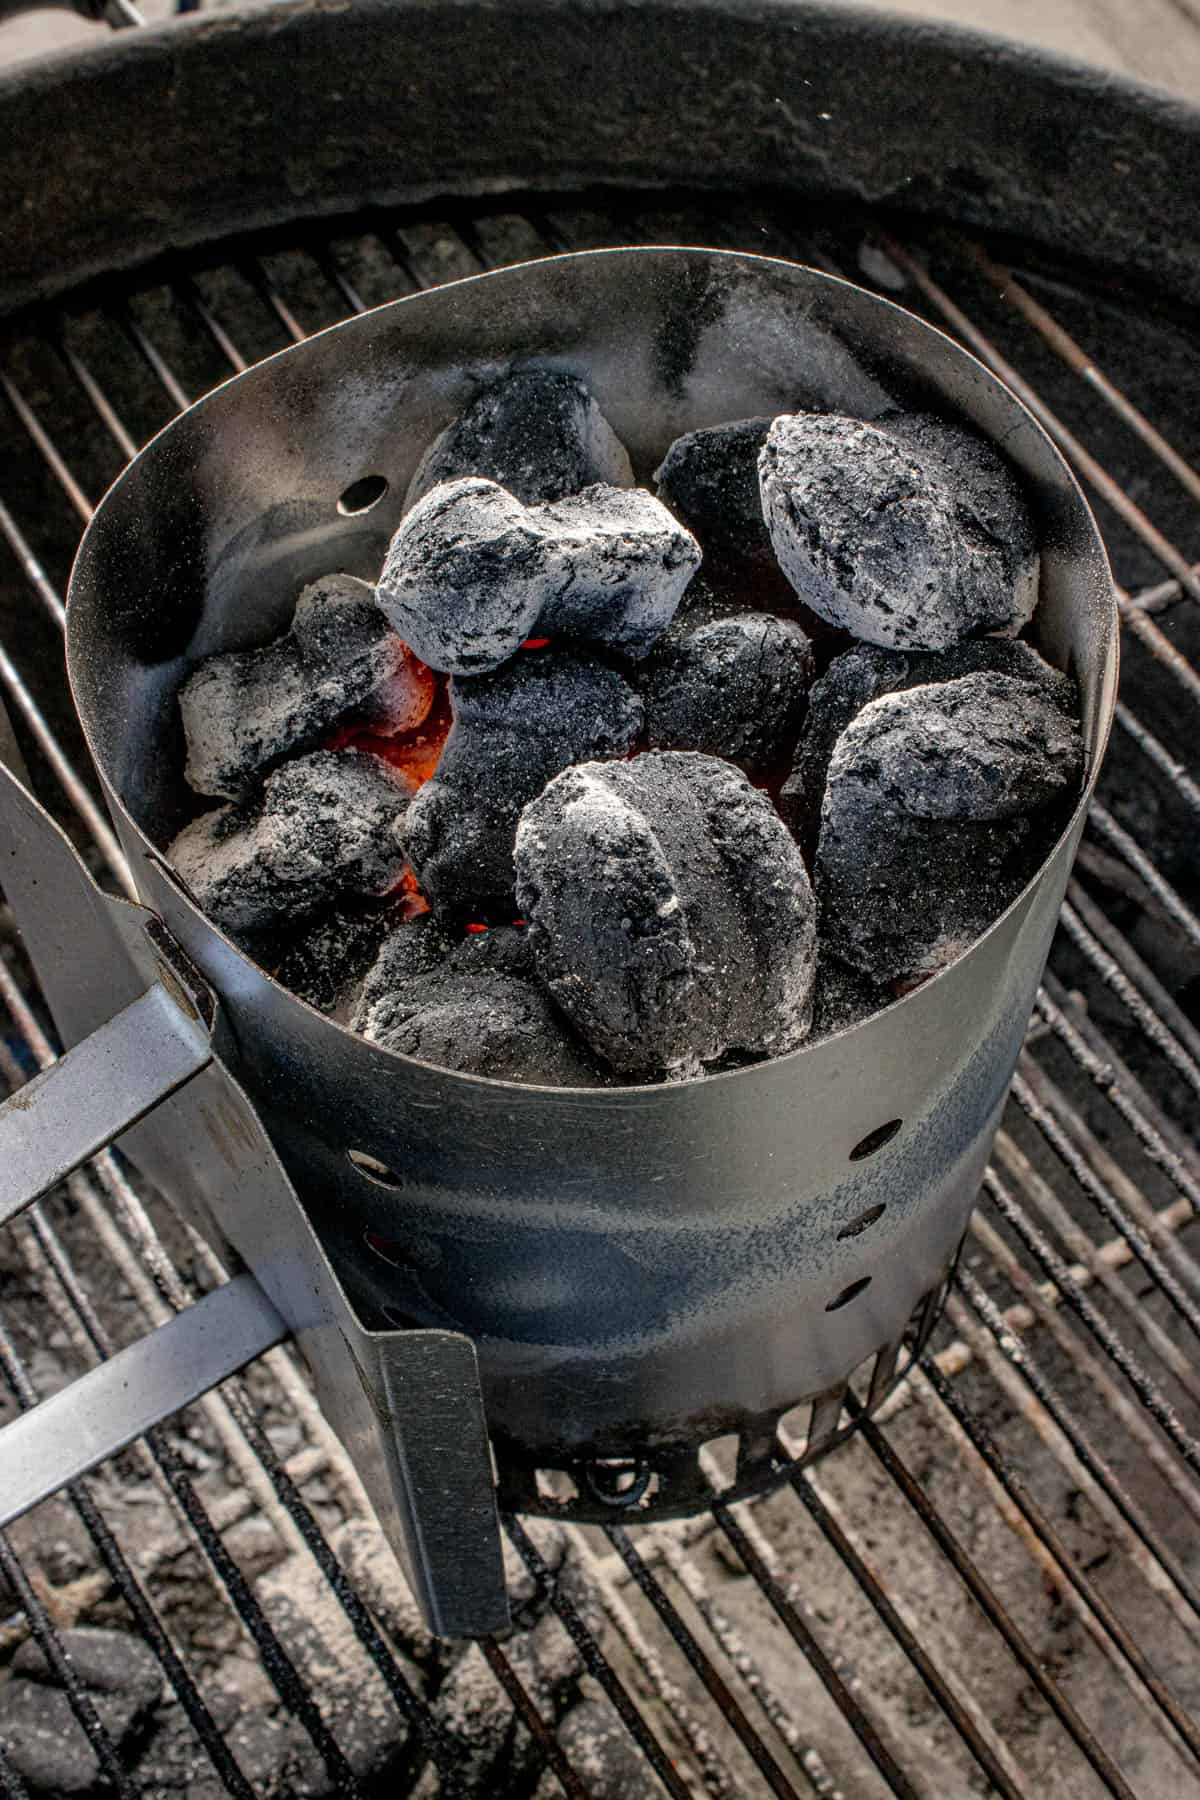
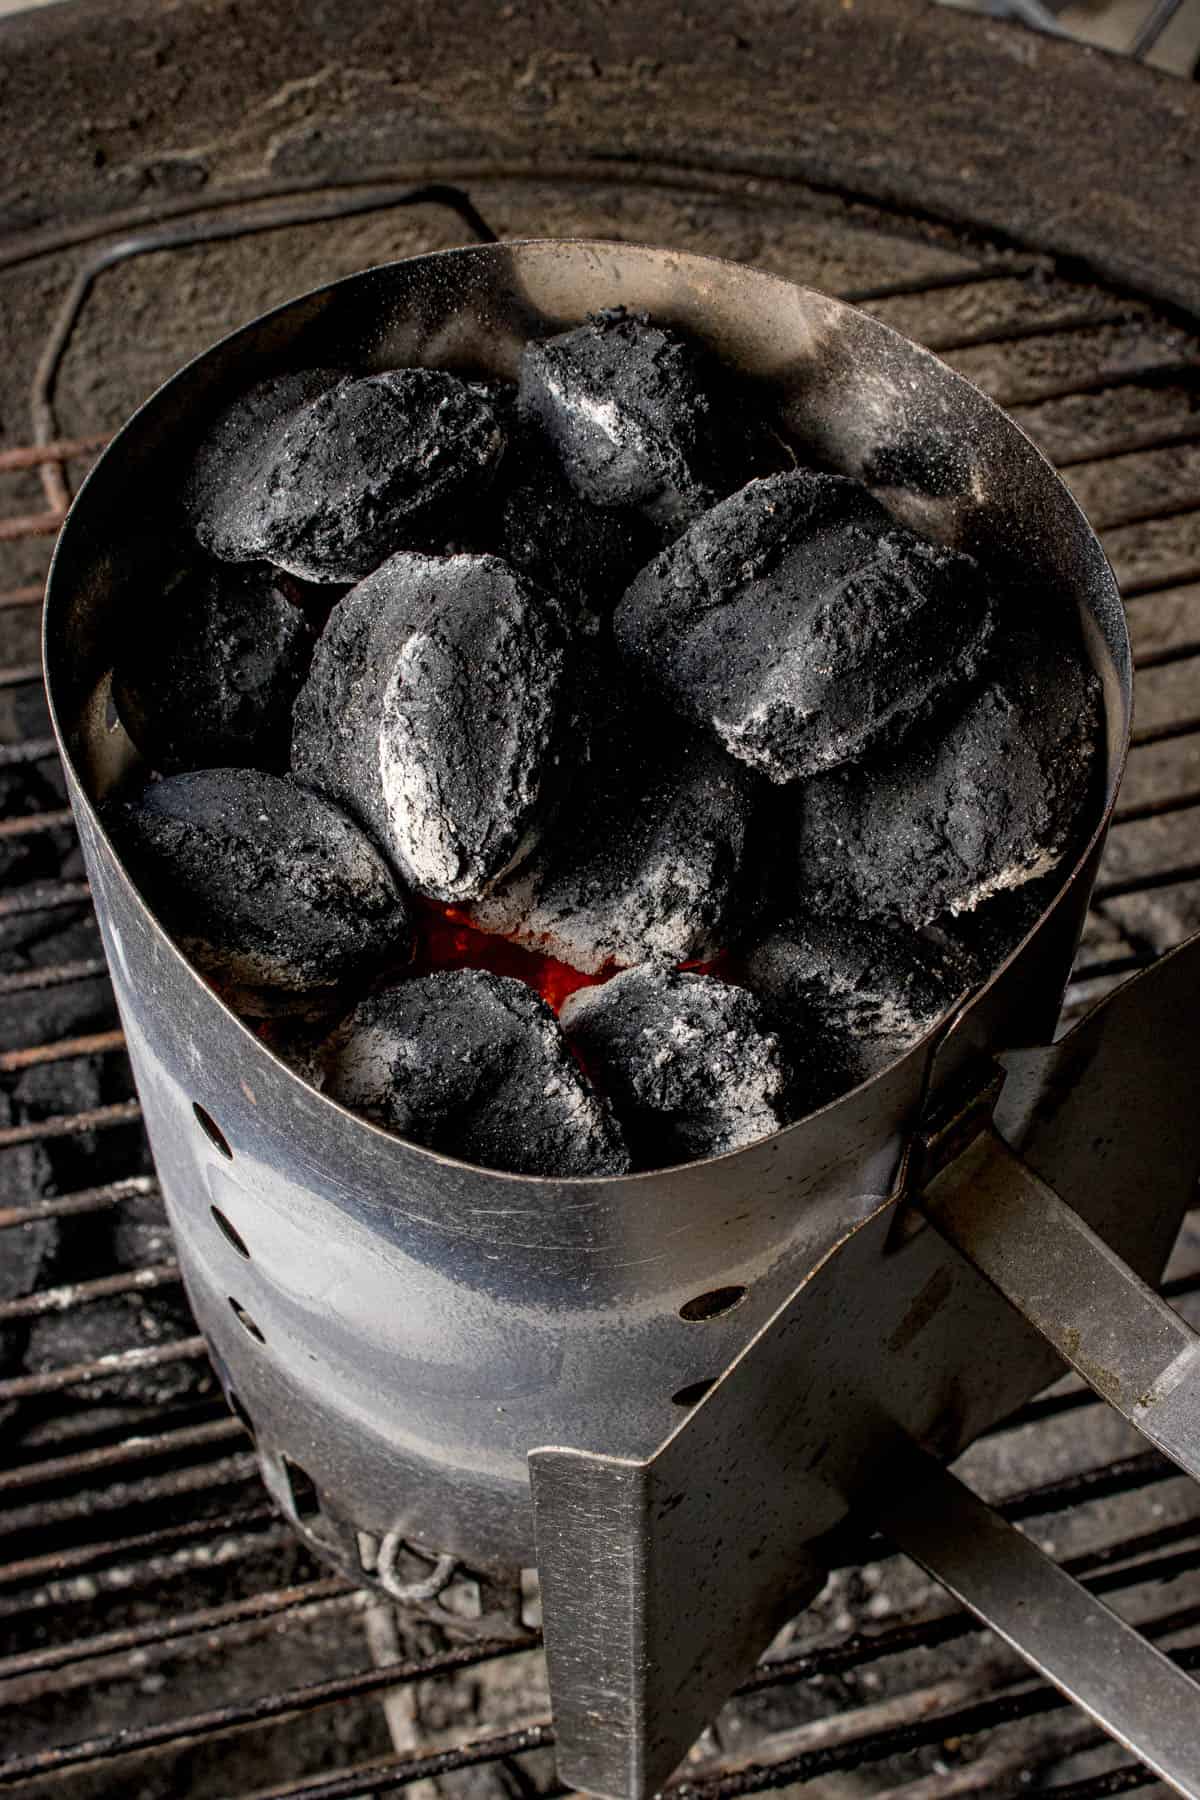
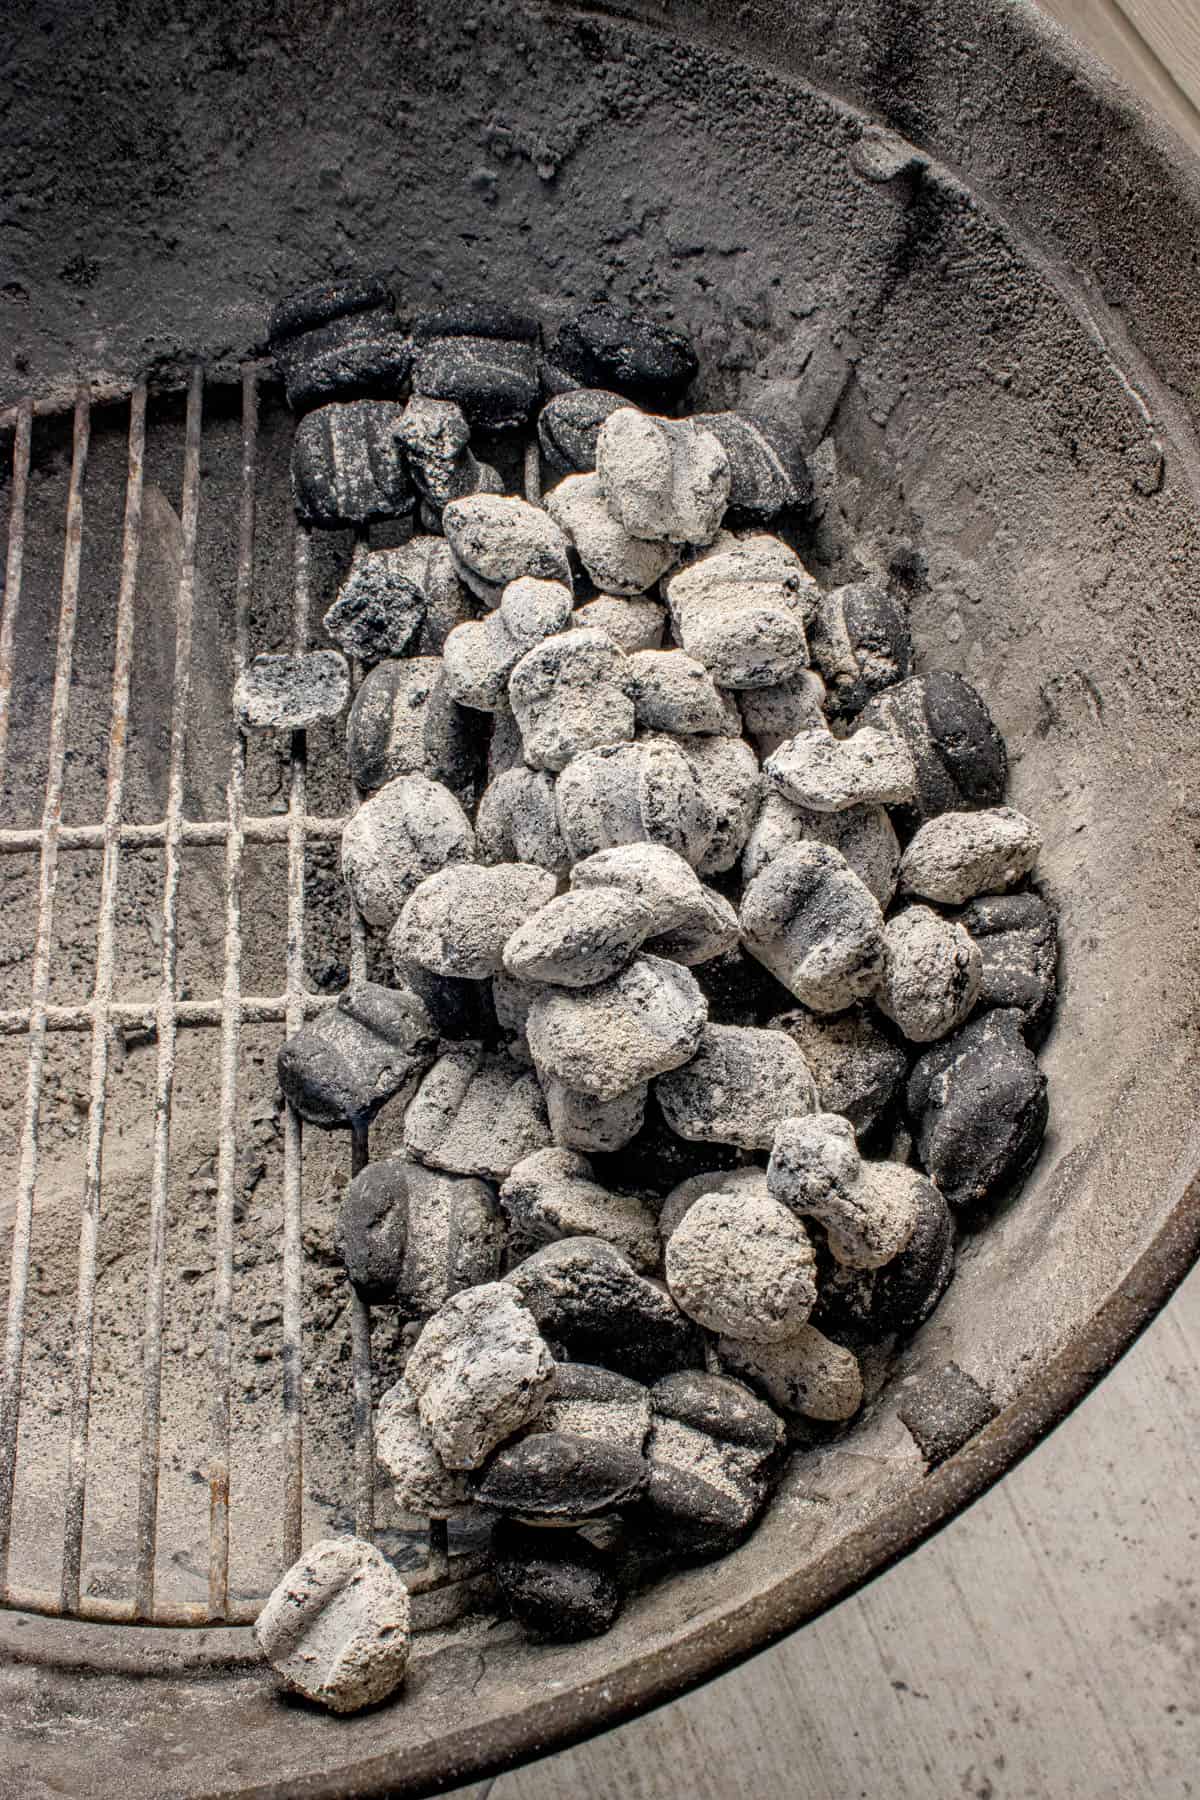
Around 15-20 minutes: The top coals begin turning gray-white while the lower coals glow orange underneath.
Your charcoal is fully ready when most of the top coals are lightly covered in gray ash and you see a steady orange glow below.
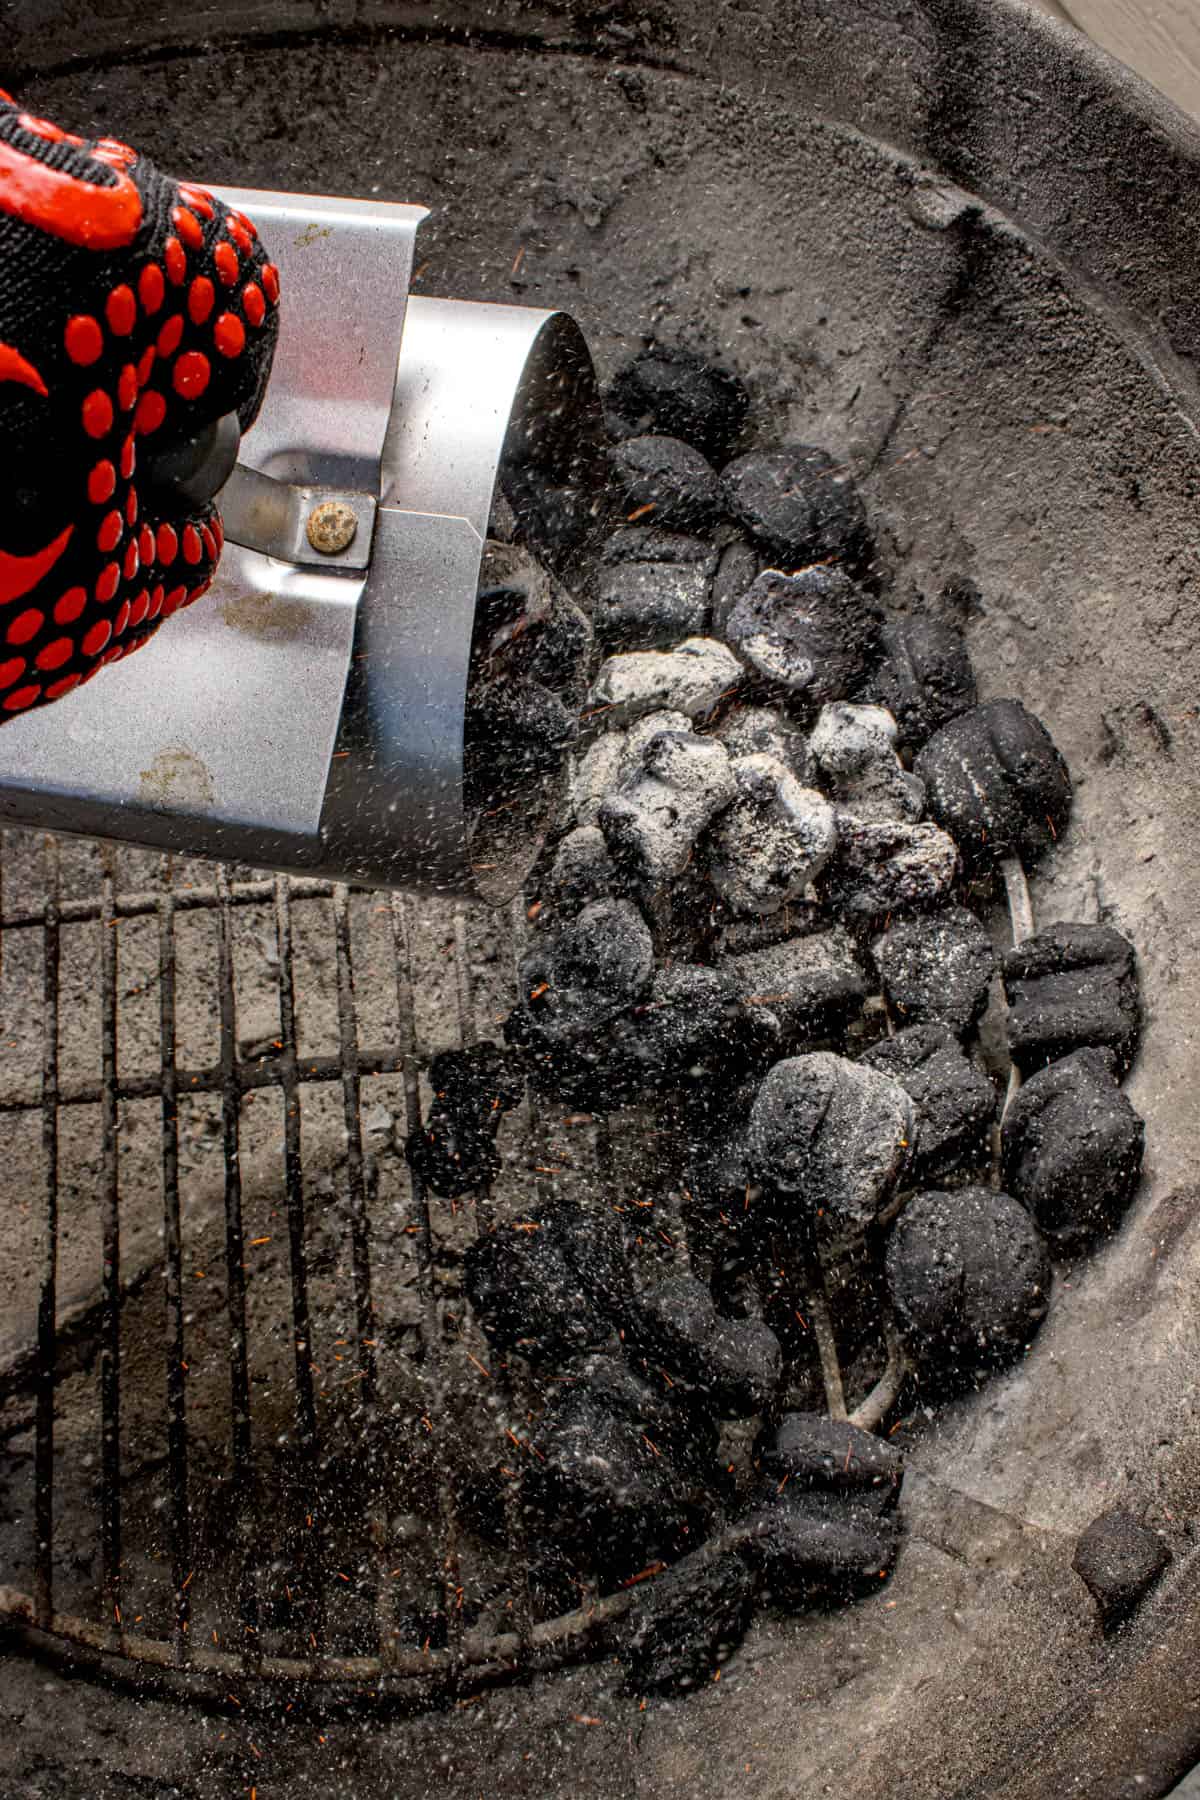
Step 6: Dump the Coals Safely
If you have heat-resistant gloves (which I highly recommend!), or oven mitts, put them on before lifting the chimney. Lift it slowly and confidently, then pour the coals into the grill carefully instead of dumping them aggressively.
Remember, the metal chimney will stay extremely hot for a long time after the coals are out so set is someplace safe and out of reach.
Step 7: Understand Direct vs. Indirect Heat
Before you use long tongs to move your coals around, you need to understand the two types of heat you can create:
Direct heat: The food sits on the grill grate directly over the coals. This creates fast cooking, intense searing, and grill marks, but using this method comes with a higher risk of burning and uncontrollable grease fires. Direct heat is great for burgers, hot dogs, thin steaks, and vegetables.
Indirect heat (Two-Zone Setup): The coals are arranged on only ½ of the grill so the food cooks to the side the coals instead of directly above them. This creates slower cooking, gentler heat, more control, and almost no risk of burning. Great for chicken, steaks, thick pork chops, larger cuts of meat, and beginner grilling.
Why Indirect Cooking Is Easier for Beginners
Indirect cooking gives you more reaction time. Instead of your food going from perfect to burnt in seconds, indirect heat cooks it more gradually. If flare-ups happen or the outside cooks too quickly, you can simply move the food farther away from the heat.
That safety zone is incredibly helpful while learning. You can always move the food closer to the coal side of the grill if it isn’t cooking quickly enough and you want more direct heat.
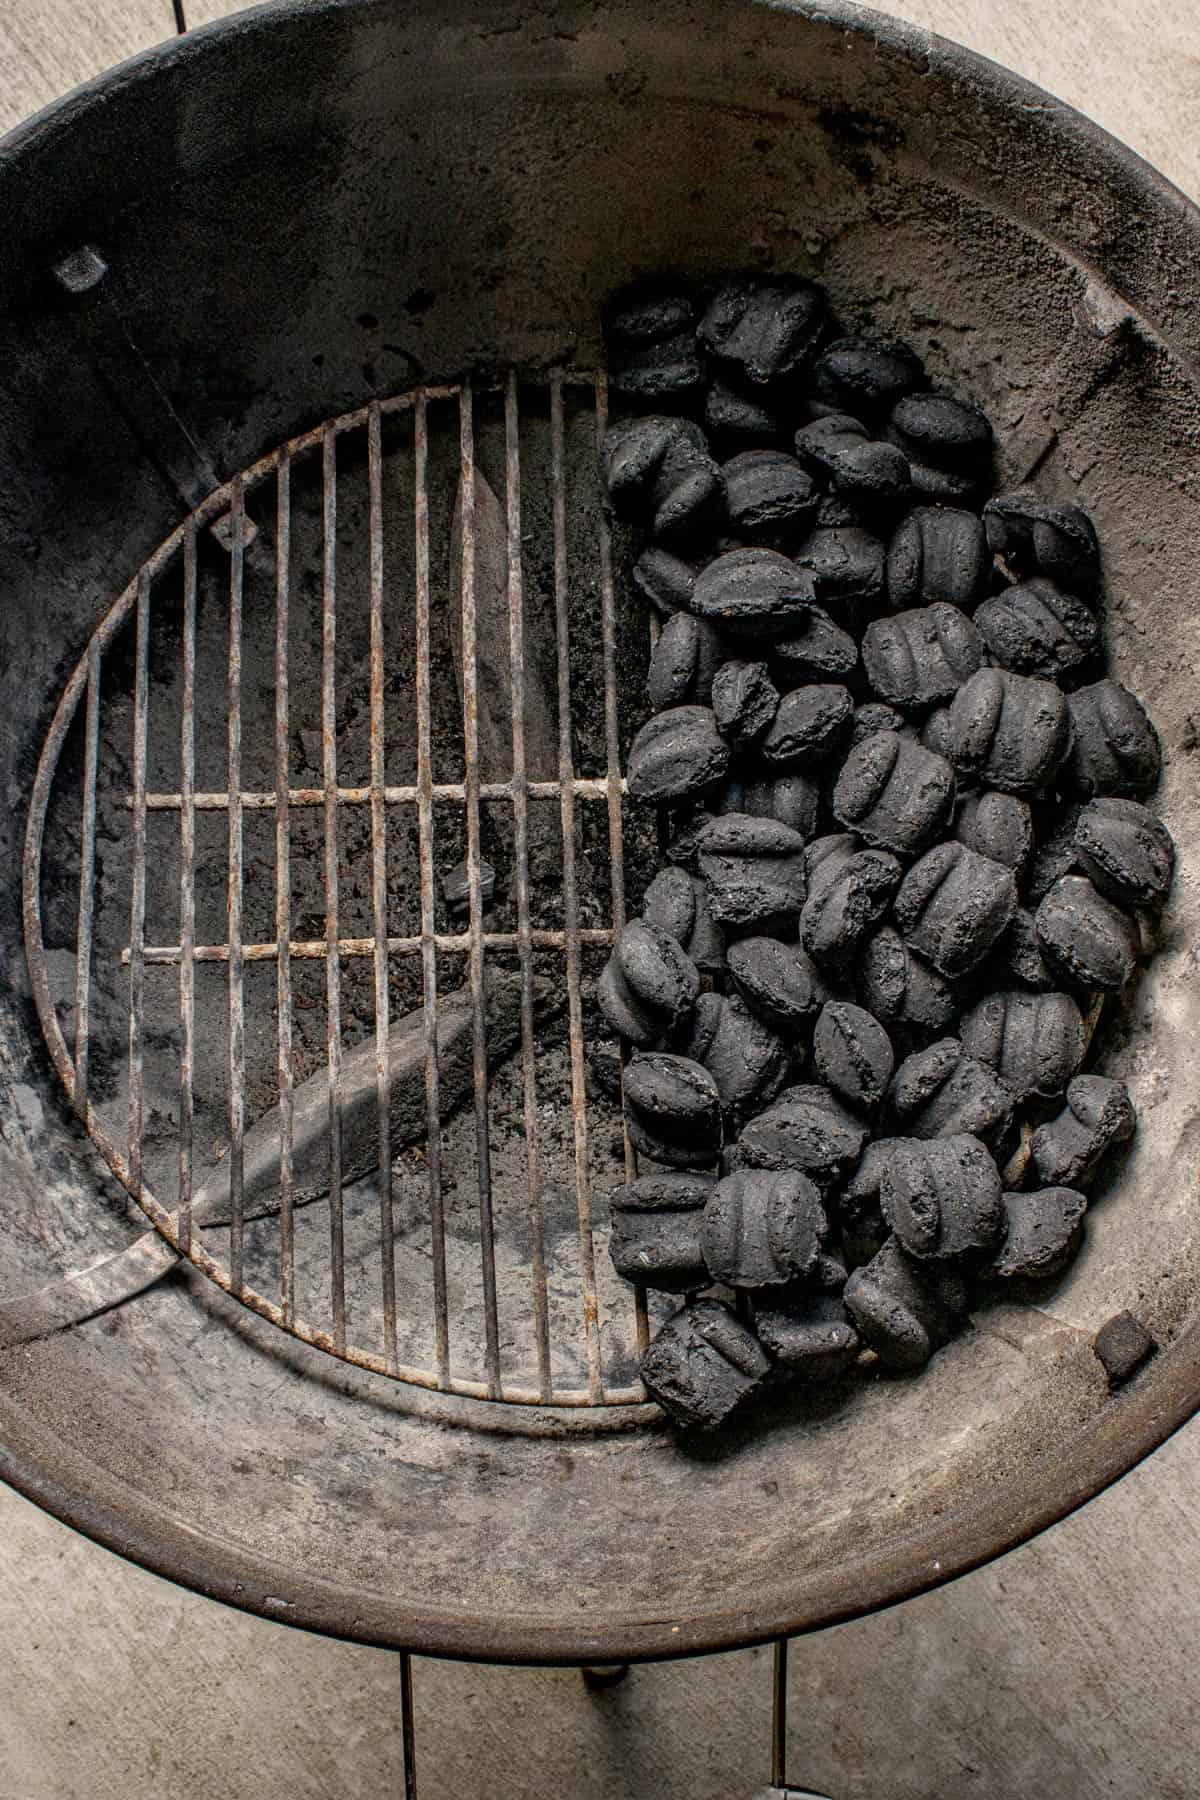
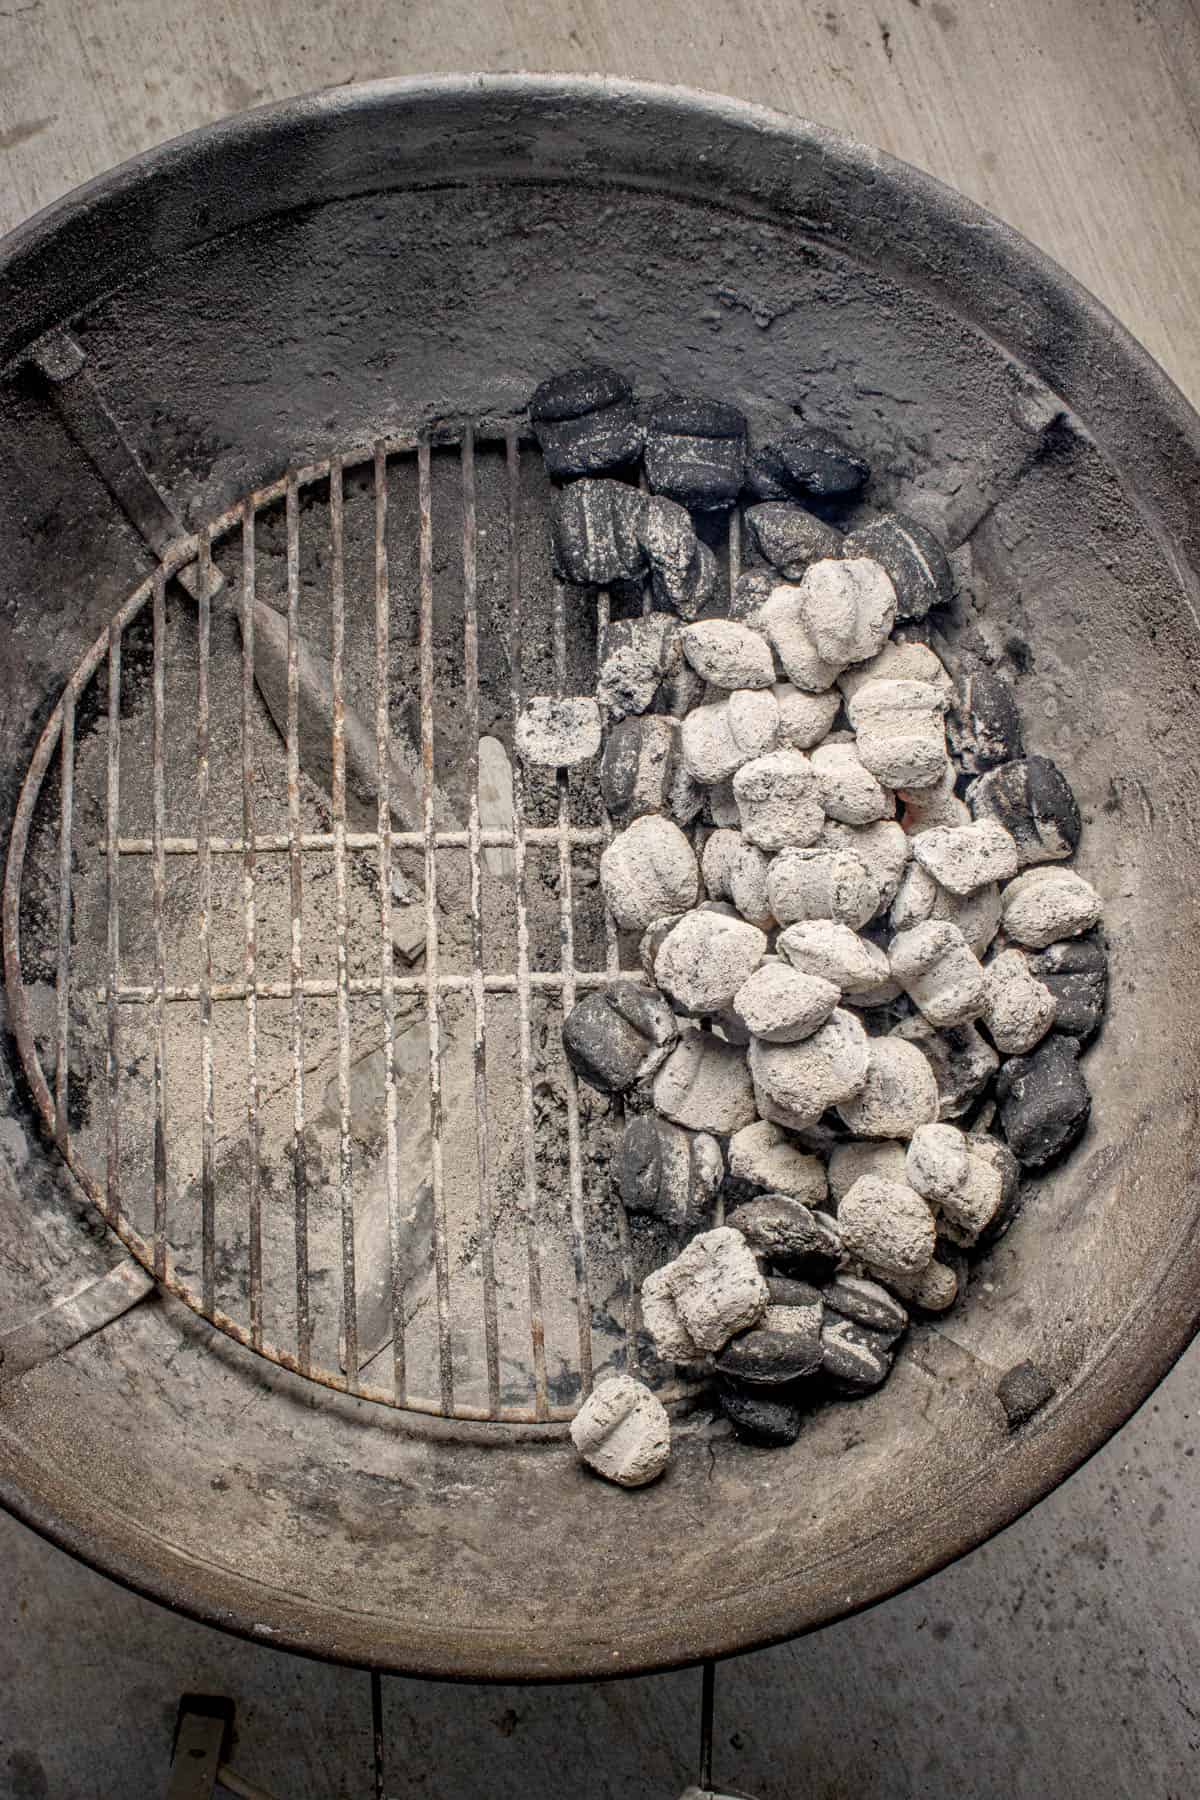
Step 8: Arrange the Coals
Use a grill tool or long tongs to move around your poured coals into one of two setups:
Two-Zone Setup (our typical approach for more even cooking): Push all the lit coals to one side of the grill. This creates one hot side (for searing) and one cooler side (your indirect safety zone where food can cook gently). This setup gives you lots of flexibility.
Full Direct Heat Setup (best for quicker cooking, like burgers and hot dogs, veggies or kabobs): Spread the coals evenly across the entire bottom of the grill. This creates full, intense direct heat across the whole cooking surface. It’s great for quick-cooking foods but requires your constant attention.
Step 9: Preheat the Grill
Put your cooking grate back on above the lit charcoal, close the lid, and let the grill preheat for at least 5 minutes. This helps burn off any remaining residue, reduces food sticking, heats the grates properly for better sear marks, and makes the entire cooking process much smoother.
Step 10: Adjusting the Vents
Most charcoal grills will have a large adjustable vent at the bottom of the grill (beneath the charcoal, where the ash passes through), and a smaller adjustable vent in the lid of the grill. Make sure you do not completely close the bottom vent. This cuts off airflow and can extinguish the coals or cause heavy smoke to build up that will ruin the flavor of your food. Keeping the bottom vent open allows the charcoal to burn more cleanly and produce a much better flavor.
You can use the top vent in the grill lid to adjust for temperature. Having a larger opening in the top vent causes a hotter temperature because there is more oxygen flow. Closing the top vent holes will reduce oxygen flow and drop the grill temperature if it is getting too hot, but you should always leave it at least slightly open to avoid trapping dirty smoke inside the grill.
We typically like to keep the lid on during the cook to help the cleaner smoke have more time to penetrate the food and seal in extra flavor. Even when doing quick grilling of burgers and hot dogs, we will place the lid on for short periods of time during the cook in order to seal in some of the good smoky flavor from the charcoal that makes this time of grilling really shine.
The Reverse Sear Method

Now that your grill is preheated and set up for the two-zone method, you are set to try the reverse sear method.
Reverse searing means cooking meat slowly first using indirect heat, then finishing it over direct heat at the very end.
It works really well for:
- Thick steaks like ribeyes or New York strip steaks
- Pork chops
- Chicken breasts or thighs
- Tri-tip
This method is especially good for beginners because it gives you more control over the internal temperature of your food before you form the crust. Instead of trying to perfectly cook a thick piece of meat entirely over high heat (which usually ends in meat that is burnt outside and underdone or raw inside), reverse searing cooks the inside evenly first, then builds incredible flavor on the outside at the end.
Troubleshooting
“My charcoal won’t light”
Usually the paper burned too quickly before the wood caught. Try crumpling the paper more loosely, adding a little cooking oil to delay the burn, and double-checking that your grill’s bottom vents are fully open. You can also try using starter cubes instead of paper for a sure-fire approach.
“The fire feels weak or keeps dying”
This is almost always an airflow problem. Check your bottom vents, top vents, and make sure old ash buildup isn’t choking the bottom of the grill. Remember: charcoal needs to breathe.
“There’s a lot of smoke at the beginning”
This is completely normal during ignition, especially if oil was added to the paper. The heavy smoke will gradually reduce and clear up as the charcoal catches fully.
Safety Rules You Should Always Follow
- Never use lighter fluid with a chimney starter.
- Never place a hot chimney on wood, plastic, or grass. Always place it on concrete, brick, or back inside the grill surface.
- Keep children, pets, and inquisitive adults away from the chimney during ignition and while it is hot.
- Never touch the chimney walls with bare skin while its hot.
Always Remember
Charcoal grilling is really just about controlling airflow, heat buildup, and timing. The chimney starter handles the most difficult part for you. Once you practice using it, understand airflow and heat zones, charcoal grilling will stop feeling intimidating and start feeling like a lot of fun.
Happy Grilling!