
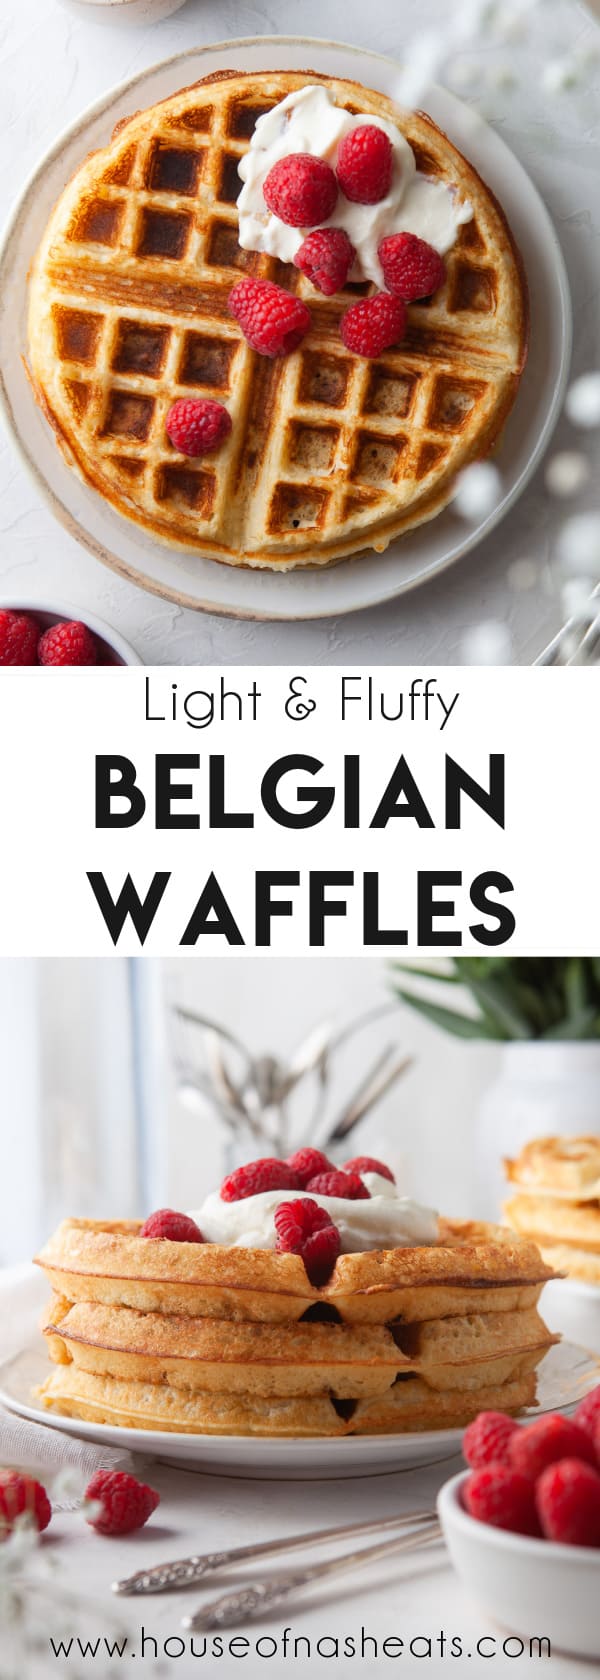
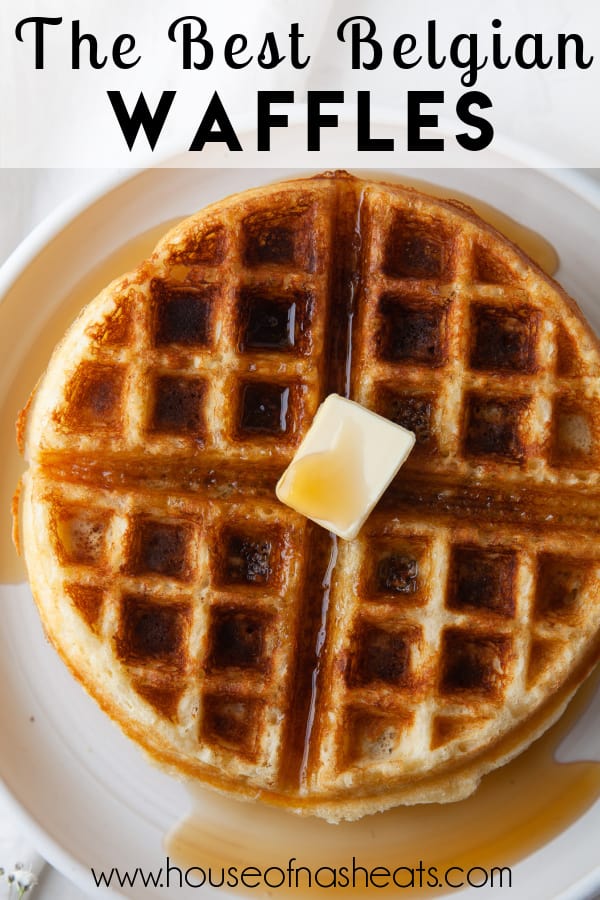
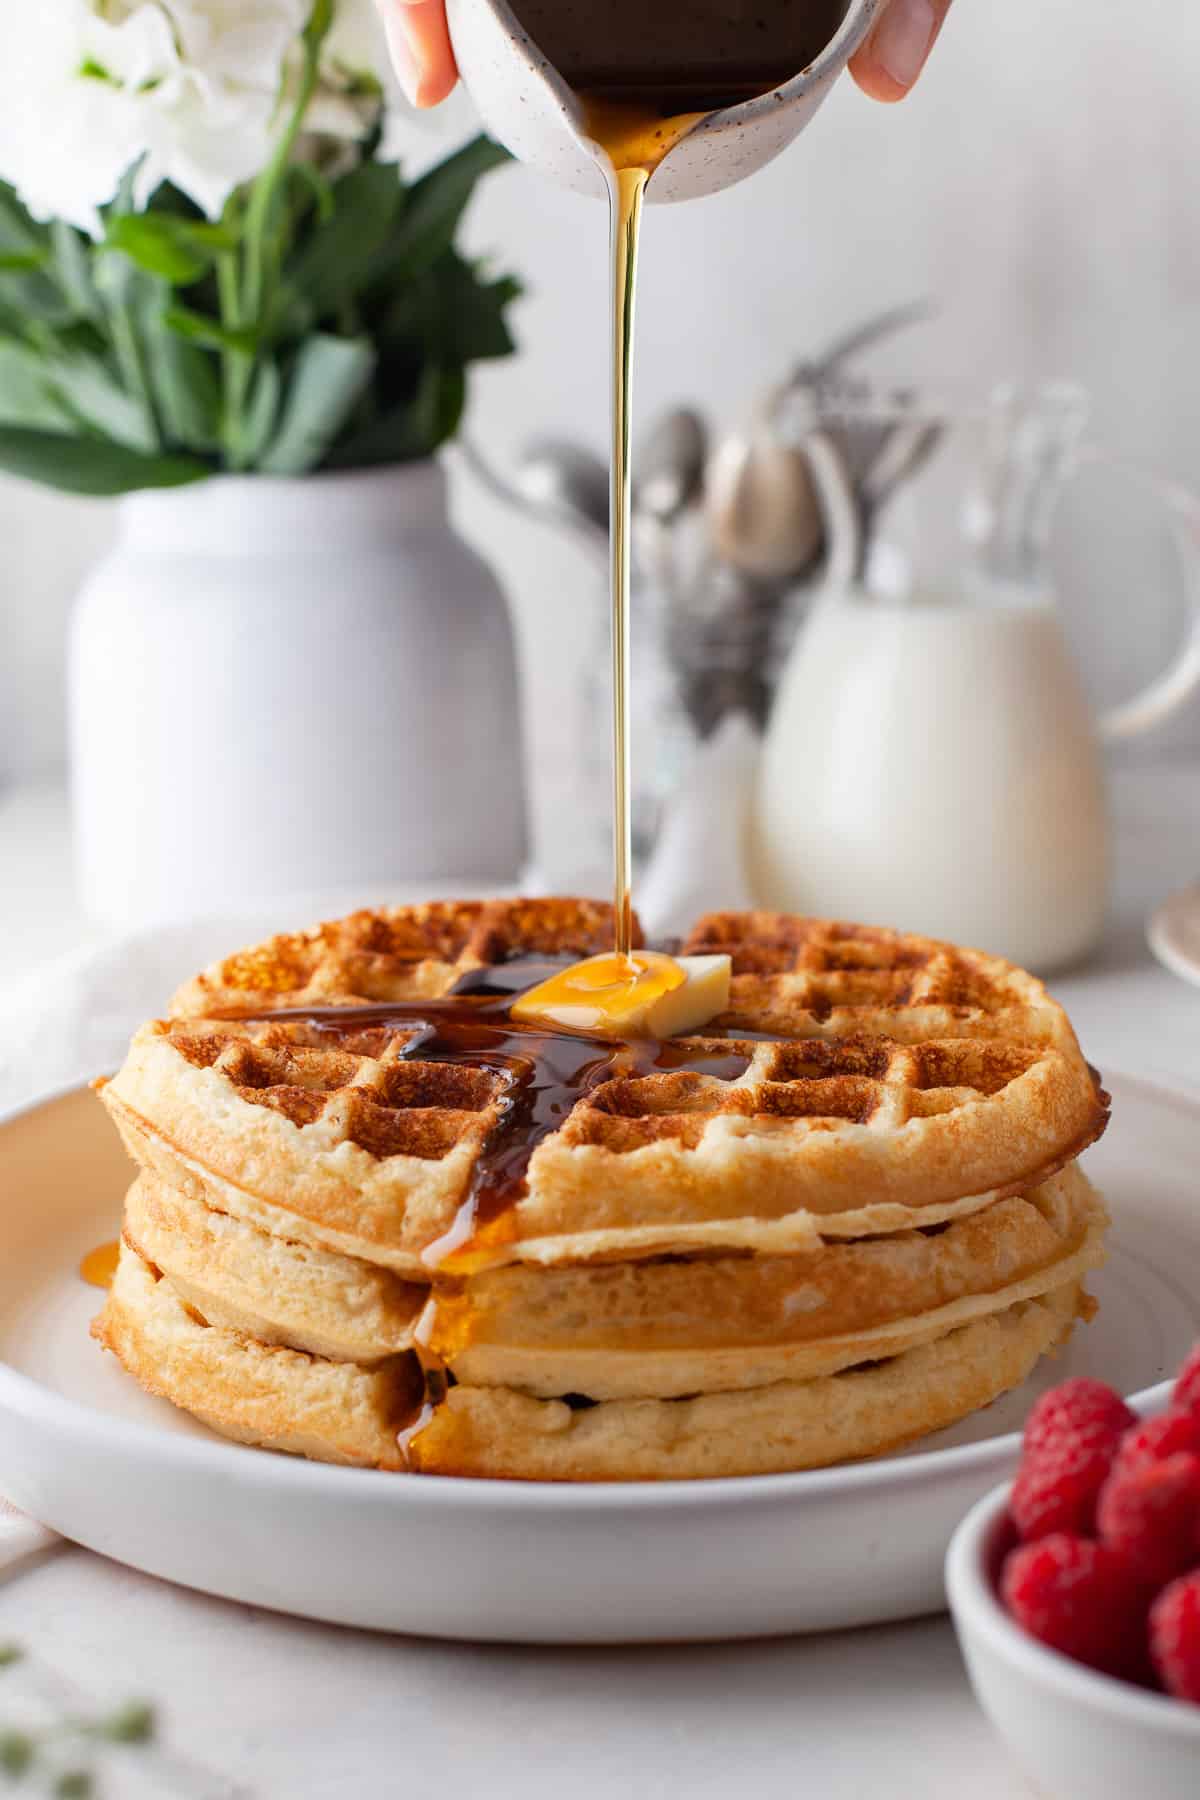
These Easy Belgian Waffles are crisp on the outside and soft on the inside – perfect for topping with Nutella or syrup or your favorite fruit with fresh whipped cream. These are ready in under 20 minutes and perfect for a breakfast, brunch, or even dessert!
Belgian waffles are deliciously fluffy with tender crisp edges and larger holes than the traditional waffle shape. They are made with a delicious and easy waffle batter that can be whipped up in minutes, then poured into a belgian waffle maker with a large grid pattern and cooked until golden brown.
I grew up with a regular waffle maker in our house that made waffles with a smaller grid and smaller holes, but those are actually harder to find these days! Belgian waffles tend to be thicker and fluffier, with a larger waffle grid pattern to them.
I am most definitely a breakfast person. I never skip it, and not just because of the old “it’s the most important meal of the day” adage. It’s really because breakfast is so fun to make. Especially when it’s an easy waffle recipe for the best homemade waffles like this one.
Want even more waffles? Be sure to try our Overnight Sourdough Waffles, Cinnamon Roll Waffles, and Liège Waffles!
Why this Belgian Waffle Recipe works
- Belgian waffles are a typically a little sweeter and have more butter in the waffle batter, which makes them richer than your standard buttermilk waffle. In Belgium waffles are frequently served by street vendors as a dessert.
- Belgian waffle makers have a larger grid pattern than a classic waffle iron. This provides them with large, deep squares and their signature look. You can use this recipe with any waffle maker, though.
- There is actually another variety of Belgian waffle known as the Liege waffle that is made with a yeast dough. They are SO good, but this recipe is more like what we think of as Belgian waffles in the U.S.A. American-style Belgian waffles, if you will.


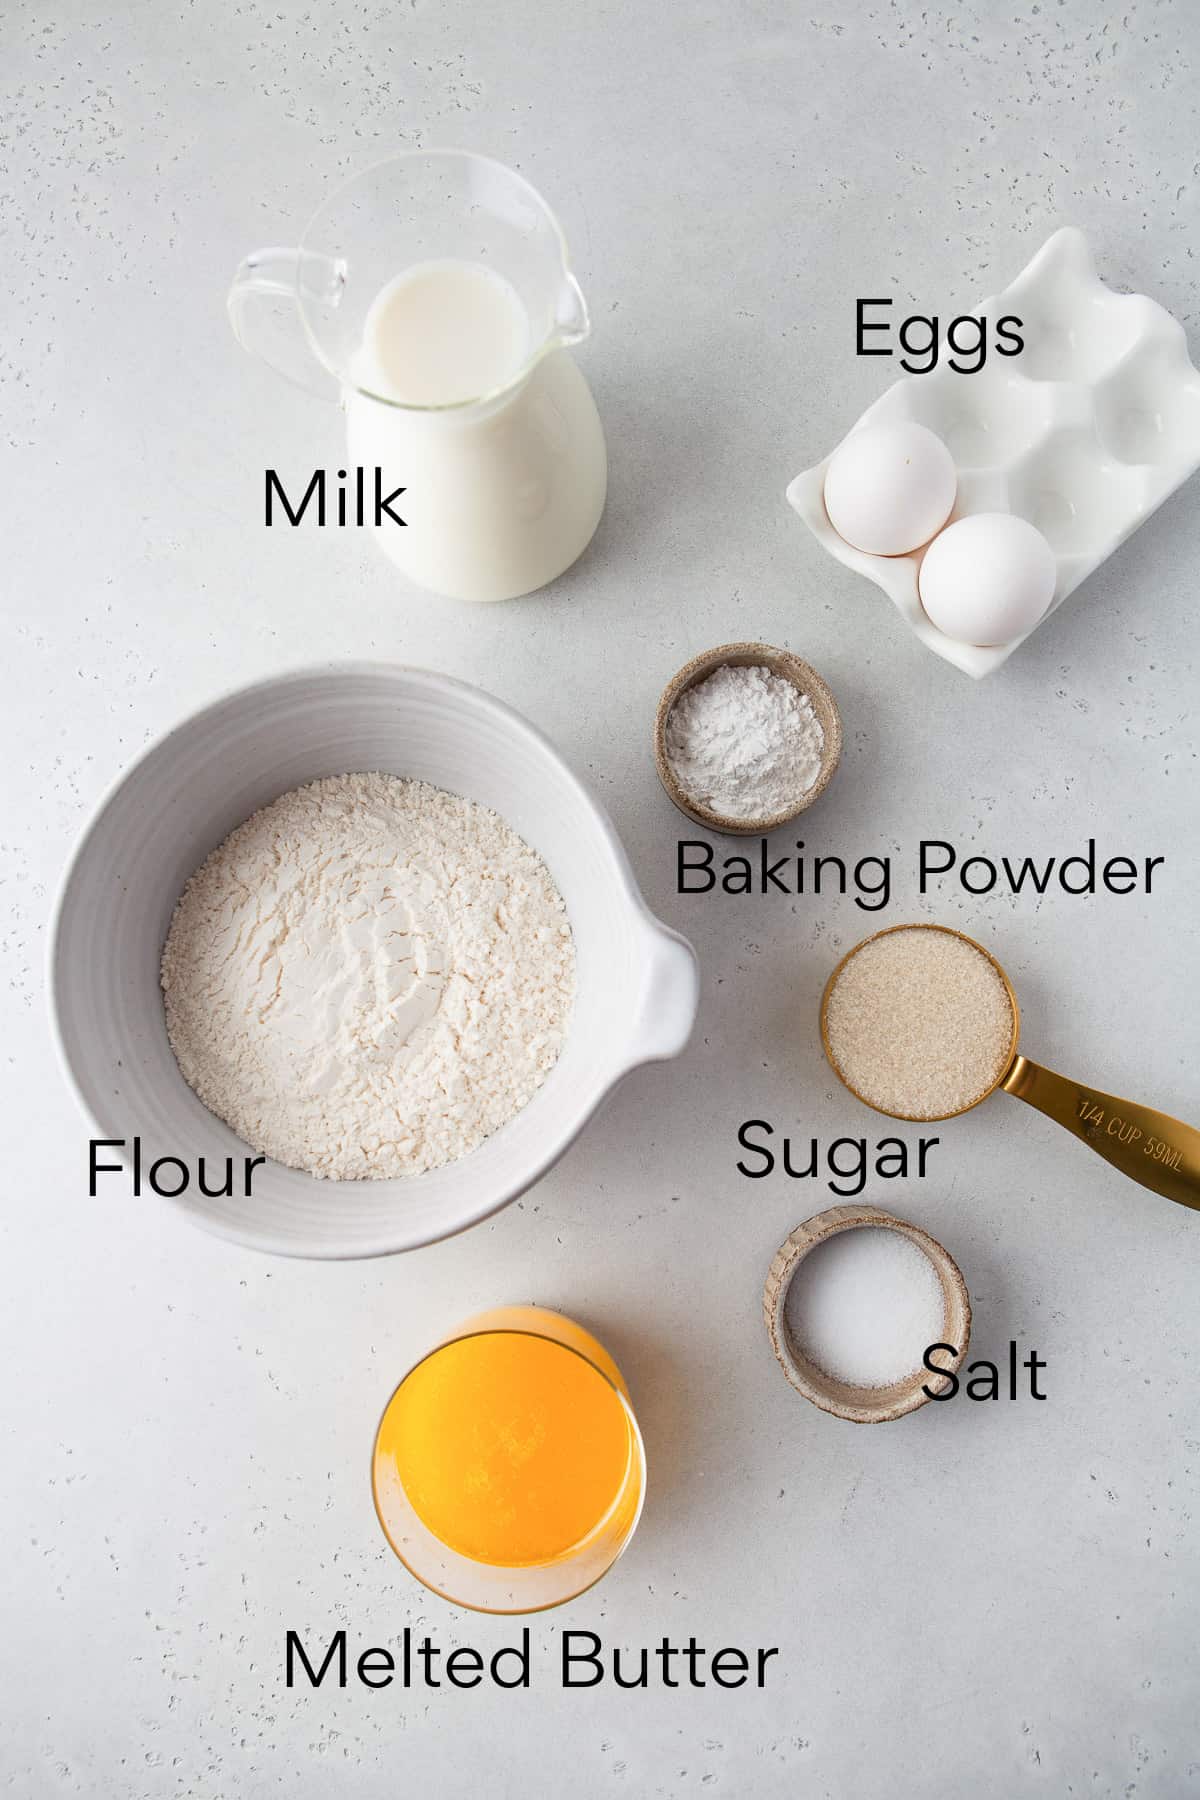
Belgian Waffle ingredients
- Eggs: The eggs are separated, with the whites beaten and gently folded in to create light and fluffy waffles.
- Flour: I use unbleached all-purpose flour in this recipe and in most of my baking unless I specify otherwise.
- Milk: I use regular milk (not buttermilk) in this recipe. Whole milk is best but we have even used 2% or non-fat milk and they still turn out great.
- Baking Powder: This leavening agent is what helps you get large fluffy waffles.
How to make Belgian waffles
- Mix flour, sugar, baking powder, and salt: Combine all of the dry ingredients in a large bowl and whisk them together. This ensures that you don’t end up with pockets of baking powder in your waffles and helps them rise evenly in the waffle maker.
- Combine wet ingredients: Whisk the milk, melted butter, and egg yolks in a separate bowl. Mixing them well now means you need to stir the batter less later, which results in more tender, airy waffles.
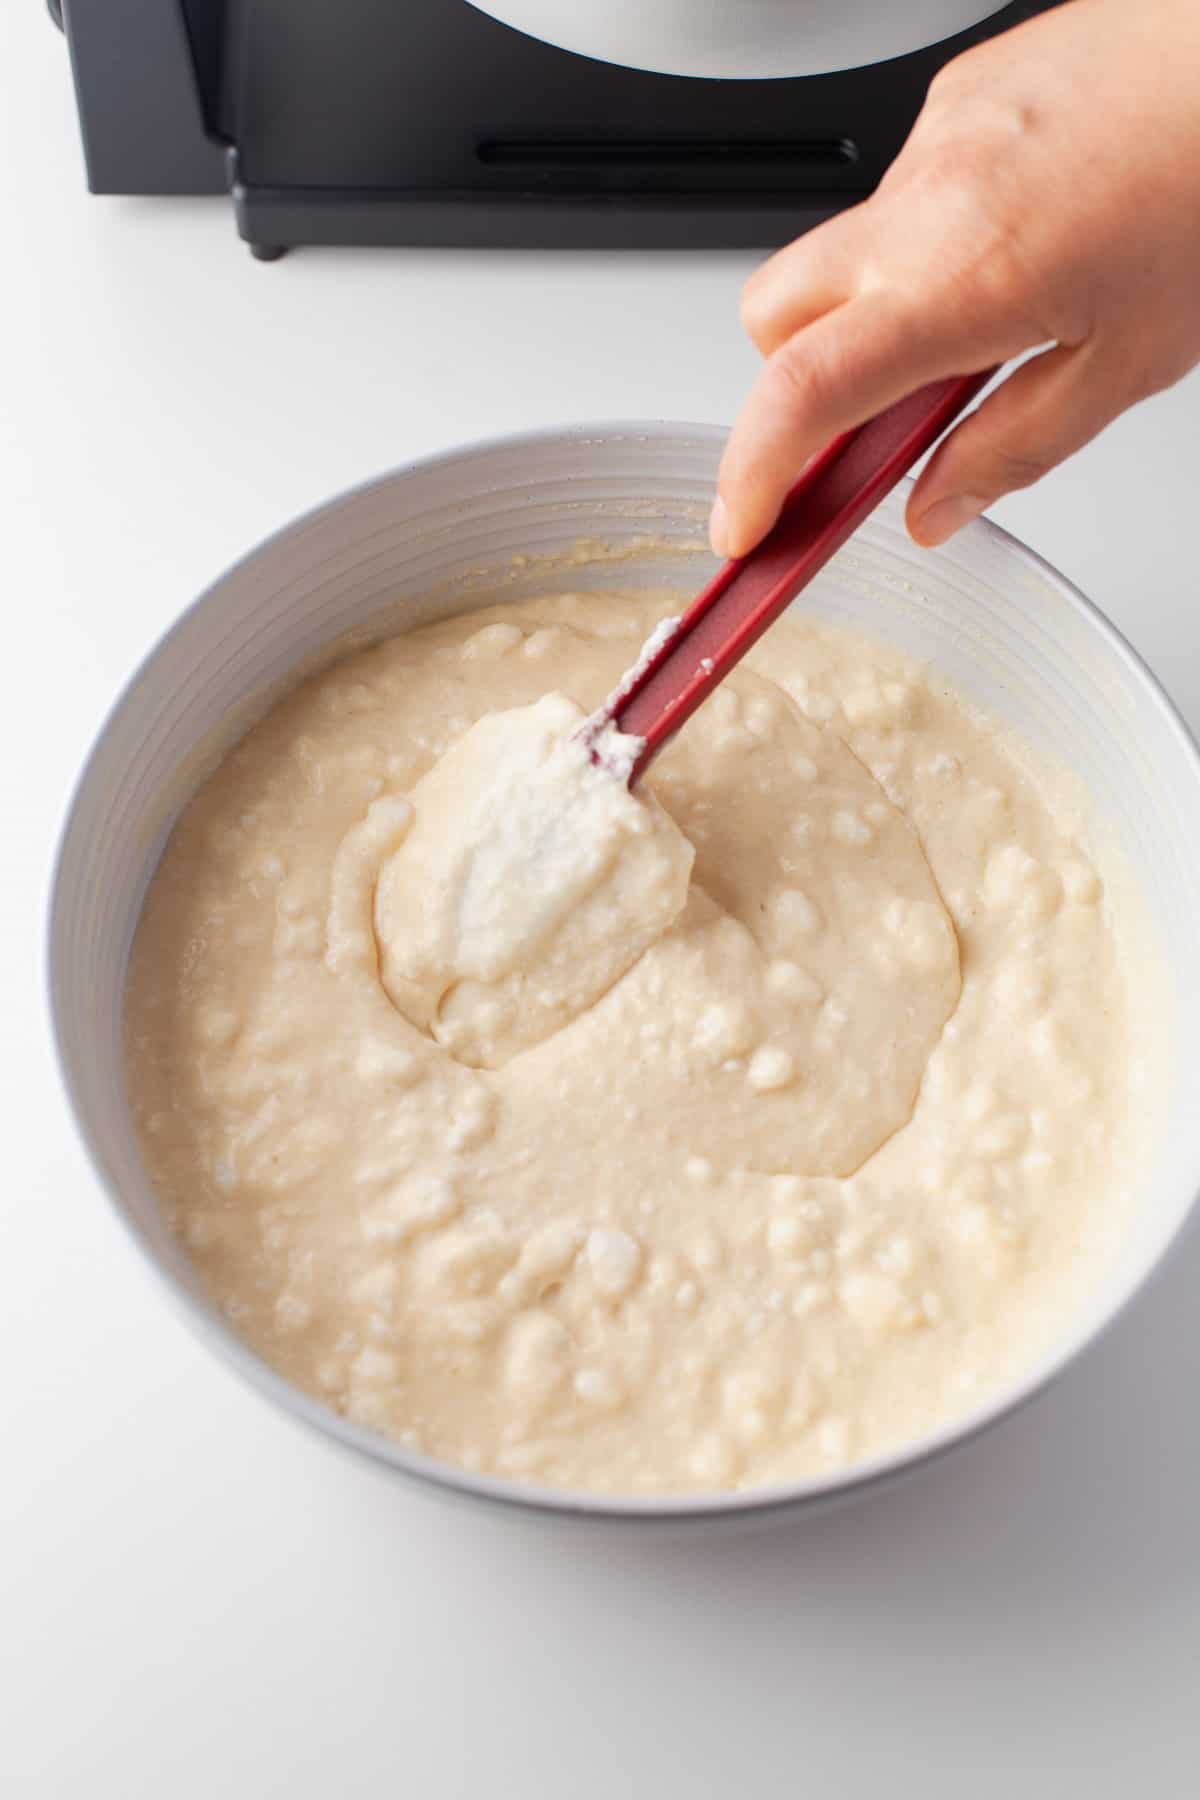
- Combine wet and dry ingredients: Pour the eggs and milk mixture into the bowl with the flour mixture. Stir just until combined and don’t worry about getting out all the lumps.


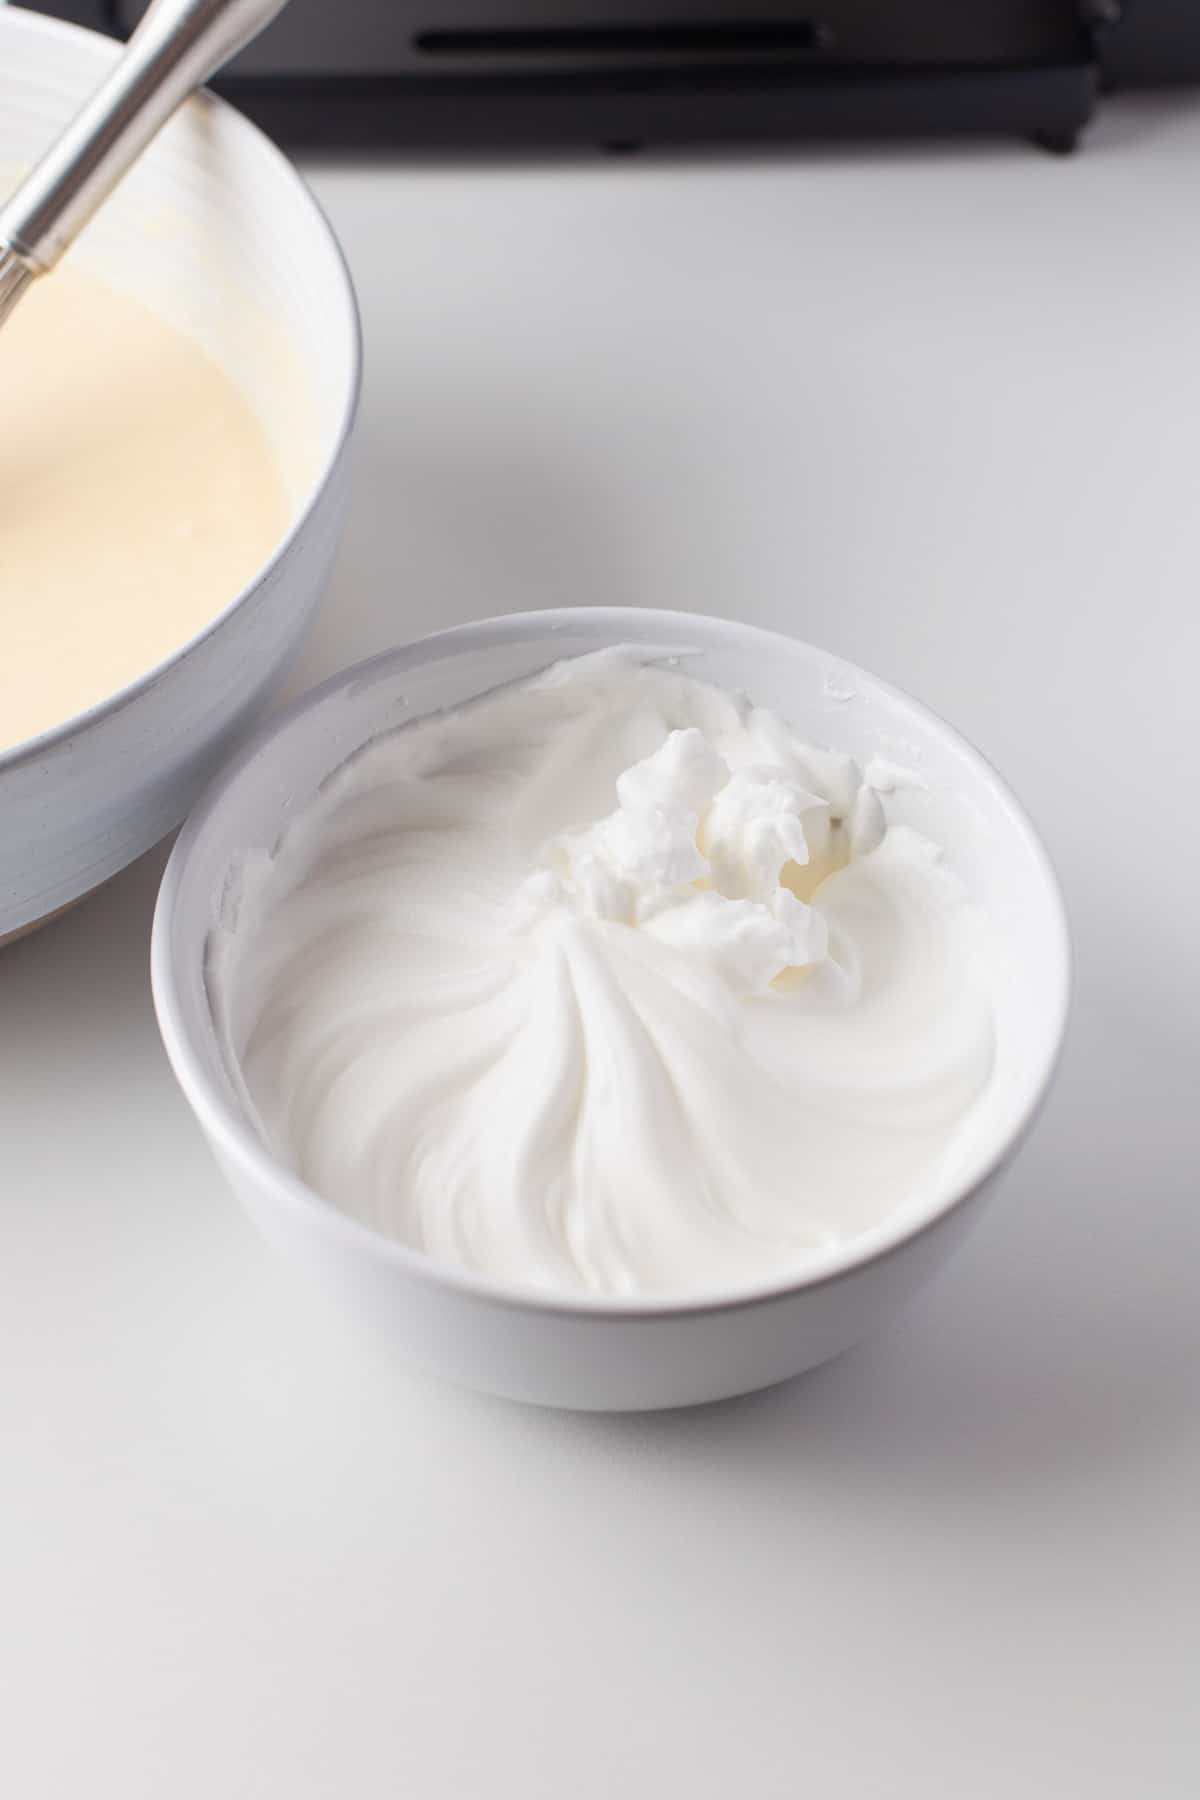
- Beat the egg whites until frothy, stiff peaks form. This can be done by hand, but it’s definitely easiest with a hand mixer.
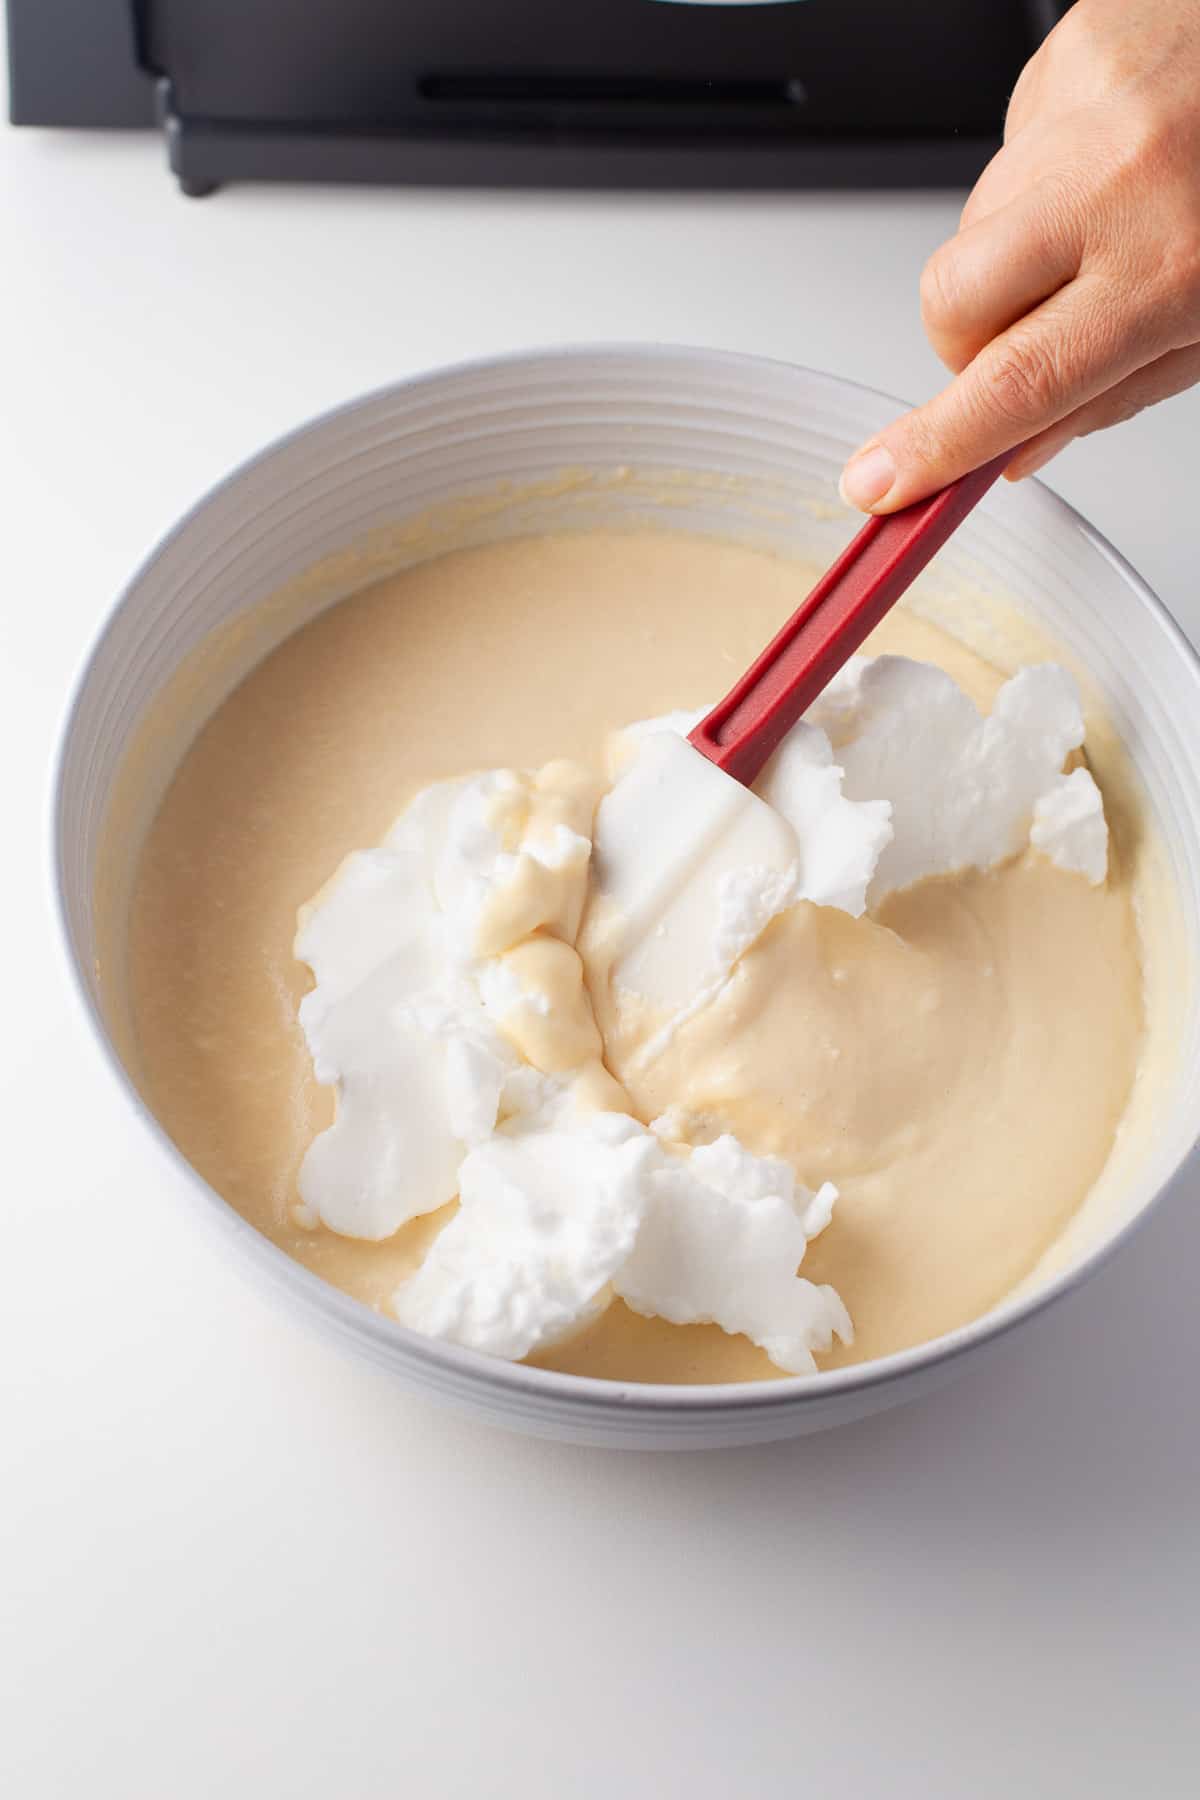
- Fold egg whites into the waffle batter. Use a rubber spatula to gently fold the egg whites into the batter until they are combined. Try not to knock out all the air that you just beat into your egg whites by folding or stirring too vigorously. It’s okay to have a few lumps.
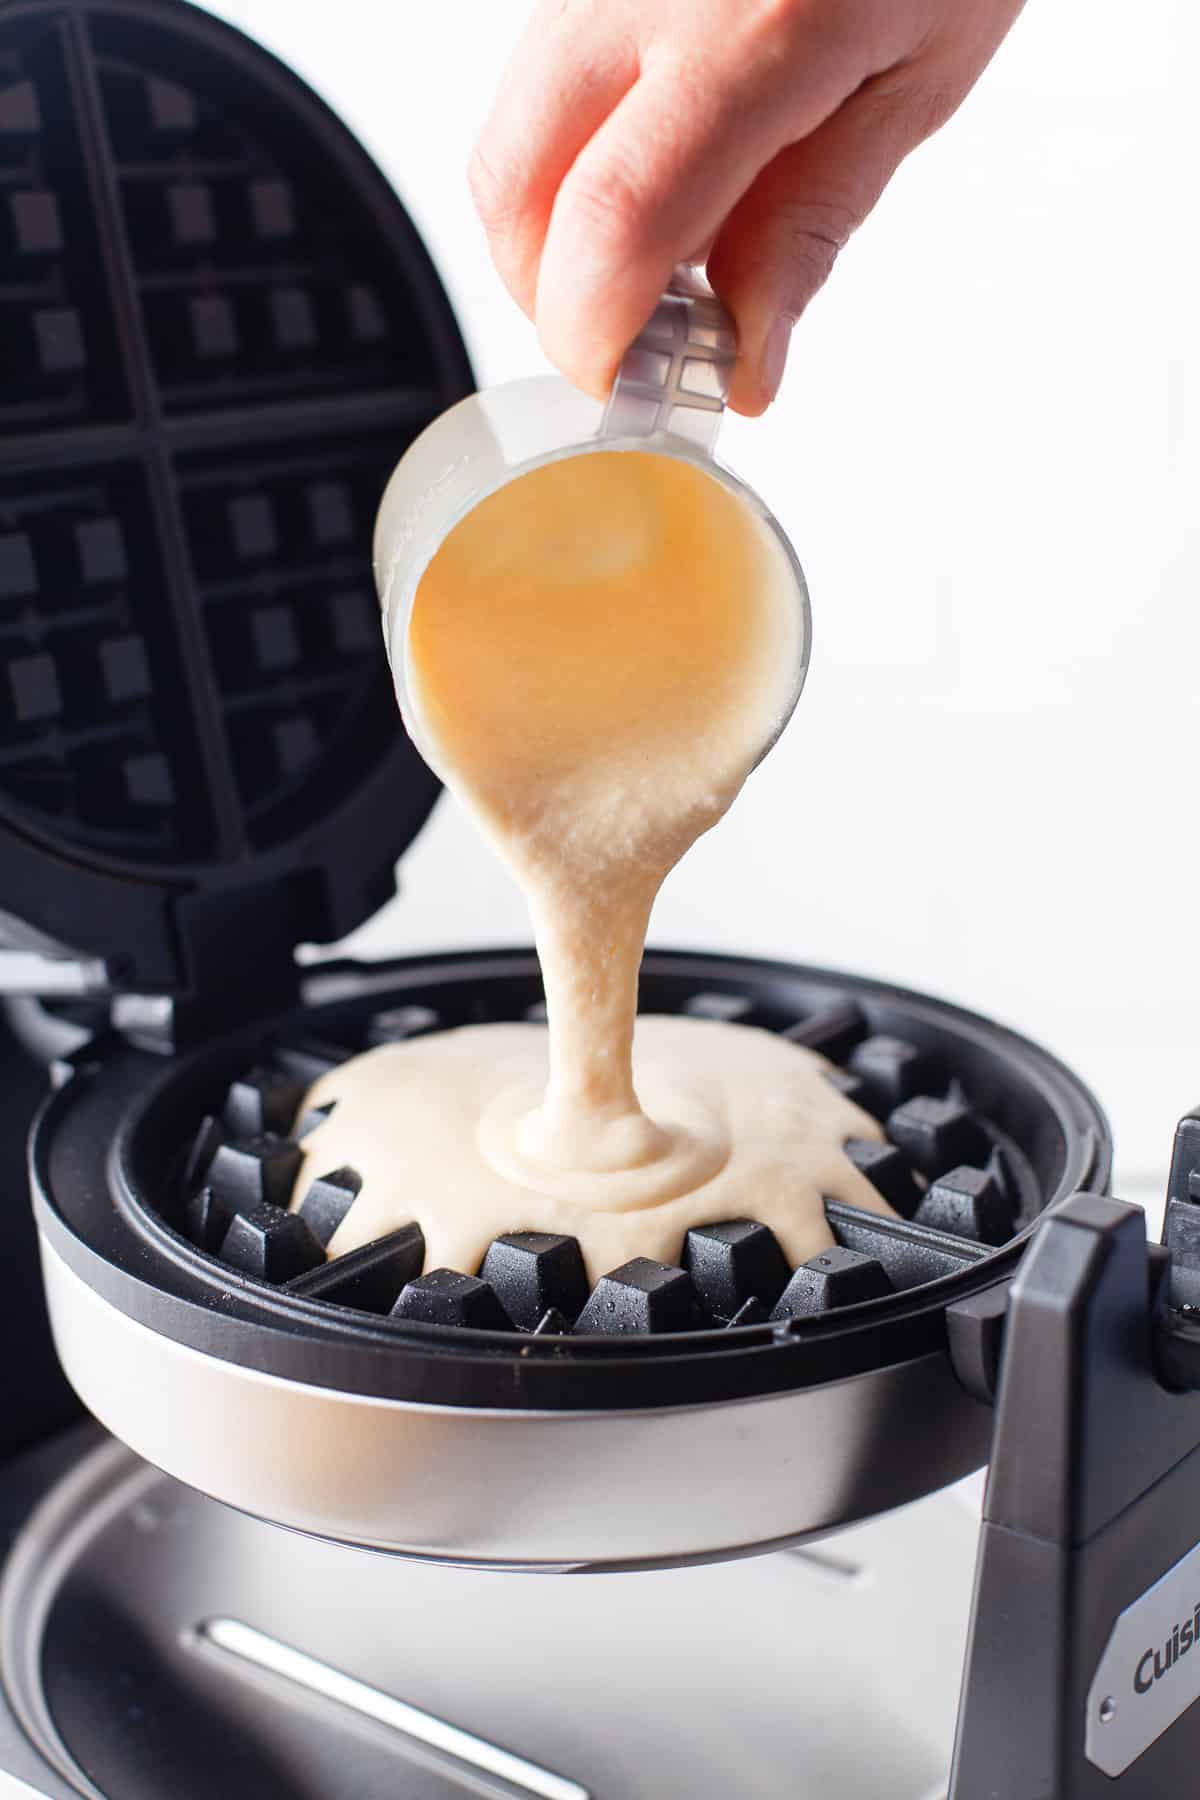
- Cook. Fill your preheated waffle maker with batter. Because all waffle makers are a little different, you might need to experiment a time or two to know just how full to fill it, but generally go with less batter than you think you might need at first or follow the instructions that come with your waffle maker. The batter will puff up and spread to fill the waffle maker while it cooks.
- Serve warm! If you are making your Belgian waffles in batches, place the finished waffles on a wire rack while you make the next round of waffles before serving. Stacking them directly onto a plate while still hot usually results in steam on the bottom of the waffles which makes them less crisp.
How to serve Belgian Waffles
Waffles are always fantastic when topped with butter and maple syrup. But Nutella with sweetened whipped cream and fresh berries, fruit syrups or jams, apple pie filling, or even peanut butter are also all delicious toppings for Belgian waffles.
- Fresh fruit & cream – Nothing is better than a freshly made hot belgian waffle with sliced strawberries or your favorite seasonal fruit and homemade whipped cream piled on top!
- Syrup – Pour your favorite syrup over the top of your favorites and the grid pattern will collect it so you get delicious maple or buttermilk syrup in every bite!
- Go the savory route – Serve your belgian waffles with some fried chicken and hot honey for delicious chicken and waffles!
Crispy Belgian Waffle Recipe Storage
If you aren’t going to eat all of your waffles at once, you can let them cool completely on a wire rack, then freeze in a single layer in the freezer for an hour or two. Once frozen solid, transfer the waffles to a freezer-safe ziploc bag for longer-term storage. They will keep well in the freezer for up to 2 months. To enjoy, reheat in a toaster or air fryer until crisp and hot.
Best Belgian Waffle Recipe FAQs
Yes, you can use this recipe in any waffle maker, although it might not have the same classic size holes of a Belgian waffle maker. Even a Dash mini waffle maker that you often see in holiday shapes at Target and other places for making individual waffles will work well with this Belgian waffle recipe.
The most important factor in getting crispy waffles is to make sure the waffle iron is hot before dropping the batter on it – you should actually hear the batter sizzle when it hits the iron. Try letting the waffle iron heat up for a full five minutes before starting to cook the waffles.
Also, when making multiple batches, transfer the complete waffles to a wire rack, instead of setting them on a plate. The steam from the hot waffles will cause them to lose some of their crispiness otherwise.
Many waffle irons have a non-stick surface so you actually don’t want to spray them with cooking spray, which can build up and actually make your waffles stick more, not less. Instead, I recommend lightly brushing the waffle maker with a little oil before adding the batter if you have had problems with your waffles sticking.
I don’t think that this waffle batter is thinner than my homemade pancake batter. The two are very similar and can be used interchangeably in a pinch.
If you have trouble with your waffles being soggy, you might need to let them cook a little longer to crisp up more. Another reason would be if you place the hot waffles directly onto a plate. They will be very hot and will steam underneath the waffles, causing them to soften and possibly turn soggy, especially if you stack them. I recommend placing them on a wire rack for a minute or two before plating to avoid this problem.
Belgian Crispy Belgian Waffle Recipe tips Recipe tips
- Don’t overmix the batter! It’s okay if there are lumps in the batter after adding the wet ingredients to the dry ingredients or after adding the egg whites. Over-mixing can lead to rubbery, flat Belgian waffles instead of light and fluffy ones.
- Adjustments: If you want to make these waffles a little healthier, you can decrease the amount of butter by half without changing any of the other ingredients. They won’t be quite as rich and amazing, but still darn good waffles.

More delicious breakfast recipes you’ll love
- Aebleskiver | Danish Pancakes
- German Apple Pancakes with Cider Syrup
- Cinnamon French Toast Sticks
- Crepes Recipe (How to Make Crepes and Crepe Filling Ideas)

Belgian Waffles Recipe
Ingredients
- 2 cups (282g) all-purpose flour
- ¼ cup (50g) granulated sugar
- 3 teaspoons baking powder
- ½ teaspoon salt
- 2 large eggs separated
- 1¾ cups milk
- ½ cup salted butter melted
Instructions
- In a large bowl, whisk together the flour, sugar, baking powder, and salt until well combined.2 cups (282g) all-purpose flour, ¼ cup (50g) granulated sugar, 3 teaspoons baking powder, ½ teaspoon salt
- n a separate bowl, whisk the milk, melted butter, and egg yolks until smooth.2 large eggs, 1¾ cups milk, ½ cup salted butter
- Pour the wet mixture into the dry ingredients and stir just until incorporated. Do not overmix; the batter should still have some lumps.
- In another bowl, beat the egg whites with a hand mixer (or whisk) until stiff peaks form.
- Gently fold the egg whites into the batter with a spatula until mostly combined. A few streaks are fine – don’t deflate the batter.
- Preheat your waffle iron. Add batter, being careful not to overfill, and cook until golden brown and crisp.
- Place cooked waffles on a wire rack while making the rest of the batch, then serve warm with your favorite toppings.
Notes
- Whisk dry ingredients so the baking powder is evenly distributed.
- Don’t overmix the batter, some lumps are fine.
- Beat egg whites until stiff peaks form for extra fluffy waffles.
- Gently fold in egg whites to keep the batter light.
- Place cooked waffles on a wire rack to keep them crisp.
Storage & Make Ahead
- Store: Keep cooled waffles in an airtight container in the fridge for up to 2 days.
- Freeze: Freeze waffles in a single layer, then transfer to a bag for up to 3 months.
- Reheat: Toast or bake at 325°F until hot and crisp; avoid microwaving.
- Make Ahead: Mix dry and wet ingredients separately ahead of time; fold in beaten egg whites right before cooking.

Great waffle recipe. My son loved them and I appreciated all the tips!
Thanks so much!
These are SO delicious, now my go-to recipe.
Yummy! This is absolutely what I hope for in a waffle – perfect texture and great flavor that tastes good with ANY topping!
Will be using your recipe for a breakfast next week!
Delicious waffle recipe. Our family really loves this and been enjoying this almost every weekend
Thank you, Linda!
OMG! I used this recipe and I absolutely LOVE IT!! They’re fluffy and have just the right amount of flavor!
Yum! These waffles are much fluffier and less dense than other waffle recipes I’ve tried! Delicious!
Worst recipe I’ve ever used!!
Great waffle recipe.
Thank you!