This showstopper Day of the Dead Black Buttercream Cake was inspired by the Dia de los Muertos celebration of remembrance of ancestors and loved ones. It's perfect for anyone who thinks they can't decorate a cake because there is no difficult piping involved!
This cake is made with white cake layers, but it would also be delicious with my Devil’s Food Chocolate Cake or even a Homemade Funfetti Cake using seasonally themed sprinkles.
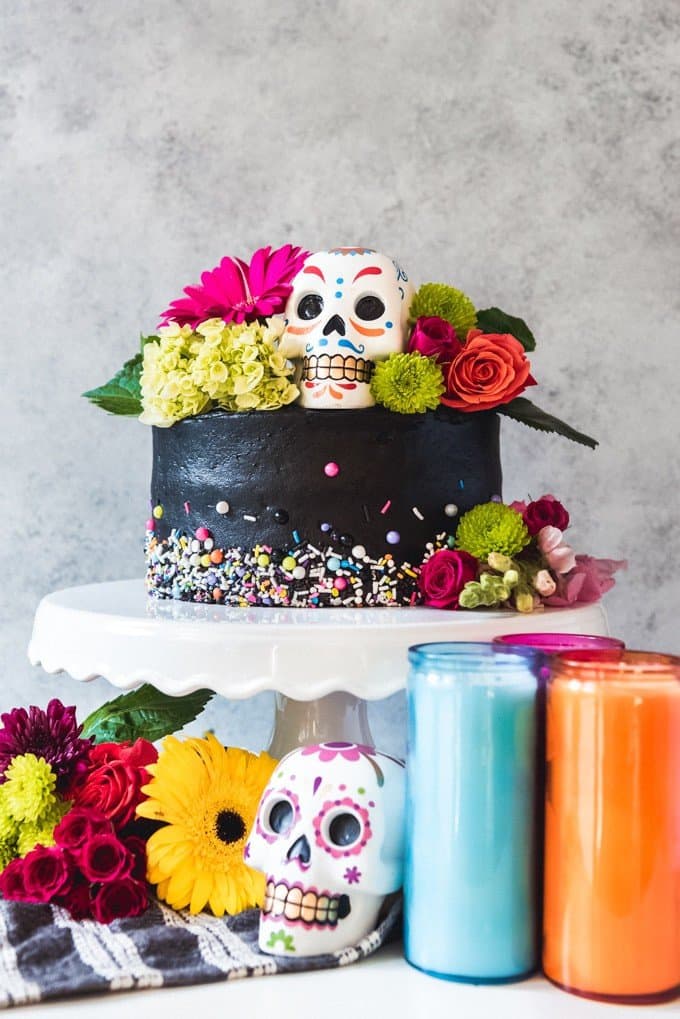
Day of the Dead Black Buttercream Cake
I have a confession. I totally Instagram stalk amazing cake decorators and wish I had those kind of skills. But I can't execute a beautiful cake with any level of finesse no matter how hard I seem to try. One day I hope to get there though!
Meanwhile, I'm just going to let colorful sprinkles and beautiful fresh flowers do the heavy lifting for me when it comes to making my layered cakes look like I have at least an inkling of what I'm doing when it comes to layer cakes.
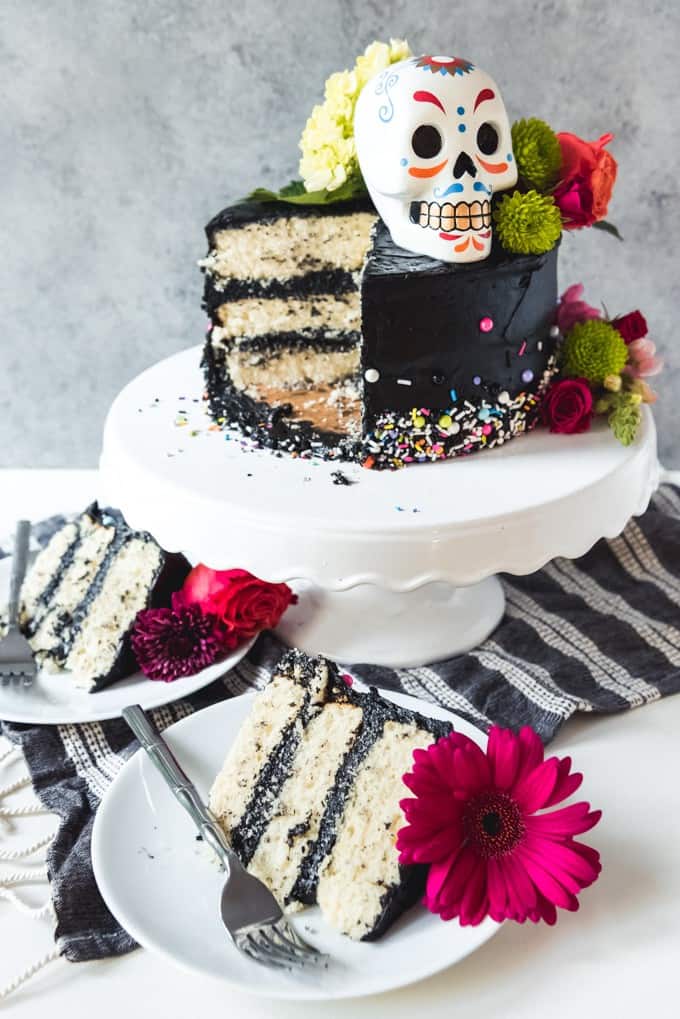
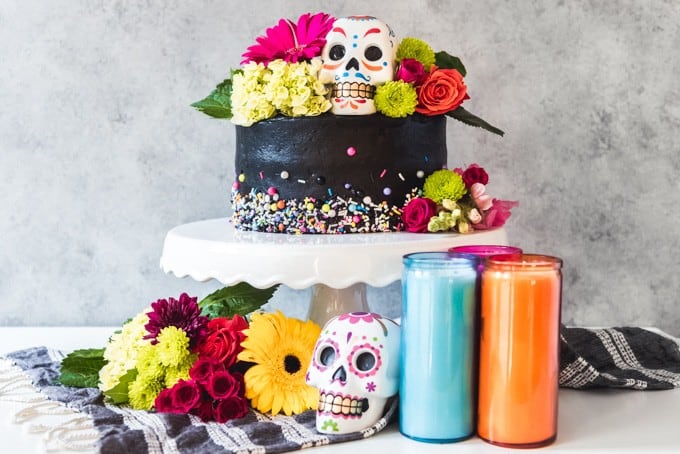
When I was brainstorming ideas for what to make for #HalloweenTreatsWeek, I happened to find loads of cute Day of the Dead decor at Target in the dollar section and seasonal aisle. Then when I found the Sweets & Treats Sugar Skull sprinkle mix, I thought it would be so fun to do a Dia de los Muertos cake using those colorful sprinkles, some of the little decor I found at Target like these cute sugar skulls, and fresh flowers, which are a big part of Day of the Dead celebrations. Although I really should have looked harder for marigolds, which are the flowers of the dead.
If you don't know much about Dia de los Muertos, it is a holiday from Mexican culture to celebrate and honor the lives of loved ones who have passed on. This is done through food, drink, parties, and activities that the departed loved ones enjoyed during their lives, as a way of keeping the them part of the living community. The idea, at least to some extent, is that the dead have the opportunity on this day to participate and share in the celebrations with their loved ones who are still alive.
Dia de los Muertos is growing in popularity in the United States, both I think from the numbers of immigrants who have brought their traditions with them, as from the more cynical view that American companies see the visual appeal of the eye-grabbing, ornate sugar skulls decorated in beautiful colors and have marketed them to us. It's a holiday that is stunningly beautiful with it's vibrant colors that really do give a feeling of "life", while also being mysterious and creepy, but in a safe, comforting way.
Our family loves the movie "Book of Life", which is a great introduction to some of the concepts behind the Day of the Dead festival. And there is also the movie "Coco", which is also about the Day of the Dead, although we didn't like that one quite as much. But I think it would be interesting and fun to have a movie night with the kids and watch one of them and discuss what it means to honor the lives of the dead and remember our loved ones.
It's a great way to develop a sense of family history, and explore other cultures, which is something I think about often since both of our daughters were adopted and I think it's important to remember to help them develop a sense of self. It also gives us a chance to have meaningful conversations with our girls about topics like death, life, love, families, and remembering.
About this Day of the Dead Black Buttercream Cake
This is a great Halloween showstopper cake that would make a fun centerpiece on a dessert buffet table.
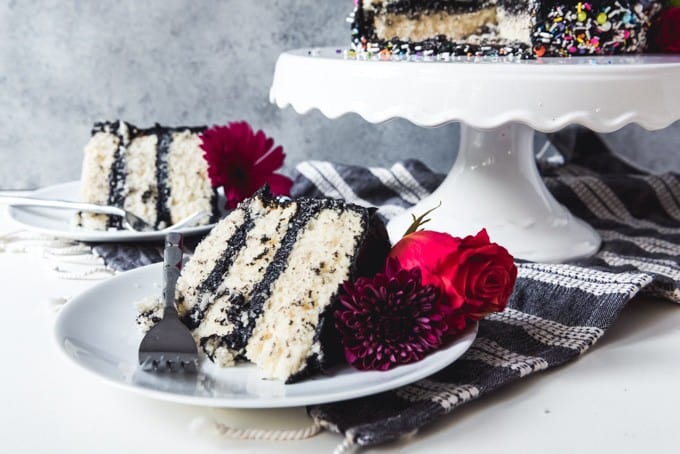
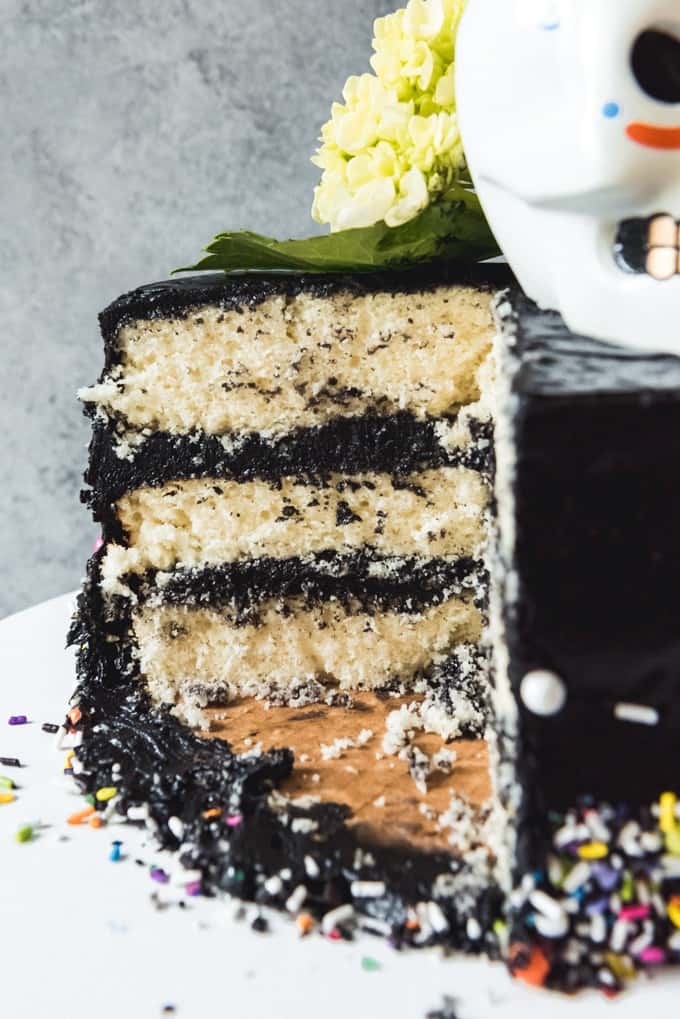
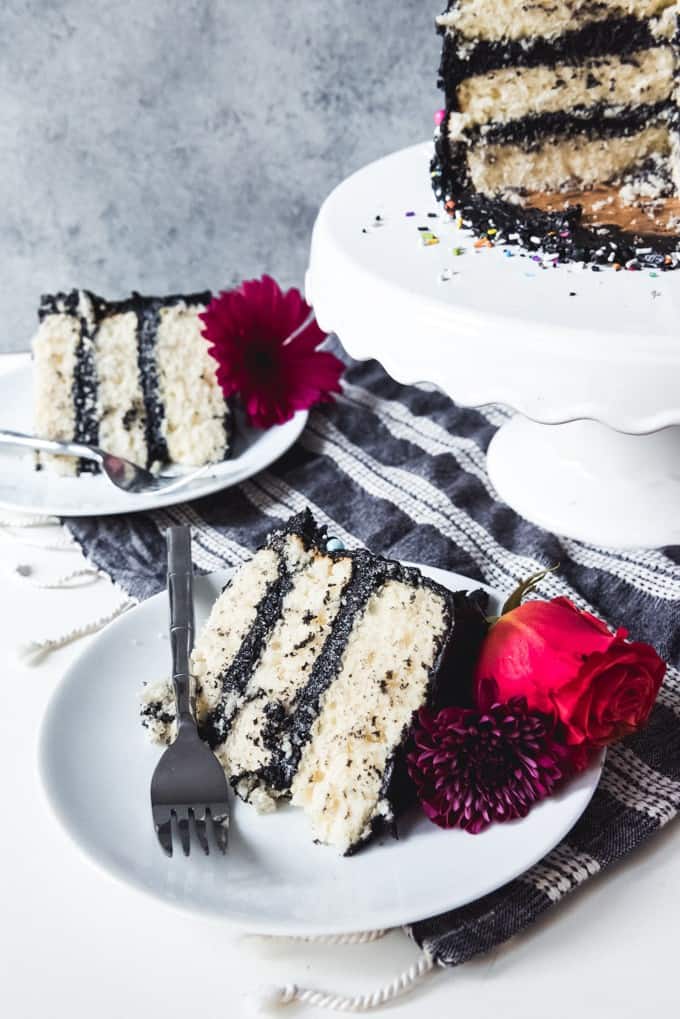
I opted to keep things simple with a classic vanilla cake base in order to let the black buttercream be the real star of this dessert. I used Cake by Courtney's classic white cake recipe and it turned out wonderful, even though I made a few slight modifications like using a combination of all-purpose flour and cornstarch in place of the cake flour and altering the instructions a bit by combining the buttermilk with the eggs and vanilla for adding the liquid rather than adding one extra step for adding the buttermilk separately.
One thing I did not modify though was that I used clear vanilla extract, as she recommended. I've read on many cake blogs that clear vanilla extract gives homemade cakes that classic boxed mix quality of flavor, which has always intrigued me, so I was excited when another Halloween Treats Week sponsor, Adam's Extracts, sent me a bottle to use in my recipe testing. Regular vanilla extract would absolutely work in this recipe, though I did like the result with the clear vanilla extract.
Making Black Buttercream for a Cake
The black buttercream is easy to achieve, but you need to make it a day in advance because the color deepens and intensifies overnight.
I just started with a chocolate buttercream as my base, which helps get you halfway to a nice dark as night black color since the frosting isn't stark white to begin with prior to adding the food dye. Then 2 teaspoons of black gel paste food dye get beaten in to the chocolate buttercream.
The buttercream won't look black right away, but after it spends a night in the fridge, it will go from a muddy gray to a really nice black that makes a beautiful backdrop for sprinkles and flowers. And it has the added benefit of being a chocolate buttercream behind the blackness, so it's delicious!
Just pull it out from the fridge at least an hour before you plan to assemble the cake and let it come to room temperature, then beat it again so it is a smooth, spreadable consistency.
Frosting a Layer Cake with Black Buttercream
Take the cooled cake layers and make sure they are level before filling the layers with the black buttercream and frosting the tops and sides. For a great tutorial on how to frosting a cake and get smooth edges, see this post from Sugar & Sparrow. I'm definitely no expert and still working on getting better at making beautiful cakes, but her tips are priceless. I definitely would say that having a cake turntable, offset icing spatula, and bench scraper have made a huge difference for me though in improving my ability to achieve a smooth look.
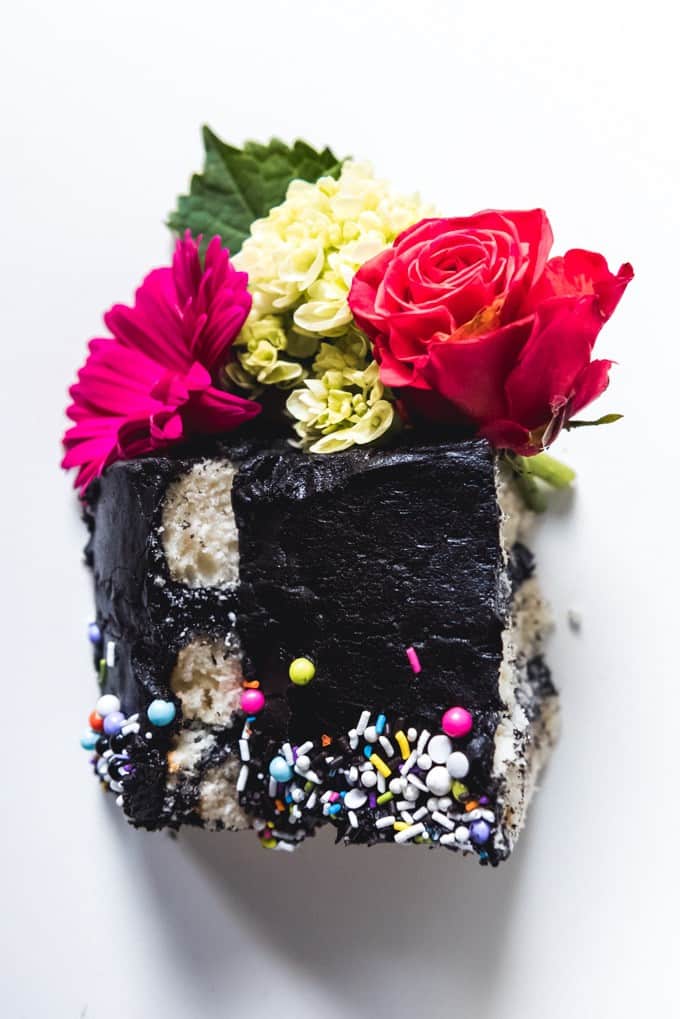
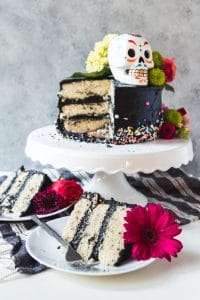
Add the sprinkles and flowers is the fun part because this is where everything starts to come together. While the buttercream is still soft, pour some sprinkles into the palm of your hand and tilt your hand to press them into the bottom of the cake. They are going to spill all over the place so I like to do this over a baking sheet. I like to cover the bottom third of the cake and not worry about the border being uneven, then carefully stick a few colorful sprinkles higher up around the cake for an unfussy look.
Decorating a Cake with Live Flowers
You don't have to use edible flowers to decorate a cake, so long as you aren't planning on eating them. I treat them more just like cake toppers that are there for the look but they get removed before consumption. But there are a few tips that are important to keep in mind when using live flowers to decorate a cake.
- Be sure to wash and dry the flowers before using them to decorate the cake. This is to get rid of pesticides and/or pests before arranging flowers on top of your frosted creations. Just run the petals and stems of the flowers under cold water and pat dry with paper towels.
- Don't decorate too far in advance. Since the flowers won't have their stems in water, they will definitely wilt given enough time so you wouldn't want to decorate this with the flowers the night before. It needs to be done day of whatever occasion you are planning on serving this Day of the Dead black buttercream cake at.
- Cut stems short. Or if you want to stick stems down into the cake itself so the flowers are standing up, wrap the stem in plastic wrap first so as not to contaminate the cake.
- Include some green. Go ahead and use the leaves from the stems, even if you are cutting the stems off. It adds color and texture and variety to the arrangement on top of the cake.
More Cake Recipes You'll Love
- Yellow Cake with Chocolate Buttercream Frosting
- Red Velvet Cake
- One-Bowl Chocolate Cake
- San Jose Burnt Almond Cake
Did you make this recipe?
Let me know what you thought with a comment and rating below. You can also take a picture and tag me on Instagram @houseofnasheats or share it on the Pinterest pin so I can see.
Day of the Dead Black Buttercream Cake
Ingredients
White Cake
- 4 large egg whites room temperature
- 1 large egg room temperature
- 1 cup buttermilk room temperature
- 3 teaspoons clear vanilla extract
- 3 cups plus 3 tablespoons cake flour*
- 1 ¾ cups granulated sugar
- 1 ½ Tablespoons baking powder
- ¾ teaspoon salt
- 12 Tablespoons butter cubed, room temperature
Black Buttercream
- 2 cups butter room temperature
- 7 cups powdered sugar
- 1 cup unsweetened cocoa powder
- 6 Tablespoons whole milk room temperature
- 4 teaspoons vanilla
- ½ teaspoon salt
- 2 teaspoons black gel food coloring (affiliate link)
Instructions
For the cake
- Preheat the oven to 350 degrees F. Lin the bottoms of three 8-inch round baking pans with parchment paper and spray with nonstick cooking spray.
- In a medium bowl, whisk together the egg whites, egg, buttermilk, and vanilla.
- In a stand mixer fitted with a paddle attachment, combine the flour, sugar, baking powder, and salt.
- Add the butter one piece at a time, while the mixer is running on low speed, waiting 10 seconds between each addition.
- Once all the butter is added, pour in the buttermilk and egg mixture in 3 batches, mixing on medium-low speed between each addition for about 1 minute and scraping the sides of the bowl. The batter should be light and fluffy. Once all of the liquid has been added, fold the batter once or twice to make sure the batter at the bottom of the bowl is getting mixed in and mix for another 20 to 30 seconds more.
- Divide the batter evenly between the pans. If you have a kitchen scale, it will be about 16 ounces of batter for each 8-inch round baking pan.
- Bake for 20 to 25 minutes, until a cake tester or toothpick inserted in the middle of the cakes comes out clean with just a few crumbs attached.
- Cool the cakes in the pans for 10 minutes before inverting them onto cooling racks and removing the parchment paper from the bottoms. Flip the cakes back over and cool completely on the wire racks.
- Level the tops of the cakes, if needed, before wrapping each cake layer with plastic wrap and chilling in the freezer for at least an hour before frosting. The cake layers can be made and frozen a few days before assembling a cake if they are wrapped once in plastic wrap. If you are making them more than 2-3 days in advance, double wrap them in plastic wrap, then wrap in foil and seal in a freezer-safe ziptight bag.
For the black buttercream
- In a stand mixer fitted with a paddle attachment, beat the butter on medium speed until creamy and light, about four minutes. Scrape down the sides of the bowl and paddle, then add the powdered sugar, cocoa powder, milk, salt, and vanilla extract and mix on low speed until the frosting comes together. Increase the speed to high and beat for two minutes.
- Scrape down the sides of the bowl and add the black food coloring (affiliate link). Beat again for 2 minutes, stopping and scraping the sides and bottom of the bowl periodically to make sure the food coloring (affiliate link) is evenly distributed. The frosting will not be dark black at this point but more of a dark gray.
- The buttercream recipe can be made ahead and stored in an airtight container in the refrigerator for up to two weeks. When you’re ready to use it, re-whip with your stand mixer.
- Transfer the buttercream to an airtight container and stick it in the fridge overnight. The next day, remove the buttercream from the fridge and let sit on the counter for at least an hour to warm up, then beat it back up in the stand mixer until it is a spreadable texture. Then before spreading the buttercream on the cake layers, mix it by hand for a couple of minutes with a wooden spoon to get rid of air pockets.
- Use the black buttercream between the cake layers and to frost the outside, then decorate with sprinkles, flowers, and other Day of the Dead decorations.