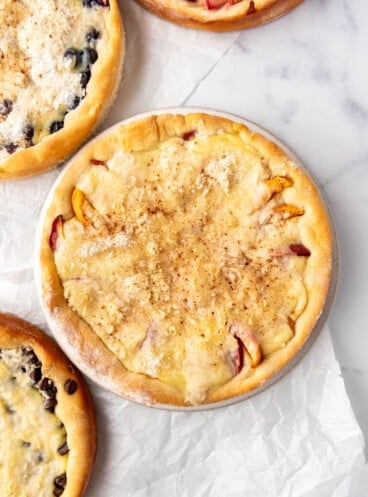
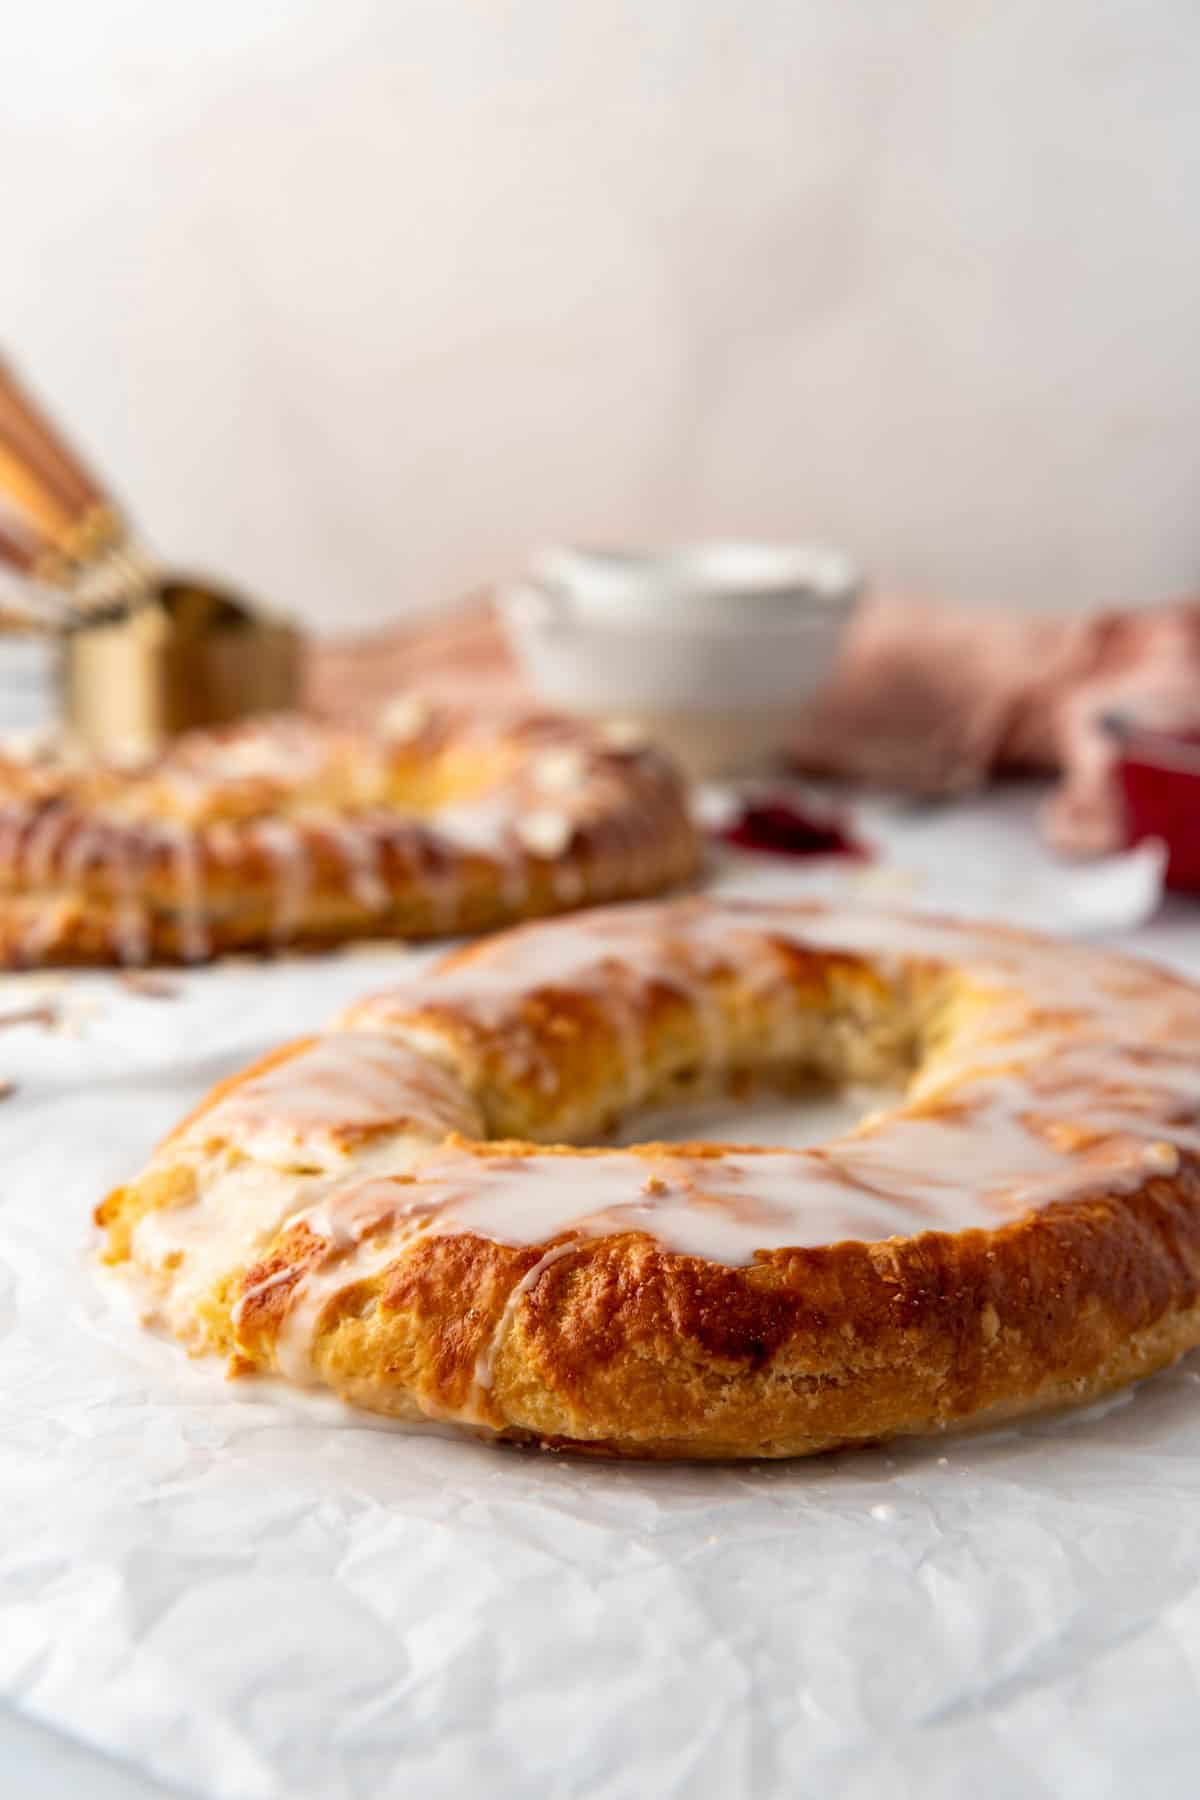
Named Wisconsin’s “official state pastry” in 2013, the whimsical-sounding kringle is one of the Midwest’s most iconic treats. With flaky, buttery layers wrapped around a sweet filling and finished with a simple glaze, it’s easy to see why this Americanized version of a Danish pastry has such a devoted following.
If you’ve ever visited Racine, Wisconsin, then you probably know that kringle isn’t just a pastry. It’s practically part of the city’s heritage, brought to America by Danish immigrants and made famous by beloved Racine bakeries like O&H Danish Bakery. My ancestors were Danes (I even went to visit Denmark to see places where they came from) so I feel a special love for this recipe!
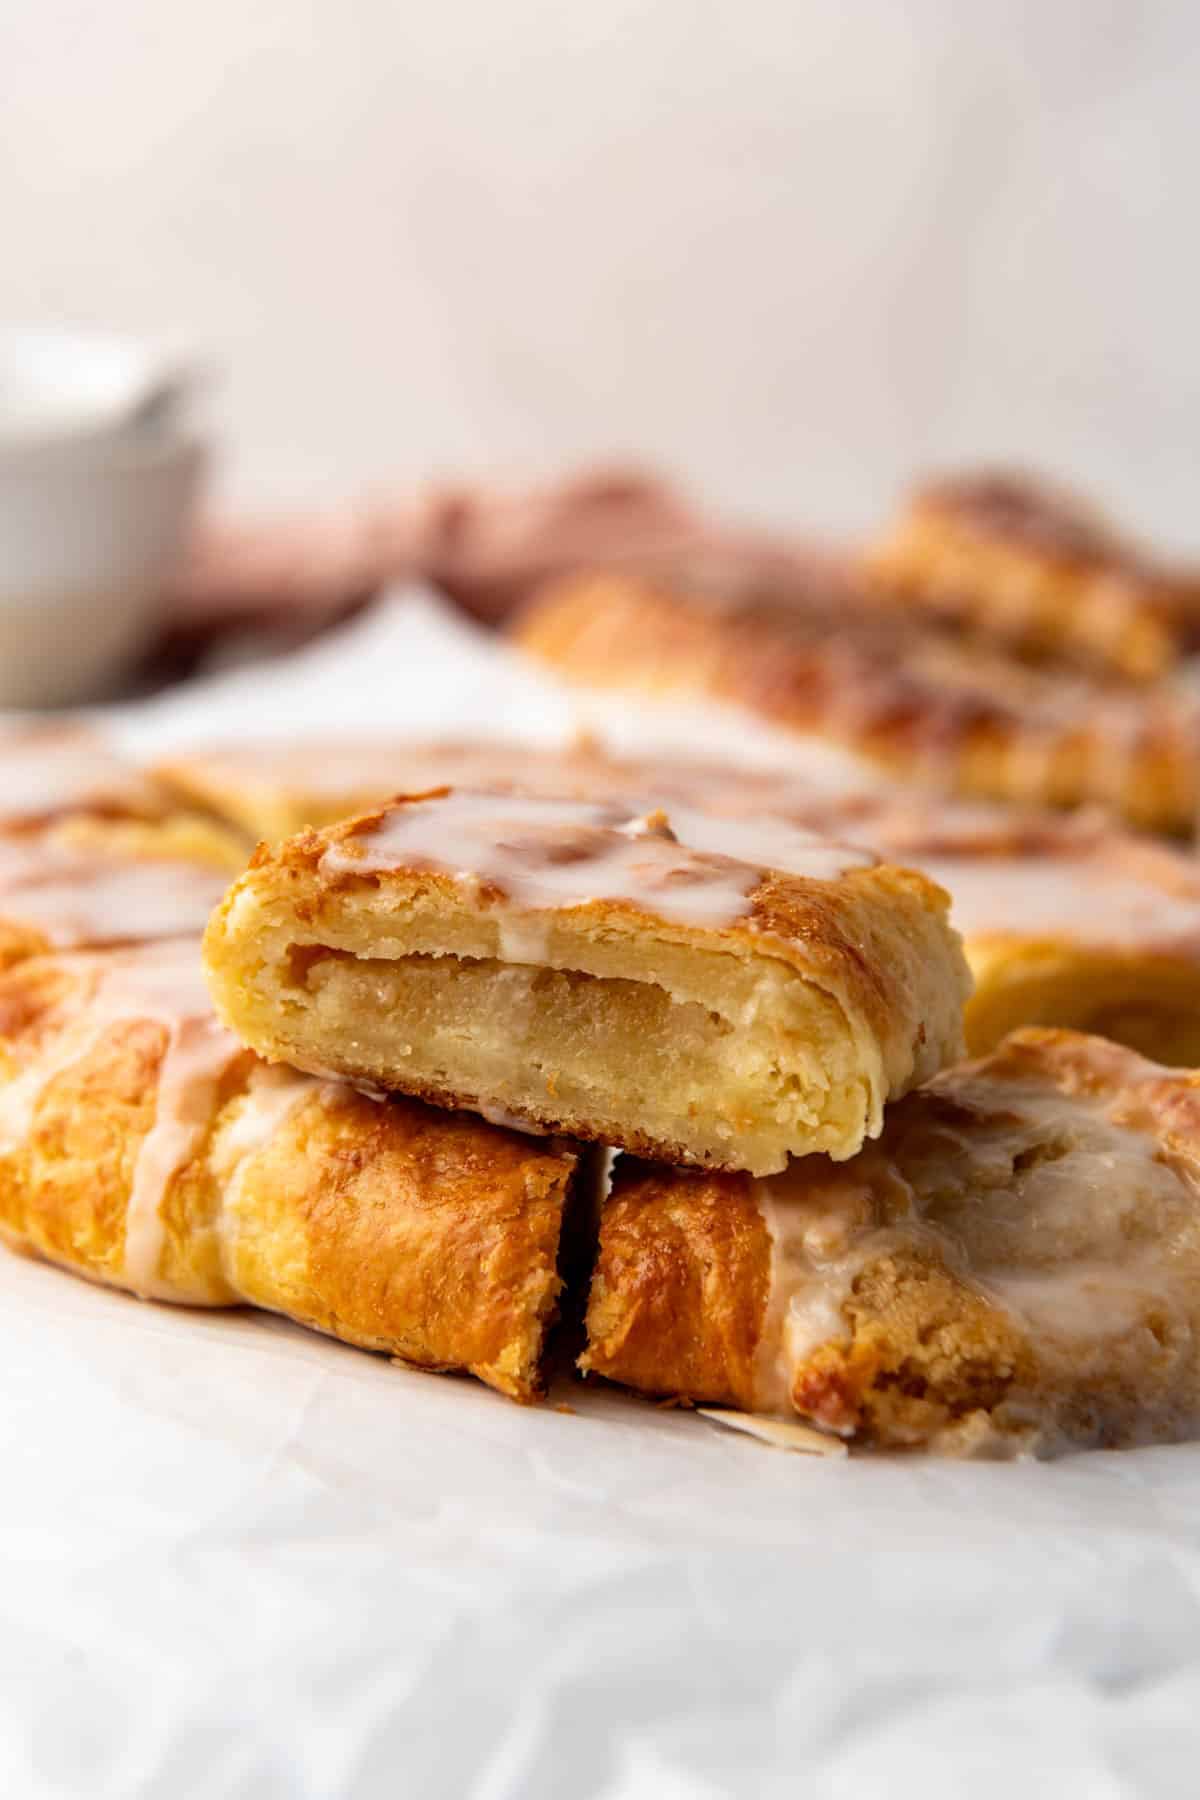
While traditional kringle might look impressive sitting in a bakery window, don’t let those beautiful flaky layers fool you. This recipe is totally doable at home! The secret is a simple lamination process that creates dozens of delicate layers of butter throughout the dough. I know it sounds fancy, but if you can roll out pie dough, then you can make kringle!
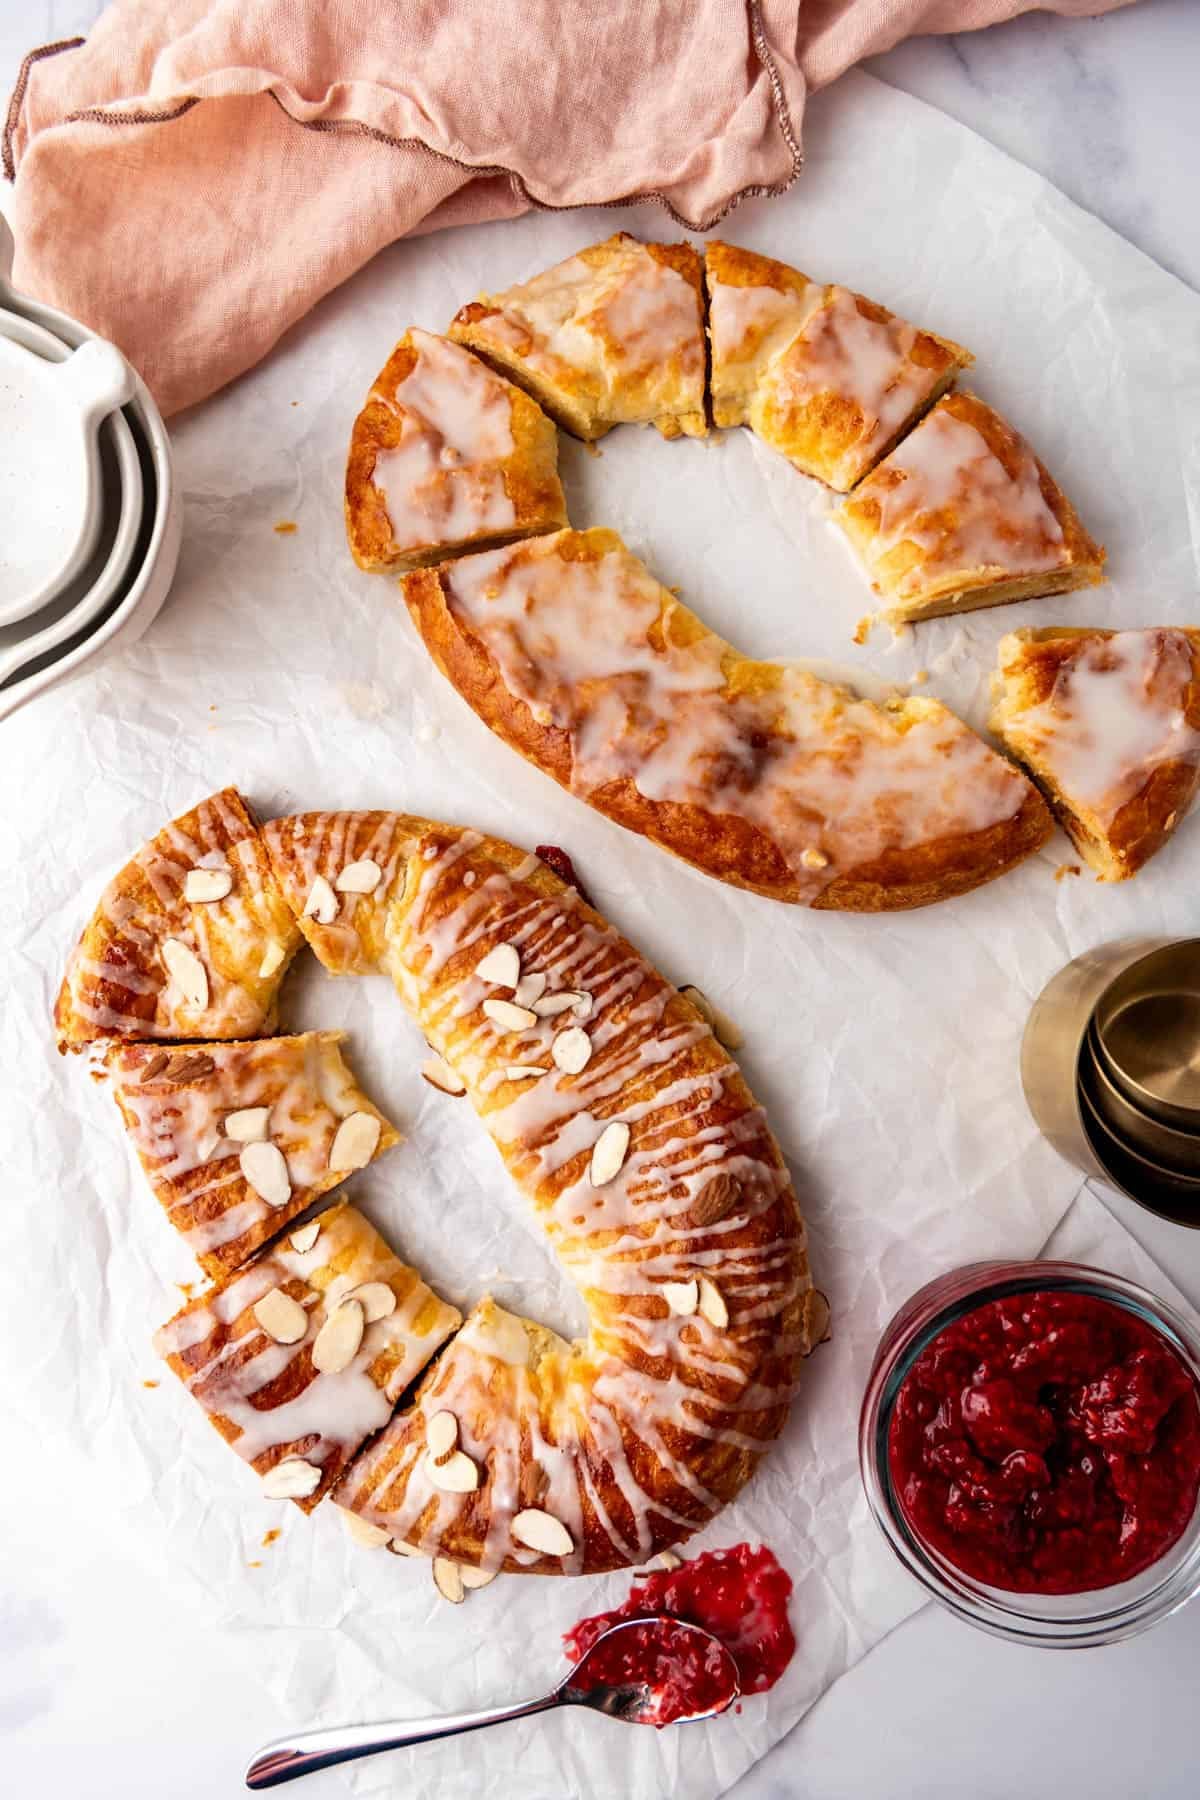
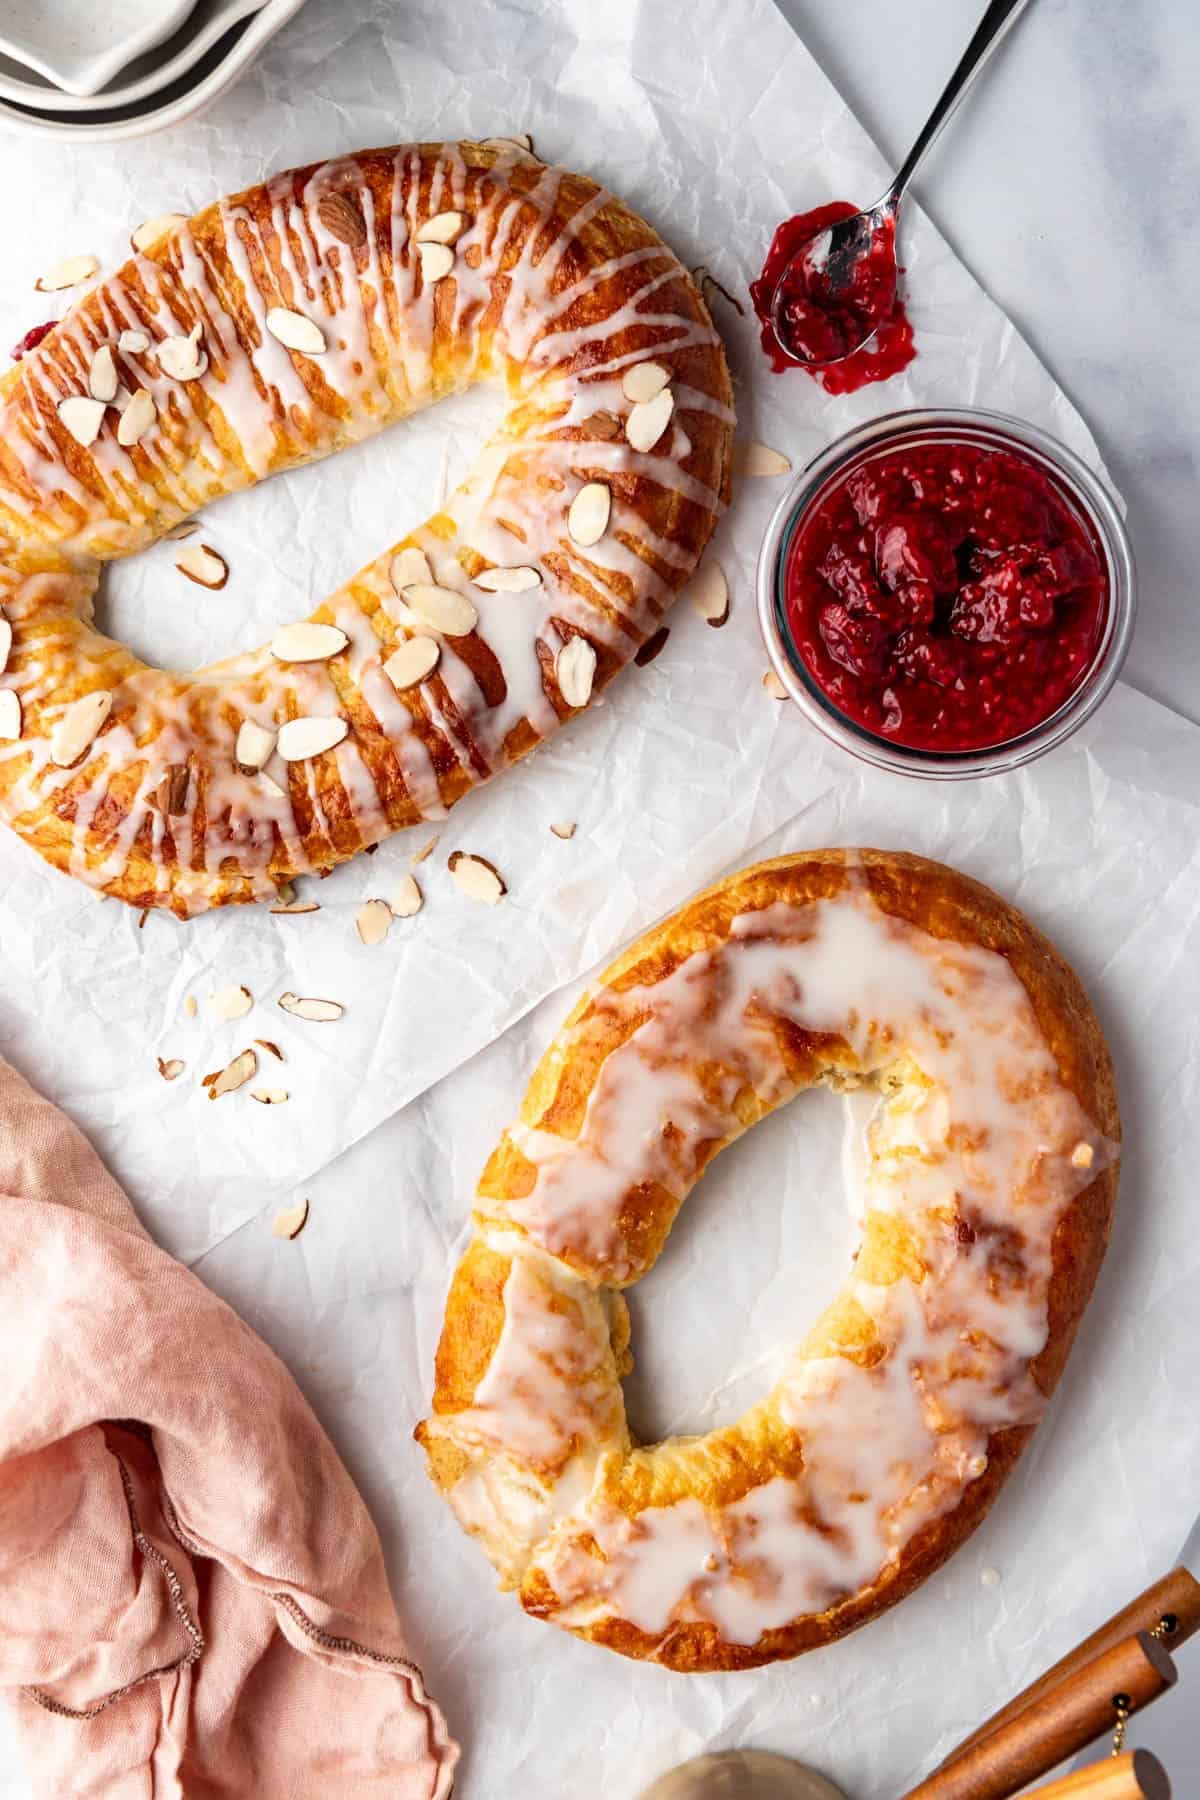
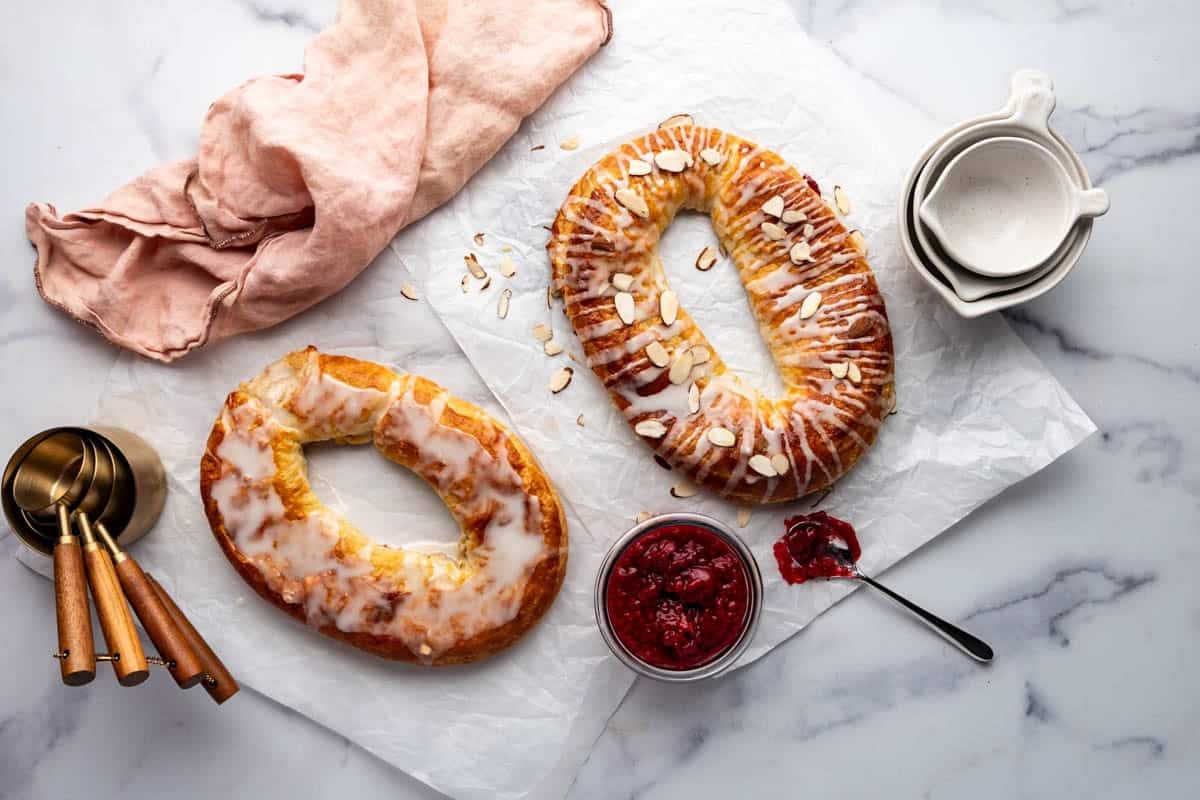
I filled my homemade kringle with two of the most popular bakery flavors: almond and raspberry. Almond is the classic choice and it is Paul and Rose’s favorite, featuring a rich, sweet almond filling that pairs beautifully with the buttery pastry. Clara and I like raspberry best with my homemade raspberry cake filling! It adds a bright, fruity contrast that cuts through the richness.
Other popular kringle flavors include pecan, cherry (we had some incredible cherry kringle in Door County, Wisconsin on a road trip!), apple, blueberry cream cheese, cinnamon, and cream cheese, but almond and raspberry remain two of the most popular flavors for good reason.
Whether you’re making kringle for a holiday breakfast, weekend brunch, or simply because you’ve always wanted to try this famous Wisconsin pastry, you’ll be amazed at how fun, doable, and rewarding the process can be.

Why you’ll love this homemade kringle recipe!

Unlike puff pastry, which relies entirely on butter for lift, kringle dough contains yeast, giving it a uniquely tender texture that’s somewhere between a flaky pastry and a soft Danish.
One thing that makes this dough especially approachable is the addition of sour cream. It creates a wonderfully tender pastry while adding just a subtle tang that balances the richness of all that butter. Combined with a straightforward folding technique, I tested this recipe multiple times to make sure it delivers authentic bakery-style results without the complexity of traditional croissant dough.
Ingredient Notes
- All-Purpose Flour: Provides tenderness and creates a delicate pastry texture.
- Bread Flour: Adds extra structure and strength, helping the dough withstand repeated rolling and folding.
- Granulated Sugar: Adds a touch of sweetness and helps feed the yeast.
- Instant Yeast: Provides a light rise that keeps the pastry from feeling dense.
- Salt: Balances the sweetness and enhances the buttery flavor.
- Cold Salted Butter: The star ingredient that creates the flaky laminated layers throughout the pastry.
- Cold Sour Cream: Adds moisture, tenderness, richness, and a subtle tang while making the dough easy to work with.
- Filling: I made an almond filling with almond paste, butter, powdered, sugar, egg white, salt and lemon juice. But you can also use my raspberry cake filling, cherry pie filling, or blueberry pie filling!
- Icing: This is a simple vanilla glaze made with powdered sugar, vanilla, lemon juice, salt, and water.
How to Make Kringle at Home
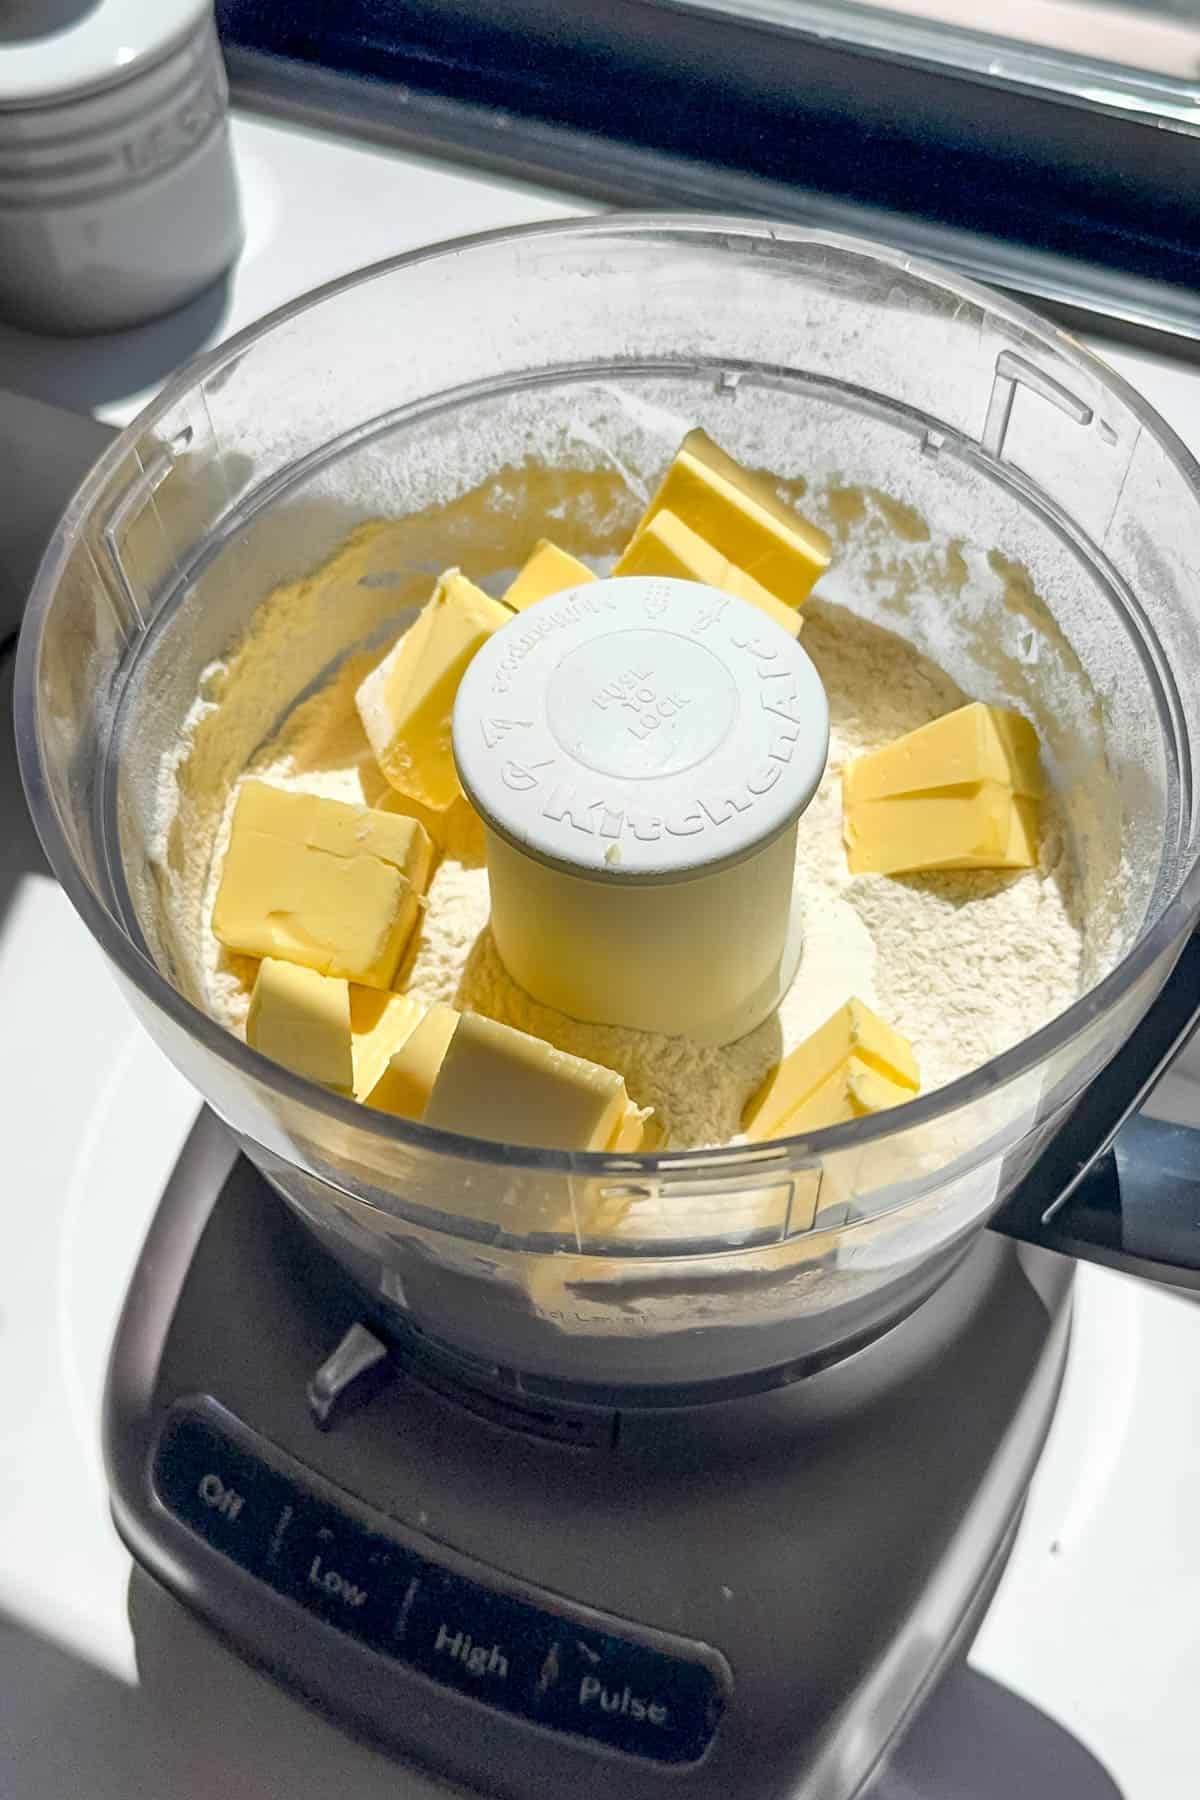
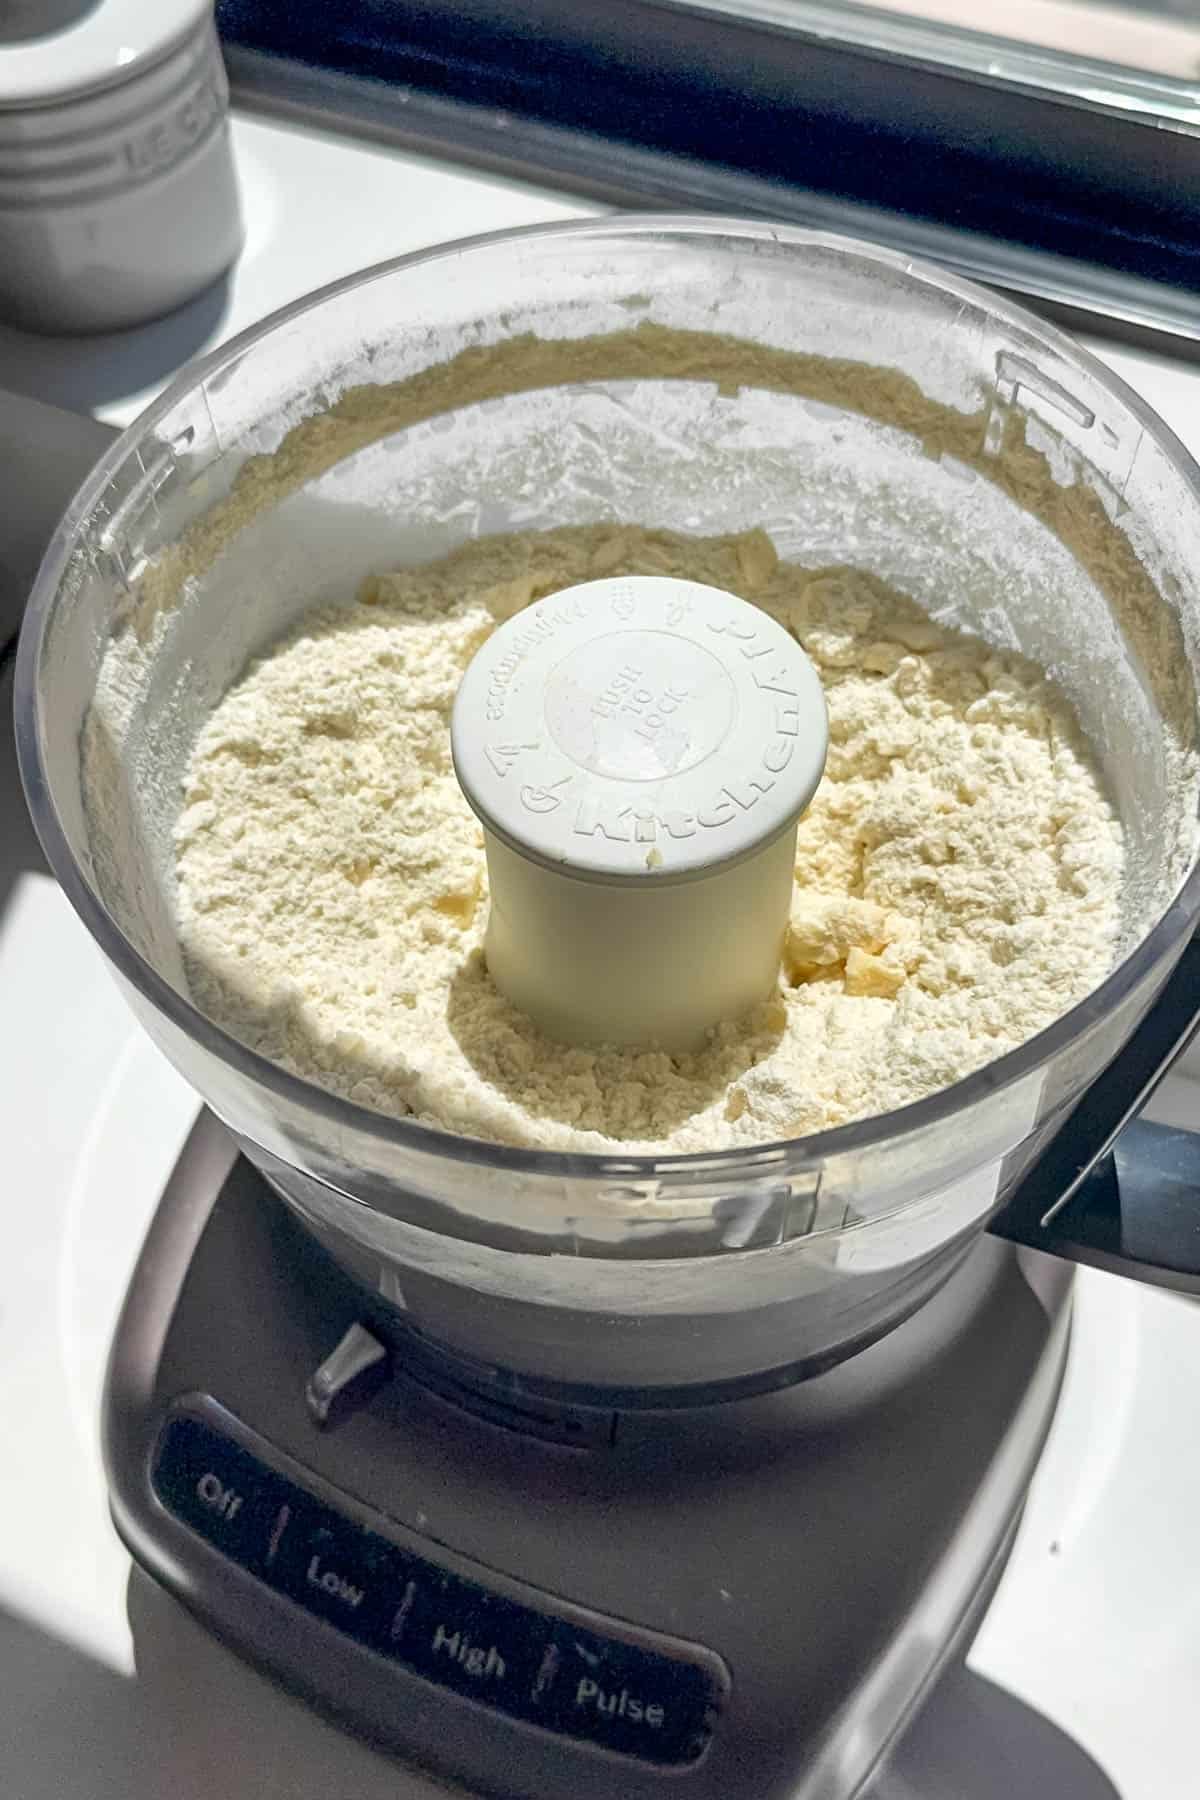
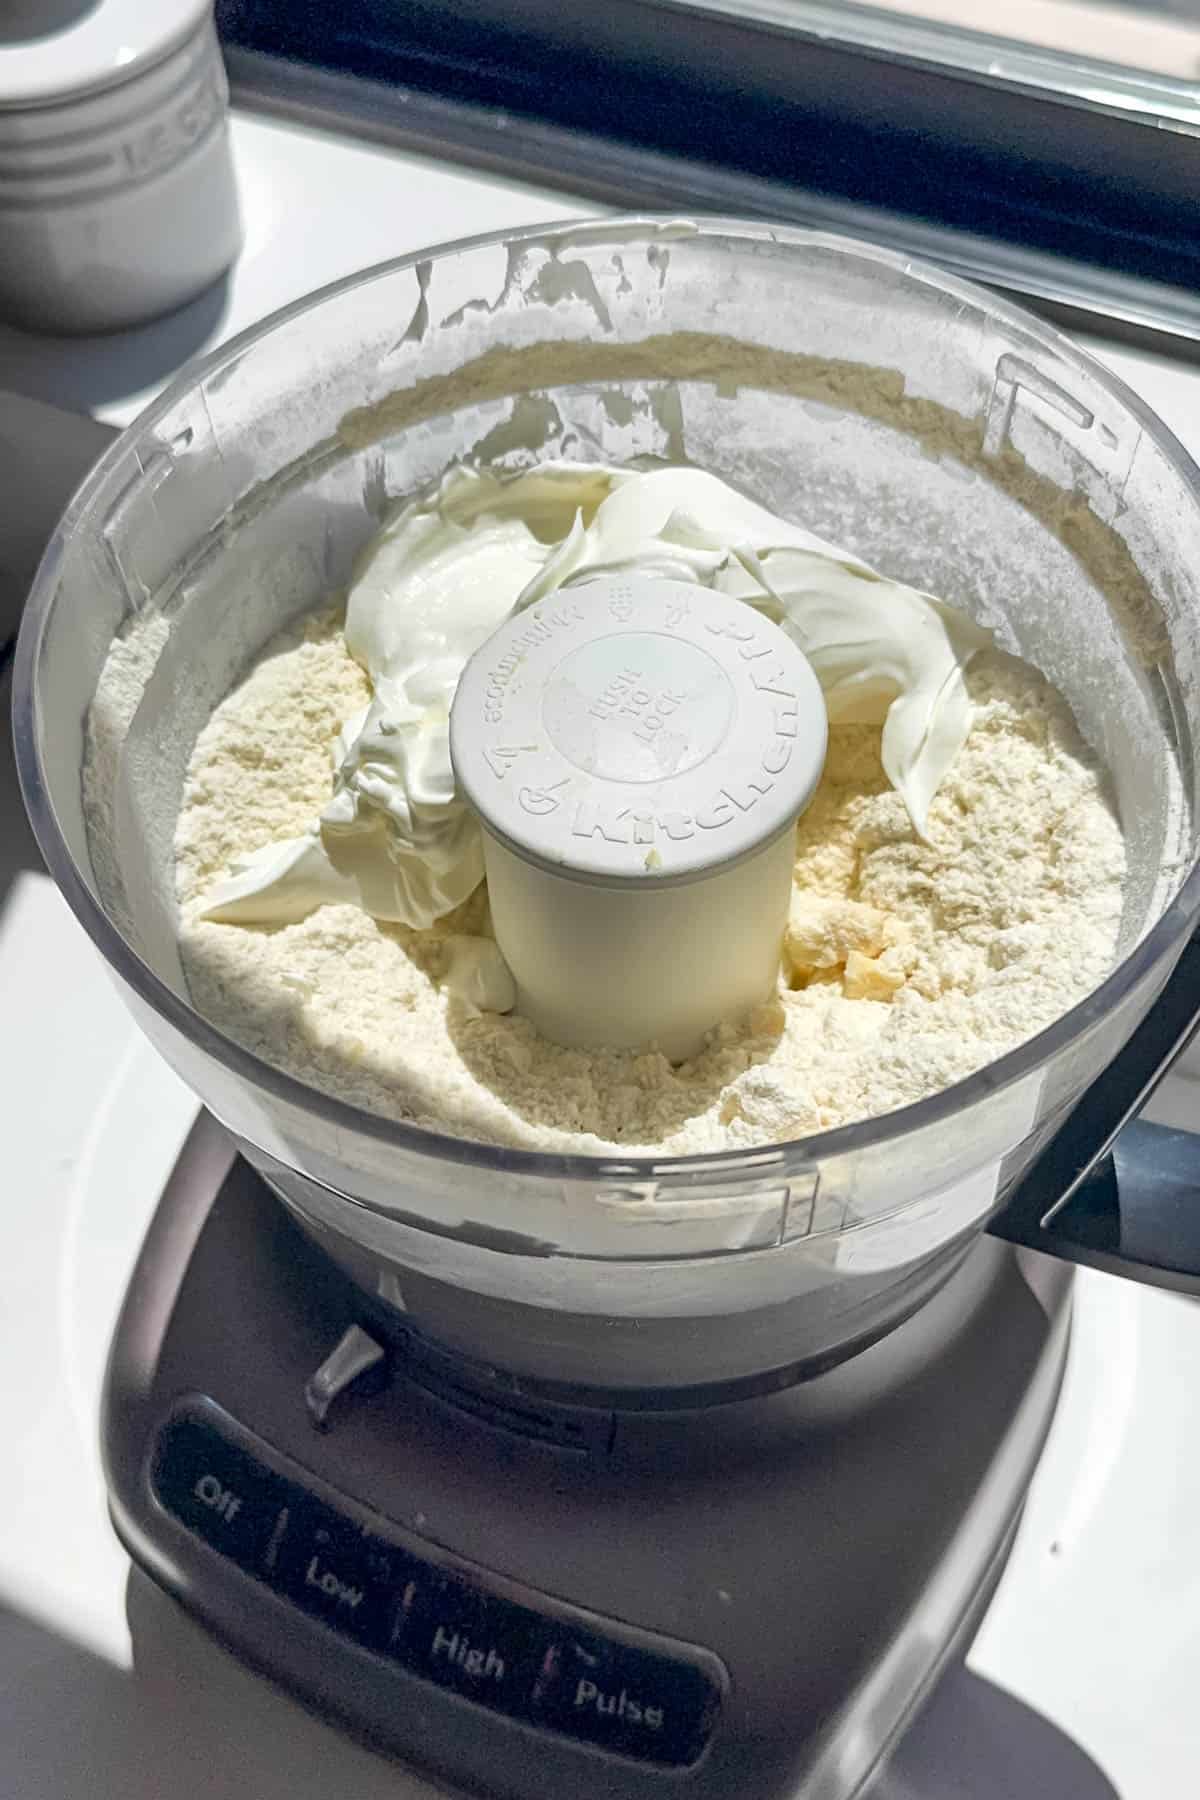
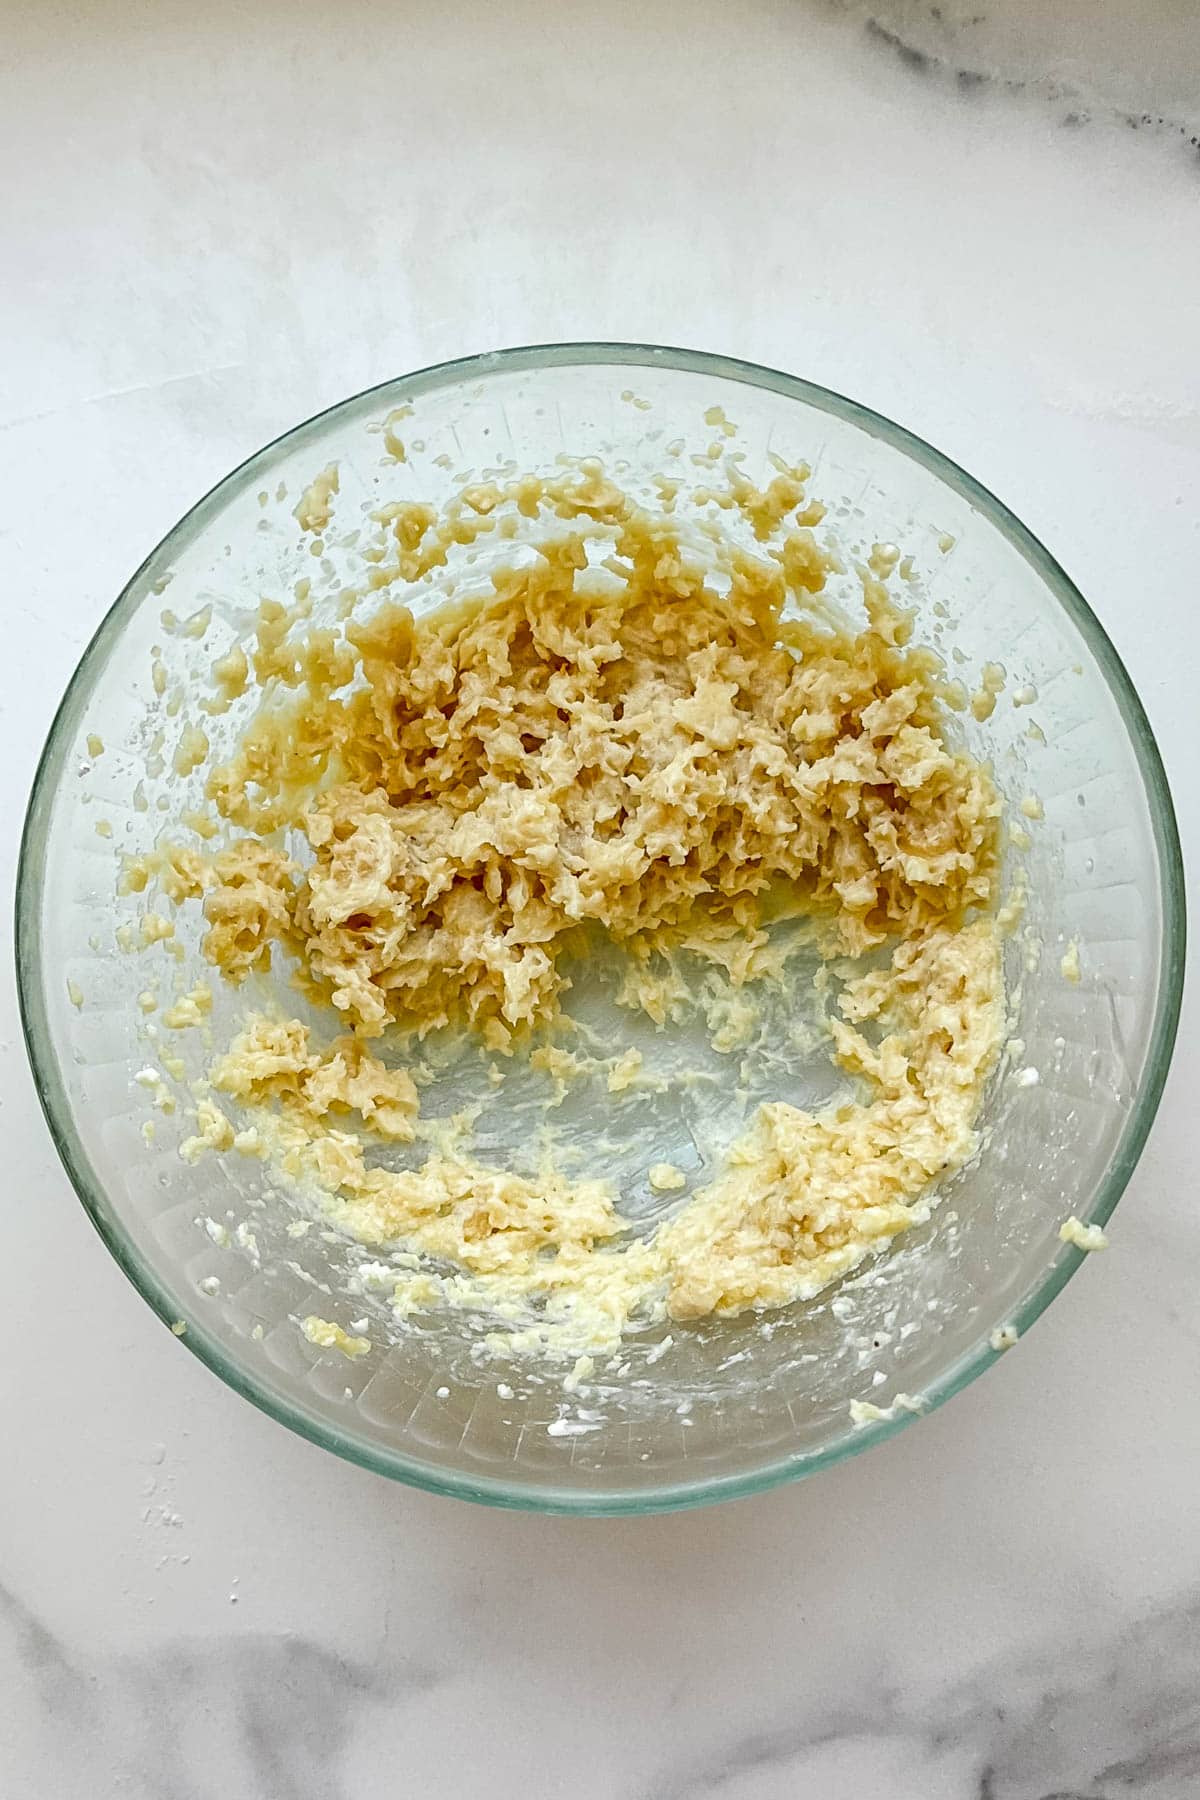
- Make the dough. Combine the flour, sugar, yeast, and salt in a large food processor (affiliate link). Pulse to blend, then add the cold, cubed butter and pulse another 8-10 times to break the cubed butter down until it is about pea-sized.
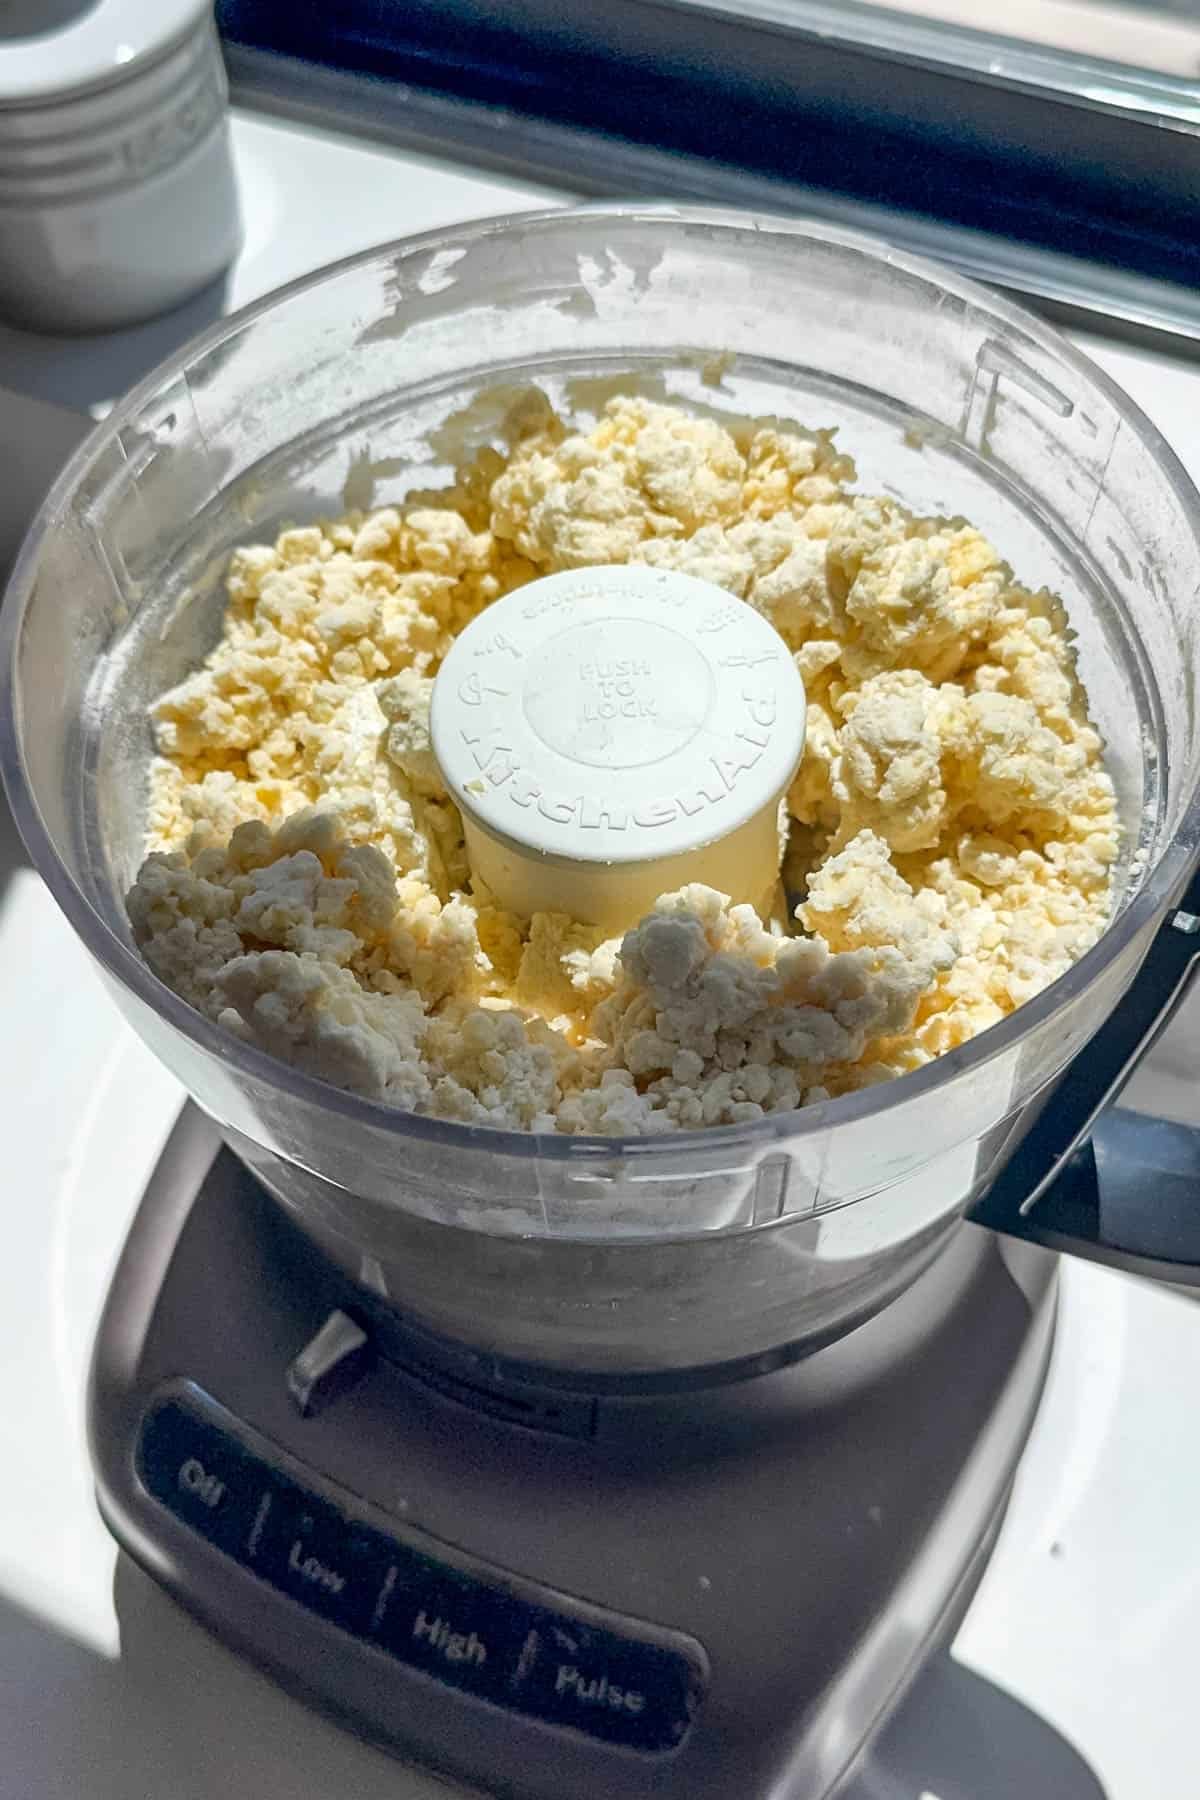
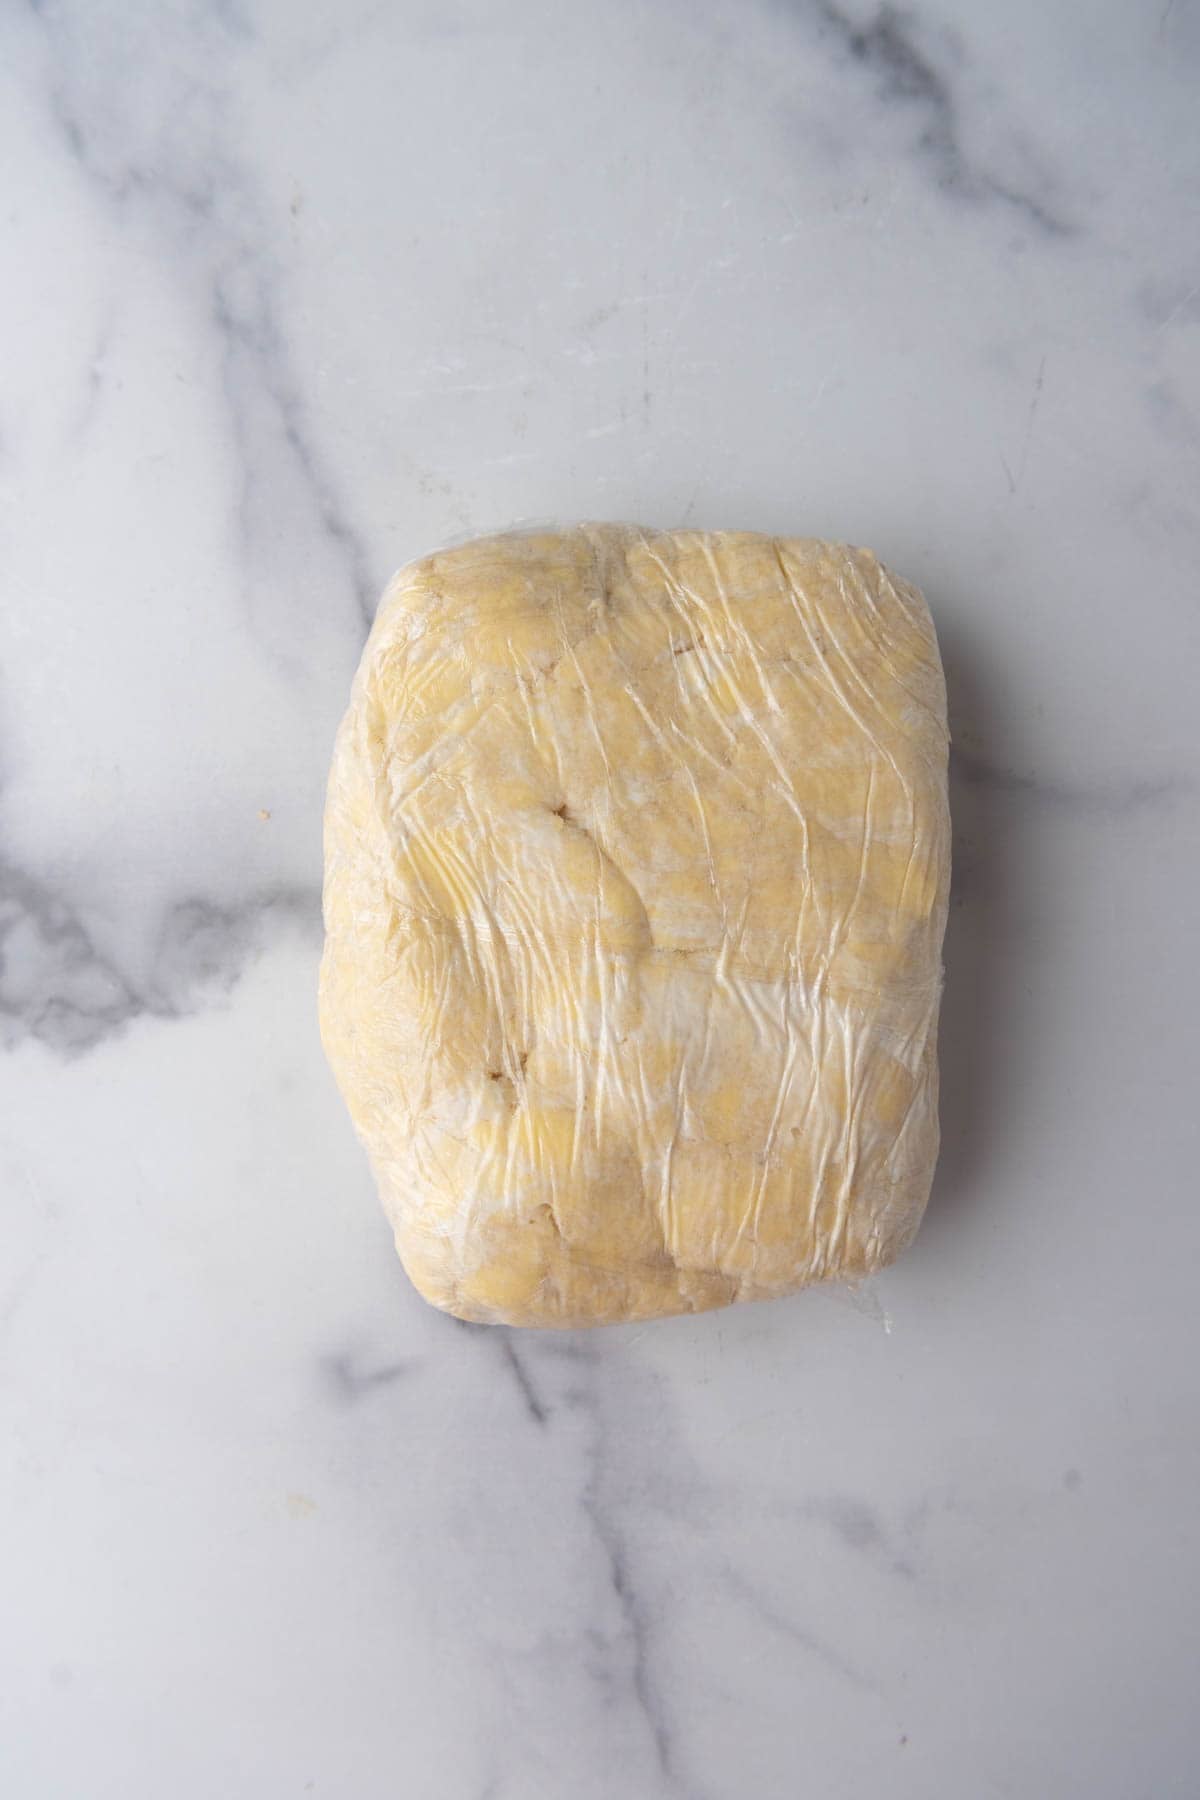
- Pulse and chill. Add the sour cream and pulse until evenly moistened and starting to clump together creating a very sticky dough. Do not overprocess the mixture. It’s okay if there are some small streaks of sour cream or flour. Turn the dough out onto a large piece of plastic wrap and press it together into a disc. Wrap the dough in the plastic wrap and refrigerate for at least 4 hours.
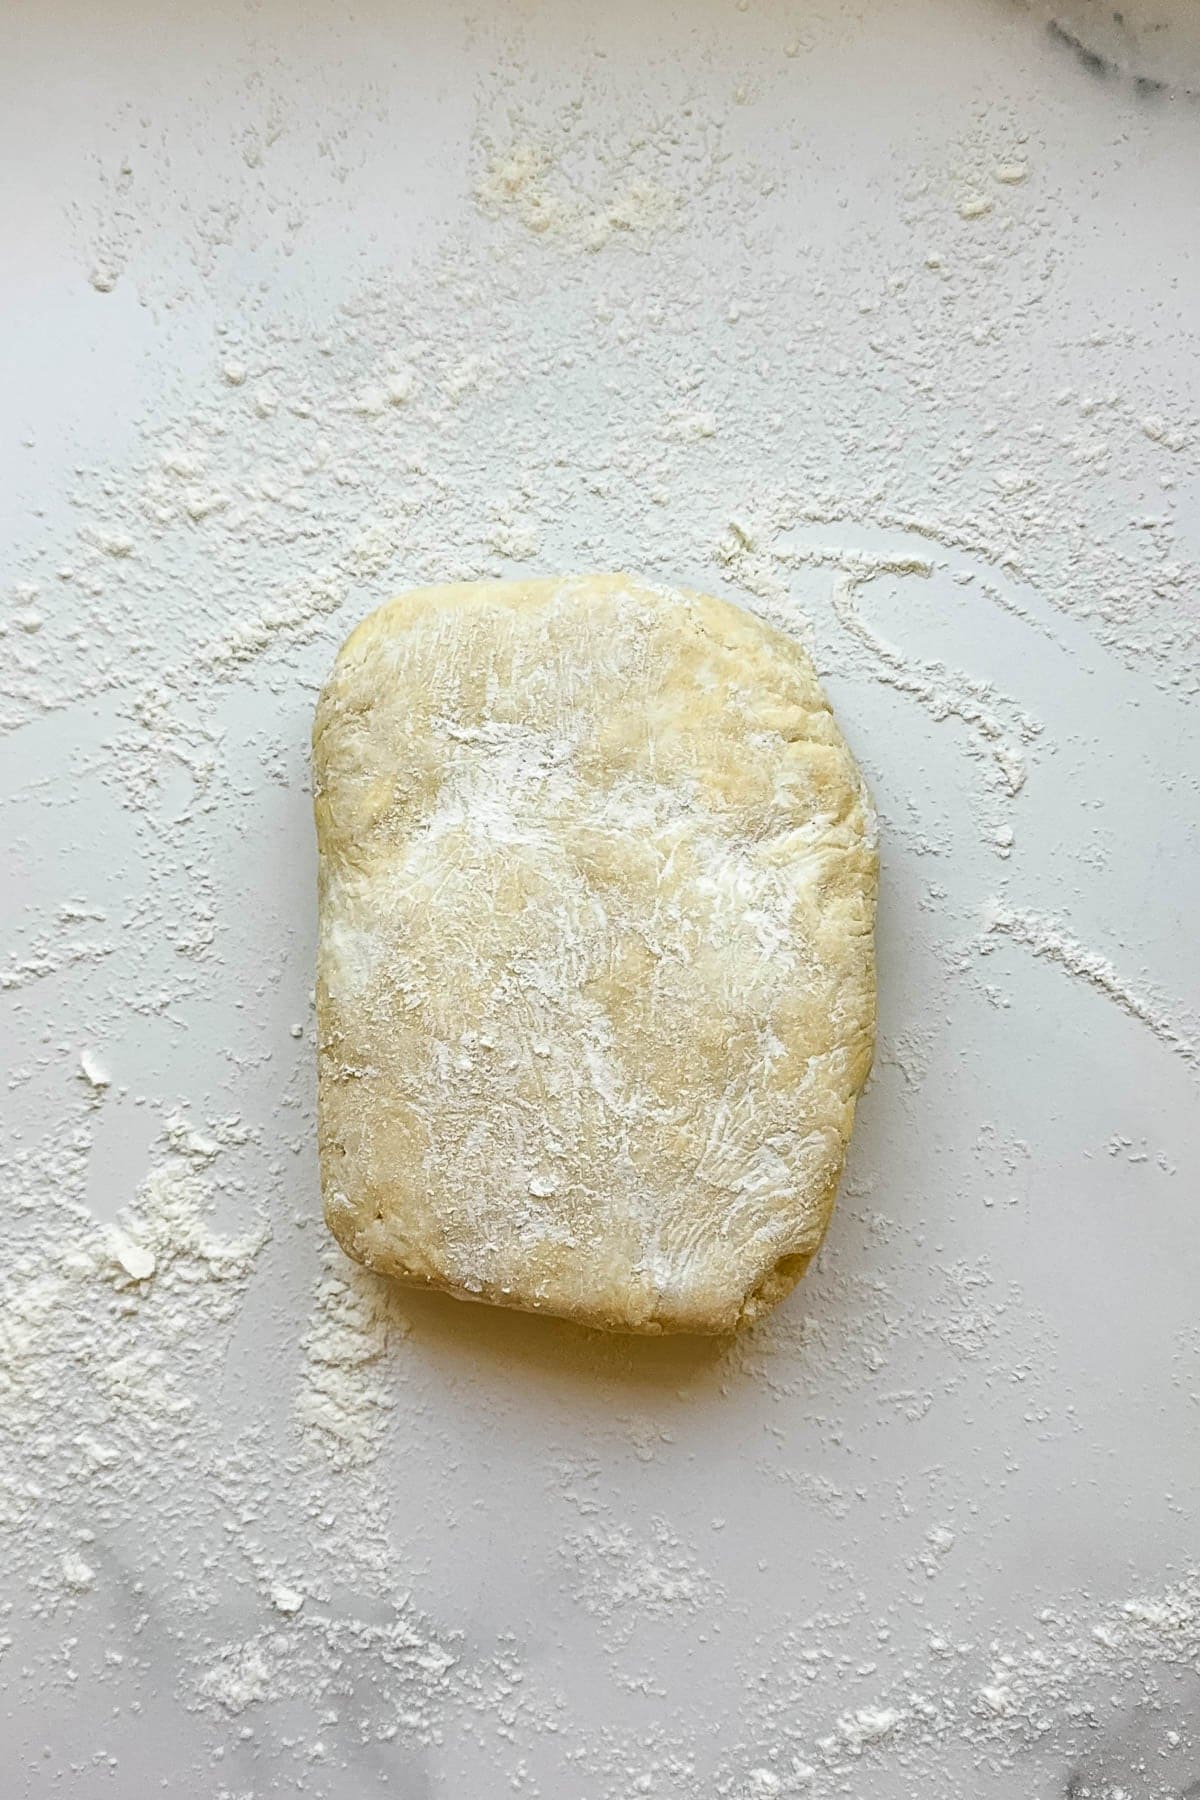
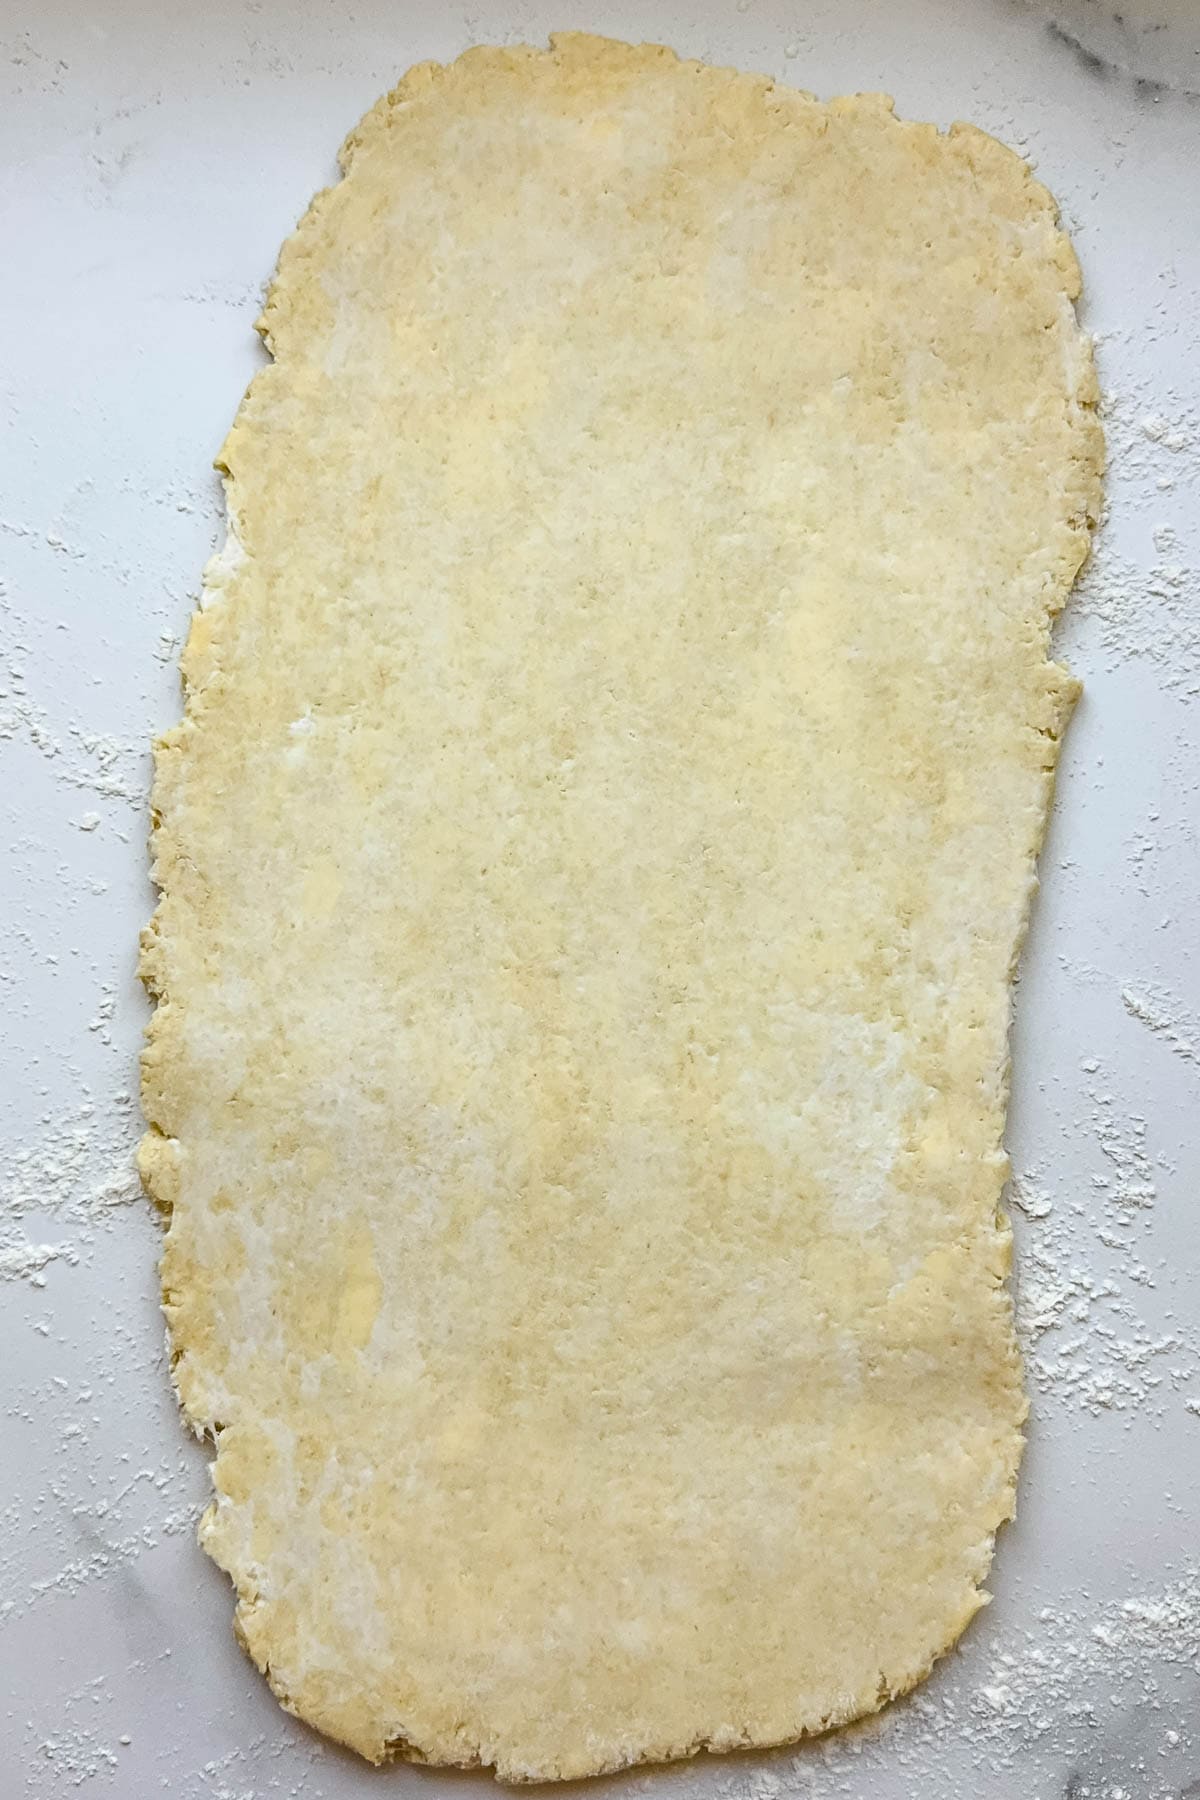
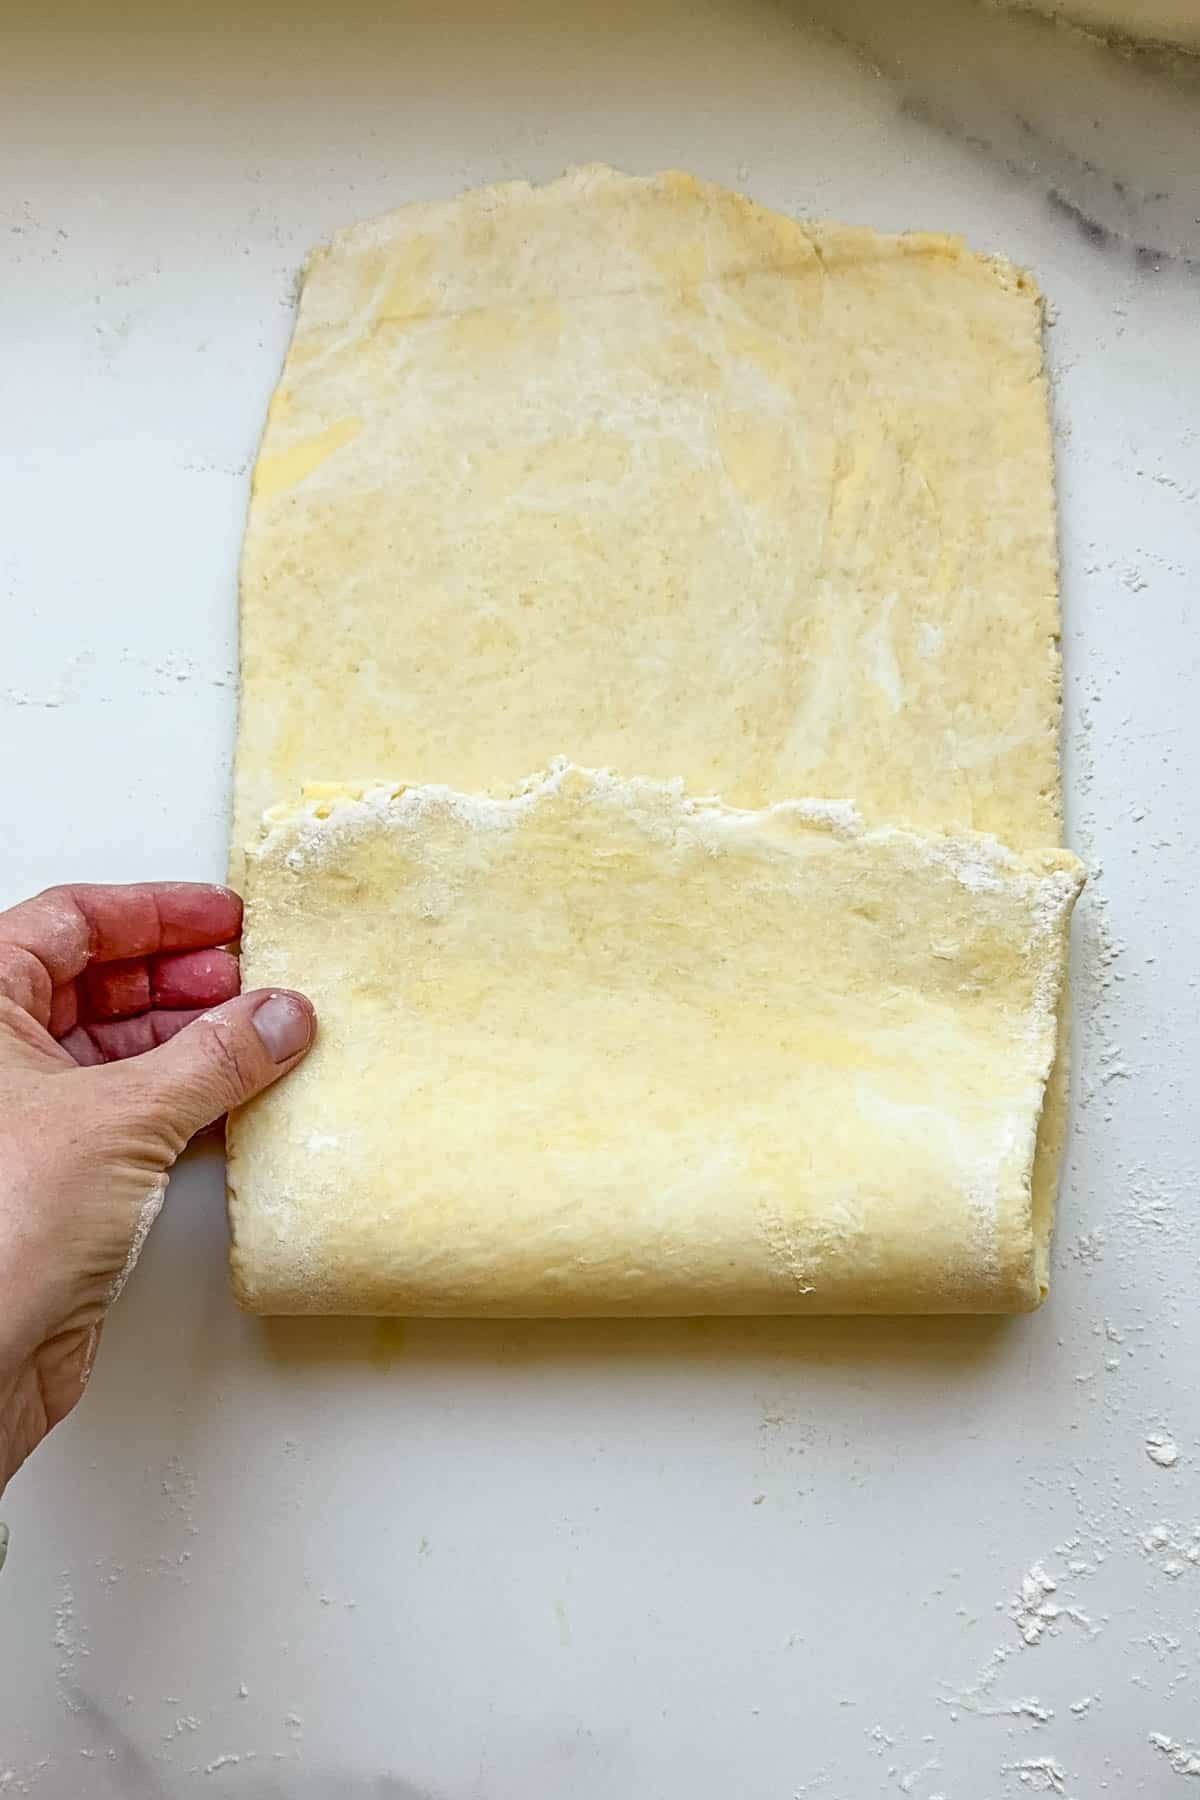
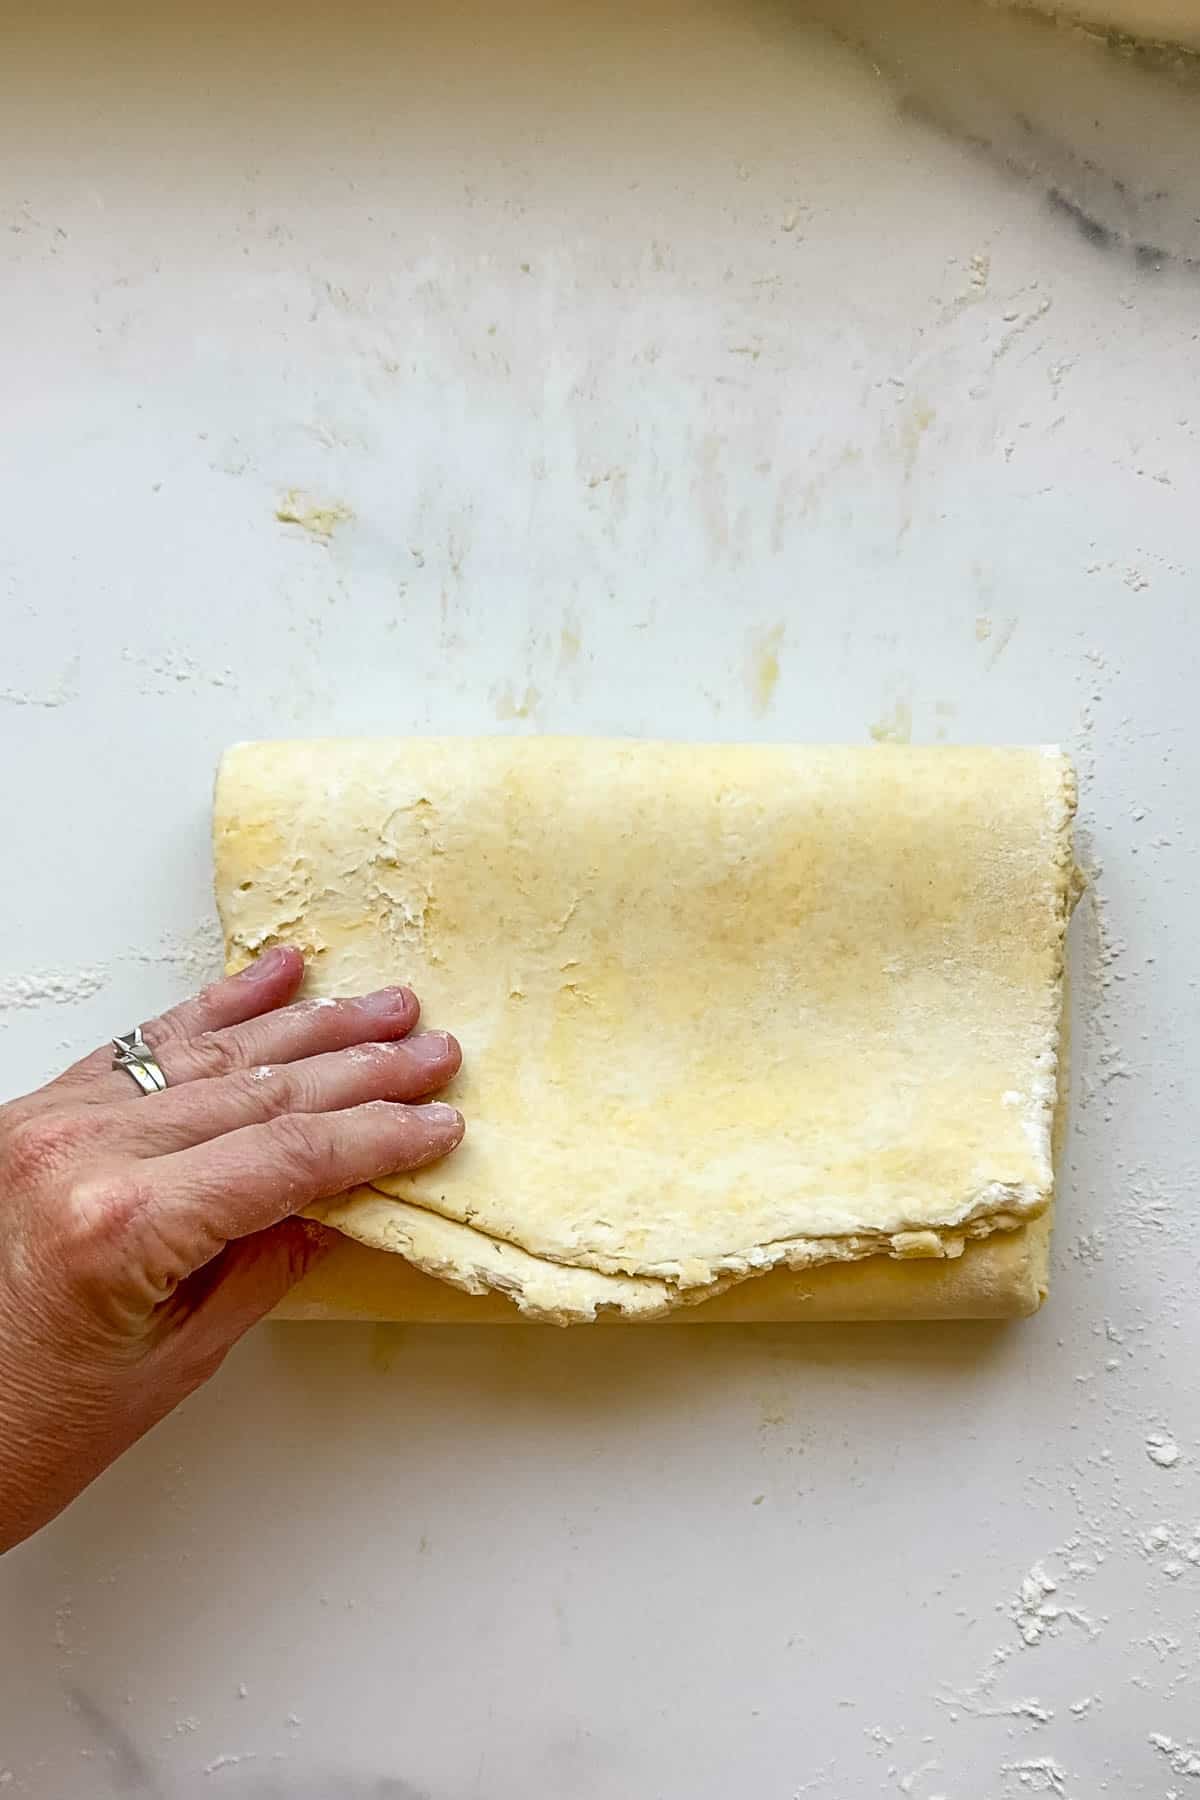
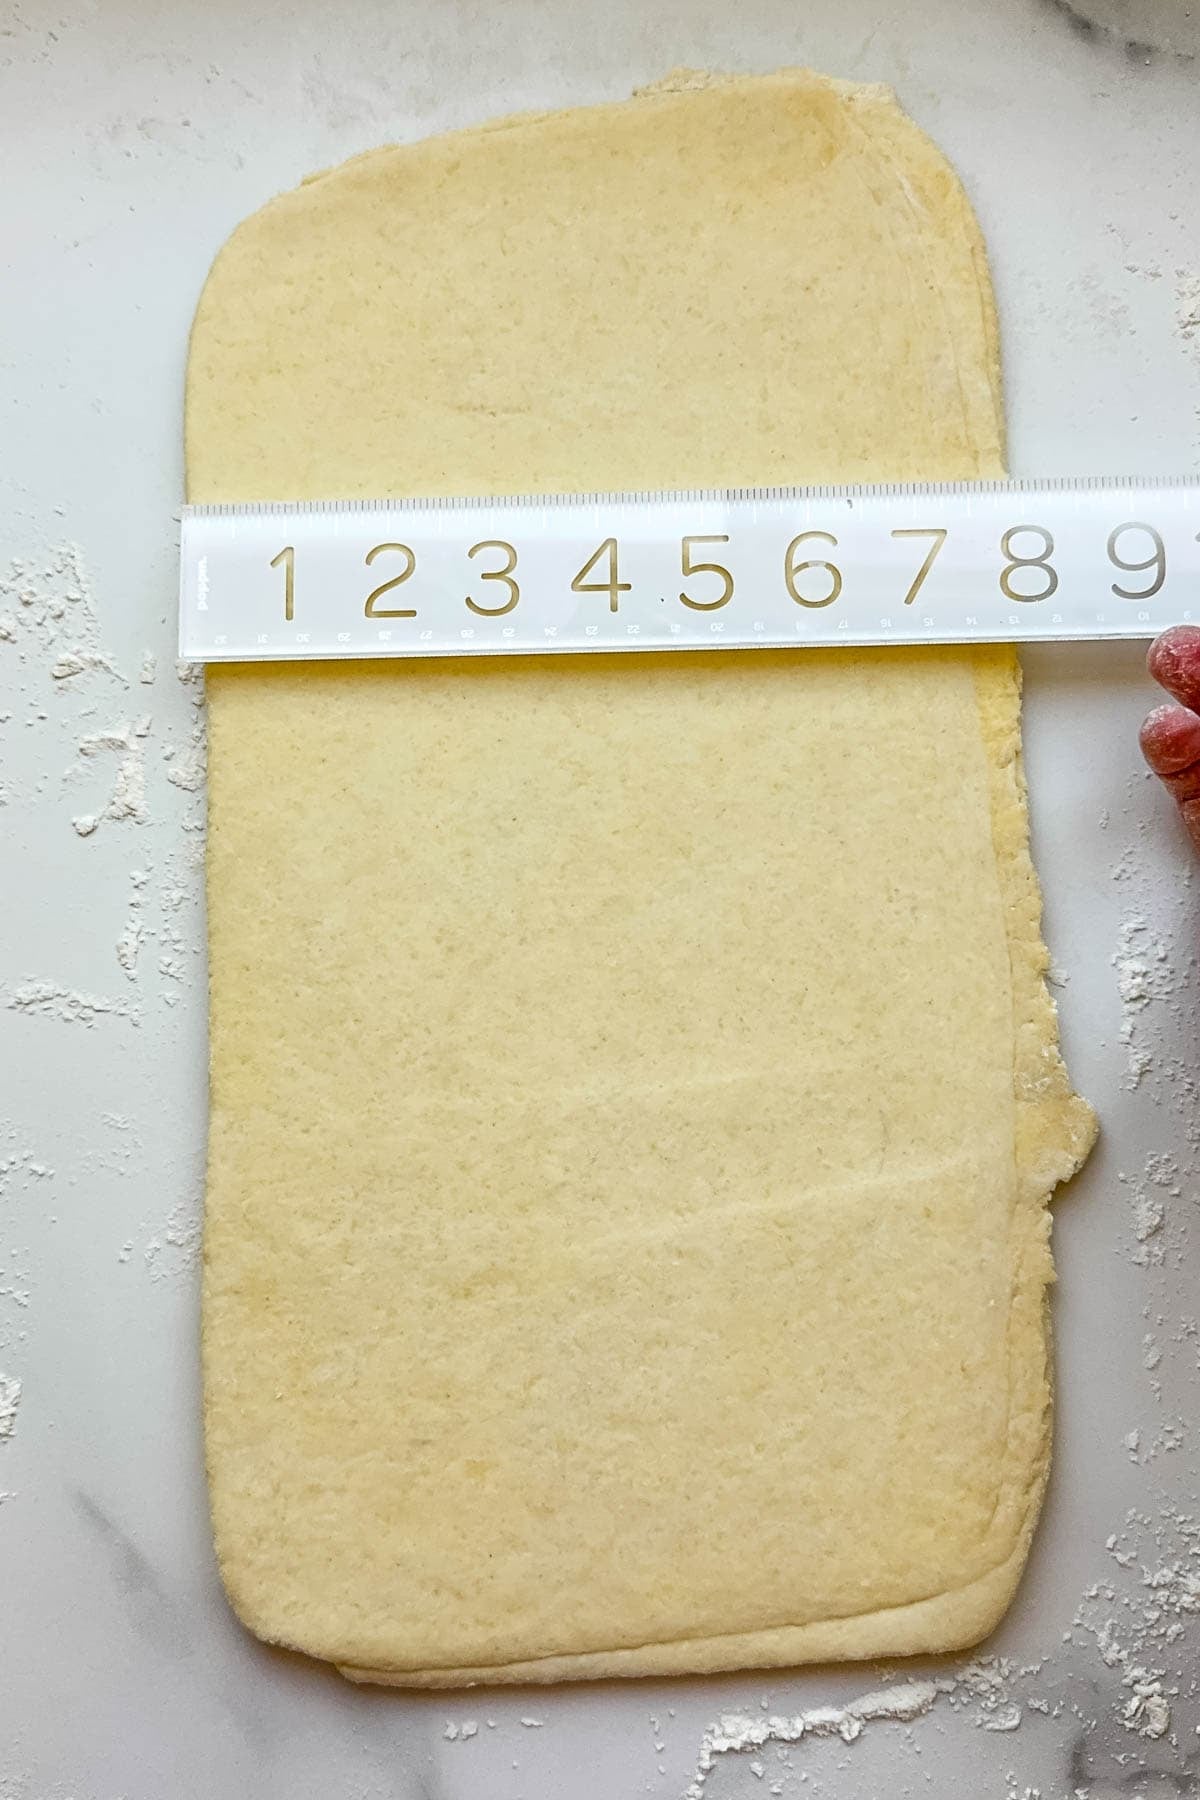
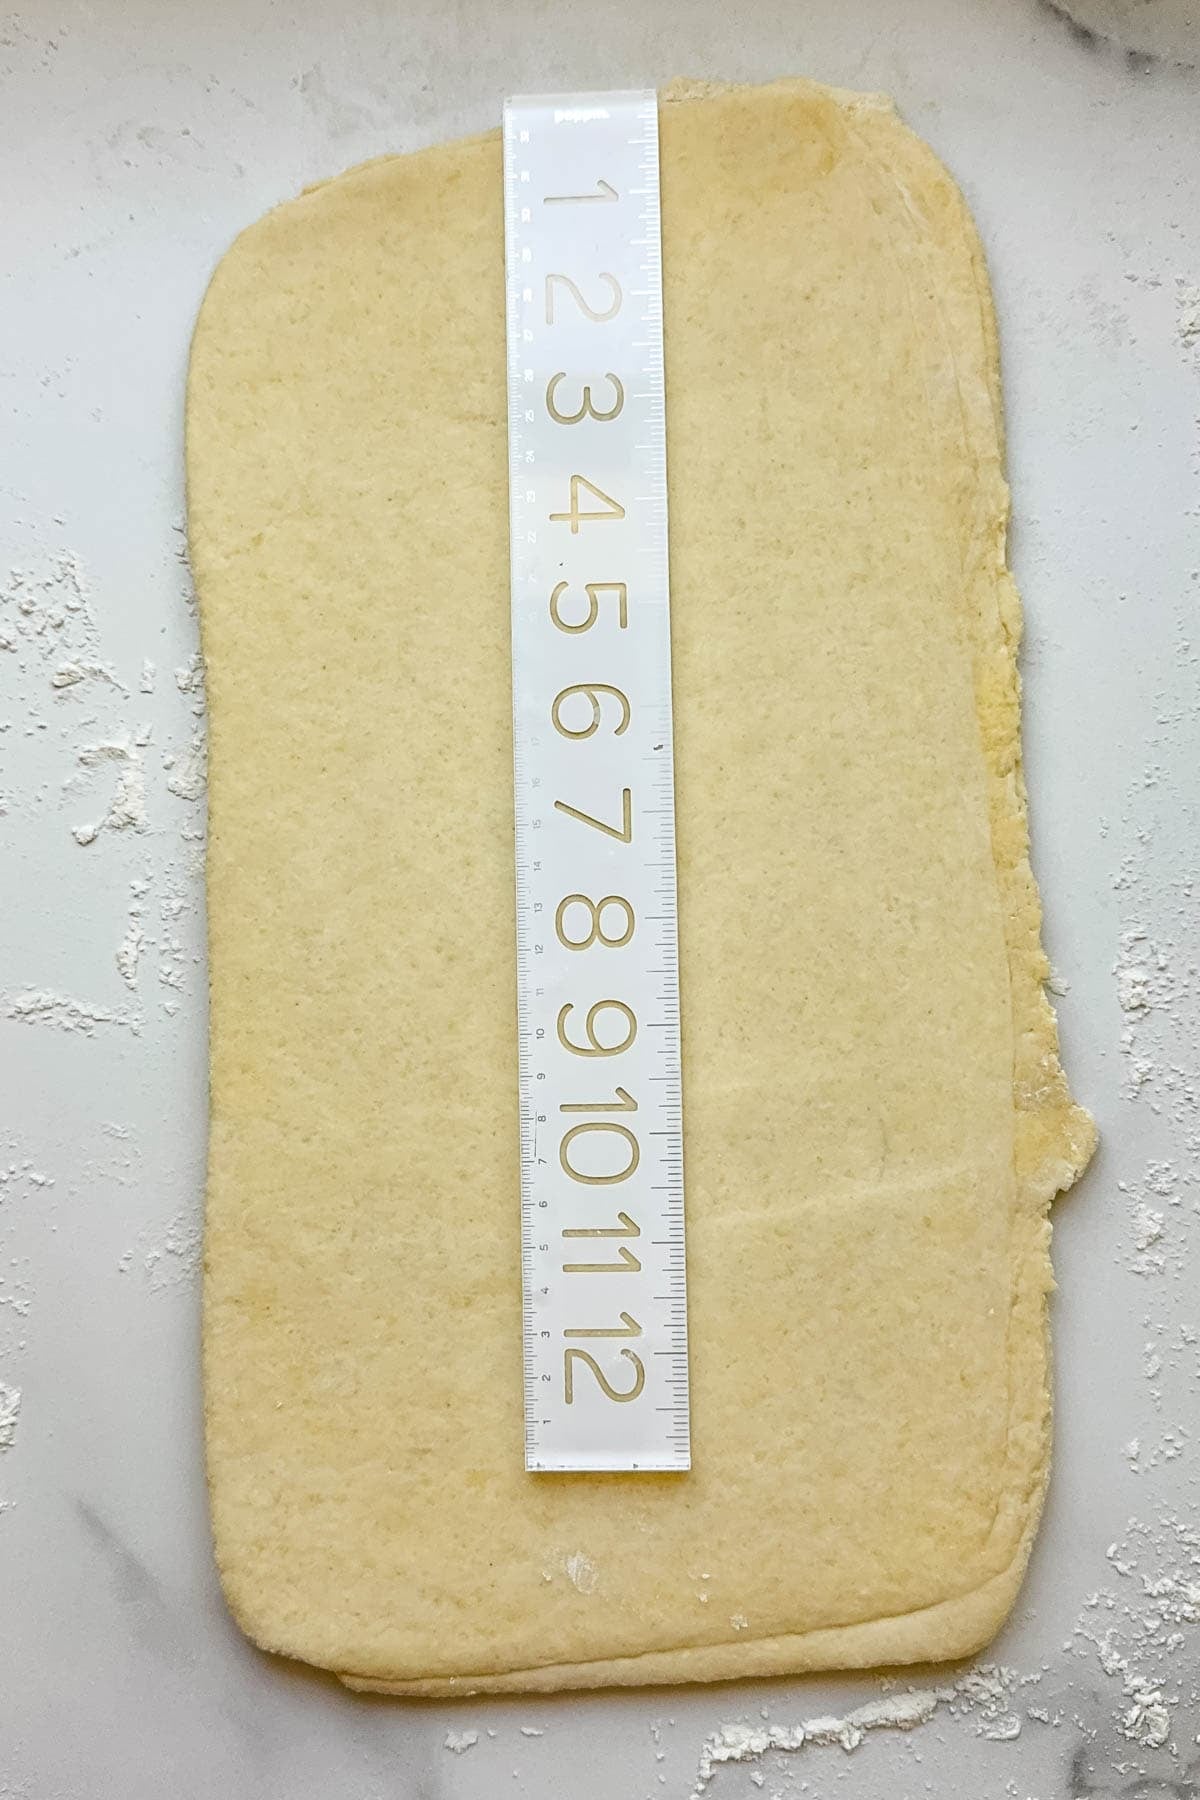
- 1st Set of Folds. Once the dough has thoroughly chilled, roll it out on a lightly floured surface into an 8×15-inch rectangle. I have an inexpensive plastic ruler that I keep in a kitchen drawer for things like this! Fold the bottom short end ⅓ of the way up, then fold the top short end over on top of that, like a letter.
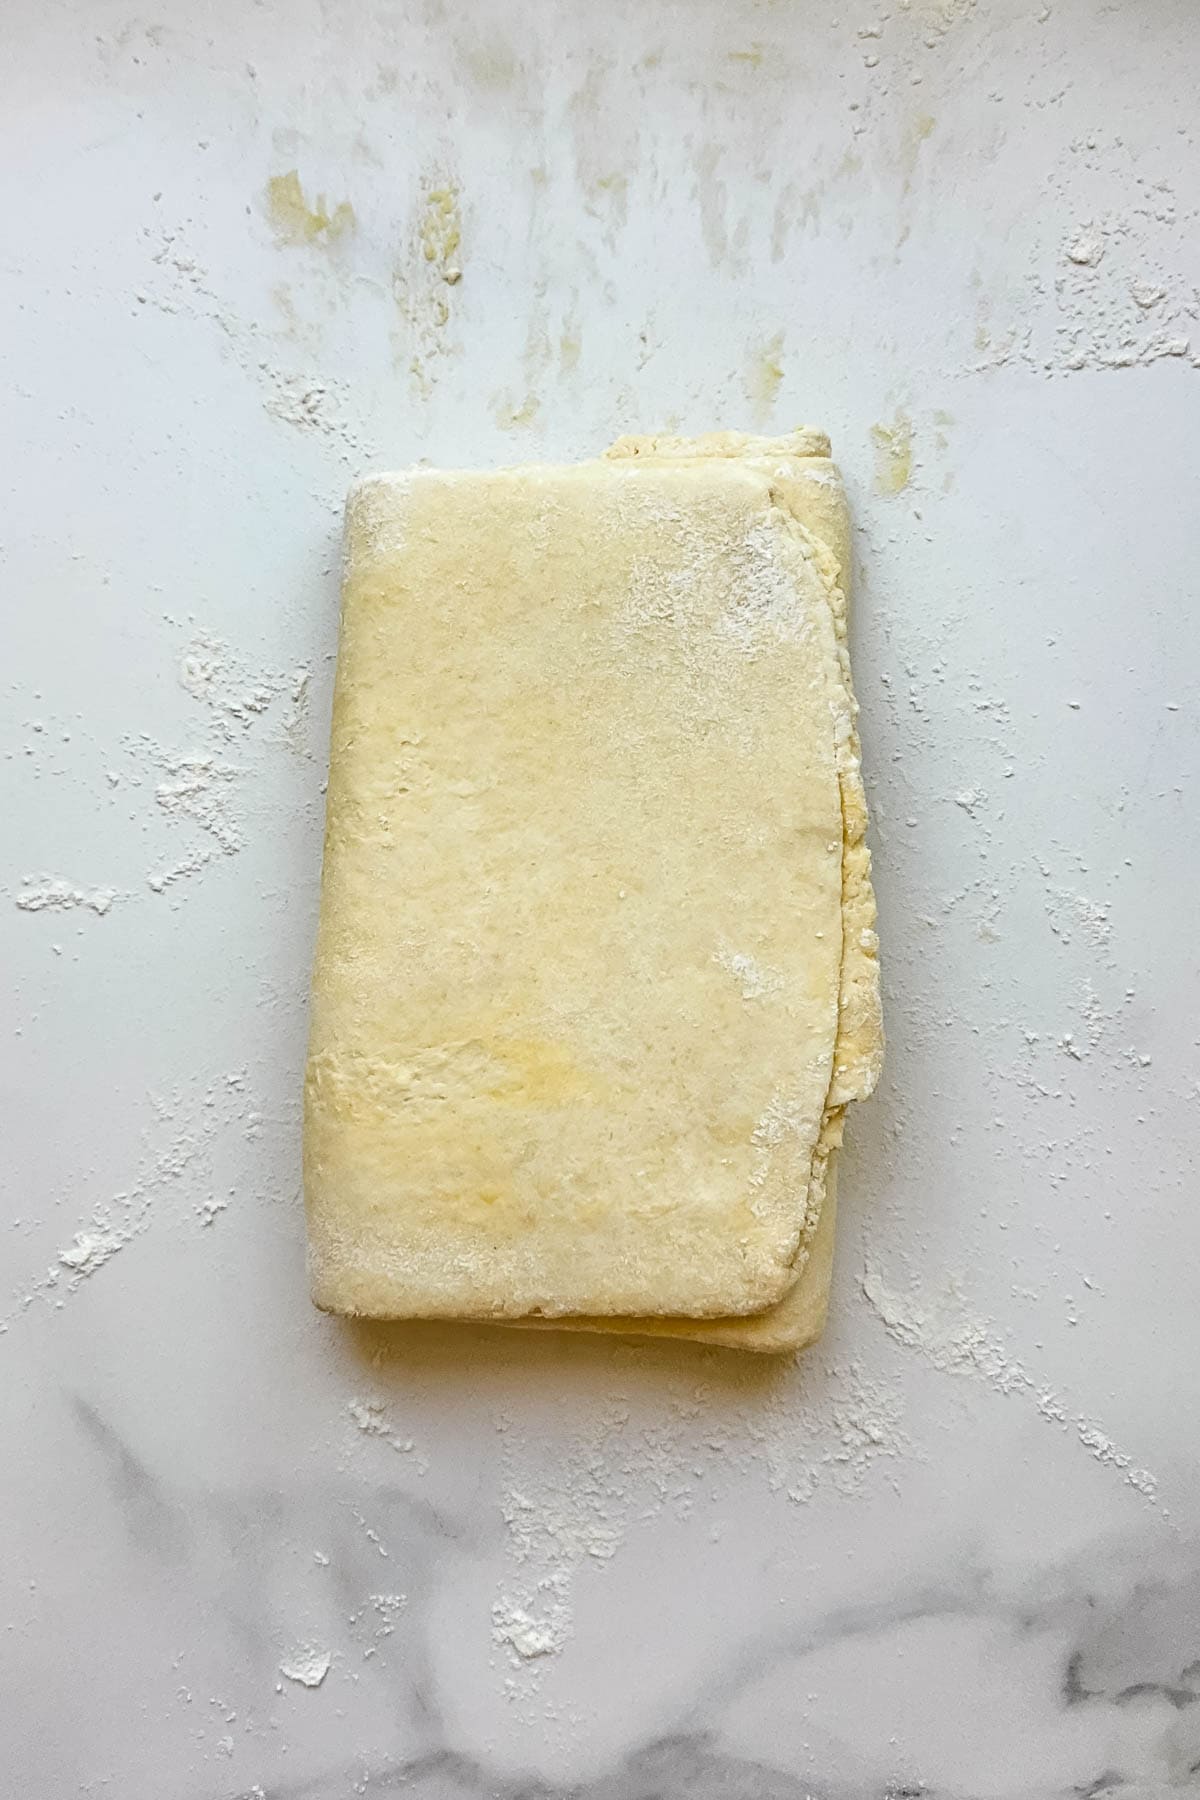
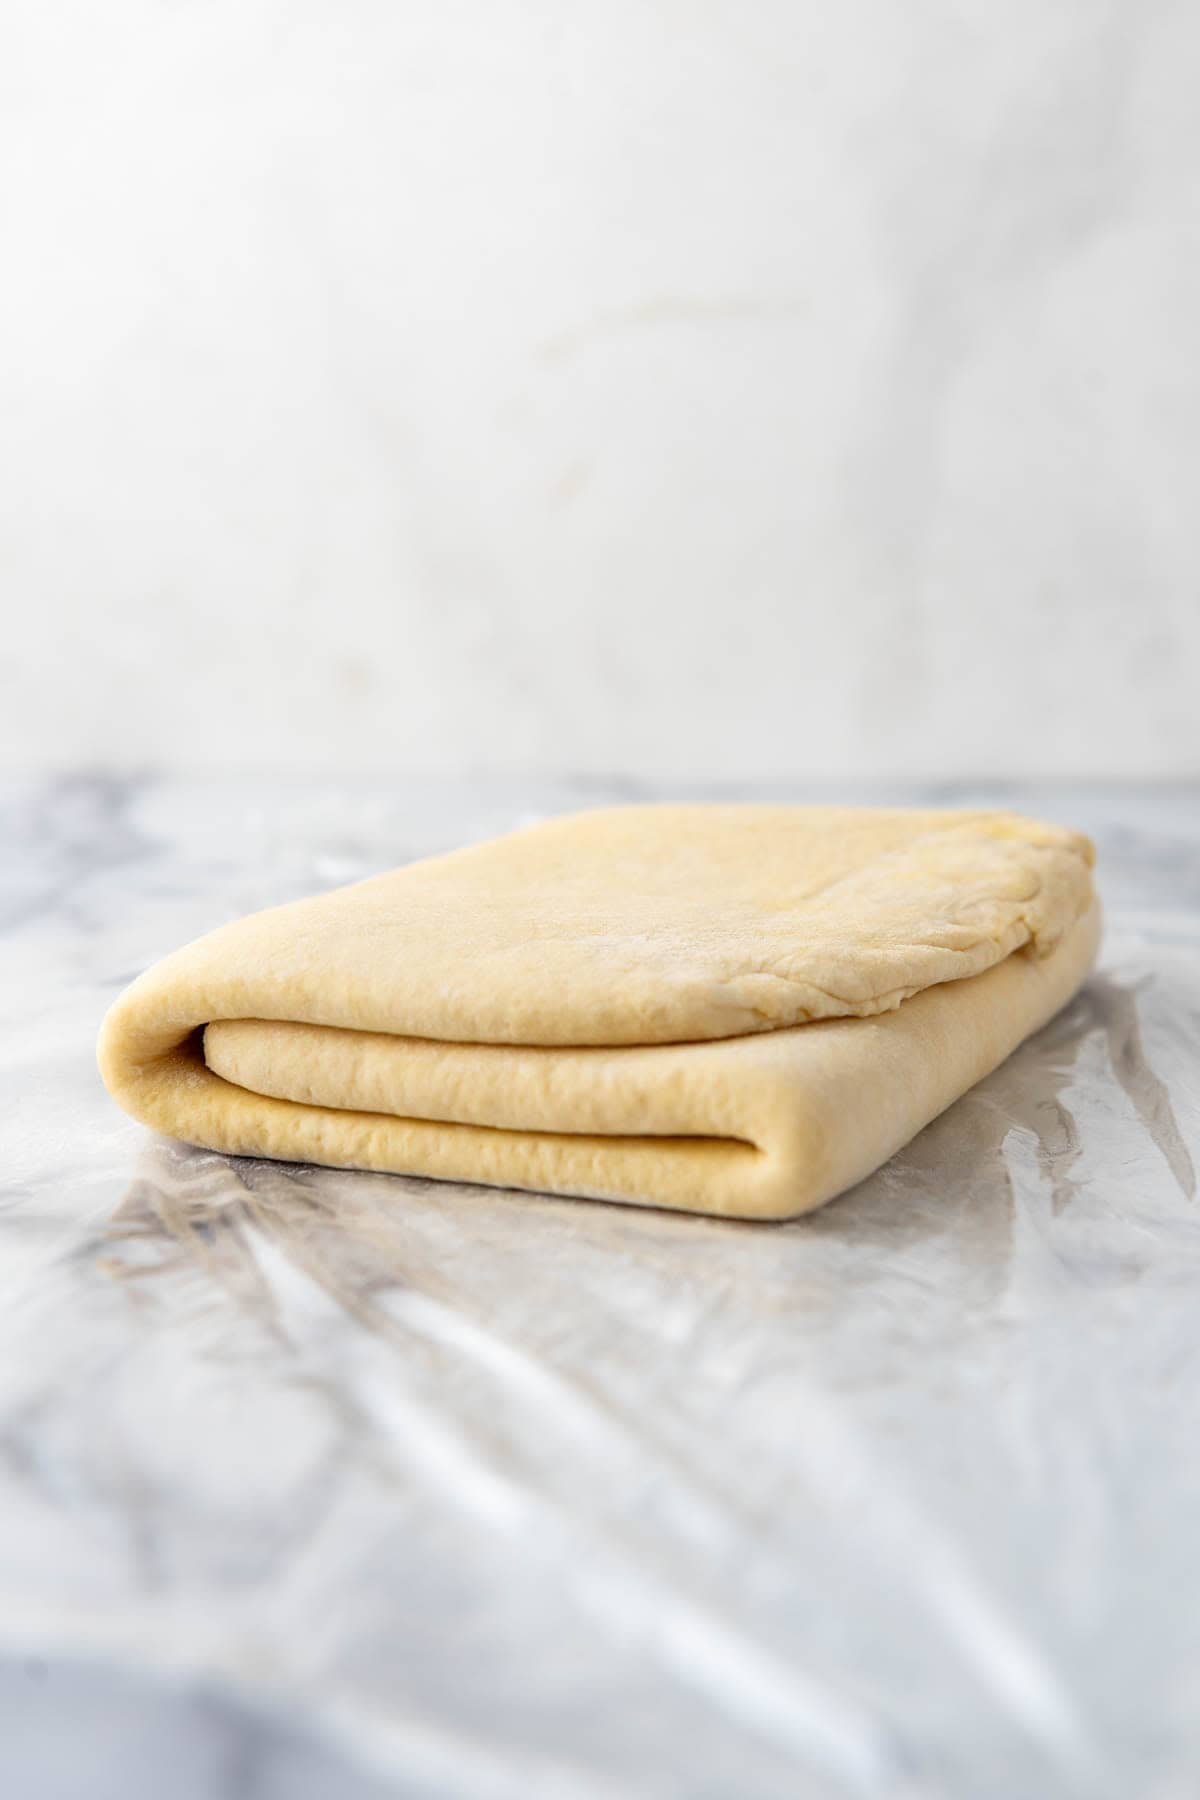
- Rotate and repeat for the second set of folds. Rotate the dough 90 degrees and roll it out again into another 8×15-inch rectangle. Fold the dough into thirds again using the same method, then rewrap the dough in plastic wrap and chill for 20 minutes to keep the butter in the dough cold and to let the gluten relax so it is easy to roll out. You will already to start to notice that the dough is much smoother and uniform looking.
- Repeat for sets 3 & 4. Once the dough has chilled, repeat the previous step of rolling the chilled dough into an 8×15-inch rectangle, folding into thirds (set 3), then turning, rolling, and folding again (set 4). Wrap it up and chill the dough for another 20 minutes.
- Repeat this process one final time for sets 5 & 6. This process is called lamination and it builds up flaky layers of butter and fat throughout the dough. The dough has to chill between sets to relax the gluten and make it easier to roll out and to keep the fat in it cold so it doesn’t melt into the dough until baking. Once the dough has been laminated, it can be wrapped tightly in plastic wrap and refrigerated for up to 3 days or frozen for up to 3 months. If freezing, thaw the dough in the fridge overnight before using.
- Make the filling. To make the almond filling, break up the almond paste into chunks, then beat the almond paste, butter, powdered sugar, egg white, salt, and lemon juice in a large bowl with an electric mixer until combined mostly combined. Set aside.
- Fill. Line two baking sheets with parchment paper or silicon baking mats. Divide the chilled dough in half. This recipe makes 2 kringle. Roll out one half of the dough on a lightly floured surface into a long 6×24-inch rectangle. Spread ½ of the almond filling (about ½ cup) down the center of the dough in a long line. Fold one of the long sides over the filling, about ⅓ of the way across. Brush the other exposed side of the dough with the beaten egg white, then fold this over the dough and almond filling. Pinch to seal the seams.
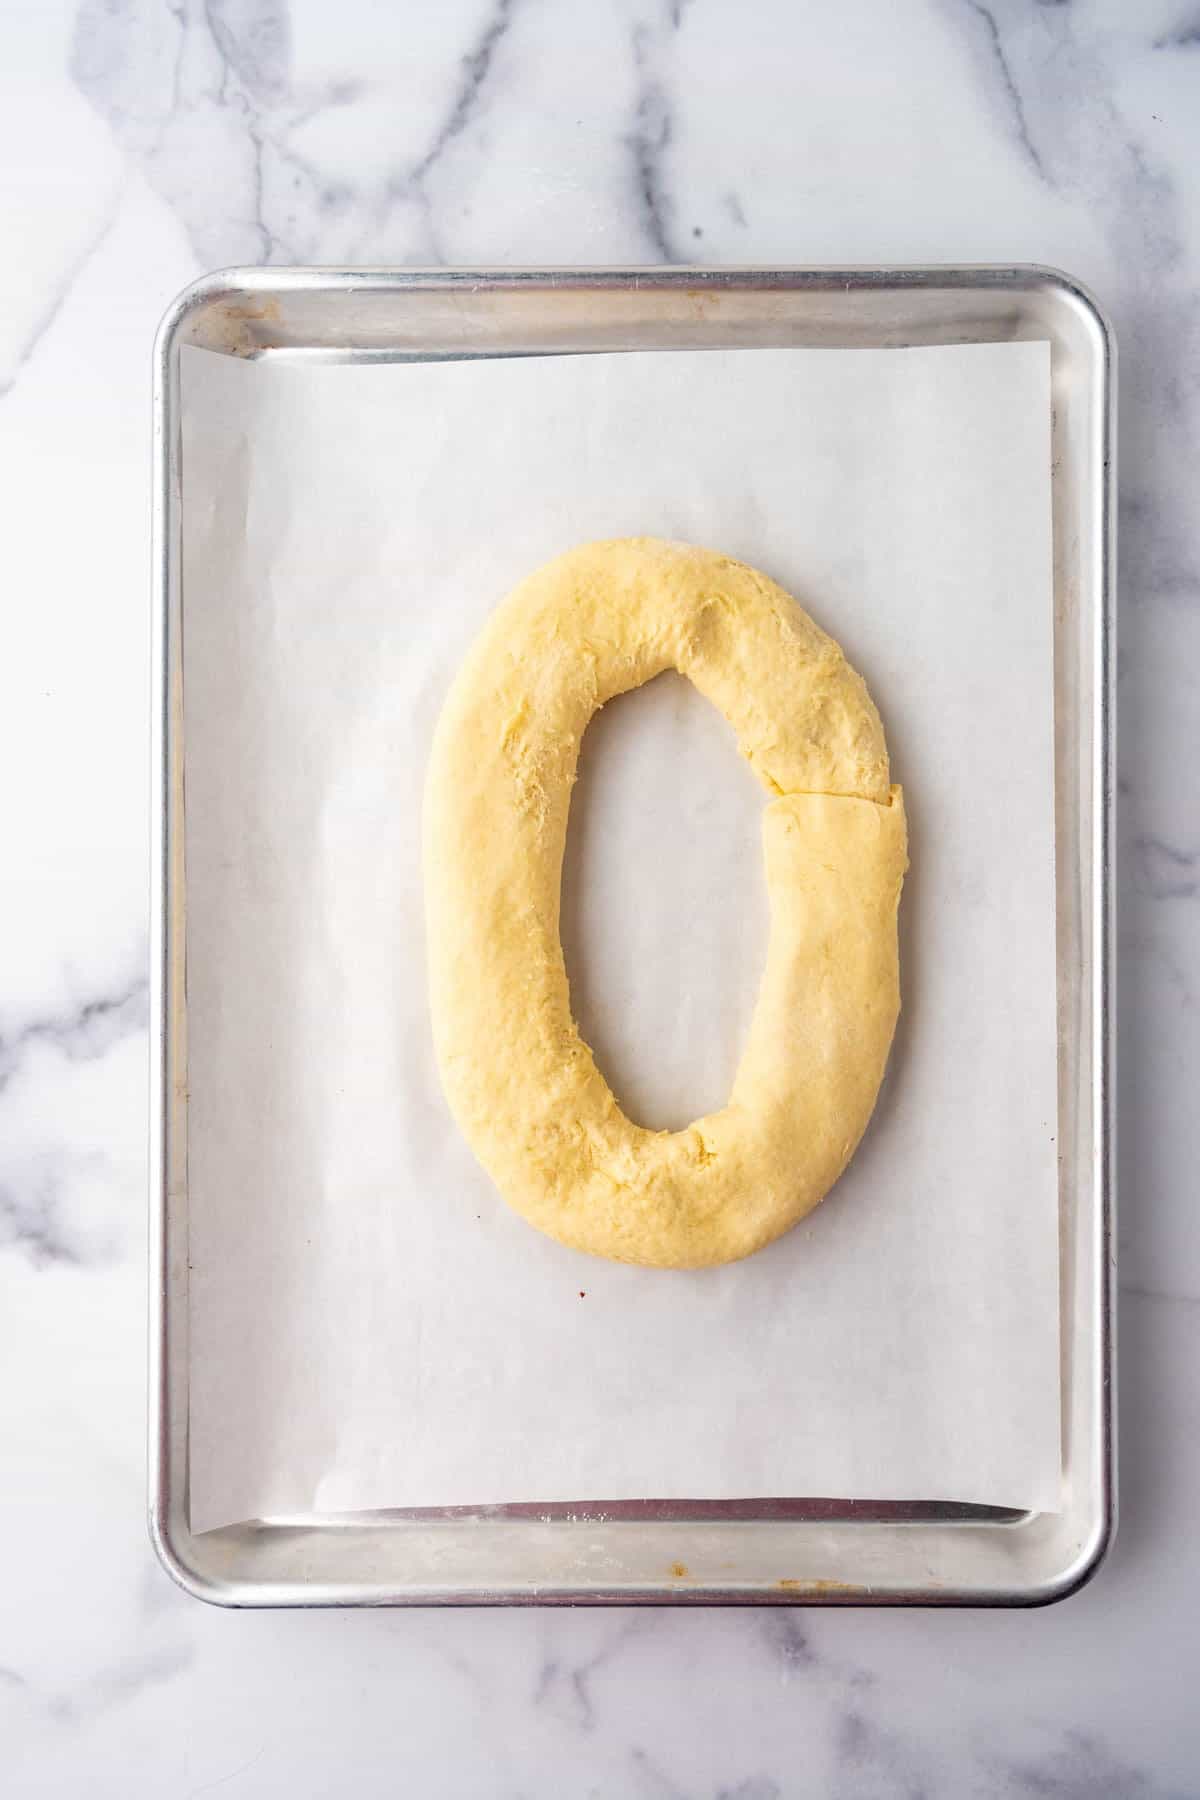
- Shape. Gently shape the dough into an oval-shape like a race track, tucking one end into the other end. You can use a little of the egg white to help seal the oval shut. Carefully transfer the oval to the prepared sheet pan, flipping it over so the seam side is down. Repeat with the other half of the dough and filling ingredients.

- Rise. Cover the kringle loosely with plastic wrap or a clean dishcloth. Let rise for 30-45 minutes until slightly puffy. While it is rising, preheat the oven to 375℉ (191℃).
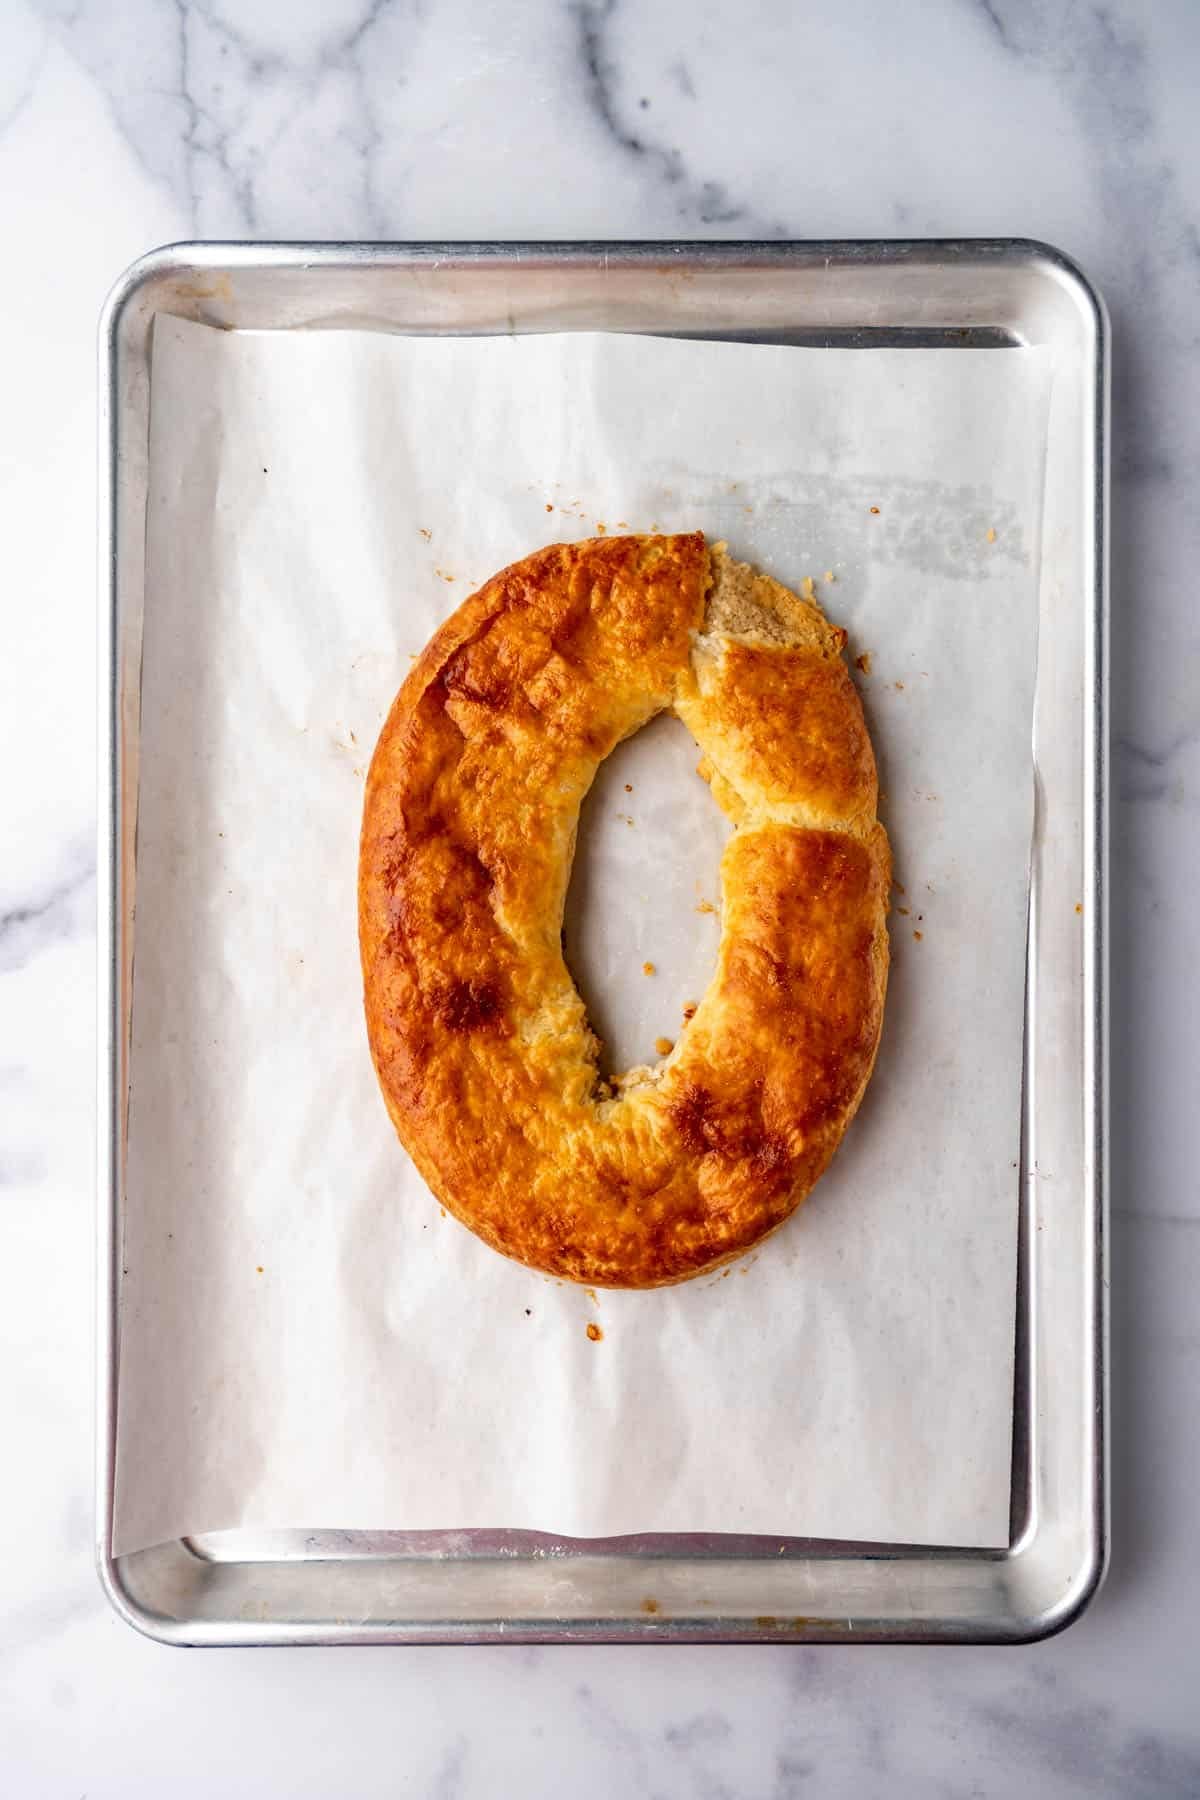
- Bake. Brush each kringle with the remaining egg white, then bake for for 25-28 minutes until golden brown, rotating the baking sheets halfway through. As soon as the kringle pastries are removed from the oven, stack the pans on top of each other and press down slightly to remove air pockets between the filling and the pastry. Do this for both pastries while they are still hot, then let the kringle cool completely before icing.
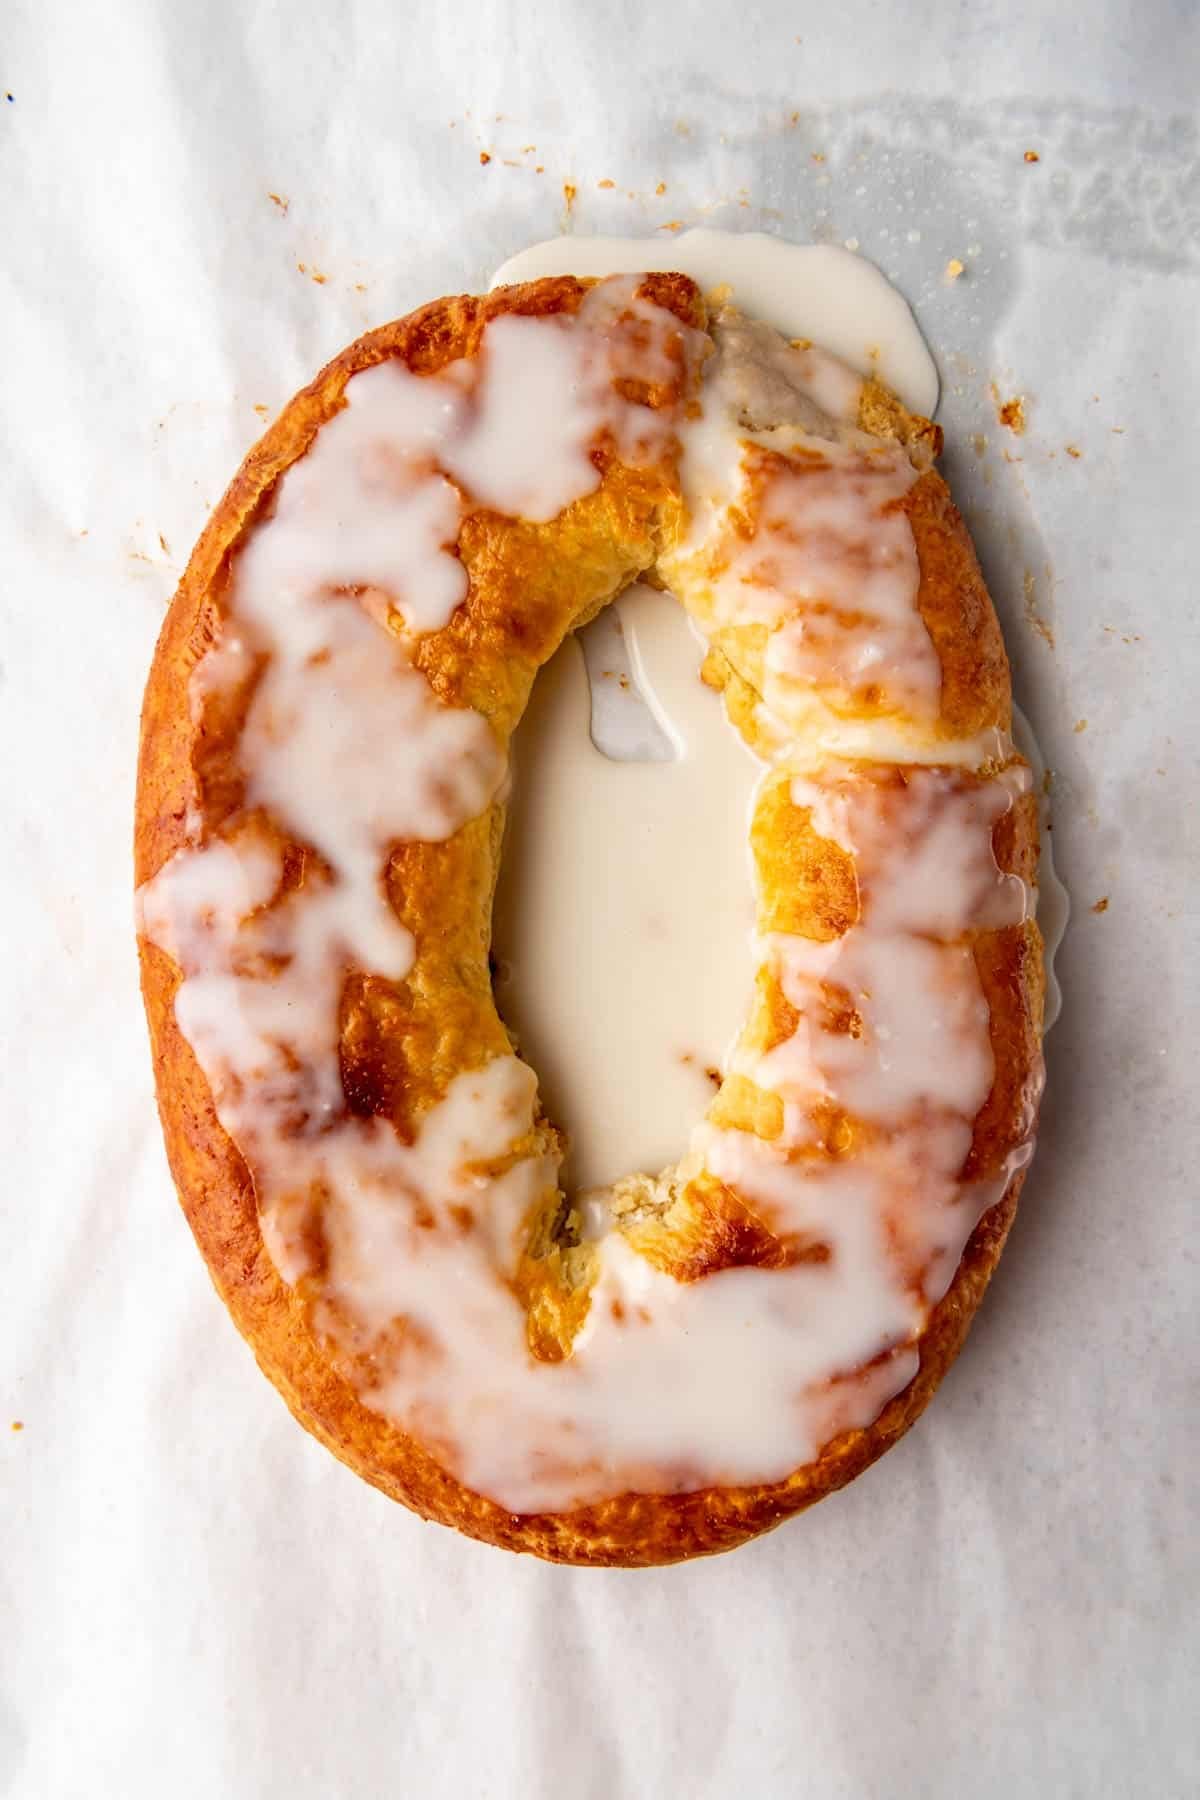
- Glaze. Make the glaze by whisking the powdered sugar, vanilla, lemon juice, salt, and water in a small bowl until smooth. Drizzle or spread the icing over the cooled kringle pastries, then let sit until the icing has dried before slicing and serving.
Recipe FAQ’s
Not at all. While the term “laminated dough” sounds intimidating, it simply means folding layers of butter into the dough. This recipe is much easier than making croissants and is very beginner-friendly.
The chilling periods keep the butter cold and allow the gluten to relax, which creates flakier layers and makes the dough easier to roll.
This helps eliminate air pockets between the pastry and filling while the kringle is still hot, creating a more uniform finished pastry.
Yes. You can cut the butter into the flour mixture using a pastry cutter or your fingertips until the butter pieces are pea-sized.
Storage Instructions
- Kringle is best eaten fresh, the day it is made. But you can store leftover kringle tightly covered at room temperature for up to 2 days unless you are using a cream cheese filling. For longer storage, refrigerate for up to 5 days. Bring slices to room temperature before serving for the best flavor and texture.
- Freezing: Baked kringle freezes great! Allow it to cool completely, then wrap tightly in plastic wrap followed by aluminum foil. Freeze for up to 3 months. Thaw overnight in the refrigerator or for several hours at room temperature before serving. You can also freeze individual slices for easy grab-and-go treats.
Make-Ahead Tips
One of the best things about this recipe is how well it fits into a busy schedule.
- The laminated dough can be refrigerated for up to 3 days before shaping.
- The dough can be frozen for up to 3 months after lamination.
- The almond filling can be prepared up to 2 days ahead and stored in the refrigerator.
- Fully assembled kringle can be refrigerated overnight before baking. Let it sit at room temperature for about 30 minutes before baking the next day.
This flexibility makes homemade kringle an excellent choice for holidays, brunch gatherings, and special occasions when you want an impressive bakery-style pastry without doing all the work at the last minute.
Tips for Success
- Keep Everything Cold. Cold butter is essential for creating flaky layers. If the dough starts feeling soft or sticky while you’re working, simply return it to the refrigerator for 15-20 minutes before continuing.
- Chill Between Folds. Those resting periods aren’t just for keeping the butter cold. Chilling allows the gluten to relax, making the dough easier to roll out without shrinking back.
- Use a Ruler. For consistent results, measure your dough rectangles with a ruler. Uniform dimensions help create even layers throughout the pastry.
- Work on a Lightly Floured Surface. A little flour prevents sticking without drying out the dough. Add more as needed, but avoid using too much.
- Keep a Bench Scraper Nearby. A bench scraper makes it easy to lift, rotate, and move the dough without tearing those precious layers.
- Weigh Your Ingredients. For the most accurate and consistent results, use a kitchen scale, especially for the flour. If you have had problems with doughs being too dry or too sticky when rolling them out in the past, having too much or too little flour (or letting the dough get too warm) is usually the culprit.
More Pastry Recipes

Danish Kringle Recipe
Ingredients
Dough
- 1 cup (141g) all-purpose flour
- 1 cup (141g) bread flour
- 3 Tablespoons (40g) granulated sugar
- 2 1/4 teaspoons instant yeast
- 1/2 teaspoon table salt
- 1 cup (227g) cold salted butter cut into 1/2-inch cubes
- 1 cup cold sour cream
- 1 large egg white beaten
Almond Filling
- 3/4 cup (170g) almond paste
- 4 Tablespoons salted butter, softened
- 1/4 cup (30g) powdered sugar
- 1 large egg white
- Pinch of salt
- 1/4 teaspoon fresh-squeezed lemon juice
Icing
- 1 cup (120g) powdered sugar
- 1/2 teaspoon pure vanilla extract
- 1/4 teaspoon fresh-squeezed lemon juice
- Pinch of salt
- 4 teaspoons water

Instructions
Making the dough
- Combine the flour, sugar, yeast, and salt in a large food processor (affiliate link). Pulse to blend, then add the cold, cubed butter and pulse another 8-10 times to break the cubed butter down until it is about pea-sized.1 cup (141g) all-purpose flour, 1 cup (141g) bread flour, 3 Tablespoons (40g) granulated sugar, 2 ¼ teaspoons instant yeast, ½ teaspoon table salt, 1 cup (227g) cold salted butter
- Add the sour cream and pulse until evenly moistened and starting to clump together creating a very sticky dough. Do not overprocess the mixture. It's okay if there are some small streaks of sour cream or flour. Turn the dough out onto a large piece of plastic wrap and press it together into a disc. Wrap the dough in the plastic wrap and refrigerate for at least 4 hours.1 cup cold sour cream
Laminate the dough
- Once the dough has thoroughly chilled, roll it out on a lightly floured surface into an 8×15-inch rectangle. Fold the bottom short end ⅓ of the way over, then fold the top short end over on top of that, like a letter. Rotate the dough 90 degrees and roll it out again into another 8×15-inch rectangle. Fold the dough into thirds again using the same method, then rewrap the dough in plastic wrap and chill for 20 minutes to keep the butter in the dough cold and to let the gluten relax so it is easy to roll out.
- Once the dough has chilled, repeat the previous step of rolling it into an 8×15-inch rectangle, folding into thirds, turning, rolling, and folding. Wrap it up and chill the dough for another 20 minutes.
- Repeat this process one final time. This process is called lamination and it builds up flaky layers of butter and fat throughout the dough. Once the dough has been laminated, it can be wrapped tightly in plastic wrap and refrigerated for up to 3 days or frozen for up to 3 months. If freezing, thaw the dough in the fridge overnight before using.
Filling
- To make the almond filling, break up the almond paste into chunks, then beat the almond paste, butter, powdered sugar, egg white, salt, and lemon juice in a large bowl with an electric mixer until combined mostly combined. Set aside.¾ cup (170g) almond paste, 4 Tablespoons salted butter,, ¼ cup (30g) powdered sugar, 1 large egg white, Pinch of salt, ¼ teaspoon fresh-squeezed lemon juice
Assembly
- Line two baking sheets with parchment paper or silicon baking mats. Divide the chilled dough in half.
- Roll out one half of the dough on a lightly floured surface into a long 6×24-inch rectangle. Spread ½ of the almond filling (about ½ cup) down the center of the dough in a long line. Fold one of the long sides over the filling, about ⅓ of the way across.
- Brush the other exposed side of the dough with the beaten egg white, then fold this over the dough and almond filling. Pinch to seal the seams. Gently shape the dough into an oval-shape like a race track, tucking one end into the other end. You can use a little of the egg white to help seal the oval shut. Carefully transfer the oval to the prepared sheet pan, flipping it over so the seam side is down. Repeat with the other half of the dough and filling ingredients.1 large egg white
- Cover the kringle loosely with plastic wrap or a clean dishcloth. Let rise for 30-45 minutes until slightly puffy.
- Preheat oven to 375℉ (191℃) about 20 minutes before you are ready to bake. Brush each kringle with the remaining egg white, then bake for for 25-28 minutes until golden brown, rotating the baking sheets halfway through.
- As soon as the kringle pastries are removed from the oven, stack the pans on top of each other and press down slightly to remove air pockets between the filling and the pastry. Do this for both pastries while they are still hot, then let the kringle cool completely before icing.
Glaze
- Make the glaze by whisking the powdered sugar, vanilla, lemon juice, salt, and water in a small bowl until smooth. Drizzle or spread the icing over the cooled kringle pastries, then let sit until the icing has dried before slicing and serving.1 cup (120g) powdered sugar, ½ teaspoon pure vanilla extract, ¼ teaspoon fresh-squeezed lemon juice, Pinch of salt, 4 teaspoons water
Notes
- Filling: This recipe makes 2 kringle. One serving is ⅙ of one kringle. I used half of the almond filling above for one kringle and froze the rest for another day, and half of a batch of my raspberry cake filling for the second kringle.
- Storage: Store leftover kringle tightly covered at room temperature for up to 2 days. For longer storage, refrigerate for up to 5 days. Bring slices to room temperature before serving for the best flavor and texture.
- Freezing Instructions: Allow the baked kringle to cool completely, then before icing, wrap tightly in plastic wrap followed by aluminum foil. Freeze for up to 3 months. Thaw overnight in the refrigerator or for several hours at room temperature before icing and serving. You can also freeze individual slices.
- Make-Ahead: The laminated dough can be refrigerated for up to 3 days before shaping. The dough can be frozen for up to 3 months after lamination. The almond filling can be prepared up to 2 days ahead and stored in the refrigerator. Fully assembled kringle can be refrigerated overnight before baking. Let it sit at room temperature for about 30 minutes before baking the next day.