
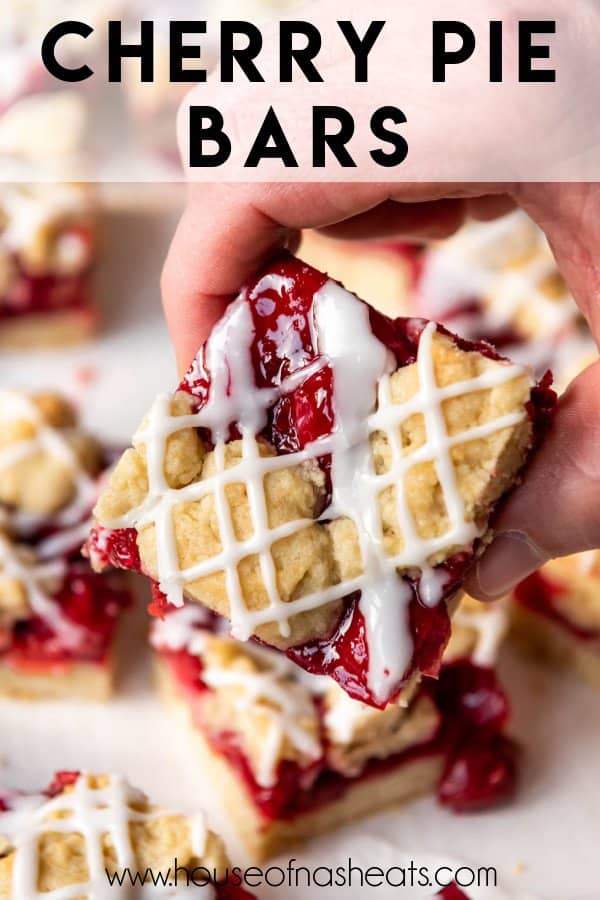
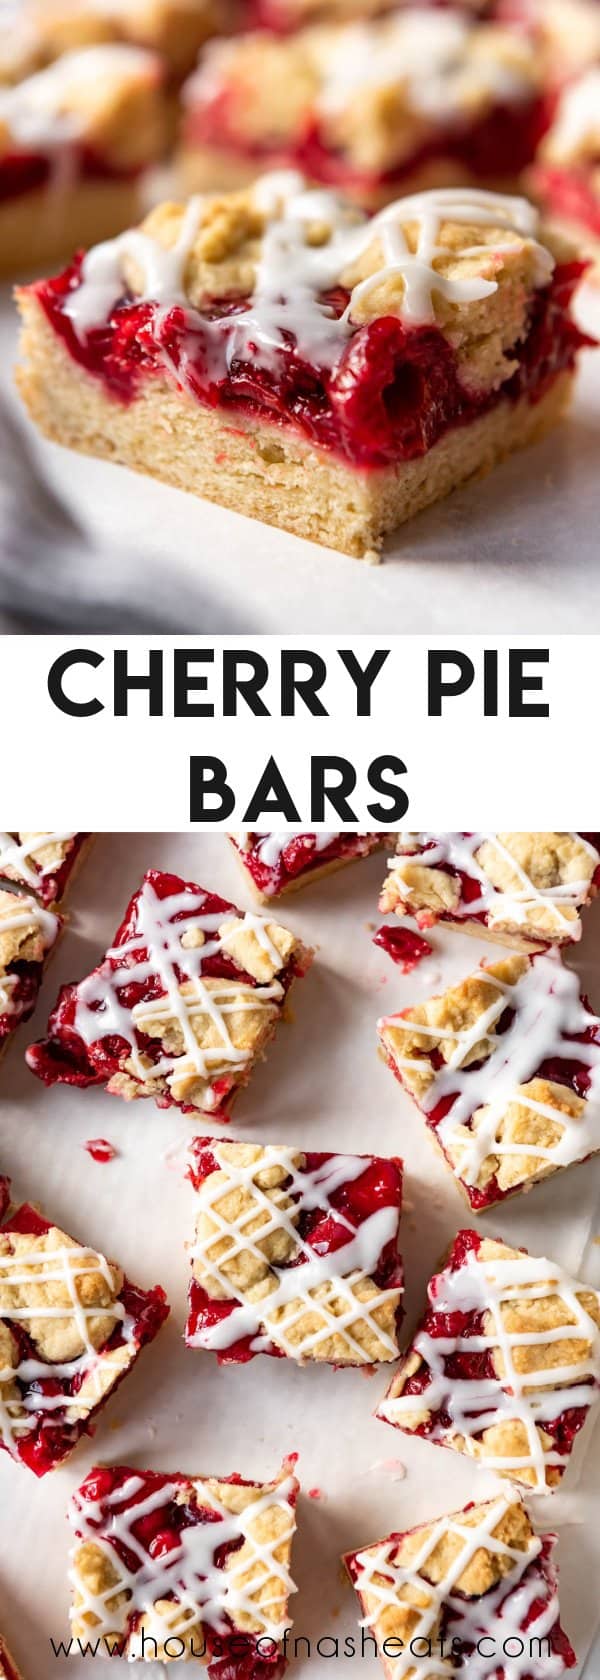

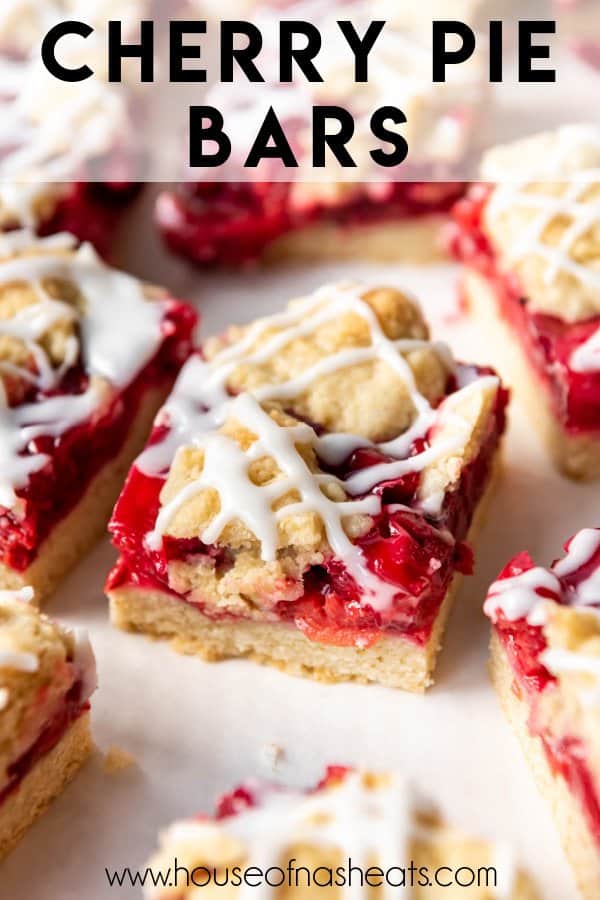
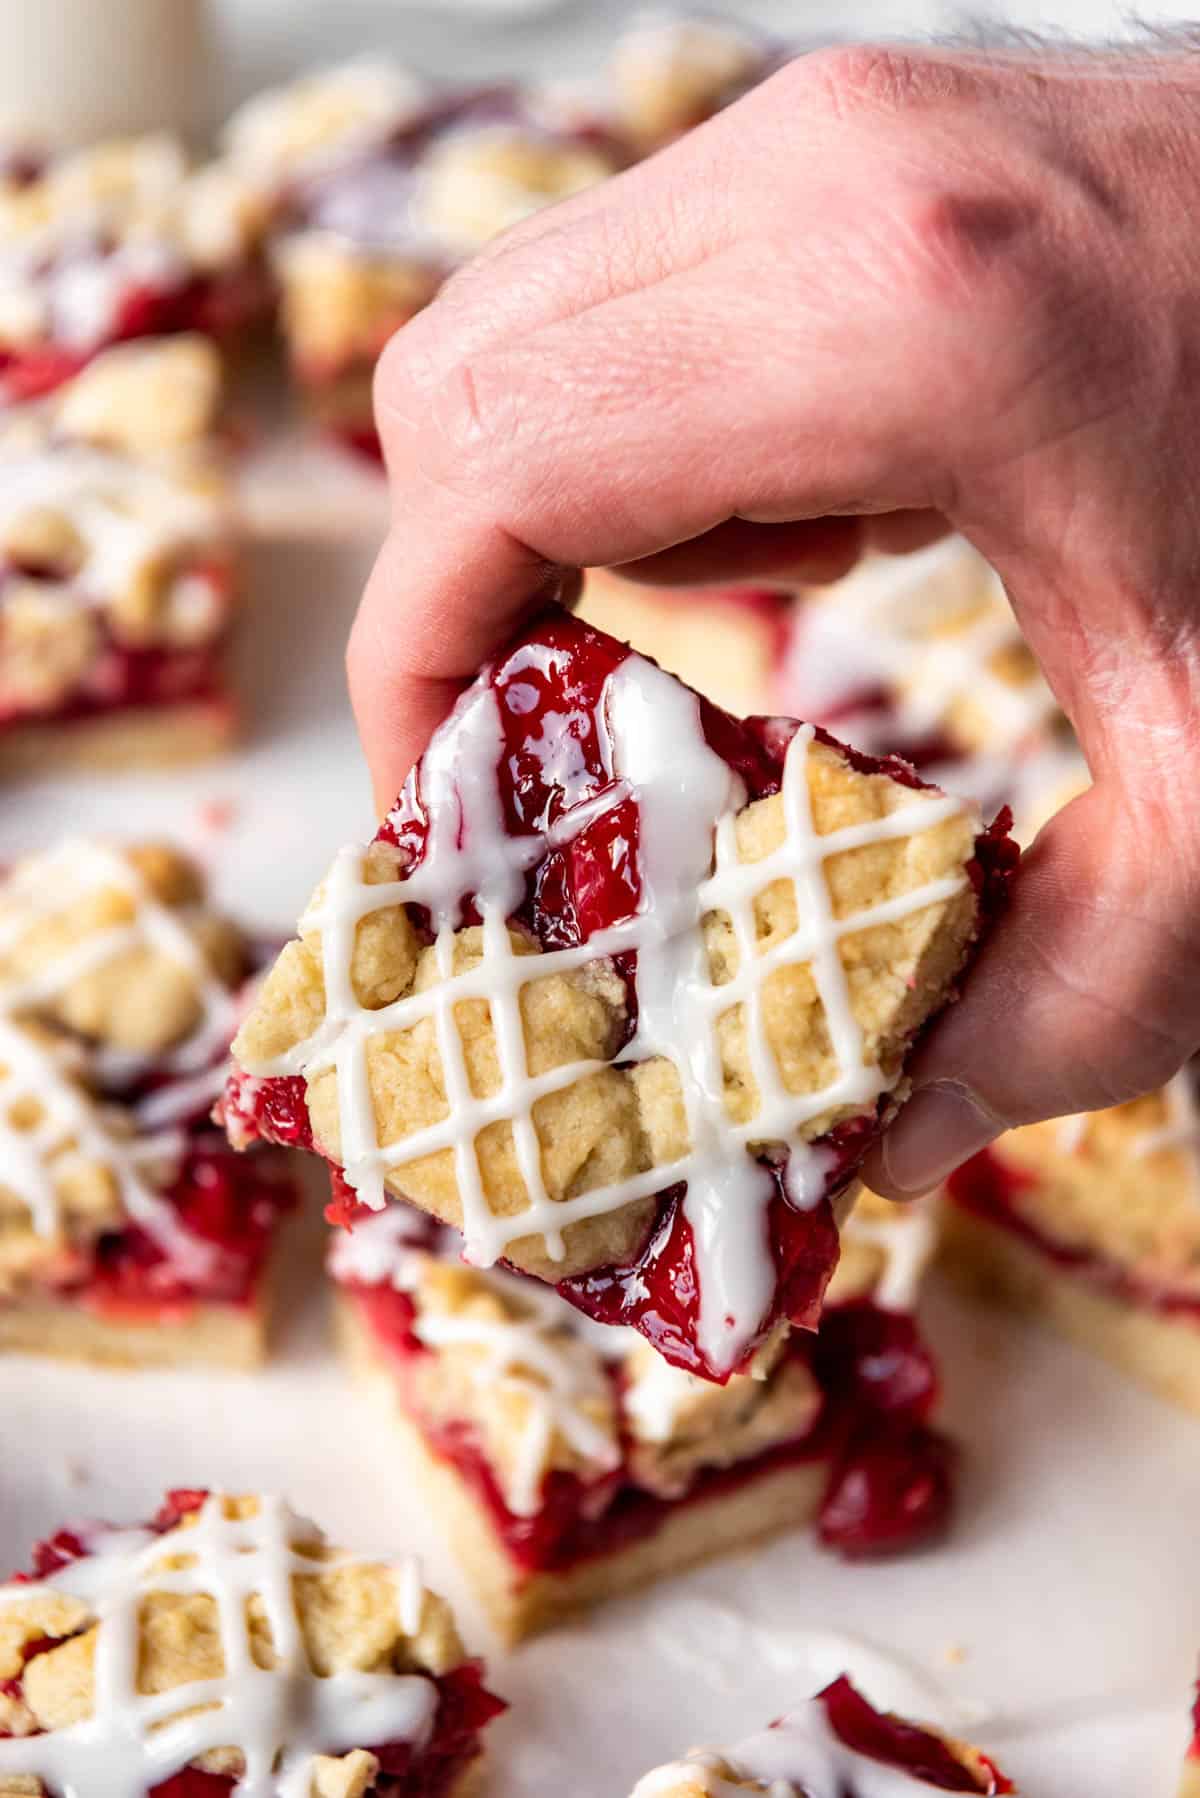
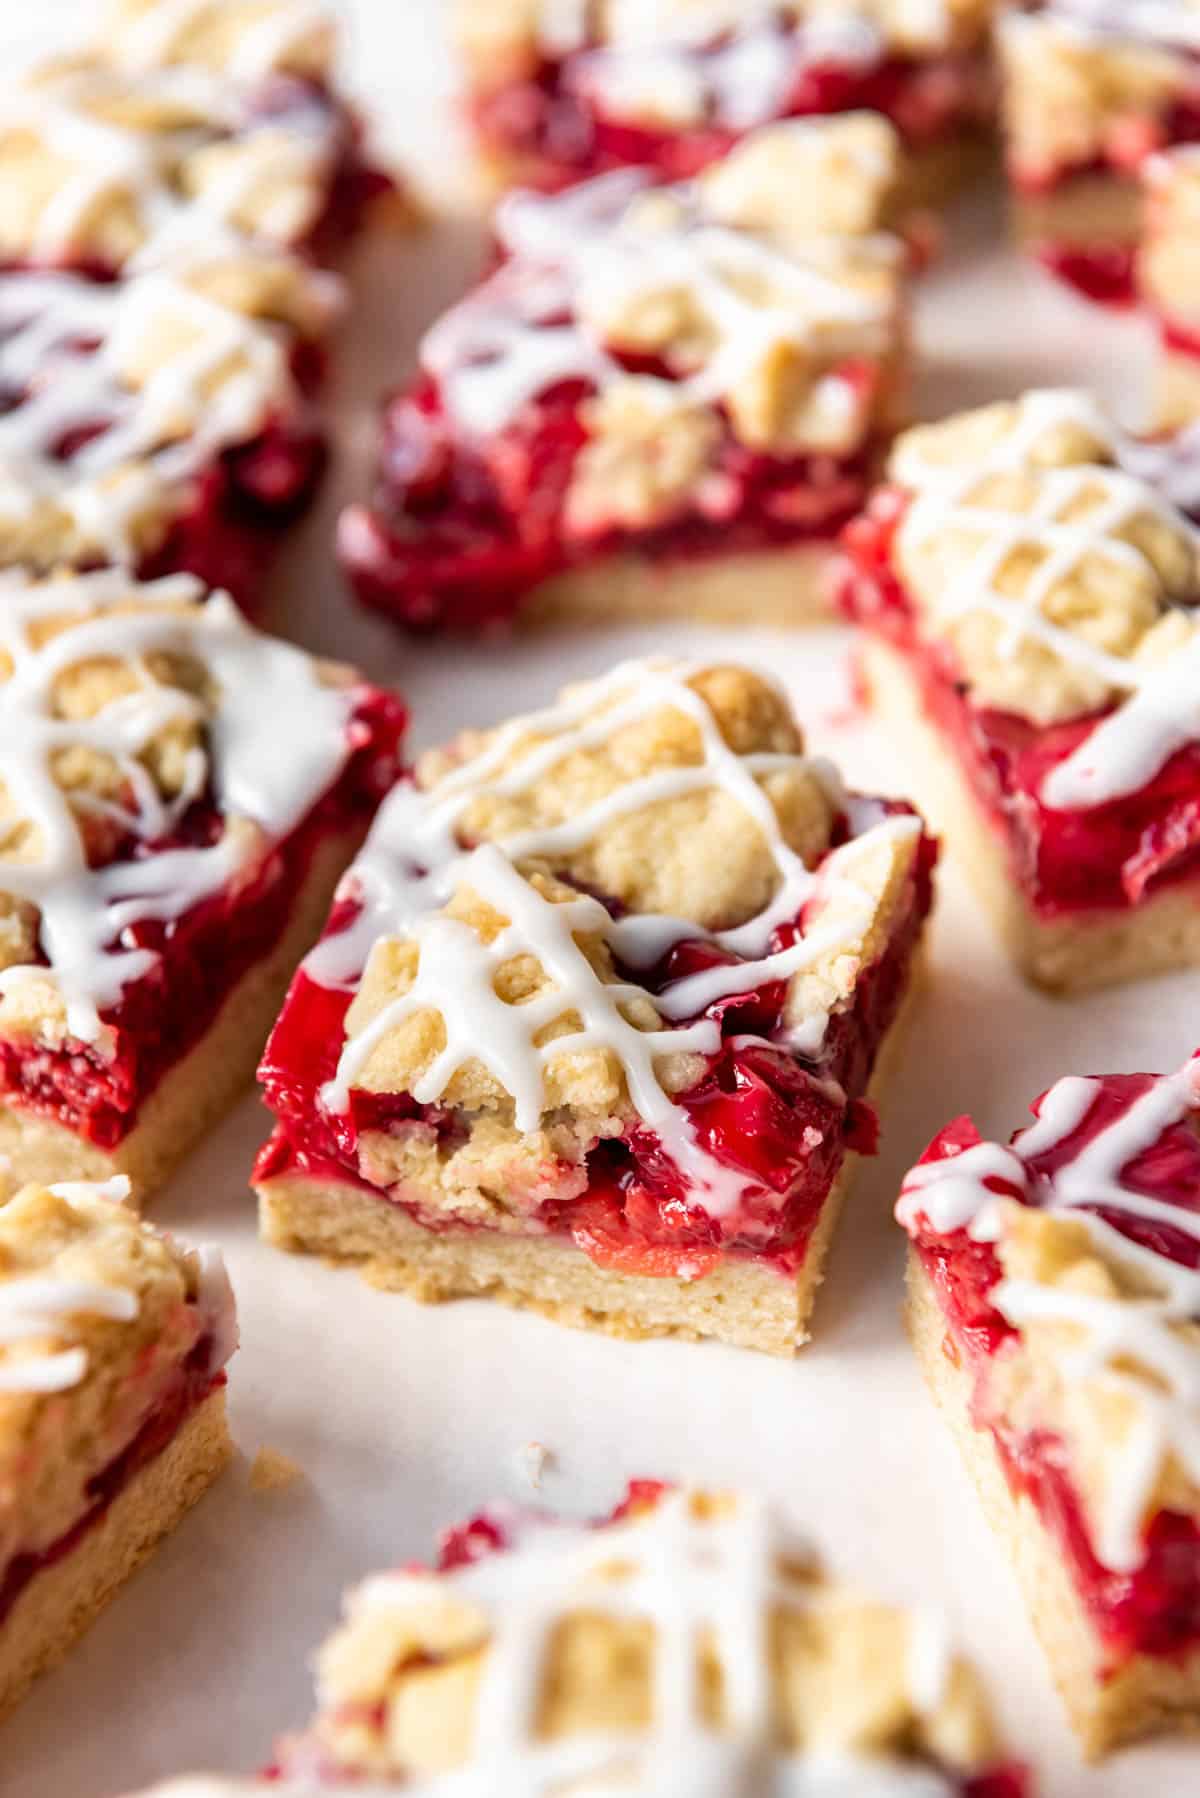
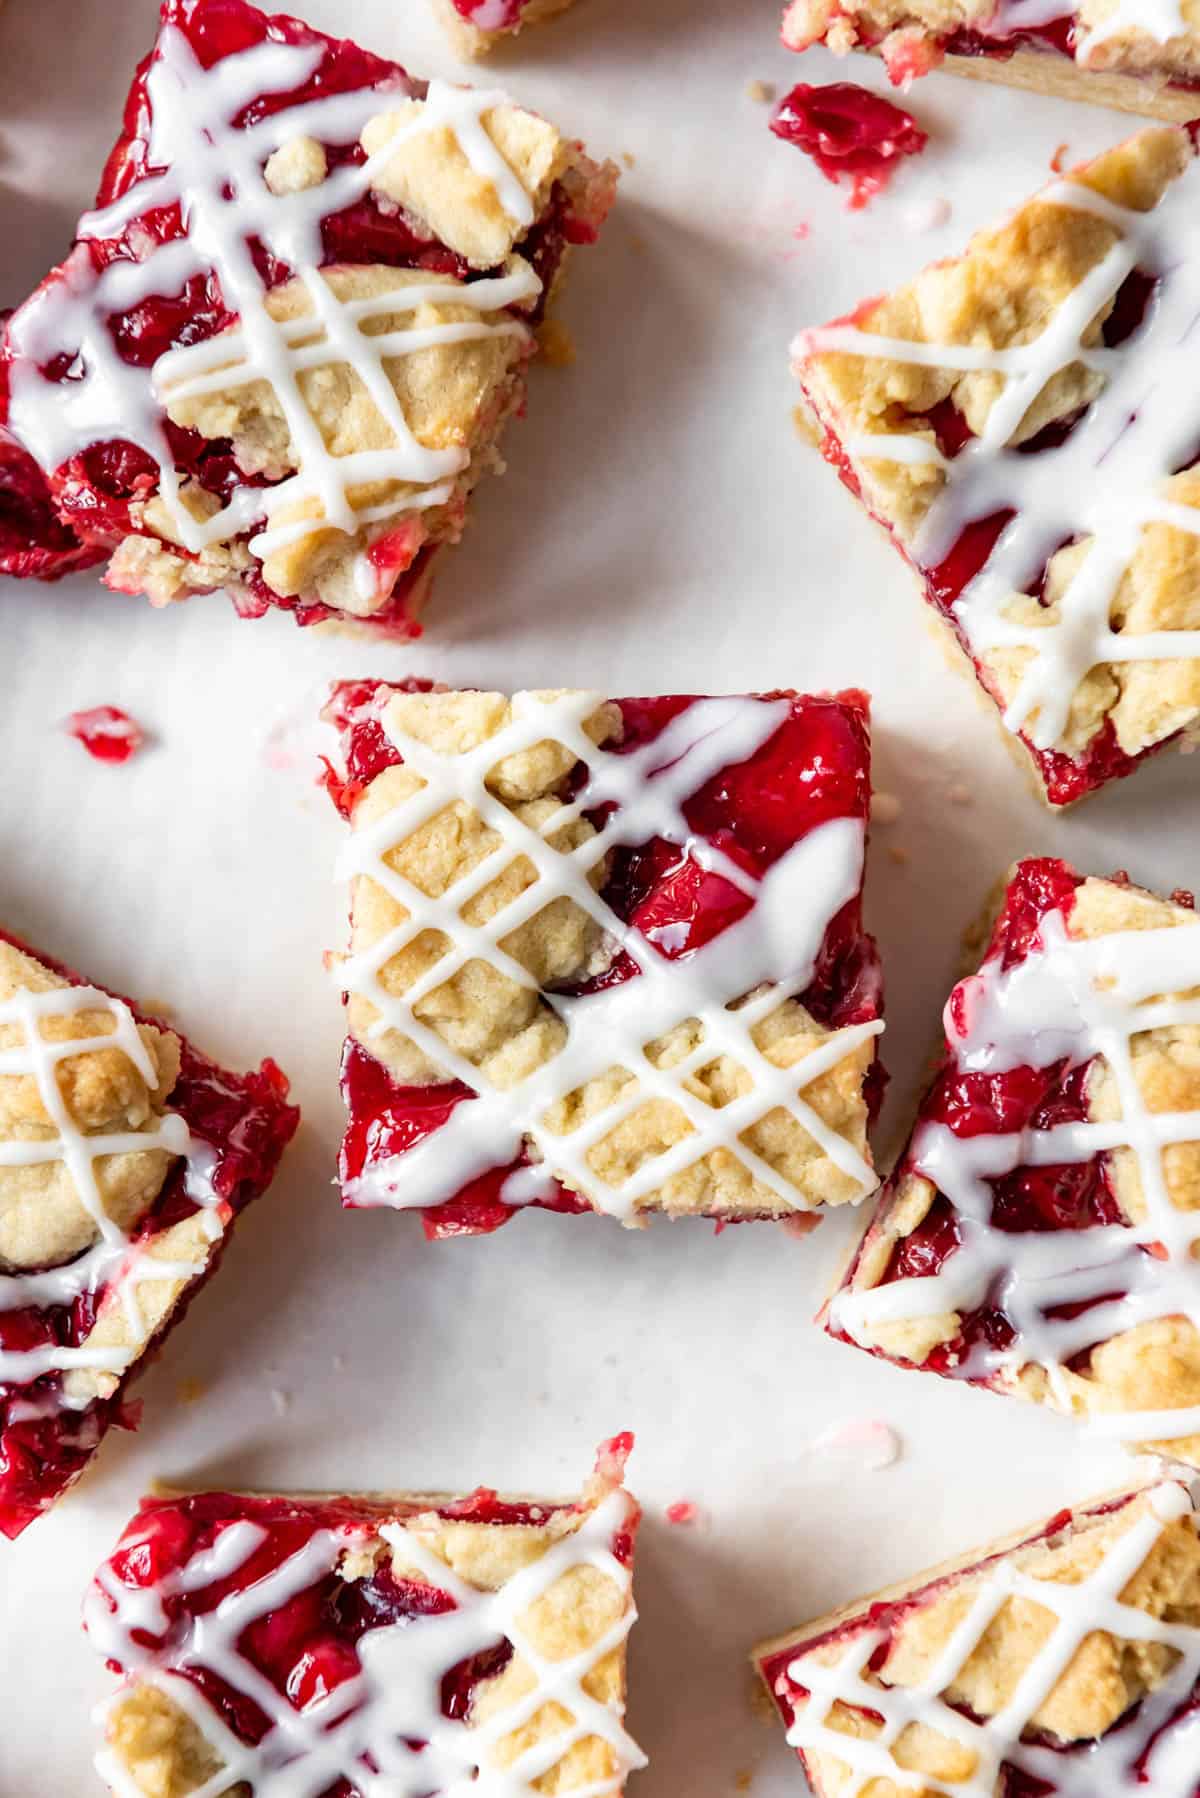
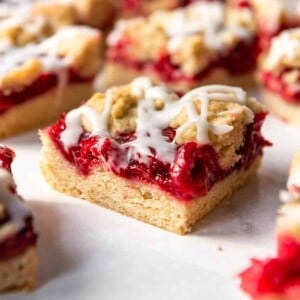
These Cherry Pie Bars are like a handheld cross between a cookie and cherry pie with a buttery shortbread crust and lots of sweet and tart cherry filling. Easier to make than a pie, these bars are perfect to serve a crowd for summer barbecues, holidays, and bake sales!
Funny story, I originally made these cherry pie bars when I was working on recipes for Michigan week as part of my American Eats series, but they didn’t turn out right on my first couple of tries. I thought I might move on, but couldn’t stop thinking about them, and have finally perfected the recipe to share with you!
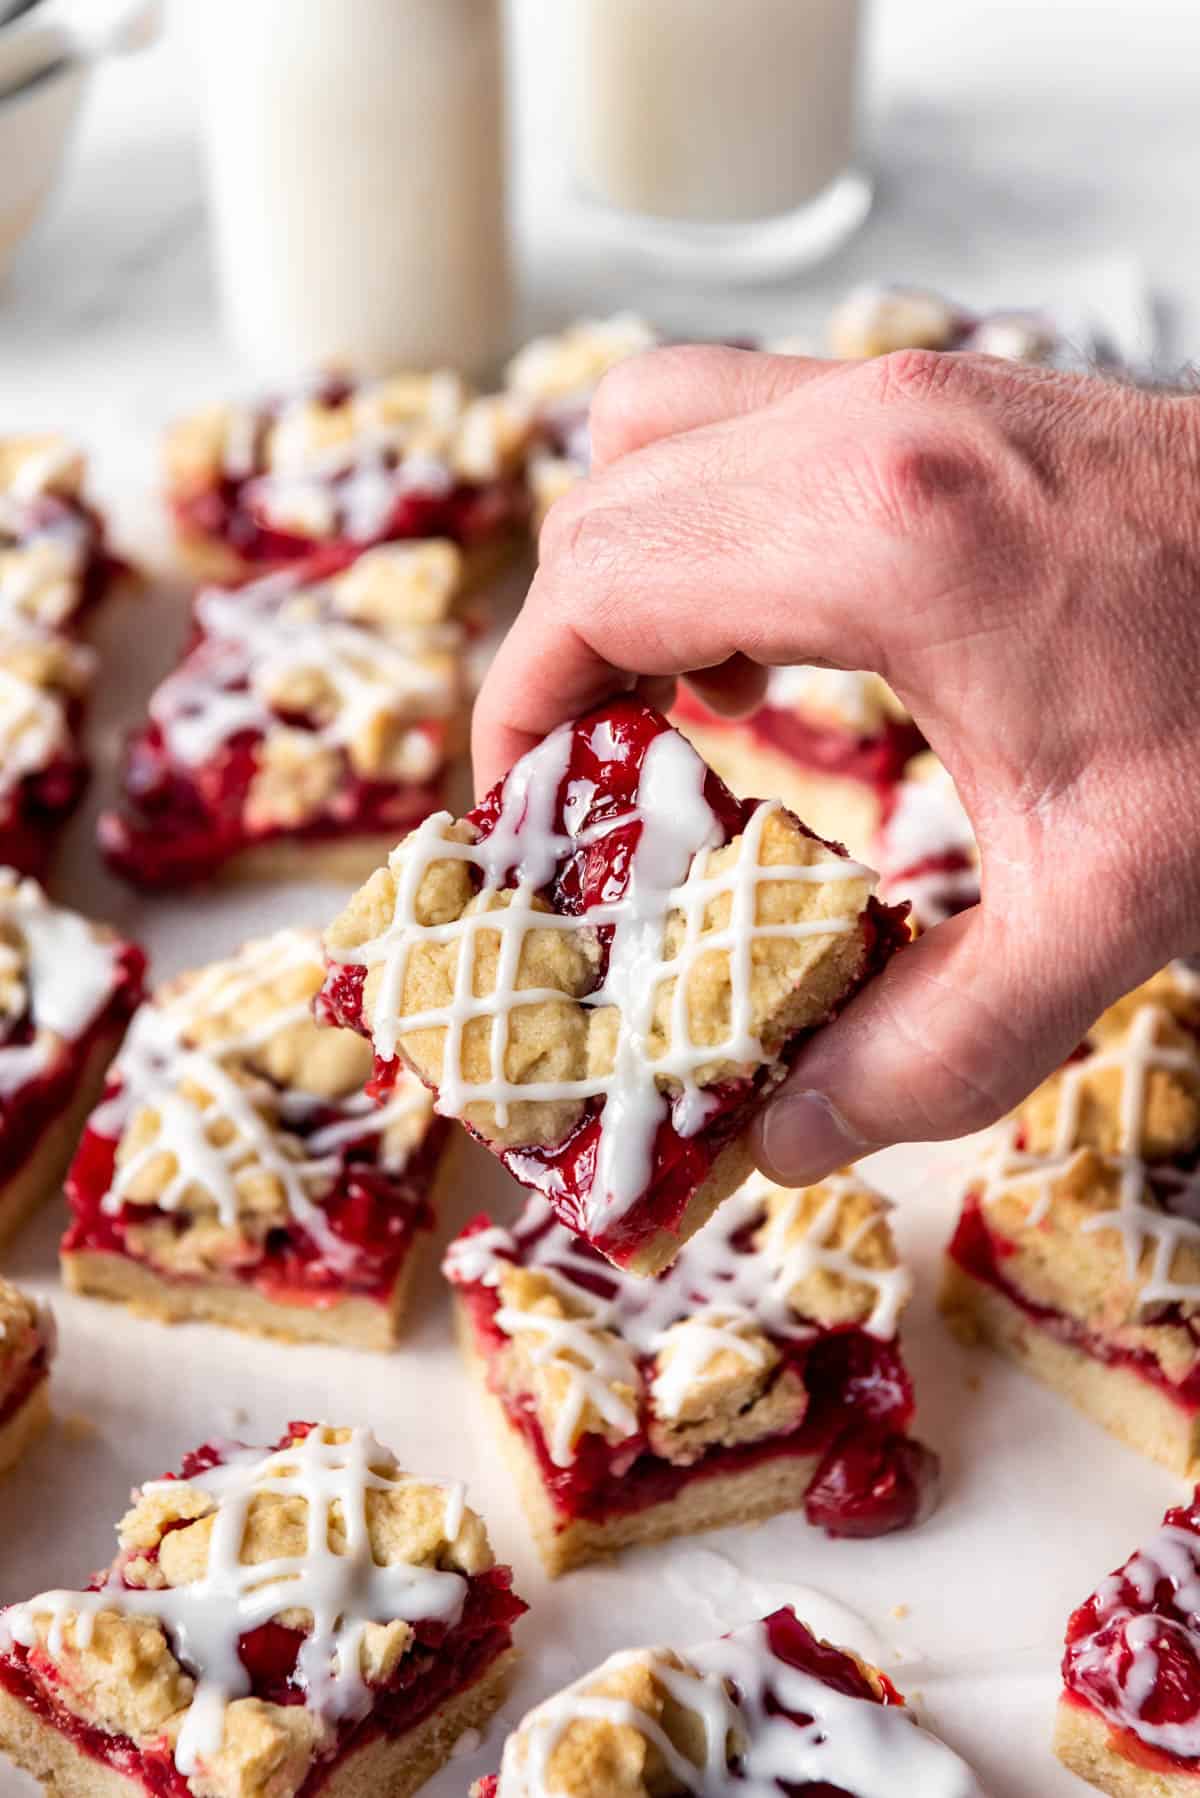
These cherry bars are so so good, truly a cherry pie in a cookie form. The filling has all the taste and texture of a classic pie whether you use homemade or store-bought. After I baked these up, my kids and I enjoyed these chilled as a refreshing treat on a summer afternoon.
And forget the hassle of baking a pie from scratch, these pie bars are quick to assemble in about 15 minutes before popping into the oven. If you love all things cherry, be sure to also check out our Cherry Crisp Cake, Cherry Vanilla Ice Cream, and Cherry Pineapple Jello Salad.
Reader Review: “I made these and they were so yummy! The recipe was really easy to follow!” – Amy

Ingredient Notes
This is a quick overview of some of the important ingredients you’ll need for this cherry pie bars recipe. Specific measurements and full recipe instructions are in the printable recipe card below.
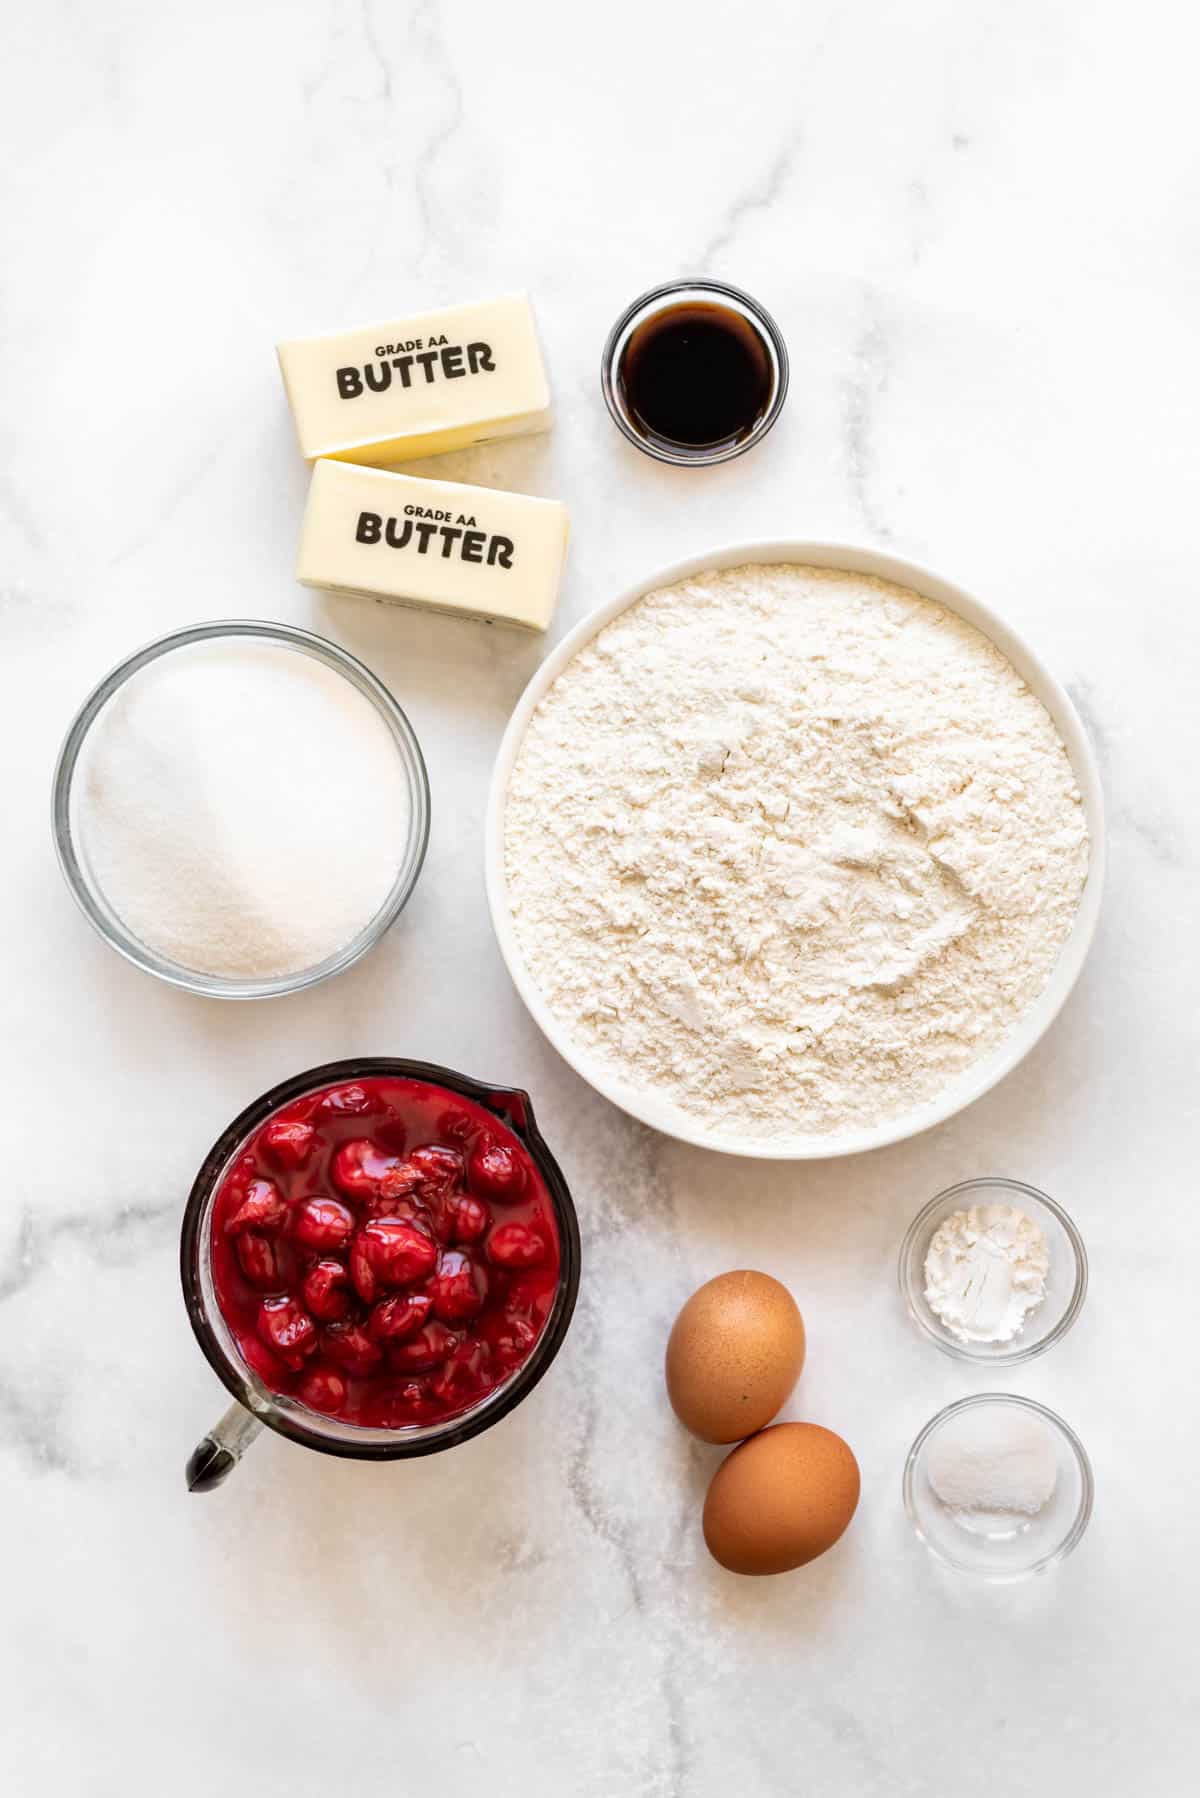
- Cherry pie filling: You can use two cans of store-bought cherry pie filling or make your own with our homemade cherry pie filling recipe. I used frozen tart cherries from Michigan to make my pie filling, but if you have access to fresh ones and they are in season, I highly recommend using those to make your cherry pie filling! Canned tart cherries are another great option and usually available at most grocery stores.
- Flour: Regular all-purpose flour works just great for the cookie base.
- Eggs: For binding and that chewy texture.
- Butter: I use salted butter in all of my baking unless otherwise noted.
- Sugar: Granulated sugar gives just the right amount of sweetness to the shortbread crust while a little powdered sugar is used to make the glaze.
- Vanilla extract: Use this for the cookie base.
- Almond extract: Use this for the glaze or sub out for more vanilla. The pairing of cherry and almond is wonderful together though.
You will also need a 9×13-inch baking dish.
How to Make Cherry Pie Bars
It’s easy to make this recipe. This is a quick overview with step-by-step images to help you visualize the process. Scroll down to the recipe card for printable, detailed instructions. Here is the basic approach:
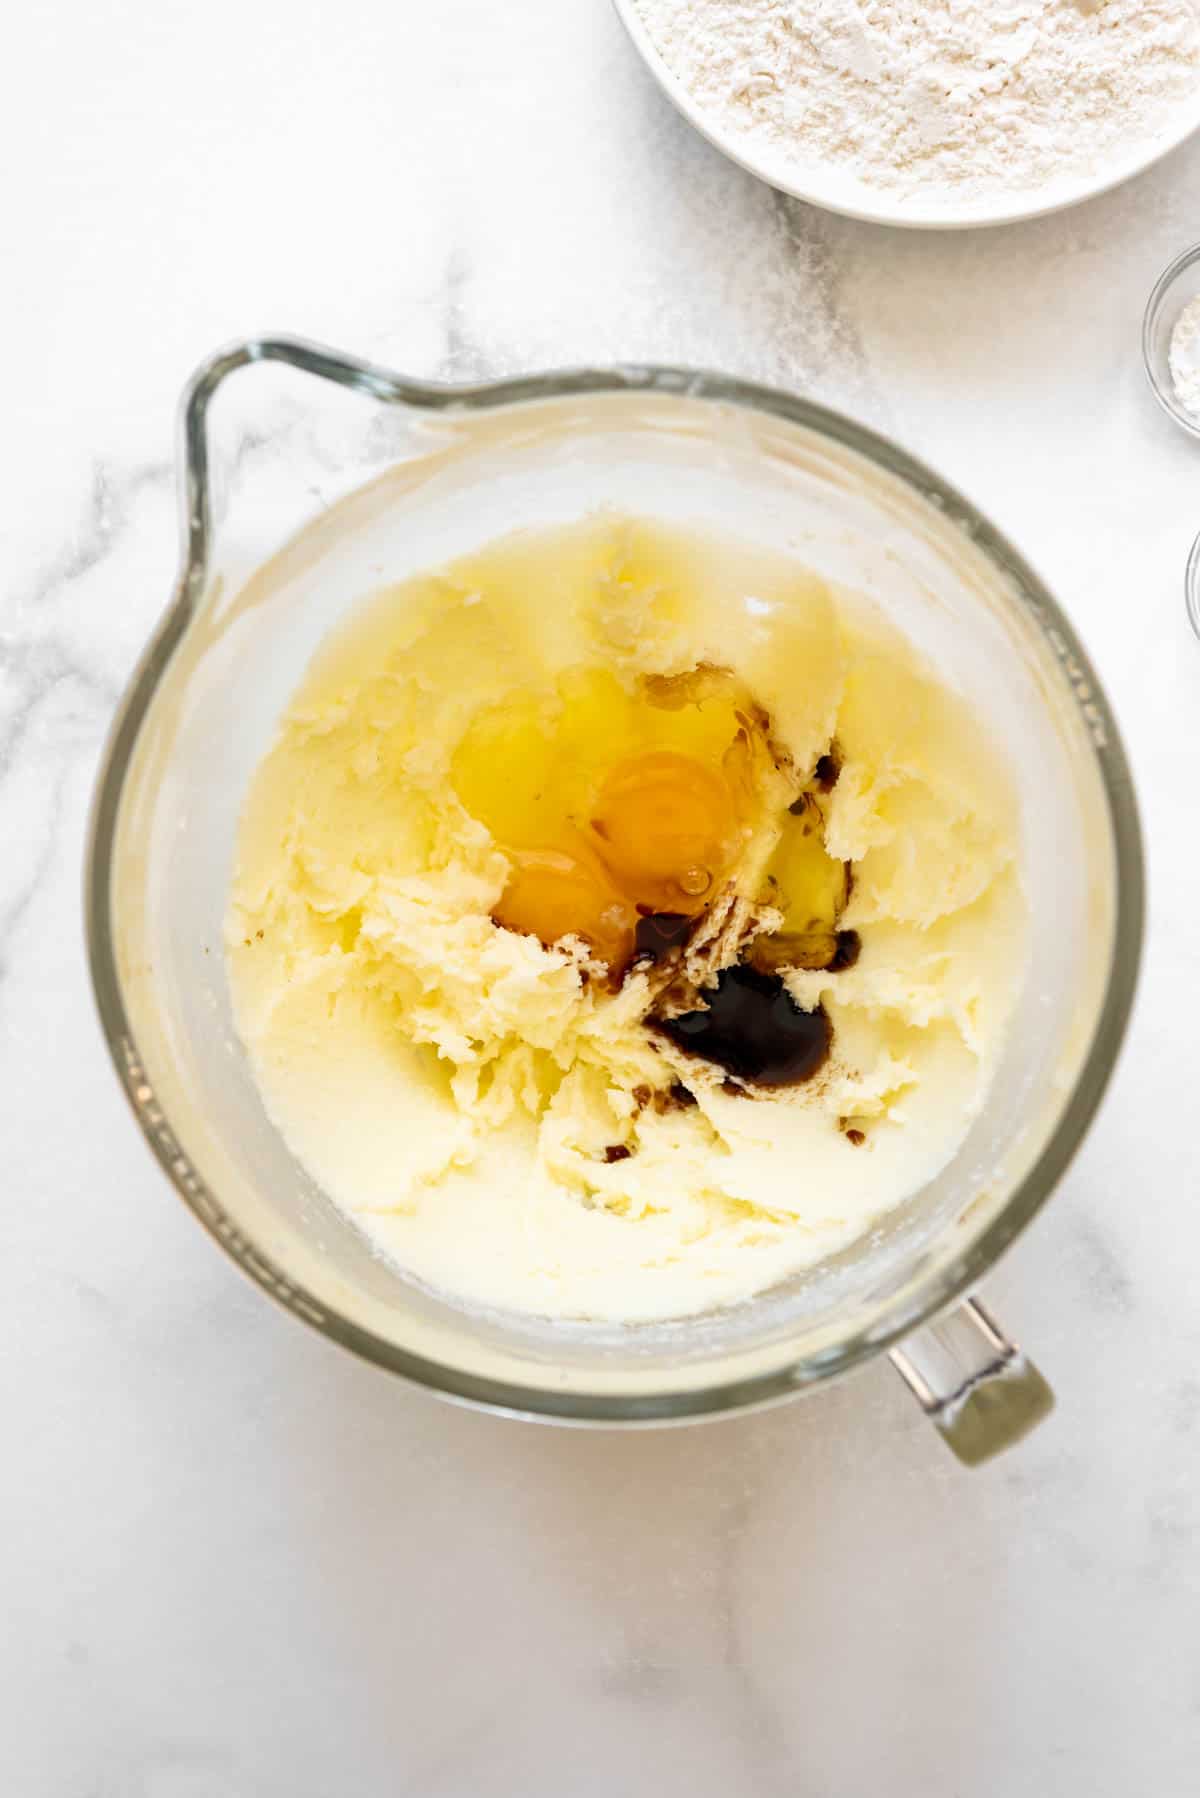
- Cream butter and sugar. I use my stand mixer to beat the butter and sugar until creamy and light, but a hand mixer will work as well.
- Add eggs and vanilla. Scrape down the bottom and sides of the bowl, then add the eggs and vanilla and mix again to combine. It’s okay if the mixture looks a little curdled.
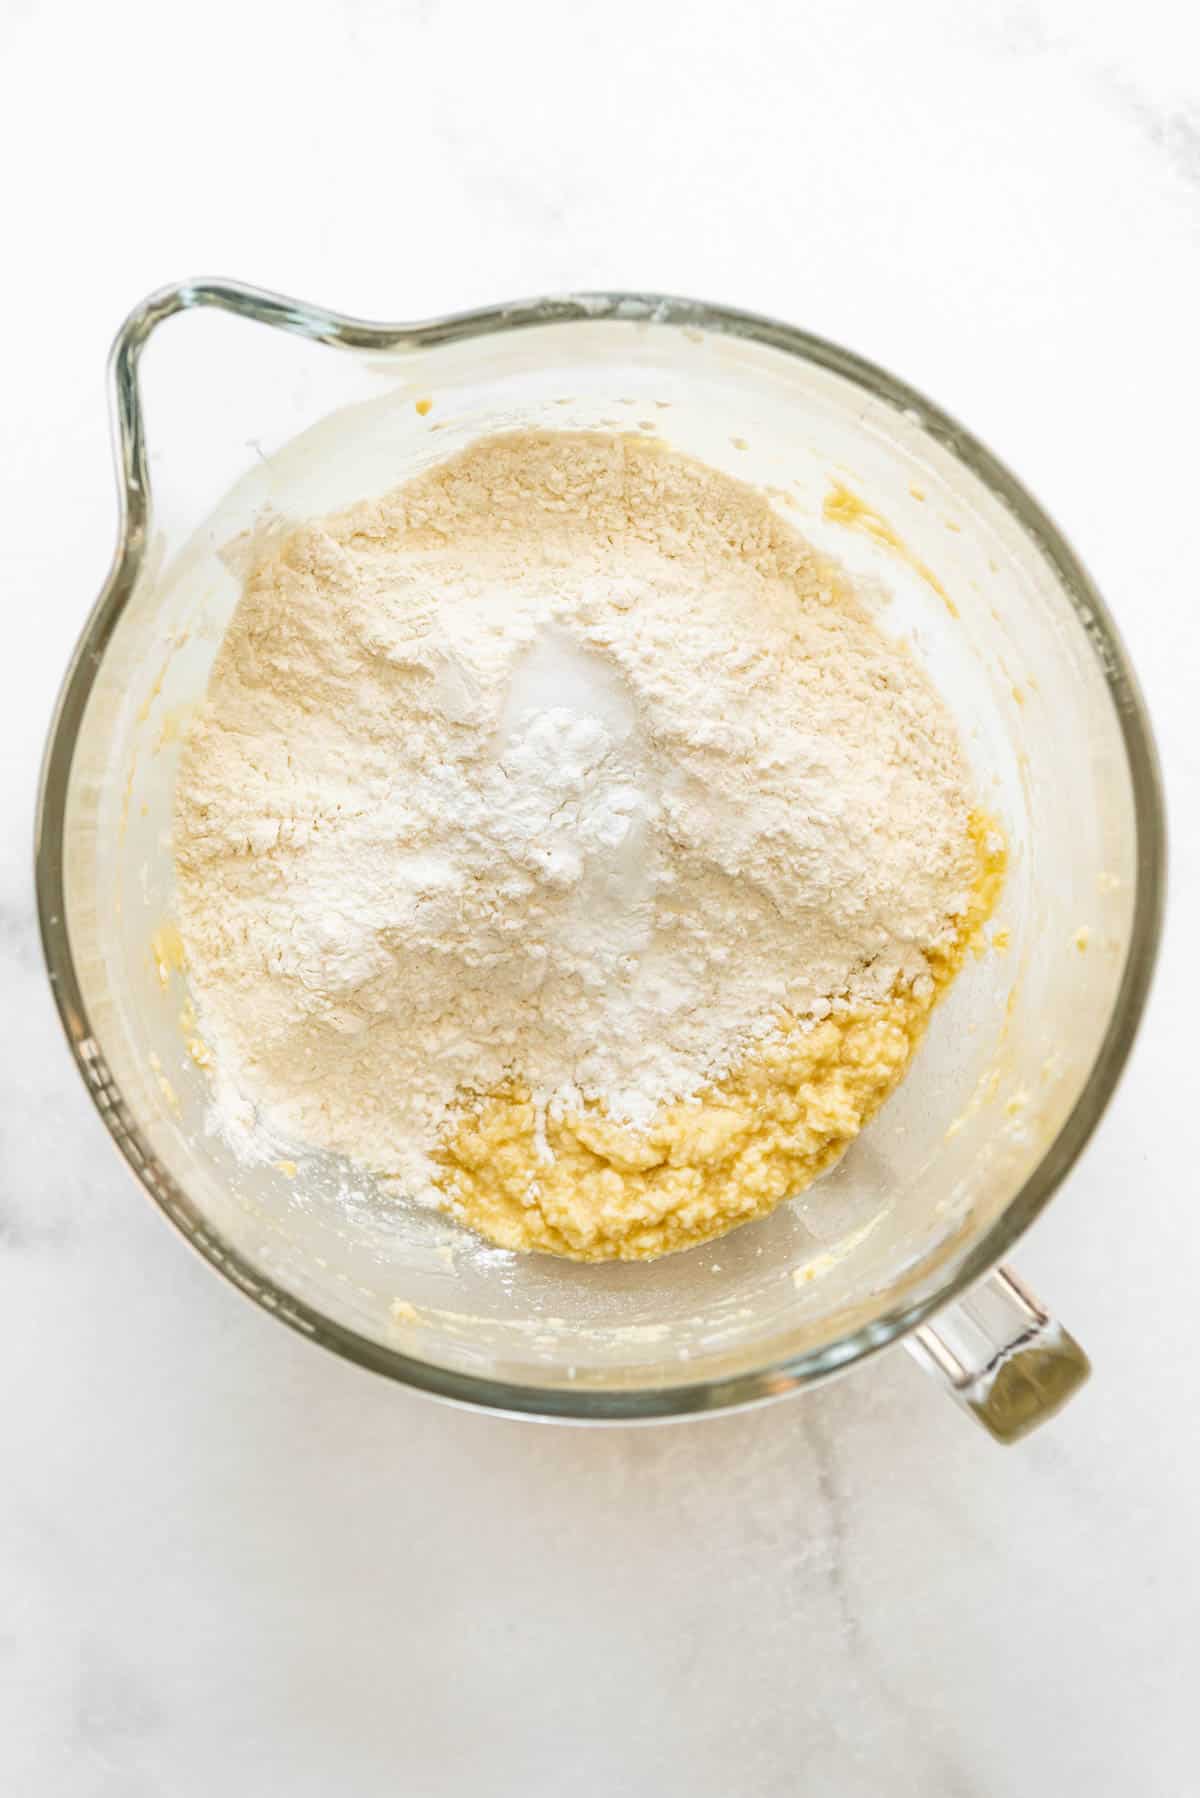
- Mix in dry ingredients. Don’t overbeat the dough at this point. You want to mix just until everything comes together.
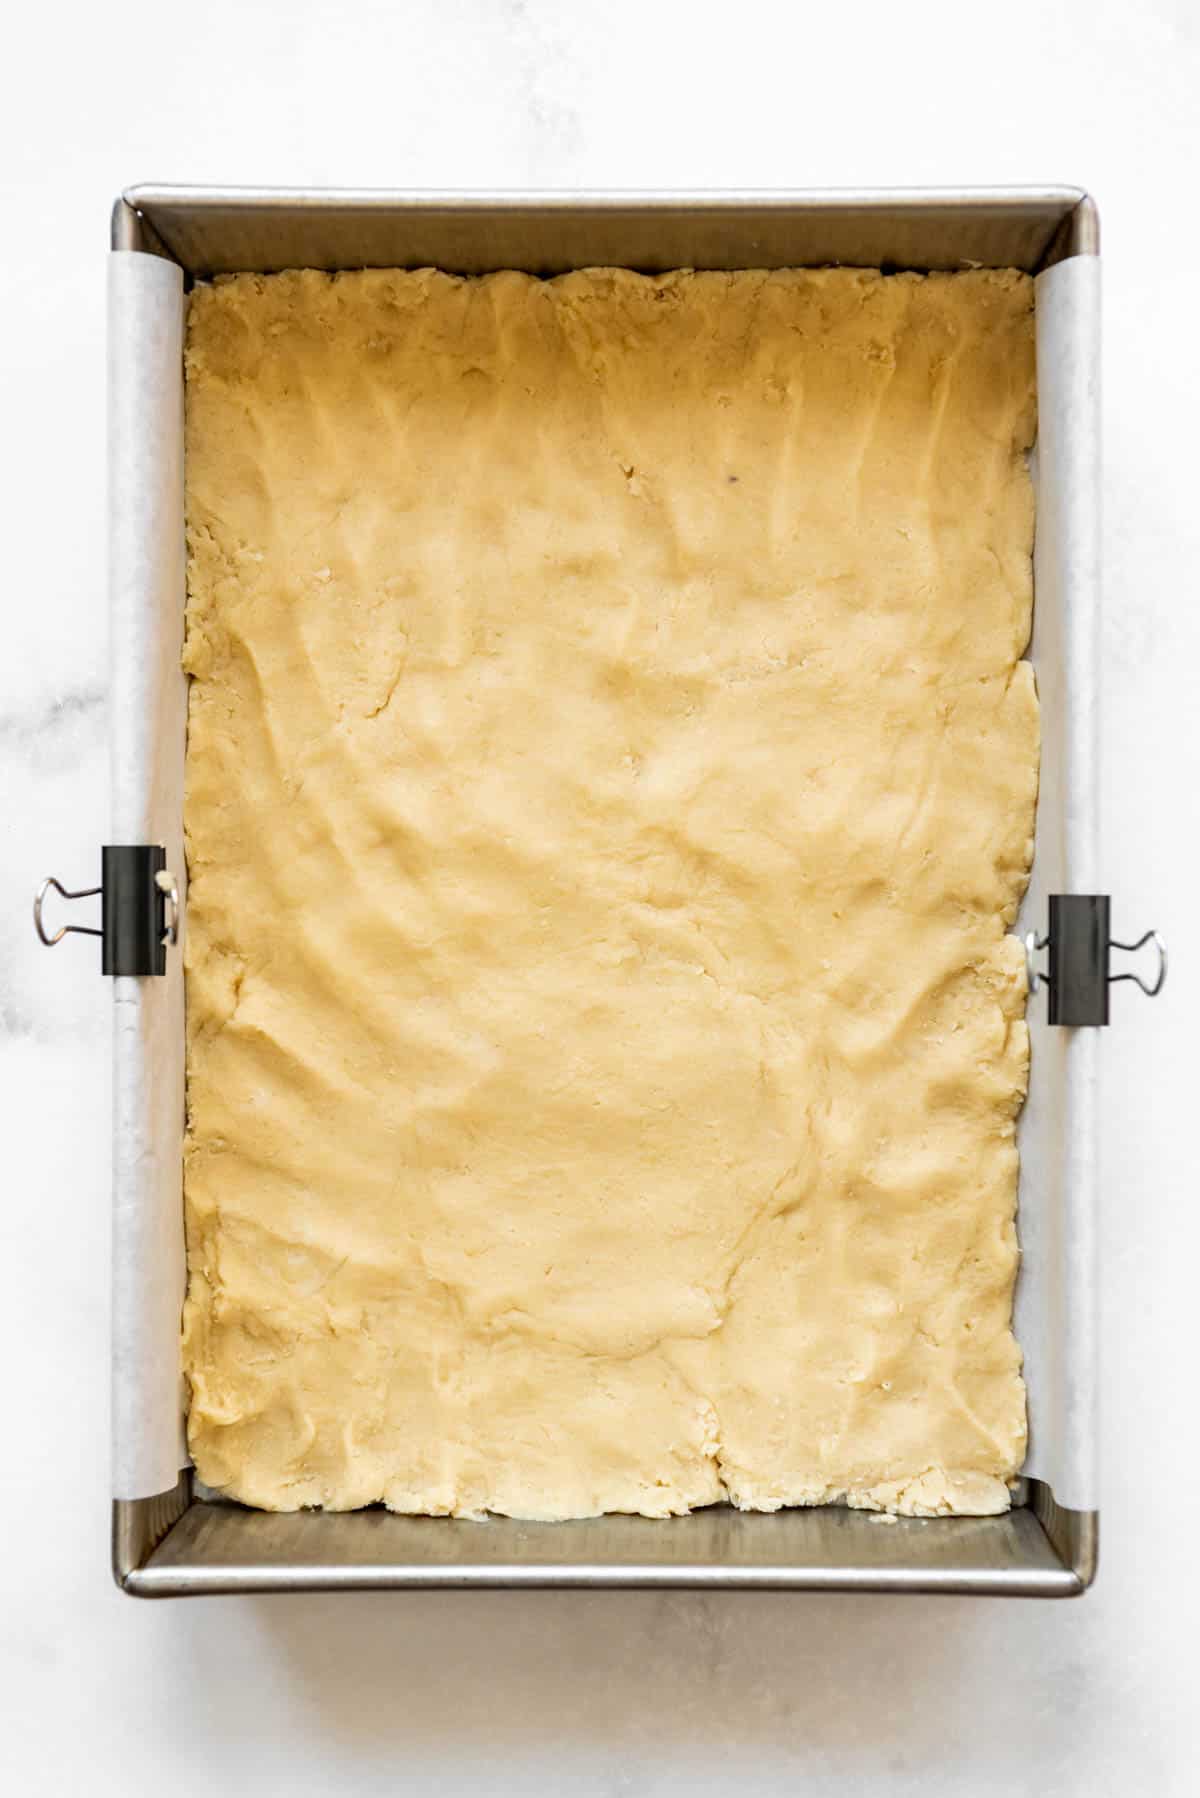
- Press into pan. Press about 2/3 of the dough evenly into the bottom of a 9×13-inch baking dish. I like to line my baking dish with a parchment paper sling so I can easily remove the bars when they are done, but it’s not necessary if you plan to just cut them in the pan.
- Par-bake the crust. I like to bake the bottom crust for 10-12 minutes to help set it before topping with the cherry filling mixture. This was a step I skipped the first couple of times I made these, but it really does seem to make a difference.
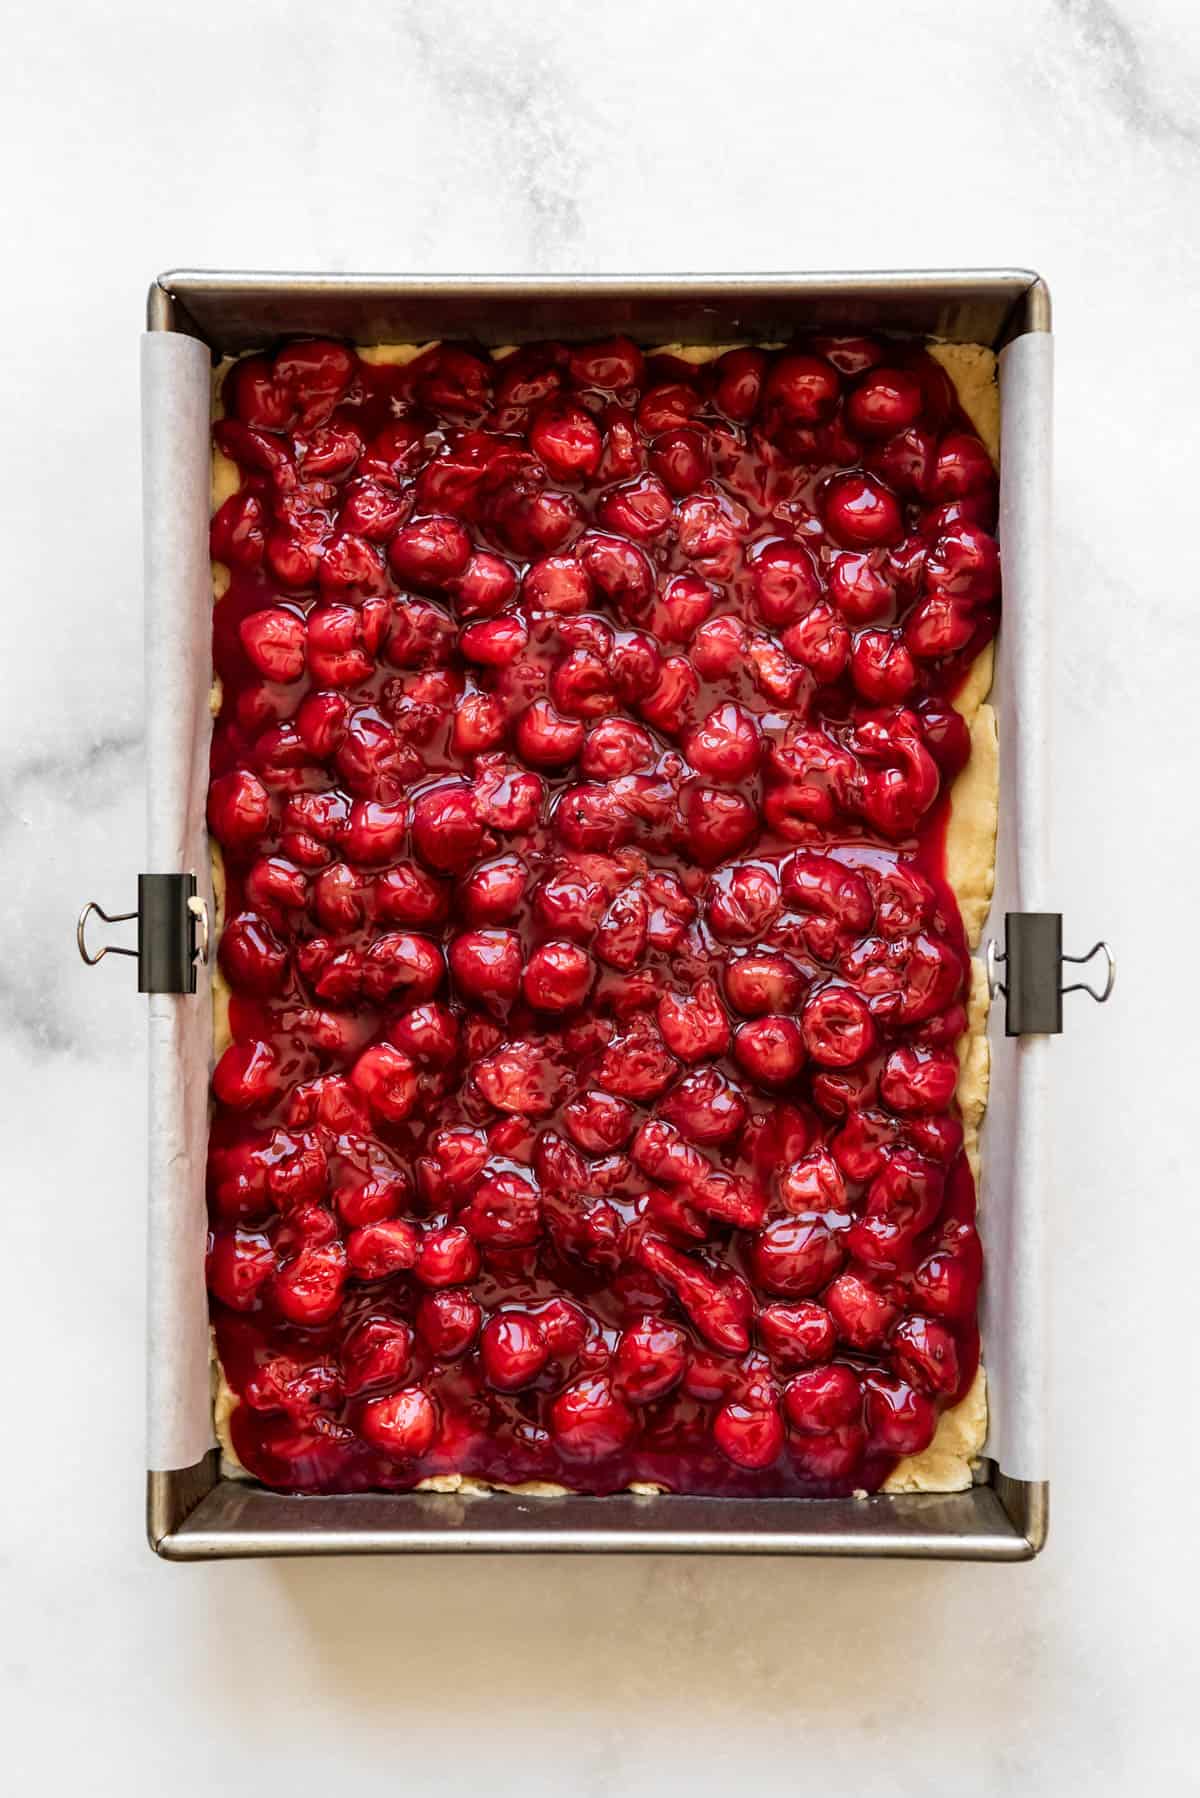
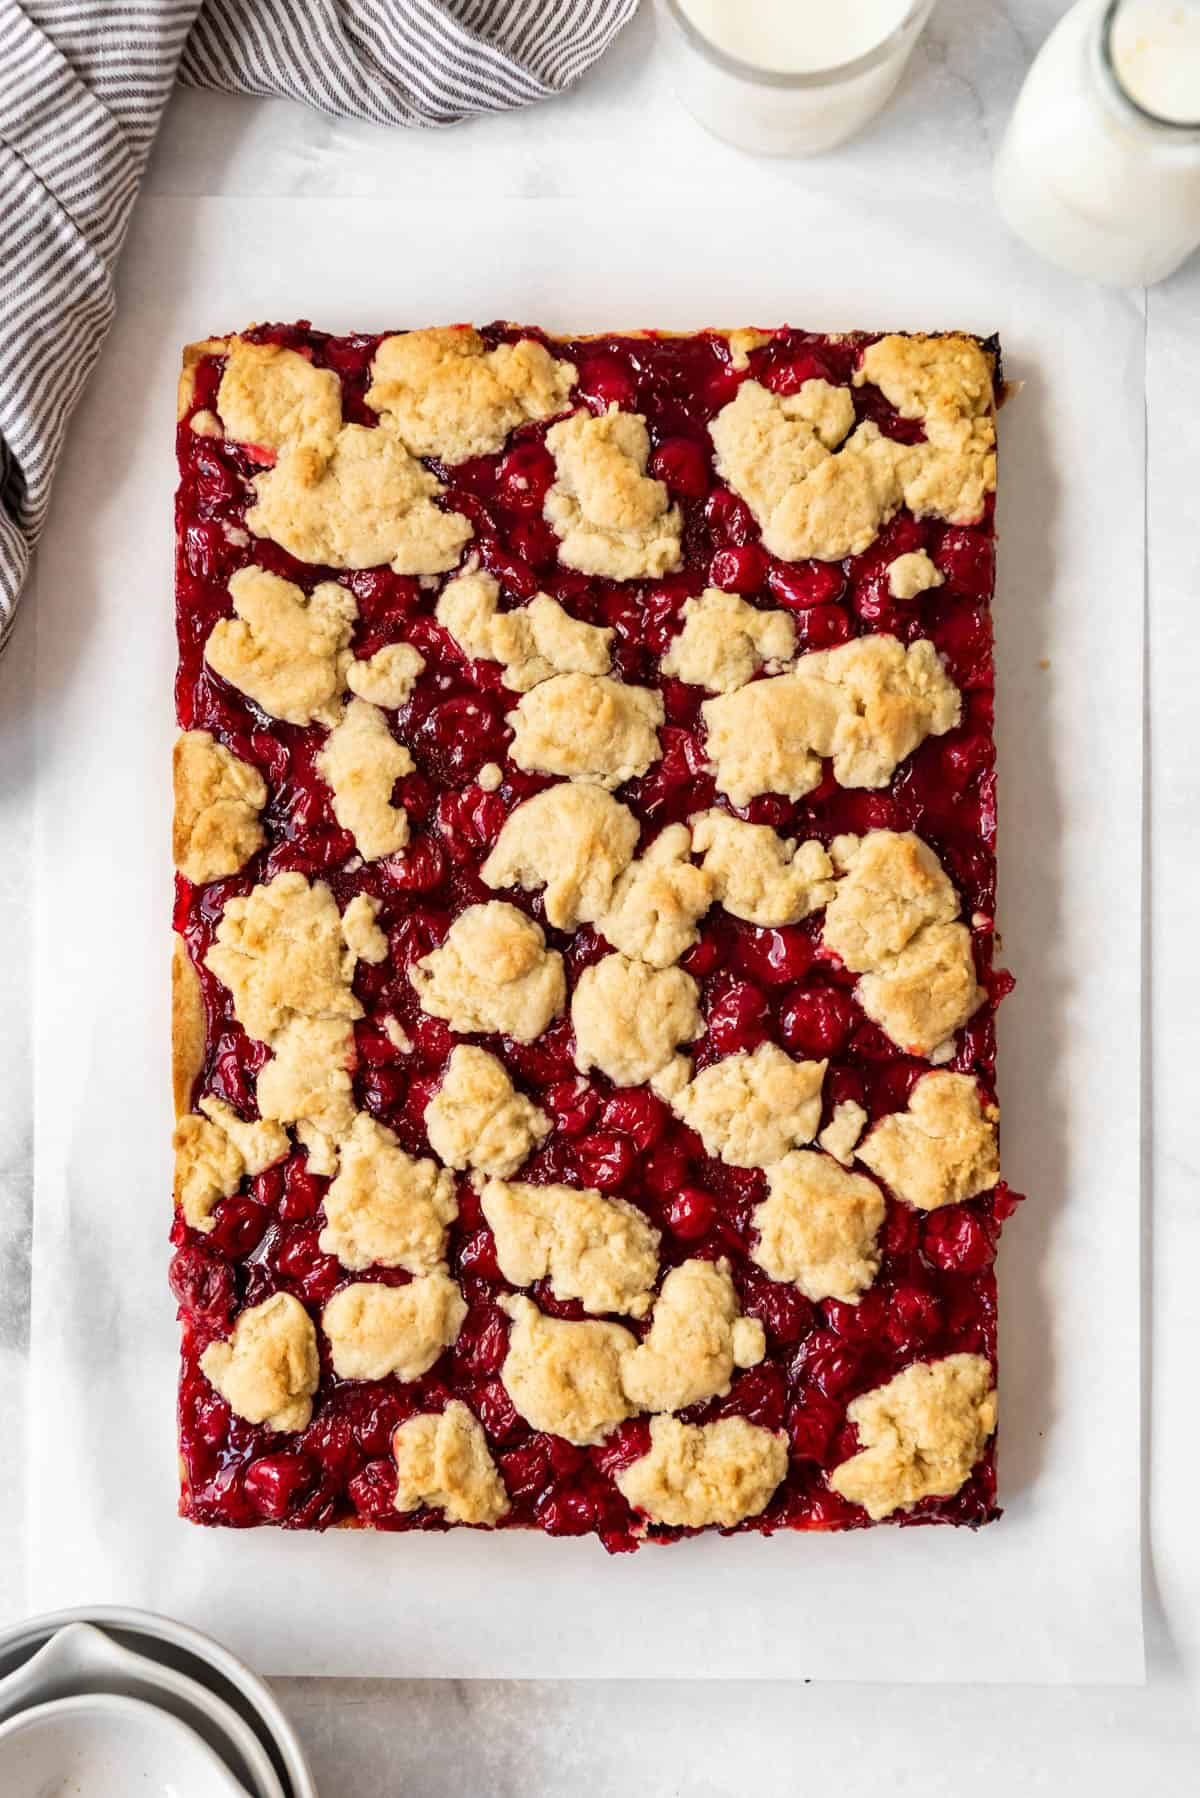
- Top with cherry pie filling. There should be just enough for a generous layer of cherries, which are the star of this show.
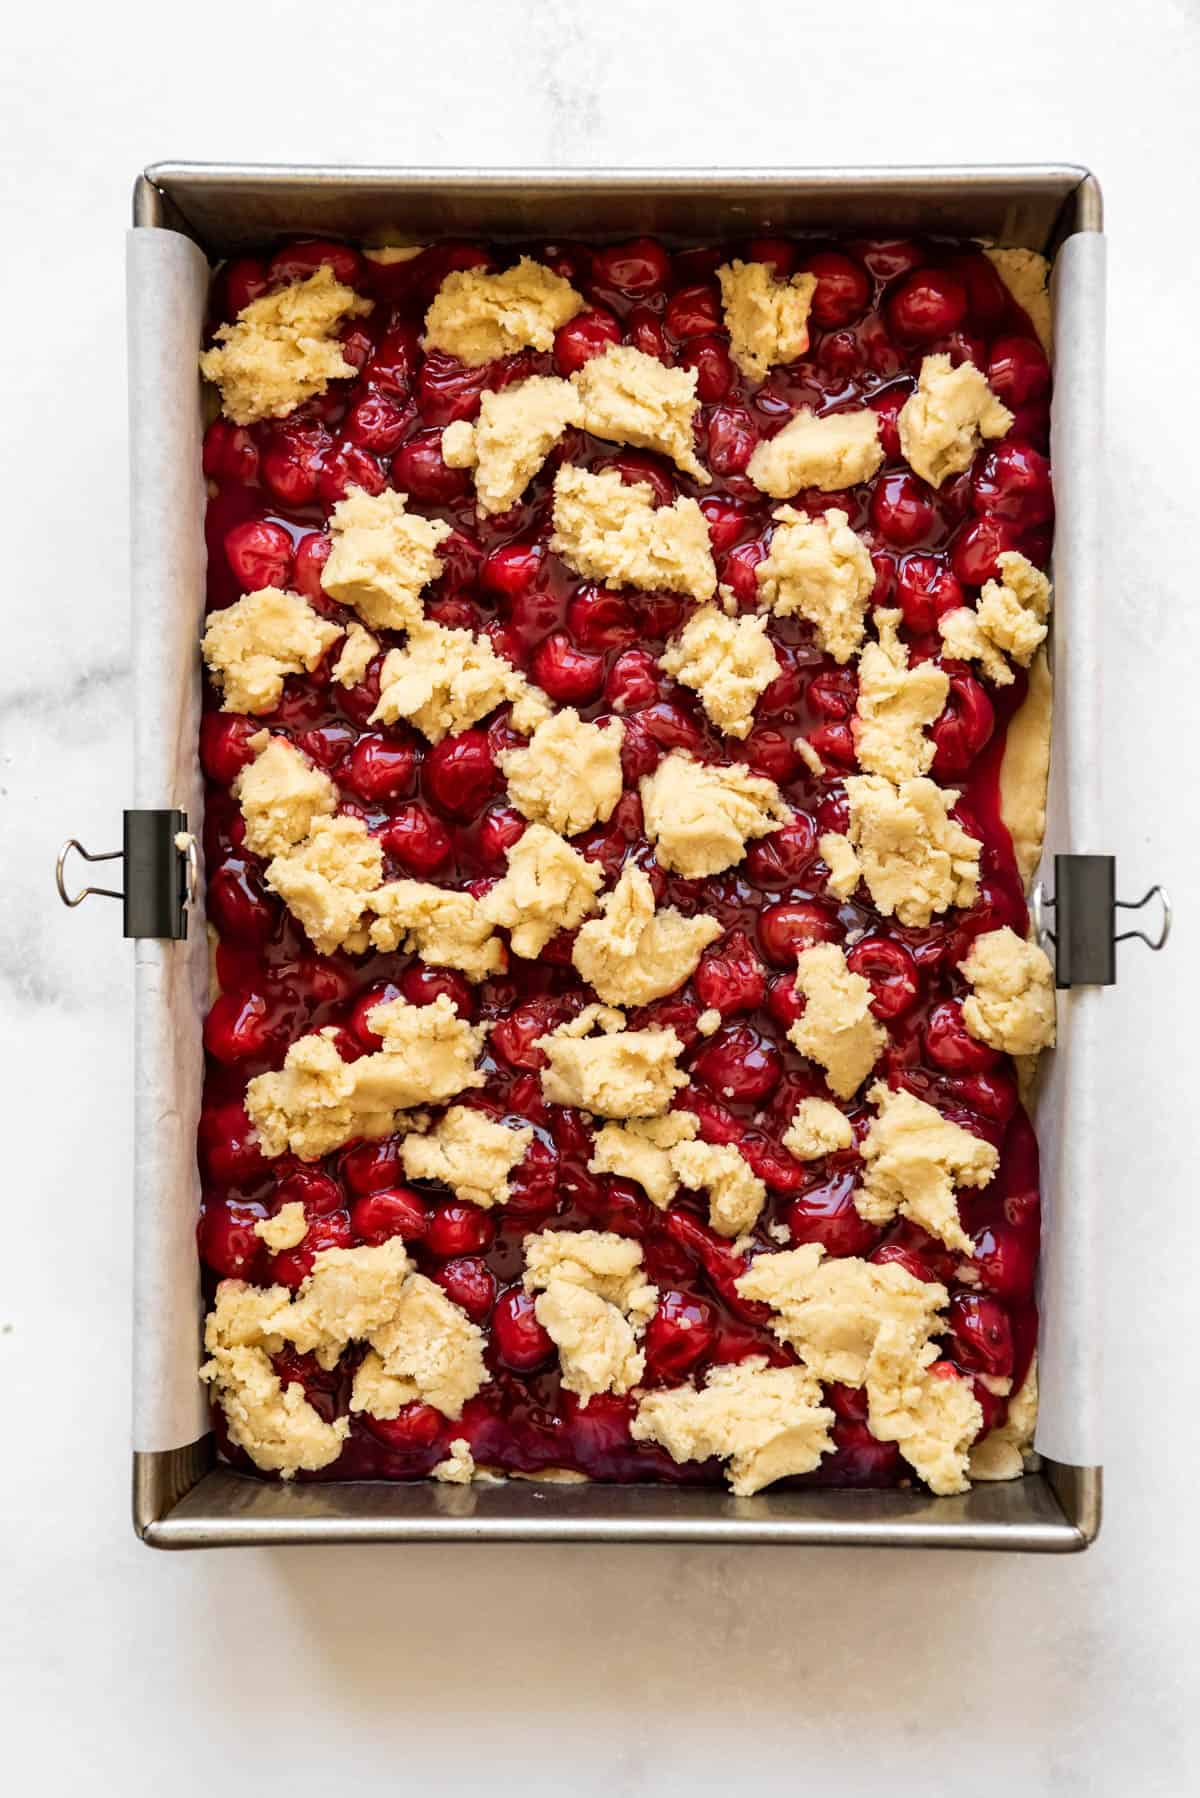
- Top with remaining dough. Drop small chunks of the remaining ⅓ cookie dough over the top of the cherries as shown in the pictures. It’s okay (good even) to have some of the cherry filling showing through.
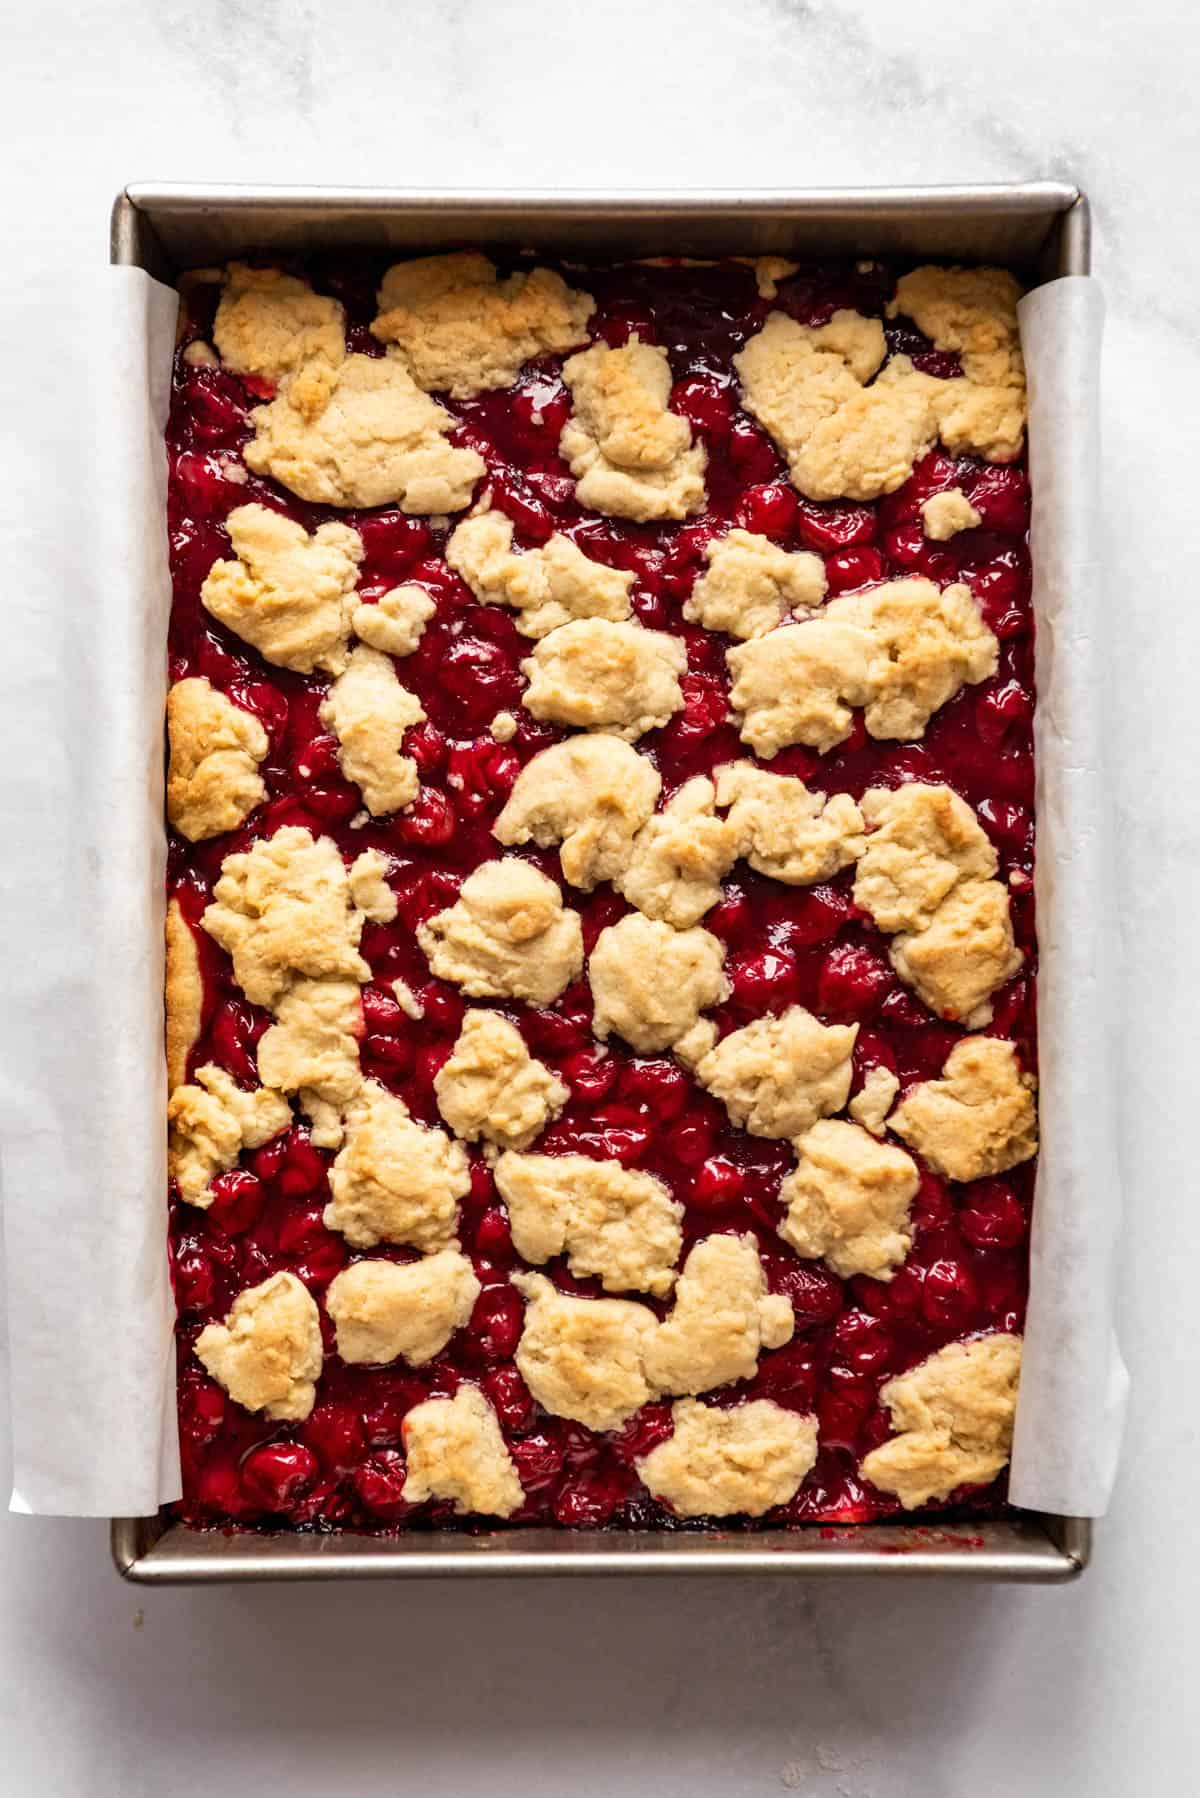
- Bake until golden brown and set. It takes another 35-40 minutes in the oven for these bars to bake through and the cookie topping to start browning around the edges. Remove from oven and cool completely.
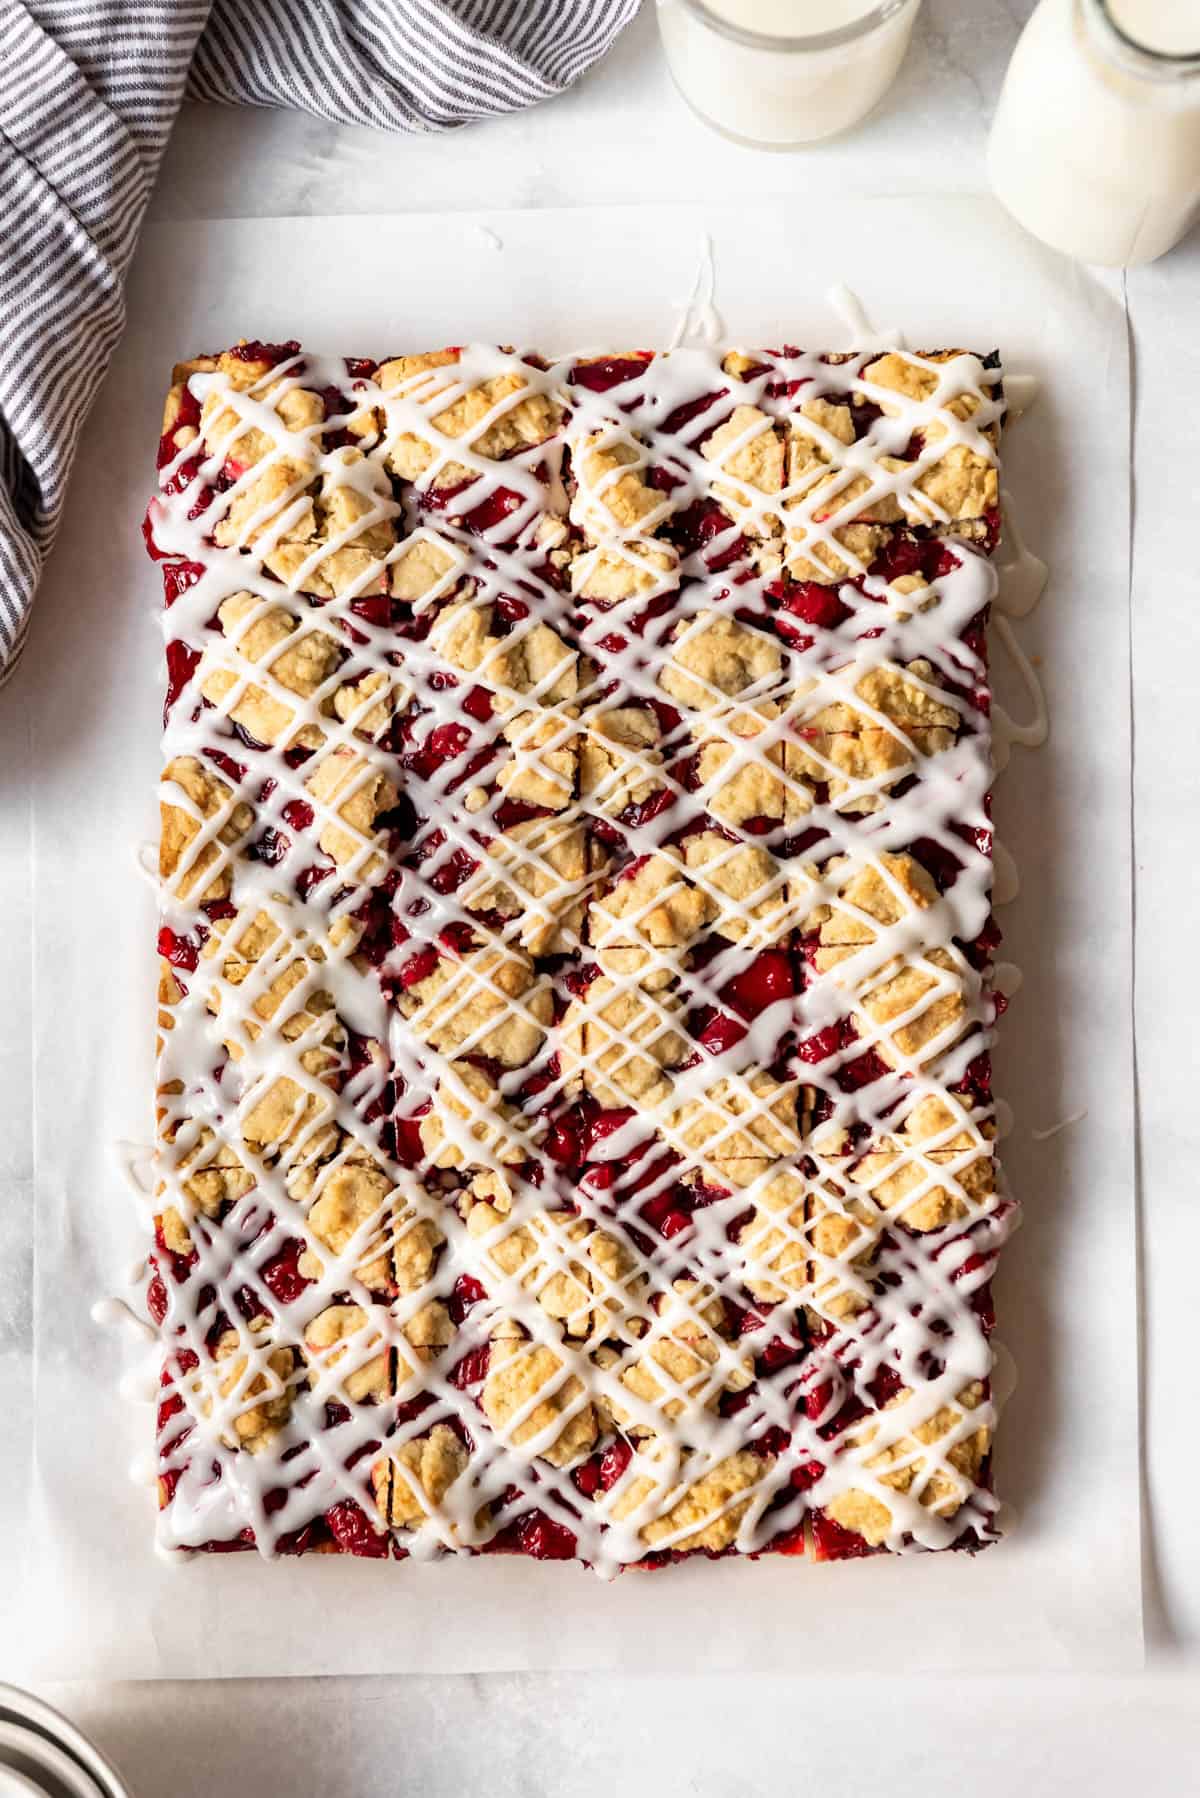
- Make the glaze. In a medium bowl, whisk together powdered sugar, milk, and almond extract until you have a thin glaze for drizzling over the bars.
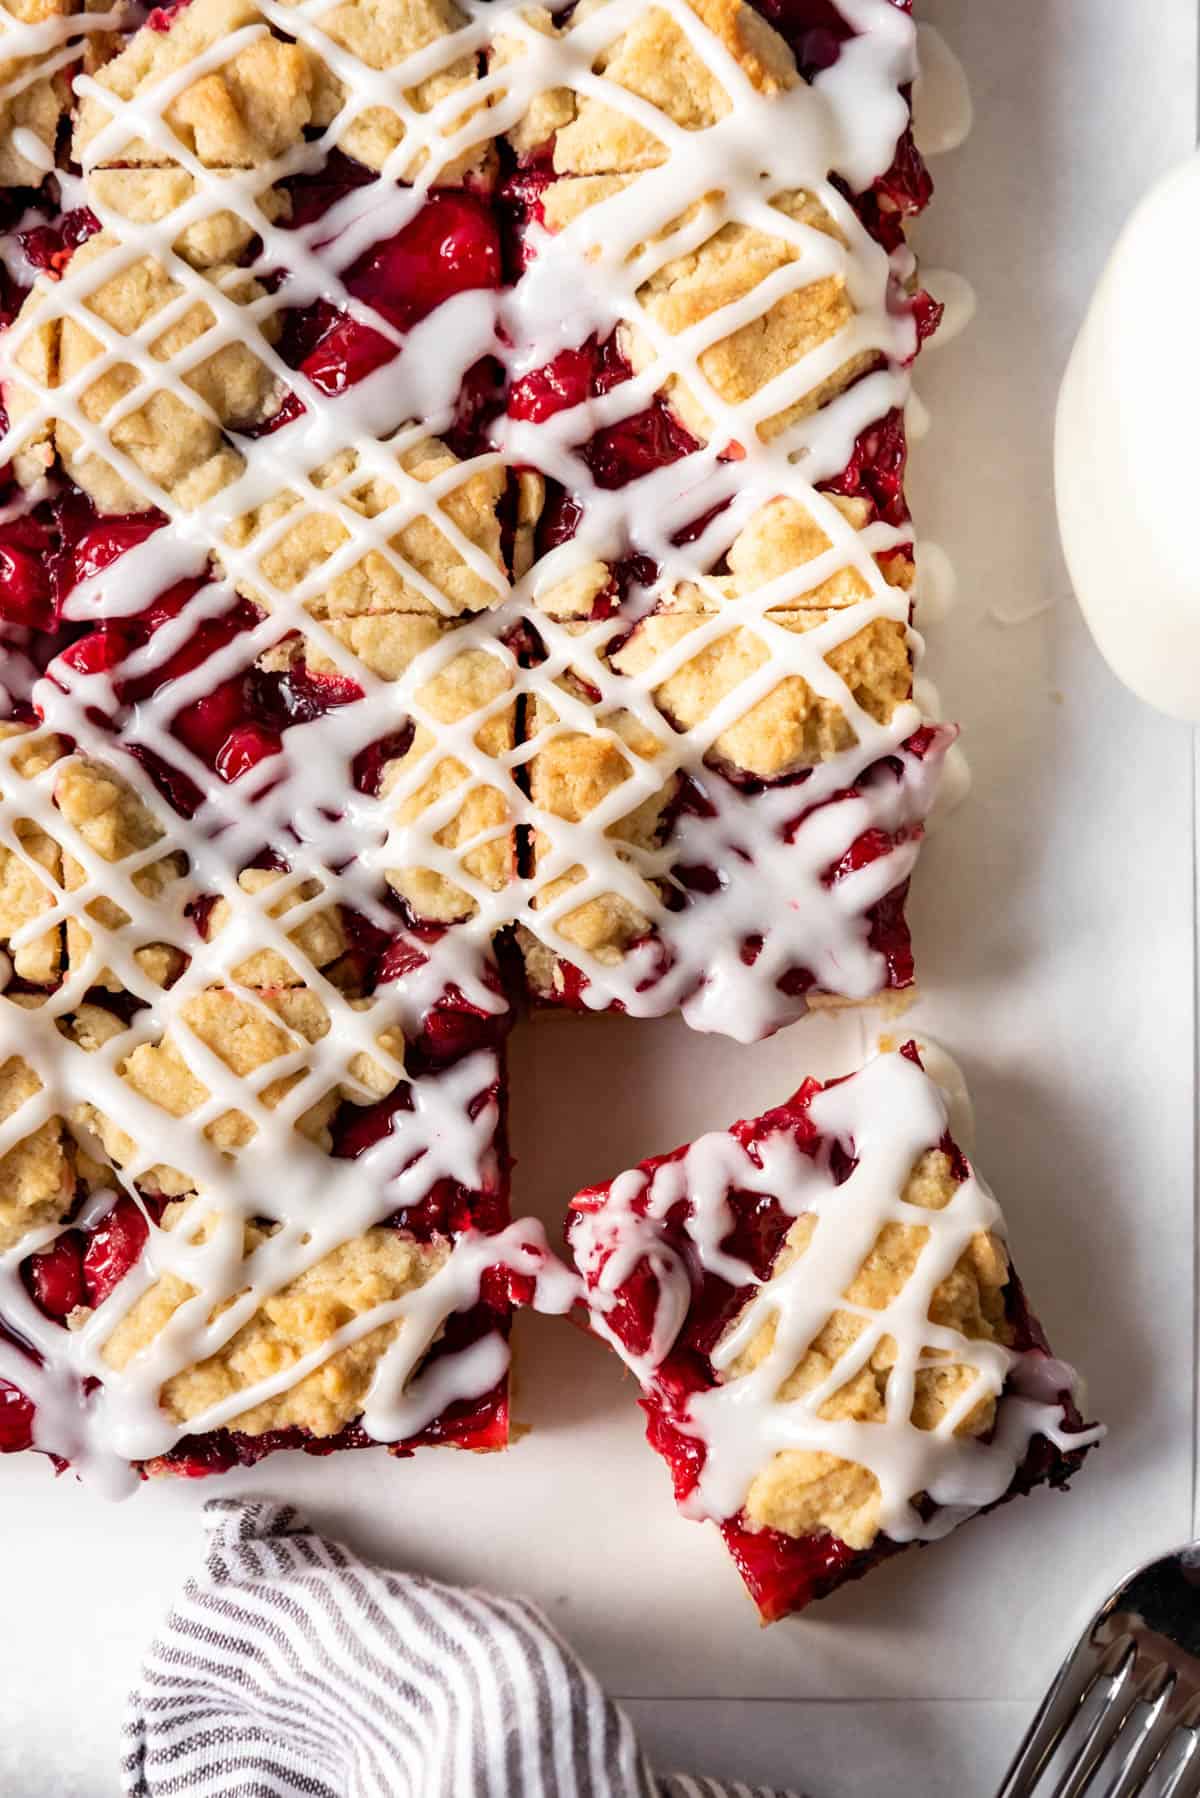
- Cut into squares and glaze. This is where the parchment sling comes in handy because you can lift the cooled bars out of the pan and more easily cut straight lines. Don’t attempt this if the bars aren’t completely cool though! I like to do small-ish squares for these bars, then glaze afterwards so I don’t mess up my pretty zigzag lines.
Expert Tips
- Do not use sweet cherries without adjusting sugar first. If making your own homemade cherry pie filling with sweet cherries, which are what you usually find in grocery stores during cherry season unless you happen to live in Michigan or Wisconsin and can get access to tart cherries, you might want to decrease the sugar in your filling by half.
- Always par-bake the bottom crust. I found this out the hard way through recipe testing. It helps to set the bottom so it’s cooked all the way through after adding the cherry pie filling.
- Cool completely before cutting. If you cut into these too early they will be super soft and crumbly rather than being firm enough to hold like a bar.
- Try with other pie fillings. These bars work just as well with blueberry pie filling, apple pie filling, or other fruit fillings.
- If your glaze is too thin, add a teaspoon or two of more milk. If it’s too thick, then add a tablespoon more of powdered sugar.
Storage
These cherry pie bars will keep well at room temperature for 2-3 days or up to 1 week in the fridge. We actually prefer them chilled and they last longer that way so it’s a win-win.
You can also freeze the individual bars for up to 2 months. Wrap them in plastic wrap and store in an airtight container. Thaw on the counter before serving.
These cherry bars are great to make ahead of time since they need to cool to set anyways. I even make them the day before and keep them in the fridge before it’s time to serve dessert to guests.
FAQ’s
Sure! I have used a 1-to-1 gluten-free flour substitute with great results before. Just make sure your cherry pie filling is also gluten-free or make my homemade version which uses cornstarch as the thickener so you can be sure.
If you want more of a cherry crisp kind of bar with oats in it, I would recommend using the cookie base from these oatmeal fudge bars or my strawberry rhubarb crumb bars instead.
You could absolutely use fresh cherries to make your cherry pie filling, then use that in these bars. I haven’t tried making them by tossing cherries with sugar and cornstarch, then adding them onto the crust, topping, and baking that way though.
More Dessert Bar Recipes
Cherry Pie Bars
Ingredients
Bars
- 1 1/2 cups (300g) granulated sugar
- 1 cup (227g) salted butter
- 2 large eggs
- 2 teaspoons vanilla extract
- 3 cups (423g) all-purpose flour
- 1 teaspoon baking powder
- 1 teaspoon salt
- 2 (21-ounce) cans cherry pie filling (or 4 ½ to 5 cups homemade)
Glaze
- 1 cup (120g) powdered sugar
- 1 Tablespoon milk
- 1/2 teaspoon almond extract
Instructions
- Preheat oven to 375℉ (191℃). Line a 9×13-inch baking dish with a parchment paper sling.
- Beat sugar and butter together until creamy and smooth, about 2 minutes. Add eggs and vanilla, scraping down the bottom and sides of the bowl and mixing well.1 ½ cups (300g) granulated sugar, 1 cup (227g) salted butter, 2 large eggs, 2 teaspoons vanilla extract
- Add flour, baking powder, and salt, stirring until combined to make a soft dough.3 cups (423g) all-purpose flour, 1 teaspoon baking powder, 1 teaspoon salt
- Press 2/3 of the dough into the prepared baking dish, then bake for 10-12 minutes.
- Add the cherry pie filling to the partially baked bottom crust, spreading into an even layer. Drop remaining dough onto the cherry filling in spoonfuls. You want some of the cherry filling to peek through. Bake for 35 to 45 minutes until golden brown and the center is set. Remove from oven and cool 15 to 20 minutes.2 (21-ounce) cans cherry pie filling
- Whisk glaze ingredients together in a bowl until smooth. Drizzle over the bars, then cut into squares and serve.1 cup (120g) powdered sugar, 1 Tablespoon milk, ½ teaspoon almond extract
Video
Notes
- Storage: These cherry pie bars will keep well at room temperature for 2-3 days or up to 1 week in the fridge. We actually prefer them chilled and they last longer that way so it’s a win-win.
- Freezing: You can also freeze the individual bars for up to 2 months. Wrap them in plastic wrap and store in an airtight container. Thaw on the counter before serving.
- Variation: These bars work just as well with blueberry pie filling, apple pie filling, strawberry pie filling, raspberry pie filling, or other fruit fillings.

I made these and they were so yummy! The recipe was really easy to follow!😀😋
This recipe should be called Cheery COBBLER. “Bar” suggests something you can pick up with the hand and eat. Thiis definitley needs a bowl and a spoon. Not successful. And took way too long to put together.
This was exactly the recipe I was looking for. Before I made a similar recipe but it only made an 8×8 pan worth. These are delicious and I loved using fresh cherries with your cherry filling recipe. I don’t like almond extract much so I just opted it out. Thank you! Will be making these a lot!
Great! I’m a big cherry fan. I’m glad you found what you were looking for!