
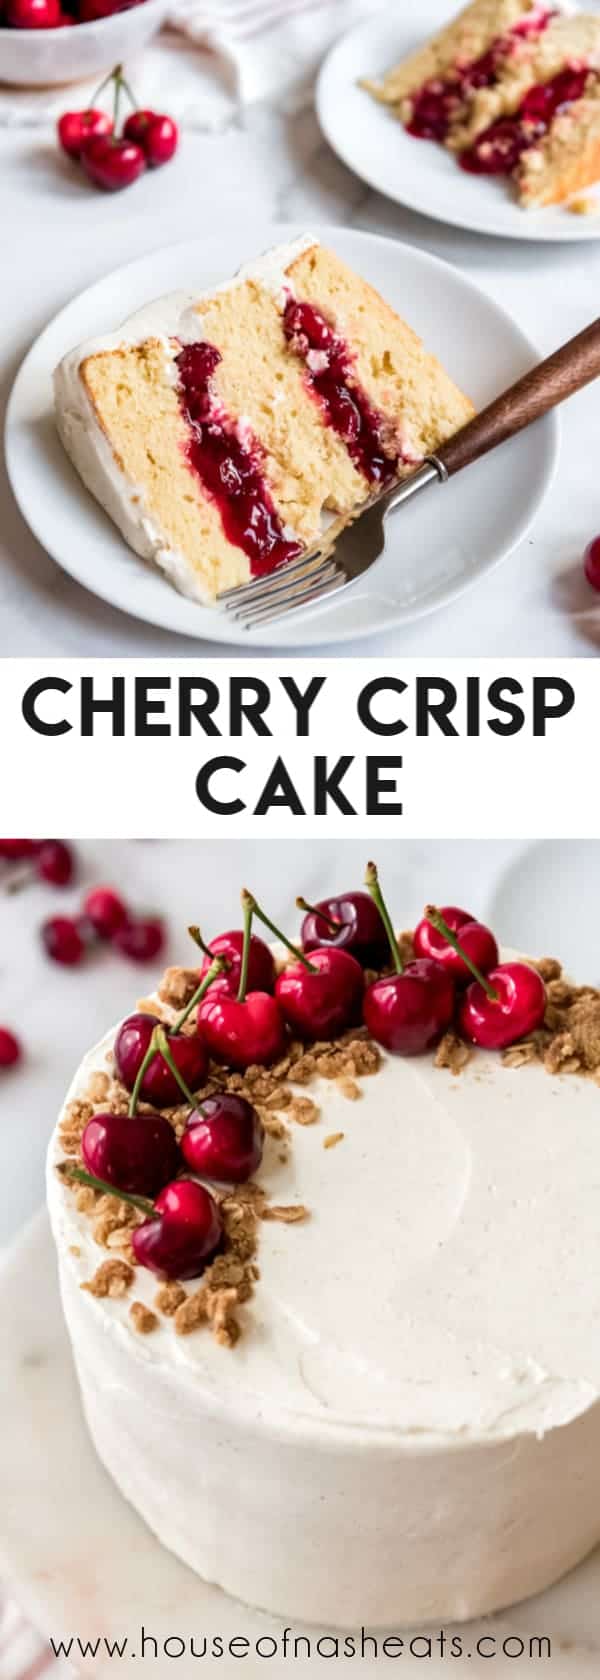
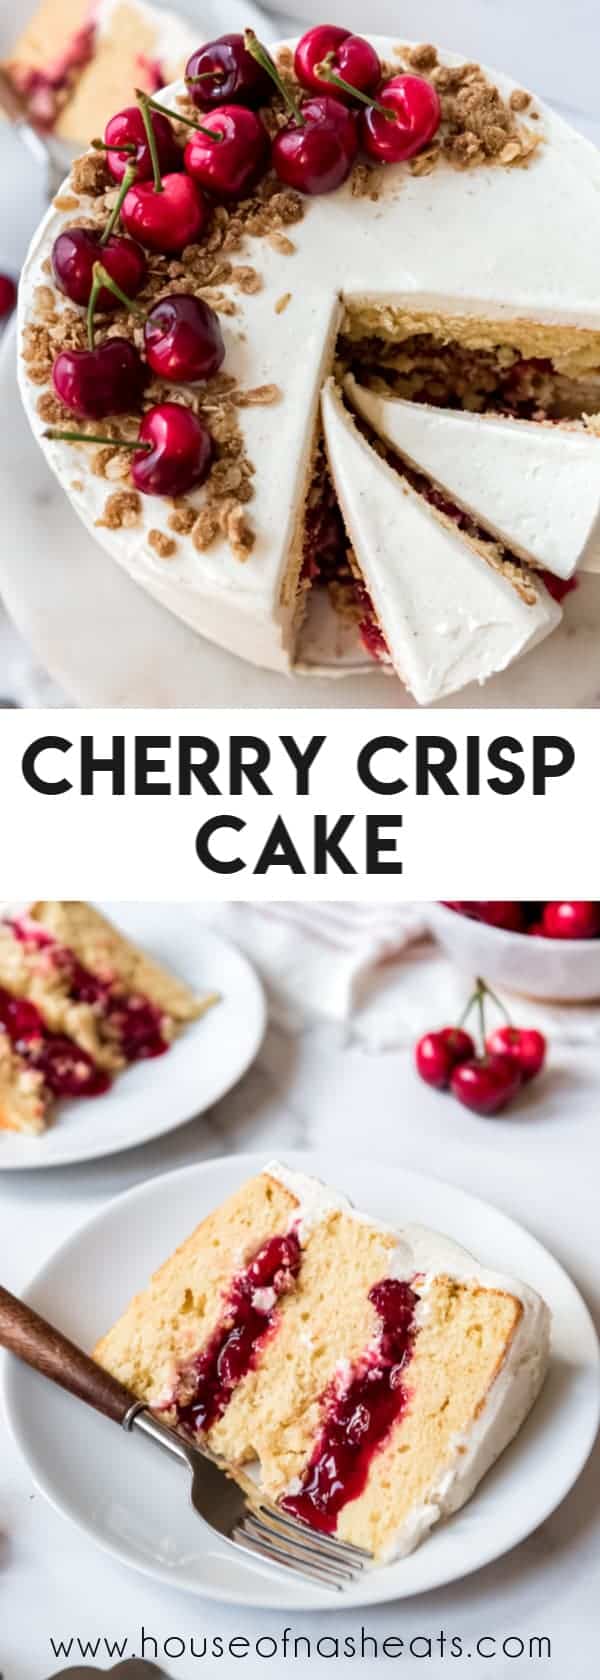
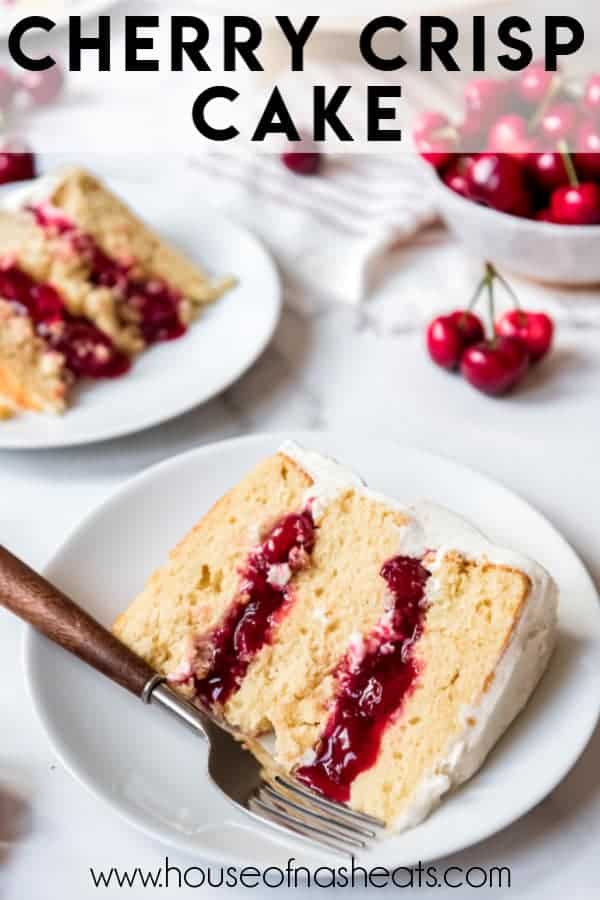
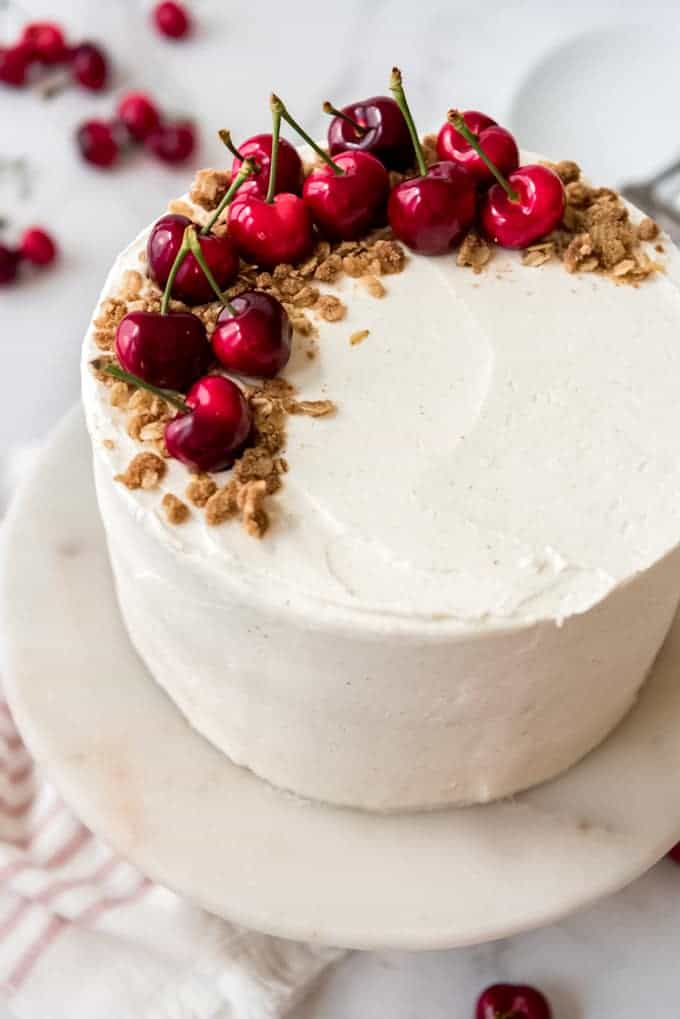
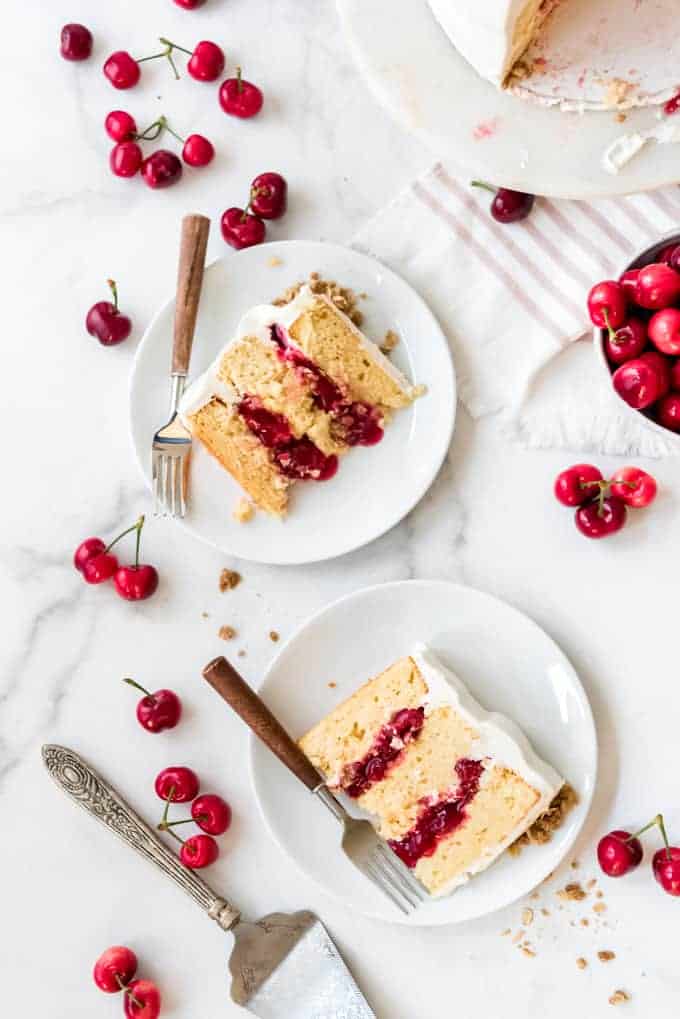
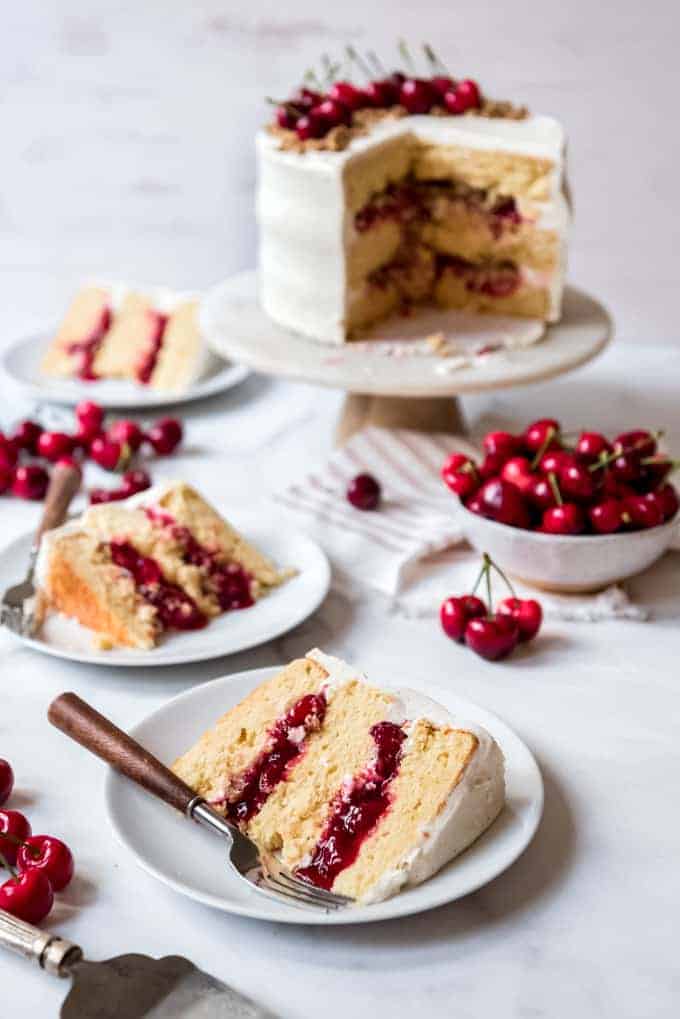
Layers of moist vanilla cake with cherry pie filling, a crisp oat crumble, and the best vanilla bean buttercream come together to make this Cherry Crisp Cake!
When summer fruit season is here, I find myself craving cherry desserts nonstop! Some of our other popular recipes using this wonderful ruby red fruit are my Homemade Cherry Pie, Cherry Vanilla Ice Cream, and Black Forest Cake!
Happy birthday to this here little blog of mine! It’s hard to believe that I’ve been creating and sharing recipes on this little corner of the internet for FOUR years now! And just like in years past, I am celebrating with a special new addition to my collection of cake recipes.
I absolutely love and adore cobblers, crisps, and fruit pies or all kinds. But when it comes to a special occasion, I feel this sense of obligation to bake a celebratory cake.
I love baking cakes and have started branching out and experimenting with new cake flavors and combinations. Once you have some cake basics under your belt, like a yellow cake, vanilla cake, or chocolate cake, you can mix and match with frostings and fillings to make some really unique dessert creations that are sure to delight friends and family.
This year though, I decided to do a mash-up of my favorite vanilla cake and a classic cherry crisp! The result was even better than I imagined it would be and I’m itching for another reason to make it again ASAP!
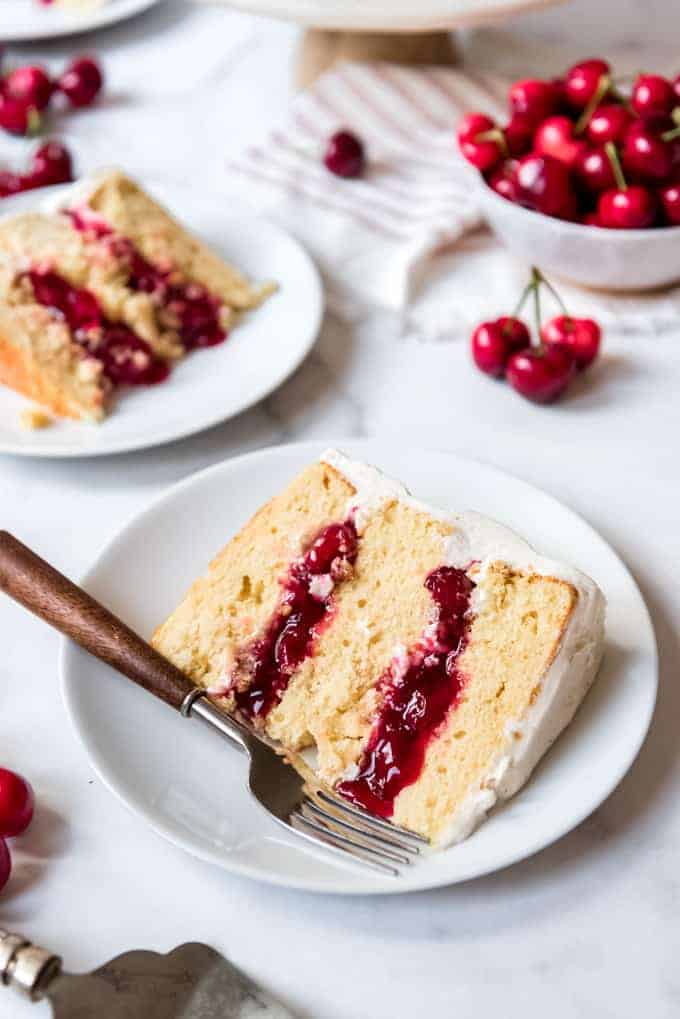
The cherry filling is just a half-batch of the filling I make for pie. And the crisp filling is soooo good and adds the most amazing textural element to this cake.
I thought about this cake for days before I made it and honestly wasn’t sure how it would turn it. But it’s easily one of my favorite cakes I’ve ever made.

How to make cherry crisp cake
The length of the recipe and ingredient list might be daunting for some bakers, but none of it is actually very difficult. It’s just a few more steps than a normal cake to make the fillings. You can even cheat on the cherry filling and just used canned cherry pie filling if you want. And the super easy crisp crumble layer takes all of 2 minutes to make and 10 minutes to bake.
You can make any of the parts of the cake – the cake layers, the fillings, or the frosting – a day or more in advance. Then just assemble on the day you want to serve the cake!
Make the cake layers
- Preheat oven to 350°F. Line three 8-inch baking pans with parchment paper circles on the bottom and spray the bottom and sides with baking spray.
- Beat butter, oil, and sugars in a large mixing bowl until creamy and light, about 2 minutes.
- Add the eggs, one at a time beating between each addition and scraping the sides and bottom of the bowl as needed.
- Add half of the flour, along with all of the baking powder and salt. Mix until combined.
- Add the greek yogurt and vanilla and mix again.
- Add the remaining flour, mixing just until combined. Divide the batter evenly between the three pans.
- Bake for 23-25 minutes until a toothpick inserted into the center comes out clean. Cool completely.
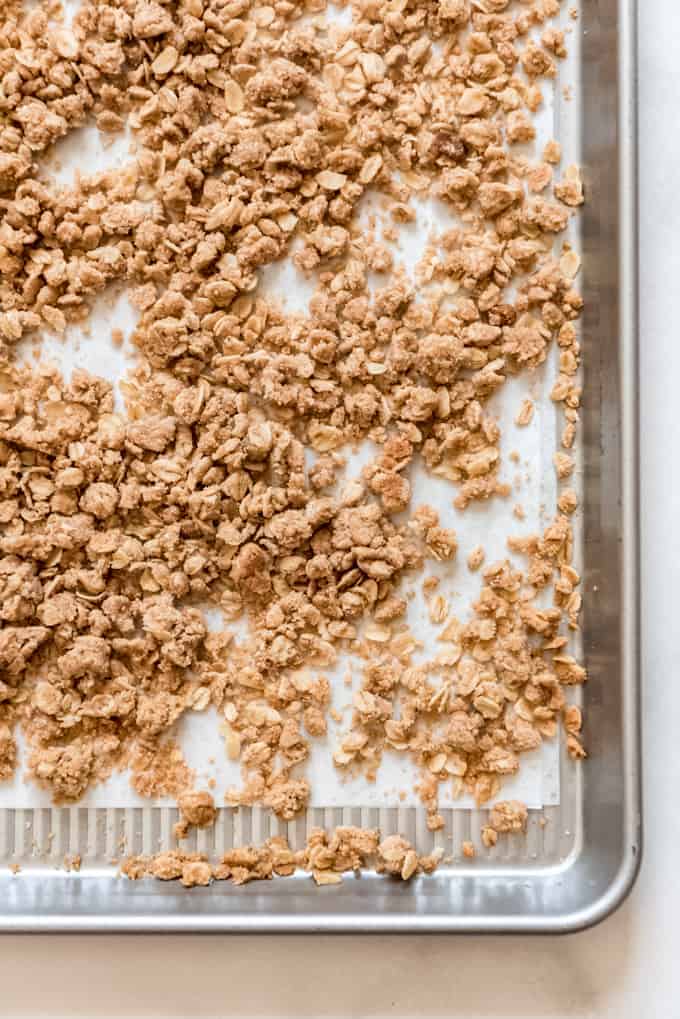
Make the crisp topping/filling
- Preheat the oven to 375°F.
- In a medium bowl, combine oats, flour, brown sugar, cinnamon, and salt.
- Add the butter and mash it into the oat mixture using a fork or even just your hands until it resembles crumbs.
- Spread onto a parchment-lined baking sheet and bake for 8-10 minutes, stirring once about halfway through. Remove from the oven and cool.

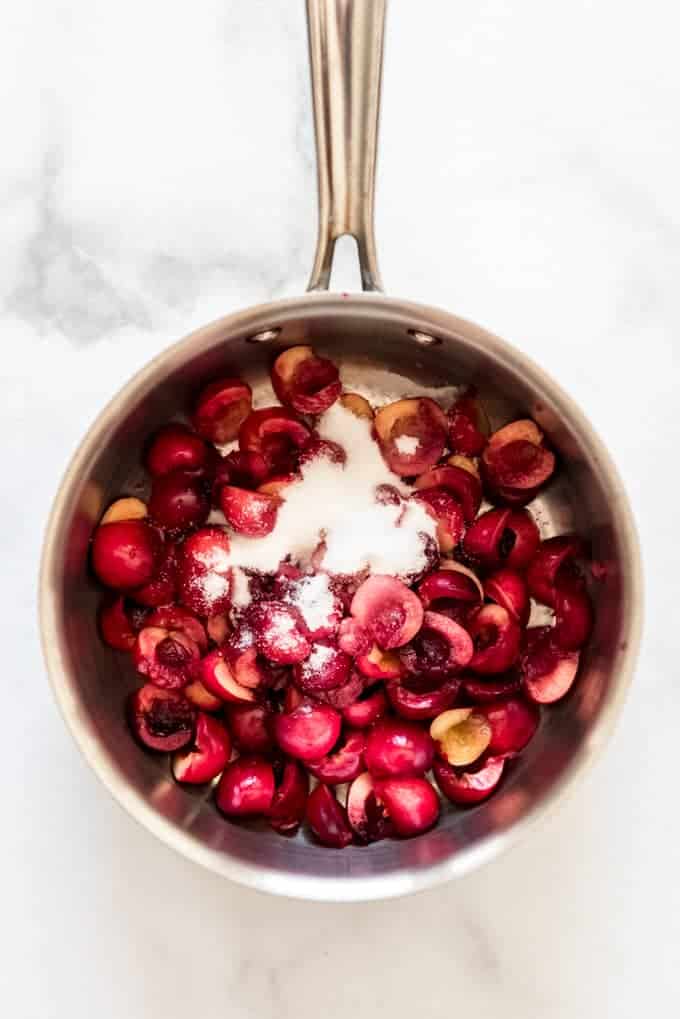
Make the cherry filling
- Wash and pit the cherries. Slice the cherries in half and add to a medium sauce pan with the sugar and cornstarch, tossing to combine. You can use frozen cherries or one can of tart cherries along with their juice in place of the water if fresh cherries aren’t in season.
- Add water and lemon juice, then bring to a boil over medium-high heat until the cherries have released some of their liquid and softened, about 10 minutes. The juice will thicken into a gel. Depending on your cherries, you may want to add a drop of red gel food coloring (affiliate link) for a more vibrant color.
- Cool completely.
Make the buttercream frosting
- Beat the butter in a large mixing bowl for 3 minutes until light and creamy.
- Add the powdered sugar and beat again until combined.
- Add the cream, vanilla bean paste (or just plain vanilla extract if you don’t have vanilla bean paste on hand), and salt, then beat on medium-high speed for 5 minutes until light.
- Use a strong wooden spoon or spatula to stir the frosting by hand for a few minutes. This helps to knock out some of the air bubbles before using it to frost the cake for a smoother finish.
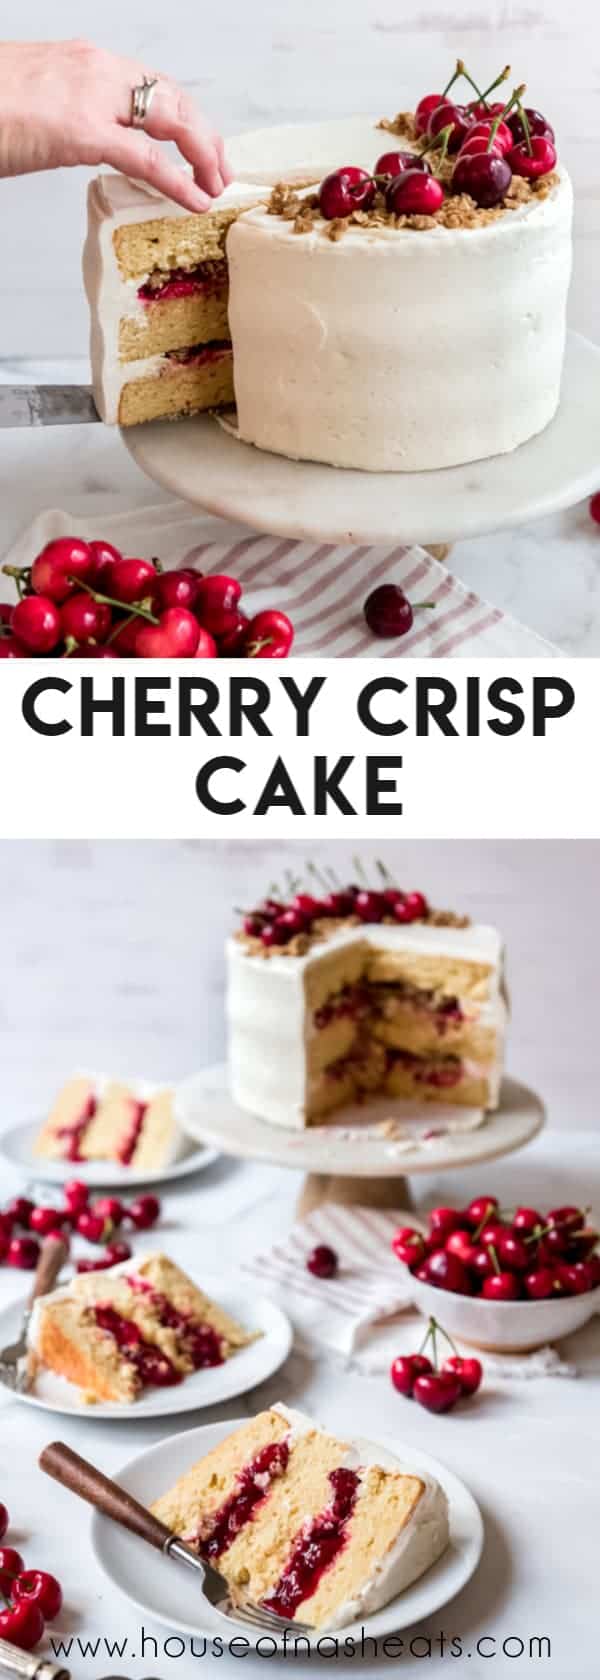
Assemble
- Level the cake layers as needed so they aren’t rounded on top. Place an 8 1/4″ cardboard round on a cake turntable, if using. I didn’t have one for years, but have since invested in one and love using it! Spread a small amount of buttercream on the cardboard to hold the cake in place.
- Place first layer on the cardboard round or directly onto a cake plate. Frost with a thin layer of buttercream. This will keep the cherry filling from soaking into the cake too much.
- Pipe a ring of frosting around the edge of the cake layer to act as a dam to hold in the fillings. Add half of the cherry filling, spreading it into an even layer. Top with half of the crumble.
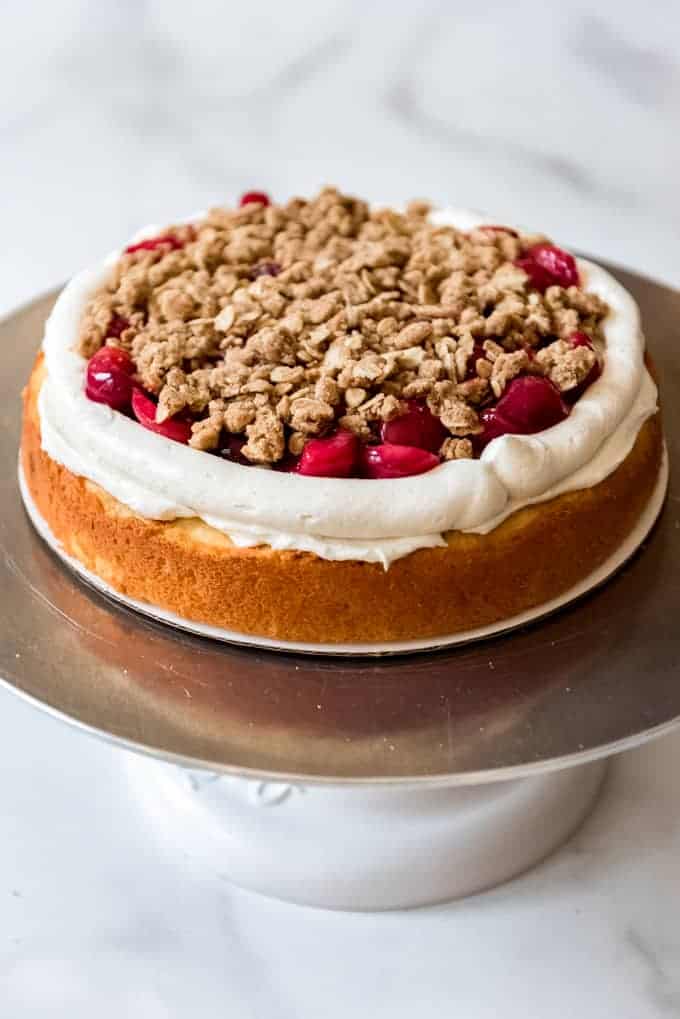
- Add on the next cake layer, and repeat. Top with final layer of cake. Freeze for 15 minutes to help set the filling so it’s easier to frost the cake.
- Crumb coat the cake by spreading a thin layer of frosting all around the top and the sides, then sticking the entire cake into the freezer for 10 minutes.
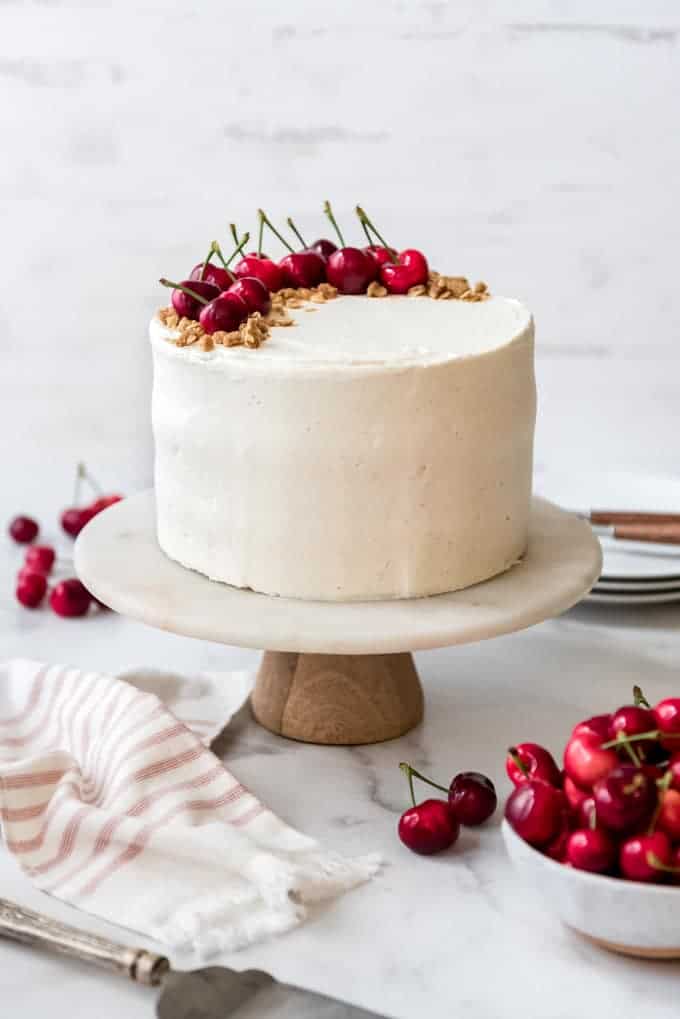
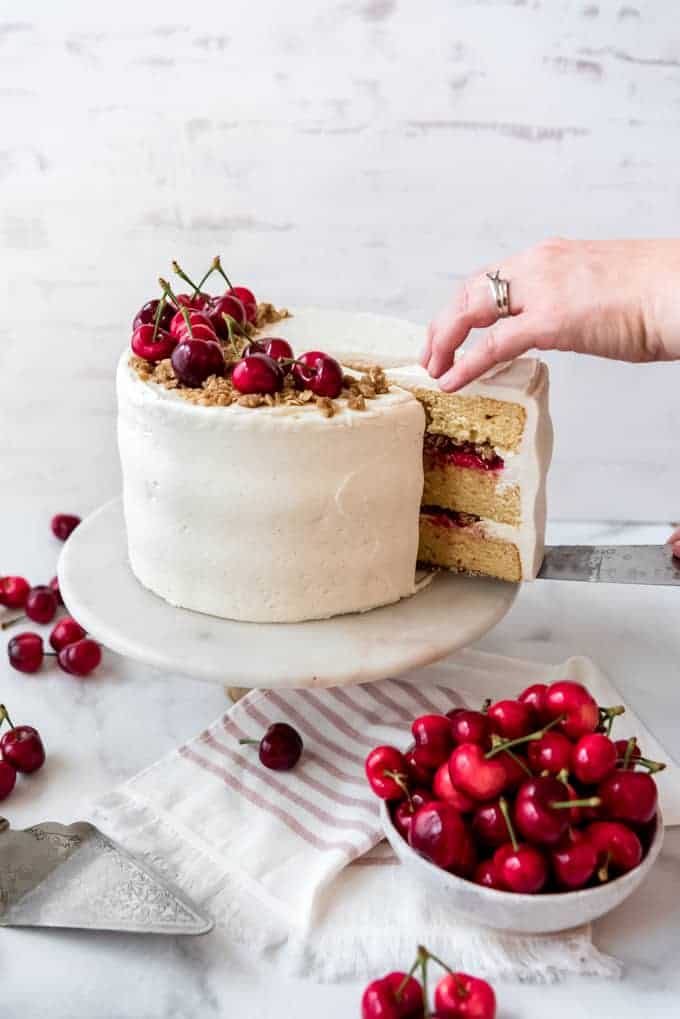
- Add the final coat of buttercream around the edges and top of the cake. If you want really smooth, clean edges like in the picture, use a flat cake scraper held at a 45 degree angle to the cake and turn the cake on the turntable to get the clean look. You may need to go around more than once, patching and filling in spots where the frosting is thinner until this look is achieved.
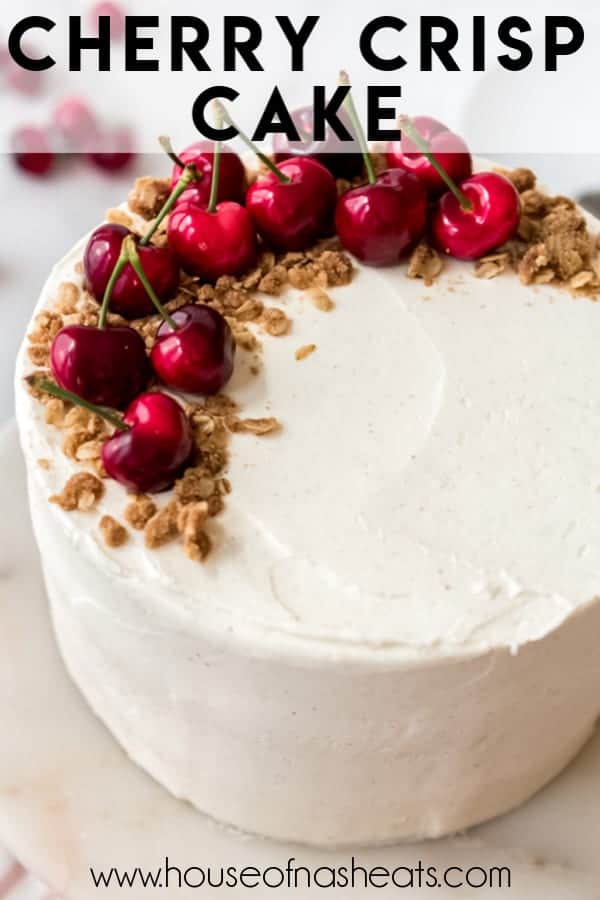
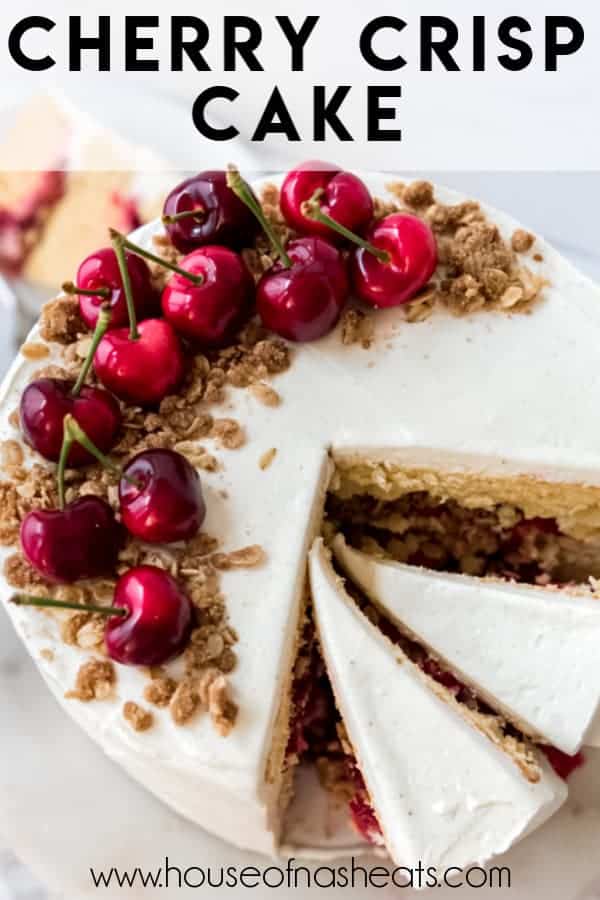
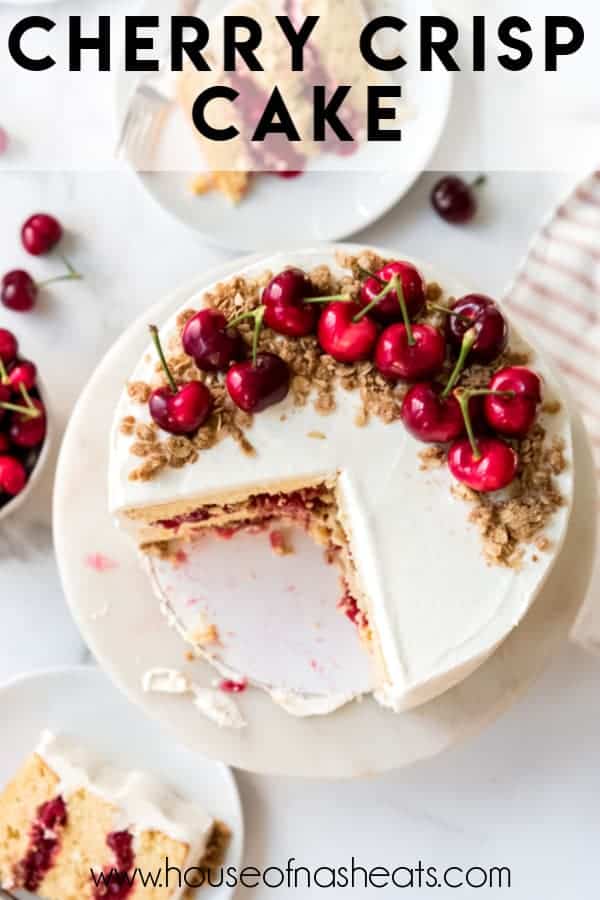
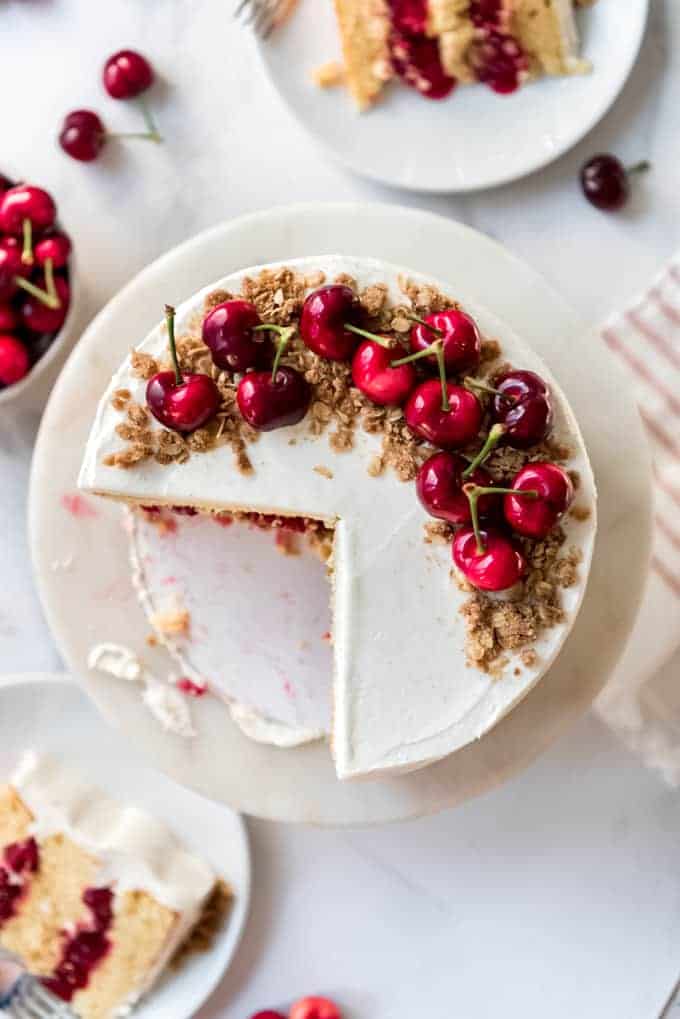
- Decorate the top of the cake with reserved crisp topping and fresh cherries as a garnish.
Tips for making and decorating professional looking cakes
I’m definitely not a cake professional. And I still advocate the beauty of a rustically finished cake that is frosted by hand with just a butter knife and has swirls on top instead of a perfectly smooth finish.
But I’ve also discovered that I really enjoy the challenge of creating something that looks like it is professionally done. Here are my best tips and tricks for achieving those kinds of results!
Make sure your layers are level
I think most people know already that you shouldn’t try to stack cake layers that are rounded on top. But it bears repeating.
One year my husband decided he was going to make a cake on a whim. Except he took the cake layers with round tips and balanced them on top of each other, trying to fill in around the edges with frosting. It was a disaster and the cake split right down the middle.
- Getting level cake tops straight out of the oven: I have found that if I use room temperature ingredients, my cake layers bake more evenly and I rarely have to do much leveling, especially with this cake recipe. But pans and ovens make a difference too. Make sure to preheat your oven for a good 20 minutes before baking for the most even results.
- Leveling cake layers: If you do need to level your cake layers so you have a flat surface to work with (it happens to the best of us), use a long serrated knife to cut in horizontally an inch or two all around the top of the cake, then carefully cut all the way across and lift off the scraps. Or you can purchase a cake leveler from a craft store or online.
Cake decorating tools to invest in
Having the right tools makes decorating cakes so much easier! These are the ones I highly recommend if you find you enjoy making and decorating cakes and want to take your skills to the next level.
- Cake turntable. This is a flat disc that you can manually spin while holding a large, flat tool at a 45 degree angle to get smooth frosting around the edges of the cake. It also helps to get on eye-level with the cake and make sure it is level after adding each layer.
- Offset spatula. These tools are basically a cross between a big flat knife and a rubber spatula and they make it much easier to spread the frosting around the cake and finish the top.
- Bench scraper or other edge finisher. You can get these tools in metal or plastic in various sizes, but the idea is that it has a sturdy, flat edge that drags around the side of the cake as you spin it, smoothing out the frosting for clean, even edges.
- Cardboard rounds. These are available at any craft store in the same size as your cake pans. Place one down before you begin stacking and assembling your cake. Then it’s easy to slip a cake lifter under the cake and move it to the cake stand.
- Cake lifter. This large, flat metal tool is basically like a giant spatula that slides under the cake and helps you move it to a decorative cake stand.
Make space in your fridge or freezer
I have had the most success frosting cakes when I take advantage of a blast of chilly air to help set the filling and frosting, especially if I’m making cake during warmer months when my house isn’t very cool. The fridge works just as well as the freezer, although you will need to wait longer for the frosting and filling to set, which is why I recommend using the freezer if you can find the space.
This is one of the fussiest parts of cake decorating because it makes everything take longer when you are taking the whole cake in and out of the freezer every 10-15 minutes, but it makes it so much easier to frost without worrying about the layers sliding around or crumbs getting mixed into the outer frosting layer.
Also, that final 10-15 minutes in the freezer makes it so easy to transfer the whole cake to a cake stand without worry about getting fingerprints on the cake because even that small amount of chilling helps the buttercream get sturdy enough for the transfer without damage.
More cake recipes
- Strawberries and Cream Sheet Cake
- Best Carrot Cake
- Chocolate Texas Sheet Cake
- German Chocolate Cake
- Cherry Chip Cake
- Best Red Velvet Cake
- Homemade Funfetti Cake
- Yellow Cake with Chocolate Frosting
- No-Bake Chocolate Eclair Cake
- Peach Cake
- Pina Colada Cake
Did you make this recipe?
Let me know what you thought with a comment and rating below. You can also take a picture and tag me on Instagram @houseofnasheats or share it on the Pinterest pin so I can see.
Cherry Crisp Cake
Ingredients
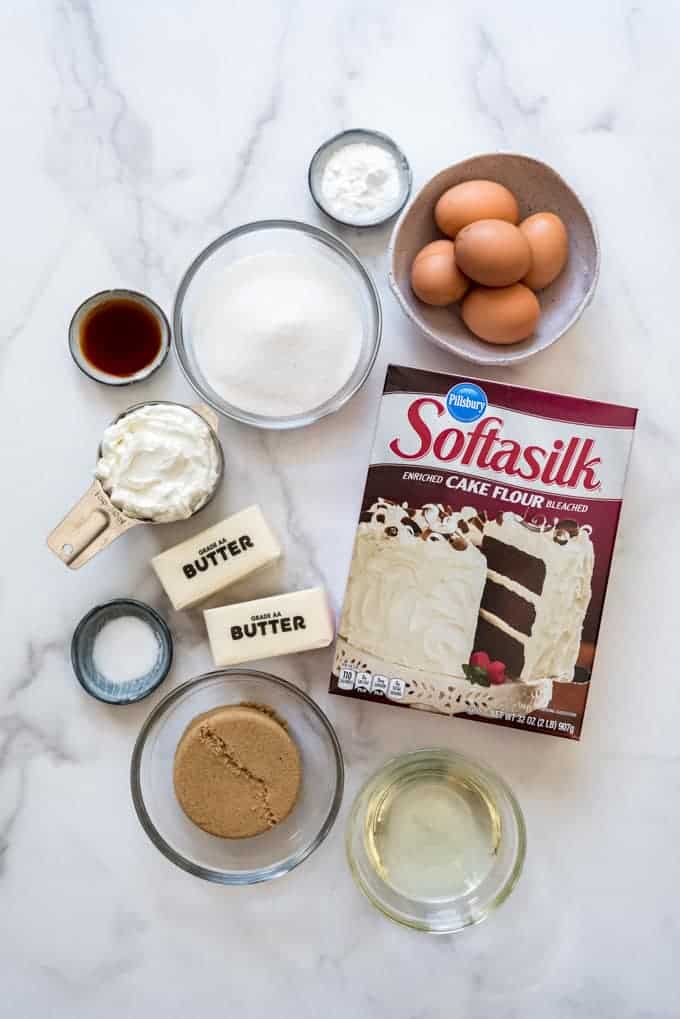
Cake
- 1 cup salted butter room temperature
- 1/3 cup canola oil
- 1 cup granulated sugar
- 1 cup brown sugar
- 1 teaspoon salt
- 5 large eggs room temperature
- 3 cups + 2 tablespoons cake flour
- 2 1/2 teaspoons baking powder
- 1 cup Greek yogurt room temperature
- 2 teaspoons vanilla extract
Crumble
- 1/2 cup old-fashioned oats
- 1/4 cup all-purpose flour
- 1/4 cup brown sugar
- 3 Tablespoons salted butter room temperature
- 1/2 teaspoon ground cinnamon
- 1/4 teaspoon salt
Cherry Filling
- 2 1/2 cups cherries pitted
- 1/4 cup granulated sugar
- 1 Tablespoon cornstarch
- 1/4 cup water
- 2 teaspoons lemon juice
Frosting
- 2 cups salted butter softened
- 6 cups powdered sugar
- 1 Tablespoon vanilla bean paste or vanilla extract
- Pinch of salt
- 1/4 cup heavy cream
Instructions
Cake
- Preheat oven to 350°F. Prepare three 8-inch cake pans by lining the bottoms with parchment paper and spraying with non-stick spray.
- Beat the butter, oil, and sugars in a large bowl of a stand mixer fitted with the paddle attachment for 2 minutes until light.1 cup salted butter, ⅓ cup canola oil, 1 cup granulated sugar, 1 cup brown sugar
- Add eggs, one at a time, beating on medium-low after each addition and scraping the sides of the bowl as needed.5 large eggs
- Add half of the flour, baking powder, and salt, mixing just until combined.3 cups + 2 tablespoons cake flour, 2 ½ teaspoons baking powder, 1 teaspoon salt
- Add greek yogurt and vanilla. Mix again just until combined.1 cup Greek yogurt, 2 teaspoons vanilla extract
- Add remaining flour, mixing again to combine. Divide between baking pans.
- Bake for 23-25 minutes until a toothpick inserted into the center of the cakes comes out clean.
- Cool completely.
Crumble
- Preheat oven to 375°F. Line a baking sheet with parchment paper.
- Mix crumble ingredients together in a medium bowl using a fork or your hands to cut in the butter until crumbs form. Spread out on the baking sheet and bake for 8-10 minutes, stirring halfway through. Let cool.½ cup old-fashioned oats, ¼ cup all-purpose flour, ¼ cup brown sugar, 3 Tablespoons salted butter, ½ teaspoon ground cinnamon, ¼ teaspoon salt
Filling
- Combing the cherries with the sugar and cornstarch in a medium saucepan.2 ½ cups cherries, ¼ cup granulated sugar, 1 Tablespoon cornstarch
- Add the water and lemon juice, then bring to a boil over medium heat. Cook and stir until thickened and the cherries have softened, about 5 minutes.¼ cup water, 2 teaspoons lemon juice
- Cool completely before using to fill the cake or the warm filling will melt the buttercream frosting.
Frosting
- Beat the butter in a large bowl of a stand mixer using the paddle attachment for 3 minutes until light and creamy.2 cups salted butter
- Add the powdered sugar, mixing until combined.6 cups powdered sugar
- Add the vanilla bean paste, cream, and salt. Beat on medium-high speed for 5 minutes to lighten the frosting.1 Tablespoon vanilla bean paste, ¼ cup heavy cream, Pinch of salt
- Use a strong wooden spoon or spatula to stir the frosting to knock out extra air bubbles before using on the cake.
Assembly
- Place the first layer on an 8 1/4-inch cardboard cake round or directly onto a cake plate. Frost the top with a thin layer of frosting.
- Pipe a thick ring of frosting around the edges of the cake layer on top to hold in the filling. Add half of the cooled cherry filling. Sprinkle with with about half of the crumble.
- Add next cake layer and repeat with the process of frosting, piping a dam, and filling with remaining cherry filling and most of the crumble topping, reserving 1/4-½ cup for decorating the outside of the cake. Top with final layer of cake.
- Transfer the whole cake to the freezer and freeze the whole cake for 10 minutes to set the frosting and filling. You could use the fridge instead, but it will take more like 30 minutes for it to really set.
- Frost the entire cake with a thin crumb coat and freeze for another 10 minutes to set.
- Frost the sides of the cake. I like to use another 8 1/4-inch cake round (I have a plastic one for decorating purposes but another cardboard one will work as well) placed directly on top of the cake to act as a guide so it’s easy to get a 1/4-inch of frosting evenly around the edges of the cake. Just fill in frosting around the edges and hold a bench scraper at a 45 degree angle against the frosting, spinning the cake slowly to get a smooth, clean edge. You may need to do this a couple times, filling in holes with extra frosting and scraping off the excess from the bench scraper until the outside edges are clean and smooth.
- Freeze the whole cake for another 10 minutes, then use a thin knife to cut off the top plastic guide and use the last of the frosting and an offset spatula to frost the top of the cake.
- Decorate with reserved crisp topping and fresh cherries for a garnish, then serve.
Notes
- Store any leftover cake in the fridge wrapped tightly in plastic wrap for up to 4 days. You can also freeze cake slices wrapped well in plastic wrap. Thaw before serving.
- The cake layers, cherry pie filling, crisp topping, and buttercream can all be made ahead and frozen. Just thaw the filling and buttercream in the fridge overnight and let them come to room temperature on the counter for 1-2 hours before using. I like to beat the buttercream again so it’s silky and easy to spread before using.
- Canned cherry pie filling may be used instead of making the filling from scratch.
- Vanilla bean paste is wonderful for this cake because it adds beautiful flecks of vanilla bean on the outside. But you can use the same amount of regular vanilla extract instead if you don’t have vanilla bean paste on hand.
- Cake flour substitute: If you don’t have cake flour, you can make a good substitute using all-purpose flour and cornstarch. Just add 2 tablespoons of cornstarch to a 1 cup measuring cup, then fill the rest of the way with all-purpose flour for each cup of cake flour in a recipe. In this cake, that would translate to 6 tablespoons of cornstarch and 2 ¾ cups all-purpose flour.


Hi Amy, are the fresh cherries you use in the cake filling sour cherries or Sweet Bing cherries? This cake looks amazing! My husband loves cherries so I will attempt to make this when cherries are in season. Thanks!
Hi Lola! Sorry for my delayed response! I have used Rainier and Brooks cherries, which are both classified as sweet cherries.
Hi there! Im really excited to try this cake! Ive been on a bit of a cherry bender lately! I have very little experience with cakes and Im a visual learner, is there anywhere where you have pictures or perhaps a video of the assembly process?
I don’t have any videos but I have easy detailed steps and pictures that will make the process easy! It will be fun to make!