

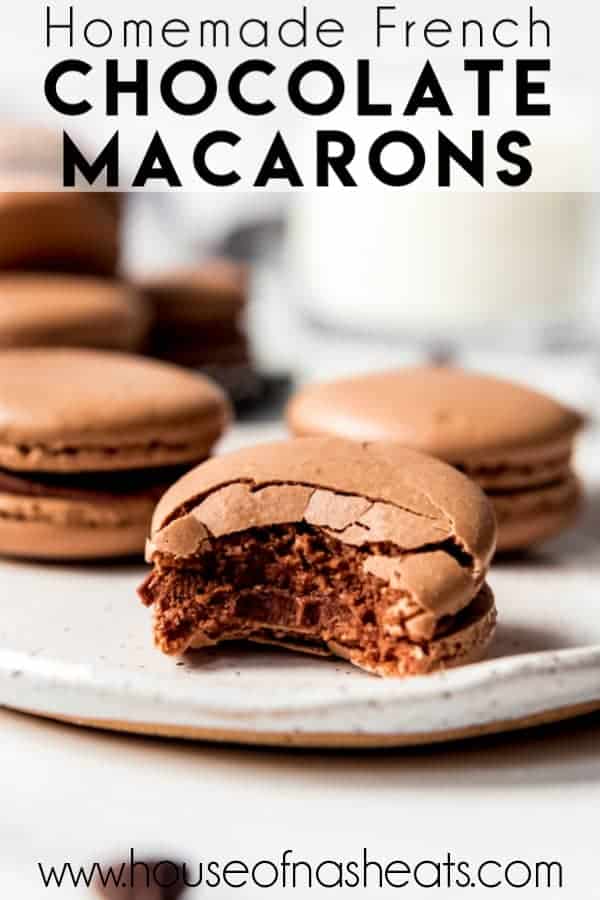

These indulgent Chocolate Macarons are filled with dark chocolate ganache and I promise they are easier to make than you would think! Don’t be intimidated by this classic French dessert. Follow my tips for the best chocolate macarons that not only taste as good (if not better) than the ones from a high-end bakery, but also don’t cost an arm and a leg!
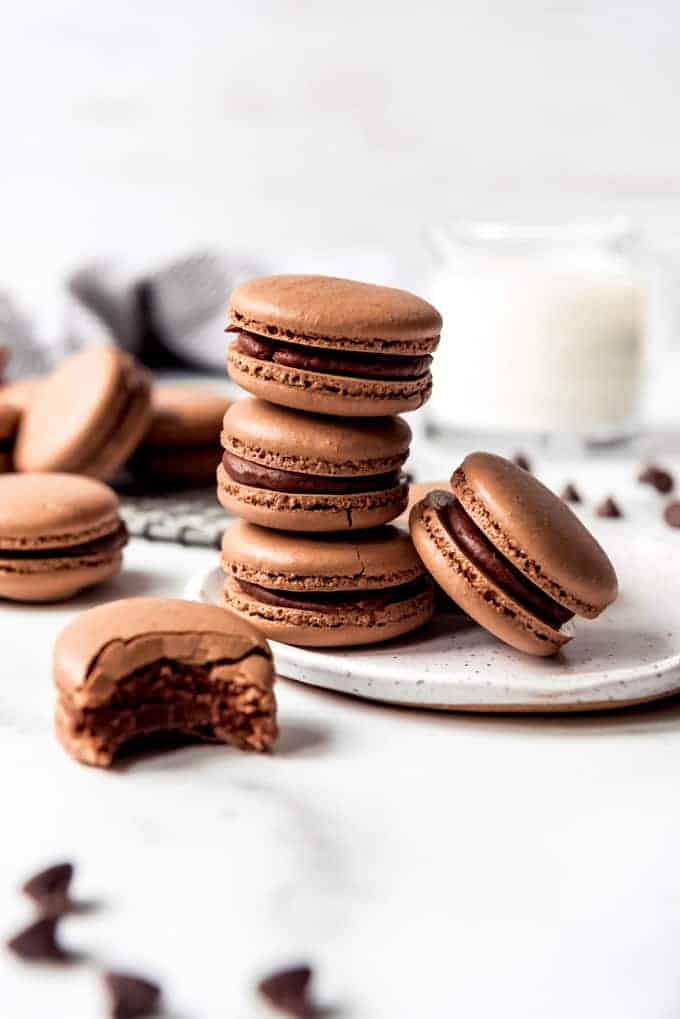
Table of Contents
French Macarons are Easier Than You Think!
Macarons are one of those treats that many people choose to buy rather than make themselves because they fear that they’re difficult to make. And I feel like so many recipes and posts I read online just perpetuate that myth!
The truth is, making macarons from scratch isn’t as hard as it might seem! I think it’s actually one of the easier recipes to try at home, and frankly, even a “failed” batch of macaron shells taste pretty darn incredible and you can still eat and enjoy them! Try this practically foolproof, easy chocolate macaron recipe for yourself and you’ll see. 😉
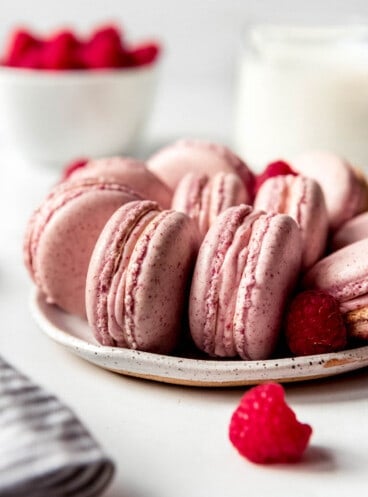
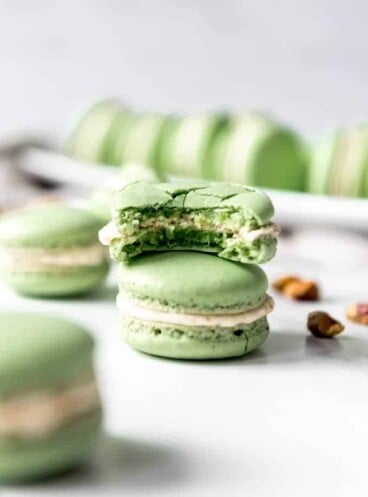
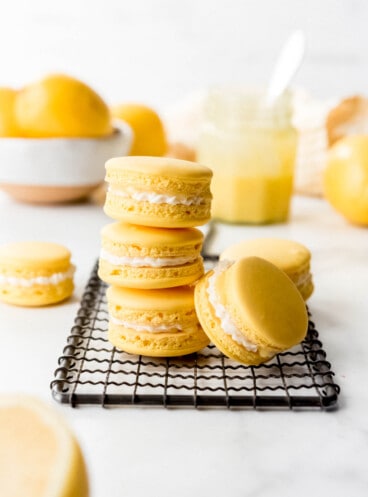
If you love macarons, make sure you check out my other easy macaron recipes like my Lemon Macarons, Cookies and Cream Macarons, Pistachio Macarons, and Raspberry Macarons.
Easy Chocolate Macaron Recipe Ingredients
- Almond Flour
- Powdered Sugar
- Cocoa Powder
- Egg Whites
- Granulated Sugar
- Semisweet Chocolate Chips
- Heavy Cream
How to Make Chocolate Macarons
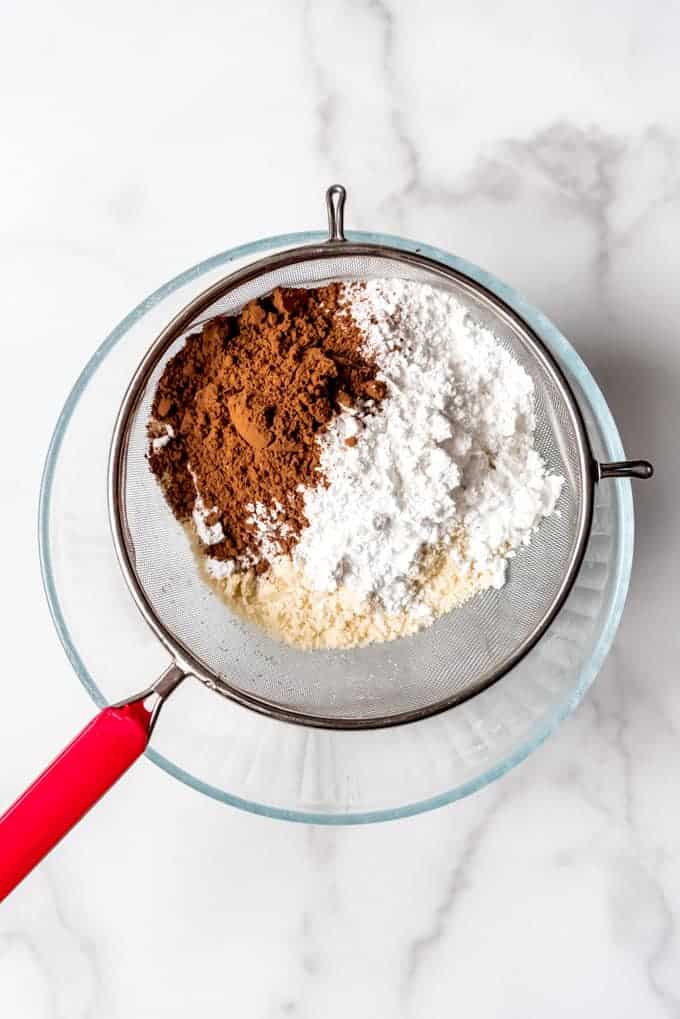
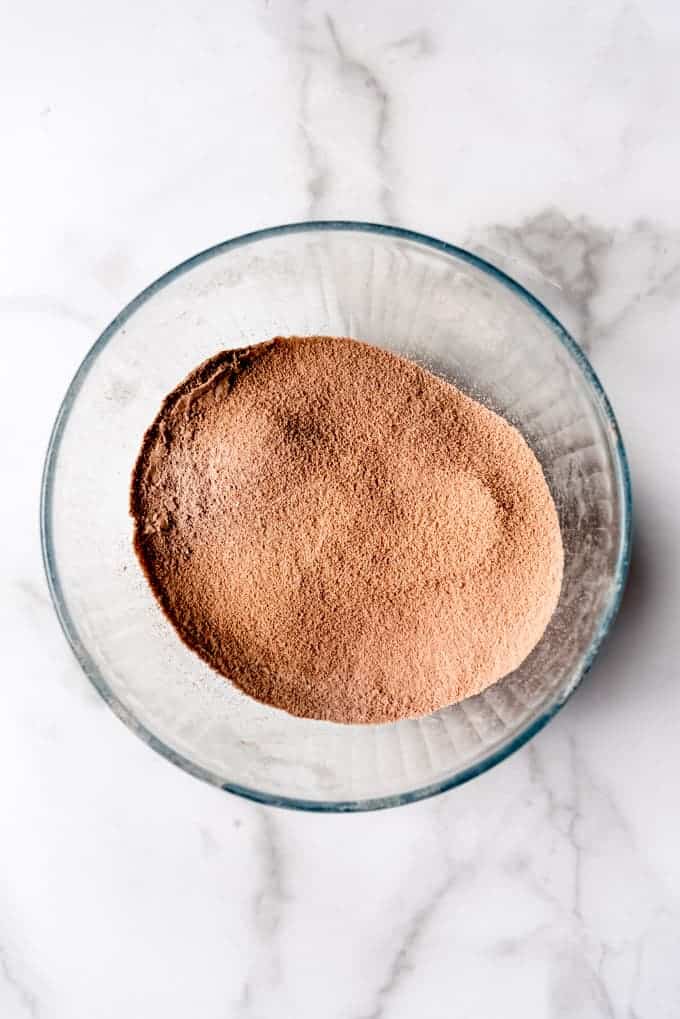
- Sifting. My first key to macaron success to is sift the almond flour, powdered sugar, and cocoa powder together TWICE through a fine mesh sieve. Not only does this help lighten the mixture and evenly combine the ingredients, but it also gets rid of larger bits of almond meal.
- For me, this is the most tedious part of making macarons. It can take a while to sift everything, but it’s one of my best tips for perfect macarons on your first try.
- Beat the egg whites. In a large, clean bowl, beat aged egg whites on medium speed until they are frothy, about 1 minute. I always use my KitchenAid with a whisk attachment for this part of things, but you could do it with a hand mixer instead.
- I’ve had the best, most consistent success with macarons when I use aged egg whites, although I don’t think they are totally necessary. To age egg whites, separate the whites and yolks, then put the whites in the fridge overnight. The next day, let them sit out on the counter for 1-2 hours before making the macarons.
- Honestly, I don’t always have time for this and will sometimes skip the overnight period in the fridge, but I always let the egg whites sit out for 1-2 hours so they really are room temperature at the very least.
- Gradually add in the granulated sugar, about 1 tablespoon at a time, whisking for 20 seconds or so after each addition, until all of the sugar has been added. Continue to whisk on medium to medium-high speed until stiff peaks form.
- Don’t overbeat the egg whites (which is why I don’t recommend upping your speed any higher than medium-high) but definitely whisk until when you stop the mixer, the egg whites have a lot of volume and will hold their shape when you lift the beaters out.
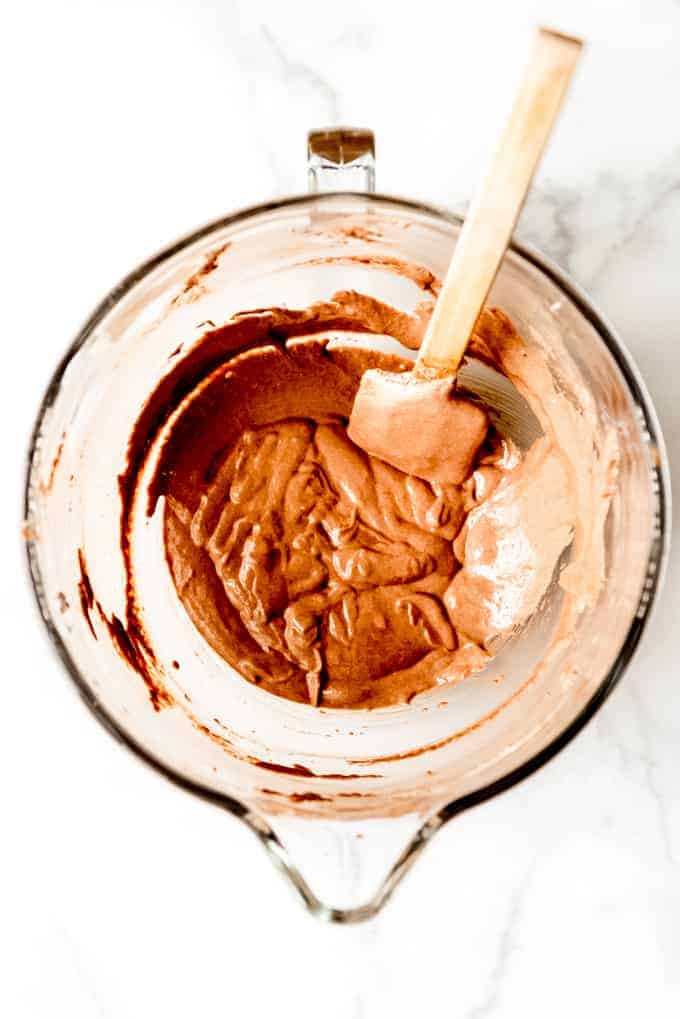
- Fold in the almond flour mixture. Some people recommend adding the sifted ingredients ⅓ at a time, but I always just dump it all in and start folding with a sturdy spatula. By “folding” the almond mixture into the stiff egg whites, I mean using the spatula to scrape the stuff at the bottom of the bowl and lift it up on top, repeating until you get a good “lava” consistency. It’s sort of a “j-shape” motion and this part is technically referred to as “macronage”.
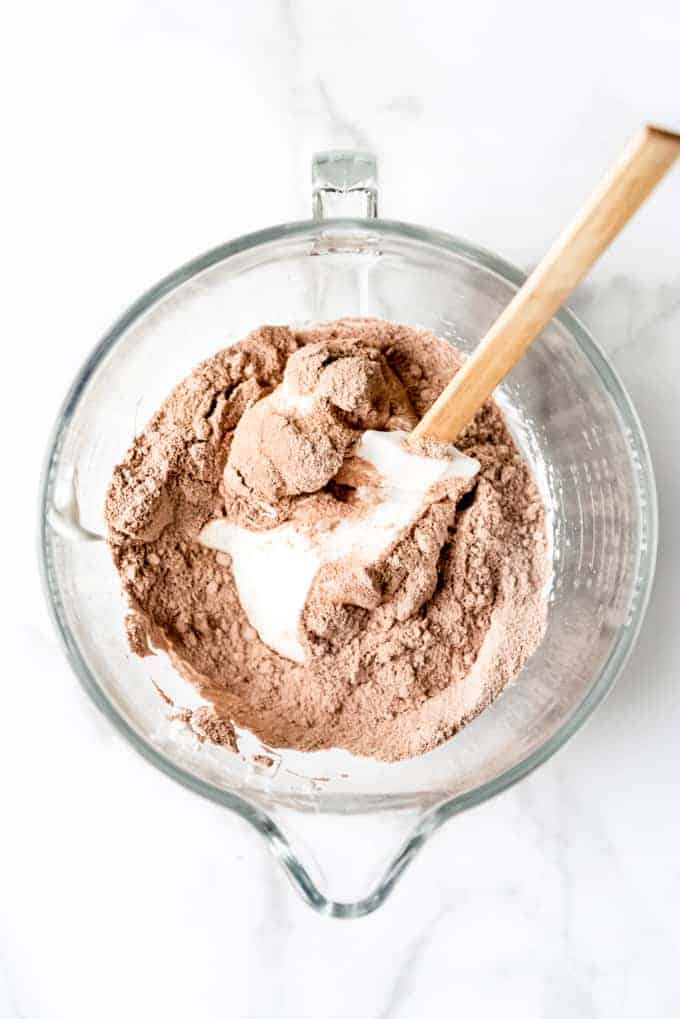
- You will know you have mixed it enough when a thick ribbon of batter flows off your spatula when you hold it up over the bowl. The batter should melt in on itself after about 10 seconds. If it falls off in blobs, you haven’t mixed long enough. If it falls off in a stream and immediately melts in on itself like honey or shampoo, there’s a chance you went too far and overmixed it.
- Honestly, this step is where most people experience the most trepidation when making macarons for the first time, but don’t let that stop you! I taught a group of 9 teenagers how to make macarons with this technique and every one of them had perfect macaron shells with feet (the ruffly looking edges at the bottom of each macaron shell that are the hallmark of excellent macarons) on their very first try.
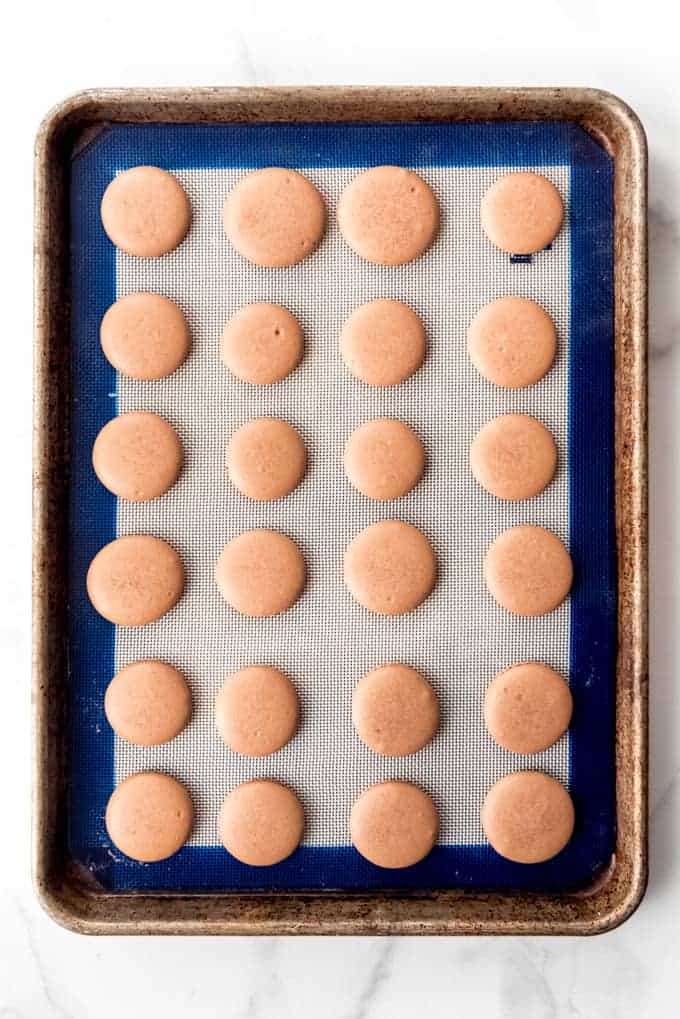
- Pipe the macaron shells. Line two baking sheets with parchment paper or silicone baking mats. Some people like to trace 1 1/2″ circles on the backside of the parchment paper as a guide for piping, and you can even buy special macaron silpat mats for this purpose, but I always just freeform it because that’s how I roll. But either way it’s important not to pipe these directly onto your baking sheets or they will stick.
- Transfer the macaron batter to a piping bag fitted with a large round tip. Or just put it in a large heavy-duty ziploc bag and cut off one corner. Pipe 1 1/2″ circles a couple inches apart on the paper or mat. Then rap the baking sheet on the counter a few times to help remove any air bubbles in the shells. You can poke air bubbles that form on top with a toothpick if you need to.
- Let the macarons dry for 30-60 minutes at room temperature. This part is key to getting those “feet” I mentioned earlier. Leaving the macarons out lets the top dry out a bit. I find I often need to open the windows in my house a bit so that a helpful cross-draft can move this part along. You should be able to touch the tops of the macarons without any of it coming off on your finger before they go into the oven. They will feel tacky, but not sticky. If they are still sticky, they haven’t dried enough and you need to wait a little bit longer and maybe place them somewhere where air can circulate around them a bit.
- Preheat oven and bake. Let the oven preheat for a good 20 minutes at 300°F, then bake one tray of macaron shells at a time for 16-18 minutes. Let the macaron shells cool completely on the baking sheet before attempting to remove them from the baking mats or parchment paper.
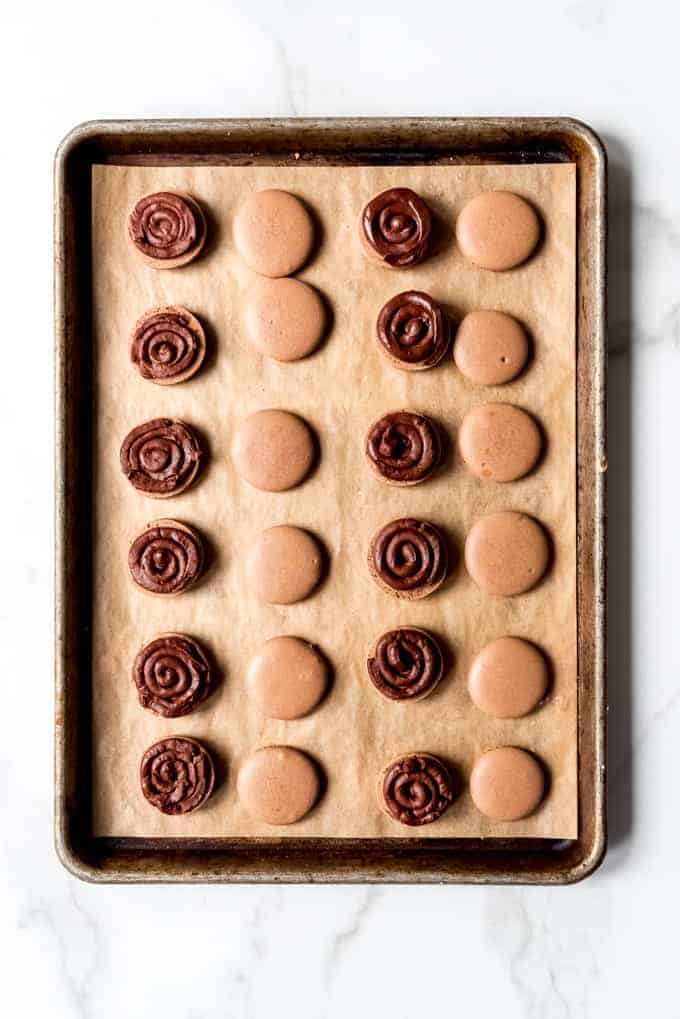
- Make chocolate ganache filling. While the macaron shells are baking, combine chocolate chips and heavy cream in a microwave-safe bowl and heat for 30 seconds. Stir well, then heat for another 30 seconds, repeating just until the chocolate chips are completely melted. Stick this in the fridge or freezer until it has cooled completely.
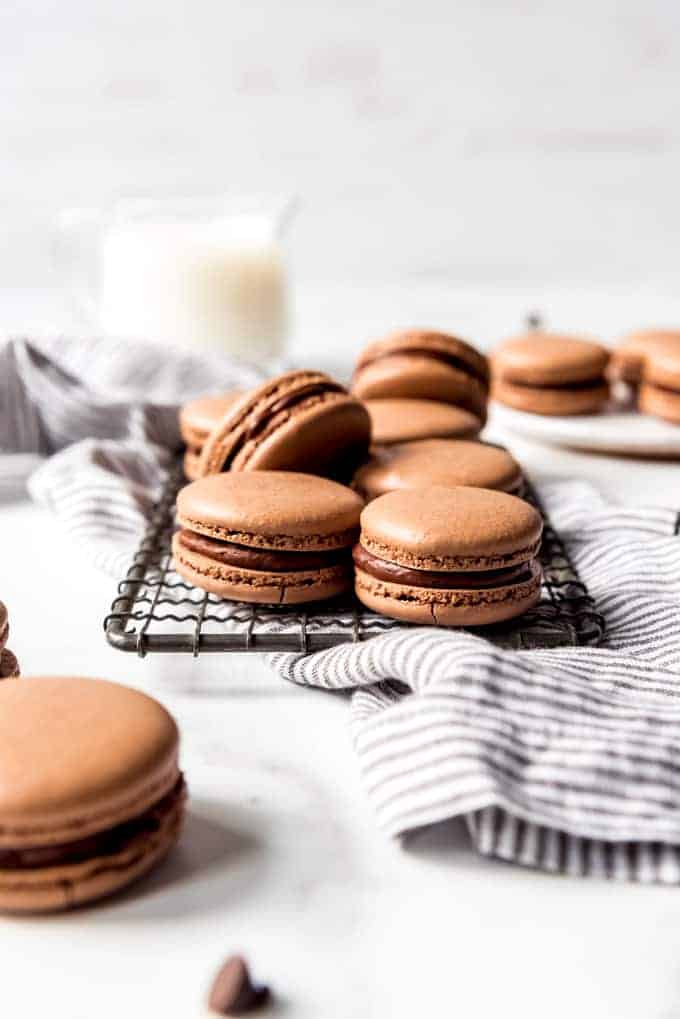
- Spoon the ganache filling into a piping bag, then pipe a small amount on the bottom side of one shell. Sandwich another shell on top to complete the chocolate macaron. Ideally, macarons are best the day after they are made, but I can never wait that long.
Easy Macaron Recipe Tips
Making perfect macarons can be challenging, particularly if it is your first time, but with a little attention to detail, anyone can achieve success on their first try. Don’t believe me? Check out the dozens of comments below. Here are sure important tips for making macarons:
- Accurate Measurements: Macarons require precise measurements. Use a kitchen scale to measure ingredients like almond flour and powdered sugar accurately for best results.
- Sift Dry Ingredients: Sift the almond flour and powdered sugar together to ensure a smooth and lump-free batter. This step helps remove any clumps and results in a finer texture for the macaron shells.
- Meringue Consistency: Whip the egg whites to stiff peaks, but be careful not to over-whip. Over-whipping can lead to a dry and crumbly texture. The meringue should be glossy, and when you lift the beaters, it should form stiff peaks that hold their shape.
- Macaronage Technique: This is the process of folding the dry ingredients into the whipped egg whites. Be gentle and fold just until the batter reaches a “lava-like” consistency. Over-mixing can lead to flat macarons, while under-mixing can result in uneven shapes.
- Resting Time and Drying: Allow the piped macarons to rest before baking. This forms a thin shell on the surface, which helps create the characteristic feet of macarons during baking. The resting time allows the macarons to develop their structure. Ensure the macarons are completely dry before baking to avoid cracking. Let them sit at room temperature until a skin forms on the surface. This can take anywhere from 20 minutes to an hour, depending on humidity.
- Temperature Control: Maintain consistent oven temperature throughout the baking process. Sudden temperature changes can cause macarons to crack or develop uneven surfaces. Use an oven thermometer to verify the accuracy of your oven.
Remember, practice makes perfect. Don’t get discouraged if your first batch isn’t flawless. Learn from each attempt, and soon you’ll be making beautiful and delicious macarons.
French Macarons Recipe Filling Ideas
There are so many options for filling chocolate macaron shells beyond just this chocolate ganache recipe that I’m sharing here. Any of the following options would also be delicious!
- Salted caramel (be still my caramel lovin’ heart!)
- Nutella
- Buttercream frosting (I have a bunch of frosting recipes that would work!)
- Marshmallow fluff
- Jam (I’m imagining these chocolate shells with a ring of ganache on the outside and raspberry jam in the middle – YUM)
How long do macarons last?
Do macarons need to be refrigerated? Can I freeze macarons?
No, you do not need to refrigerate your macarons, but they will last longer and taste fresher if you do. They will be good for about 1 week in an airtight container in the fridge. You can also freeze the assembled macarons for up to 2 months. Let them thaw in the fridge overnight or on the counter for a few hours before enjoying.
Easy Macaron Recipe FAQs
Sifting once is fine and does a great job at breaking up all of the big clumps of almond flour, cocoa powder, and powdered sugar, but sifting twice helps to make sure that no clump gets missed while giving you a velvety smooth texture of well incorporated dry ingredients to work with. I highly recommend sifting the second time just because it’s so worth it!
Incidentally, I have used both the superfine almond flour from Bob’s Red Mill and the Kirkland brand almond flour from Costco with great results.
Absolutely! The chocolate ganache in this recipe will work with milk, dark, or semi-sweet chocolate without any other necessary changes. Semi-sweet is just right for me though!
Macarons can be sensitive to moisture in the air (this is one of the reasons people say not to try making the when the weather is bad). But, you can keep your chocolate macarons in an airtight container on the counter for up to 3 days or in the fridge for up to a week. For a longer term storage solution you can freeze these macarons too, just make sure to let them come to room temperature before eating.
The biggest mistakes I made when I first started making macarons were mostly around rushing the process. I was impatient and didn’t sift my almond flour, cocoa powder, and powdered sugar. Then I didn’t beat my egg whites enough and over or undermixed the macaron batter. I recommend reading through the recipe and post once or twice before starting so you have a good idea of the steps and give yourself plenty of time to practice.
I recommend baking these macarons at 300°F in an evenly preheated oven.
I don’t recommend leaving macarons out that long. While it is important that they develop a skin before baking, leaving them out that long can dry them out and lead to other undesirable results.
A macaron is a French sandwich cookie made with almond flour and egg white shells sandwiched around a filling, while a macaroon is a totally different cookie made with shredded coconut.
Pointy macarons can be caused by issues in piping technique, air bubbles in the batter, and meringue consistency. If you’re applying too much pressure while piping or holding the bag at a sharp angle, it can lead to pointy tops. Make sure to mix the batter thoroughly to eliminate large air bubbles. Additionally, ensure that the egg whites are whipped to stiff peaks without overdoing it. Watch out for these factors to achieve smoother, more even macaron tops.
Note: When piping macarons, I recommend using a plain round piping tip like the Ateco #804 or Wilton #12. This tip allows for a smooth and controlled flow of the macaron batter, helping you create uniform circles with a consistent size.
Using a plain round tip is ideal for achieving the classic macaron shape and ensures that the batter is evenly distributed. It also makes it easier to control the amount of batter you pipe onto the baking sheet, resulting in macarons with a uniform size and appearance.
I like to age my egg whites for macarons, although this isn’t strictly necessary. To do so, separate the egg yolks and egg whites the day before you plan to make your macarons and store the whites in an airtight container in the fridge overnight.
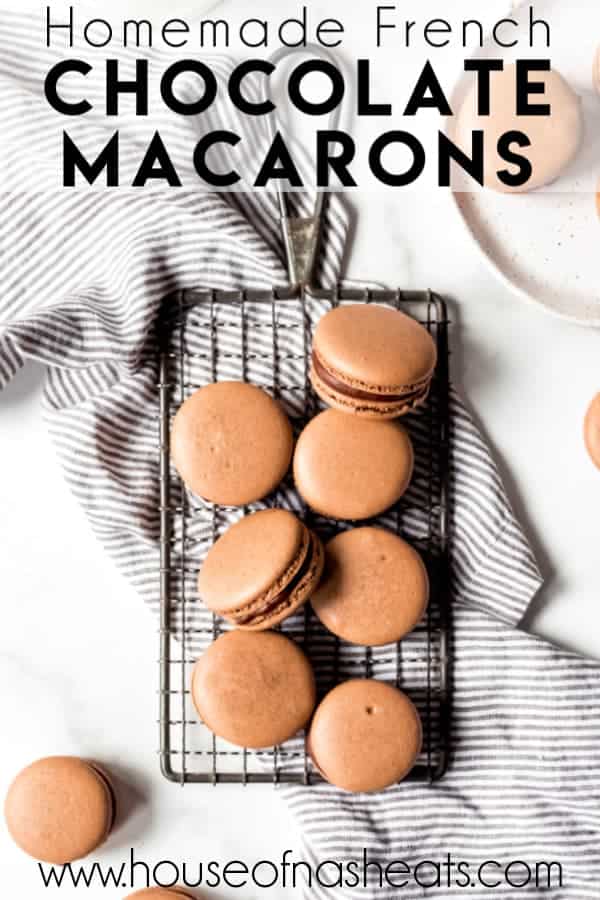
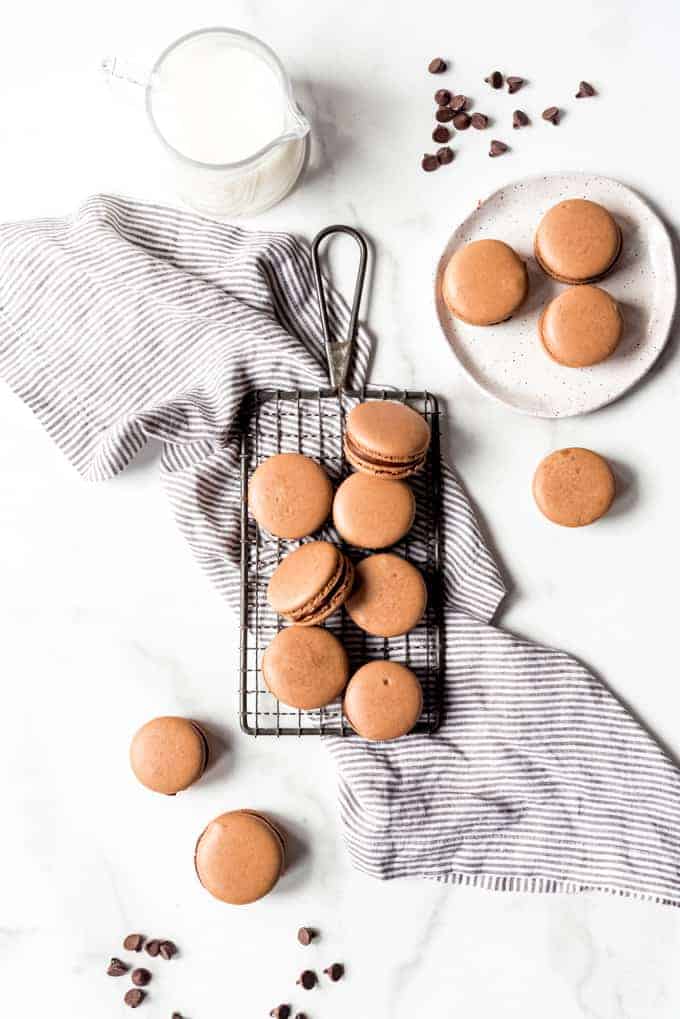
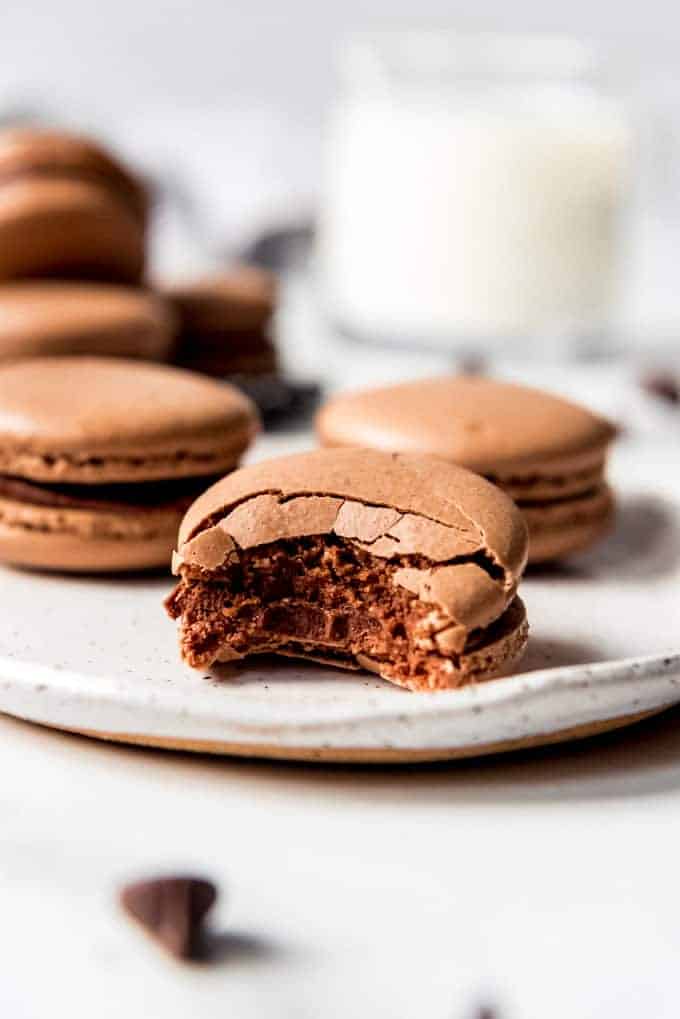
Your macarons should be have slightly crisp outer shells with chewy interiors.
Hollow or cracked shells are typically caused by one of a few issues that come up when making the macaron shells.
Overmixing: If you overmix the batter during the macaronage process, it can lead to hollow shells. Overmixing deflates the batter and results in less structure during baking.
Undermixing: On the other hand, undermixing can cause uneven shapes and cracked shells. Ensure you fold the batter just until it reaches a “lava-like” consistency.
Inconsistent Oven Temperature: Fluctuations in oven temperature can cause macarons to crack. Use an oven thermometer to verify that your oven temperature is accurate. Maintain a consistent temperature throughout the baking process.
Incomplete Drying Time: If the macarons are not allowed to dry properly before baking, they can develop cracks. Ensure that the piped macarons form a dry shell on the surface before placing them in the oven. This can take anywhere from 20 minutes to an hour, depending on humidity.
When making chocolate macarons, keep an eye out for a smooth, shiny, and firm outer shell. You’ll want those distinct “feet” at the base, giving your macarons that perfect look. To check if they’re done, gently touch a macaron – it should feel firm but have a soft inside. If they easily lift off the baking surface and a toothpick comes out clean, you’re on the right track. Follow the recommended baking time of around 16-18 minutes, but watch closely to avoid overbaking and ending up with a dry texture. Once out of the oven, let them cool completely on the baking sheet before indulging in your delicious chocolate macarons.
More like this French Macaron Recipe
- Simple Chocolate Tart
- French Fruit Tart
- Chocolate Andes Mint Cookies
- Rocky Road Cookies
- Carmelitas (Chocolate, Caramel, and Coconut)
Did you make this recipe?
Let me know what you thought with a comment and rating below. You can also take a picture and tag me on Instagram @houseofnasheats or share it on the Pinterest pin so I can see.
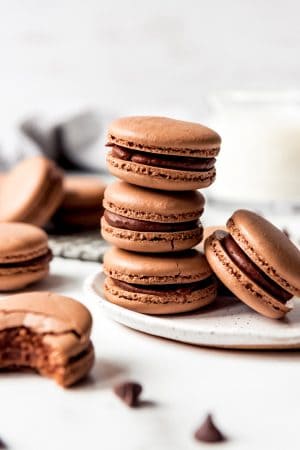
Chocolate Macarons
Ingredients
Macaron Shells
- 1 cup almond flour (100g)
- 3/4 cup powdered sugar (100g)
- 2 Tablespoons natural unsweetened cocoa powder (10g)
- 3 large egg whites room temperature (100g)
- 1/2 cup granulated sugar (100g)
Ganache Filling
- 2/3 cup semisweet chocolate chips
- 1/3 cup heavy cream

Instructions
- Line two baking sheets with parchment paper or silicone baking mats. You may want to trace 1-1/2" circles spaced a couple inches apart on the back of each side of parchment paper as a guide for piping macaron shells later.
- Sift the almond flour, powdered sugar, and cocoa powder through a fine mesh sieve, discarding any pieces of almond meal that are too large to go through. Sift a second time to make sure the ingredients are thoroughly mixed and light, then set aside.1 cup almond flour, ¾ cup powdered sugar, 2 Tablespoons natural unsweetened cocoa powder
- In a large bowl, beat the egg whites on medium speed until foamy, about 1 minute. Gradually add the granulated sugar, about 1 tablespoon at a time, while continuing to whisk the egg whites and waiting 20 seconds or so between each addition.3 large egg whites, ½ cup granulated sugar
- Once all the sugar is added, continue to beat the egg whites on medium to medium-high speed until stiff peaks form. The egg whites should create a thick, fluffy meringue that holds it’s shape when you stop the mixer and lift the beaters out. If the peaks don’t hold their shape well, continue to beat a bit longer, but be careful not to mix at too high of a speed or for too long, which can cause the meringue to break.
- Add the sifted almond/cocoa powder mixture to the stiff egg whites and begin to fold them in by mixing with a spatula from the bottom of the bowl and lifting it up to drop onto the top of the mixture. Continue to pull the spatula through the mixture by hand, lifting and dropping in a j-shaped folding motion until the mixture begins to loosen and reaches a consistency similar to flowing lava. If you lift a spatula fill of batter from the bowl, it should drizzle off in a thick ribbon and melt in on itself within about 10 seconds. If it falls off in blobs, rather than a ribbon, keep mixing the batter. You should be able to make 1 or 2 figure-eight patterns with the ribbon of batter. If the mixture immediately melts in on itself like honey or shampoo, then you have probably mixed a bit too far.
- Transfer the macaron batter to a pastry bag fitted with a large round piping tip. Or use a large heavy-duty ziploc bag with one corner cut off. Pipe the macarons into 1 1/2" circles on the prepared parchment or silicone-lined baking sheets, spacing them a couple inches apart. When the trays are filled, rap them a few times on the counter to help remove air bubbles from the shells, then let them sit out for 30-60 minutes until the tops are dry to the touch and don’t stick to your finger.
- Preheat oven to 300°F. Bake one tray of shells at a time for 16-18 minutes. Let them cool completely before removing the shells from the parchment paper or silicone mats.
- Meanwhile, make the ganache by combining the chocolate chips and cream in a medium microwave-safe bowl. Heat for 30 seconds, then stir well. Heat again in another 30 second burst, then stir, repeating until the mixture is smooth if necessary.2/3 cup semisweet chocolate chips, ⅓ cup heavy cream
- Transfer the ganache to the fridge and let it cool completely. Transfer to a piping bag fitted with a medium round tip, then pip onto the bottom-side of half the macaron shells. Match up with top shells to finish the macarons. You can eat them right away, although macarons are best the next day.
Notes
- Aging egg whites: I’ve had the best, most consistent success with macarons when I use aged egg whites. To do this, separate the whites and yolks, then put the whites in the fridge overnight. The next day, let them sit out on the counter for 1-2 hours before making the macarons. I don’t always have time for this and will sometimes skip the overnight period in the fridge, but I always let the egg whites sit out for 1-2 hours so they really are room temperature at the very least.
- Freezing and storage: Store in an airtight container on the counter for 3 days or in the fridge for 1-2 weeks. When filled with ganache, these can even be frozen for up to 3 months, but some other fillings like jams that have a higher moisture content don’t freeze as well.

Hi I’ve seen many recipes using cream of tartar I wanted to know what difference it would make if I add that to the recipe or don’t?
Some recipes use cream of tartar to stabilize the meringue part. I don’t think it’s necessary, but it won’t hurt.
I can’t wait to try this recipe! Thanks for the hints!!
Why did mine for some reason not end up such a dark brown? Mine are much lighter in colour.
Honestly, I don’t really know? Maybe you used a different cocoa powder? They are a pretty light brown and not too dark. Other than the color, did they turn out ok?
Yes they were amazing!
I think I over mixed my batter. The mixture is liquidy and not holding much shape but i’m not sure exactly where I went wrong. Do you have any suggestions/ tips?
Well first things that come to mind when batter can be slightly runny is overmixing the batter or your egg whites were not whipped enough to form “peaks” that hold their shape. Also, make sure the egg whites are room temperature. If you are still having trouble, weighing your measurements will ensure more accurate amounts for the macarons. I also have a Youtube video on how to make macarons if that will be helpful. https://www.youtube.com/watch?v=1sF01WttIFs
My biggest tip though is to not give up! Keep trying again if it doesn’t work out perfectly the first time. You can do it!
Followed directions and the macarons came out perfectly! Will be making again.
Oh good! I am so glad! Way to go! They’re so fun to make!
I have watched LOTS of videos on how to properly make macarons so without a video, I might have been a failure, but this recipe made amazing macs that REALLY taste like chocolate. So many just taste like sugar. Can’t wait to try more. So excited about my first try!
they taste good, but they never grow feet. i’ve tried this recipe at least 5 times, and they never have feet
Hmmm I wonder why? There are several factors that can go into forming feet. One of the most important is making sure you let it rest before baking. Resting before baking helps form a “skin” over the macaron so while baking the bottom pushes out forming feet. If the macaron is too wet it wont push the bottom out and will not form feet. If you are resting and they seem to have a matte skin and still are not forming feet, other reasons could be rushing the process and not forming stiff meringue peaks or over mixing the batter or not sifting the dry ingredients. My biggest tip though is to not give up! Macarons can be finicky little things but once you get it, it’s so rewarding!
Not a big baker, and was super nervous to try these, but they worked!!!! 1st batch was a little ugly but I cut a smaller hole in my ziplock bag for the 2nd batch and they came out perfect! I was amazed that I made this!
Great! You should be very proud! I would love to see pictures if you have any!
Your recipe sounds great and I can’t wait to try it. I have a lot of frozen egg whites from recipes that only needed yolks. Do you think I can use them and if I do, will that count as aging them?
While I myself have never tried using frozen egg whites I know others who have and it’s worked for them. I would just make sure they come to room temperature before using. My only concern or hesitation is if there is any extra liquid with the egg whites from being frozen. So just be careful with that and make sure the consistency of the egg whites once whipped is good!
Thanks so much for your quick response. I am making them on Sunday, so wish me luck!
You will do great! Let me know if you have any more questions!
The frozen egg whites worked great. I followed your advice and made sure they were beaten to stiff peaks. It just took a little longer than a meringue usually takes. Your recipe is perfect! They were not overly sweet as store bought macaron can be. We made the chocolate and lemon ones. Thank you for the recipe!
Great! I am glad it all worked out well!
Delicious! It was my first time making macrons and they came out great.
Thanks Michelle! That makes me so happy to know they turned out great.
I don’t know if this is me doing something wrong but my egg whites take much longer to become foamy. This recipe is awesome they’ve come out perfect everytime!
Don’t worry about the amount of time it takes, you just want them to look frothy. Mixers may mix differently! I am so glad you like the recipe! Thank you for making these! I would love to see a picture if you have any. 🙂
My first time making macarons and they turned out amazing! For reference, I am a fairly experienced home baker. I followed the macaron recipe with only two very slight adjustments – i let the egg whites come to about room temp before whipping, and I did use Guittard cocoa powder. I followed each step closely and while it took some work everything came together as described! I used a ganache in the center. The macaron flavor and texture is amazing. Can’t wait to try another flavor!
Great Katie! Yes, they take a little time to make but if you follow the steps they should turn out pretty good! I am so glad you liked the macarons. You will have to try some of my other flavors and let me know when you make them. I would love to see pictures!
My first time making macarons and they came out amazing!! For reference, I am a fairly experienced home baker. I made two very slight adjustments… I let the egg whites come to about room temp before whipping, and I did use Guittard cocoa powder which is what I had and has the 1g fat. I followed the step by step instructions exactly and everything came together as written! I did ganache for the filling. The flavor and texture of the macarons is absolutely incredible! Thanks so much, I can’t wait to try another flavor!
These turned out great! Question for you, you mention can freeze these filled with ganache after maturing, but is it better or same to freeze just shells then defrost, fill and mature? Are shells more fragile if just freezing the shells alone?
Hi Lynn, good questions. After letting it mature for at least 24 hours, you can freeze them filled or just the shells. Both are fine. If you freeze just the shells, they will last longer than a filled macarons. Ideally you want to store filled macarons for 1-2 months and shells you can store 2+ months. When you defrost, make sure you defrost in the fridge so you avoid any condensation build up on the shells.
THIS IS THE BEST MACARON RECIPE EVER!!! It is the first time my macarons have actually worked. Thank you!!
That makes me so happy Bob! I would love to see pictures of your macarons!