
These Glazed Apple Hand Pies are like a cross between cookie and a slice of apple pie with a perfectly spiced homemade apple pie filling and buttery, flaky crust coated in a sweet glaze. They are perfect for packing in school lunches for a sweet treat or for sharing with family and friends!

These fun apple hand pies are everything you love about apple pie, except you can eat it with your hands instead of a fork. And they’re glazed. And shaped like actual little apples thanks to a cookie cutter. How could anyone resist?
Use my easy perfect pie crust recipe with foolproof instructions to create your pie dough ahead of time so it can chill while you prepare the simple apple pie filling. The hardest part is cutting out the apple shapes and crimping the edges, but you could totally just make these into circles instead.
I’m obsessed with the extra crunch around the edges and the soft, perfectly spiced apple centers. We make these every fall and they are definitely a favorite in our home. Hopefully apple hand pies will be in yours as well.


Ingredients You’ll Need
Here’s a brief overview of the ingredients you’ll want to have on hand to make this recipe. I love that this recipe is made with simple, real ingredients like flour, butter, sugar, cinnamon, apples, and salt. For full measurements and instructions, you can find them in the printable recipe card below.
- Apples: Golden Delicious, Granny Smith, Pink Lady, Honeycrisp, Braeburn, Pippins, Jonathans, and Jonagolds are all good options to use.
- Pie Crust: I always use this perfect pie crust recipe which is just flour, salt, butter, shortening, a little sugar, and cold water. I even have a helpful video tutorial on my YouTube channel to help show you how to make a pie crust.
- Brown Sugar: For a sweet, gooey filling.
- Spices: I like a combination of cinnamon and nutmeg best for my apple filling. It complements the apple flavor without overwhelming it.
- Egg: This is for the egg wash. It gives a much better color to the crust and adds a little texture too.

How to Make Apple Hand Pies
- Prep the pie crust. This can be done a day or two or even a month in advance and stored in the fridge or freezer. After combining flour, salt, and sugar in a large bowl, you will cut in the butter and shortening with a pastry cutter until the mixture is sandy with pea-sized clumps of fat. Then gently mix in cold water until the dough just starts coming together, divide it into discs, and refrigerate or freeze until ready to use.
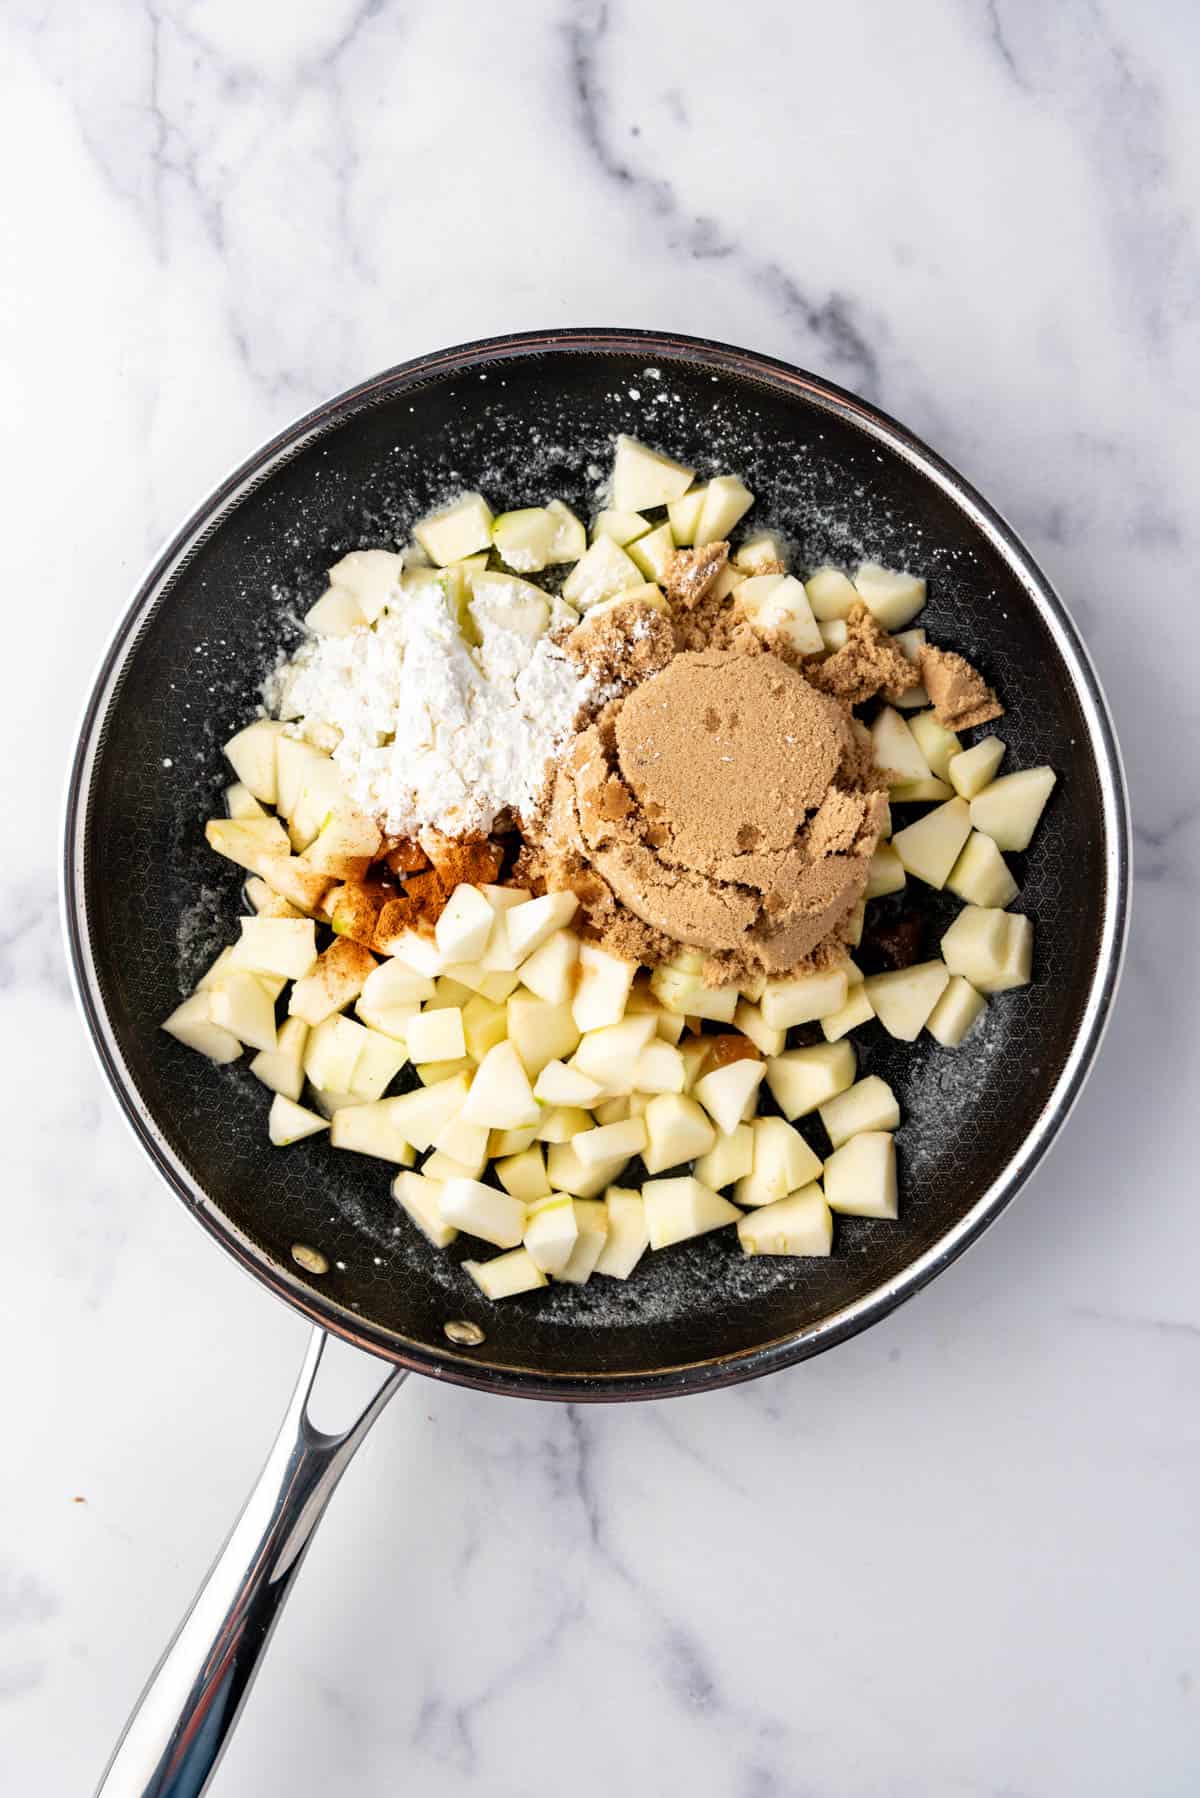
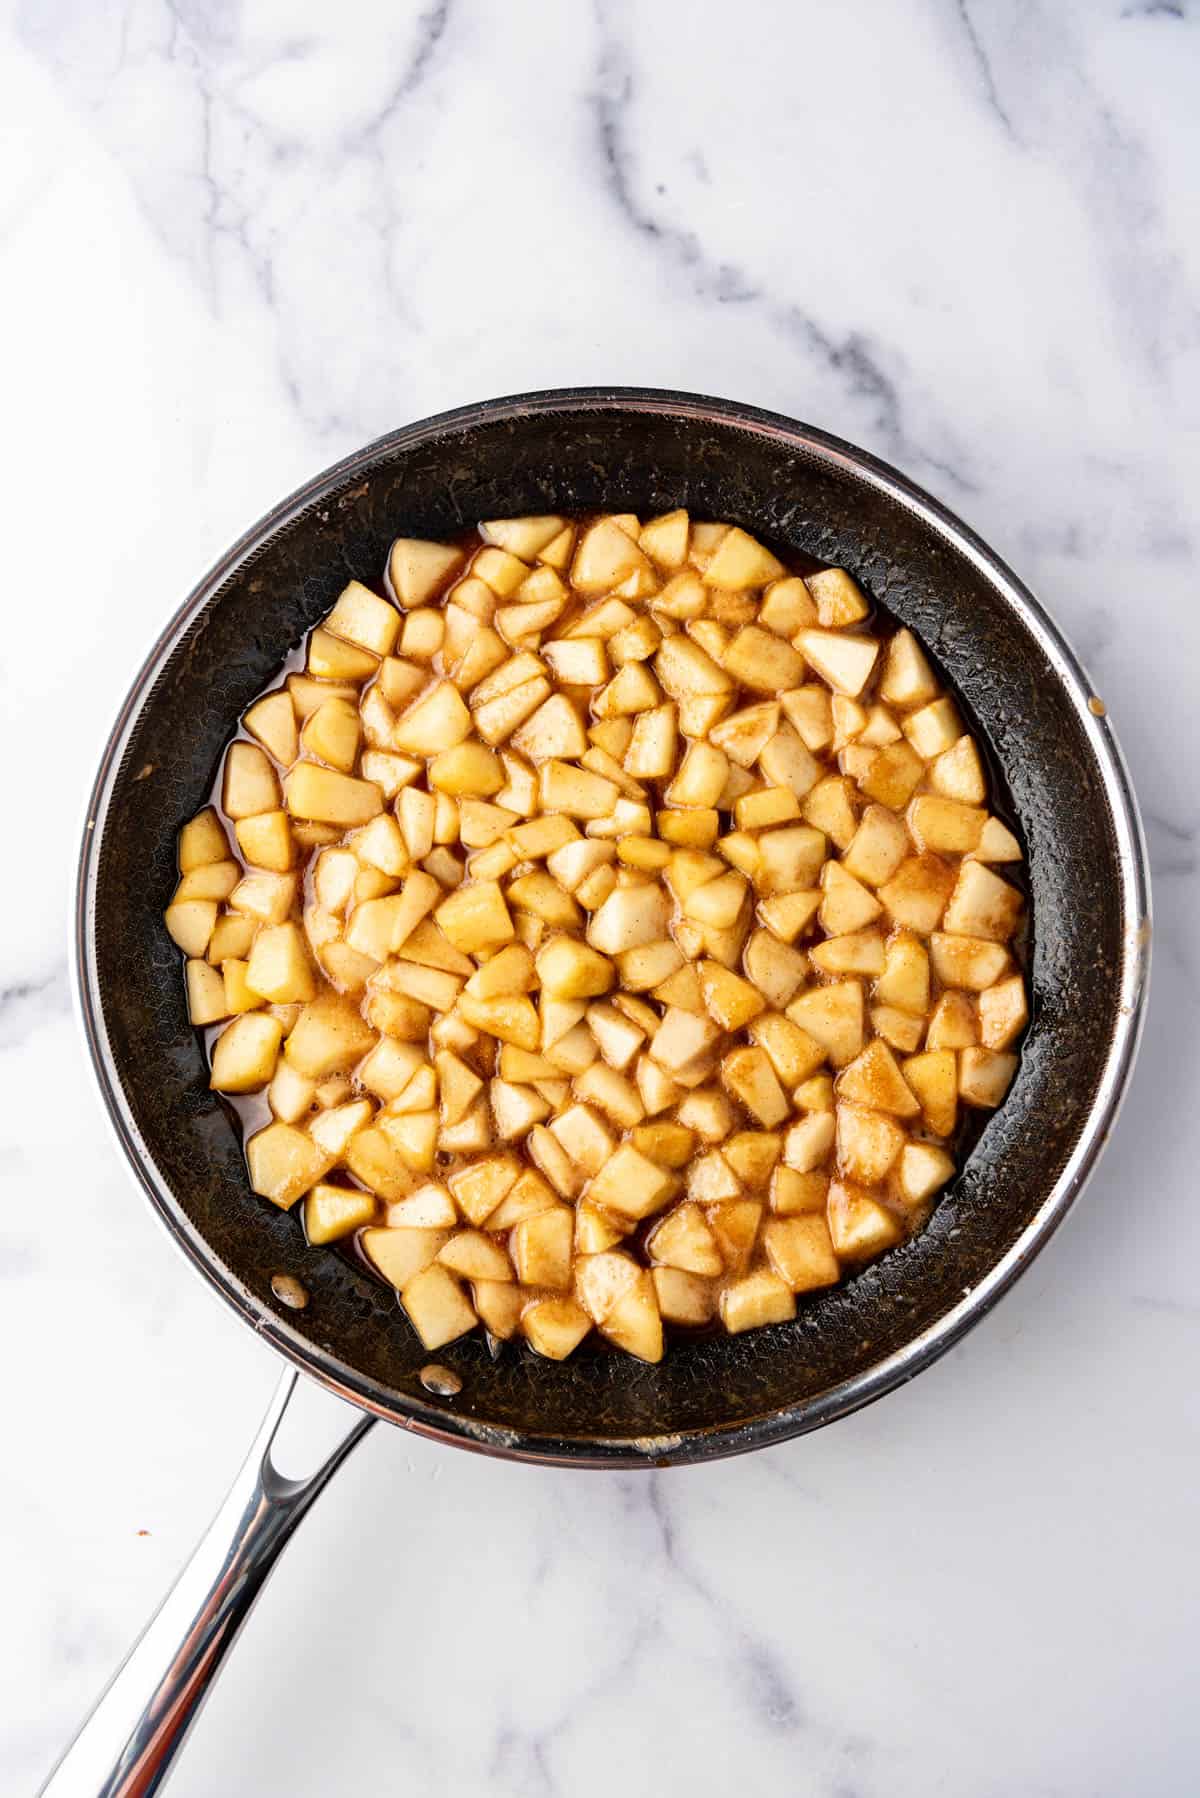
- Make the filling. Start by peeling and dicing your apples smaller than you normally would for apple pie. Melt a little butter in a large skillet on the stovetop over medium heat, then add the apples, brown sugar, cinnamon, nutmeg, and a little salt and cook for 5-10 minutes until they start to release their juices. Thicken the filling with just a bit of flour so it doesn’t run everywhere when baking the hand pies in the oven but doesn’t get overly gummy either. Set aside and let this cool before assembling.
- Roll and cut out shapes. After giving the chilled crust a few minutes out of the fridge to thaw just a bit, roll it out like you would a normal pie crust until it is about 1/4-inch thick. Use a cookie cutter to cut out apple chapes or just plain circles. You can combine and re-roll scraps of pie dough until you use it all up.
- Assemble. Transfer the cut out pasty pieces to baking sheets lined with parchment paper. Top each cut out shape with about 1, maybe 2 tablespoons of the apple pie filling, mounding it in the center and leaving the edges clear.


- Add top pastry and crimp. Carefully place your top piece of pastry over the filling, stretching the edges to cover the filling as needed. I like to lightly wet the edges of the bottom piece with a little water with my finger, then crimp the edges together with the tines of a fork to seal the filling inside.
- Add egg wash. Meanwhile, beat an egg with 1 teaspoon of cold water in a small bowl and brush onto the hand pies for a golden brown and crisp finish. Use a sharp paring knife to slice a gash in the center of each pie so steam can release while they bake.
- Bake, then glaze. These need to bake for 18 to 20 minutes in a 425°F oven until golden brown on top and the bottom is crisp. Let them cool, then whisk together a simple glaze of powdered sugar and milk to brush it over the tops of the hand pies with a pastry brush while still warm. You could also just dunk them if you find that easier.
- Let the glaze harden before eating. The glaze will firm up and crust over in about 10 to 20 minutes, sealing the hand pies and helping them to stay fresh and delicious for days (if they last that long in your house).


Variations
- Change up your filing by adding raisins or chopped cranberries to the apple mixture.
- Add more spice like cardamom or allspice if you prefer more punch to your apple filling.
- Add some flavor to your glaze like a sprinkle of cinnamon or maybe a drop or two of almond extract.
Storage Instructions
These keep well in an airtight container on the counter for 4-5 days. Be sure to place a layer or parchment paper or wax paper between layers of cookies so they don’t stick.
Freezing Instructions
You can freeze leftover hand pies for up to 2 months in an airtight container. Let them thaw on the counter overnight before enjoying.

Recipe Tips & Tricks
- Don’t overfill. 1 Tablespoon of filling per apple pie cookie should do it since you want the pie filling to be contained and not leak out of the cookies. Too much filling means you are going to have a hard time stretching the top crust enough to cover the filling and match up with the edges of the bottom crust, so the hand pies are less likely to stay sealed.
- Let your pie crust rest. This is both before and after rolling out your dough. When people have problems with pie crust, it’s usually one of three things: 1. The dough was too cold to roll out easily, 2. The dough wasn’t sufficiently moistened from water or fat or a combination of the two beforehand, or 3. The gluten in the flour has been overworked making it want to stretch back in on itself instead of relaxing. Giving the dough chance to rest helps with issues 1 and 3. You won’t have a problem with issue 2 if you use my pie crust recipe.
- Don’t skip the glaze. My husband used to hate eating pie crust and I know he’s not the only one. These hand pies are the way to change that and it’s the glaze that is the catalyst behind the change. It perfectly compliments the buttery, flaky crust with a sweet crunch of its own that is just too, too good.
Recipe FAQ’s
Absolutely. use your favorite gluten-free crust and a cup-for-cup all-purpose flour substitute or cornstarch to thicken the pie filling and you will get delicious morsels you can’t resist.
I like using a variety of Envy, Opal, Pink ladies, Honeycrisp and more. I suggest sticking away from golden delicious and red delicious variatiesl
You could use store-bought pie crust and canned apple pie filling, but we at least recommend that you make the apple pie filling from scratch with fresh, seasonal apples. I know it means some peeling and chopping is involved, but c’mon, we all at least kinda’ like to cook here anyway, right? Or have aspirations in that regard, yes? And be sure to check out my post on how to make pie crust for my best pie crust recipe and all my tips and tricks that makes homemade pie crust easy and stress-free!


Love apples? Check out these other Apple Recipes on House of Nash Eats!
- Salted Caramel Apple Pie
- Gourmet Homemade Caramel Apples – there is an apple pie version included in the recipe box!
- Slow Cooker Homemade Apple Cider
- Instant Pot Homemade Applesauce
- German Apple Cake with Streusel Topping [Apfelkuchen mit Streusel]
- Easy Apple Oatmeal Muffins
- Classic Apple Cider Donuts
- Apfelstrudel Recipe (German Apple Strudel)
- Easy Cranberry Apple Pie
Did you make this recipe?
Let me know what you thought with a comment and rating below. You can also take a picture and tag me on Instagram @houseofnasheats or share it on the Pinterest pin so I can see.

Glazed Apple Hand Pies
Ingredients
Apple Hand Pies
- 1 [double crust pie crust recipe]
- 4 cups apples peeled, cored, and diced (about 4 large apples)
- 3 Tablespoons salted butter
- 1/2 cup brown sugar
- 1 teaspoon cinnamon
- 1/4 teaspoon nutmeg
- 1/4 teaspoon salt
- 2 Tablespoons all-purpose flour
- 1 large egg
Simple Glaze
- 2 cups powdered sugar
- 3 Tablespoons milk

Instructions
- Prepare pie crust and refrigerate for 1 hour. Pull from fridge and let rest on the counter for 10 minutes so they will roll out more easily. Line a baking sheet with parchment paper. Heat the oven to 425°F.1 [double crust pie crust recipe]
- While the oven heats, peel, core, and dice the apples. Melt the butter in a large skillet over medium-high heat. When butter is melted, add the apples, brown sugar, cinnamon, nutmeg and salt, and cook for 5-10 minutes over medium heat, stirring occasionally, until apples have softened and released their juices.4 cups apples, 3 Tablespoons salted butter, ½ cup brown sugar, 1 teaspoon cinnamon, ¼ teaspoon nutmeg, ¼ teaspoon salt
- Sprinkle the flour over the apples and stir thoroughly to combine. Cook for 1 minute more to thicken the juices released from the apples, then remove from heat.2 Tablespoons all-purpose flour
- Roll out 1 crust on a lightly floured surface and cut it into apple shapes with an apple cookie cutter, or use a large circle cutter. Gently transfer the apple-shaped pieces of crust to a parchment lined backing sheet. You may need to combine and re-roll scraps of pastry dough.
- Scoop 1 tablespoon of apple pie filling into the center of each apple crust, leaving space on the edges to seal with a second crust. Roll out the second crust on a lightly floured surface and cut it into apple shapes with the same cookie cutter or large circle cutter. Carefully place each top crust on each mound of apple pie filling and press the sides down to match the sides of the bottom crust. You may need to slightly stretch the top crust to reach the edges. Use a fork to press around the edges of each hand pie for a good seal and a decorative finish.
- Make an egg wash by beating the egg in a small bowl with 1 teaspoon of water, then brush the tops of each hand pie with the egg wash using a pastry brush. Cut a slit in the dough on top of each hand pie.1 large egg
- Bake at 425°F for 18-20 minutes, until the crust is lightly browned. While the hand pies are baking, prepare glaze by whisking together the powdered sugar and milk in a medium bowl.2 cups powdered sugar, 3 Tablespoons milk
- When pies are done, transfer them to a wire rack and brush with the glaze using a clean pastry brush. Alternatively, you could drizzle the glaze over the pies or even dip them into the glaze. Allow to cool and let the glaze set for at least 10-15 minutes before serving either warm, cold or room temperature.
Notes
Nutrition
This recipe was originally shared September 4, 2017. It has been updated with additional helpful information.


Yum! Do you think they’d freeze well? I’d love to make a batch and have them handy in the freezer for thr girls lunches.
Hmmm, honestly, idk. I think they would freeze fine unglazed, but I’m not sure how the glaze would do as they thaw – maybe get a little sticky? If you try it, let me know!
Awesome idea and recipe!! Looks amazing!!!
Thank you! They are super fun to make too!
They are so so pretty and that glaze on top looks so good! Agree on -at least- the filling made from scratch!
These are awesome! They remind me of getting Hostess Apple Pies with my great grandparents whenever we saw them. Thanks for sharing on the All Things Apple Celebrate 365 Blog Party!
I love these cookies! Such a creative idea!
Although some occasions call for store bought ingredients, I like take the time to make the homemade version. These look delicious and they’re SO adorable.
Omg these are the cutest little apple pies ever! What an amazing idea to use an apple shaped cookie cutter!
Amy, these look SO cute!! And you’re totally making my mouth water right now. It’s bringing back childhood memories of those amazing Hostess pies! Such a great idea to cut them into the shape of an apple.
Now they look like the perfect little treat. I could go a couple of those with a big mug of coffee right now.
beautiful!!!
Do you think they would freeze/keep well? I’d like to include these with our desserts at Thanksgiving, but would need to make them during the prior weekend due to timing. Sounds super yummy.
I would freeze them without the glaze, then thaw and glaze the day before serving so the glaze has time to dry. Usually glaze doesn’t thaw super well after freezing but otherwise I think you would be just fine!
I’ve really enjoyed reading these recipes. They have inspired me to dig out my baking trays and start creating once again. Thank you.
Aw thanks Dawn! That just made my day! I hope you keep getting inspired. There are some fun recipes to make! 🙂
Oh my goodness, these are magnificent! I didn’t have shortening for the pie dough so I substituted with coconut oil. I made these for our fellowship table at church. All it took was a child or two to tell their parents about them and next thing I knew, they were completely gone. This recipe made my taste buds dance.
Great Debbie! Thank you! I am so glad this recipe made your tastebuds dance 😉 So fun!