

Gourmet Homemade Caramel Apples are easy and fun to make! The sweet, buttery caramel is perfect with crisp, tart Granny Smith apples, and you can decorate them with as many crunchy, chewy, nutty or crispy toppings as you want!
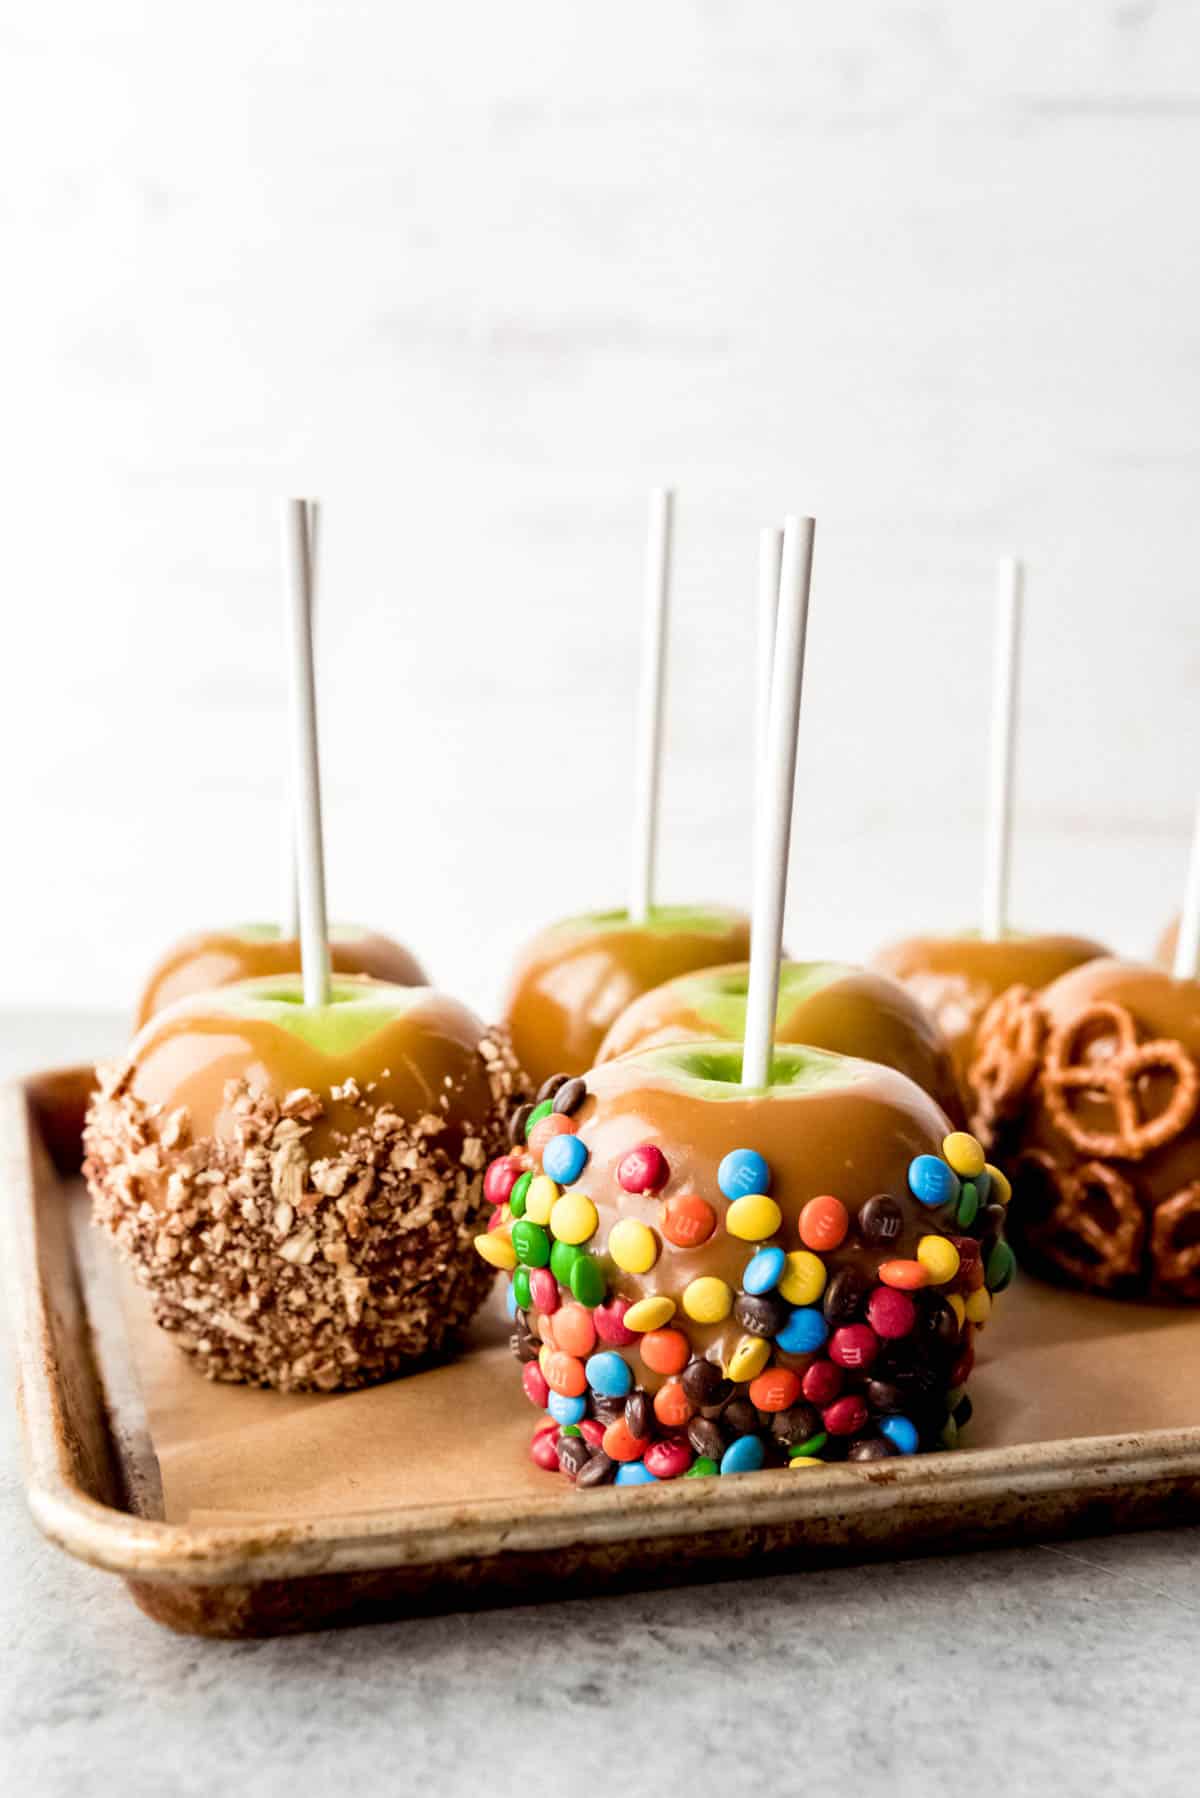
Table of Contents
You know those huge, fabulous gourmet caramel apples at Disneyland? Those stunning orbs of caramel & chocolate with nuts & candy never fail to lure me in when I’m walking past the candy shop on Main Street.
The scent of that fresh caramel is possibly the most incredible aroma on earth. They are one of my favorite Disney treats along with the Jolly Holiday Raspberry Rose Macarons.
When Paul and I were dating back in college, one of our favorite things to do was go to Rocky Mountain Chocolate Factory and buy a caramel apple to share. It was a splurge for us because we were broke undergrads, but totally worth it!
But even a delicious gourmet caramel apple is nothing compared to a fresh, made-from-scratch homemade caramel apple. Plus, you can make an entire batch of this easy caramel apples recipe for the price of just one apple from a candy shop!
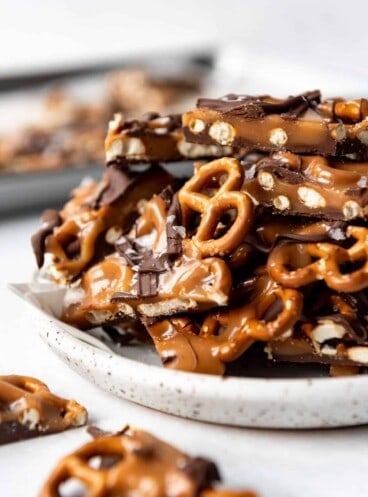
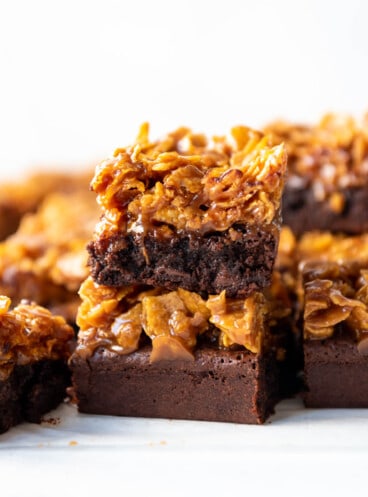
Love all things caramel? Be sure not to miss our Easy Caramel Pecan Brownies and Homemade Caramel Pecan Sticky Buns!
What are the best apples for caramel apples?
Since the caramel itself is so sweet, we think the best apple for caramel apples are tart, firm Granny Smith apples. Not only do tart apples have great flavor and texture, but the color makes for the prettiest presentation with the vibrant green peeking through robes of thick caramel. Envy and Honeycrisp apples are good second choices.
Look for apples that are small to medium size rather than the biggest apples you can find. By the time the apples are covered in caramel and other toppings, they will be massive! Plus, smaller apples gives a better apple to caramel ratio.
How to Make Caramel Apples
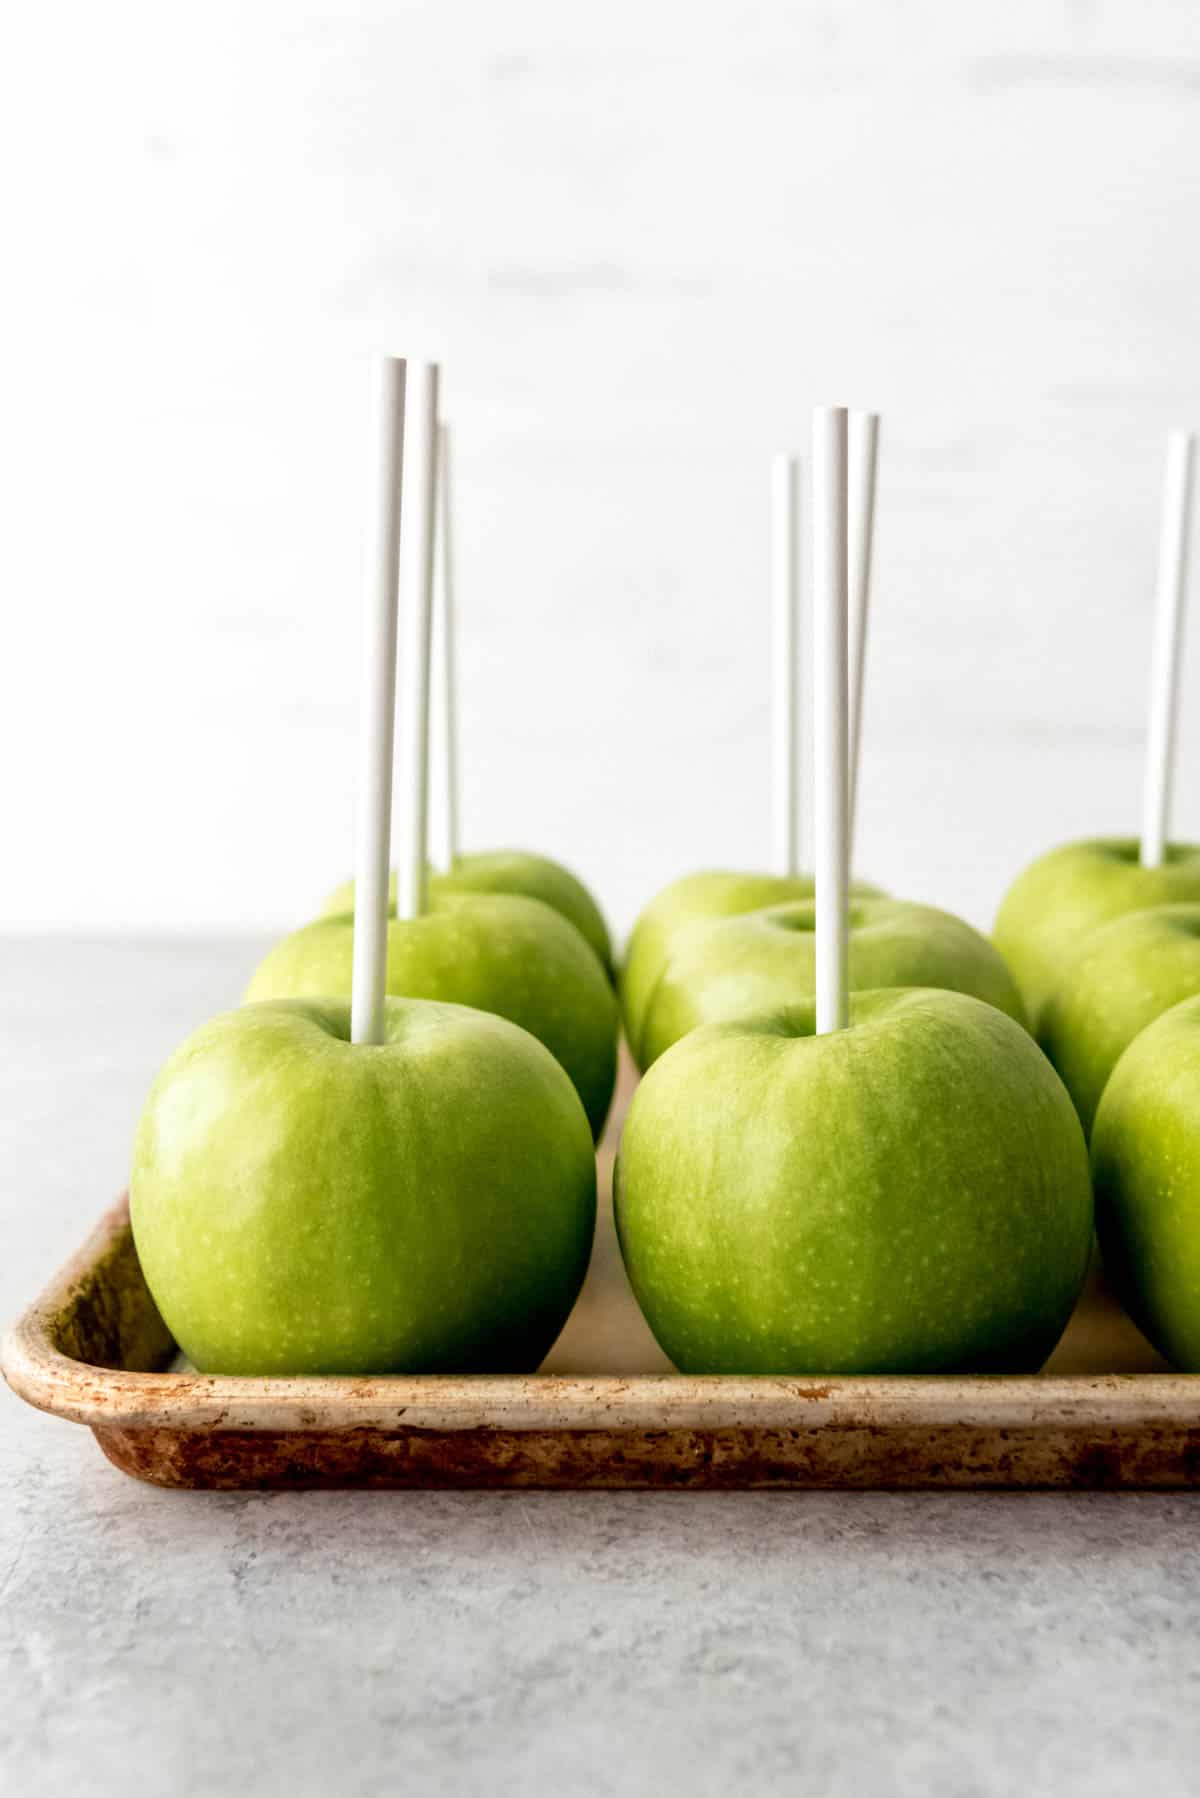
Before you start making your caramel, go ahead and get your apples set up by washing them well.
Stick sturdy candy sticks (not the thin ones but the really substantial, thick ones), tongue depressors, popsicle or wooden craft sticks, or even sturdy, cleaned twigs for a really rustic look, into each apple, right down through the core.
Then set your apples on a baking sheet lined with parchment paper and set them in the freezer to chill while you make the caramel.
Using cold apples is super helpful because it will allow the hot caramel to set faster and adhere to the apple when you go to dip them.
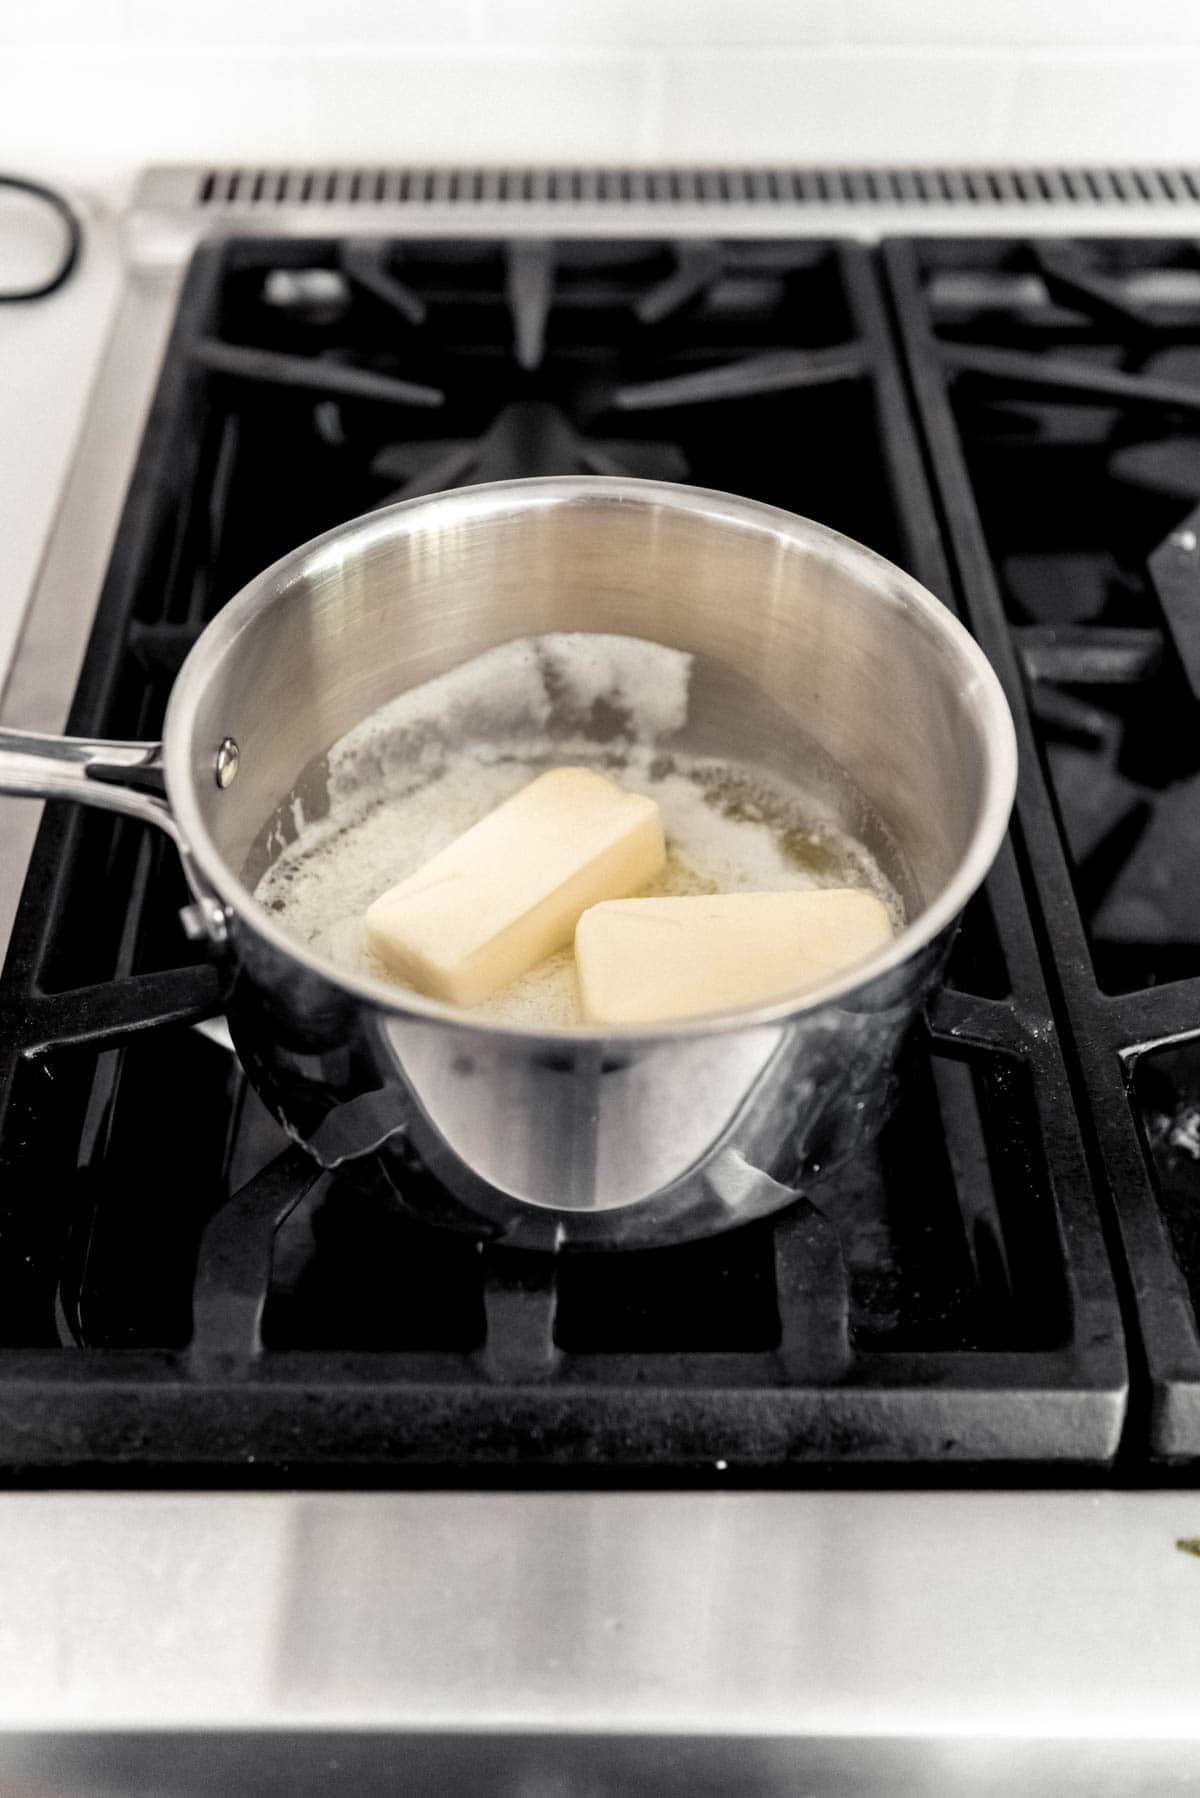
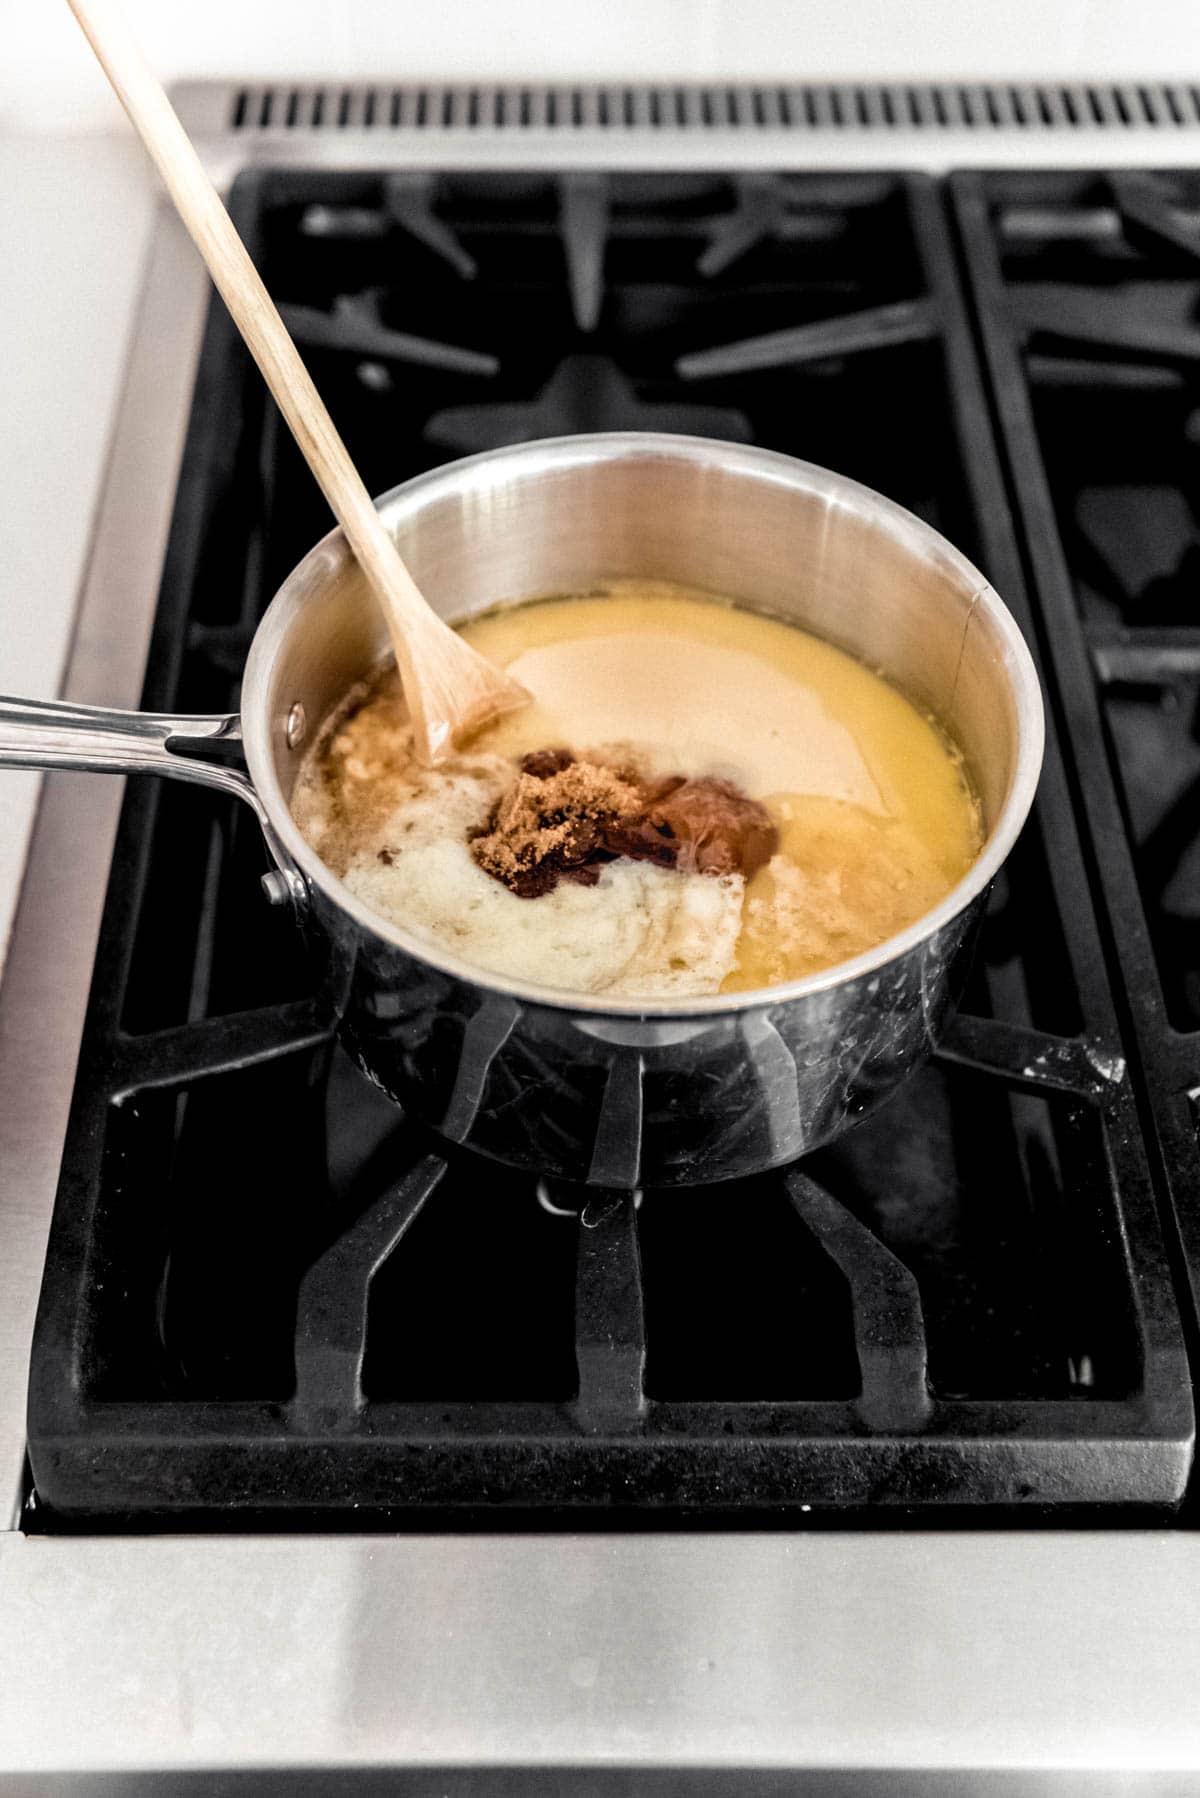
Melt the butter in a medium saucepan over medium heat. Add the brown sugar, corn syrup, and sweetened condensed milk, then continue to cook and stir until combined.
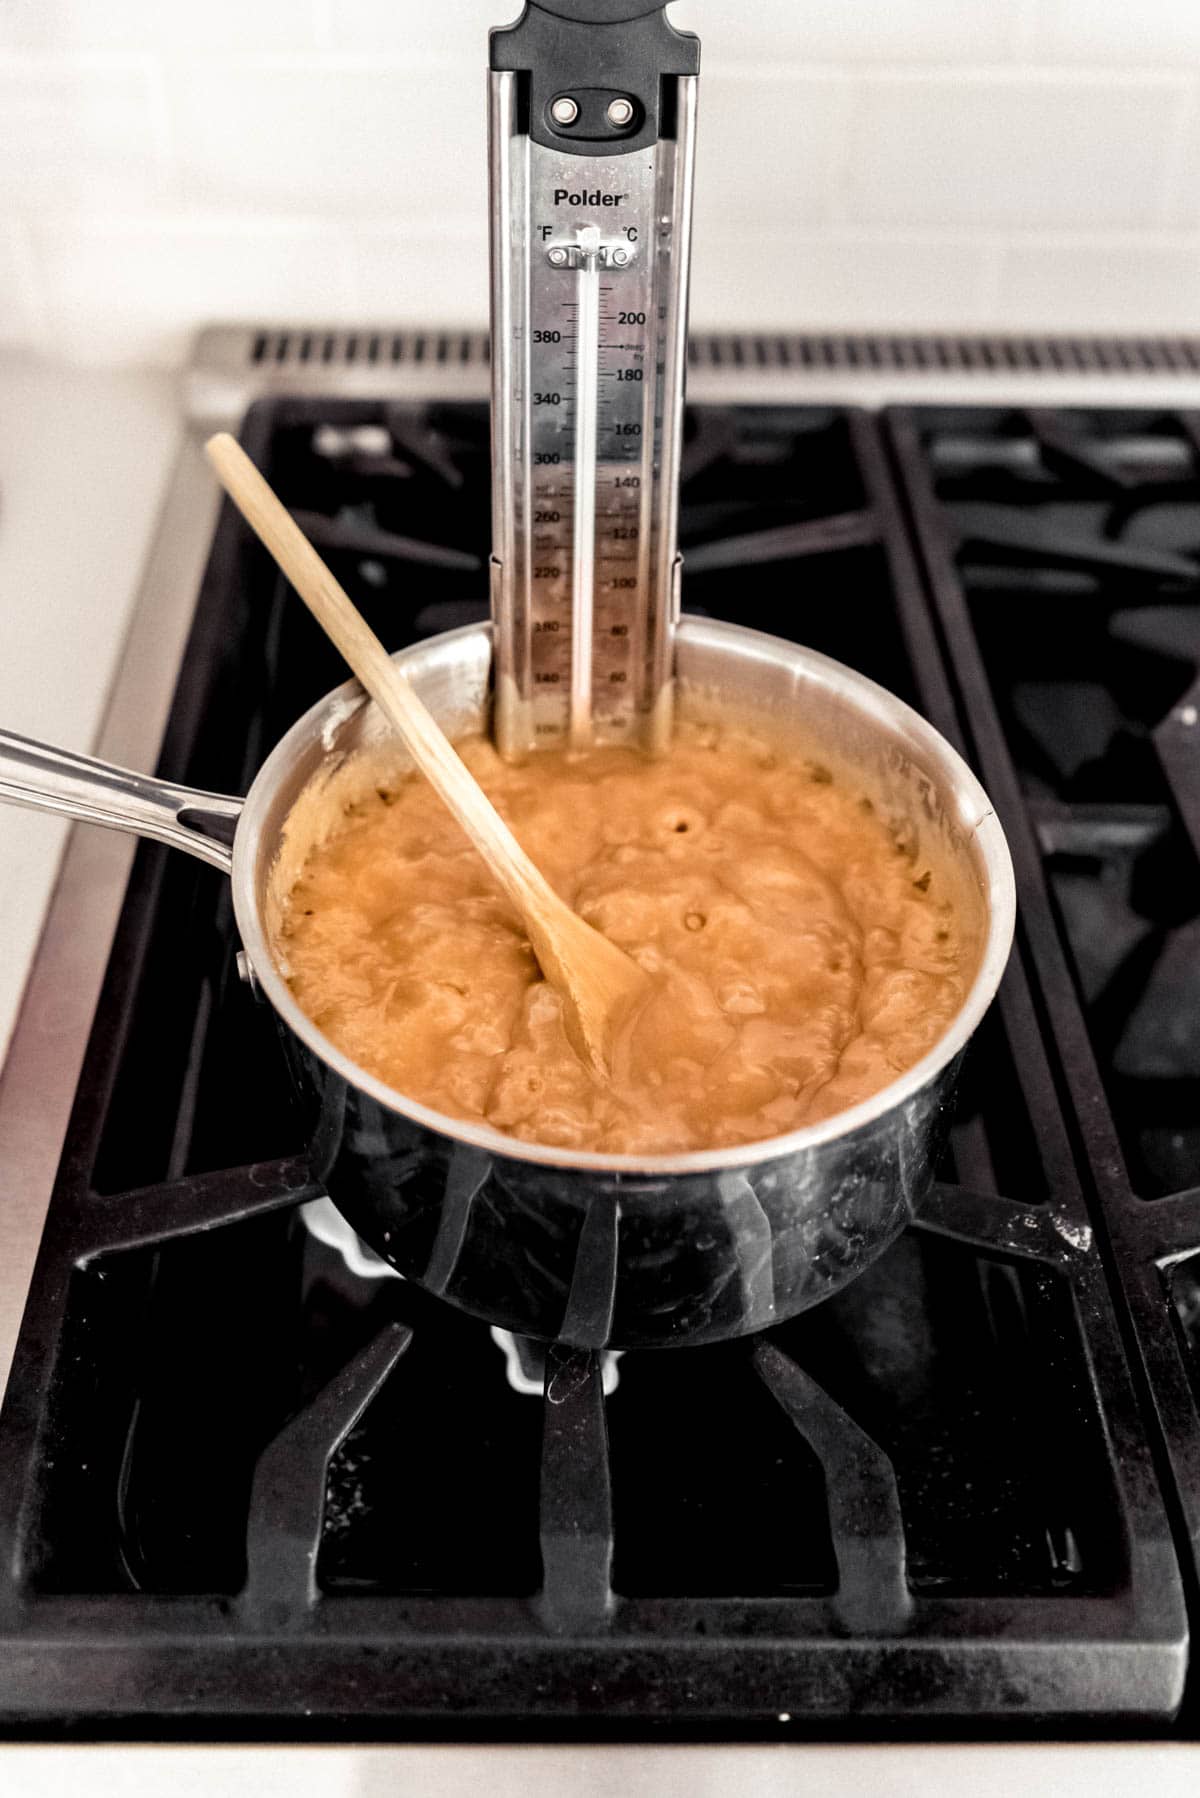
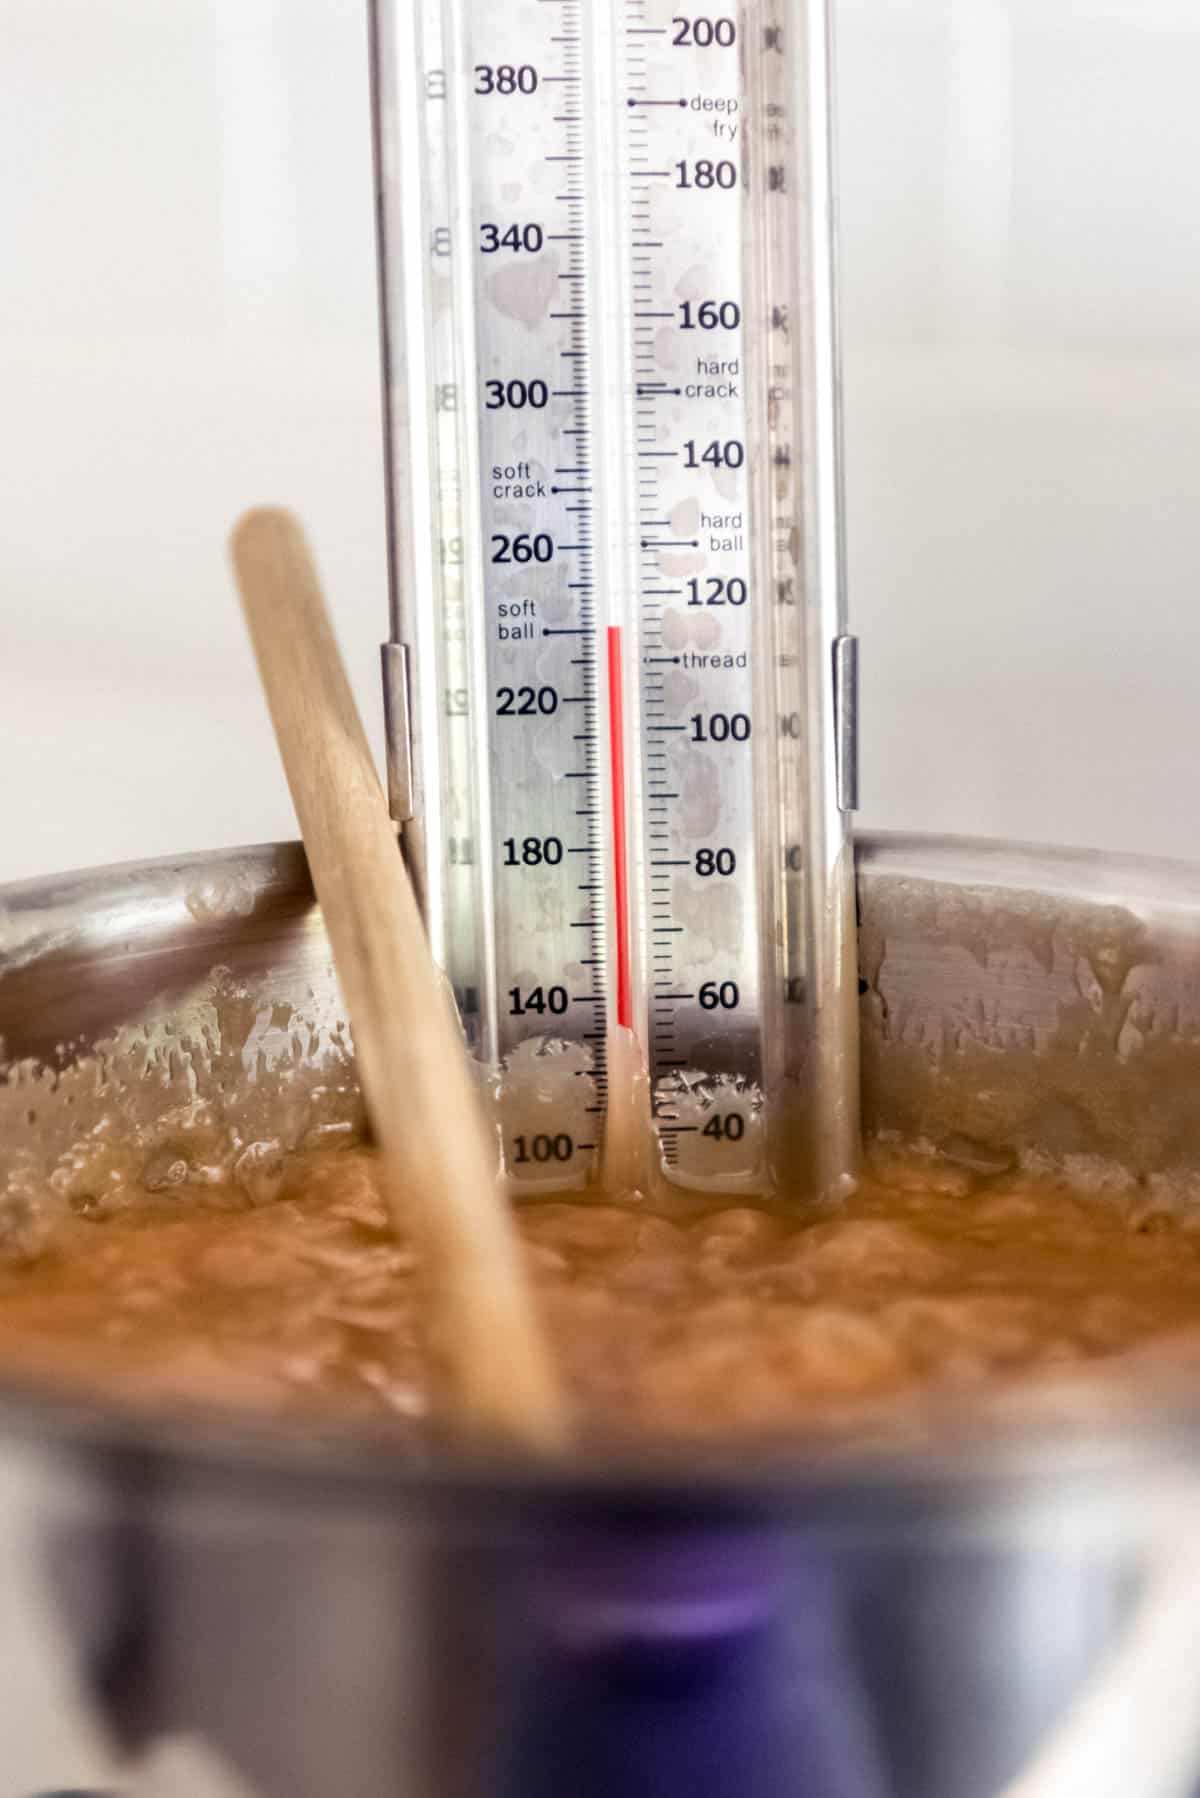
Cook, stirring frequently, until the caramel reaches 240°F on a candy thermometer (affiliate link). This is also known as “soft ball” stage.
Remove the caramel from the heat and immediately stir in the vanilla extract.
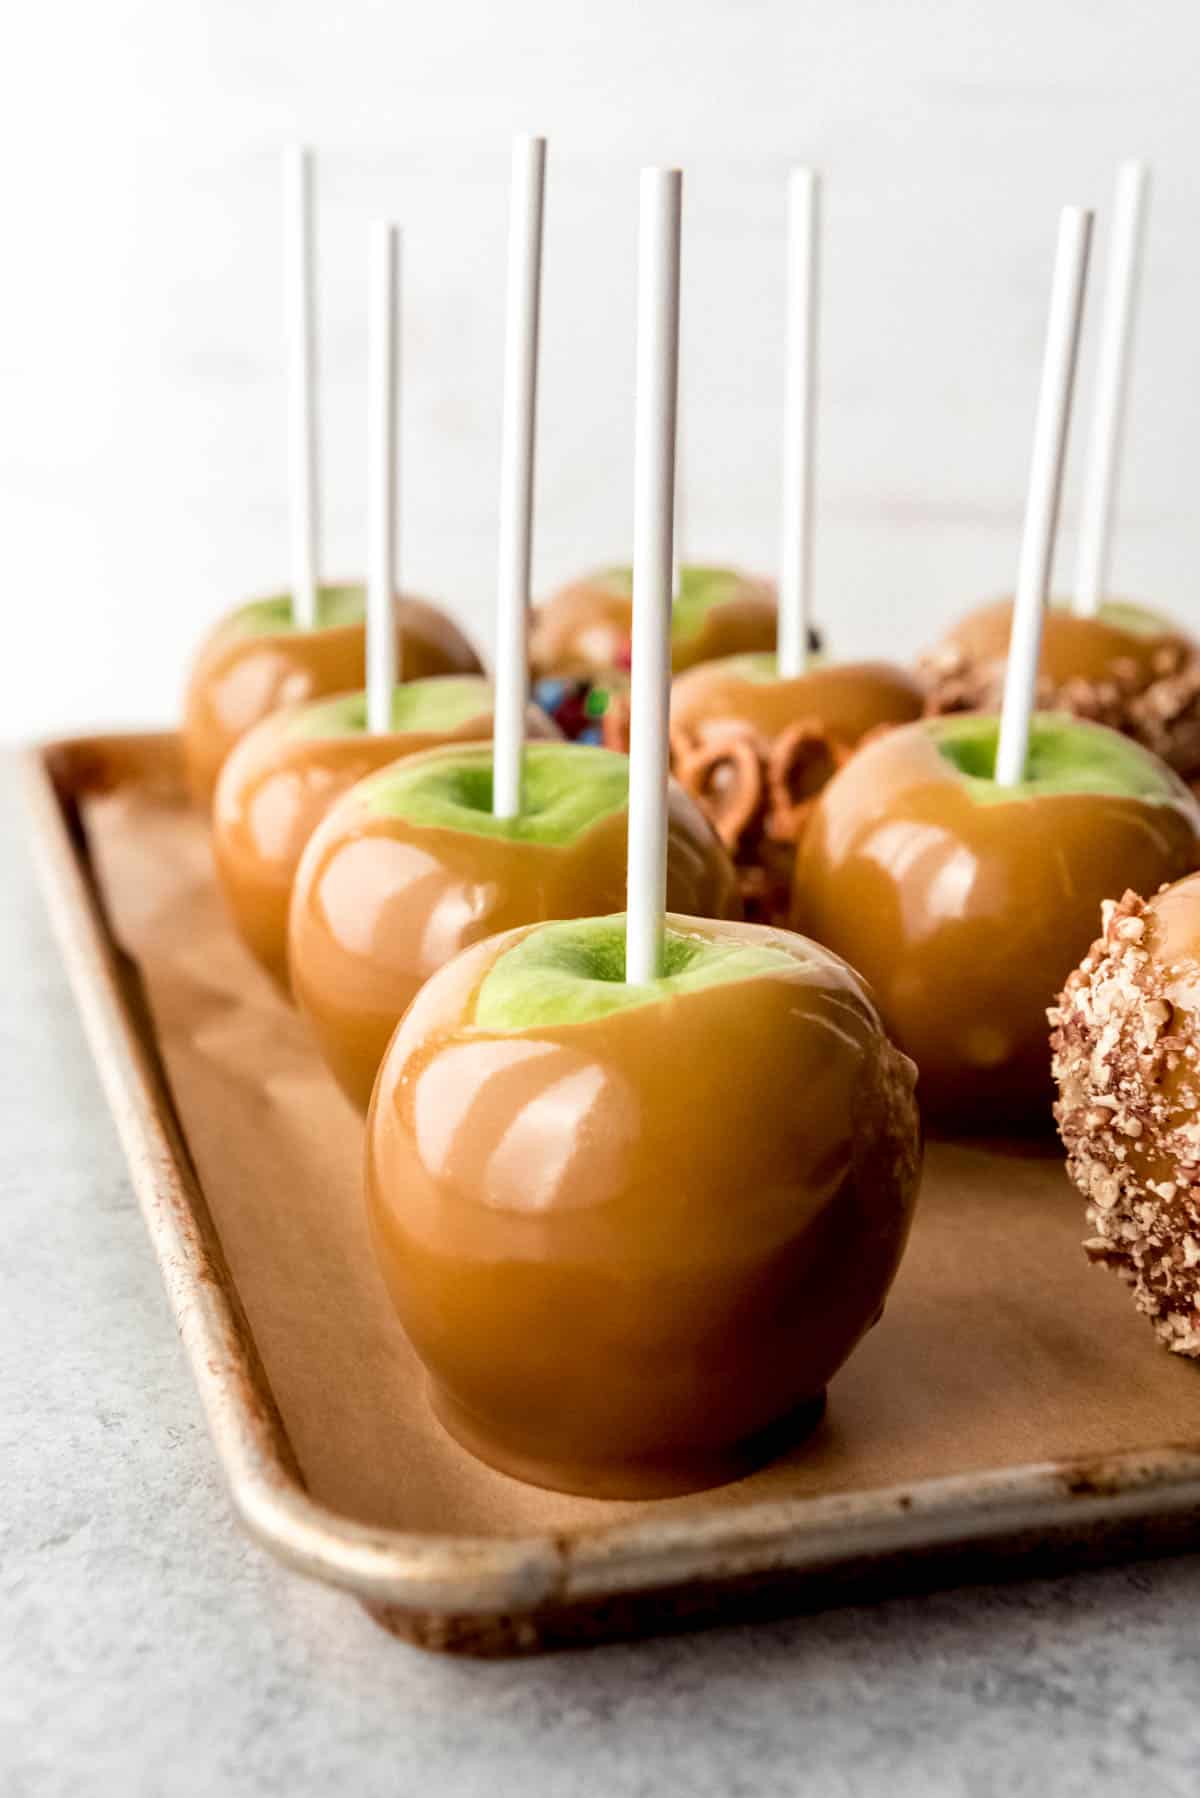
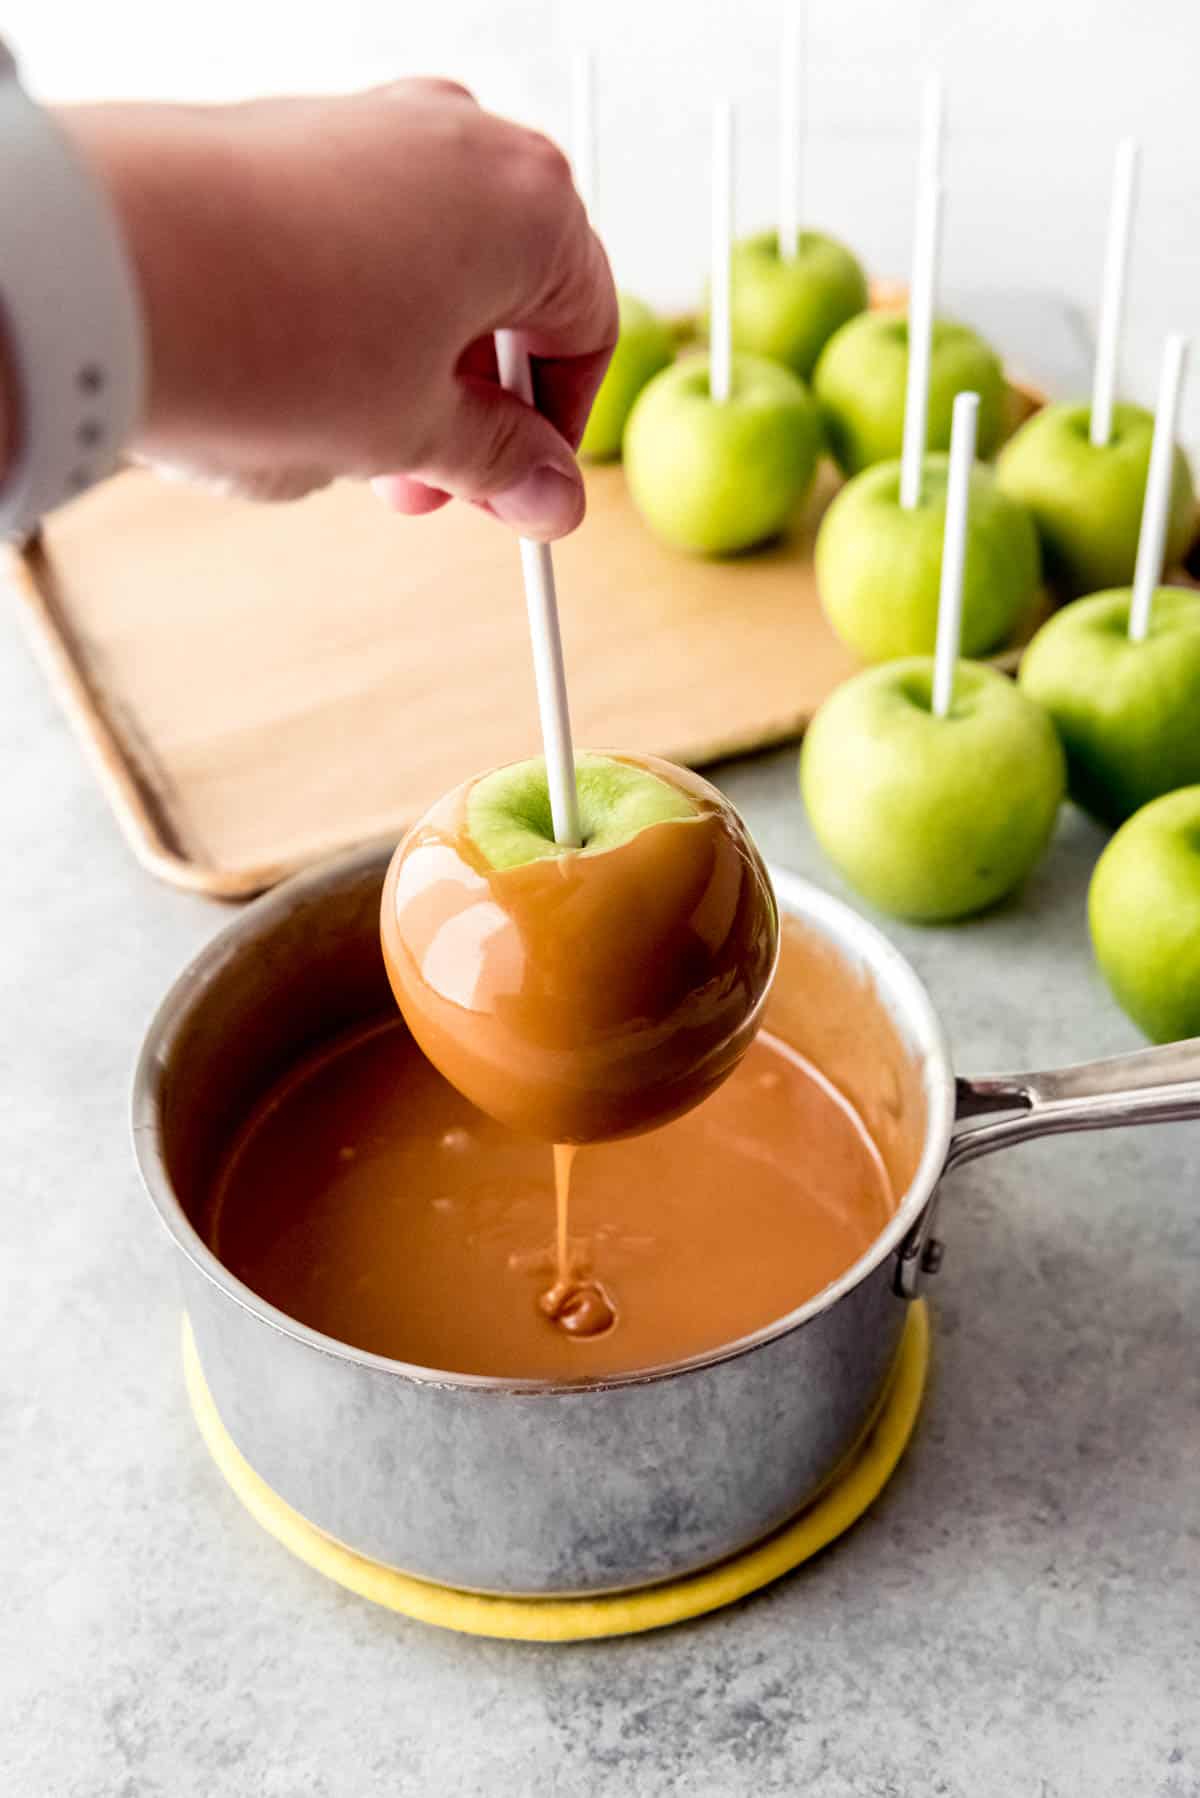
Then dip each cold apple into the hot caramel, rotating quickly to coat all sides and letting the excess caramel drip off before transferring the dipped apples to a baking sheet lined with parchment paper.
The best technique for dipping is to plunge the apple in and out quickly, rolling it around if necessary but not letting it linger in the hot caramel.
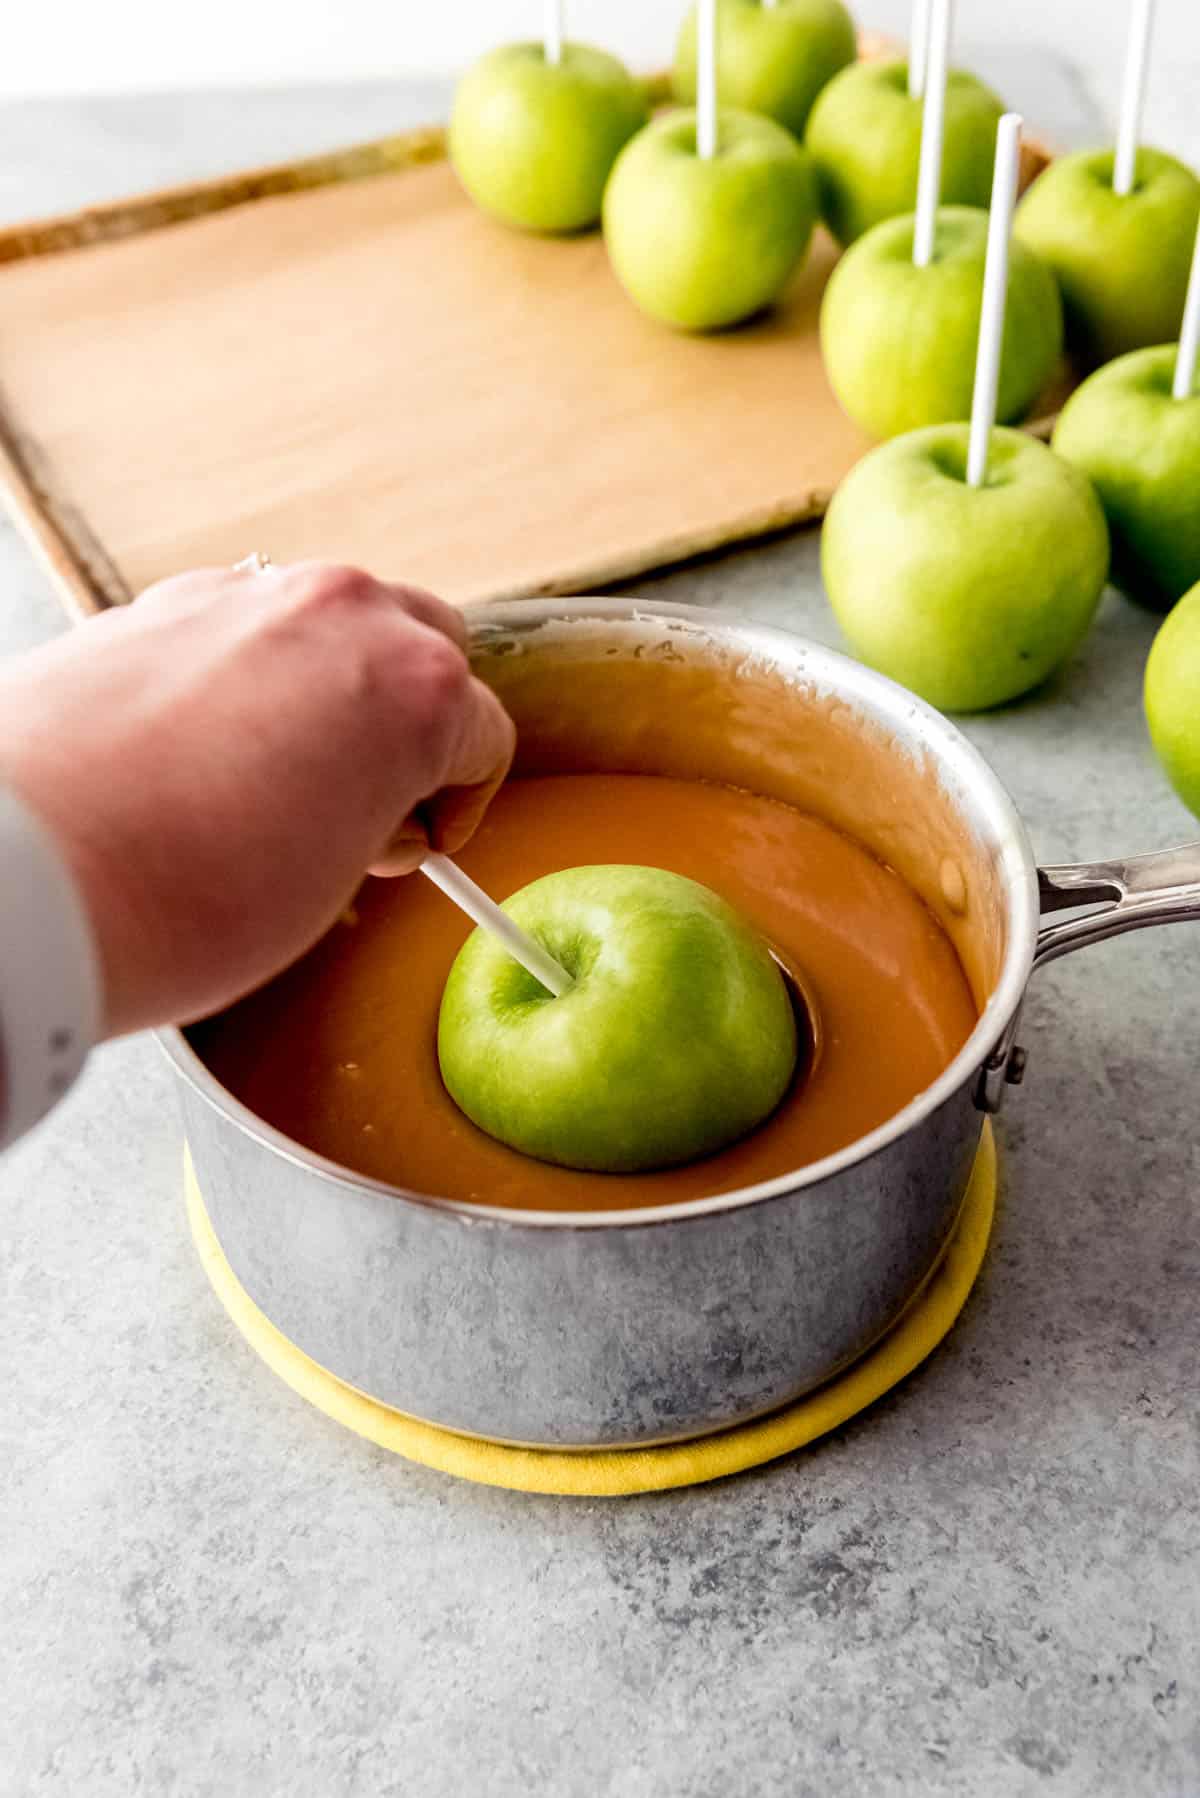
As the apple warms up from the heat of the caramel, it makes it so that the caramel has a harder time setting up and it tends to slump down the sides of the apple.
A quick in-and-out approach works best because the apple stays cold, letting the caramel have a better grip to set up more quickly.
Recipe FAQ’s
It’s not totally necessary to chill the apples in the freezer or fridge before dipping them in the homemade caramel, but using cold apples does help the hot caramel stick and set faster.
Waxy apples can make the caramel slide off. To remove the wax, place the apples in very hot water for a few seconds to remove the wax, then rinse in cool tap water. If the wax is particularly stubborn, you can also scrubbing the apples with a little apple cider vinegar using a vegetable brush or paper towel, then rinsing well.
The biggest issue to watch for (and this really is a big problem if it happens) is if the butter in the caramel separates, which usually happens because you have finished the caramel but let it sit too long without stirring or transfer it to a crockpot and leave it on low for a long time. None of the caramel will stick to the apples if there is a thin layer of separated butter on the top of the caramel. If that starts to happen, it’s going to take some elbow grease and a really strong wooden spoon to bring the caramel back together, but it can be done. Just turn the heat off and let the caramel cool down for a while, then stir, stir, stir, until it comes back together.
Tips for Success
- Don’t use wax paper or aluminum foil. It has a tendency to melt from the heat of the caramel and stick to the bottom of the apple. Use parchment paper instead.
- Invest in an inexpensive candy thermometer (affiliate link). Yes, there are tests you can do by dropping small amounts of your cooked caramel in a bowl of water to determine what stage it is at, but it is so, so much easier and far more reliable to just use a thermometer.
- Stick close by your caramel while it is cooking. It is going to take about 12-15 minutes for the caramel to come up to temperature and you will want to stir it almost constantly to make sure it isn’t burning on the bottom and that the ingredients are combining well to create the caramel.
How to Store Caramel Apples
Refrigerate your caramel apples to keep them fresh. They will stay fresh weeks in the fridge (at least in theory – ours never make it that long because we eat them first!)
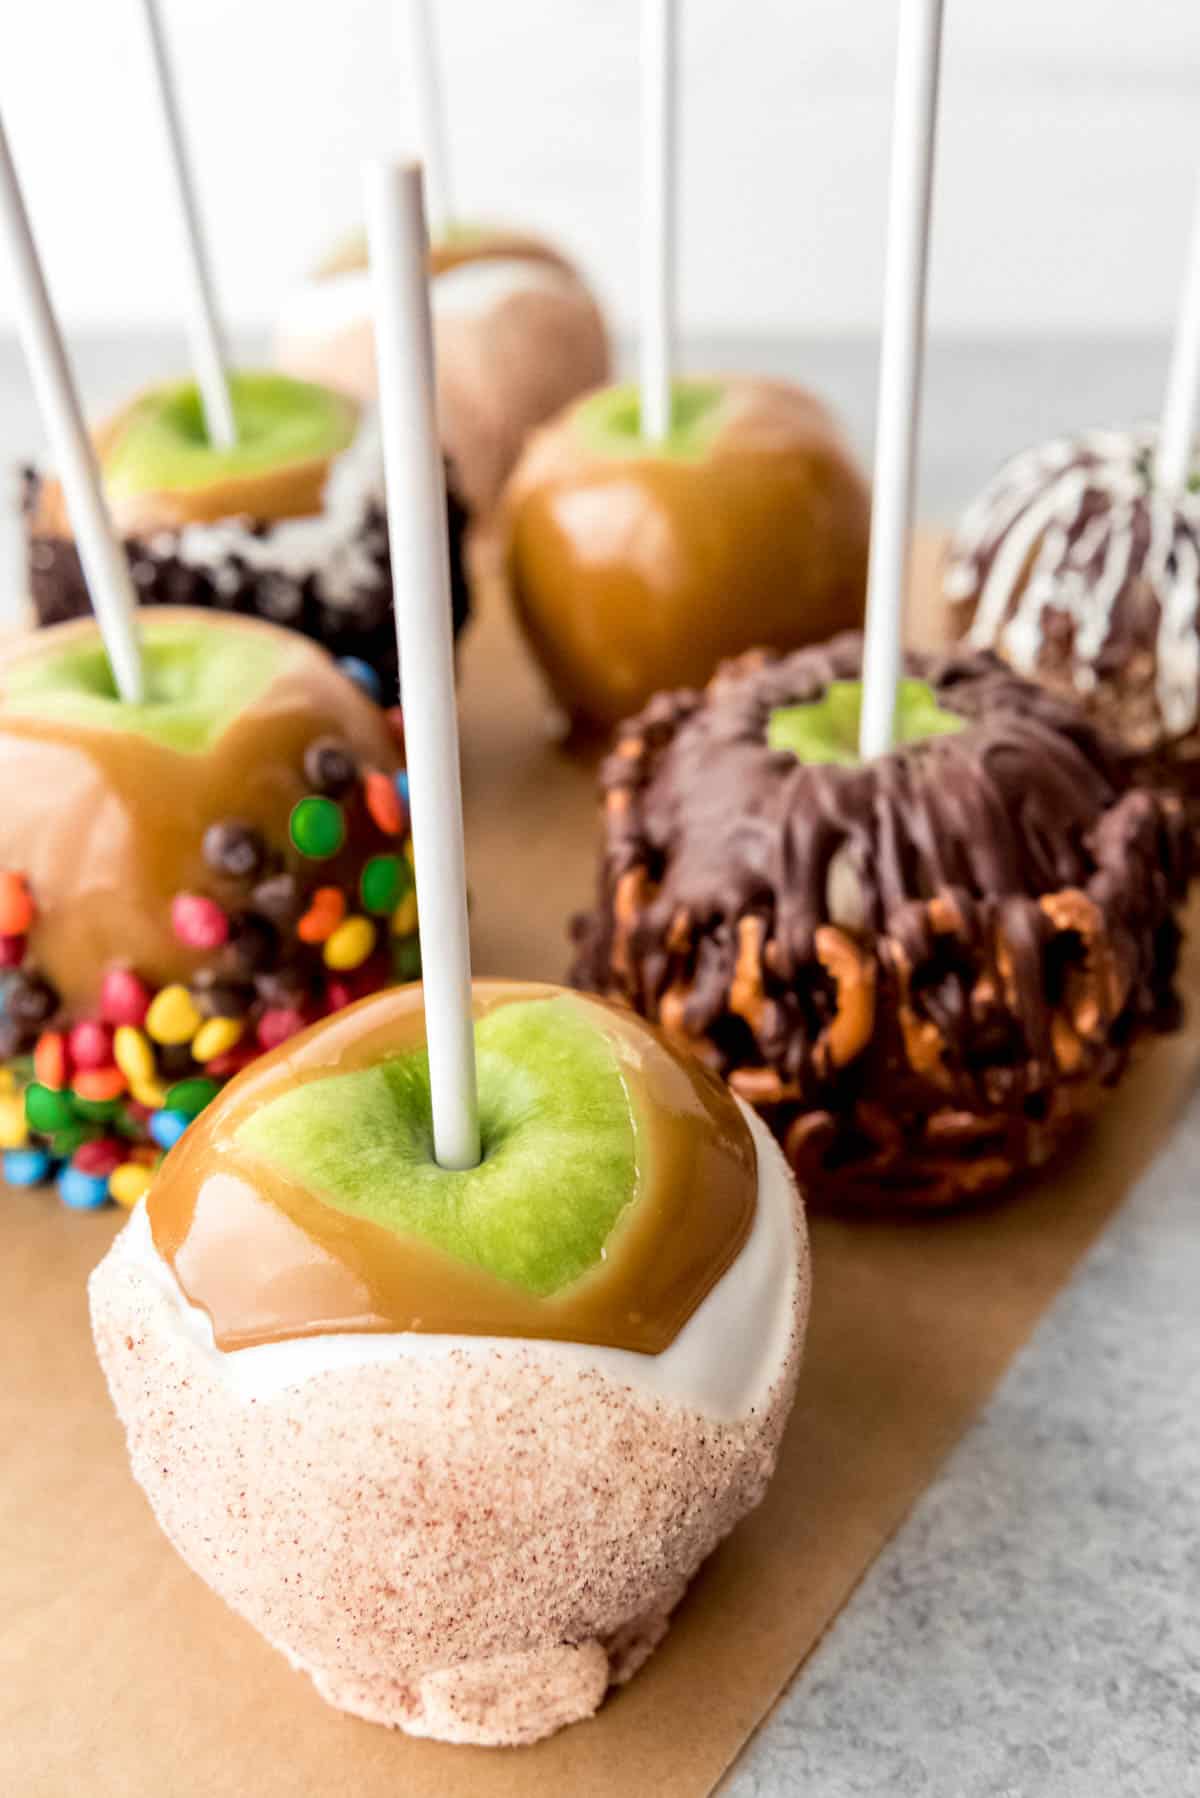
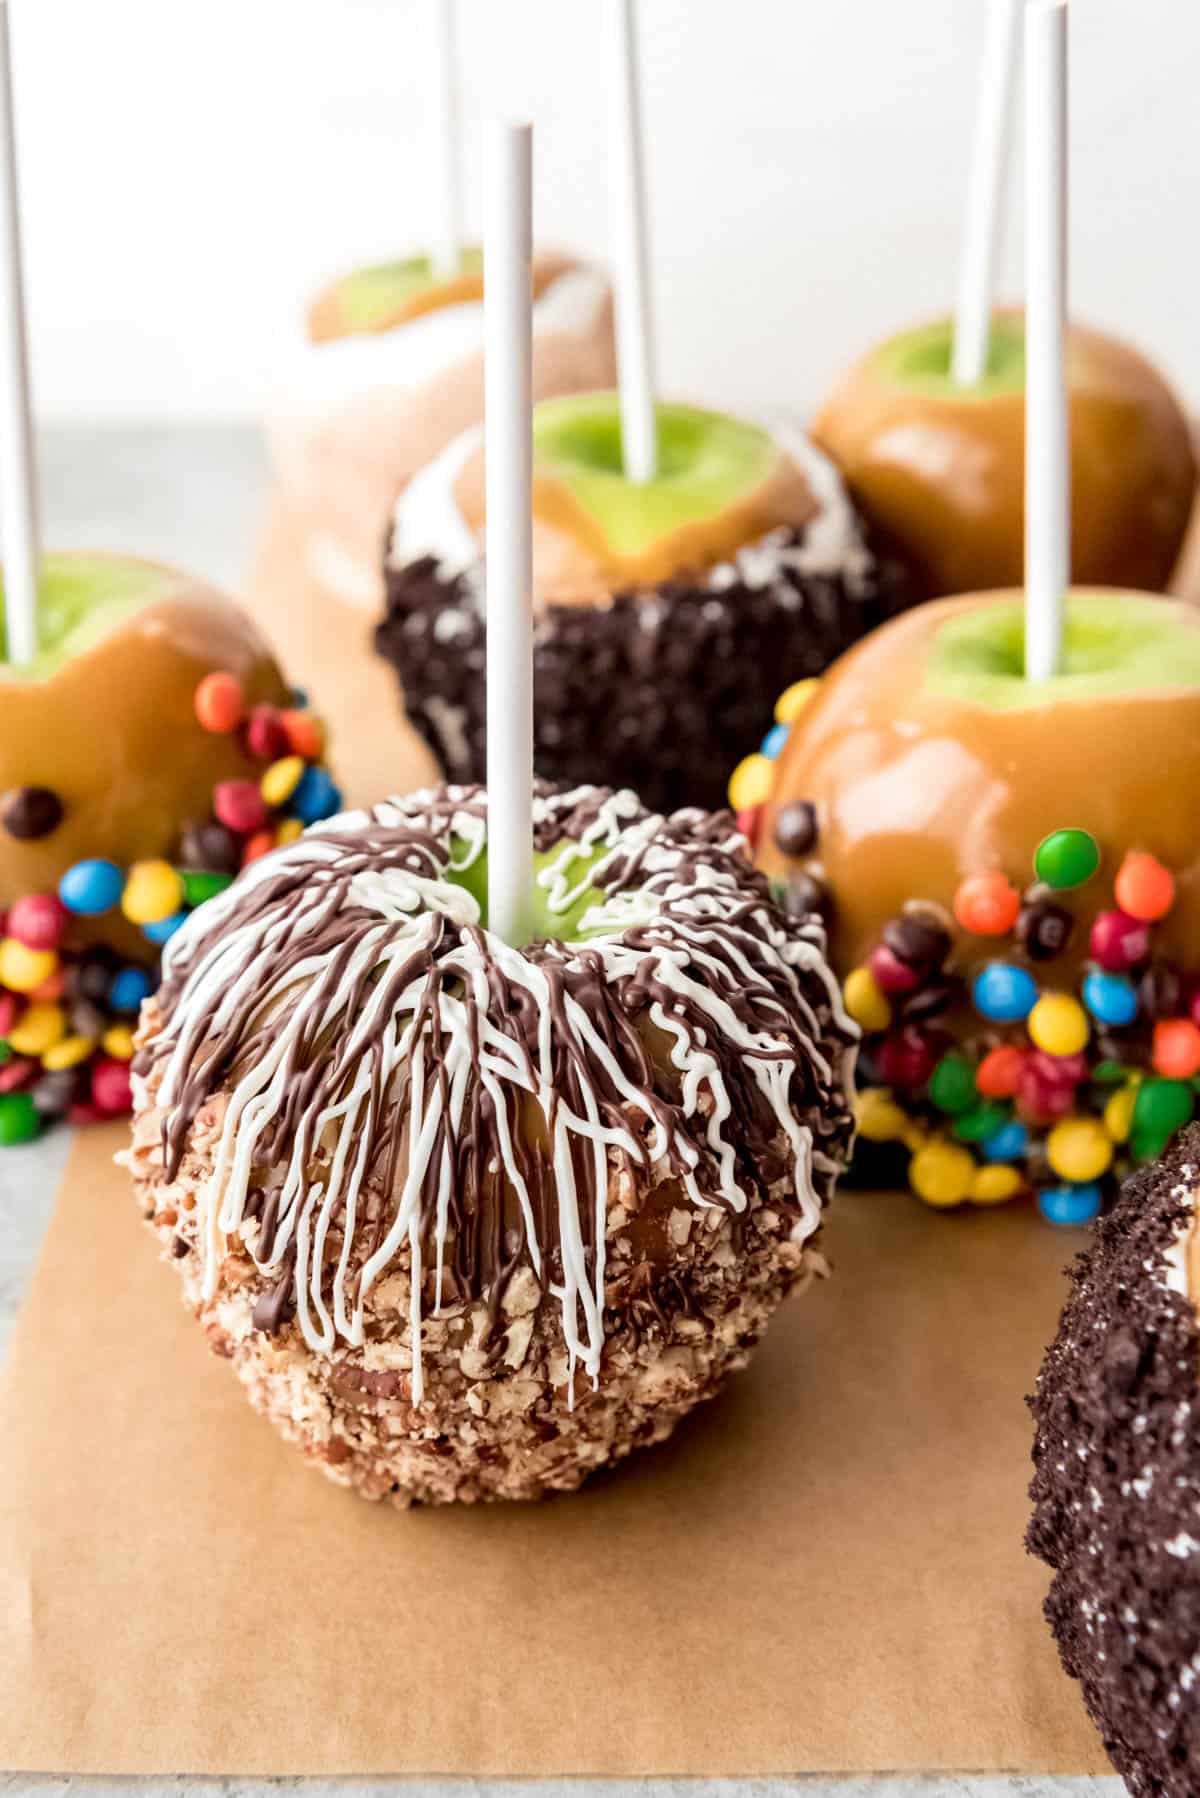
Decorating Caramel Apples
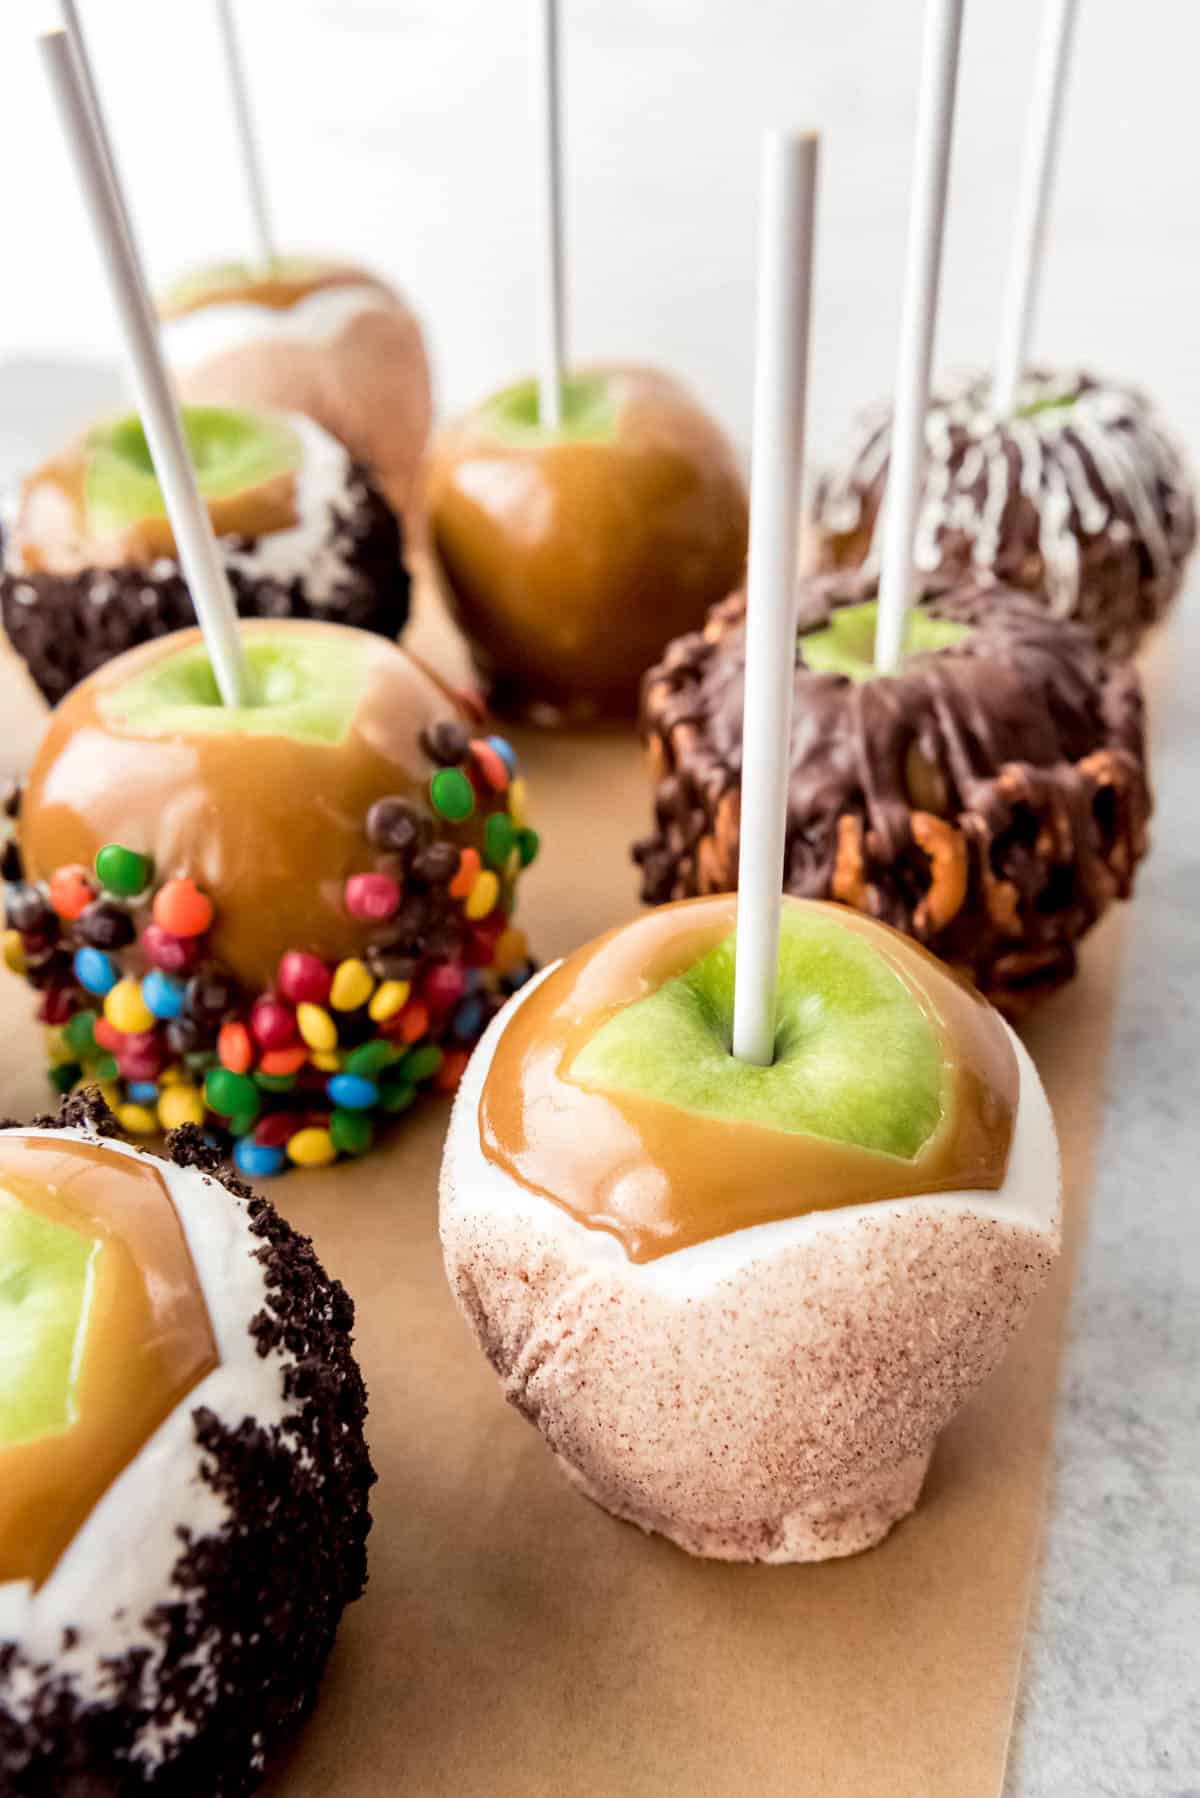
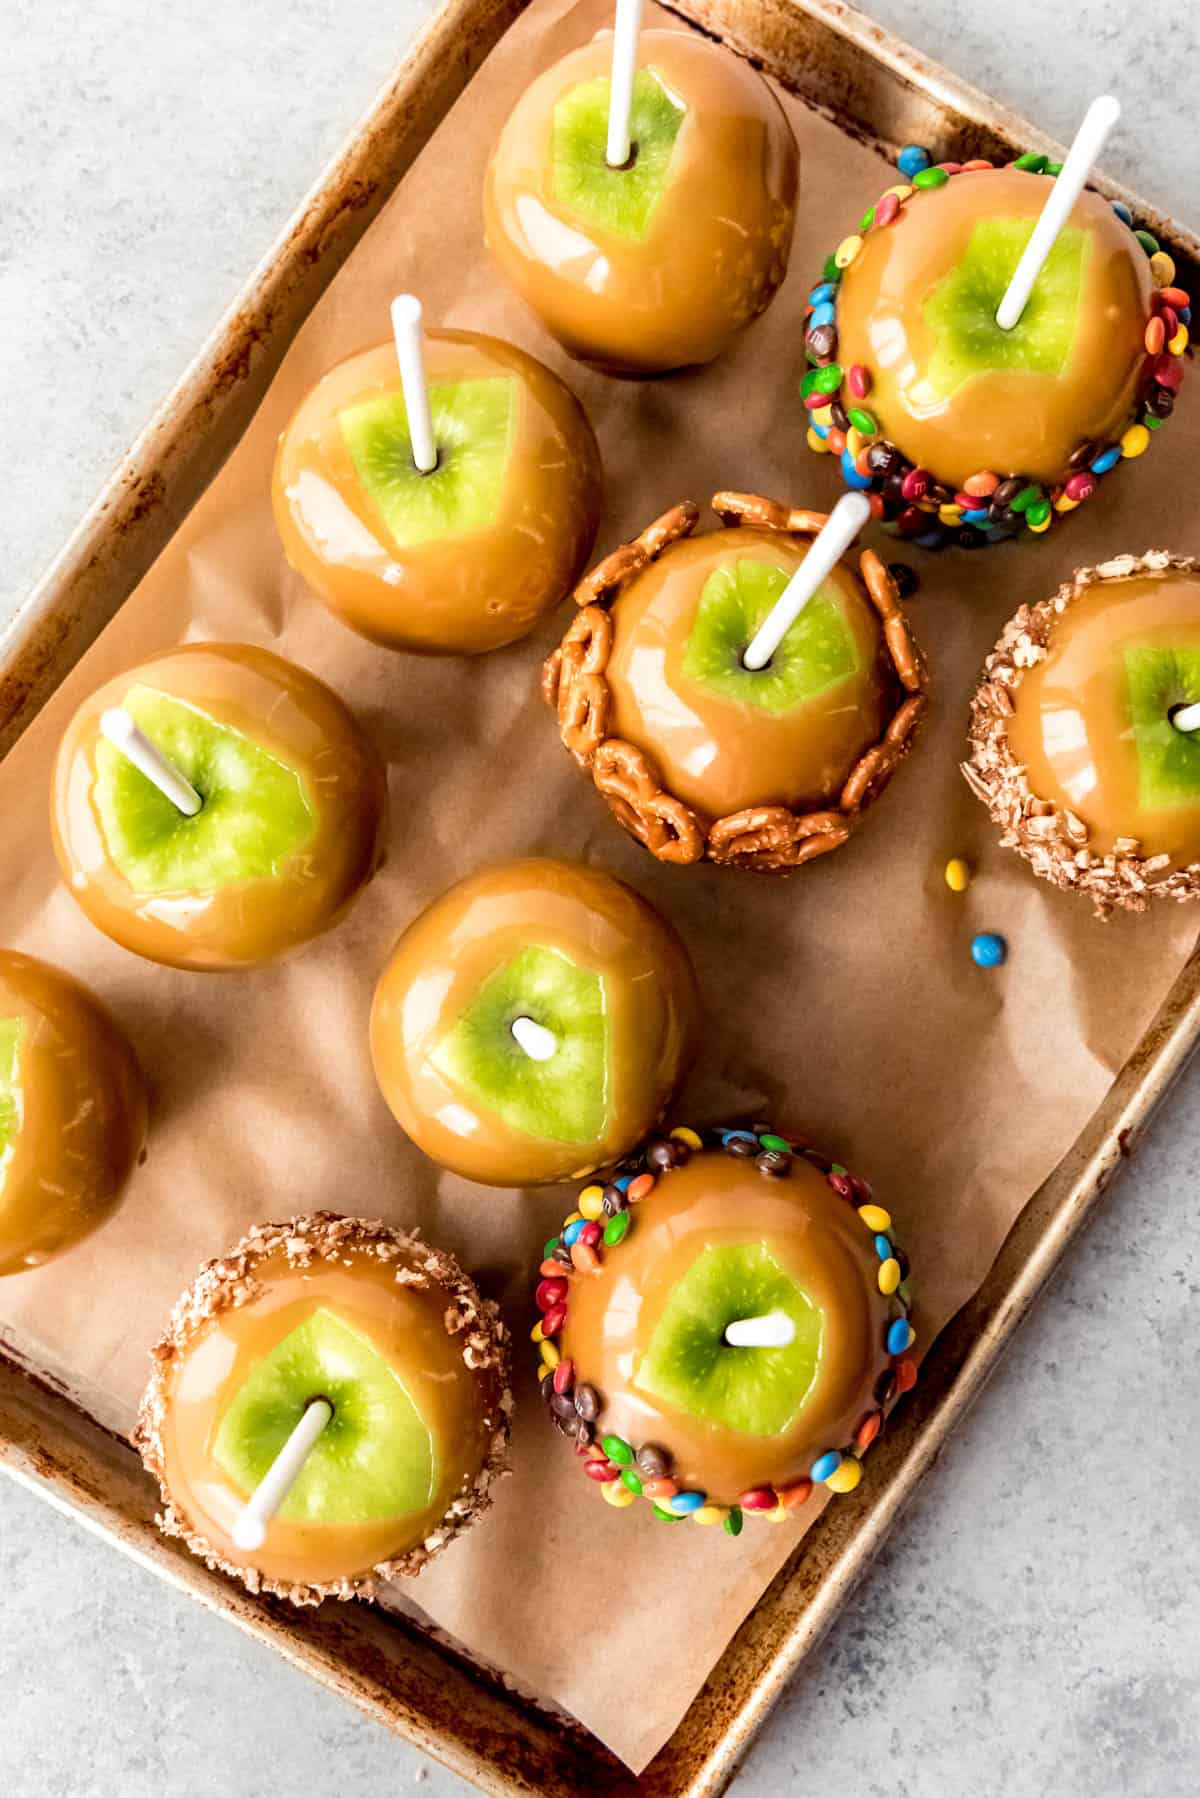
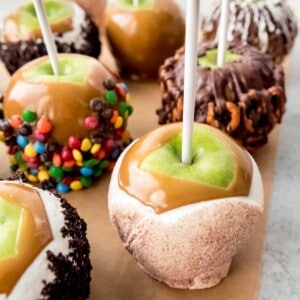
After dipping your apples into the caramel, you can top them with as many toppings as your heart desires! You can go as simple or crazy as you like.
I tend to favor simpler caramel apple toppings like just pecans or toasted coconut.
But Paul loves an apple pie version of a homemade caramel apple (I’ve included additional instructions in the recipe below on how to make those), and kids always seem to go for the Oreos, pretzels or M&Ms (or whatever spare Halloween candy you may still have around).
And melting some dark or milk chocolate to drizzle over the apples makes for a really fancy (but super easy) presentation.
Here are some of our favorite caramel apple toppings:
- chopped nuts (pecans, peanuts, or sliced almonds are always popular)
- mini M&M’s (the regular size ones are too big and will just pull the caramel off the apple)
- candy corn
- toasted coconut
- crushed cookies like Oreos, graham crackers, and Biscoff
- pretzels
- melted white, milk, or dark chocolate
- cinnamon sugar mixture
- crushed butterfingers, snickers, or other candy bars

More Caramel Recipes
- Easy Homemade Cream Caramels
- Carmelitas (Oatmeal, Chocolate, Caramel Bars)
- Caramel Oreo Fudge Ripple Ice Cream
- Salted Caramel Cheesecake Bars
Did you make this recipe?
Let me know what you thought with a comment and rating below. You can also take a picture and tag me on Instagram @houseofnasheats or share it on the Pinterest pin so I can see.
Homemade Caramel Apples Recipe
Ingredients
- 10-15 Granny Smith apples
Caramel for dipping
- 1 cup salted butter
- 2 cups light brown sugar
- 1 cup light corn syrup
- 14 ounces sweetened condensed milk
- 1 teaspoon vanilla extract
Optional Toppings
- White candy melts, cinnamon-sugar, crushed pretzels, chopped pecans, chopped peanuts, mini M&M's, crushed Oreos, toasted coconut, melted dark, milk, or white chocolate, chopped mini Reese's peanut butter cups, chopped Butterfingers, graham cracker crumbs, marshmallows, etc.
Instructions
- Line a baking sheet with parchment paper. Prepare the apples by washing the well to get any waxy residue off. Dry completely and stick a tongue depressor right into the apple from the top, jamming it in deep enough to hold firmly. Place the skewered apples on the prepared baking sheet and stick them in the freezer for 20 minutes while preparing your caramel.10-15 Granny Smith apples
- Melt the butter in a medium saucepan over medium-high heat. Stir in the brown sugar, corn syrup and sweetened condensed milk with a wooden spoon. Continue cooking and stirring over medium-high heat until the temperature of the caramel reaches 235-240°F on a candy thermometer (affiliate link) (about 12-15 minutes but you definitely want to use a candy thermometer (affiliate link) for this step!). You will want to stir almost constantly to avoid burning the caramel on the bottom of the pan.1 cup salted butter, 2 cups light brown sugar, 1 cup light corn syrup, 14 ounces sweetened condensed milk
- Remove the pan from the heat and immediately stir in the vanilla. Don't worry about the caramel bubbling a bit when the vanilla gets stirred in. Just keep stirring and it will all come together.1 teaspoon vanilla extract
- Pull the (now-chilled) apples out of the freezer and dip them into the caramel, one at a time, letting excess caramel drip off the apple. Give the apple a quick flip upside down and hold it like that for 20 seconds or so to give the hot caramel a chance to set up on the cold apple before turning it right side up and setting the dipped apple down on the parchment paper. Repeat with remaining apples, then transfer to the fridge for 15 minutes to set completely.
- If you want to go beyond a traditional caramel apple, you can roll your caramel dipped apple into any of the toppings listed above (or whatever else you can think of that sounds good!) just after dipping the apple but before the caramel completely sets up.
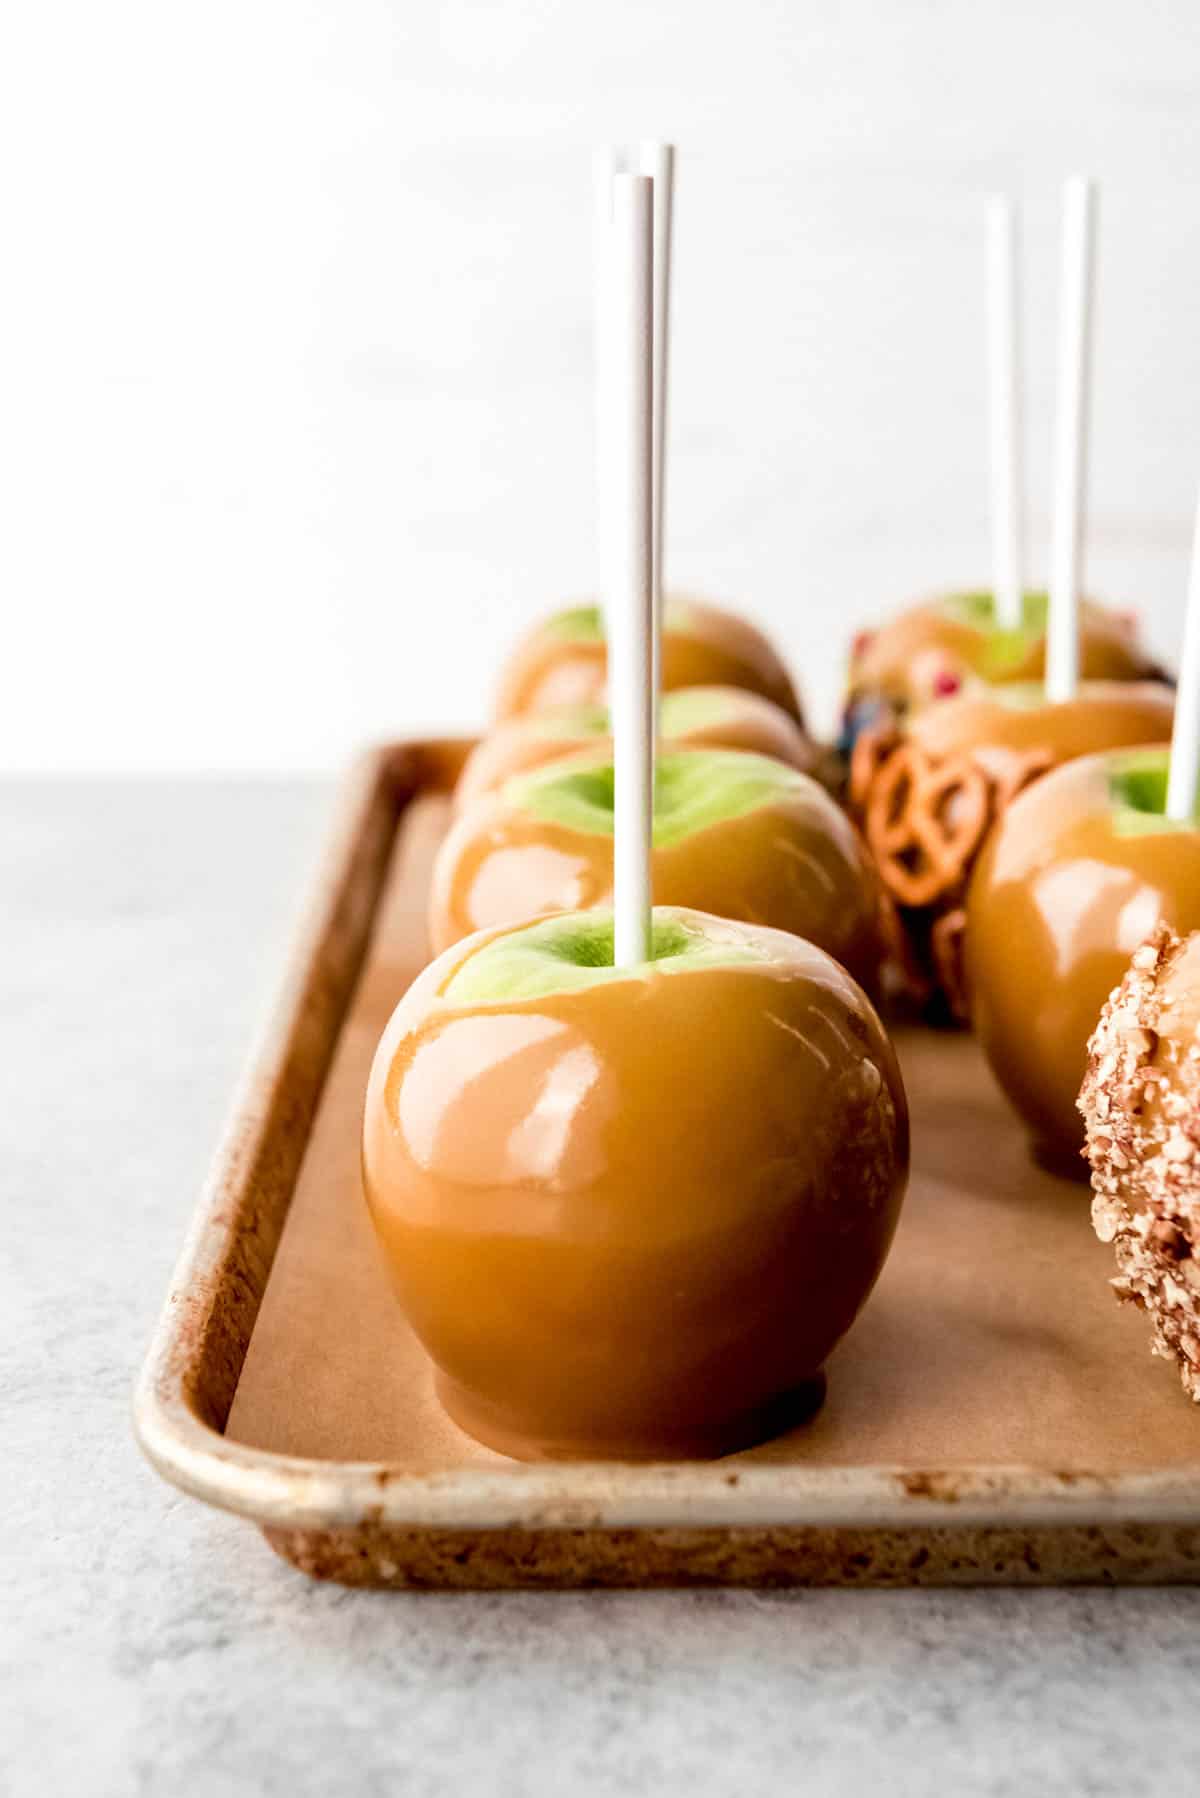
- Once your apples have set completely, they can be loosely wrapped in cellophane and tied with a ribbon for a sweet gift!
Video
Notes
- Storage: Refrigerate your caramel apples to keep them fresh. They will stay fresh weeks in the fridge (at least in theory – ours never make it that long because we eat them first!).
- Apple Pie Caramel Apples: In a small bowl, mix together 1 cup sugar and 1 teaspoon cinnamon. Melt white candy melts or 2 cups white chocolate chips with 1 tablespoon shortening in the microwave in short 30 second bursts, stirring well between each burst, until melted. After dipping an apple in the caramel, let it set up for a few minutes in the fridge. Then dip the caramel apple into the melted white chocolate, scraping off any excess white chocolate so it is not too thick (or else it will start to slide off the caramel, especially once you add additional toppings). Immediately (before the white chocolate starts to set) roll the chocolate-covered apple in the cinnamon sugar mixture to coat. Return the dipped apple to the pan and allow it to set completely.
- S’mores Caramel Apple: Melt 2 cups milk chocolate chips with 1 tablespoon shortening in the microwave in short 30 second bursts, stirring well between each burst, until melted. After dipping an apple in the caramel, let it set up for a few minutes in the fridge. Then dip the caramel apple into the melted chocolate, scraping off any excess chocolate. Immediately roll the chocolate-covered apple in graham cracker crumbs to coat. Press marshmallows into the caramel, then drizzle with additional melted chocolate. Return the dipped apple to the pan and allow it to set completely.
- Make-Ahead: You can cook the caramel up to 1 week in advance and keep it in the fridge. I have done this and then reheated it on the stove before transferring to the slow cooker and keeping it warm for up to 2-3 hours on the “low” setting by stirring every 10 minutes so the butter doesn’t separate.
Nutrition
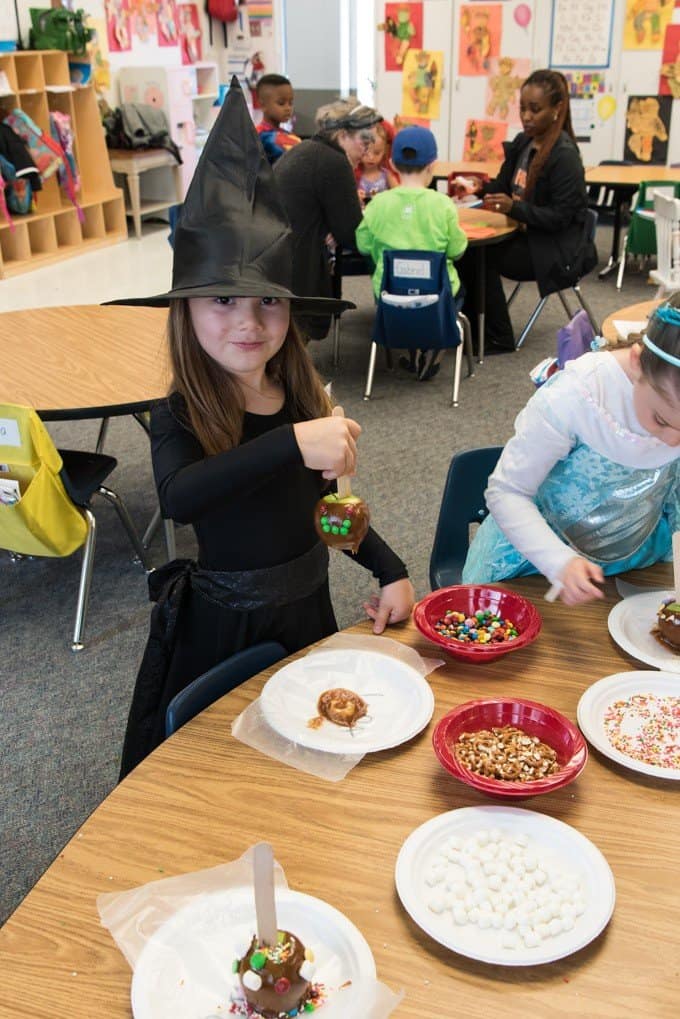
I took a triple batch of caramel to my daughter’s Kindergarten class and kept it warm in the slow cooker. We dipped and decorated apples for their Halloween party, which was so much fun! Everybody got to take their apple home and eat it there.
This is my cute little witch at her Kindergarten class party with her Jack-O-Lantern caramel apple. I cannot believe she is in 8th grade now!
This post was originally published in November, 2016. The photos and content were updated in September, 2022.
Recipe originally from Jamie Cooks It Up.


These look amazing! I love the neighbor gift idea. So glad I stumbled onto your blog!
I’m glad you stumbled onto it too, Leanna!
What a cute little witch!!!!!! The apples looks amazing!!!
Thanks, Kathy! I thought she was pretty cute too! 🙂 Although later that day she got brave and went with green paint on her face and neck so she could be the Wicked Witch of the West.
Oooo! Very yummy! Thank you for the recipe!
You are so welcome!
These look like so much fun! Caramel apples make the best treats. Love your photo of the cute little witch. 🙂
It is such a fun project and the result is far better than the store bought kind! These caramel apples look great and super delicious. And the witch in the picture is adorable 😉 .
Thanks, Nicolette! I think she is pretty adorable too. 🙂
Love the whole idea… Plus it’s a nice way the kids to eat more fresh fruits!!!
So true – never a bad thing to get more fruits & veggies into their diet. Maybe caramel carrots next time? Lol. 🙂
Never tried caramel apples myself. Thanks for the recipe!
You’re welcome!
I’m surprised no one else has pointed out that wax paper is not the right sort of paper to use for this sort of thing: I used it for this recipe and ruined all of my apples, as the wax finish melts onto the caramel apples. Just going to stick with apple cider and snacks for my party tonight I guess.
Once I googled the issue when I realized the mistake, I got a million results of people saying to absolutely never use wax paper for melted candy for the exact reason I said.
So did you mean to say parchment paper? Because as I just discovered, there is a big difference.
Oh no!! I’m so, so sorry! Yes, I meant parchment paper, not waxed paper! I feel terrible! I already updated that mistake. I’m surprised no one mentioned it before now!
Actually parchment is not good for this either… silicone or just brush the baking sheet with butter.
What is the shelf stable of the caramel apples? Planning on giving them for xmas.
They will keep in the fridge for 1-2 weeks. Just make sure they have a few hours at room temperature for the caramel to soften before enjoying.
So beautiful! Love these pictures and I love this simple food idea and how you made it creative! LOVE
I love that you have made these all fancy! The s’mores would be a fun one for me to try!
What a great idea for a Halloween Party! Thanks for sharing on the Celebrate 365 Blog Party!
How far ahead can these be made up and what is the best way to store them until you need them? Would like to make them for a birthday party
I wouldn’t make them more than two days in advance. I would store them in the fridge to keep them as fresh as possible.
I’m so going to try this recipes tomorrow I have a whole fresh picked apples and this will be a great way to use them plus the kids will love them…the recipe Is so we’ll explained…Thank you!
If the caramel is too hard, is it because I didn’t cook it long enough?
No, actually I would think it’s that it cooked too long or got too hot. Were you using a candy thermometer?
Can you keep the leftover caramel? If so, how long and what’s the best way to store it?
Absolutely! I pour mine into an airtight container and store it in the fridge. It can be reheated in the microwave and poured over brownies or added to an apple pie or used lots of other ways!
Can I reuse them for the apples when I reheat? Or will they not work?
I think that will depend on how much caramel you have leftover. If it’s just a partial batch it might be hard to cover the apples easily in it and have them turn out smooth. But yes, it should reheat and be fine for making caramel apples! Great question!
These turned out amazing and delicious! I had to triple the recipe because I was leading a kids class at my job and this was the activity I chose to do- so it took a very long time for the caramel to get to temp but it was sooo worth it!
Can you make this caramel in advance and then warm to soften the caramel for dipping at a party?
Yes, you can make the caramel in advance and then refrigerate it up for to 2 weeks and reheat to use for dipping later.
Made these last night and they turned out awesome! At first it had a weird flavor, but it turned out that was coming from the sprinkles the kids had used (on almost all of them! 😖). Anyway, I was able to recreate my absolute favorite version that I would usually purchase at RMCF. Quick question, what do you suggest for storing them? I usually store a caramel apple in the fridge, but these seem to turn rock hard and then it’s impossible to slice them without the caramel pulling off. Should they not be stored in the fridge? Did I do something wrong when making the caramel or do you just need to let them sit out for a few minutes before slicing?
Hi Erica! I’m so glad you enjoyed these and figured out the weird flavor was from the sprinkles your kids used, lol! If you are going to eat them within a few hours, you can just store them on the counter covered loosely in foil. But otherwise, yes I recommend storing them in the fridge. The caramel definitely gets hard in there, but if you leave them at room temperature for a couple of hours (a few minutes won’t do a whole lot for cold caramel) it should soften up and be ready to slice and eat!
Have you ever tried the caramel with agave nectar instead of corn syrup? Social distancing has me trying to be creative with what I have on hand. These look like such a fun activity to do with my kids while we’re home.
I haven’t tried making the caramel with agave nectar but I would be interested in hearing how it goes! I hear you can use honey as well!
How do I get my caramel to a darker color like yours? Also is it best to put them in the fridge after you dip them?
If you want darker caramel, use you always use dark brown sugar or dark corn syrup instead of light corn syrup!
My kids can’t get enough of the caramel! This is so good! I’ve never seen caramel apples disappear so fast. The kids are literally fighting over them. I am not a fan of caramel apples, but I have been taking small pieces when they have one. Thank you for sharing your delicious recipe.
This makes me so happy to hear, Elie! Thank you for sharing!
Mine turned out with the Carmel WAY WAY too hard and thick 🙁 …. how do you get the coating to be thin? We couldn’t even bite into the apples….
Oh no! I’m sorry that happened! Sounds like the caramel was cooked to too high of a temperature. You might need a new thermometer.
Would the recipe change if using the kitchenaid tempered attachment?
I’m not actually familiar with that attachment!
What size can of condensed milk? We tried tonight but it was too runny. We didn’t have a candy thermometer (just ordered) but there were multiple sizes of condensed milk at store so could have also used the wrong size. It was good for dipping slices of apples, but want to try again.
It’s a 14-ounce can of sweetened condensed milk. Bummer that it was too runny, but I’m sure you will have better results with a candy thermometer to help!
I love this recipe! Made it for the first time yesterday. I had 2 green apples and wanted to do something with them. I made the caramel and cooked the caramel under 240. Around 236. When it was ready i stirred it until it got thickened while cooling. Dipped the apples and did what you suggested and turned the apple over. I had no pooling at the bottom. The caramel stayed on the apple. I dipped it into toffee bits then melted white coating and drizzled it over the apples. Did the same with the semi sweet chocolate. So pretty and lots of caramel left over for icecream. Thank you for the wonderful recipe and clear instructions.
You are very welcome! I’m so glad you found the extra tips and info helpful!
Okay question on the caramel! I took it off heat at 235 and it worked great for the first 5 apples. Then it seemed to get too hard so I tried to reheat it and after just a little bit of time I started to separate and the butter was coating the apples and the caramel wouldn’t stick. Did I ruin it re heating it?
That’s weird that it would get hard after just five apples and then not come back together with the butter separating. Did you try stirring the caramel back together really vigorously? That’s pretty much the only way to get the caramel to work again if the butter starts separating is to use elbow grease to combine them. Otherwise, I would say to just drain the separated butter off and use the caramel you have for dipping apple slices or drizzling over ice cream and try again with a new batch. Sometimes it’s just like that with candy making until you figure out how it works best on your stove and with your equipment!
I haven’t tried them YET, but plan to this weekend. I’ve made caramel apples before and definitely agree about NOT using the “slick” sticks as the apples just fall off. Your apples are very pretty, but why are using the “slick” white sticks after not recommending them?!?
I know! I really need to fix that. I just liked the look of the pretty white sticks for the photos, but in regular practice I use the wooden popsicle sticks which are much more practical.
These turned out amazingly! Thanks for the recipe.
I plan on using this for a church youth group activity. When you transfer the caramel to the crockpot, do you continue to use the candy thermometer to make sure the temp is correct or does the low setting keep it warm enough?
No, once I transfer it I just leave it on the low setting. Just make sure to stir it occasionally so it doesn’t separate again.
These are so much fun! Kids absolutely loved making them for our halloween party, no grumbling about eating apples!
Caramel apples are one of my favorite treats. Yours came out picture perfect! Love how customizable you can make them plus they are super tasty! Love, love, love!
Caramel apples are the best! They are so easy to make and are so much fun – yum!
Oh my goodness! These are super fun and festive! Can’t wait to make them with my grandkids.
These caramel apples are perfect for fall. I can’t wait to get into the kitchen and have my kids make these along side me.
Hello! I am so excited to try this caramel. Quick question, have you ever made the caramel in advance? Refrigerated it and then warmed it on low in the crock pot?
Yes! I mentioned this in the post, but you can cook the caramel up to about 1 week in advance and keep it in the fridge. Reheat it gently on the stove or in the crock pot, being sure to stir occasionally.
I followed this recipe exactly with the exception of chilling the apples because they had been in my trunk overnight in 40 degree weather.
This recipe is easy and so delicious! I made one dozen apples and had plenty of caramel left over. I poured the excess in a buttered pie dish and sprinkled crushed salted peanuts on top. It is so very good I cannot stop sampeling it!
Try this recipe, you will not regret it! Oh and my grandson loved it!
Thank you, Brenda! I love that idea for using the leftover caramel! So smart!
Awesome recipe. We made these for my 6 year old’s birthday party and it was a hit. I made the caramel a couple days in advance, reheated the day of the party and kept it warm in a slow cooker. It was so much fun and the kids (and adults!!) loved them. Just perfect! Thank you!
Thank you! I’m so glad you liked it! Nothing beats a good caramel apple! It’s a crowd pleaser for sure.
These turned out amazing! My first time making caramel and it was a success. I made all the apples you posted. I feel like a gourmet caramel apple maker now.
Wow! You are a gourmet apple maker! Aren’t they so fun?! They feel so fancy but really are not that hard to make. I’m so glad you liked them!
I’m going to be serving these at a fall festival. How long can you keep the caramel warming in the crockpot? It’s an all day festival, from noon until 6pm. Thanks for the recipe, this caramel is delicious!
It can work but it’s trickier. Keeping it warm that long means there is a good likelihood that the caramel will separate. I would bring it and plug it in, then only leave it on the lowest warming setting for 30 minutes, then turn it off for 30 minutes, then turn it back on for 30 minutes, etc. Make sure it gets stirred well with a very sturdy wooden spoon to keep it from separating.
I would like to try this with the heavy cream.. would it still be 14 oz? Cannot wait to try this.. thank you
Yes, the same amount.
Where are the measurements & timing? Bit confused by this website…
If you go to the very top of the post there is a “jump to recipe” button that will take you straight to the recipe.
This was an epic fail. Every bit of caramel fell off. I think the apples were sweating from being in the freezer. I tried drying them off but the caramel would just ooze off. We used a candy thermometer got it to 136°. It just didn’t work. I tried to twirl the apples to keep the caramel on. Finally we put them in the fridge and I just took the puddles of caramel and molded it onto the apples. Most stressful caramel apples. I don’t think I’ll use this recipe again. Too disappointing.
I’m sorry this didn’t work for you, Jess! I saw your IG message also where you mentioned the candy thermometer went to 236°, not 136° and that it was just a typo. If the caramel just oozed off, I have a couple of thoughts. The first one is that the butter separated if the caramel wasn’t used immediately. That has happened to me before if the better isn’t really mixed in and there is a super thin, almost unnoticeable layer of it on top of the caramel. In that case, the butter coats the apple first, and yeah, the caramel won’t stick. A really vigorous stirring with a heavy wooden spoon can usually help if that’s the issue. The other is dipping apples too slowly. We have realized that if you dip the apple and hold it down in the super hot caramel for 10 seconds or more (kids especially seem to think holding the apple in the caramel longer will get a thicker coating), it heats up the apple and then when you pull the apple out the caramel slides off. A quicker in-and-out approach to dipping seems to work better. And finally, you can let the caramel cool down for a bit after reaching temperature and then start dipping – you don’t have to do it right away. There caramel will thicken as it cools, but then you might start dealing with the butter separation issue so be sure to stir it really well before dipping. Regardless of whether you use this recipe again or try another, I hope some of these trouble-shooting tips help!
Caramel is very tasty and we had fun making them. The only problem was after we decorated the apples and set them on the sheet, things started slipping down. Next time should I let the caramel cool some? It was pretty hot. I did freeze the apples for over 20 minutes. Thanks!
I don’t know what happened. I followed the instructions and waited till the temperature was at 235 before I dipped the apple into the caramel. The caramel was thick. When the caramel cooled off on the apple, it was hard. I had to use a knife to cut through. The chipped caramel pieces tasted good. It was like candy. I wish it didn’t get so hard.
Hmm my guess is the caramel got a little too hot. Caramel can be tricky because it can change very fast! The Caramel texture depends on how much moisture remains in the caramel and the temperature of the caramel. If there is more moisture it’s a softer caramel. If it gets cooked longer and hotter the water will evaporate which can change the texture of the caramel to feel more like hard candy. You can add a little bit of cream or water to try and soften it up again. Try again and let me know if you have any questions!
Gonna be spending sometime (9 days) 😳 this recipe is fun for everyone, creative and delicious! Can’t wait 😍
Gonna be spending sometime (9 days) 😳 my grandkids! This recipe looks like it would be fun for everyone creative and delicious! Can’t wait 🥰
Can you use this to make caramels as well? Also, can the caramel be left out, or does it need to be refrigerated? This caramel is so good!
My recipe for homemade caramels is different than this recipe for caramel apples. My candy caramels recipe is https://houseofnasheats.com/cream-caramels-recipe/
You can leave the caramel out as long as it is still warm. Just stir it every 10 minutes or so to prevent the caramel from separating. If you need to save it for later I would store in the fridge.
I followed the recipe as written. I even did the boiling method for removing the natural wax from the apples and chilled them afterwards. For some reason, the caramel hardened too quickly and I was only able to coat 2 apples. I ended up making homemade caramel candy with the rest. It tastes great but overly chewy. I used a candy thermometer, but maybe I shouldn’t have gone to 235°F. Maybe at 225 next time.
Hmmm I feel like 235 F should’ve been fine. Chewy caramel is closer to 245 F and above. Was your candy thermometer correct? But yes, if the caramel is too hard and chewy it was cooked a little too long. Caramel can be a little finicky and the slightest temperature change can dramatically change the result and texture of the caramel. Try the caramel again and let me know how it goes!
These are the best carmel apples I have ever made and eaten. I would give it a 10.
Wow! Thank you!
The best recipe ever! I just made this. I followed all directions. It’s in my fridge right now. Can’t wait to make this again. So easy and tasty!
Great recipe. Different flavor from most Pop recipe. Tangy, yet sweet. Yummy!
Very tasty!
I’ve halved the recipe, made it as-is and doubled it and came out with darn good quality each time. I am a beginner, yet the recipe was straight-forward enough to achieve decent results. It is challenging to get the caramel to set just enough so that it doesn’t peel off, but not let it set too much to hold the toppings. But I will continue to practice. The flavor on these is worth it!
Woohoo! I am glad you like it! Yes, with more practice you will know the exact consistency you will want. Sounds like you’re doing pretty good though!
This recipe is a top notch recipe and I will never use another one again!!
I made this for a few friends and got a text from the same friend a few weeks later “You have ruined me for good; there are caramel apples in the office and I tried one and after eating yours, I can never go back to another caramel apple again”
I mean that’s a win in my book!
Wow that is a win! I am so happy you found this recipe!