Roasted Red Peppers are not only wonderfully sweet, rich and incredibly flavorful, but they add wonderful color and beauty to many dishes and sauces. They are super easy to make at home instead of spending a fortune on the bottled ones you get at the supermarket.
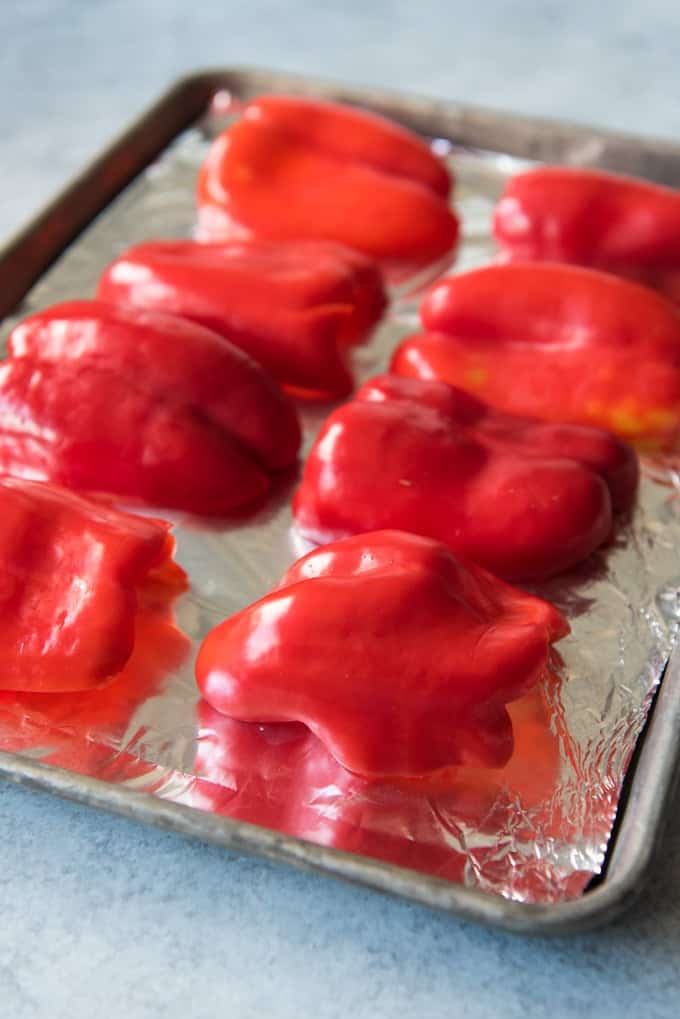
I love the flavor of roasted red peppers – roasting brings out the natural sweetness of the peppers and gives them a milder, richer flavor that is wonderful in so many dishes.
And red peppers are in their peak season right now, so even though you can get them year round thanks to imported peppers, you will find the freshest, most delicious local red peppers during this transition period of the year between late summer and early fall.
Since you will need to use roasted peppers in the Roasted Red Pepper Sauce I posted about last week, I thought another little tutorial might be in order.
Ways You Might Use Roasted Red Peppers:
- In roasted red pepper sauce over pasta
- Chopped and added to pasta or a salad
- As a pizza topping, especially with other fresh herbs or vegetables and a cornmeal crust
- On a panini with melted cheese
- Diced and scrambled with eggs for breakfast
- Pureed with cream cheese in a blender to make a dip for crackers or other vegetables
- In soups
- Added to your favorite hummus
- Combined with some softened butter and then chilled until firm for a delicious compound butter to use with meat or to spread on bread
I have plans to post future recipes for some of the uses mentioned above (especially the pizza and panini), so I hope you give roasting peppers a try.
It’s much less expensive to roast your own peppers, rather than purchasing them in a jar from the store. And it’s kind of fun, too.
There are a number of ways to roast peppers, including directly over a flame on a gas stove, but I have found that roasting them in the oven is just easiest, quickest, and I get the best results this way.
Really it’s just a matter of prepping your peppers by cutting them removing the seeds, membranes and stems from your peppers, then slicing them into strips – about 5-6 per pepper – then roasting them under the broiler for 7-10 minutes, until the skins on the top are charred black and wrinkled.
Cutting them peppers into strips makes it so you don’t have to reach in with tongs and keep rotating the peppers to be sure the skin gets evenly charred around larger pieces of pepper. Once the peppers are charred (but not burnt) they steam in the bowl while the peppers soften and the charred skins loosen enough to easily peel them away from the soft red pepper meat.
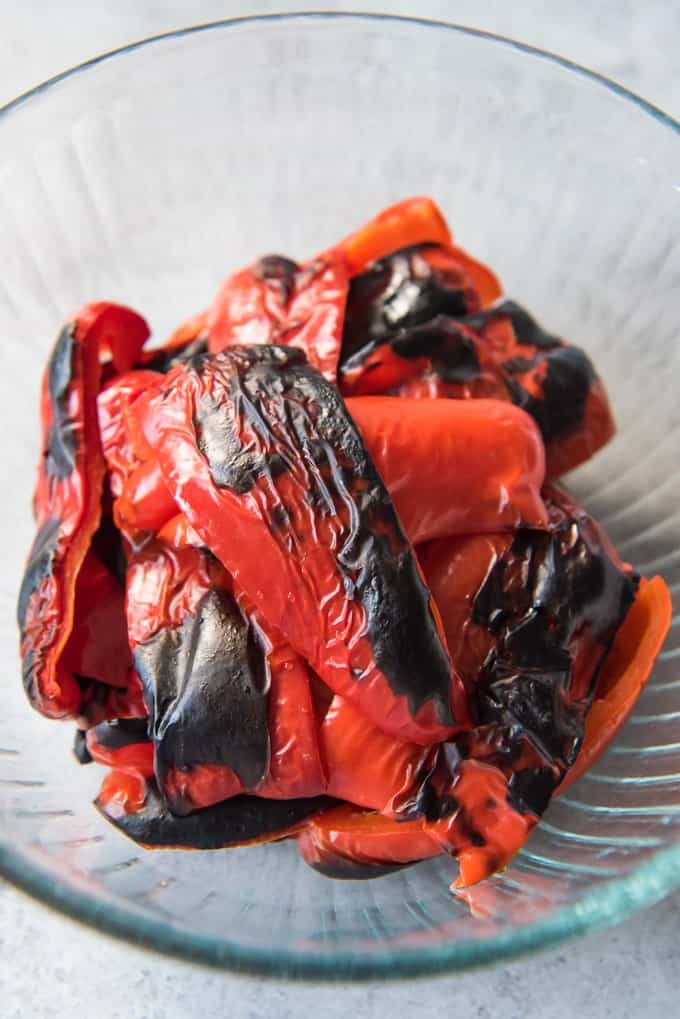
If you aren’t planning on using the peppers immediately, you can store them in a jar in the fridge for a few days with a few tablespoons of olive oil, or put them in a freezer-safe bag along with the olive oil and freeze them for up to 6 months so you always have some on hand.
More Recipes Using Red Peppers
- The BEST Stuffed Peppers
- One Pan Roasted Peppers, Onions, & Sausages
- Roasted Red Pepper Sauce
- Sheet Pan Shrimp Fajitas in 30 Minutes
- Grilled Chicken and Steak Fajitas
Did you make this recipe?
Let me know what you thought with a comment and rating below. You can also take a picture and tag me on Instagram @houseofnasheats or share it on the Pinterest pin so I can see.
How to Make Roasted Red Peppers
Ingredients
- 4-5 large red peppers
- water for washing

Instructions
- Set top oven rack 6 inches below the broiler. Preheat the oven to broil on high. Line a baking sheet with aluminum foil for easier clean-up.
- Wash and dry the red peppers, then remove the seeds, stems, and membranes. Slice each pepper into 5-6 strips and lay flat, skin-up, on the baking sheet in a single layer.
- Place the peppers in the oven, 6 inches below the broiler flame, and cook for 7-10 minutes, until the skins are charred black and wrinkled.
- Remove from oven and immediately place the peppers in a glass bowl and cover it tightly with plastic wrap. Allow the peppers to rest for 30 minutes so the peppers can soften and the skins loosen.
- Once the peppers are cool enough to handle, peel the charred skin away from the red pepper “meat” and discard the skins. Use immediately or store in a jar in the fridge with 2 tablespoons of olive oil for 3 days or in a freezer-safe bag in the freezer for up to 6 months.


It’s far easier to skin the peppers if you simply cut the peppers in half. I would think skinning strips would be quite a fiddley, time consuming endeavor as opposed to slipping the skins off of a larger chunk. Definitely appreciate the time and temp requirements and also your wonderful website!
Thank you for the suggestion, Jenni! That’s a great idea! Glad you found this post helpful!