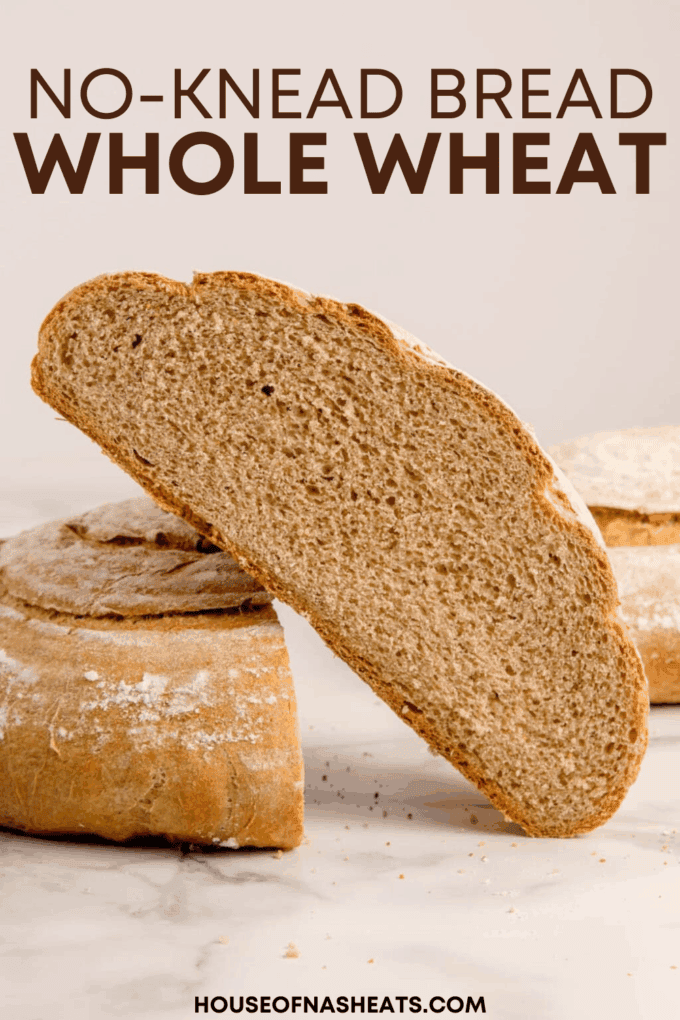

This no knead whole wheat bread recipe is the easiest way to get a crusty, bakery-style loaf at home – no kneading, no fancy tools, no stress. Just stir, rise, and bake in a blazing hot Dutch oven for a wholesome, golden loaf that’s soft at the center and finished with a deep, crackly crust that delivers on every bite.

Table of Contents
This no knead whole wheat bread is the kind of low-effort recipe that feels like magic every time. You mix everything in one bowl – no kneading, no bread machine, no fancy gadgets – just a wooden spoon and a little patience. The dough rises into a beautiful round loaf with a chewy center and deep golden crust that looks like it came from an artisan bakery, but tastes even better because you made it yourself.
Whenever I pull a crusty loaf from the Dutch oven and hear it crackle as it cools on the counter, it feels like such a win – simple, homemade, and honestly just really good bread, especially paired with some homemade jam.
If you’re craving more wholesome, homemade breads, try my Sweet Molasses Brown Bread, Roasted Garlic & Rosemary No-Knead Artisan Bread, Easy Rosemary Focaccia Bread, Swirled Garlic Herb Bread, and Homemade Rye Bread.
Why We Love This Recipe
- It’s a healthier choice than store-bought sandwich bread, packed with whole grains and no extra additives.
- No kneading needed – this easy whole wheat loaf is great for beginners or anyone who wants to mix and relax.
- It uses simple, budget-friendly basic ingredients you likely already have in your pantry.


What You’ll Need
Scroll down to the recipe card below this post for ingredient quantities and full instructions.
- Oil – Keeps the crumb tender, helps the loaf stay fresh longer, and adds a bit of richness. I use olive oil, but melted butter or another neutral oil will work too.
- Whole Wheat Flour – Brings a nutty flavor, fiber, and nutrients to the loaf. Whole wheat flour (also called whole grain flour) absorbs more water than white flour, so the dough may need extra hydration. You can swap it out with spelt flour if you’d like.
- All-Purpose Flour – Adds structure while keeping the crumb soft and light. You can use bread flour instead if you want a bit more chew.
- Instant Yeast – Works faster than active dry yeast and doesn’t need to be proofed first, making it perfect for this no knead recipe.
- Salt – Boosts flavor and keeps the yeast in check so the dough rises evenly. I use kosher salt, but sea salt or table salt works too. Just adjust the amount slightly if you’re using table salt.
- Warm Water – Activates the yeast and hydrates the flour. Ideal water temperature is between 105-110°F (40-43°C). You can also use warm milk – regular or plant-based – for a slightly richer loaf.
- Sugar – Feeds the yeast to help it rise better and adds a touch of sweetness. You can use maple syrup, honey, or agave instead – or skip it entirely if you prefer.

How to Make No Knead Bread with Whole Wheat
- Combine dry and wet ingredients. Start by adding all your dry ingredients to a large bowl (or the bowl of a stand mixer). Pour in the warm water, olive oil, and sugar right on top.
- Stir until fully combined. Use a wooden spoon to stir everything together until no dry bits remain. The dough should be tacky but not sticking all over your fingers.


- Adjust if needed. If the dough is too sticky to handle, sprinkle in all-purpose flour a tablespoon at a time, stirring after each addition, until it forms a soft, manageable dough ball.
- Let dough rise. Cover the bowl with plastic wrap or a clean kitchen towel and set it on your kitchen counter. Let the dough rise at room temperature for 3 to 4 hours, or until it’s doubled in size. When you gently press your finger into the dough, it should leave an indentation that slowly puffs back.


- Shape the dough. Gently press down on the dough with your fingertips to deflate it, then move it to a lightly floured surface. Stretch it into a rectangle about ½ to 1 inch thick. Fold both long edges toward the center.
- Roll and shape. Starting from a short end, roll the dough up tightly like a burrito. Flip it seam side down and shape it into a smooth, round loaf. Lightly dust the top with flour.


- Final rise. Place the dough seam side up into a well-floured banneton or a bowl lined with a floured kitchen towel. Cover loosely. Let it rest for 45 to 60 minutes until it looks puffy and has grown by about 50%.
- Preheat Dutch oven. Set your Dutch oven with its lid inside your oven and preheat to 450°F. This helps build up heat so the bread rises quickly and forms a beautiful crust.


- Transfer and score. Gently flip the dough out onto a piece of parchment paper, seam side down. Use a sharp knife or razor blade to slice the top – this helps control the rise and gives you that artisan look.
- Bake. Carefully place the dough (on the parchment) into the very hot Dutch oven. Cover and bake for 35 to 40 minutes, until the crust is deep golden brown and the bottom sounds hollow when tapped.


- Cool completely. Move the finished loaf to a wire rack and let it cool for at least 1 hour before slicing. This helps the inside finish setting up and gives you perfect slices.

Recipe FAQ’s
Yes! You can use a sourdough starter in place of instant yeast or active dry yeast, but you might need to adjust the amount of flour and water in your dough and the rising time will be longer.
You can, but the loaf will be denser and a bit heavier. Using a mix of whole-wheat flour and all-purpose flour gives you the best of both worlds – great texture and that nutty whole grain flavor you love in homemade bread.
Whole wheat absorbs water slowly, especially in no knead bread recipes. Let it rest 10 minutes before shaping, or lightly flour your hands to make handling easier.
This can happen if your yeast is no longer active or the dough was over-proofed. Make sure your yeast is fresh, and don’t skip the second rise – it’s key for that good oven spring.
Check the expiration date or mix the yeast with 1 cup of warm water and sugar; if it foams in 5 minutes, it’s alive and ready to help your whole wheat loaf rise.
Yes, you can use an oven-safe metal pot with a lid, but make sure it retains heat well. A Dutch oven creates steam while baking, which is what gives you that deep golden brown, crusty top.
Store: Keep homemade bread in an airtight container, plastic bag, or bread box at room temperature for 2-3 days, or 5-7 days if wrapped tightly in the refrigerator. If you won’t finish the loaf in time, freeze it.
Freeze: Slice your no knead bread before freezing for easy grab-and-toast mornings. Store in a freezer bag and freeze for up to 3 months.
Reheat: A quick toast in a toaster or warm oven brings that crusty texture back. If the slice is frozen, no need to thaw – just toast it straight from the freezer.
Make-Ahead: You can mix the dough the night before, cover it tightly and let it rise slowly in the fridge overnight, and then continue with shaping and baking the next day. It’s great for prepping ahead for a weekend brunch or cozy family dinner.


Tips for Success
- Let the dough rise in a warm, draft-free spot – near the oven or with the light on works great for a good rise.
- Spoon whole wheat flour into your measuring cup and level it off – scooping packs in too much and can make the loaf dense.
- Make sure your yeast is fresh so your no knead dough rises properly and gives you that perfect crusty bread texture.
- Store your whole wheat loaf in a plastic bag or bread box once cooled to keep it soft and fresh for days.
- Cool the bread on a wire rack for at least an hour before slicing to avoid a gummy center.

Substitutions and Variations
- Sprinkle white flour or unbleached flour on the top before baking for that classic artisan-style, crackly finish on your crusty bread.
- Add a handful of sunflower seeds, rolled oats, or chopped walnuts on top just before baking for a rustic look and a little extra crunch in every bite.
- Tuck in chopped herbs like rosemary or thyme for a savory twist that pairs perfectly with soups or roasted dishes.
- Toss in shredded cheese, caramelized onions, or roasted garlic after the first rise to turn your loaf into a flavor-packed showstopper.
- Use a mix of spelt flour and all-purpose flour for a slightly nuttier flavor and a more open crumb – it’s a fun way to experiment with other whole grain flours.


More Homemade Bread Recipes to Try Next
- Amish White Bread
- Soft Homemade Potato Bread
- Homemade Multigrain Bread
- The Best Challah Bread
- Homemade Sourdough Bread
- Brown Bread Dinner Rolls
- Homemade French Bread

No Knead Whole Wheat Bread
Ingredients
- 2 cups (282g) whole wheat bread flour
- 1½ cups (212g) all-purpose flour
- 2¼ teaspoons instant dry yeast
- 1½ teaspoons salt
- 1¾ cups warm water
- 1 Tablespoon granulated sugar
- 2 Tablespoons olive oil

Instructions
- Combine all the dry ingredients first in the large mixing bowl of a stand mixer or mixing bowl. Add the liquid ingredients and stir with a wooden spoon until they are fully combined (the dough will be tacky but not sticky). If it's sticky, add the right amount of flour a tablespoon at a time and mix until you get a smooth dough ball.2 cups (282g) whole wheat bread flour, 1½ cups (212g) all-purpose flour, 2¼ teaspoons instant dry yeast, 1½ teaspoons salt, 1¾ cups warm water, 1 Tablespoon granulated sugar, 2 Tablespoons olive oil
- Cover the bowl with a clean kitchen towel or plastic wrap and let the whole wheat loaf dough rise and double in size on the kitchen counter, approximately 3-4 hours. The dough is ready when it has visibly increased in volume and pressing a finger into the dough leaves a slight indentation that slowly fills back in.
- After the first rise, gently deflate the dough by pressing it down with your fingertips. Transfer it to a lightly floured work surface and stretch the dough into a rectangle about ½ – 1 inch thick with even thickness. Fold both long sides into the center, then roll tightly from one short end like a burrito. Shape the dough into a smooth ball, seam side down and lightly dust the top with flour.
- Transfer the dough, seam side up, to a floured banneton or a bowl lined with a well-floured kitchen towel. Cover loosely and let it rise for 45-60 minutes. The dough should look puffy and increase by about 50% in size.
- Place a dutch oven with a lid in your oven and preheat the oven to 450°F. Transfer the dough to a piece of parchment paper, slice the top of the dough with a knife or a razor blade. Once the oven is preheated, carefully lower the dough (on the parchment) into the hot Dutch oven and cover. Bake the bread for 35-40 minutes, or until its crust is deep golden brown and sounds hollow when tapped on the bottom.
- Let the bread cool completely on a wire rack for at least 1 hour before slicing.
Notes
Storage & Make Ahead
- Store: Keep homemade bread in an airtight container, plastic bag, or bread box at room temperature for 2-3 days, or 5-7 days if wrapped tightly in the refrigerator. If you won’t finish the loaf in time, freeze it.
- Freeze: Slice your no knead bread before freezing for easy grab-and-toast mornings. Store in a freezer bag and freeze for up to 3 months.
- Reheat: A quick toast in a toaster or warm oven brings that crusty texture back. If the slice is frozen, no need to thaw – just toast it straight from the freezer.
- Make-Ahead: You can mix the dough the night before, cover it tightly and let it rise slowly in the fridge overnight, and then continue with shaping and baking the next day. It’s great for prepping ahead for a weekend brunch or cozy family dinner.