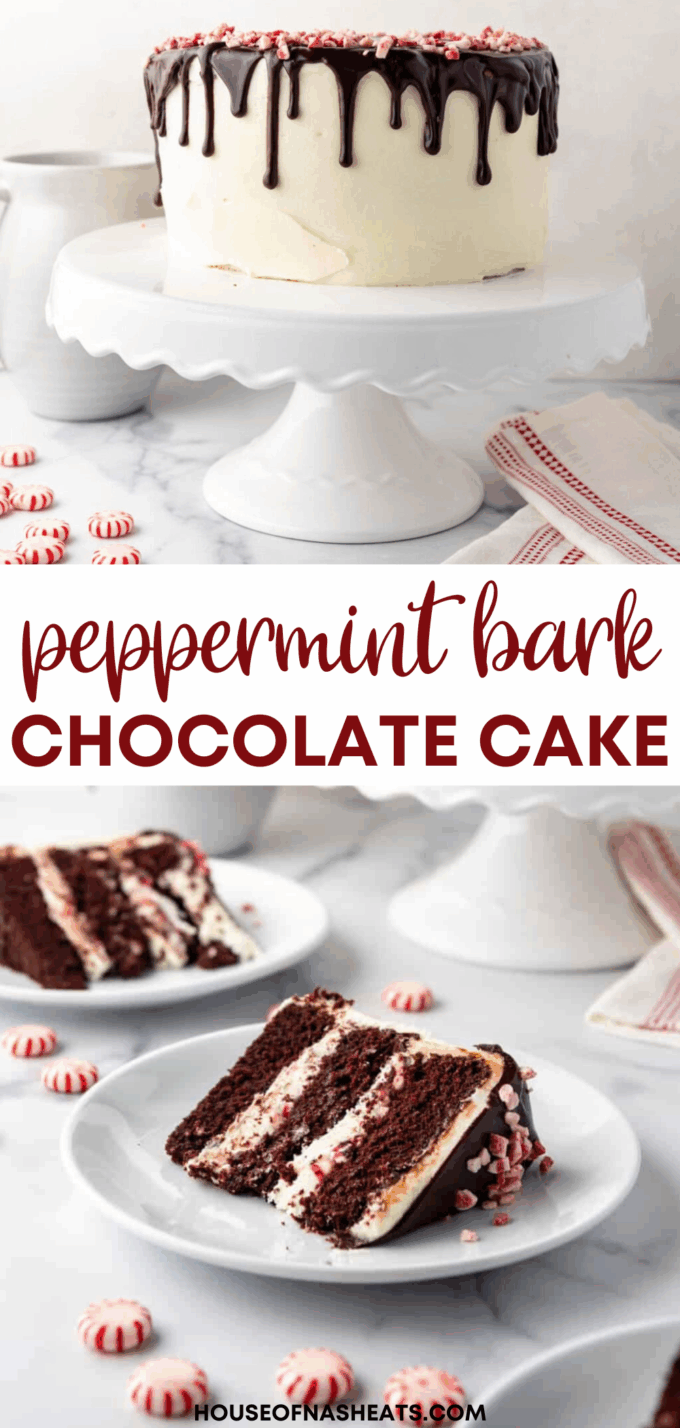
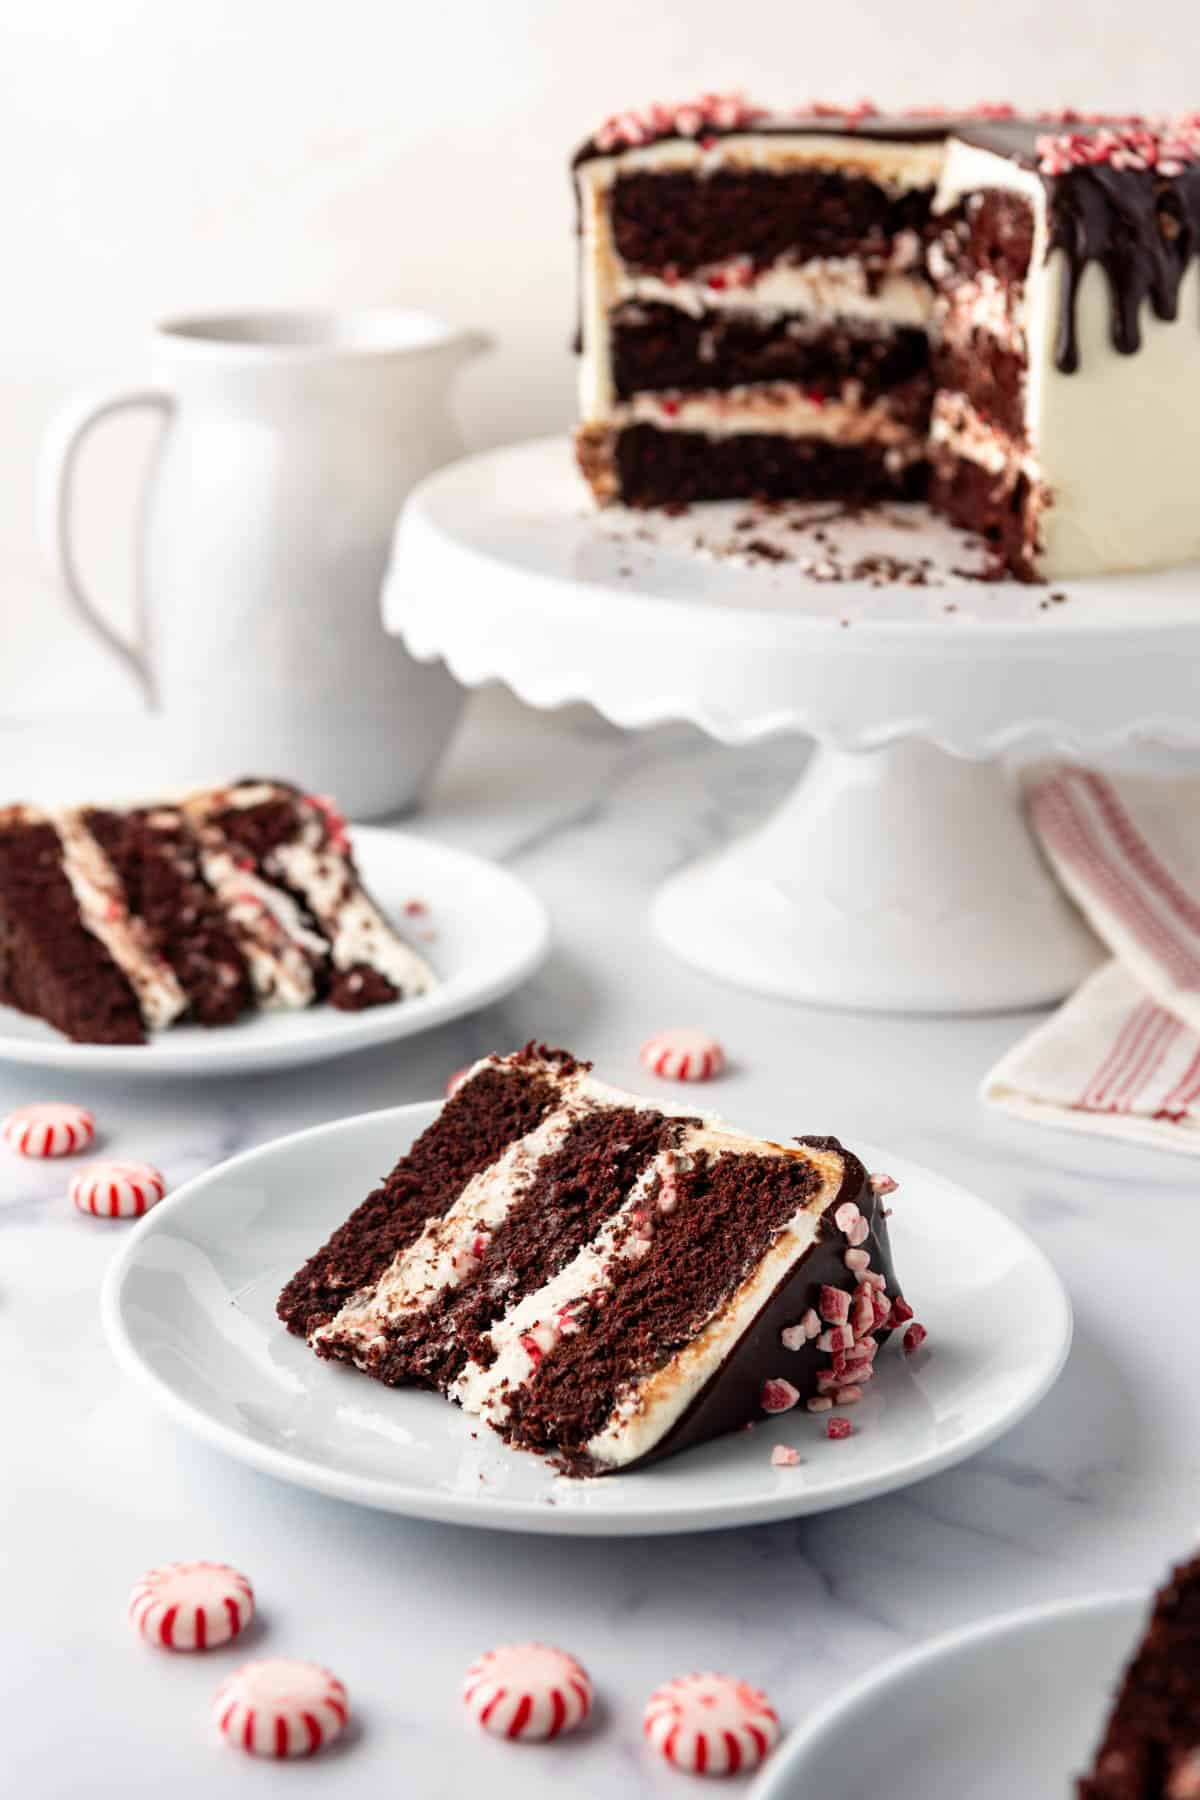
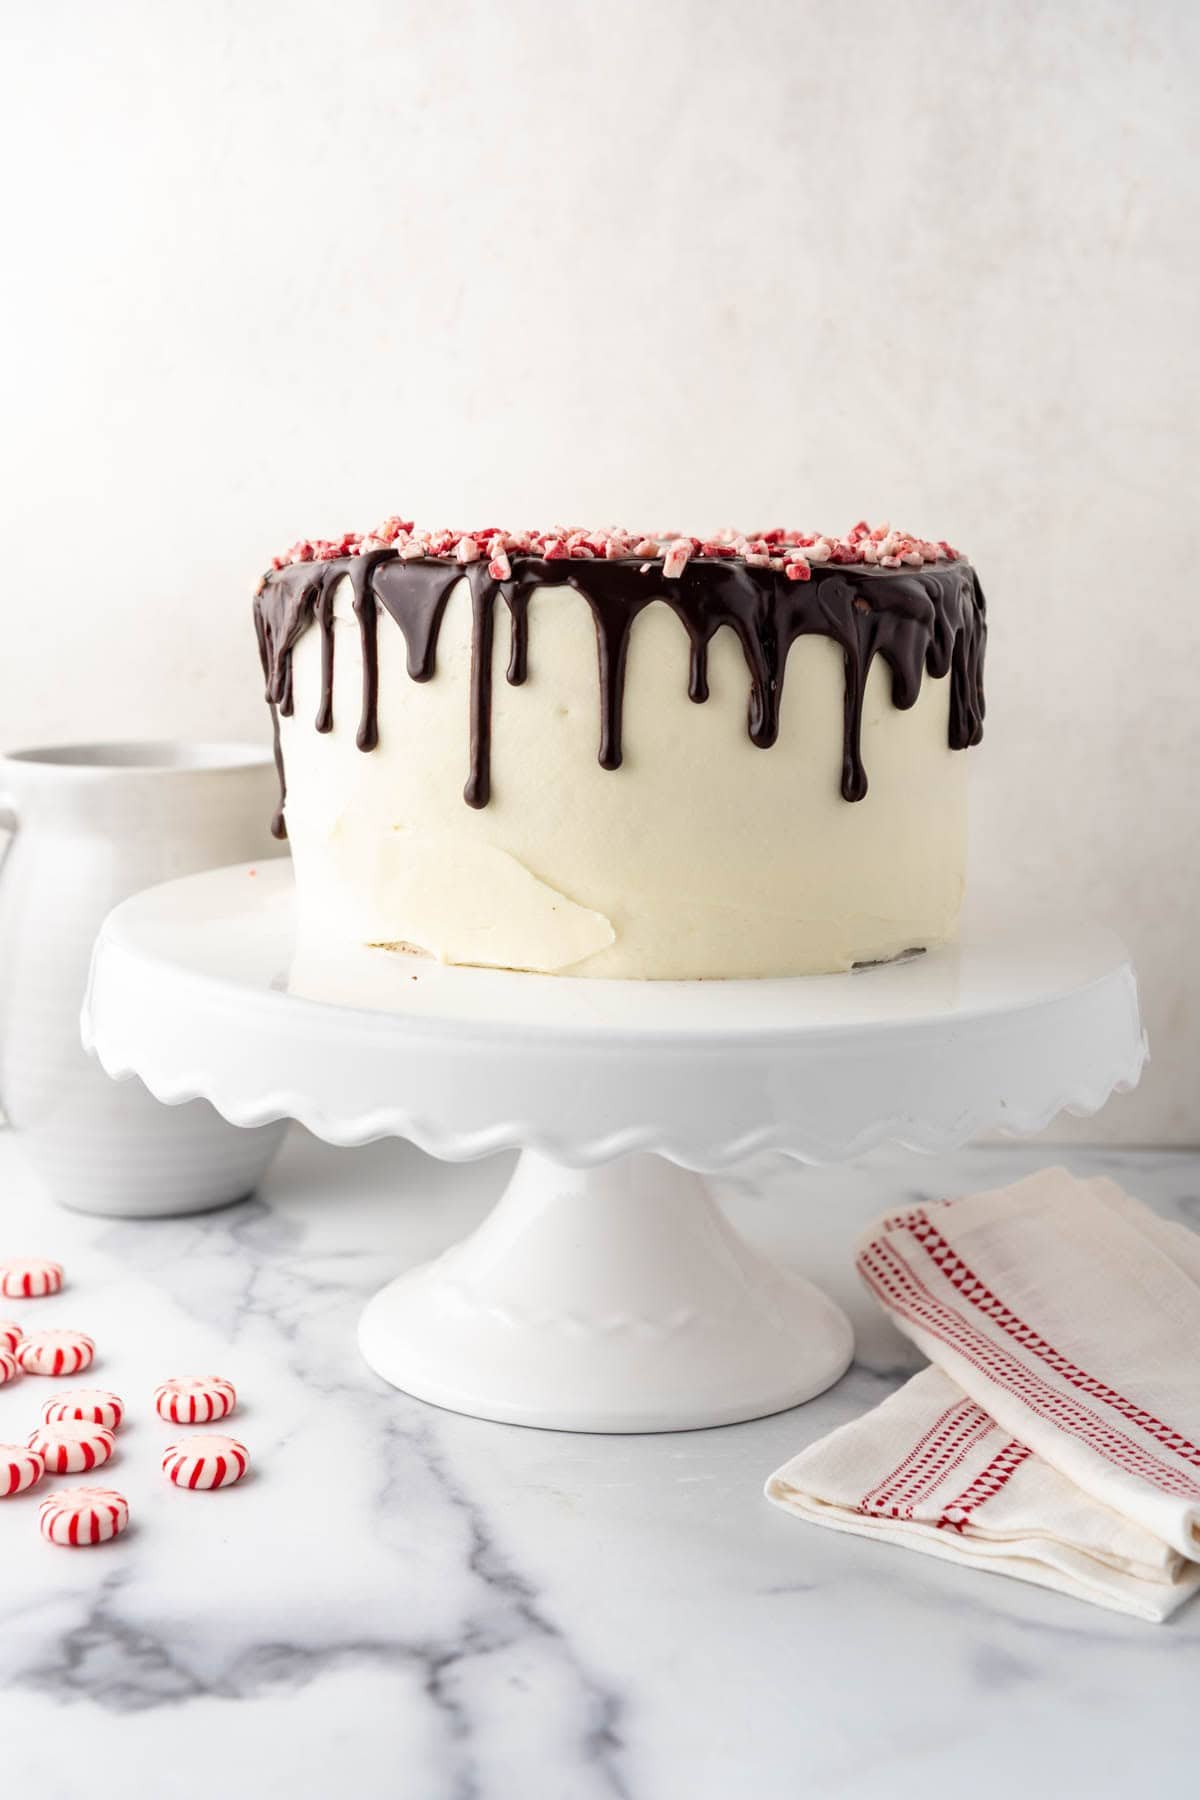
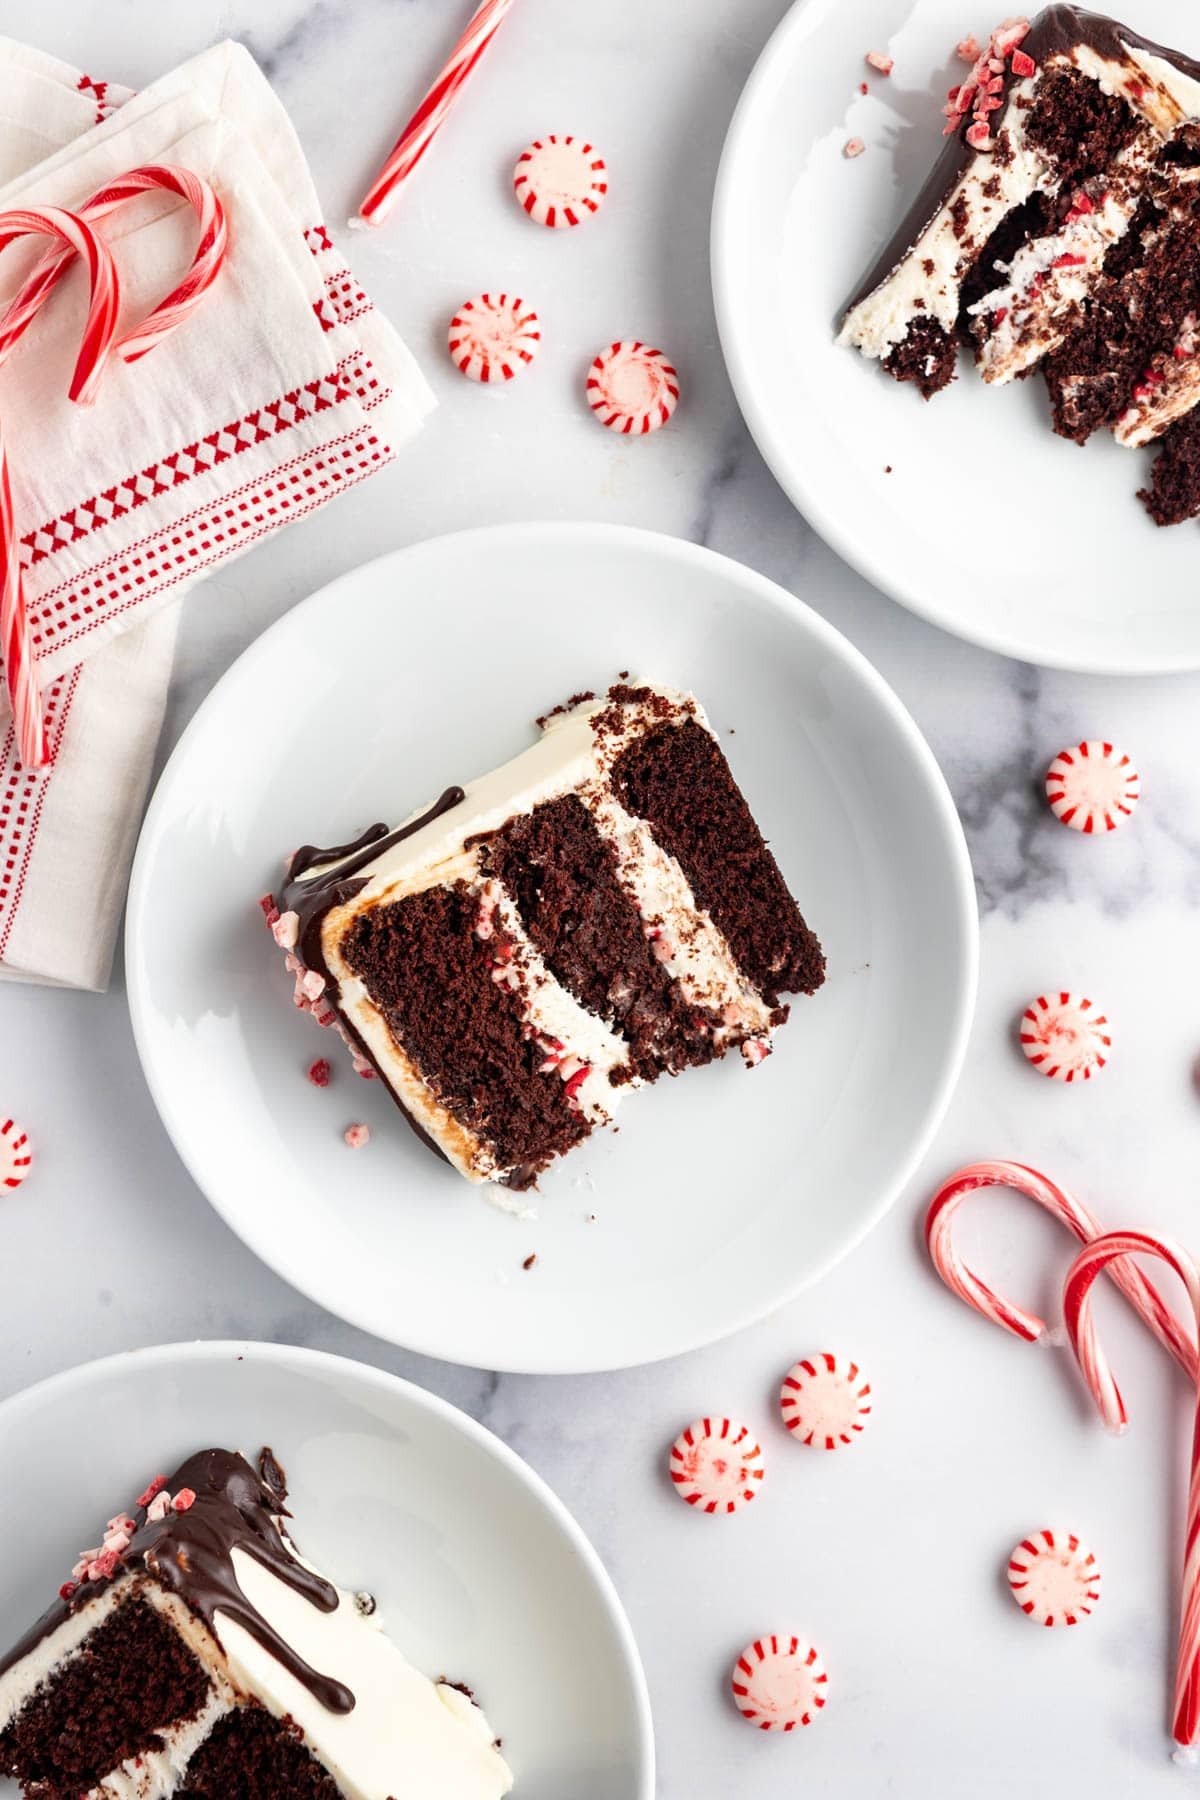
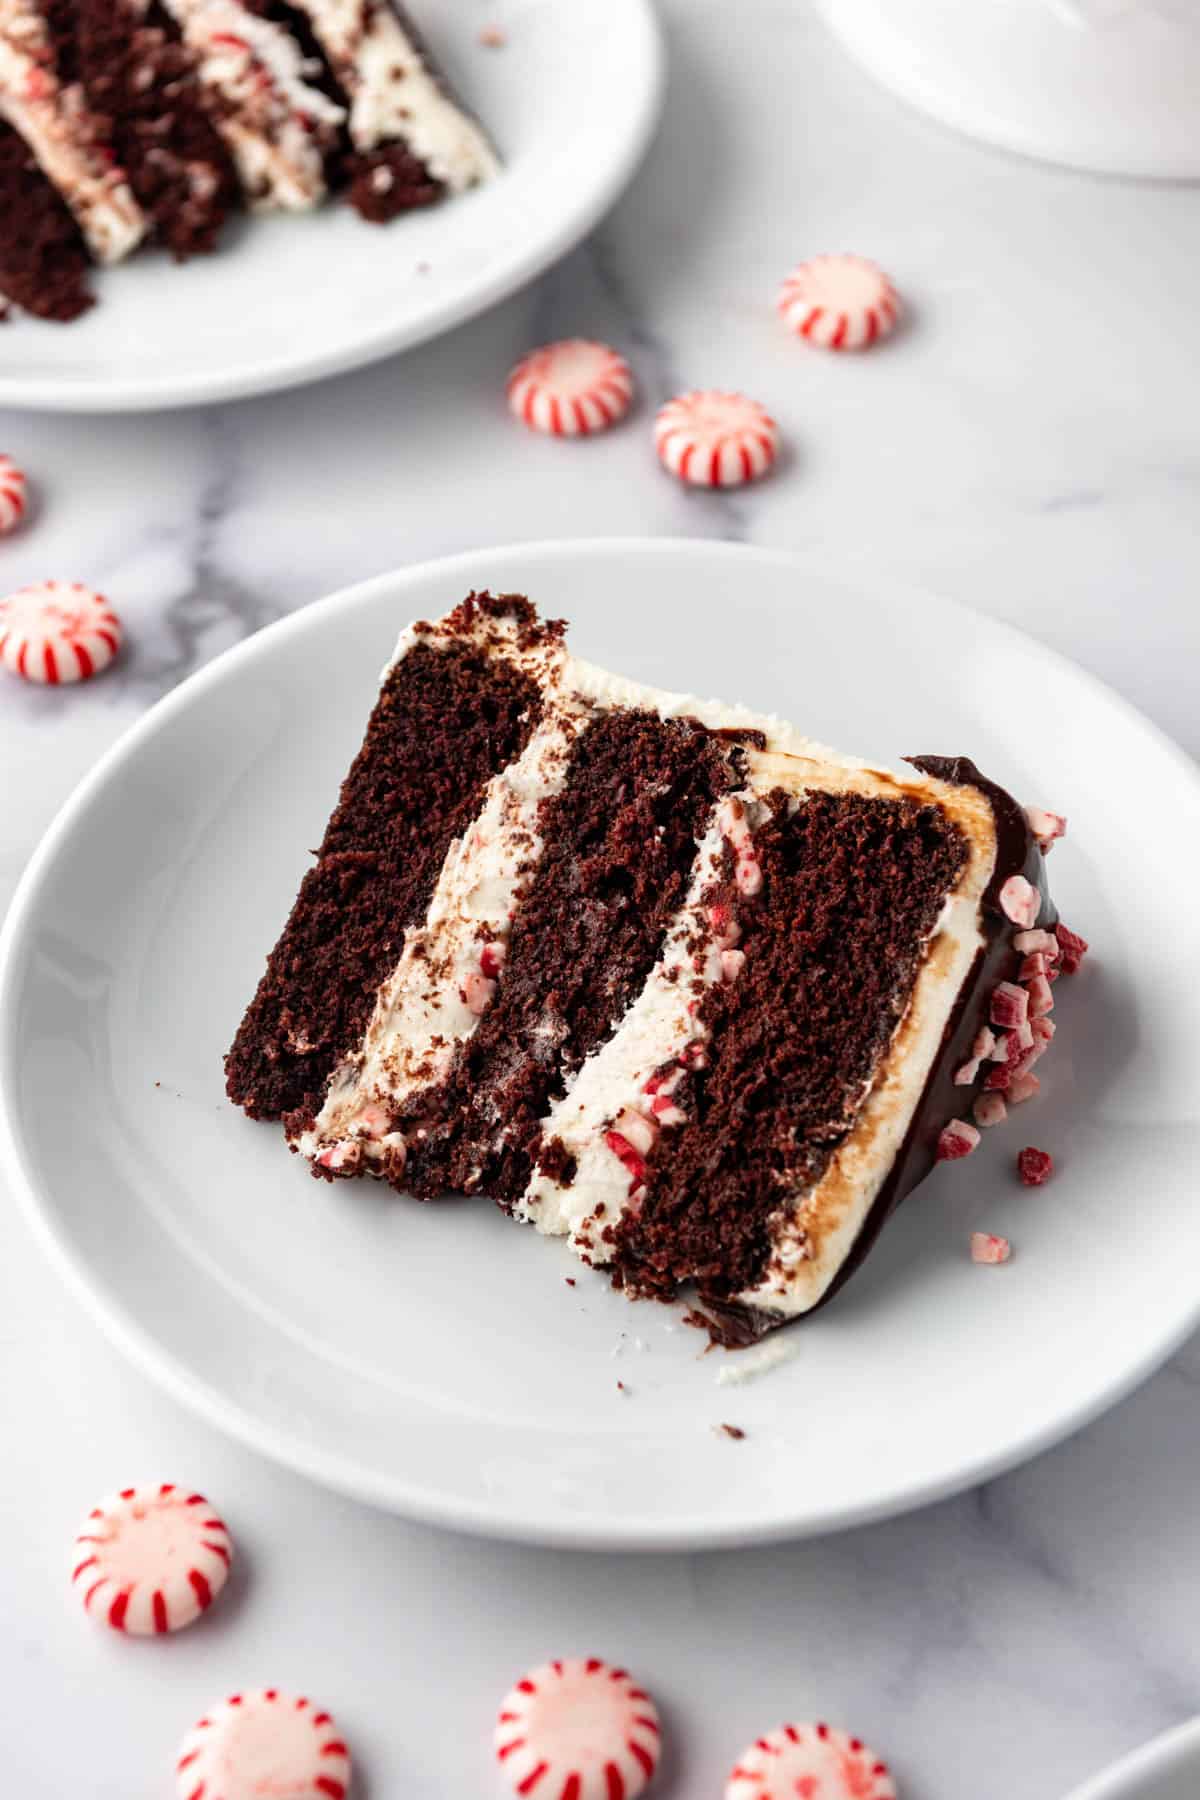
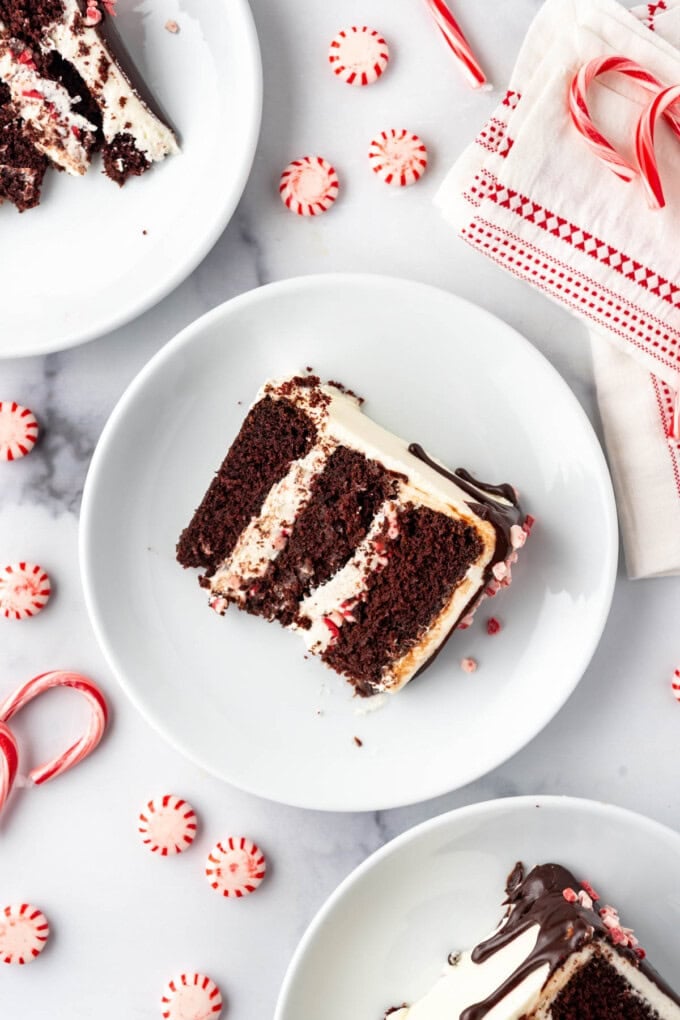
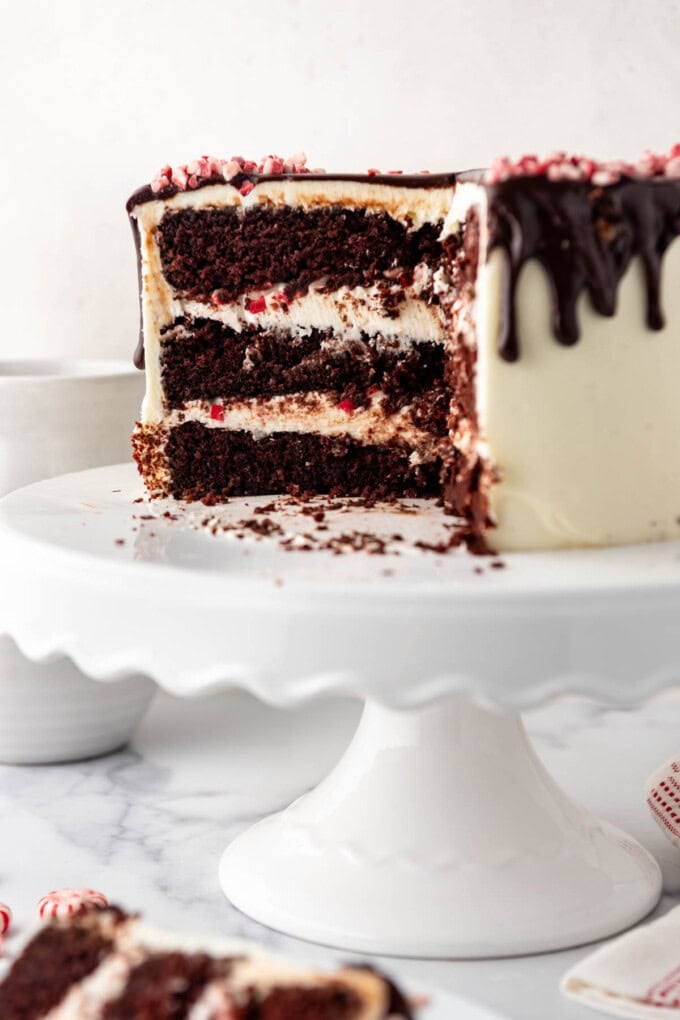
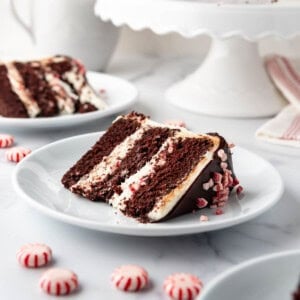
Three-layers of my famous chocolate cake are stacked with peppermint white chocolate frosting, sprinkled with Andes peppermint crunch bits, and topped with a decadent dark chocolate ganache in this wintry Peppermint Bark Cake. It’s the perfect showstopper for your holiday dinner or Christmas dessert!
If there is one cake you make for Christmas, let it be this one! The flavors are so perfectly festive and cheery. I have been looking forward to making this cake all year and it was everything I dreamed of and more.
I based it off my tried-and-true Devil’s Food Cake, which is our family’s go-to chocolate cake recipe. Instead of using crushed candy canes, which are a little too crunchy for a cake (at least for me), I went with Andes peppermint crunch bits, which you can find online or at most any grocery store during the month of December. They have the perfect amount of texture and the same fresh peppermint flavor!
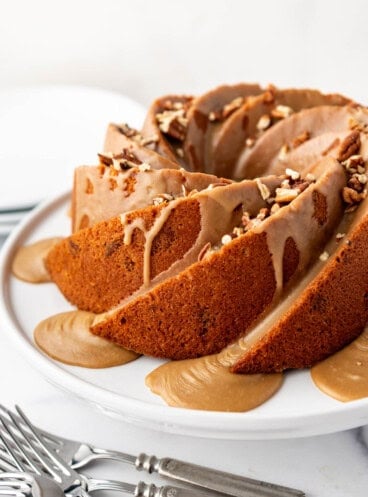
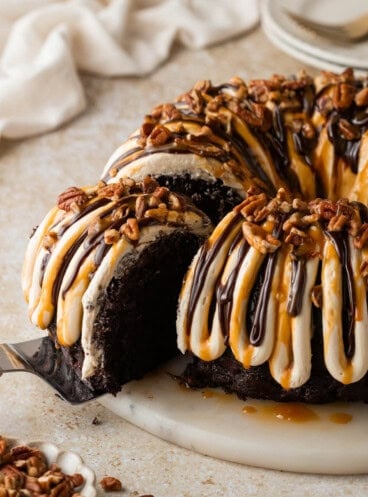
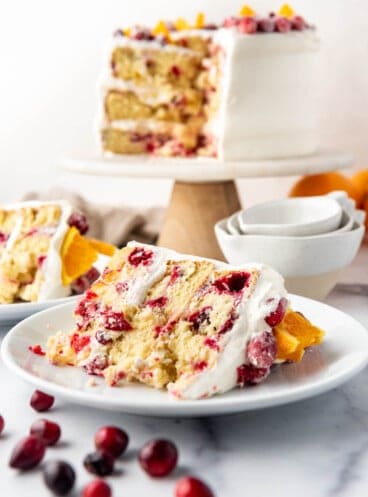
I spent the past year working on my collection of layer cake recipes and learned so much from each one. I had a wildly viral moment on social media with my Snickerdoodle Cake, added a much overdo classic with my Vanilla Cake recipe, a couple of dessert mashups in the form of an Apple Pie Cake and a Key Lime Cake, and a Banana Cake where the brown butter frosting stole the show. Then there the bucket list cake ideas I have been wanting to try for ages like Biscoff Cookie Butter Cake, Chocolate Turtle Cake, and an Italian Cream Cake. I also added some fun seasonal flavors like Lemon Blueberry Cake, Pumpkin Cake, and Cranberry Orange Cake.
This is the ultimate cake for anyone who loves peppermint and chocolate.

- Layers of incredibly tender and plush chocolate cake that is 1,000x better than any box mix.
- The perfect amount of peppermint thanks to the white chocolate peppermint frosting and Andes peppermint crunch pieces that won’t get stuck in your teeth like crushed candy canes.
- A chocolate ganache drip that is both delicious and easy enough to make even beginner bakers look like a total pro.
What You’ll Need
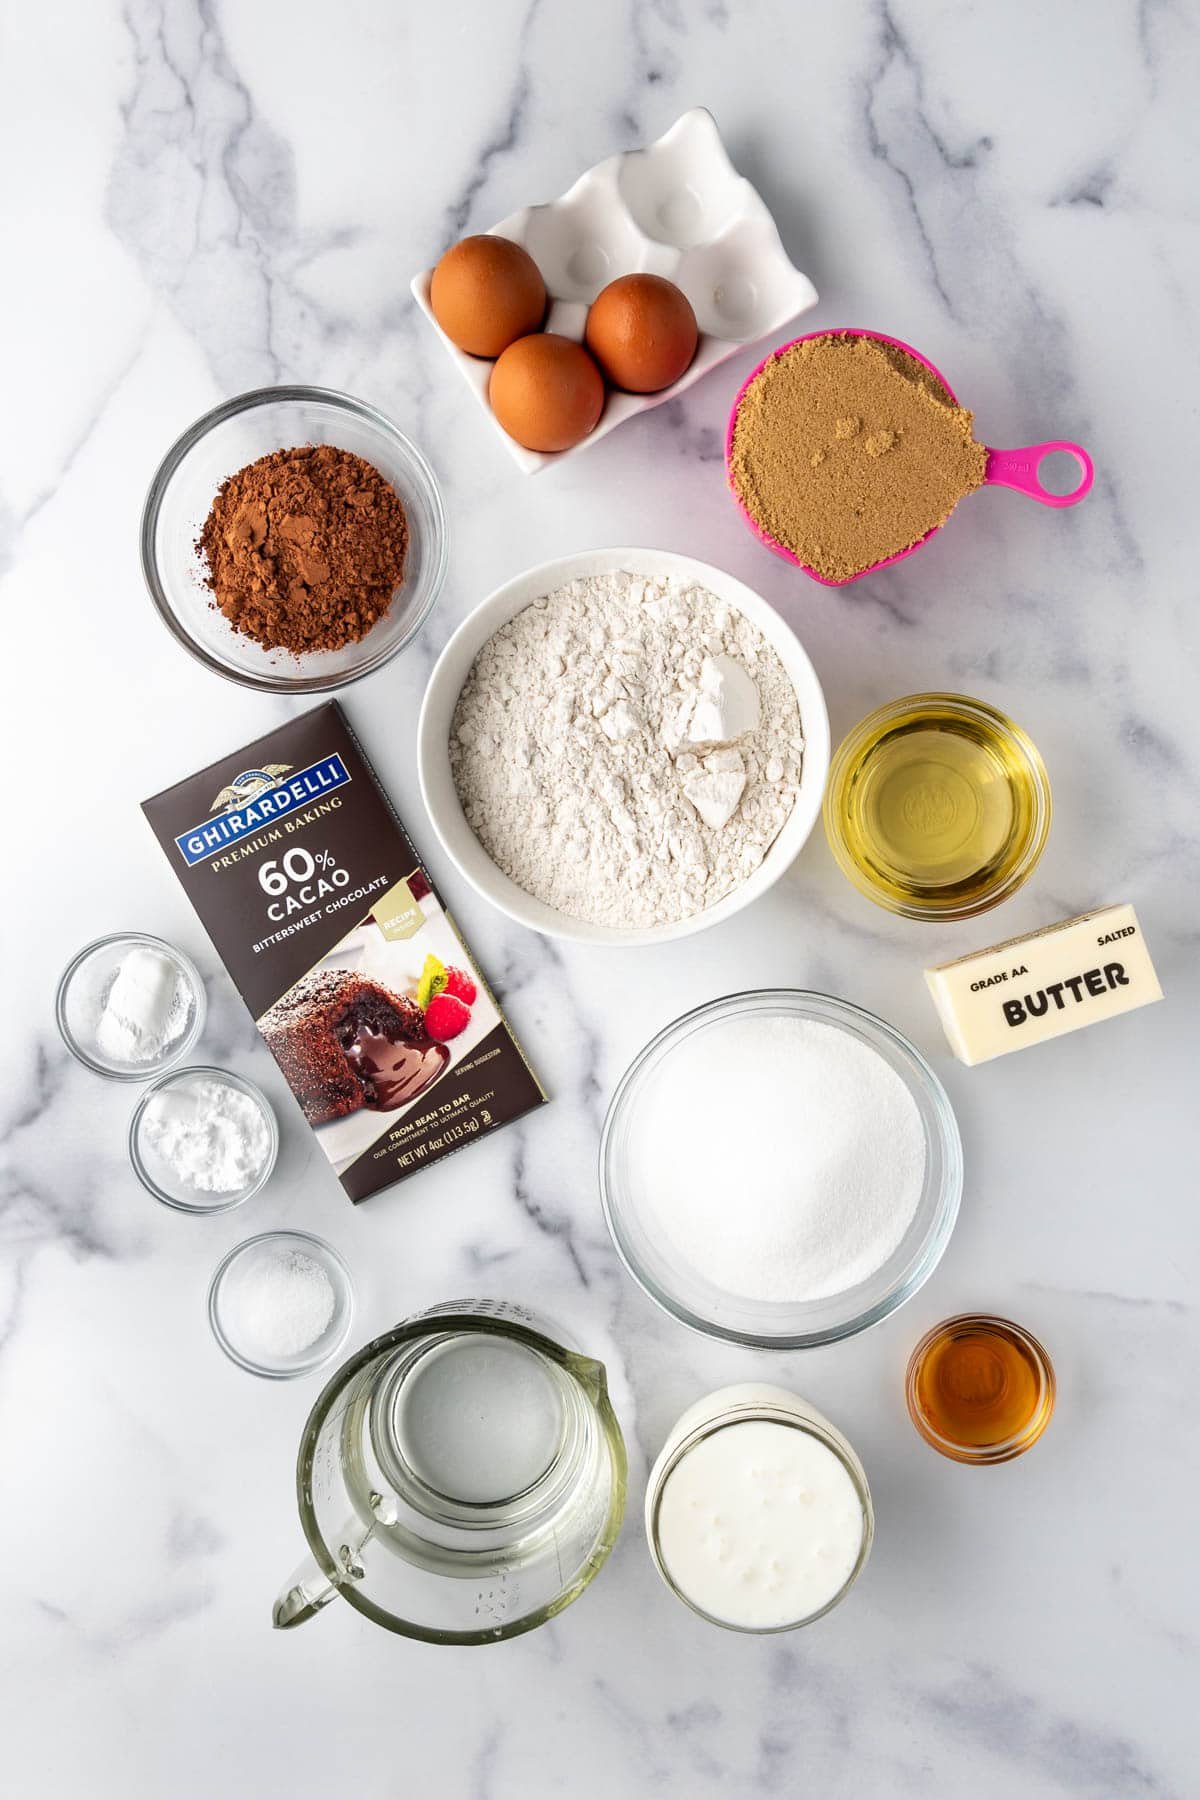
This is a brief overview of the ingredients that you’ll want to gather up before you start making this cake. For specific measurements and instructions, keep scrolling to the printable recipe card below.
- Flour: I have tested this cake with cake flour, all-purpose flour, and even King Arthur measure-for-measure gluten-free flour substitute and they all work great.
- Sugar: A combination of brown sugar and granulated sugar gives depth and flavor to the cake.
- Chocolate: Using both chopped bittersweet chocolate and cocoa powder in the cake batter provides a more interesting, developed chocolate flavor than using cocoa powder alone. You’ll also need good quality white chocolate for the frosting.
- Eggs: For richness and adding structure to the crumb so the cake isn’t too crumbly.
- Fat: Oil helps keep the cake moist for days while butter adds great flavor to the cake crumb.
- Hot water: I use boiling hot water to melt the chopped chocolate, but you could replace it with an equal amount of hot coffee, if you prefer.
- Buttermilk: Adds needed moisture while also tenderizing the cake crumb for a soft, plush texture and improving overall flavor thanks to its tang and richness. See notes for substitutes below.
- Vanilla extract: An unsung baking hero that adds depth, dimension, and complexity to cakes. I make my own.
- Leavening agents: A combination of baking soda, baking powder, and salt flavor and give lift to the cake for that classic texture.
Let’s Make It!
- Bloom the chocolate. Start by combining chopped chocolate and boiling hot water in a bowl. Stir until melted and smooth, then add the buttermilk and vanilla and set aside to use in a sec.
- Cream butter, oil, and sugars. Beat these in a large mixing bowl with an electric mixer or the paddle attachment of a stand mixer until light, about 2-3 minutes. Then add the eggs and beat again.
- Alternate adding dry and wet ingredients. Add half of the flour, baking soda, baking powder, and salt. Mix on low speed just until they start to incorporate, then add half of the chocolate-buttermilk mixture. Mix again, stopping to scrape the bottom and sides of the bowl. Repeat with the remaining flour and chocolate-buttermilk mixture, mixing just until a smooth batter forms. Do not overmix.
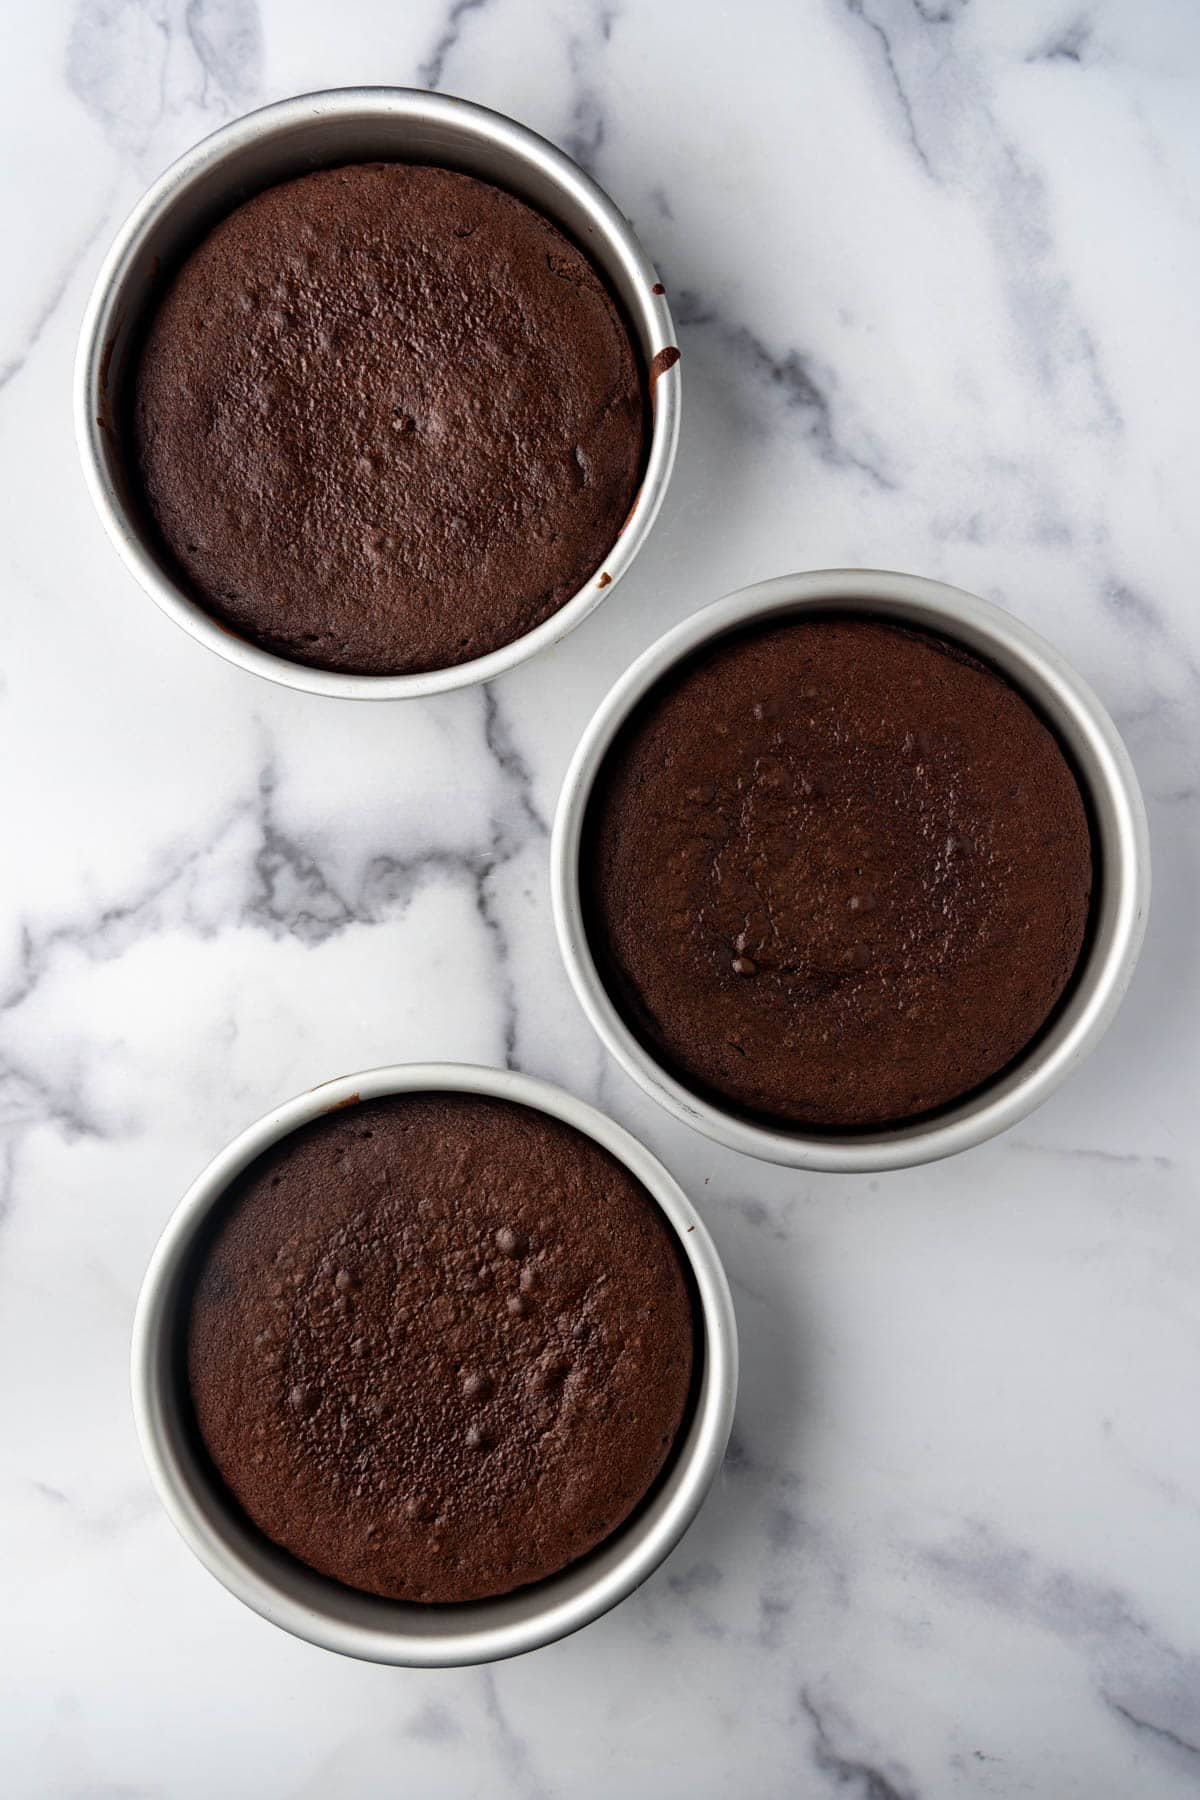
- Bake. Divide the cake batter evenly between three 8-inch cake pans lined with parchment paper circles. Bake for 25 to 30 minutes at 350°F (177°C) until a tester inserted into the center of each cake comes out clean with just a few crumbs clinging to it. Remove the cake layers from the oven and cool completely.
- Make the frosting. Start by carefully melting the white chocolate using short bursts of heat in the microwave (15-20 seconds max, stirring between every burst until melted and smooth) or in a double boiler on the stovetop. Set aside to cool. Meanwhile, beat the butter, powdered sugar, peppermint extract, and vanilla until combined. Add the melted white chocolate and beat until creamy and light, adding as much of the heavy cream as desired to get a soft, spreadable frosting consistency.
- Assemble. Place your bottom cake layer on a cake plate or decorative cake stand. Spread with a generous amount of the frosting (around ¾ cup) and sprinkle with ¼ to ⅓ cup of the Andes peppermint crunch bits. Repeat with the next layer of cake and frosting. Top with the final cake layer and spread a crumb coat of frosting around the top and sides of the cake. Freeze for 30 minutes to help set the frosting.
- Make the ganache. Meanwhile, heat the cream in the microwave or on the stovetop until steaming and small bubbles start to form around the edges. Pour over the chocolate chips and corn syrup, then stir until completely melted and smooth. Set aside to thicken and cool.
- Decorate. Frost the cake with the remaining frosting, then pour the ganache over the top of the cake. I used a spoon to nudge drips of ganache off the edge of the cake for the drip effect before filling in the middle. Sprinkle with more of the Andes peppermint crunch chips to finish.

Recipe Variations & Tips
- Use room temperature ingredients. You’ll get the best results (flat cake tops instead of domes, moist tender crumb) if you let your eggs, butter, and buttermilk come to room temperature before mixing up the cake batter.
- Try another design! If you have more skill than I do (not a high bar), you might try dividing your frosting in half and coloring part of it pink or red with food coloring (affiliate link), then decorating with red and white stripes for a striking visual presentation.
- Piping swirls. Another option would be to reserve a portion of your frosting to pipe swirls of frosting on top of the cake for decoration.
Recipe FAQ’s
Yes! In fact, the cake you see pictured here is a gluten-free version that I made with King Arthur measure-for-measure flour when I was recipe testing and it tastes exactly the same as when I made the cake layers with all-purpose flour. It was so much fun to surprise my friend with a gluten-free version of this cake!
If it’s not Christmas and you want to make this cake, it might be a challenge to find the baking bits. But you can always use regular Andes creme de menthe baking bits instead! Or you can chop up Andes mints or your favorite peppermint bark.
Yes, you absolutely can used crushed candy canes instead of Andes peppermint crunch bits. They might melt into the frosting a bit over time but they will get a wonderful peppermint flavor and extra crunch to the cake.

More Peppermint Recipes
- Peppermint Swig Cookies
- Peppermint Bark Rice Krispies Treats
- Peppermint Bark Fudge
- Peppermint Ice Cream
Peppermint Bark Cake
Equipment
- 8-Inch Round Cake Pans
Ingredients
Devil’s Food Chocolate Cake
- 4 ounces bittersweet or semisweet chocolate, finely chopped
- 1 cup boiling water
- 1 cup (236mL) buttermilk room temperature
- 2 teaspoons pure vanilla extract
- 1/2 cup (114g) salted butter softened
- 1/2 cup vegetable oil
- 1 cup (200g) firmly packed brown sugar
- 1 cup (200g) granulated sugar
- 3 large eggs room temperature
- 2 1/4 cups (317g) all-purpose flour
- 1/3 cup natural unsweetened cocoa powder
- 2 teaspoons baking soda
- 1 teaspoon baking powder
- 1/2 teaspoon salt
White Chocolate Peppermint Frosting
- 12 ounces white chocolate chopped
- 2 cups salted butter softened
- 6 cups (720g) powdered sugar
- 1 teaspoon pure vanilla extract
- 1 1/2 teaspoon peppermint extract
- 4-5 Tablespoons whole milk or heavy cream
Chocolate Ganache
- 4 ounces semisweet chocolate
- 1/3 cup heavy cream
- 1 teaspoon corn syrup
- Andes peppermint crunch baking bits

Instructions
- Preheat the oven to 350℉ (177℃). Prepare three 8-inch round cake pans by cutting circles of parchment paper to line the bottoms, then lightly spray the insides of the pans with baking spray.
- Add the finely chopped chocolate to a medium bowl. Pour the boiling water over the chocolate and stir until the chocolate is completely melted. Add in the buttermilk and vanilla. Set aside to cool.4 ounces bittersweet or semisweet chocolate, finely chopped, 1 cup boiling water, 2 teaspoons pure vanilla extract, 1 cup (236mL) buttermilk
- In the large bowl, combine the butter, oil, brown sugar, and granulated sugar. Beat on medium speed with an electric hand mixer or stand mixer for 2-3 minutes until creamy and light. Scrape down the bottom and sides of the bowl, then add the eggs and beat again until combined.½ cup (114g) salted butter, ½ cup vegetable oil, 1 cup (200g) firmly packed brown sugar, 1 cup (200g) granulated sugar, 3 large eggs
- In another bowl, whisk together the flour, cocoa powder, baking soda, baking powder, and salt. Add half of the dry ingredients to the batter and mix on low speed just until combined. Add half of the chocolate-buttermilk mixture and mix again, just until combined. Stop and scrape the bottom and sides of the bowl with a spatula, then repeat with the remaining dry ingredients and remaining chocolate-buttermilk mixture until a smooth batter forms. Do not overmix.⅓ cup natural unsweetened cocoa powder, 2 ¼ cups (317g) all-purpose flour, 2 teaspoons baking soda, 1 teaspoon baking powder, ½ teaspoon salt
- Divide the batter evenly between the prepared cake pans. Bake for 25 to 30 minutes, or until a toothpick or cake tester comes out clean. Do not overbake.
- Transfer the cakes to wire racks and allow them to cool completely before assembling the cake with frosting.
- To make the frosting, place the white chocolate in a medium bowl and heat in the microwave on medium power in 15-20 second bursts, stirring between each burst of heat, until melted and smooth. Allow the chocolate to cool for 15-20 minutes until no longer warm to the touch so that it doesn’t melt the butter.12 ounces white chocolate
- Meanwhile, beat the butter, powdered sugar, and vanilla for 3-5 minutes until creamy and smooth. It will be very thick. Add in the melted white chocolate, mixing until combined. Add as much of the cream as needed to get a spreadable consistency. You may not need all of the cream.2 cups salted butter, 6 cups (720g) powdered sugar, 1 teaspoon pure vanilla extract, 1 ½ teaspoon peppermint extract, 4-5 Tablespoons whole milk or heavy cream
- Place one of the cake layers on a cake stand or serving plate. Frost with a generous amount of the frosting. I typically use around ¾ cup. Sprinkle with ¼ to ⅓ cup of Andes peppermint crunch bits or crushed candy canes. Repeat with the next layer of cake, frosting, and peppermint candy. Top with the final cake layer and frost with a thin crumb coat to cover the cake and seal in any crumbs. Transfer the cake to the freezer for 30 minutes to set the frosting.Andes peppermint crunch baking bits
- While the cake chills, make the ganache by heating the heavy cream in the microwave for 60-75 seconds, just until it starts to bubble and steam. Pour over the chocolate chips and corn syrup in a medium bowl, then let it sit for 1 minute. Stir until completely melted and smooth, then set aside to thicken and cool.4 ounces semisweet chocolate, ⅓ cup heavy cream, 1 teaspoon corn syrup
- To finish the cake, frost the top and sides of the cake with the remaining frosting. Use a spoon to drip small streams of ganache off the top edges of the cake for a drip effect. Pour the rest of the ganache over the middle of the top of the cake and smooth out with an offset spatula or the back of a spoon. Sprinkle with additional Andes peppermint crunch bits or more crushed peppermint for decoration.
Notes
- Storage: This cake can be kept covered in an airtight container at room temperature for 2-3 days, or you can freezer the whole cake or individual slices for longer term storage. I do not recommend storing in the fridge as it tends to make the cake taste stale faster.
- Make-Ahead & Freezing Instructions: You can make the cake layers and frosting one day and assemble the cake the next day to spread out the work. Wrap the cooled cake layers in plastic wrap and store at room temperature overnight. Store the frosting in an airtight container in the fridge. Let the frosting sit out at room temperature for 2-3 hours the next day before assembling the cake, then beat again before frosting so it is smooth and easy to use. Unfrosted cake layers can be frozen for up to 2 months. You can freeze the entire cake or individual slices for up to 2 months. Thaw overnight in the refrigerator before serving.
- Buttermilk Substitute: If you don’t have buttermilk, I recommend replacing it with ½ cup sour cream + ½ cup milk for this recipe.
- 9-inch Round Pans: You can make this as a 2-layer cake using two 9-inch round cake pans. Bake the layers for 26-30 minutes.
- 9×13-inch Pan: You can bake this in a large rectangular baking dish for 30-35 minutes and either frost and serve directly from the pan or turn out and frost like a sheet cake.