
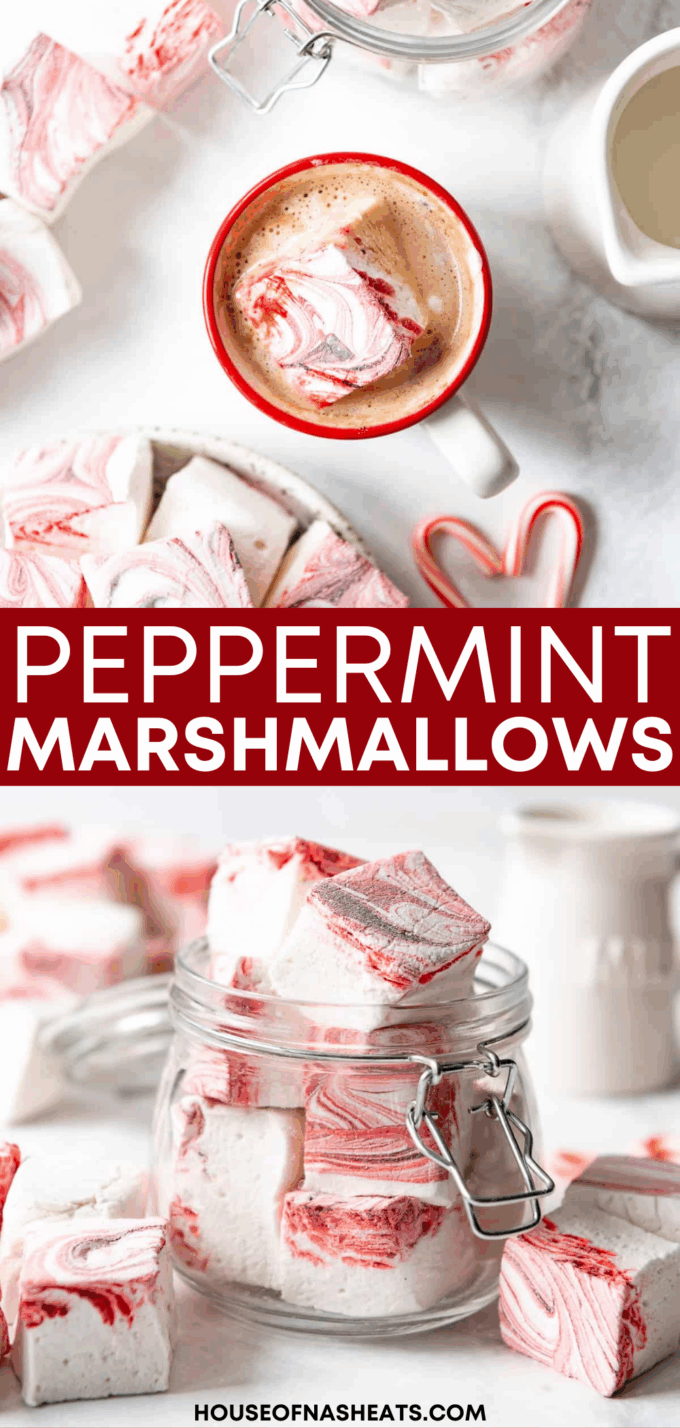

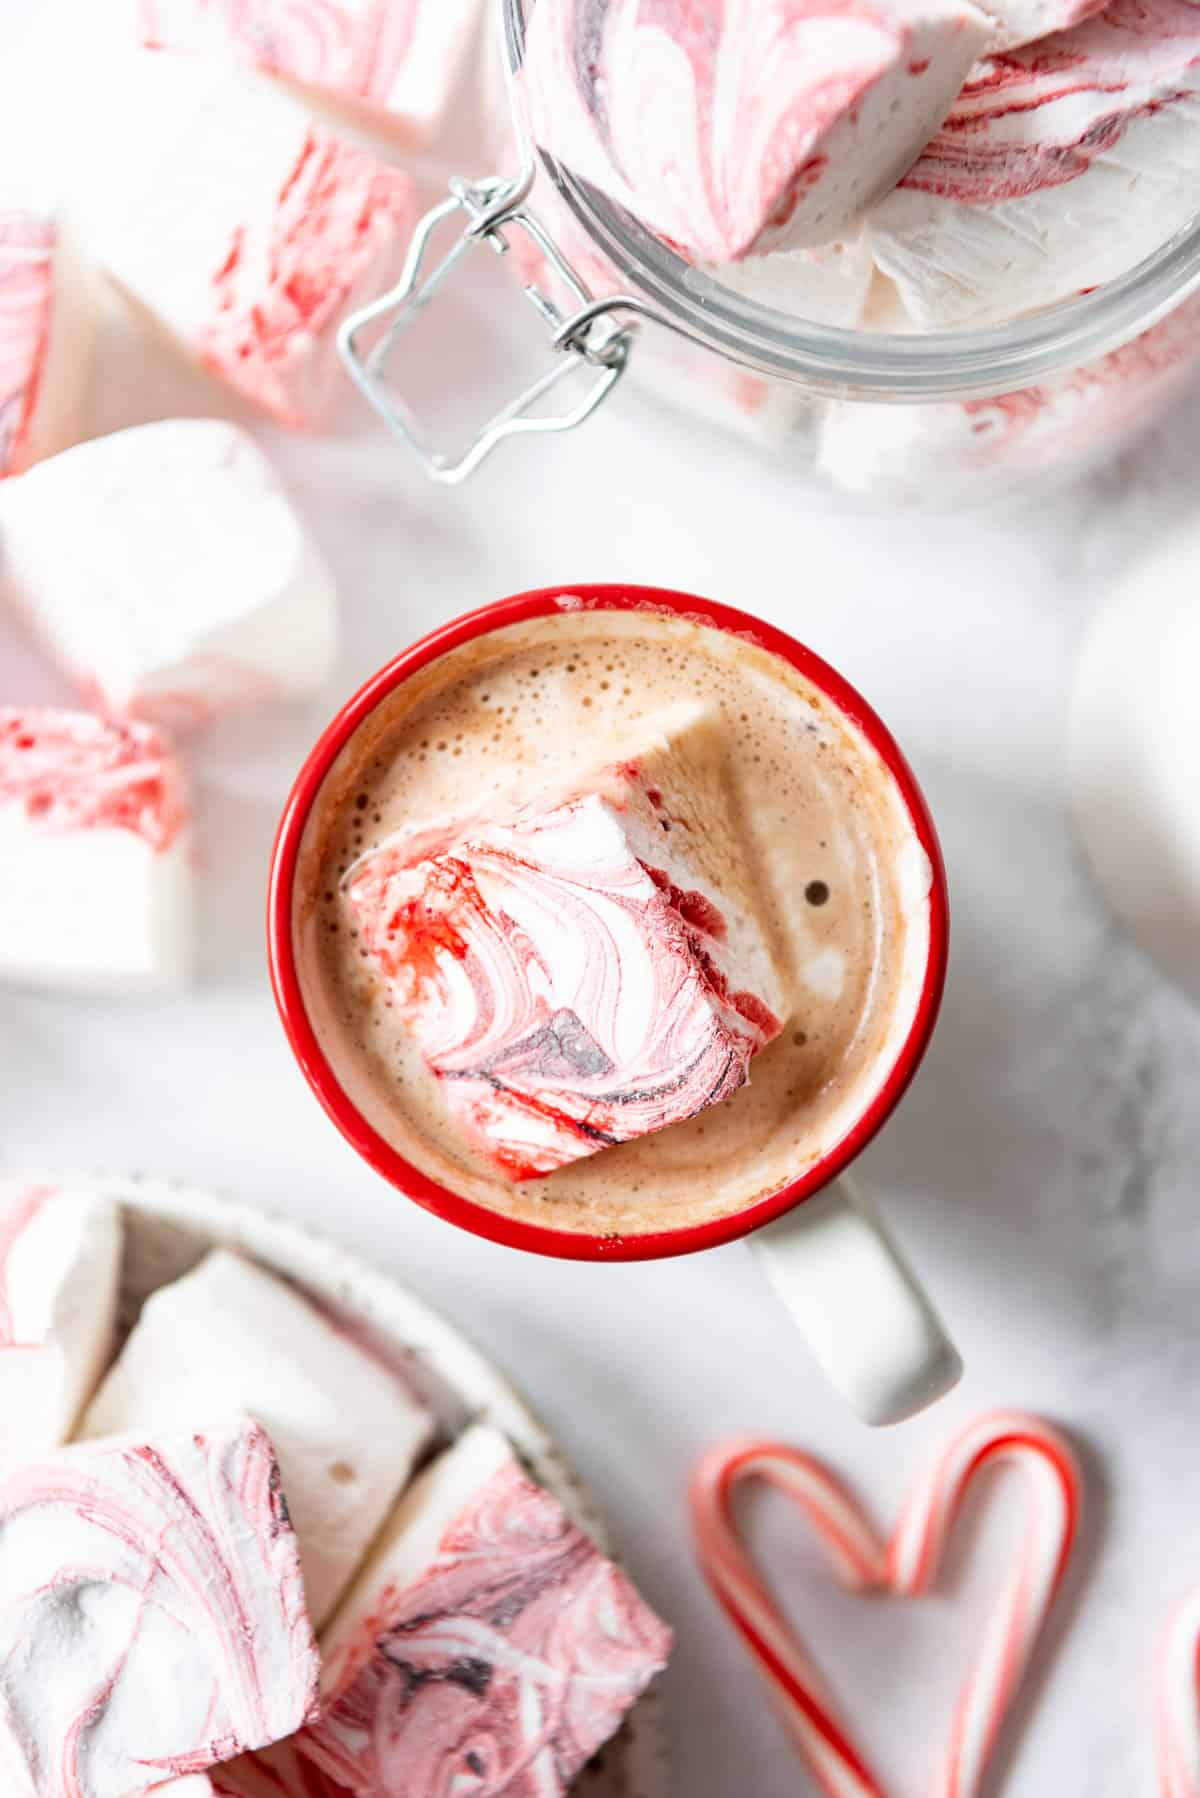
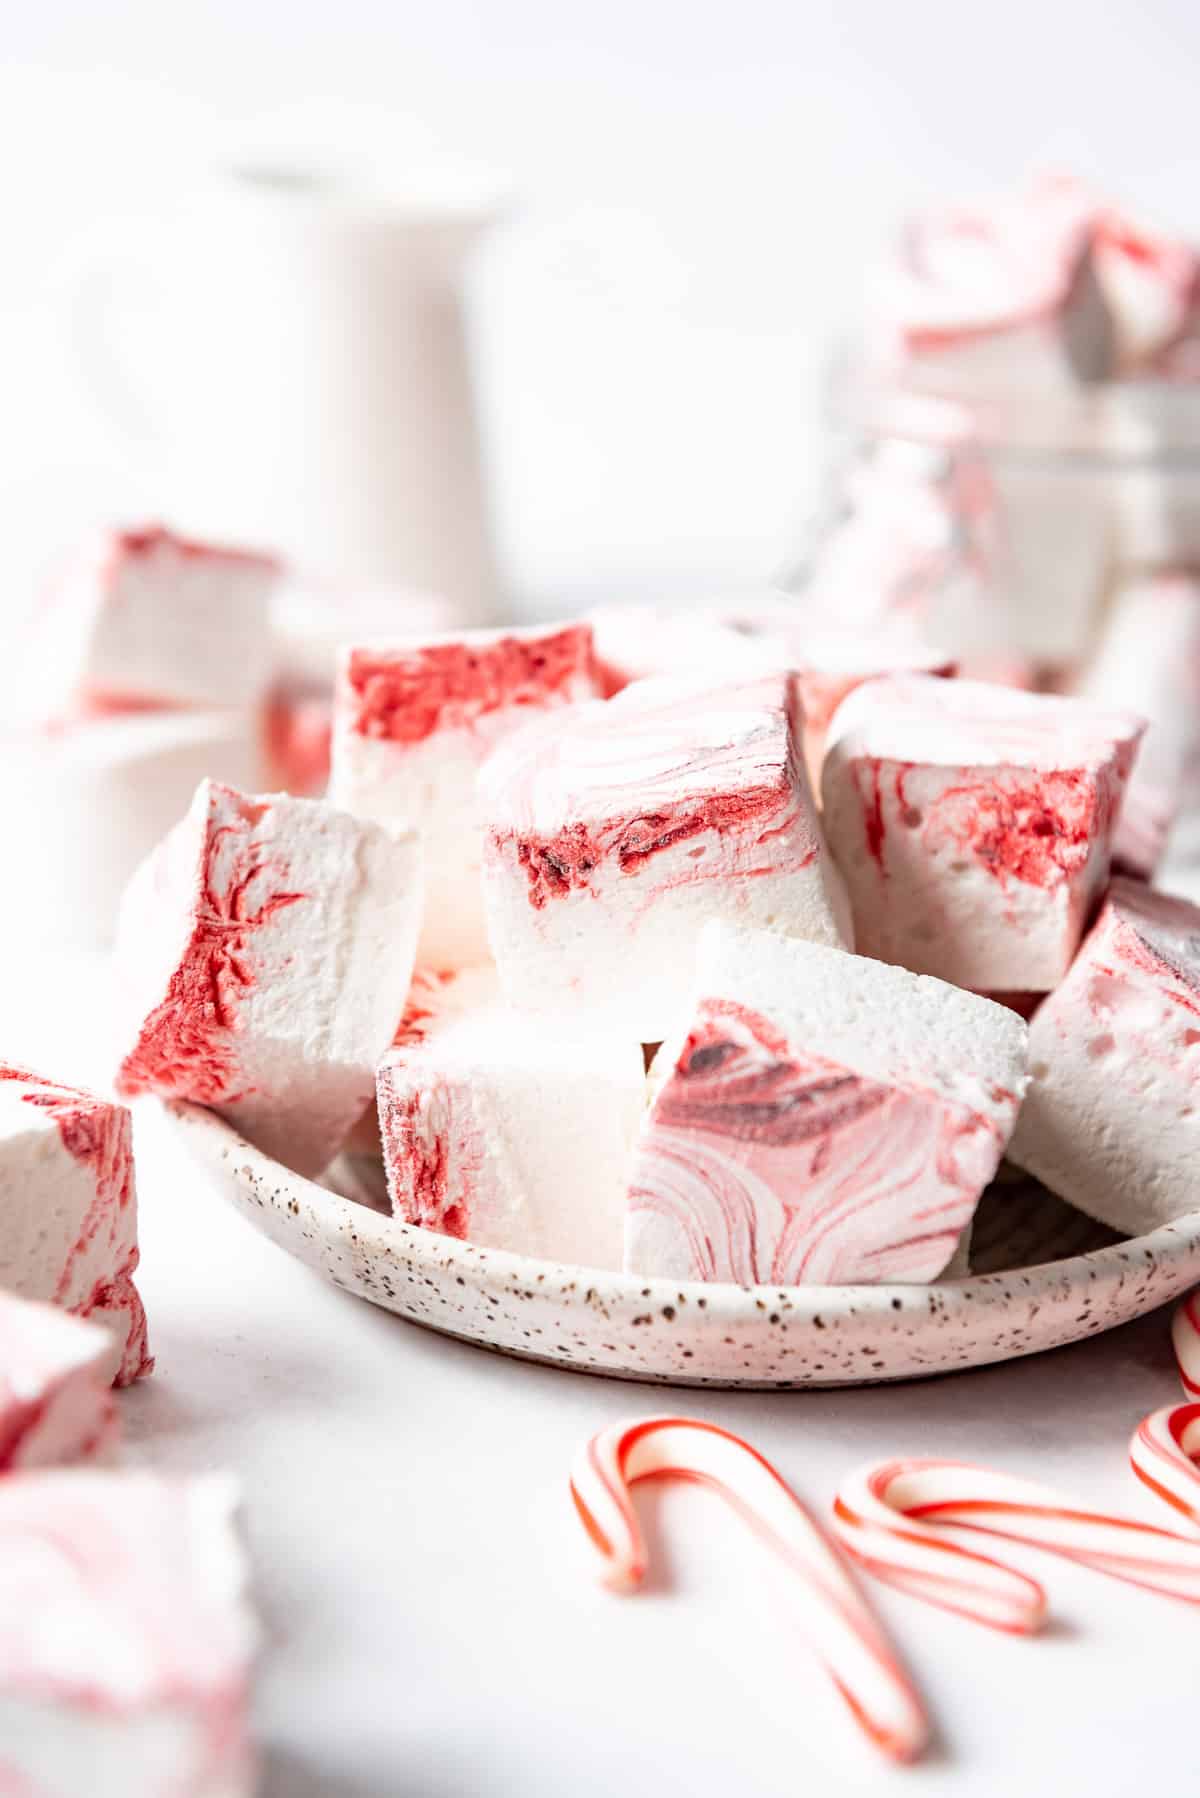
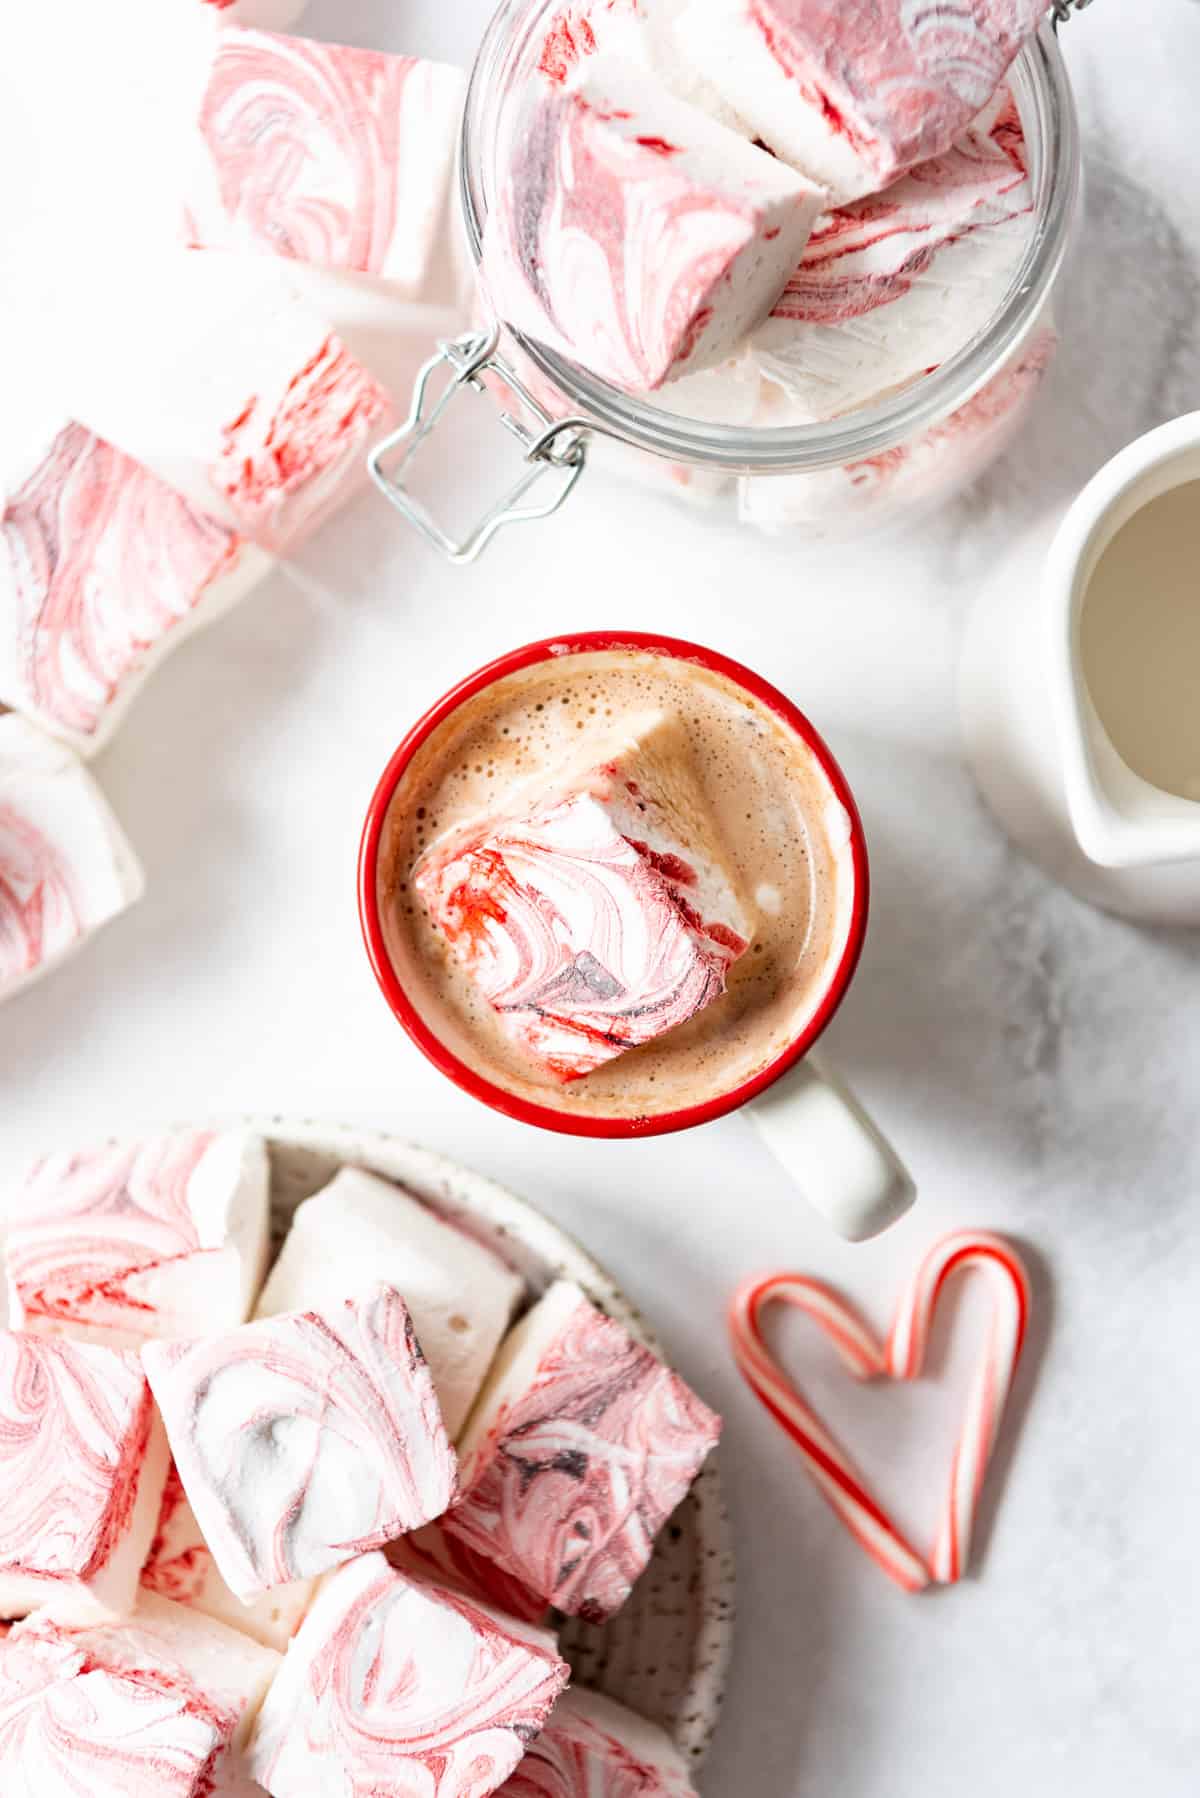
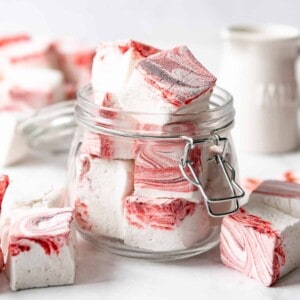
Sweet Peppermint Swirl Marshmallows are light and fluffy clouds of candy cane flavor that are perfect for topping your hot cocoa or making s’mores! They make great edible gifts for friends, neighbors, and teachers, too!
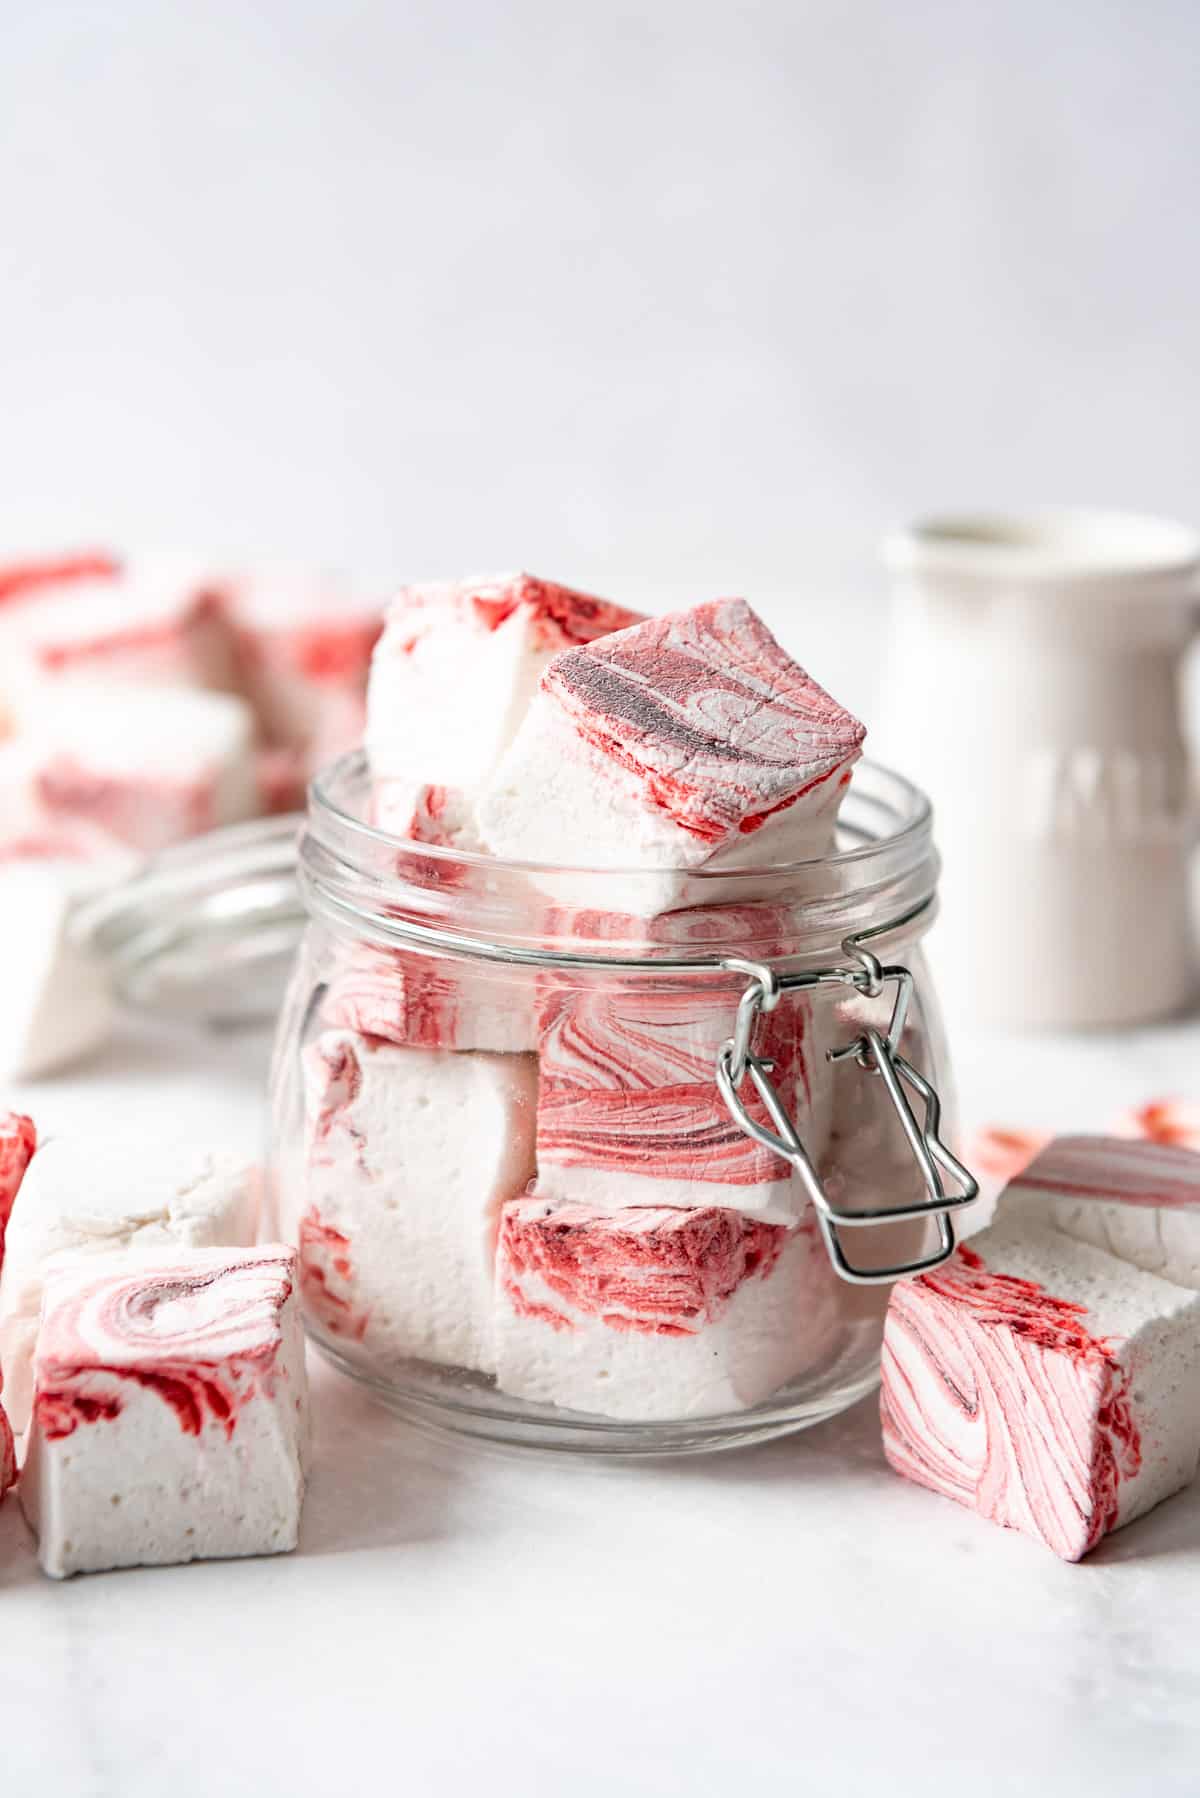
Table of Contents
I figured as long as I was making homemade marshmallows for neighbor gifts this year, I might as well make a batch of peppermint swirl ones as well. People need to have options, right?
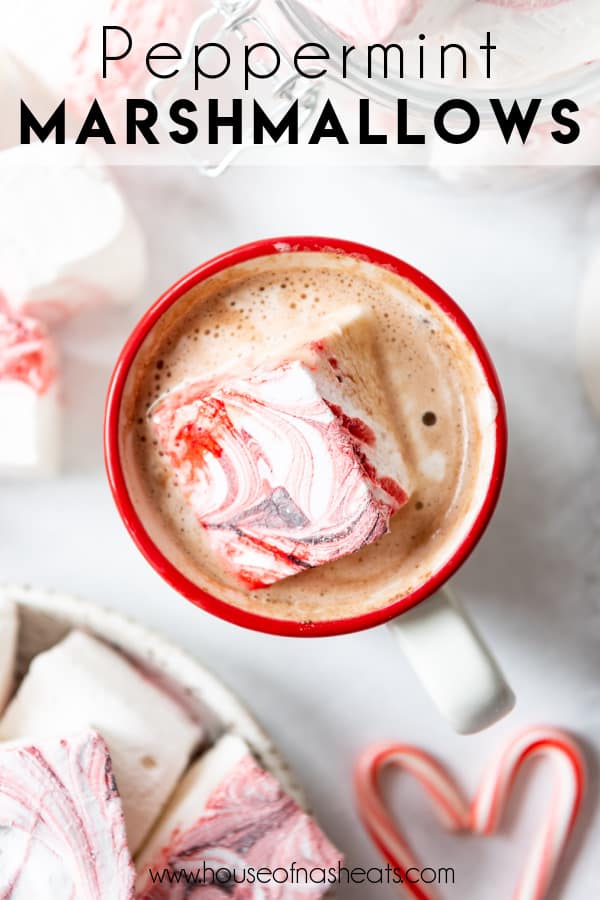
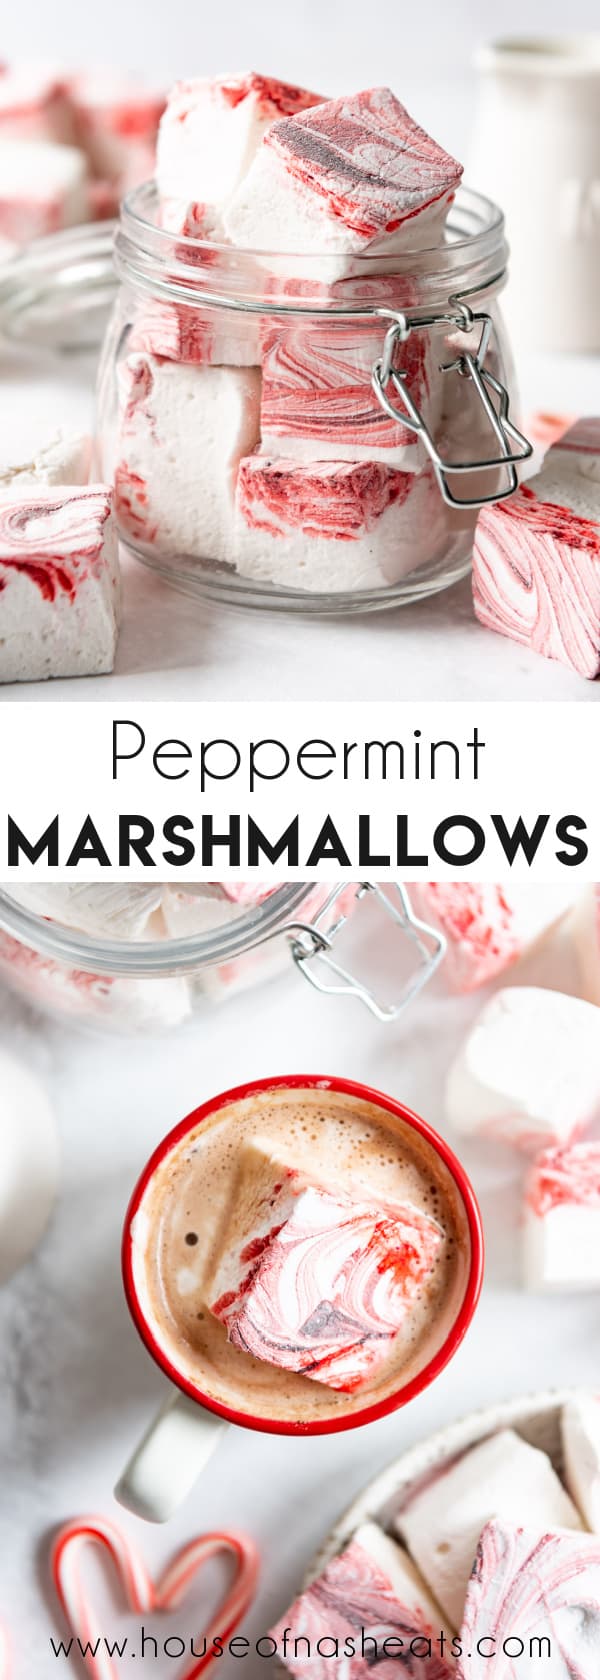
These were a huge hit with my candy cane lovin’ kiddos. And an even bigger hit when we dropped them into mugs of hot chocolate. Feel free to go the extra step of sprinkling some crushed candy cane dust on top for extra sparkle and crunch.
Also, you have to try making peppermint chocolate s’mores by using chocolate graham crackers, Oreos, or other chocolate wafer-type cookies with a peppermint bark square (or just regular chocolate) and one of these peppermint marshmallows toasted over the fire! It’s seriously next level for all my s’mores loving peeps.
If you love all things peppermint, be sure to try our Candy Cane Peppermint Pie, Homemade Peppermint Patties, and Chocolate Peppermint Blossoms next!
Why this Recipe Works
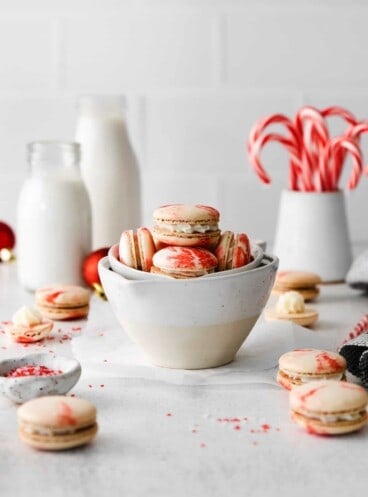
- These have the same enticing swirl effect as my Peppermint Macarons that makes them totally irresistible!
- There are no egg whites in this easy homemade peppermint marshmallow recipe and they are naturally gluten-free, so they are really allergy friendly treats.
- It’s actually pretty easy to make these as long as you have a candy thermometer (affiliate link) and stand mixer, which do most of the work for you.
- You can increase or decrease the amount of peppermint extract to your liking. I think ½ a teaspoon is perfect for a mild vanilla peppermint flavor, while doubling the amount gives a solid peppermint flavor without Altoid-strength levels.
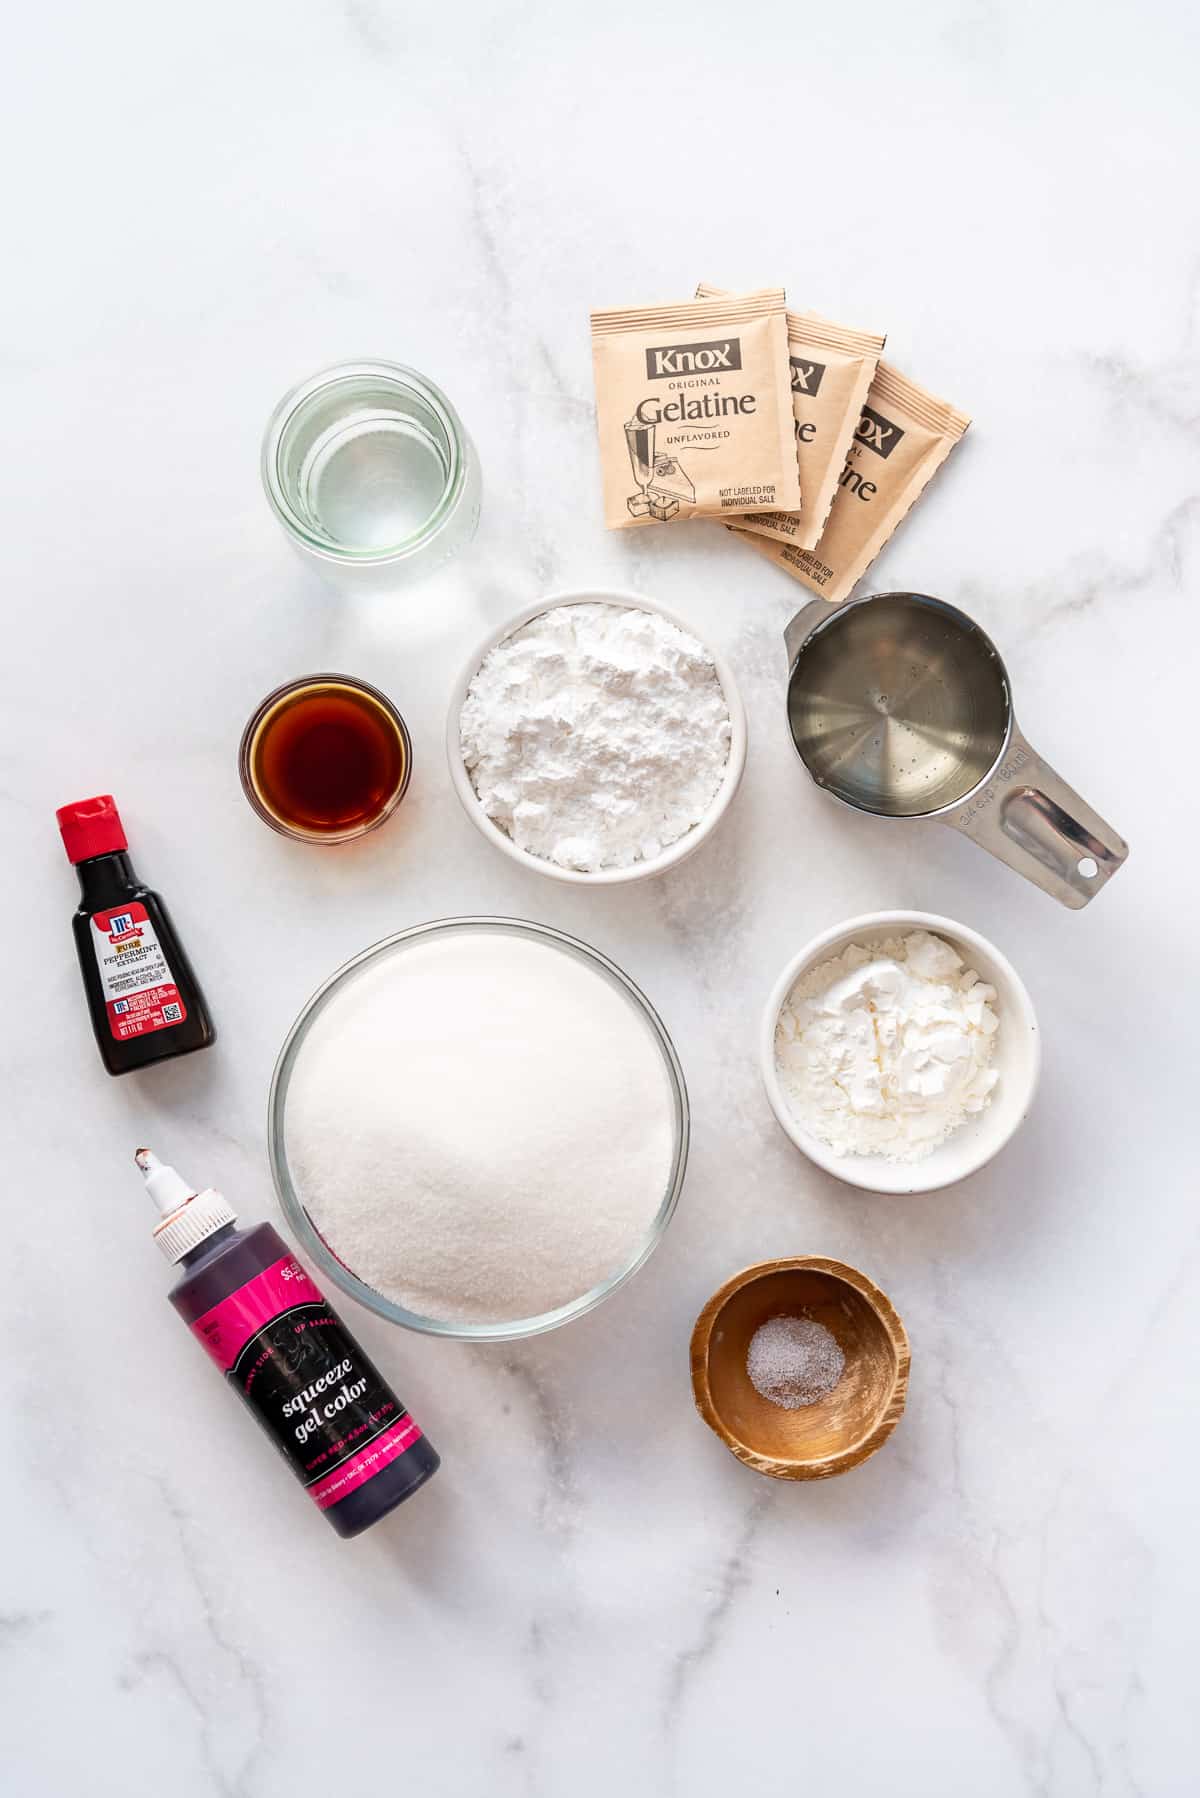
Ingredient Notes
- Peppermint extract: I have found over the years that each brand of peppermint extract is a little different and we like the McCormick brand the best. Be sure not to get confused and use regular “mint” extract, which is more spearmint (i.e. toothpaste) than peppermint (i.e. candy cane).
- Powdered gelatin: You’ll need 3 of the small envelopes of unflavored gelatin powder to make a batch of marshmallows.
- Corn syrup: Yes there are substitutes for corn syrup, but no, I have not tested them. I have no qualms about using light corn syrup in occasional treats and this homemade marshmallow recipe is tried-and-true so I’m not messing around with it at this time.
- Food coloring: I really recommend red gel food coloring (affiliate link) because of its concentrated pigment. But if you just want to dye the entire batch of marshmallows pink instead of go for a swirl, feel free to use the liquid kind.
How to Make This Recipe
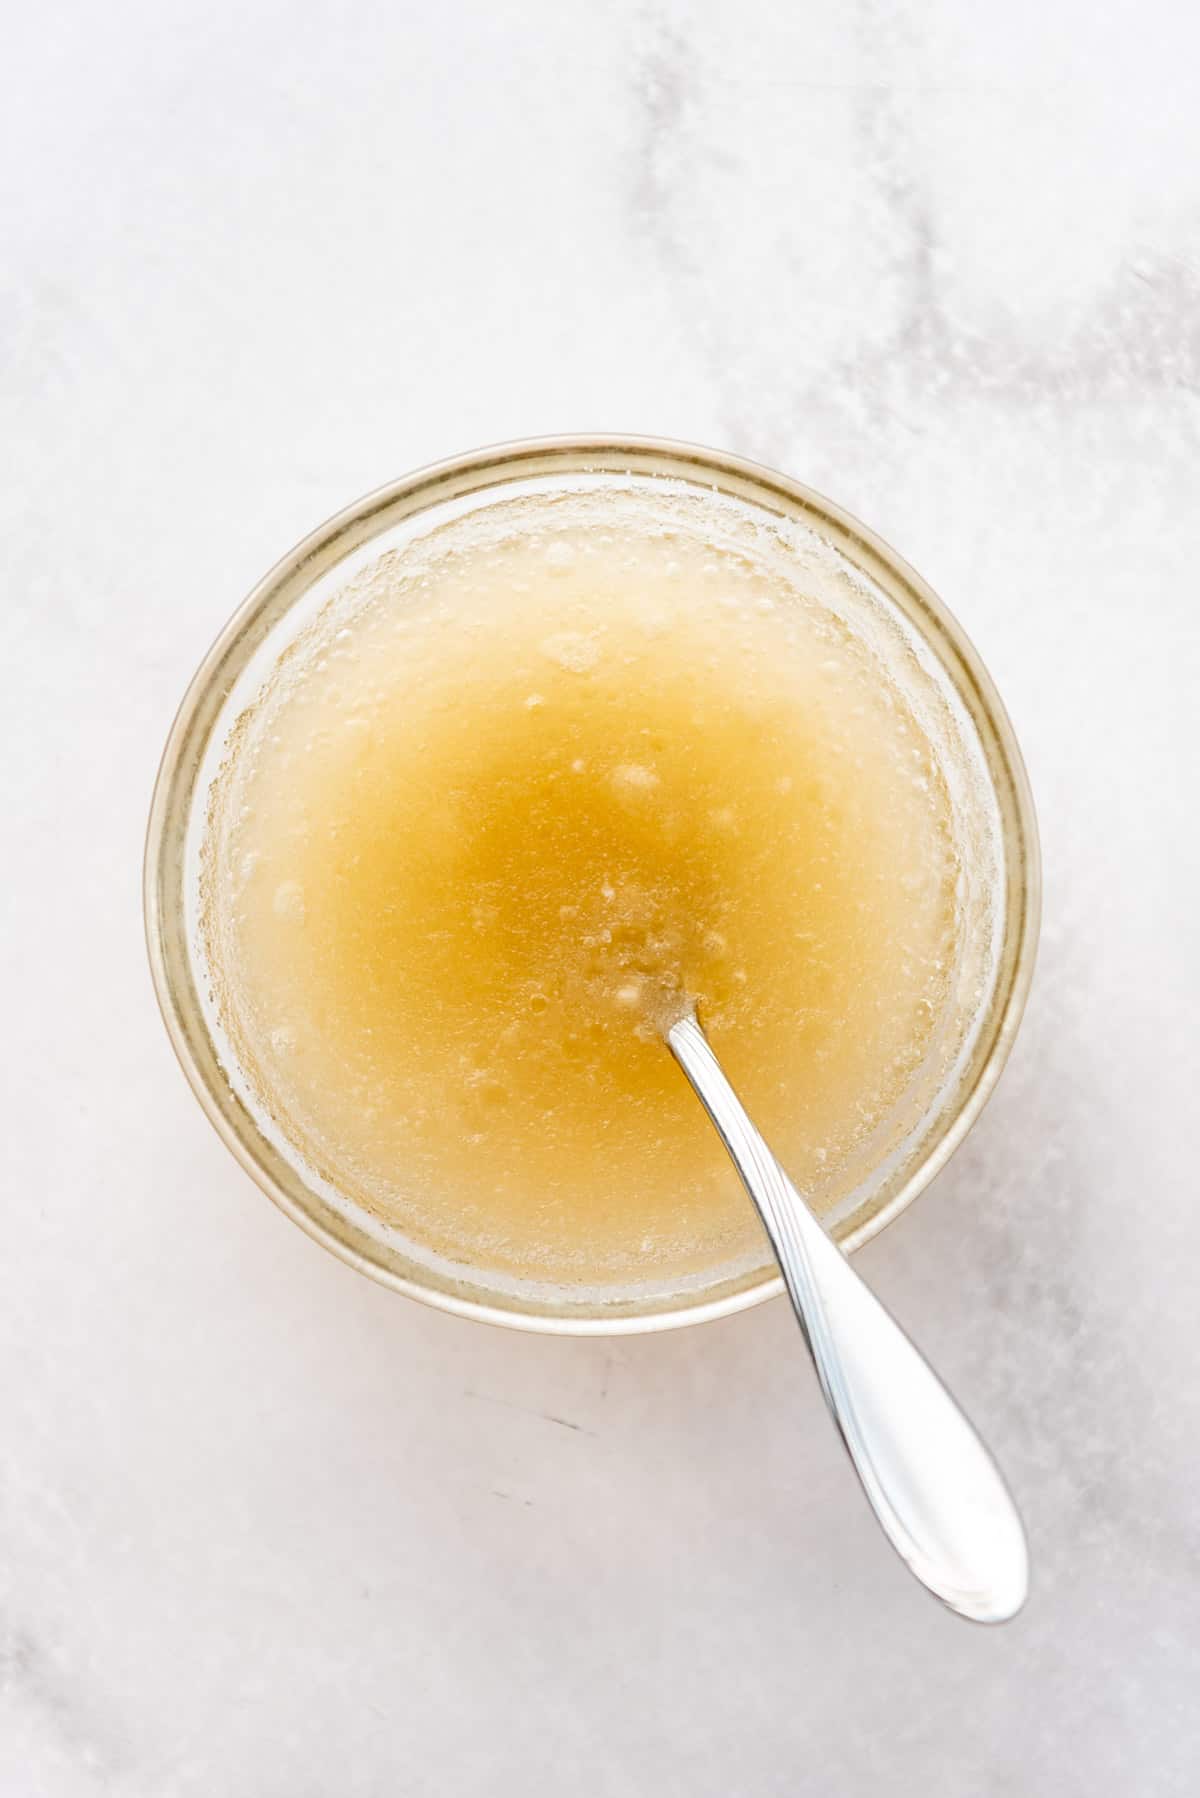
Start by “blooming” you gelatin powder in a bowl of cold water. Just stir the powder in, then let it sit for 5 minutes until it firms up into a gelatinous, rubbery puck. Sounds appealing, I know, but stick with me.
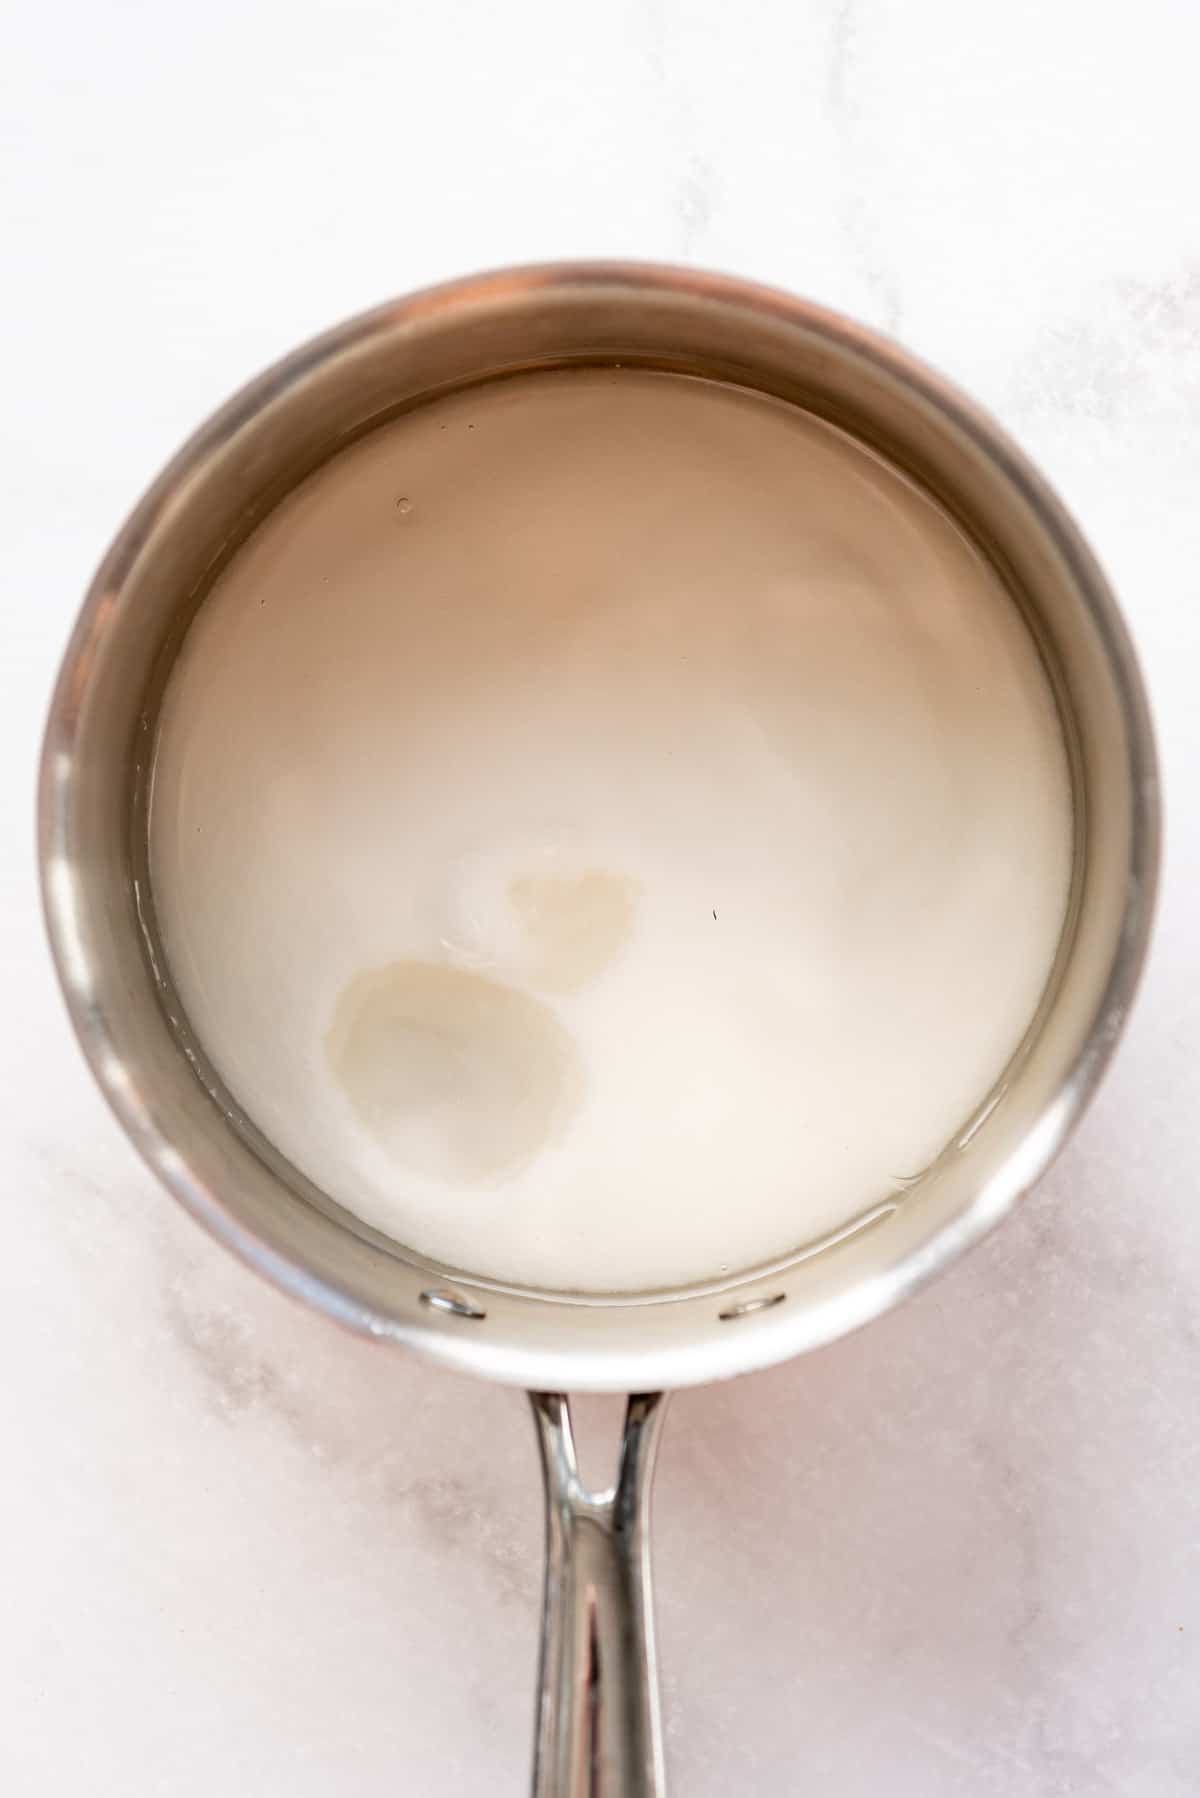
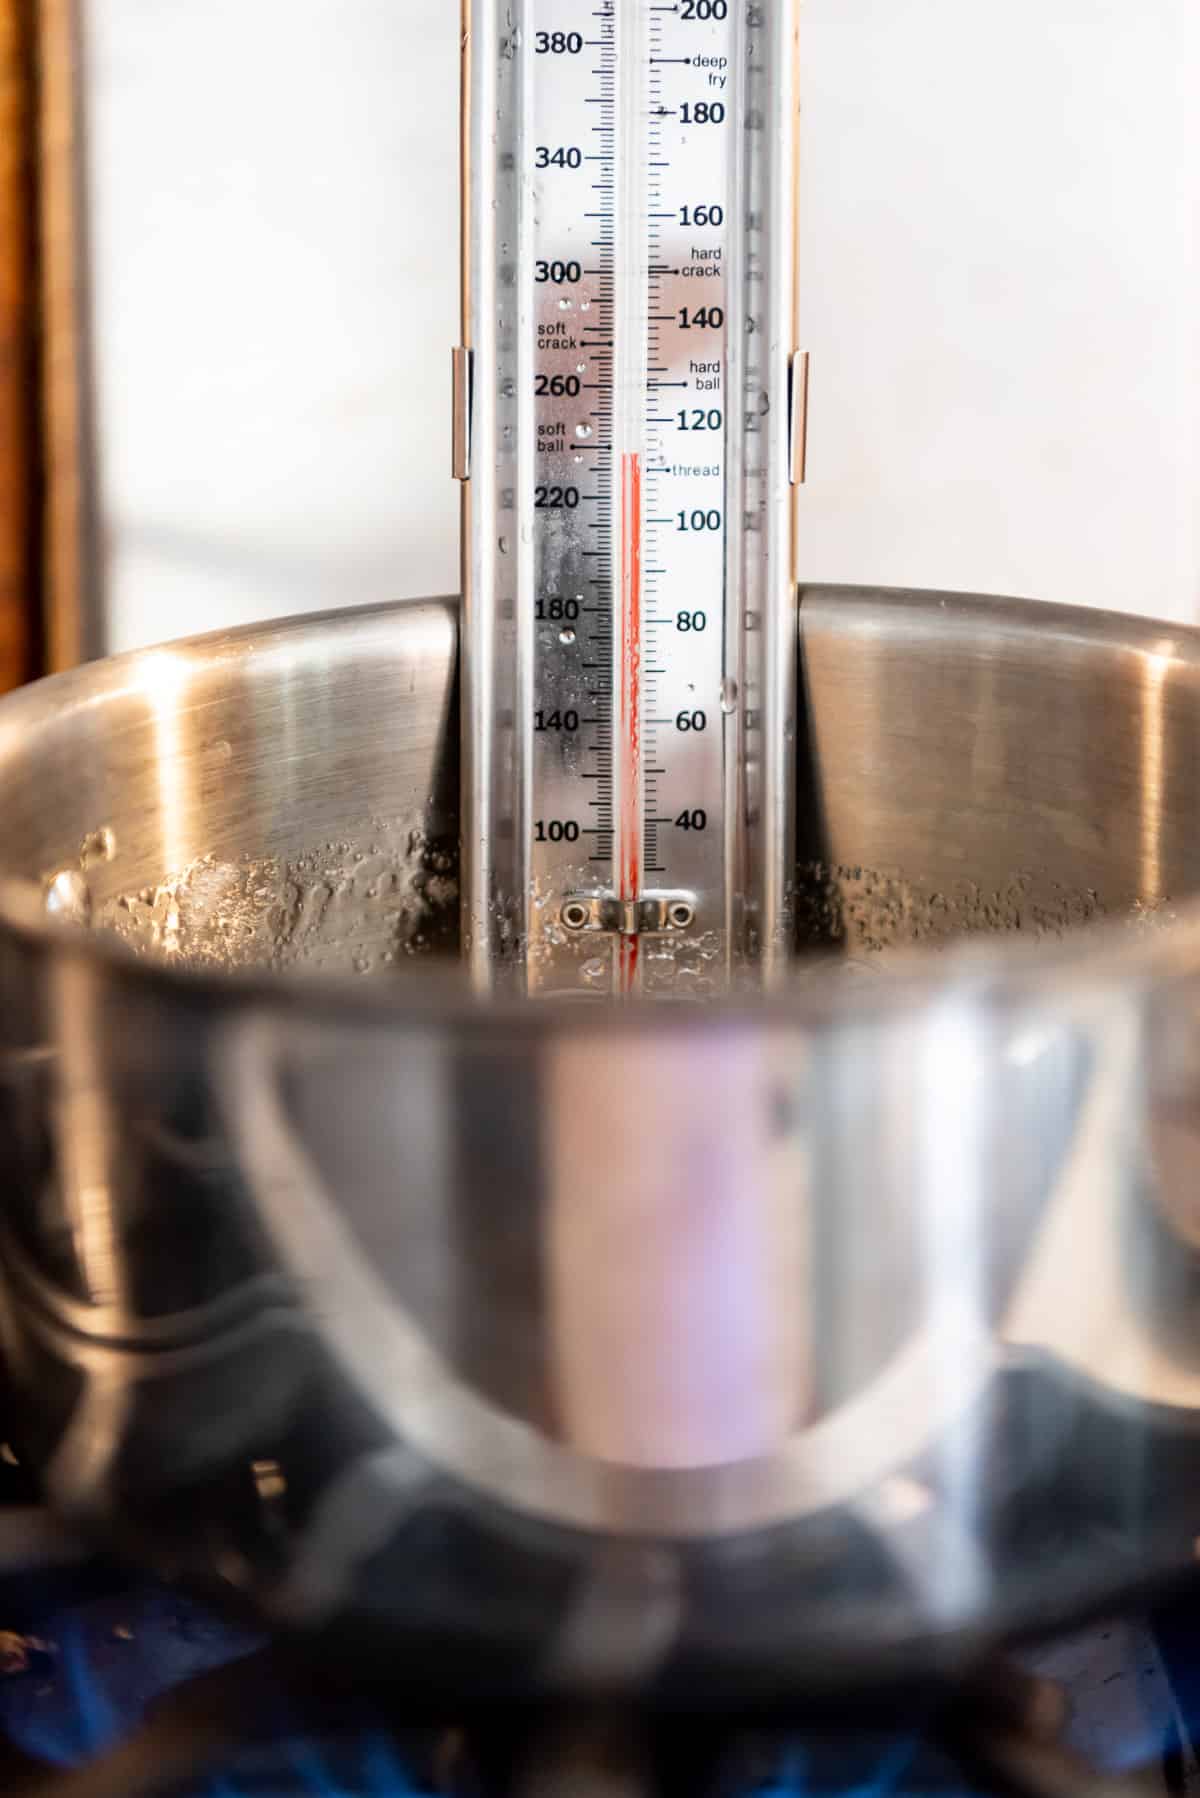
Meanwhile, combine sugar, water, corn syrup, and a pinch of salt in a medium saucepan over medium heat. Cook, stirring occasionally, until you hit 235 to 240°F on a candy thermometer (affiliate link) clipped to the side of the pot.
Please note that if you live at high altitudes, you should decrease the target temp by 2 degrees for every 1,000 feet you are above sea level.
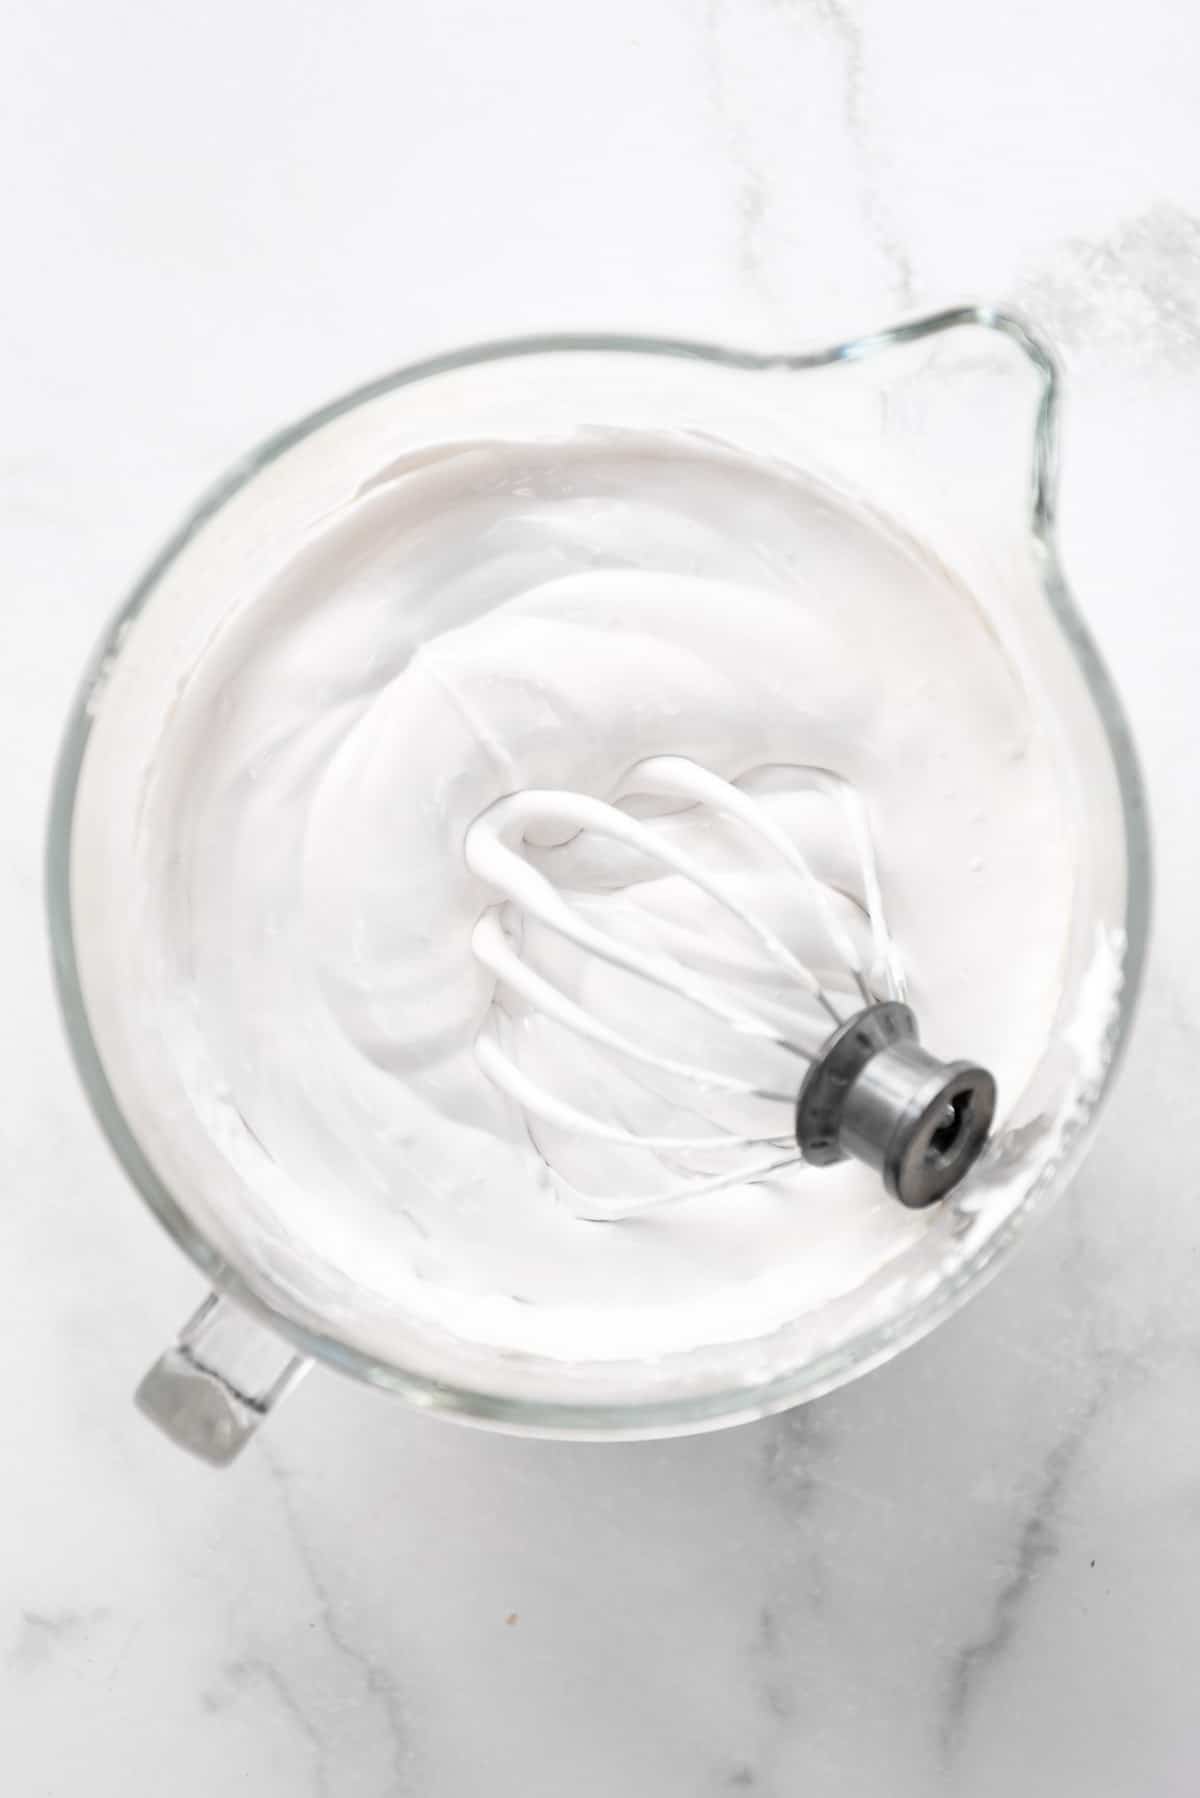
Dump the lump of gelatin into the bowl of a stand mixer fitted with a paddle attachment, then start whisking at medium speed. Slowly pour the hot sugar syrup over the gelatin in a thin stream over about a minute or two until it has all been added, then increase the speed to high and beat for 10 minutes until thick, fluffy, and more than doubled in volume.
Add the vanilla and peppermint extracts during the last minute of mixing to flavor the marshmallows.
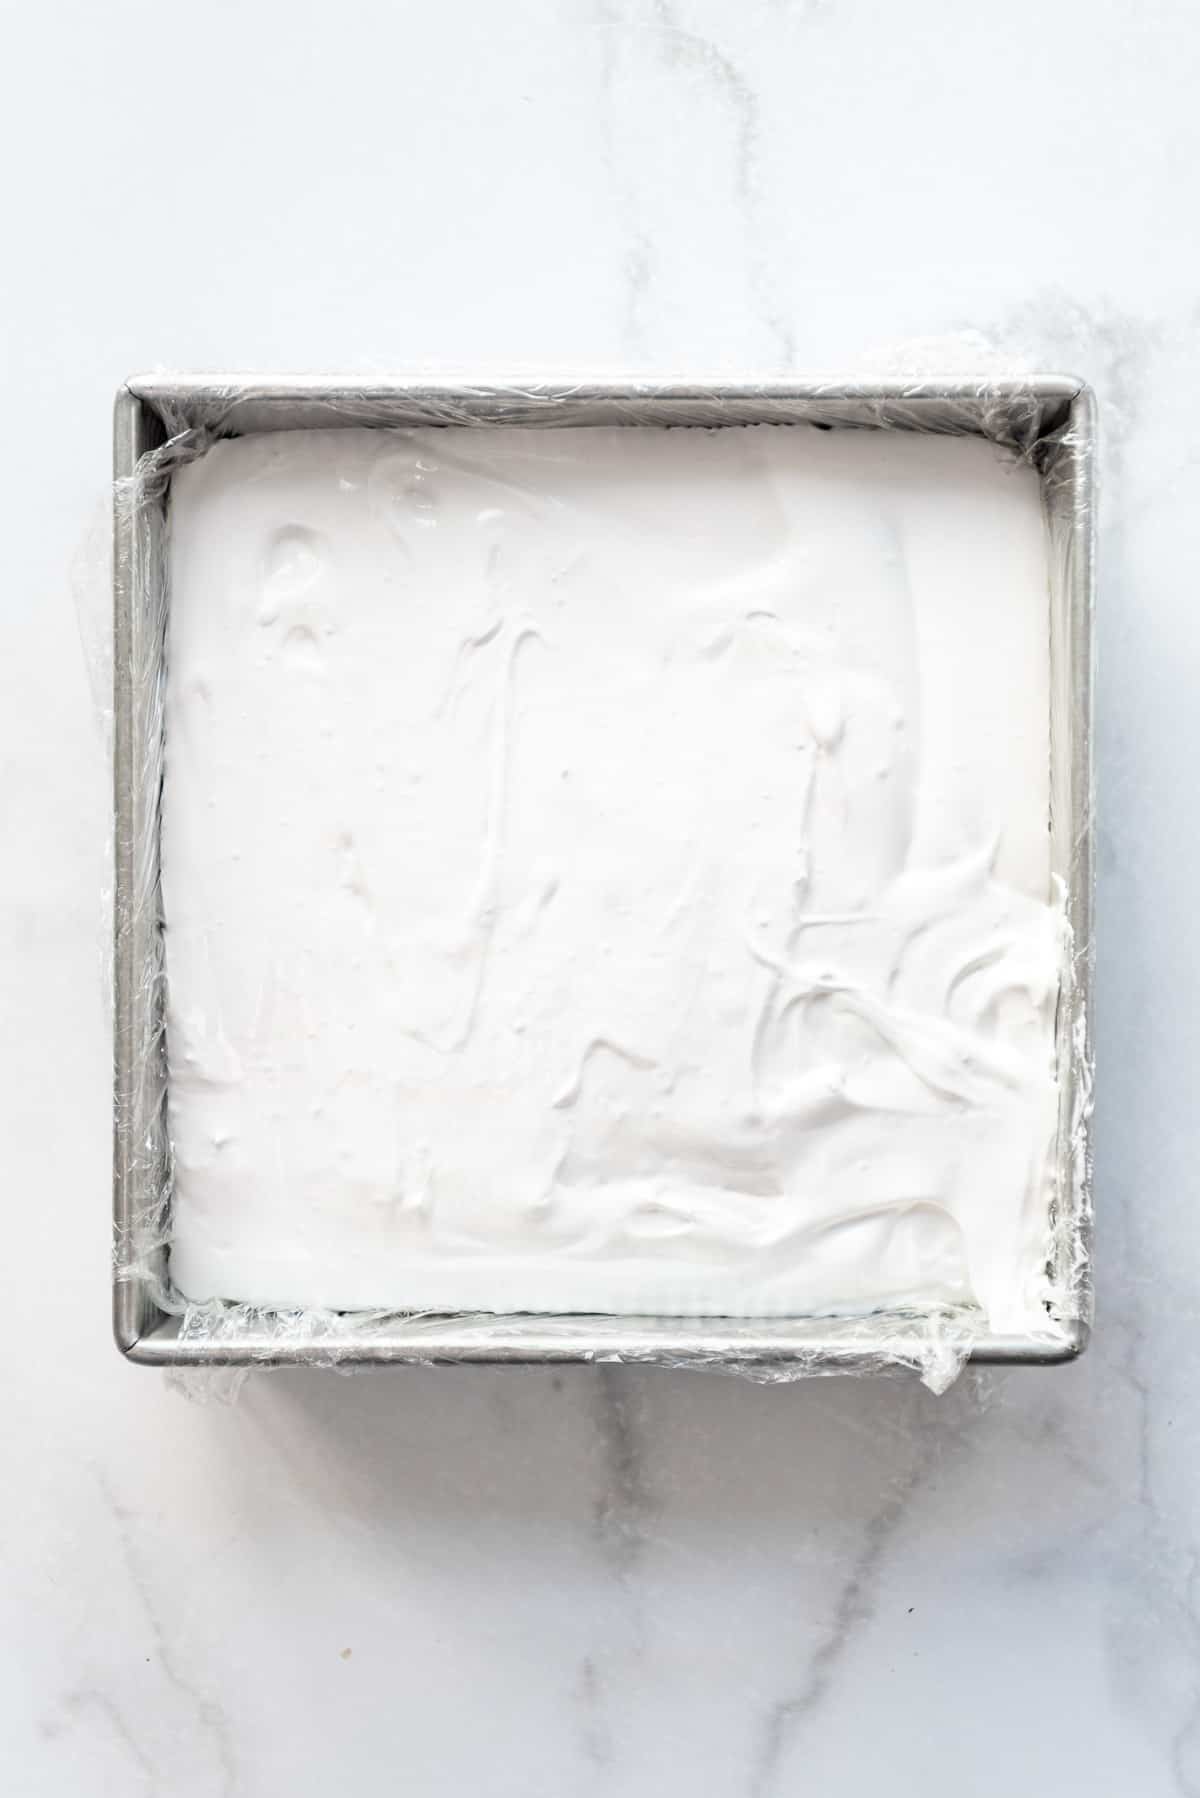
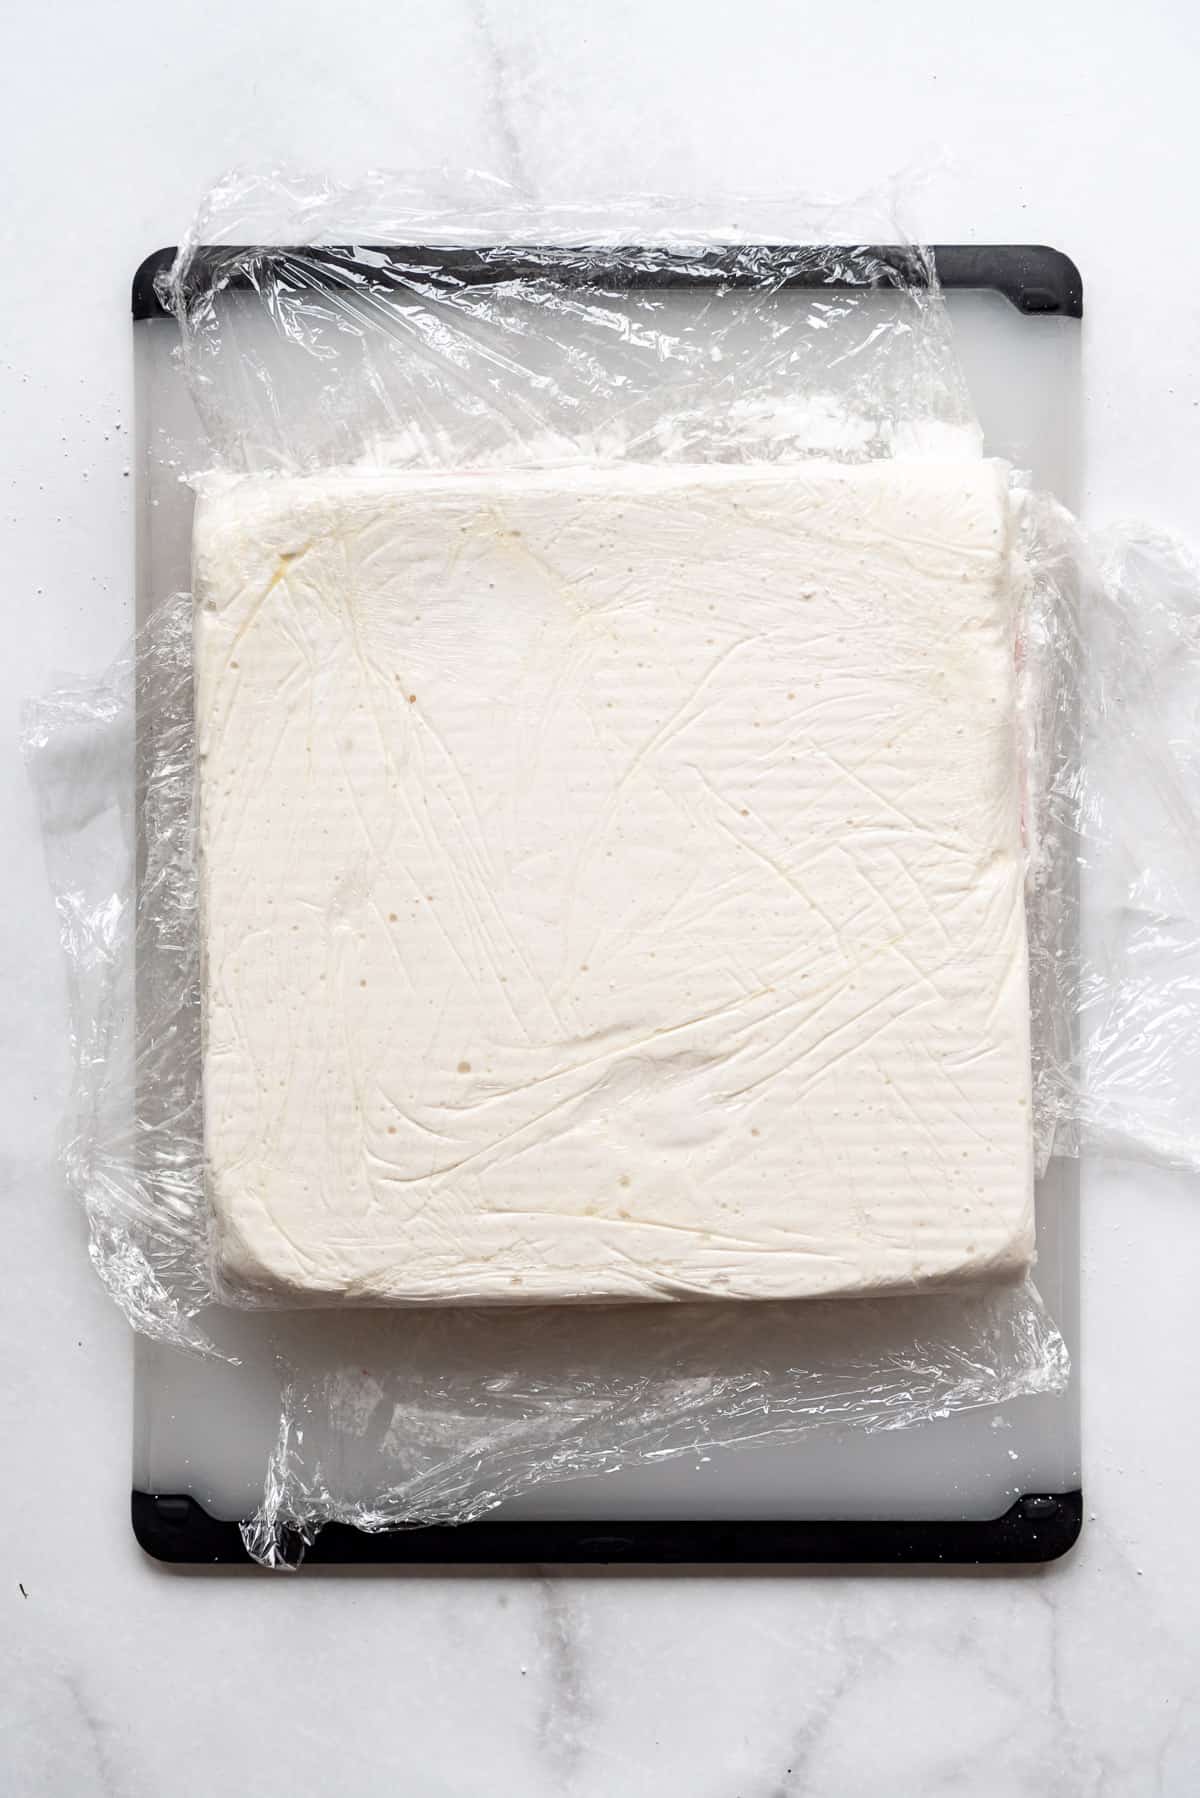
Scrape the marshmallow mixture into a 9×9-inch baking dish lined with plastic wrap that has been sprayed with cooking spray. Use a rubber spatula sprayed with cooking spray to nudge the marshmallow into corners or smooth out the top, if needed.
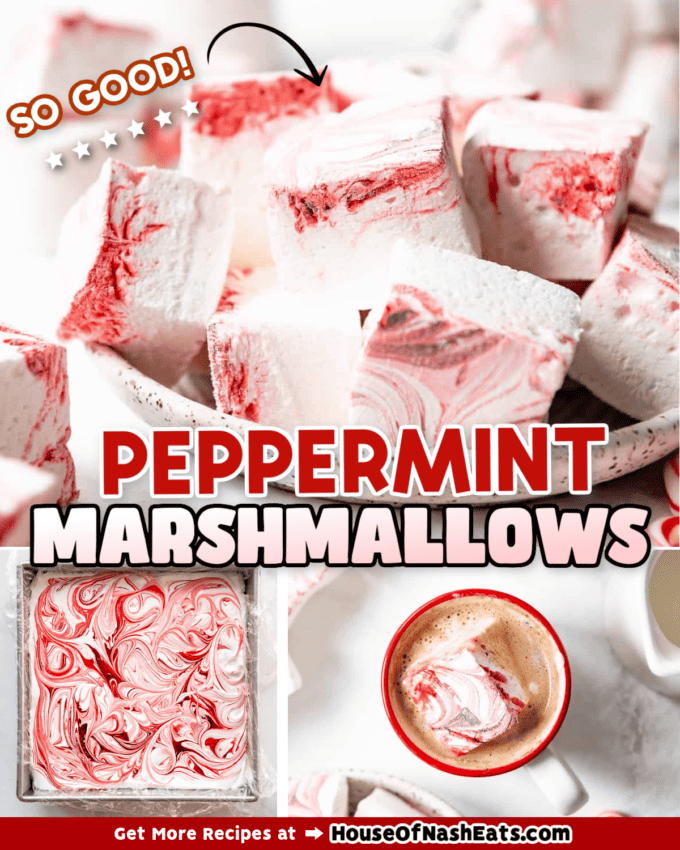
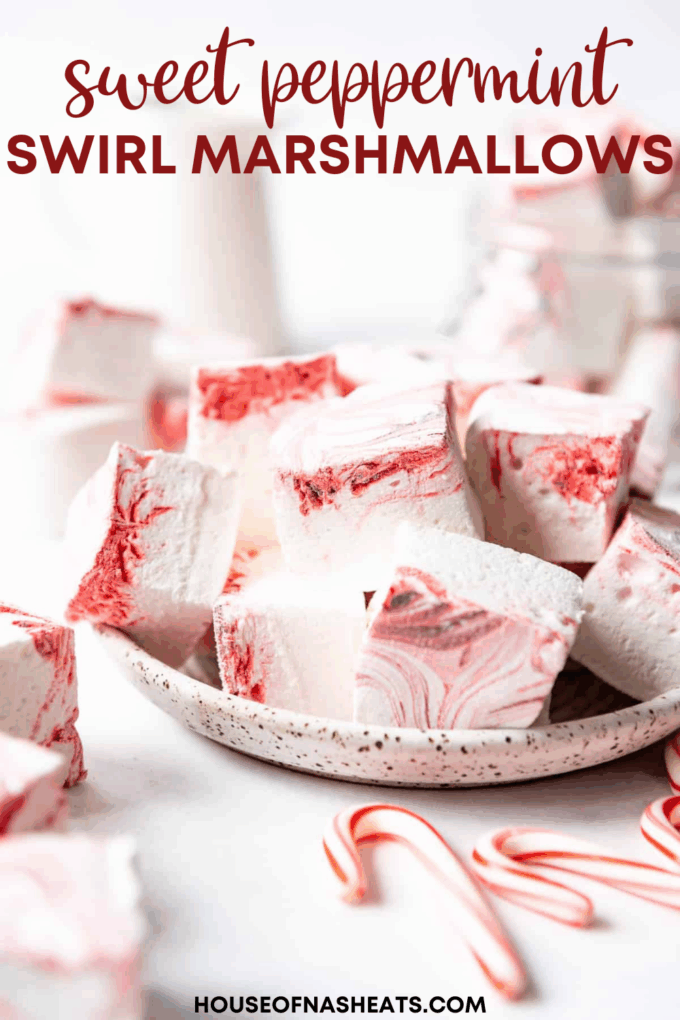
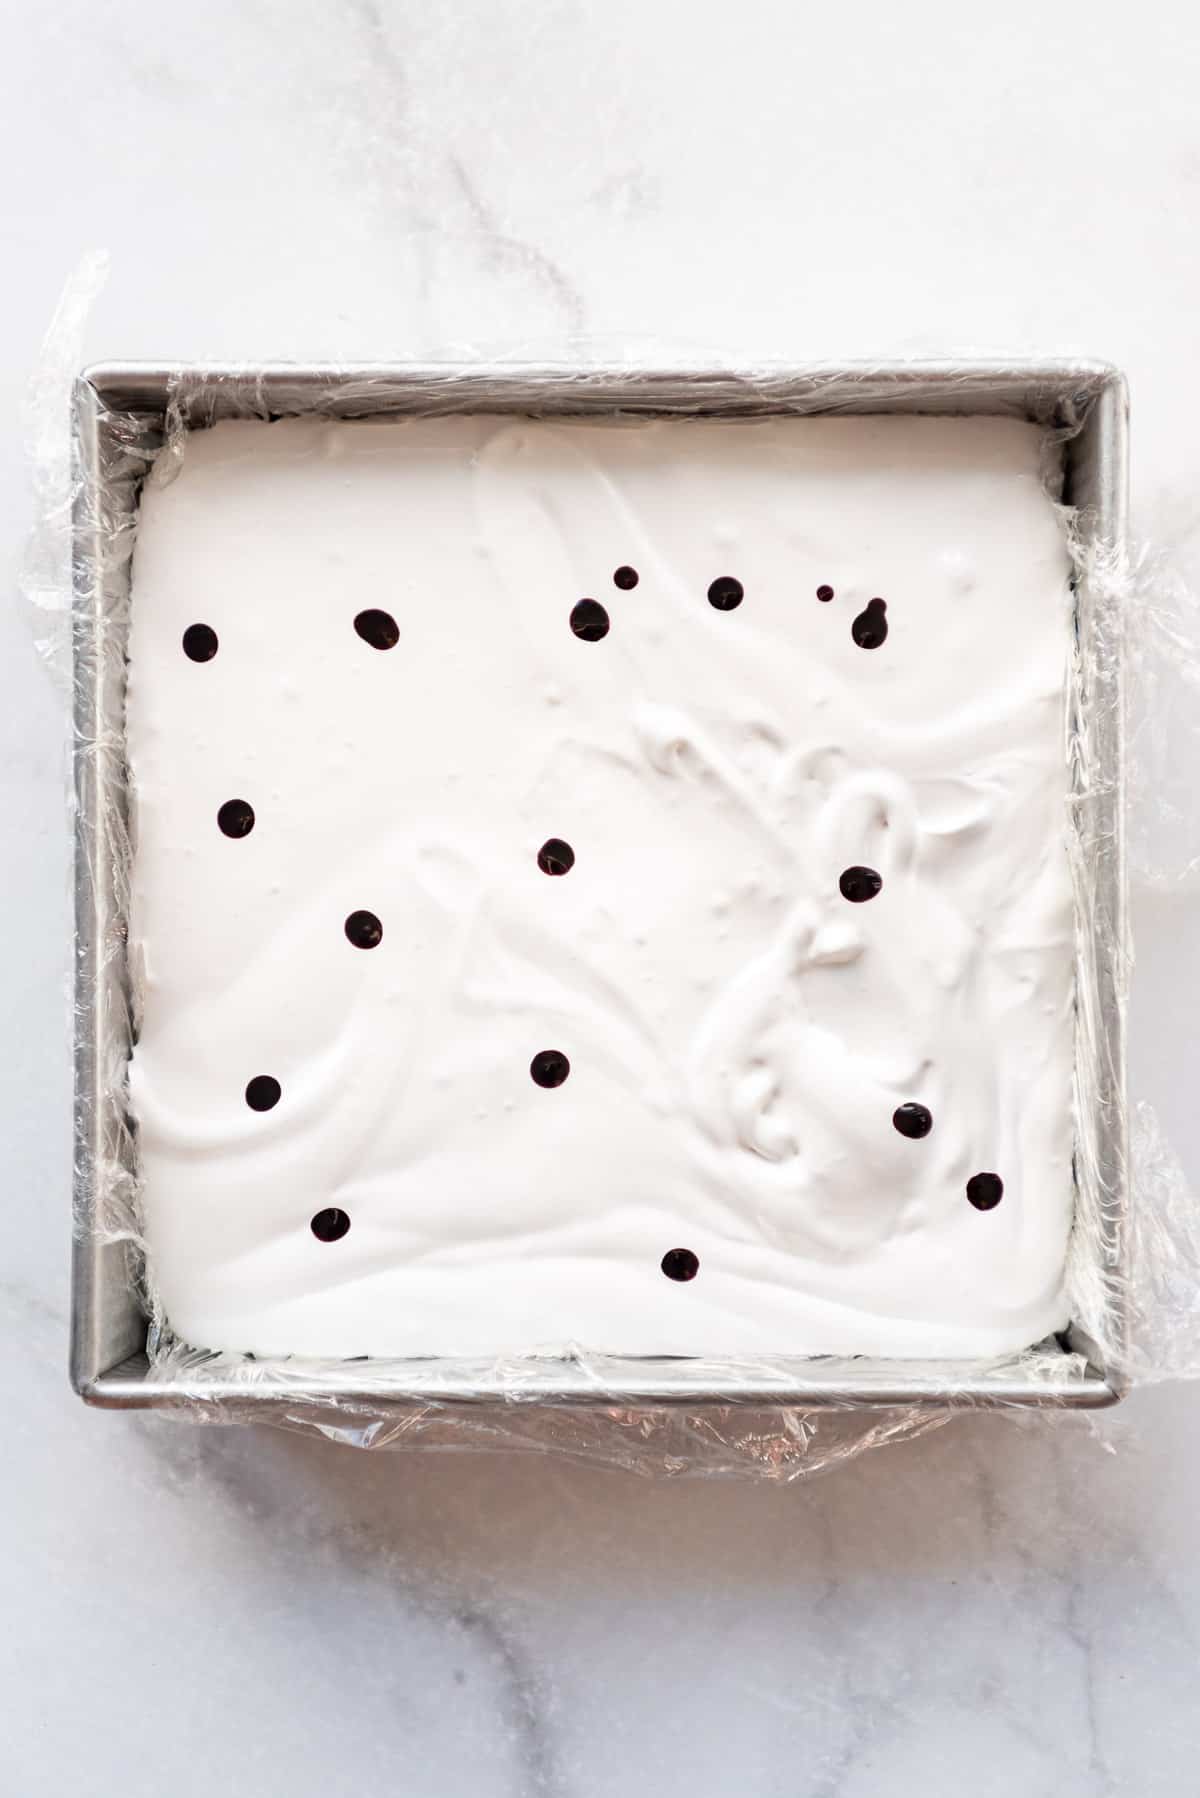
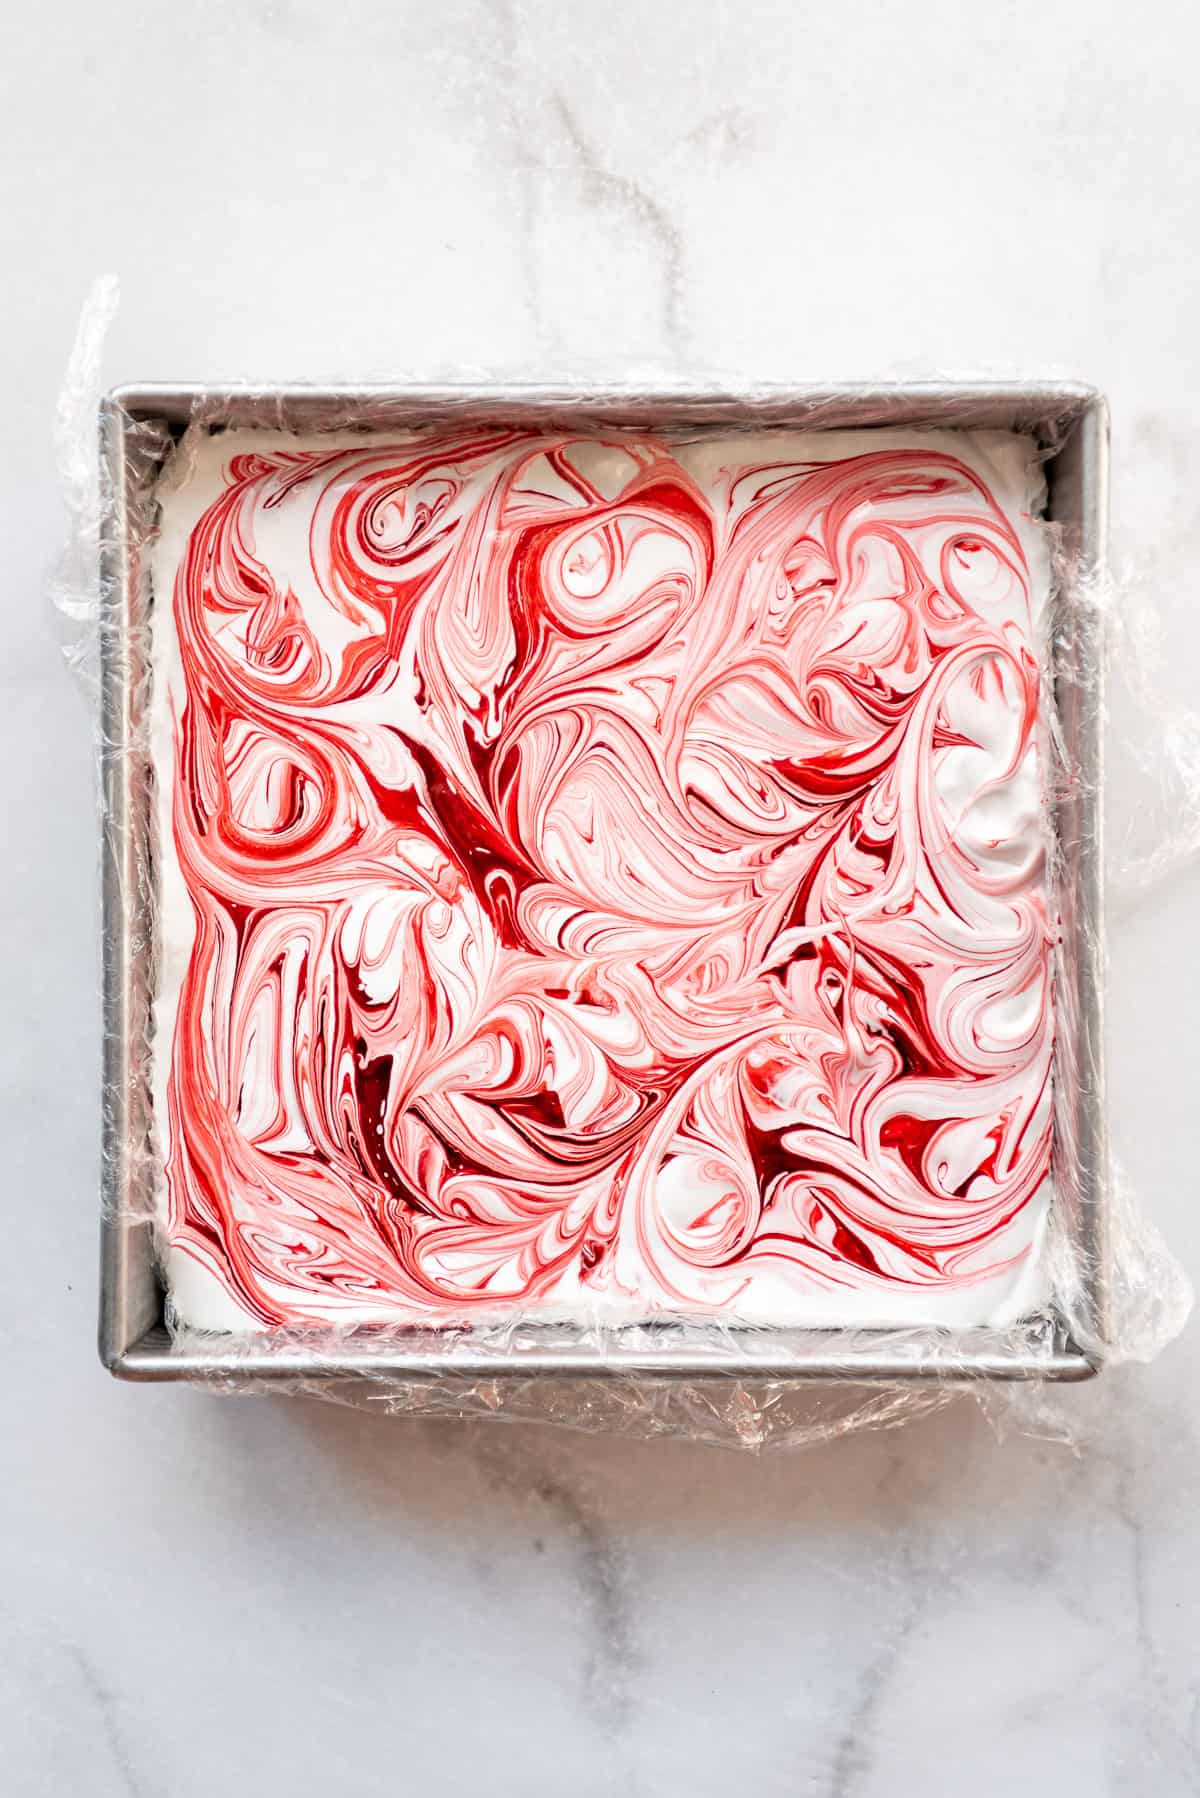
Drop dots of red food coloring onto the top of the marshmallow mixture and immediately swirl it in using a knife or toothpick before the marshmallow has a chance to set up.
In a medium bowl, whisk together powdered sugar and cornstarch to create a dusting powder, then cover the top of the fresh marshmallow mixture with a couple tablespoons of the dusting powder sifted through a fine mesh sieve. Let the marshmallows rest for 4 hours or overnight to set up completely.
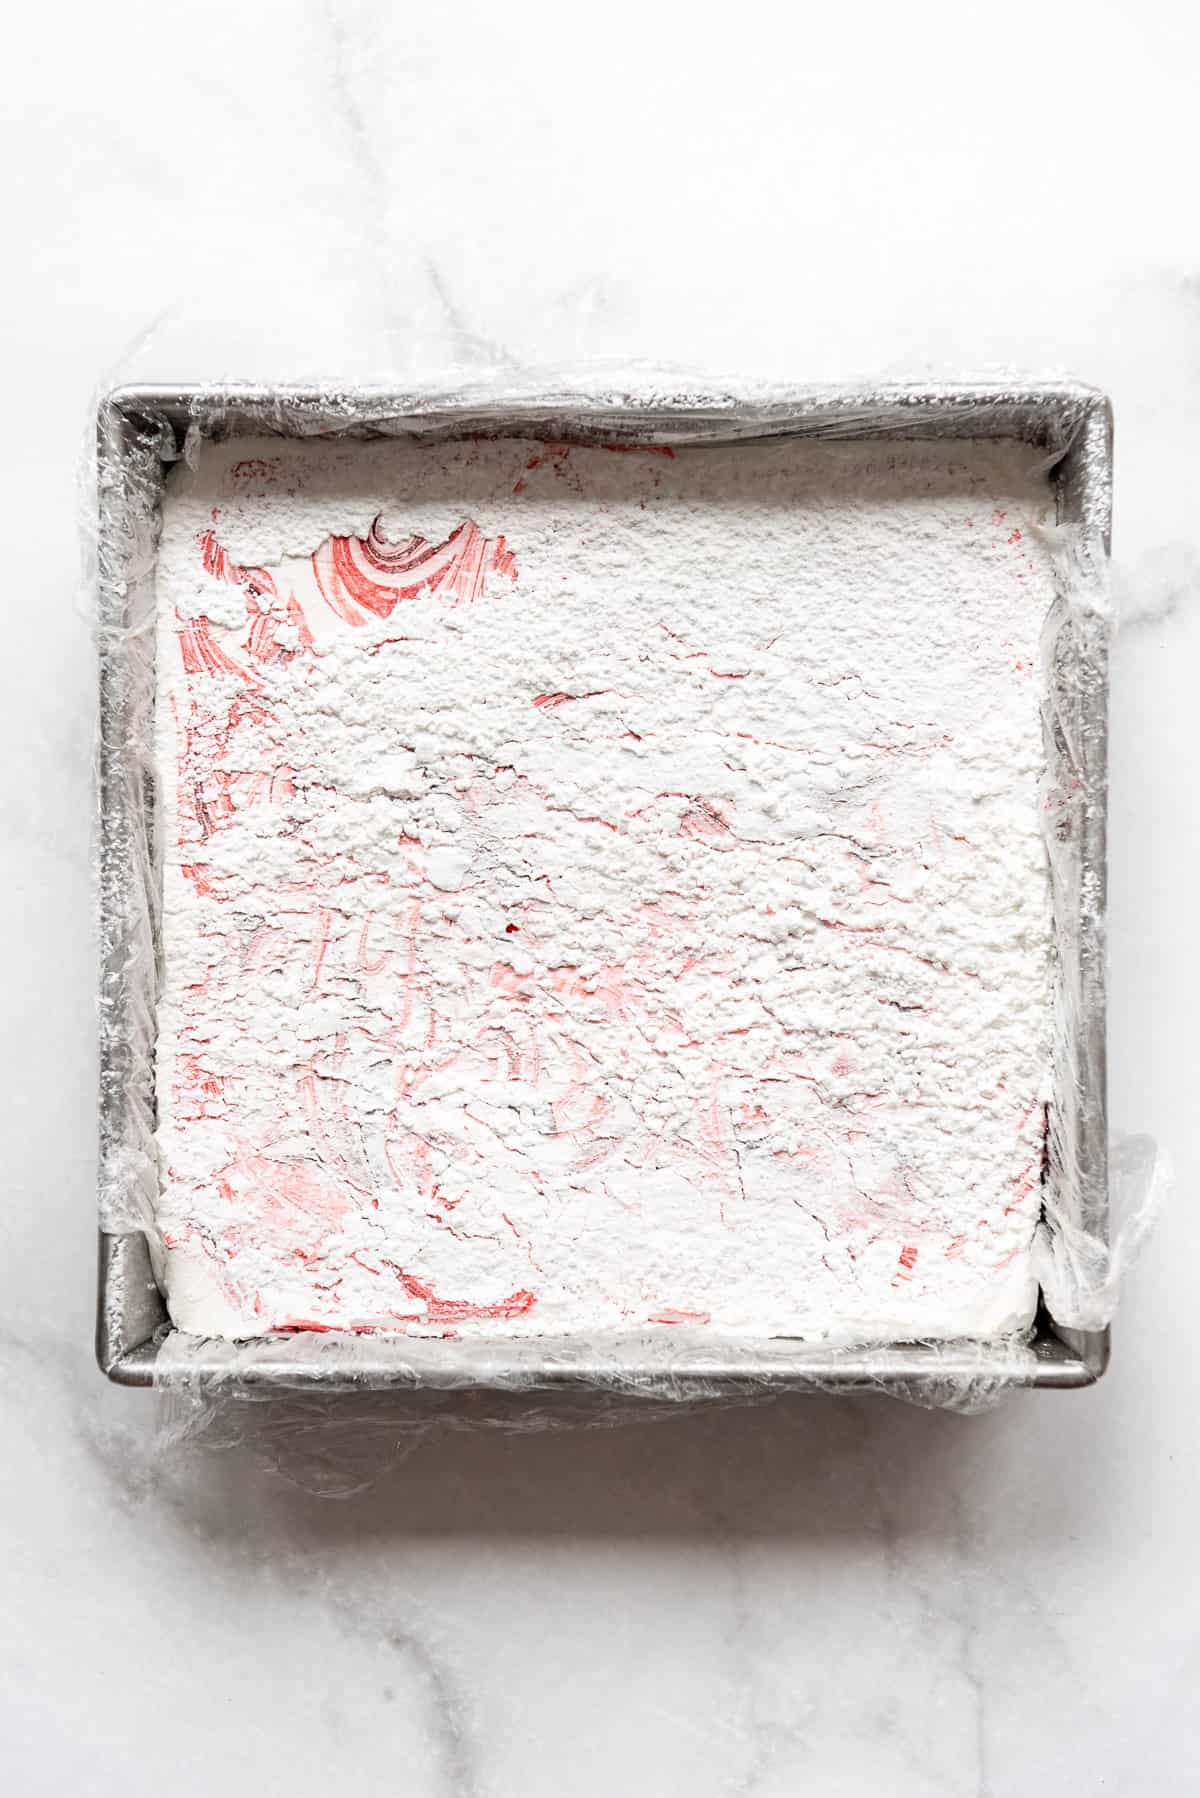
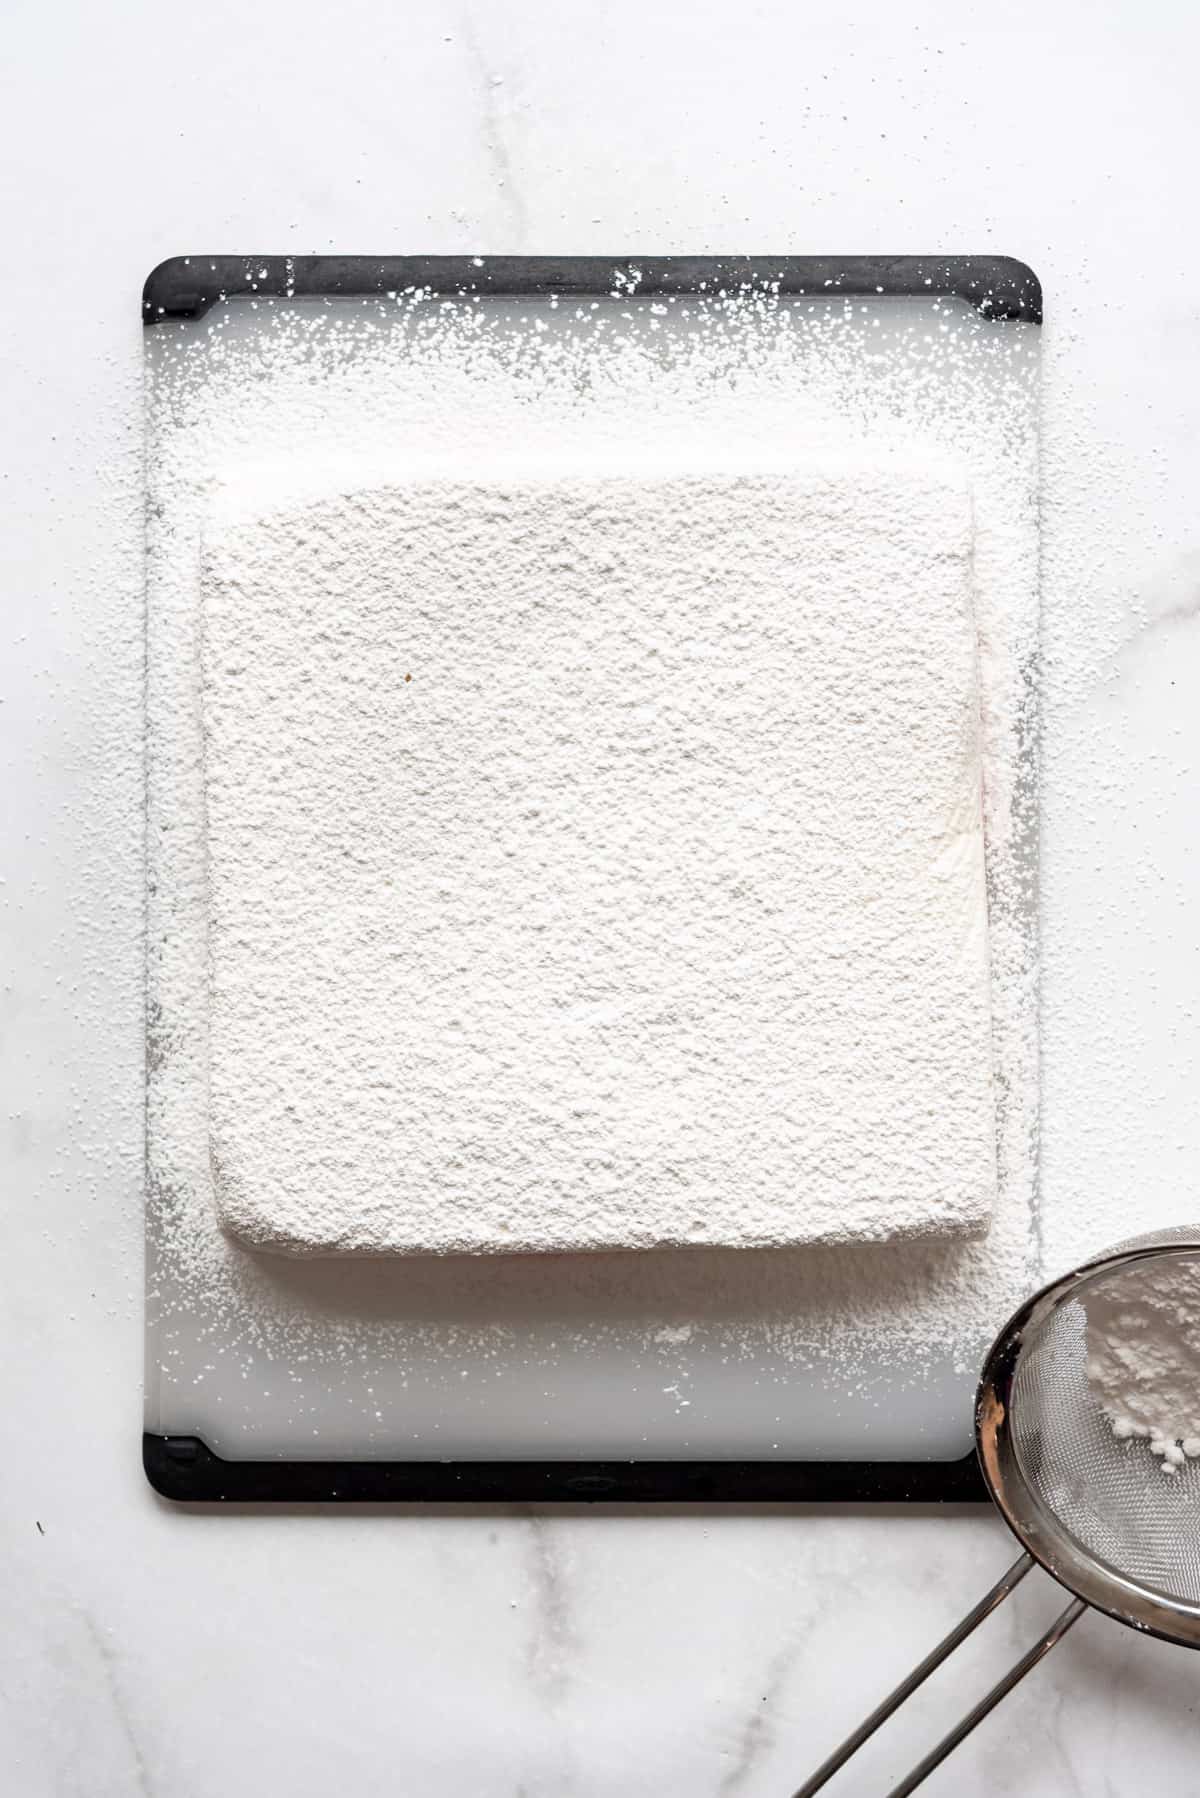
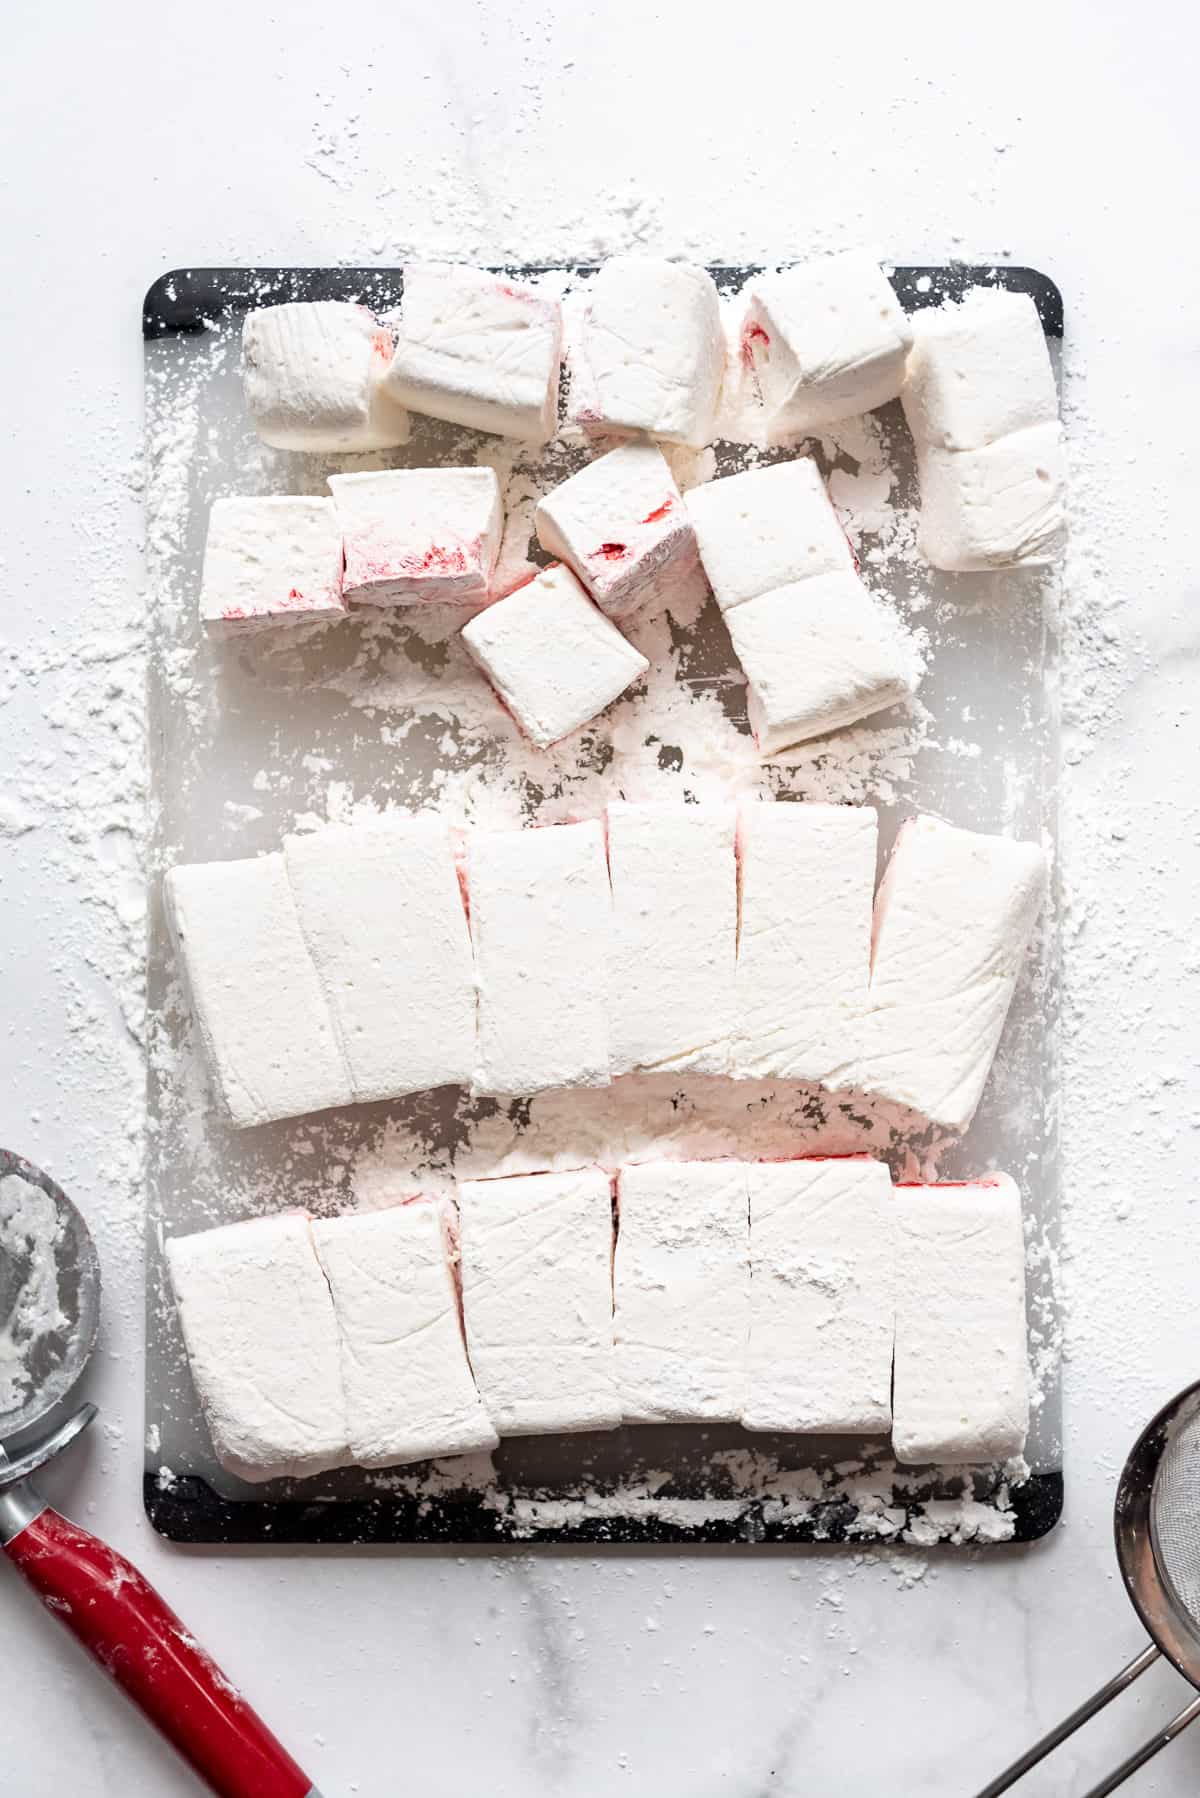
Once the ‘mallow mixture is set, flip it out onto a clean surface and peel off the plastic wrap. Dust the exposed sticky side with more of the powdered sugar mixture.
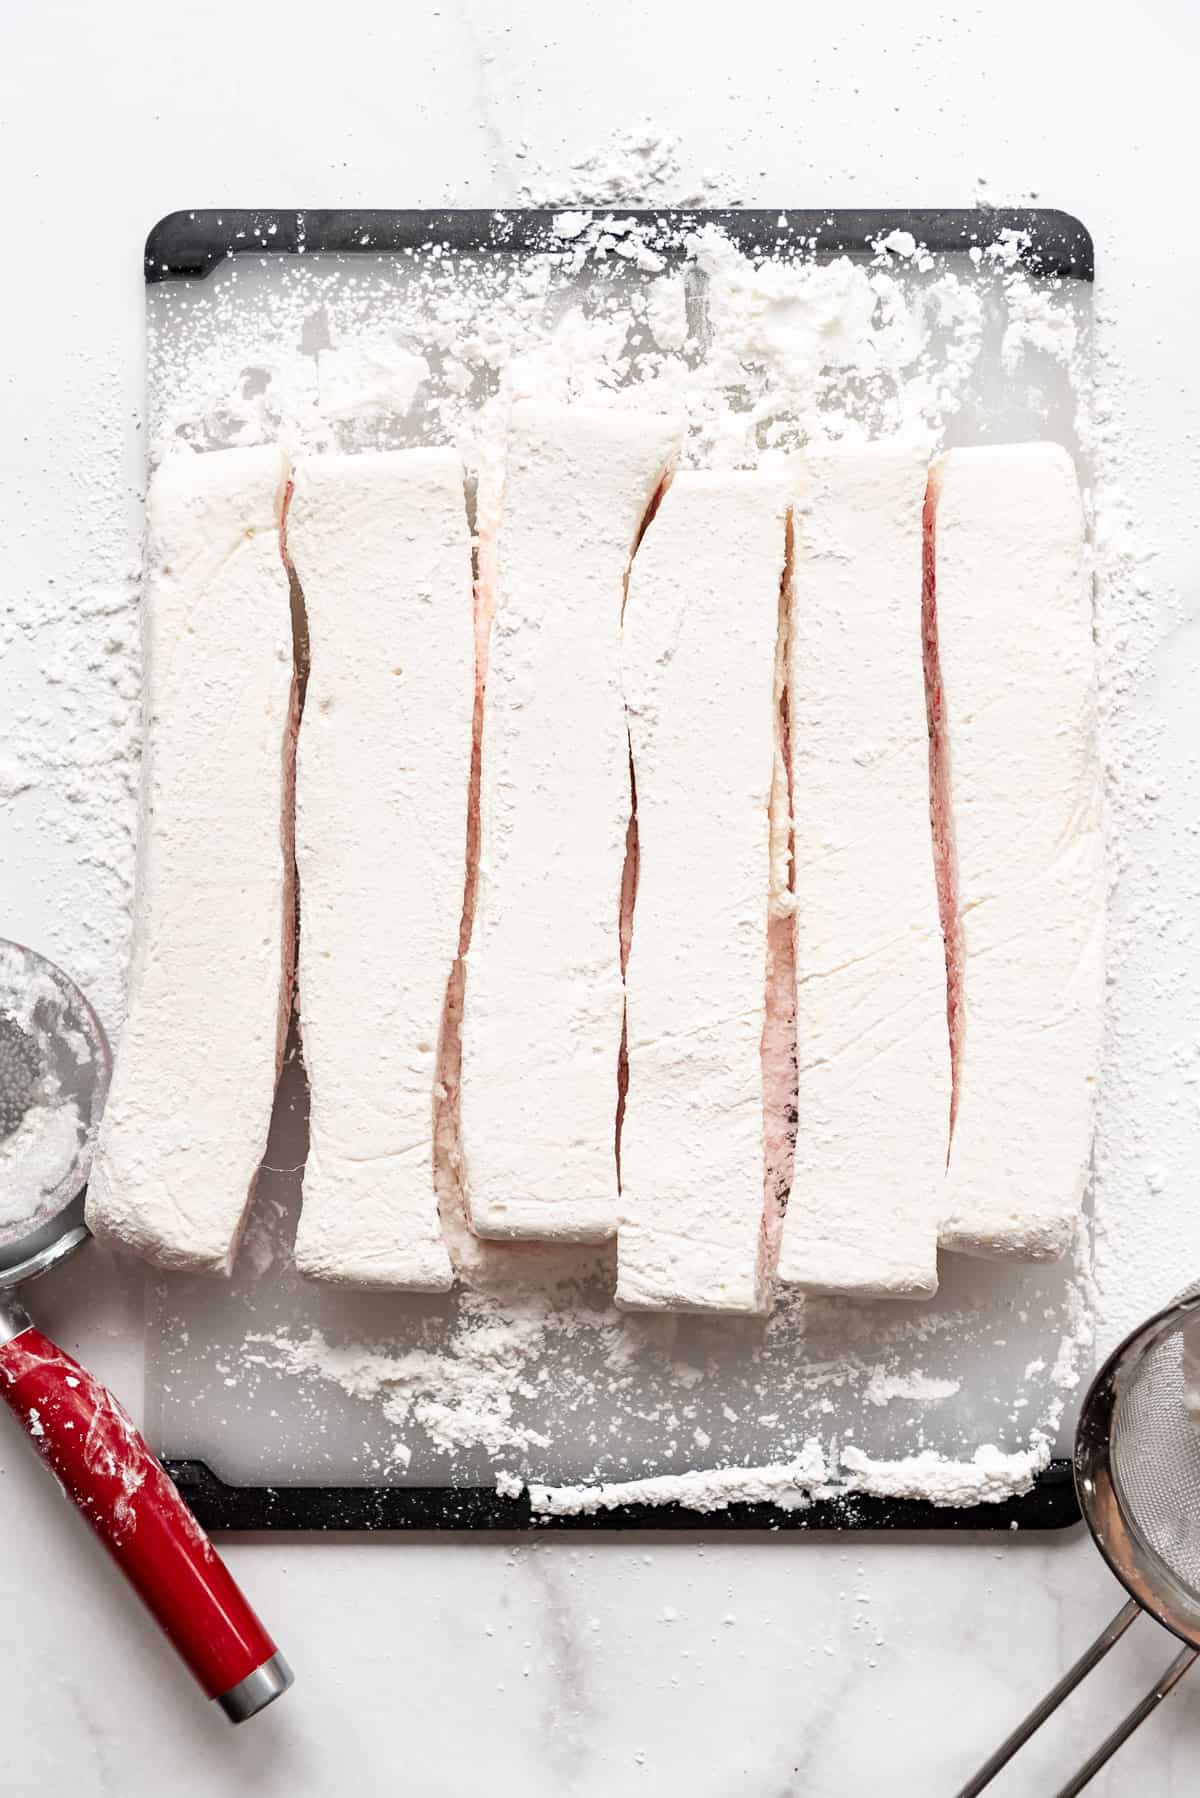
The freshly cut marshmallow will want to stick to itself, so just separate them and dip them in some of the excess powdered sugar and cornstarch mixture, dusting more on occasionally as needed.
Slice or cut the slab into six columns with a greased pizza cutter or pair of kitchen scissors. Then cut the long strips into 1 ½-inch cubes for 36 marshmallows. Toss them one more time in the dusting powder so they are fully coated, then shake a few at a time in your sieve to knock off excess powder before storing in an airtight container.
Recipe FAQ’s
Yes, you can mix in crushed candy canes during the last minute of mixing before pouring the ‘mallow mixture into the prepared pan. I would recommend about ½ cup.
You are speaking my language here! Yes, you sure can coat these marshmallows in melted dark, white, or milk chocolate for a special indulgent treat! We love the Ghiradelli melting wafers for this kind of candy-making because they melt easily and harden up with a shiny, smooth finish.
Recipe Tips
- Storage: Keep your peppermint marshmallows in an airtight container on the counter. They will be good for at least a couple of weeks.
- Tools: Don’t try making these with a hand mixer. It will likely burn out the motor. You’ll need a strong stand mixer that can stand up to the thick marshmallow mixture. You’ll also need a reliable candy thermometer (affiliate link). I have found that the cheap ones are my favorite over the fancy electric gadgets.
- Don’t rush the setting time: They really do need 4 hours to firm up before you cut into them so the marshmallows can cure.
- Use cooking spray: As long as you coat things in cooking spray, you should end up with a sticky mess. Also, be generous with your dusting mixture, which makes it easy to handle the peppermint marshmallows.
More Peppermint Recipes
- Peppermint Chocolate Chip Cookies
- Peppermint Bark Cheesecake
- Peppermint Ice Cream
- Peppermint Bark Caramel Corn

Did you make this recipe?
Let me know what you thought with a comment and rating below. You can also take a picture and tag me on Instagram @houseofnasheats or share it on the Pinterest pin so I can see.
Homemade Peppermint Swirl Marshmallows
Equipment
Ingredients
- 3/4 cup water divided
- 3 (.25-ounce) packages unflavored powdered gelatin (2 ½ Tablespoons)
- 2 cups granulated sugar (400g)
- 3/4 cup light corn syrup
- Pinch of salt
- 2 teaspoons vanilla extract
- 1/2 teaspoon peppermint extract (up to 1 teaspoon for a stronger peppermint flavor)
- Red gel food coloring (affiliate link)
- 1/2 cup powdered sugar
- 1/4 cup cornstarch

Instructions
- Line a 9×9-inch square pan with plastic wrap, then spray the plastic wrap with cooking spray. Spray a rubber spatula with cooking spray as well to use later. Set aside.
- Stir all of the powdered gelatin into ½ cup of the water in a small bowl, then let it sit for 5 minutes to bloom. Once the gelatin is a firm lump, dump it in the bowl of a stand mixer fitted with a whisk attachment.¾ cup water, 3 (.25-ounce) packages unflavored powdered gelatin
- Combine the remaining ¼ cup of water, sugar, corn syrup, and salt in a heavy duty medium saucepan over medium heat. Bring to a boil, stirring occasionally, until the mixture reaches 235 to 240°F on a candy thermometer (affiliate link) stuck on the side of the pan.2 cups granulated sugar, ¾ cup light corn syrup, Pinch of salt
- Slowly pour the hot sugar syrup in a thin stream over the gelatin in the mixer while it is running on medium speed over the course of 1-2 minutes. Once all of the liquid has been added, increase the speed to high and beat for 10 minutes, until fluffy and the marshmallow mixture has more than doubled in volume. Add the vanilla and peppermint extracts during the last minute of mixing to flavor the marshmallows.2 teaspoons vanilla extract, ½ teaspoon peppermint extract
- Pour the marshmallow mixture into the prepared baking dish using the rubber spatula sprayed with cooking spray to scrape it all out of the ball and to smooth it into the corners of the pan as needed.
- Drop dots of red food coloring (affiliate link) onto the top of the marshmallow mixture and immediately swirl it in using a knife or toothpick before the marshmallow has a chance to set up.Red gel food coloring (affiliate link)
- Whisk the powdered sugar and cornstarch together in a medium bowl, then sift about 2-3 tablespoons of this mixture over the marshmallow in the pan to cover the top. Reserve the rest for later.½ cup powdered sugar, ¼ cup cornstarch
- Let the pan of marshmallow rest for at least 4 hours or overnight.
- Turn out the pan of marshmallow onto a clean surface. Peel off the plastic wrap, then dust generously with more of the powdered sugar mixture. Spray a pizza cutter or pair of kitchen scissors with cooking spray and cut the slab of marshmallow into six columns, then across in six rows to create 36 large marshmallows. Dust generously with the remaining powdered sugar mixture while cutting to prevent the fresh marshmallows from sticking to each other.
- Shake off excess powder before storing in an airtight container. I find it easiest to throw a handful of the marshmallows into a fine mesh sieve and shake them around in it to get the excess powder off. Enjoy!
Notes
- Storage: These will stay fresh and delicious in an airtight container on the counter at room temperature for about 2 weeks.
- Chocolate marshmallows: You can coat these marshmallows in melted dark, white, or milk chocolate for a special indulgent treat! We love the Ghiradelli melting wafers for this kind of candy-making because they melt easily and harden up with a shiny, smooth finish.

Have you ever tried to make a sugar free version of the marshmallows?
No, I haven’t.
Where do you add the peppermint? Am I missing this because the recipe only says to add the vanilla extract when mixing?
Thanks for pointing that out! It goes in with the vanilla extract – I updated the recipe to reflect that so it is more clear!
Corn syrup in marshmallows – IF the marshmallows will be used as an ingredient where honey flavor is welcome (Like for s’mores to go with the graham crackers), I have used honey as a 1-1 replacement without adjusting anything else. They WILL retain the honey flavor.