A bubbly, crisp crust with signature sourdough tang makes the perfect base for the best kind of pizza night at home. My sourdough pizza crust can be made ahead so there is no stress when it’s time to assemble and bake with your favorite toppings.

Homemade sourdough pizza has everything I want in a great pizza crust: incredible flavor, a chewy and airy interior, crisp edges, and those wonderful bubbles that blister and brown in a hot oven. Add tomato sauce, plenty of melty mozzarella, and your favorite toppings and you have a pizza night that beats delivery any day.
The real secret to incredible pizza is giving the dough time.
This sourdough pizza dough spends 1 to 3 days slowly fermenting in the refrigerator, developing flavor and texture while you basically forget about it. When pizza night rolls around, all that’s left to do is divide, shape, top, and bake.
You can make this sourdough pizza in a regular home oven or use the dough in a high-temperature outdoor pizza oven like an Ooni or whatever version you have. Either way, you’re going to want to eat every last bite of the crust.
Why Sourdough Makes Such Good Pizza

I’ve made plenty of homemade pizza over the years, but there is something extra special about a sourdough crust that is absolutely worth the wait.
It is so satisfying watching a shaggy pile of flour, water, and sourdough starter transform into a beautifully elastic dough. I love when the crust puffs, the pepperoni curls at the edges, and the mozzarella starts bubbling and browning. It’s almost as much fun as eating the pizza!
Then there’s the flavor. A long fermentation gives the dough a depth and complexity that you just don’t get from a quick pizza dough. There’s a subtle sourdough tang, but it’s not overpowering. Instead, it makes the crust taste almost nutty and gives it enough flavor to stand up to whatever toppings you pile on.
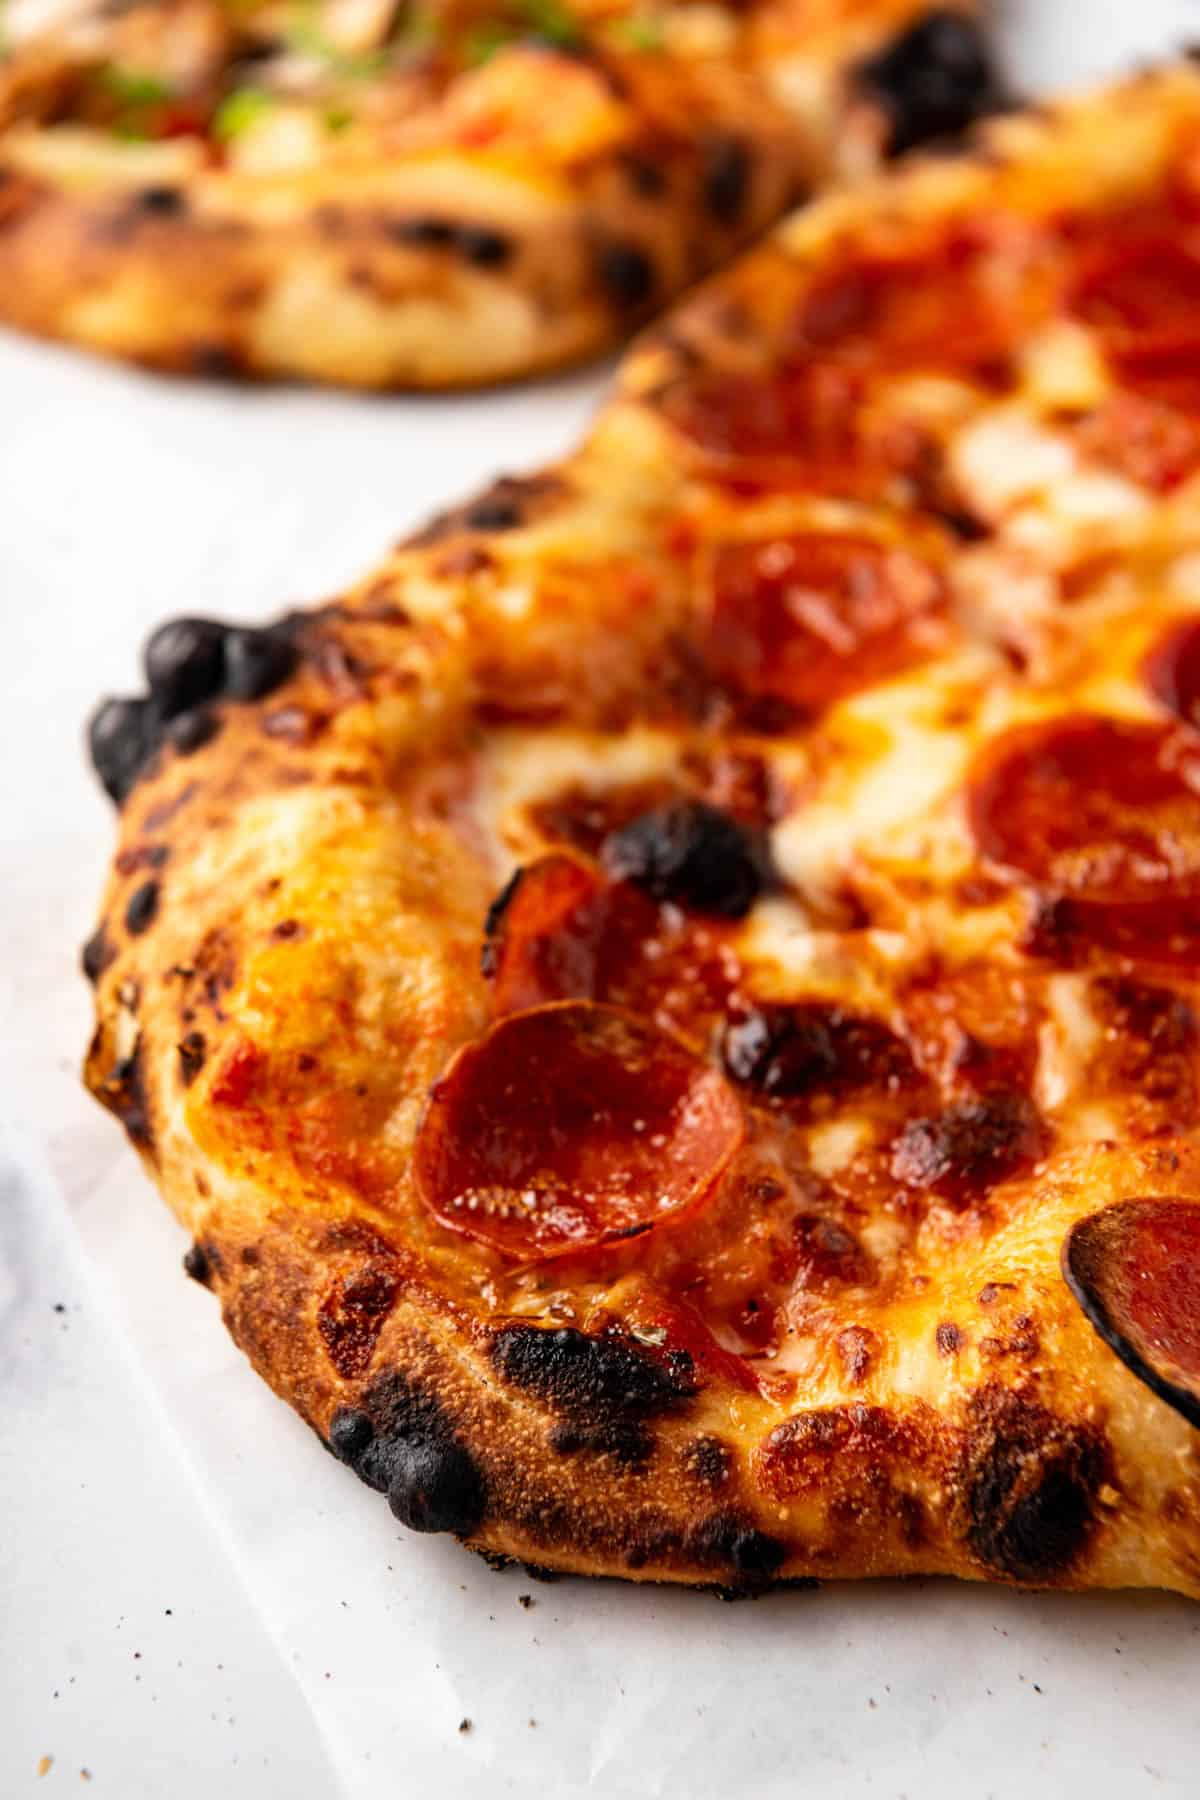
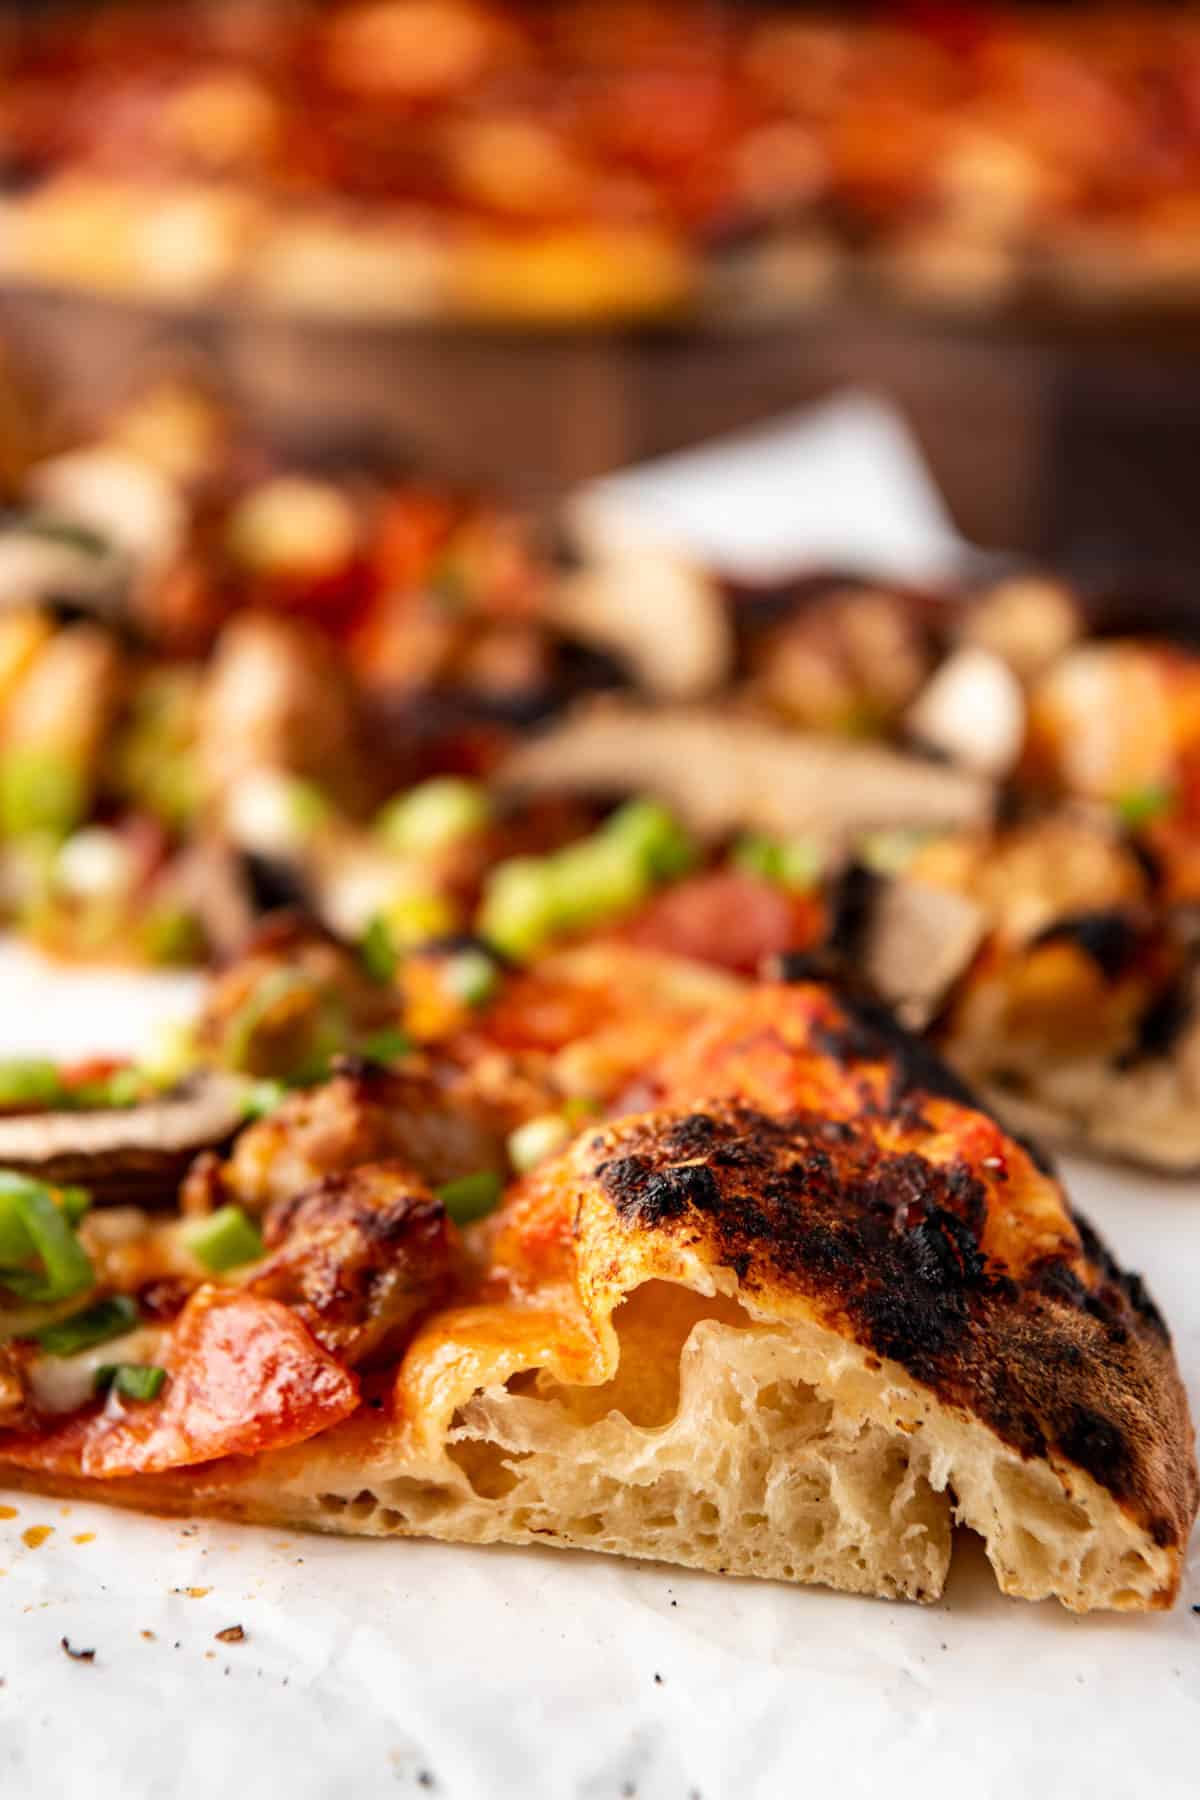
And of course a good sourdough pizza crust is crisp on the outside while staying chewy and tender inside. The natural fermentation also creates air pockets throughout the dough, which means those delicious bubbles around the edges can puff, blister, and brown as the pizza cooks.
While it takes longer than a traditional yeast pizza dough, most of that time is completely hands-off.
Ingredients You’ll Need
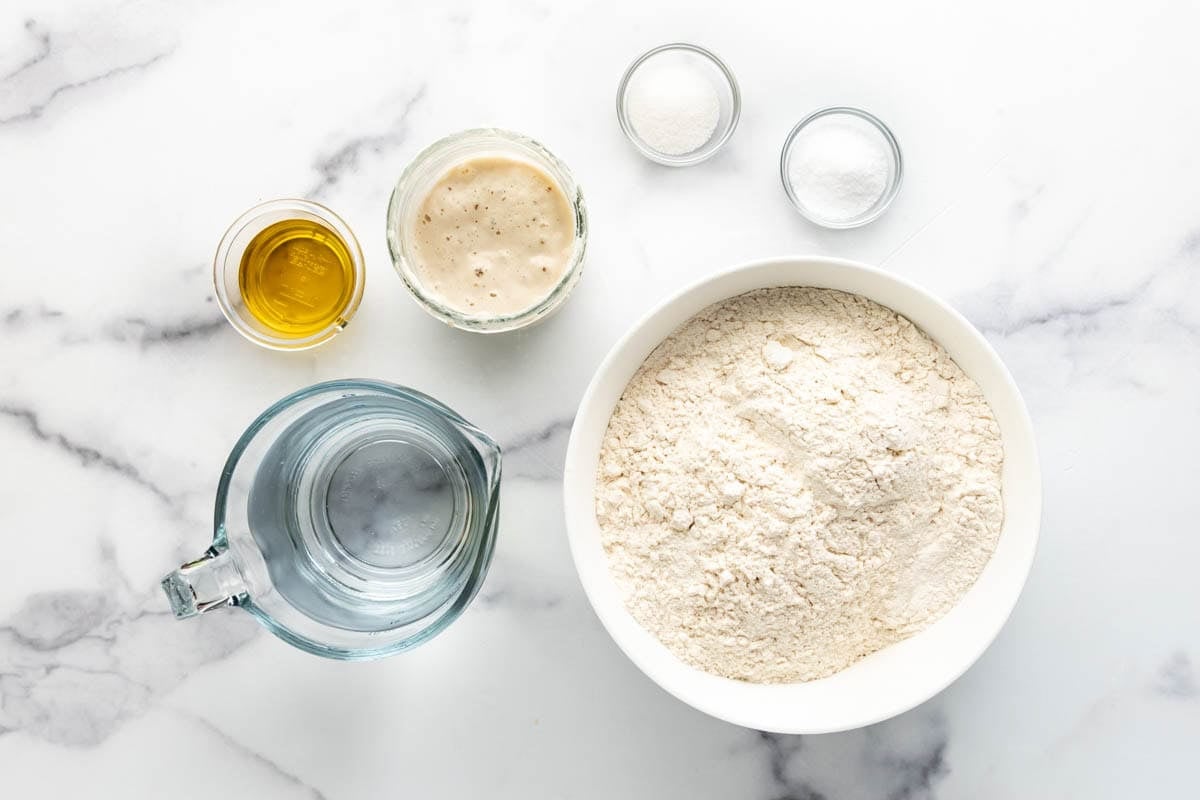
- Active sourdough starter: You want bubbly, active sourdough starter. Ideally, your starter should be recently fed and at or near its peak when you mix the dough.
- Warm water: Warm water helps get fermentation off to a good start.
- Sugar or honey: Gives the starter a little extra food for a solid rise and helps with browning.
- Olive oil: Adds flavor and tenderness to the dough.
- Bread flour: The higher protein content gives us the gluten structure we need for that wonderfully chewy pizza crust.
- Kosher salt: Seasons the dough and helps brings out all of that wonderful fermented flavor.
Once the dough is ready, you will also need pizza sauce (even a good quality tomato sauce with a sprinkle of oregano will do!), mozzarella cheese, and your favorite pizza toppings. That’s it!
How to Make Sourdough Pizza Dough
- Combine the starter and water. Add the warm water and bubbly sourdough starter to a large container or bowl. Mix to loosen and disperse the starter throughout the water.
- Mix the dough. Add the sugar, olive oil, and salt and mix to combine. Add the bread flour and stir until roughly combined. I usually end up using my hands to work in any remaining dry flour. When you first mix the dough, it will look shaggy and rough, which is totally normal.
- First rest. Cover or seal the container and let the dough rest and hydrate for 1 hour. This first rest gives the flour time to fully absorb the water and allows gluten development to begin naturally. This rest helps build structure in the dough before you even begin the coil folds.
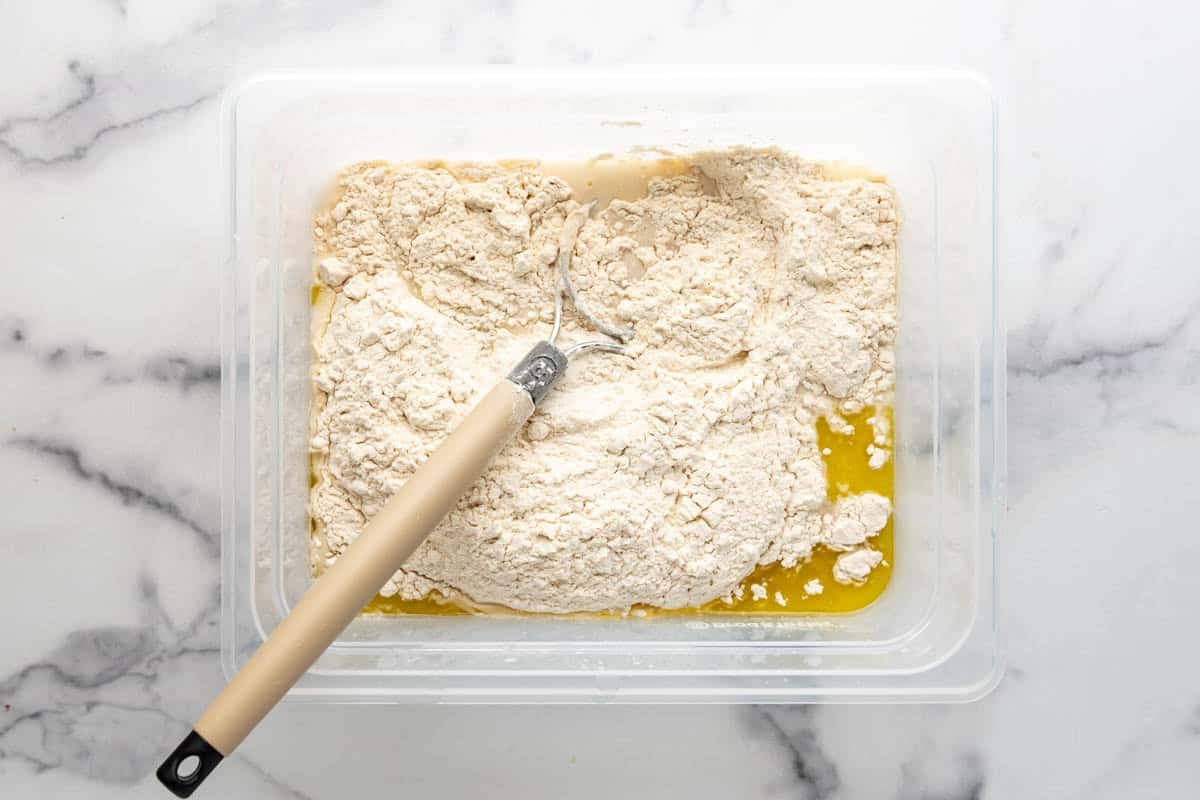
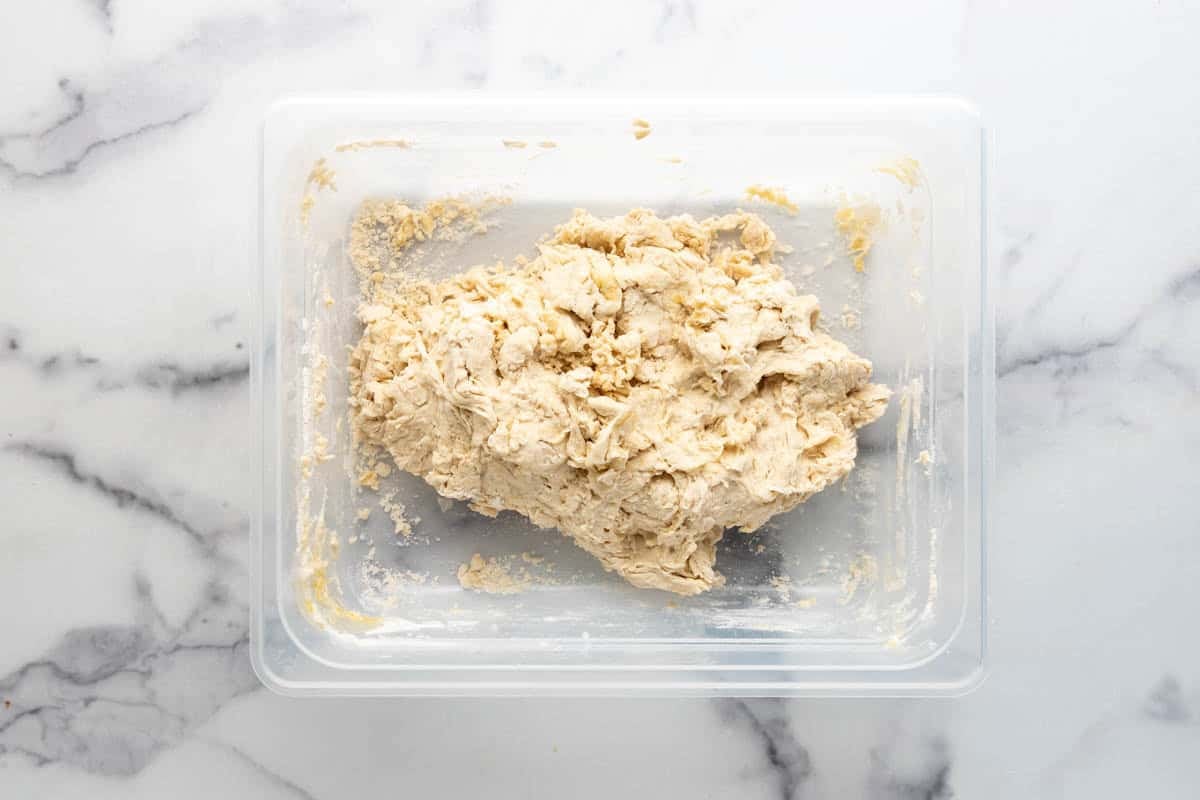
- Do the first coil fold. Wet your hands so the dough doesn’t stick to them. Reach both hands underneath the center of the dough and gently lift it so the ends stretch downward, then tuck them underneath. Rotate the container and repeat. The goal isn’t to aggressively knead the dough. We’re gently stretching and folding it to develop gluten structure. I’m always amazed that after just an hour of resting, the dough already feels more cohesive, softer, and easier to stretch. Even on this first set of folds it will look smoother and more like normal bread dough.
- Rest again for 1 hour. Cover and let the dough rest for another hour.
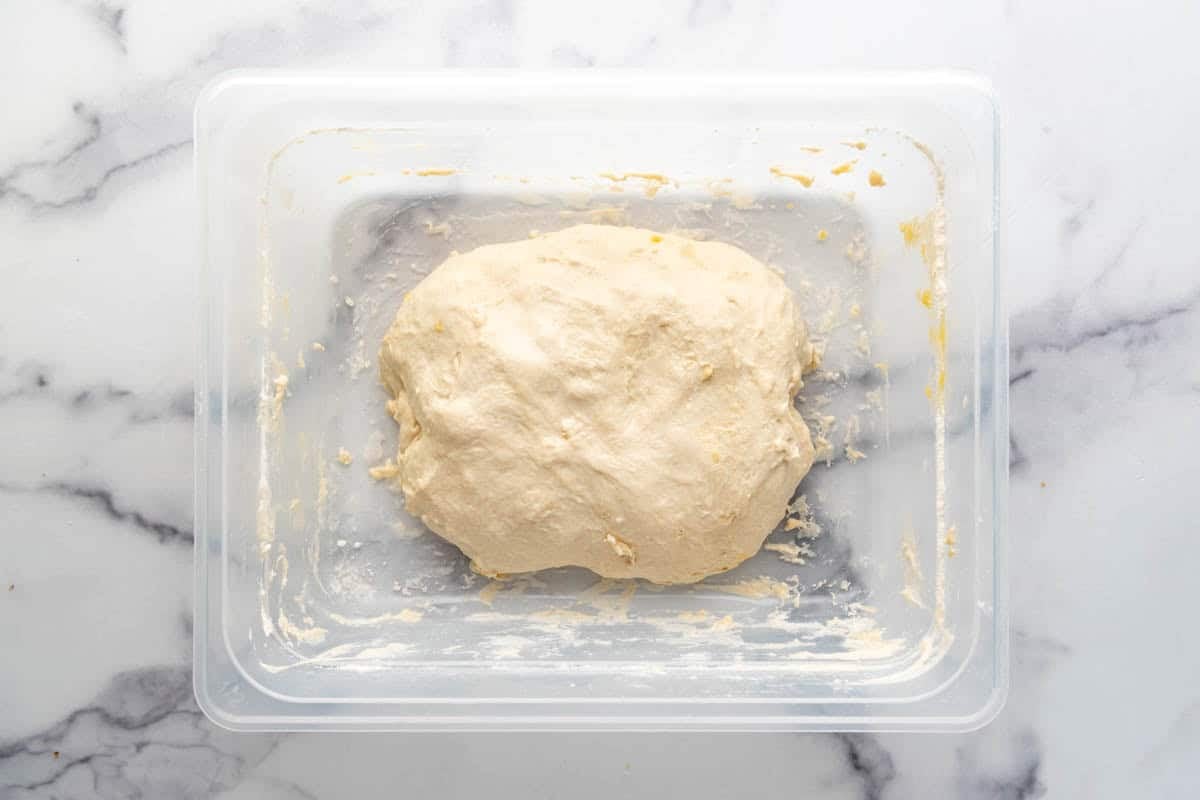
- Repeat the coil folds and rests two more times, resting the dough for 1 hour between each set. It’s 4 hours of rising time with 3 sets of coil folds. The dough should be noticeably smoother by the end.
- Shape into a ball. After the final rise, turn the dough out onto a clean, unfloured or very lightly floured surface so the dough has just enough grip on the counter. Cup both hands around the back of the dough and gently pull it toward you, then rotate and repeat until it feels smooth, round, and slightly taut. Transfer the dough to a clean bowl drizzled with a little olive oil, then rub some of the olive oil lightly over the top of the dough before covering. Alternately, you could separate the dough into separate balls and shape each of them at this point, but I also just do one big ball and then divide it later.
If the dough sticks to your surface badly when rolling into a ball to create tension, you can dust the counter very lightly with flour, but avoid adding too much or the dough will just slide around. The gentle dragging motion against the counter tightens the outside of the dough, creating surface tension that helps it hold its shape and structure as it ferments.
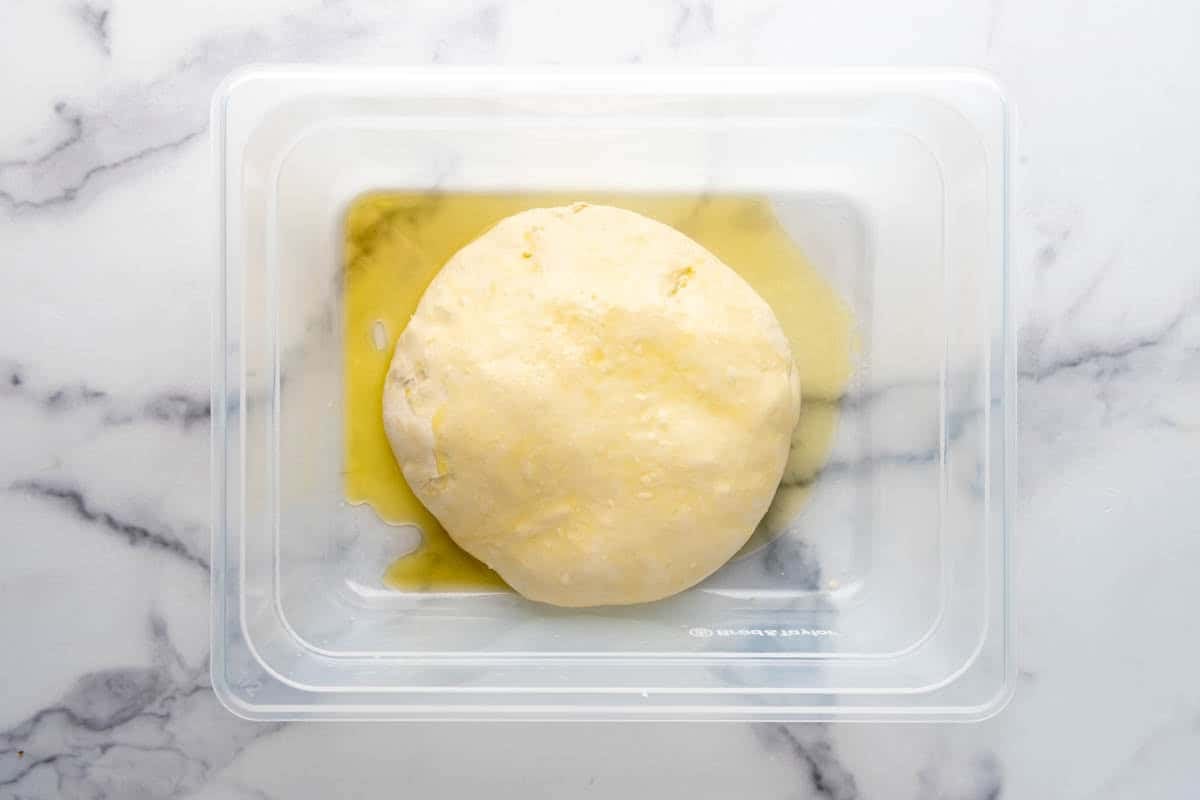
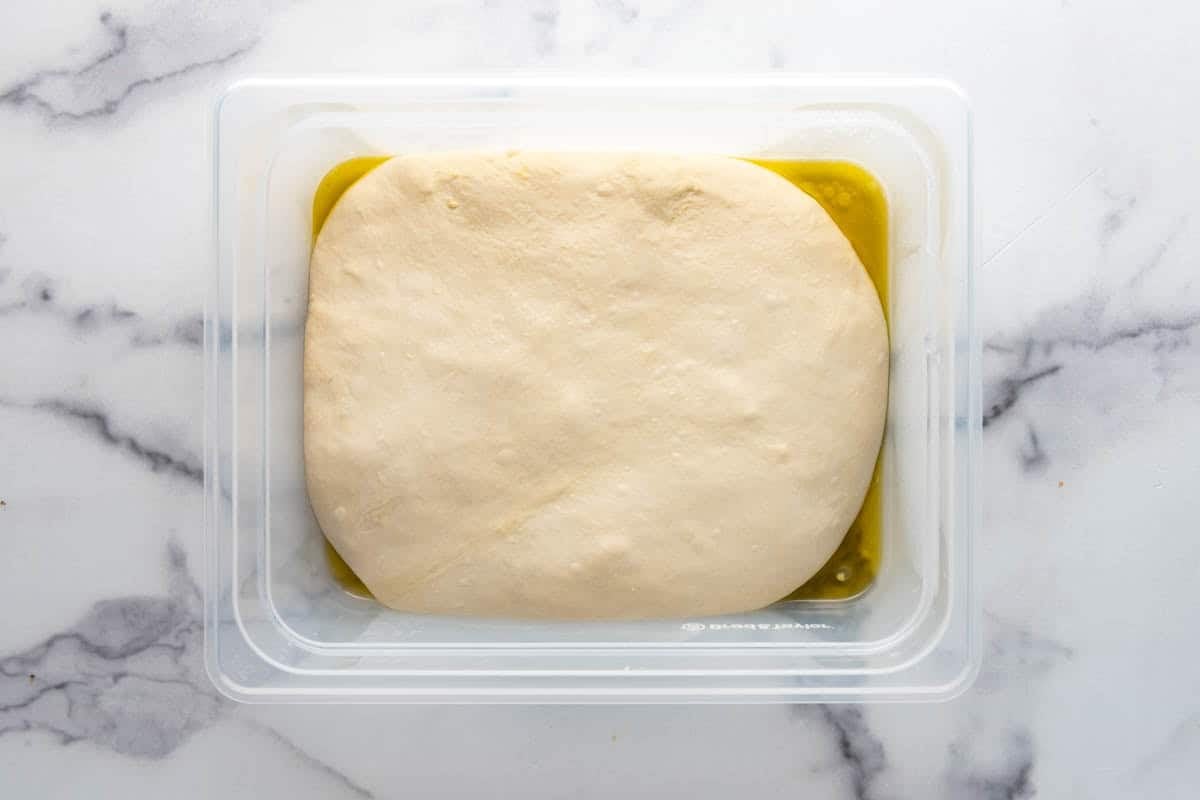
- Cold ferment for 1-3 days. This is the hardest part but important because a lot of the wonderful sourdough pizza flavor and texture develop by this slow rise in the fridge. The slow, cold fermentation gives the dough time to mature and develop complexity, but it also has the added benefit of making this recipe surprisingly convenient. Below you’ll see the dough when it first goes into the fridge and what it looked like 48 hours later before I made it into pizzas.
Dividing and Shaping the Dough
When you are ready to make your pizzas, remove the dough from the refrigerator and let it sit on the counter at room temperature for 30 minutes so it is easier to work with.
Turn the dough onto a floured work surface and divide it into 3-4 equal portions, depending on how big you want your pizzas to be. Shape each portion into a ball, then use your hands to gently press and stretch it into a circle on a floured surface.
My favorite technique is to use my fingers to press and dimple around the edges of the circle to create a crust border about 1/2-inch wide. Then I lift the dough and use my knuckles of both hands to gently stretch the dough into a circle (take rings off first!). You can also use gravity to help stretch out the dough until you get it thin enough and to a size you like. My pizzas usually aren’t perfectly round, and that’s okay!
If the dough keeps springing back or fighting you, don’t force it. Let it rest on the counter for another 15-30 minutes so the gluten can relax, then try again. I do not recommend using a rolling pin when shaping pizza dough. It can flatten all of those wonderful air pockets that developed during fermentation.
How to Make Sourdough Pizza in a Regular Oven
You absolutely do not need a pizza oven to make homemade sourdough pizza! But I do use a slightly different technique for a conventional oven because home ovens can’t reach the extreme temperatures of dedicated pizza ovens.
Start by preheating the oven as high as it goes to 500°F (260°C) for most home ovens.
Shape one dough ball into a pizza crust on a generously floured surface, then brush the dough all over with olive oil, and poke it all over with a fork. This keeps the center from puffing dramatically during the initial bake.
Transfer the crust to the oven and parbake for 8-10 minutes. Remove the crust from the oven and brush it again with a little olive oil.
Now add your sauce, cheese, and toppings. Return the pizza to the oven and bake for another 8-10 minutes, until the cheese is melted and bubbling and the crust is beautifully golden brown.
That initial parbake helps ensure the sourdough crust cooks all the way through rather than becoming soggy underneath the sauce and toppings.
How to Make Sourdough Pizza in a Pizza Oven
If you’re lucky enough to have an outdoor pizza oven, you can use the same sourdough dough but change the baking method. We got an outdoor pizza oven a couple years ago and love it, so if you find yourself making lots of sourdough pizza, it might be worth the investment.
For starters, do not poke the dough all over with a fork or parbake it first. In a pizza oven, we want those bubbles!
Preheat your pizza oven thoroughly according to the manufacturer’s directions. The cooking surface needs to be fully heated before you launch your first pizza or you will have trouble with it sticking to the bottom while overcooking on top.
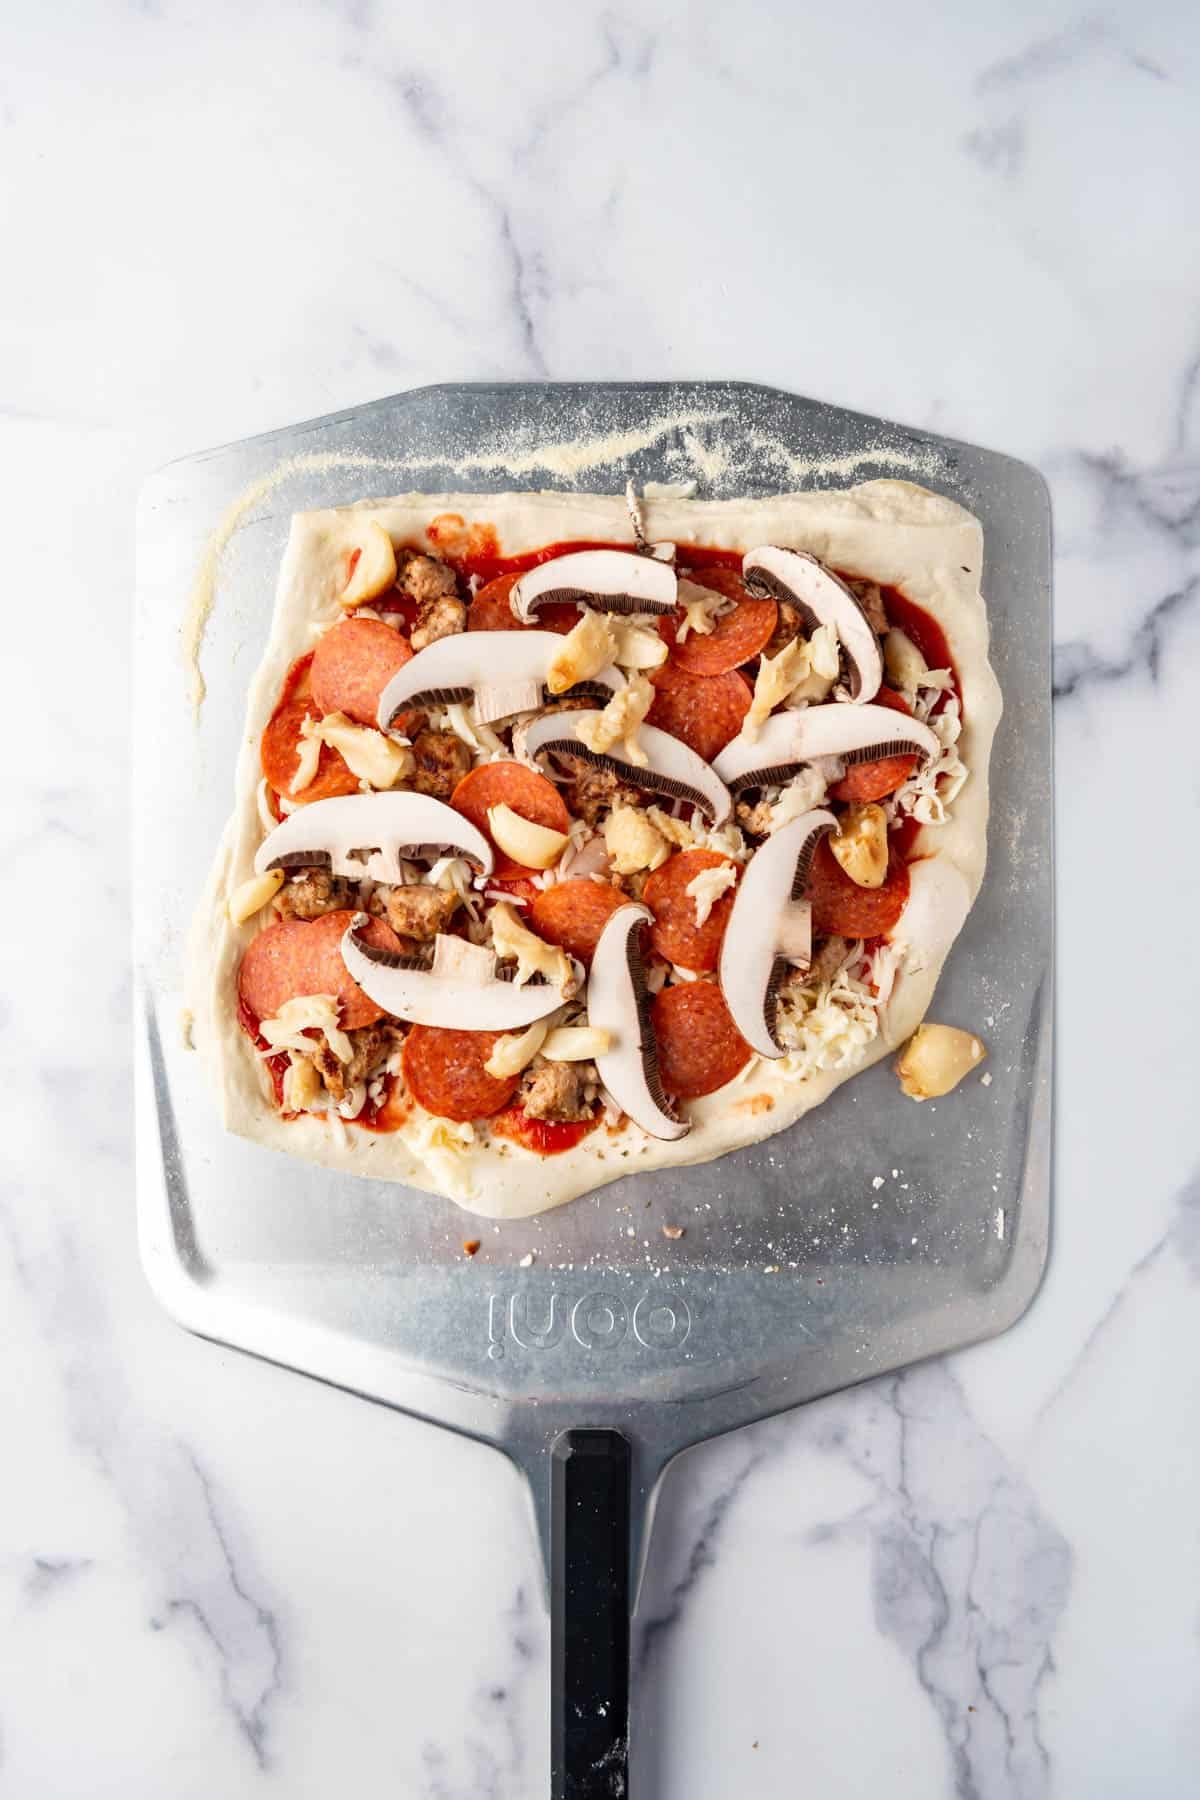
Generously dust a pizza peel with flour or semolina, then gently stretch a dough ball into a pizza. Transfer the dough to the peel and give it a little shake to make sure it slides. If not, fix the problem now by carefully lifting any sticky areas and getting a little more flour or semolina underneath them.
Spread on a thin layer of sauce, add cheese, then your toppings. Work quickly once the dough is on the peel. The longer a topped pizza sits there, the more likely it is to stick. Launch the pizza into the hot oven and rotate as needed while it cooks.
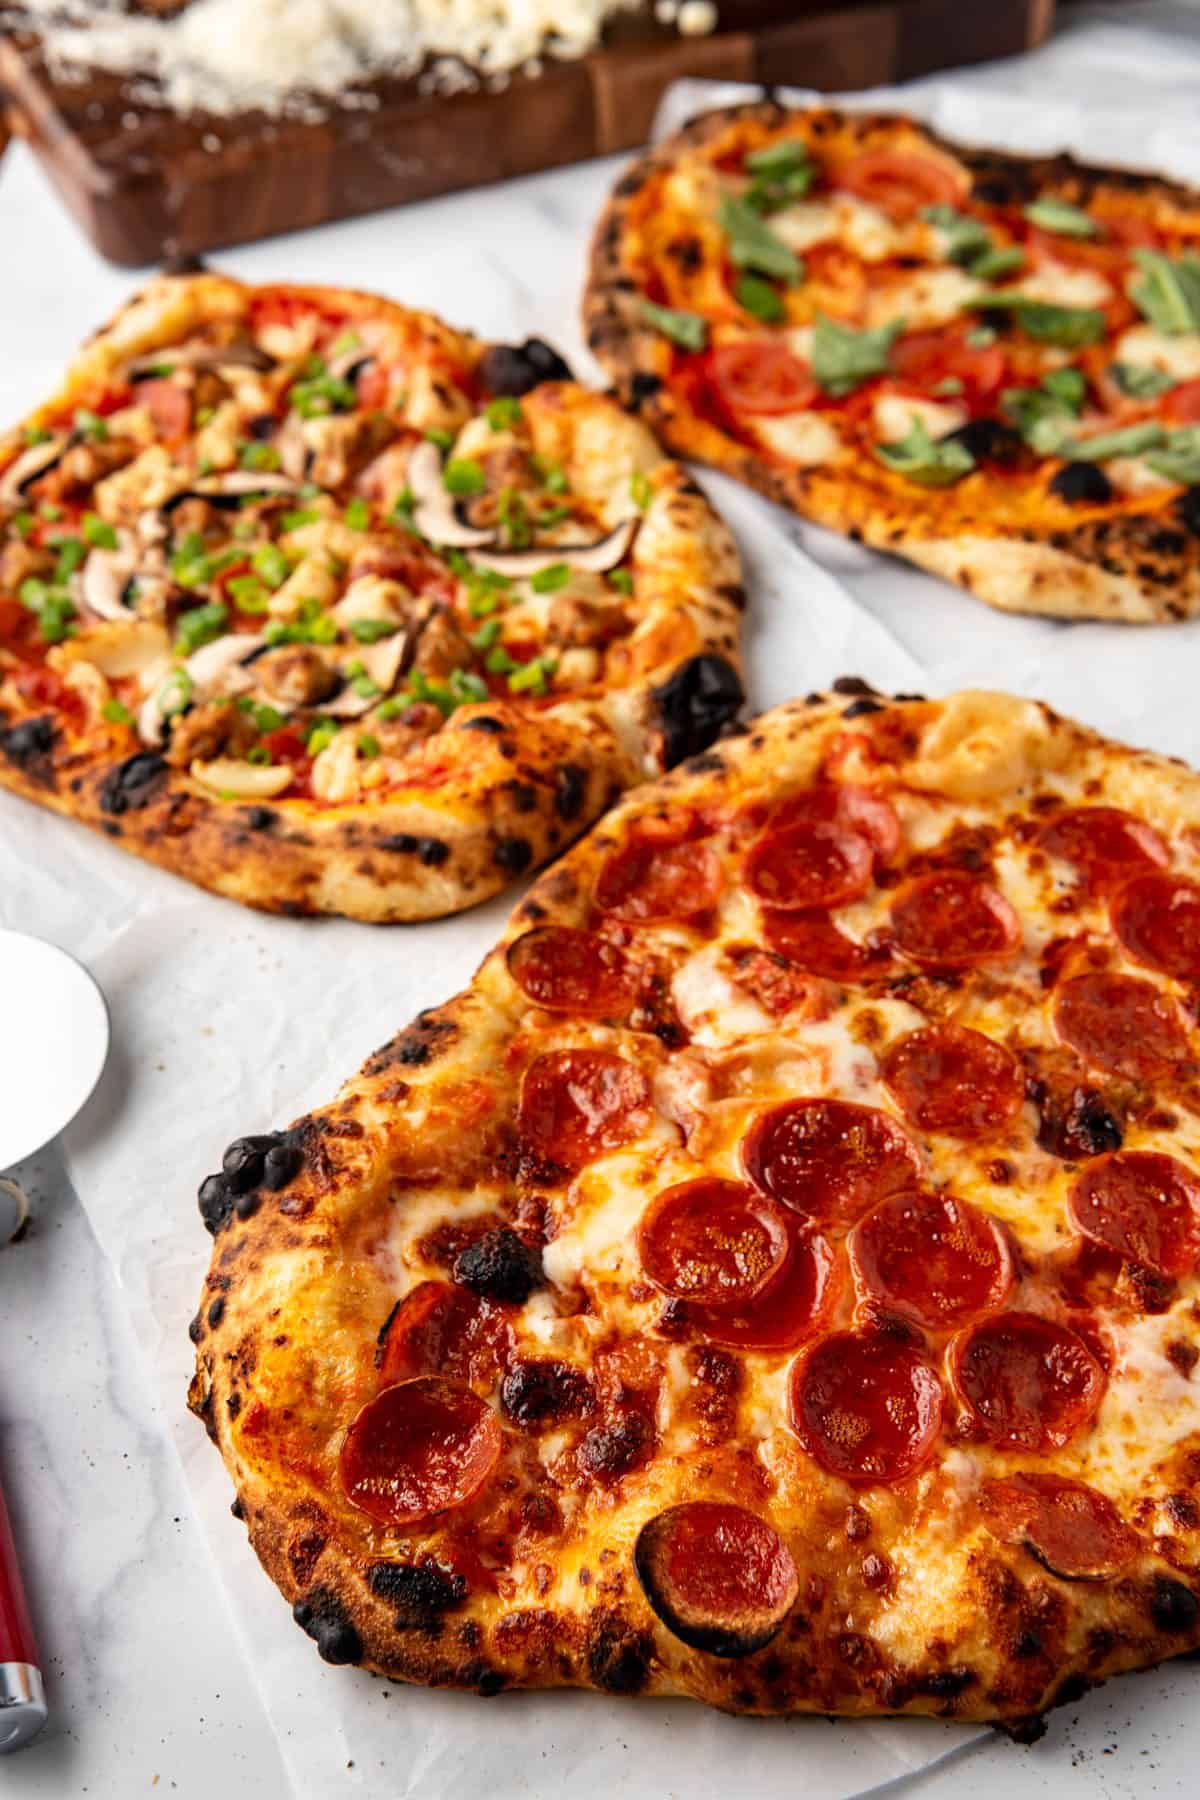
At pizza-oven temperatures, everything happens fast. You’re looking for a puffed, blistered crust with beautifully charred spots and bubbling, browned cheese.
The Easiest Homemade Pizza Sauce
Don’t overthink the sauce. I have an excellent 5 minute, no-cook pizza sauce that is better than any storebought jar, but with sourdough pizza I actually prefer something ridiculously simple. I literally just use a good quality can of tomato sauce + a sprinkle of dried oregano. That’s it!
You can add a little salt, garlic, or olive oil if you like, but you don’t need to cook the sauce beforehand or even mix anything together. The biggest trick is to use less sauce than you think you need.
A thin layer gives you plenty of tomato flavor without weighing down your beautiful sourdough crust or making the center soggy.
Please Shred Your Own Mozzarella
If you’re already going to the trouble of making sourdough pizza dough from scratch, buy a block of mozzarella and shred it yourself. Or have your kids do it. It is SO much better.
Bagged shredded mozzarella is convenient, but it’s typically coated with anti-caking ingredients that keep the individual shreds from sticking together. Unfortunately, that also affects how smoothly the cheese melts.
Freshly shredded low-moisture mozzarella melts into that gorgeous, stretchy, gooey blanket of cheese that makes homemade pizza so irresistible. It’s a tiny extra step that makes a noticeable difference.
Our Favorite Sourdough Pizza Toppings
One of the best parts about homemade pizza night is making several pizzas and trying different combinations. Just remember: Don’t overload your pizza. Especially when using a pizza oven, too many toppings can weigh down the dough and leave you with a soggy center.
- Pepperoni + Hot Honey. An updated classic that is everyone’s current obsession. The combination of spicy pepperoni, salty melted cheese, sweet heat from the honey, and chewy, tangy sourdough crust is ridiculously good.
- Classic Neapolitan-Inspired Pizza. Sometimes simple really is best. Top your dough with a thin layer of tomato sauce and pieces of fresh mozzarella (the wet kind that you tear apart instead of grating), then bake until the crust is puffed and blistered. Finish with fresh basil leaves and a drizzle of good olive oil. With so few toppings, you really get to appreciate the flavor of the sourdough crust.
- Prosciutto & Arugula. Bake the pizza with tomato sauce and mozzarella, then top it after baking with thinly sliced prosciutto, fresh arugula, shaved Parmesan, and a drizzle of olive oil. So good.
- Big Sur (Pizza My Heart Copycat). If you aren’t familiar, Pizza My Heart is a Northern California pizza chain that started in Capitola, and their Big Sur pizza is legendary. It’s loaded with pepperoni, cooked Italian sausage crumbles, portobello mushrooms, green onions, and LOTS of roasted garlic (40 cloves to be exact)! It’s bold, savory, garlicky, and exactly the kind of loaded California pizza that works beautifully with a chewy sourdough crust.



Tips for the Best Sourdough Pizza
- Use an active, bubbly starter. Your sourdough starter is doing the heavy lifting here, so you want it healthy and active before mixing your dough.
- Don’t skip the cold ferment. Those 1-3 days in the refrigerator aren’t just about scheduling. They’re developing flavor.
- Wet your hands for coil folds. It makes handling sticky dough dramatically easier.
- Don’t add a bunch of extra flour to the dough. The dough will become smoother and easier to handle as the gluten develops.
- Make sure your pizza slides on the peel BEFORE you launch it. A little shake can save you from the heartbreak of watching your beautifully topped pizza fold itself into a calzone as you try to get it into the oven.
Sourdough and San Francisco: A Bay Area Love Story
If you’re not from the San Francisco Bay Area, you should know that sourdough is a big part of our culinary identity dating back to the California Gold Rush in 1849. The city’s cool, foggy climate helped turn sourdough into one of San Francisco’s most iconic foods. It’s hard to picture Fisherman’s Wharf without thinking of a crusty sourdough bread bowl filled with clam chowder!
And if you need any further proof that San Francisco takes its sourdough seriously, just look at its football team. The official mascot of the San Francisco 49ers is a mustachioed Gold Rush miner named Sourdough Sam.
Recipe FAQ’s
Sourdough pizza uses naturally fermented sourdough starter rather than relying solely on commercial yeast. The longer fermentation develops a more complex flavor and contributes to the crust’s wonderfully chewy, airy texture.
No. There is a pleasant tang, but the flavor shouldn’t be overwhelmingly sour. Think of it as deeper, more complex pizza crust rather than aggressively sour bread.
Cold fermentation develops flavor while allowing the dough to mature slowly. It’s one of the reasons this crust tastes so much better than a pizza dough made just a couple of hours before dinner.
Yes! That’s actually one of the best things about this recipe. Make the dough 2-3 days before pizza night and let it ferment in the refrigerator until you’re ready.
Yes. Use 100 grams of sourdough discard and let the mixed dough bulk ferment at room temperature overnight before doing your stretch-and-folds the next morning.
The gluten is too tight. Let the dough sit, covered, for about 15 minutes before trying again. The gluten will relax and the dough should become much easier to stretch.
A dense crust can be caused by an inactive starter, insufficient fermentation, or pressing too much of the air out while shaping. Make sure your starter is bubbly and active and handle the fermented dough gently.
Yes. Divide the dough into individual portions and freeze the dough balls in airtight freezer-safe containers or bags. Thaw overnight in the refrigerator, then allow the dough to come to room temperature and relax before shaping.
You can, although the texture will be slightly different. I prefer bread flour because its higher protein content helps create the chewy structure I want in pizza crust.
When using a conventional home oven, I parbake the crust for 8-10 minutes before adding the toppings. This gives the thicker sourdough crust a head start and helps prevent a soggy or underbaked center. You don’t need to do this when using a high-temperature pizza oven.
For classic pizza, I love whole-milk, low-moisture mozzarella that I shred myself. It melts beautifully without adding too much moisture. For a Neapolitan-inspired pizza, use well-drained fresh mozzarella.
Usually the dough was too wet underneath, there wasn’t enough flour or semolina on the peel, or the topped pizza sat on the peel for too long. Give the pizza a little shake before you add toppings and again immediately before launching it. It should slide freely.
No. This recipe is specifically designed so you can make great sourdough pizza in a regular oven using the parbake method. If you have a pizza stone or steel, you can certainly use it, but don’t let the lack of specialized equipment stop you from making pizza.
More Sourdough Recipes
- Homemade Sourdough Bagels
- Easy Sourdough Bread
- Soft Sourdough Sandwich Bread
- Overnight Sourdough Waffles

Sourdough Pizza
Ingredients
Dough
- 1/2 cup (115g) bubbly active sourdough starter
- 2 cups (472g) warm water
- 2 Tablespoons (30g) olive oil
- 2 teaspoons (10g) granulated sugar or honey
- 5 cups (705g) bread flour
- 2 teaspoons (10g) kosher salt
Toppings
- tomato sauce + a sprinkle of oregano or your favorite pizza sauce
- freshly grated mozzarella cheese
- your favorite pizza toppings
Instructions
To make the dough:
- Combine water and sourdough starter. Mix to loosen the sourdough starter.½ cup (115g) bubbly active sourdough starter, 2 cups (472g) warm water
- Add olive oil, sugar, and salt. Mix. Add bread flour and mix until roughly combined. Use hands if needed to mix in any dry flour but it's okay for it to be shaggy. Seal the container or cover. Let the dough rest for 1 hour.2 Tablespoons (30g) olive oil, 2 teaspoons (10g) granulated sugar or honey, 2 teaspoons (10g) kosher salt, 5 cups (705g) bread flour
- Wet hands then do coil folds, tucking and rotating the dough. Let rest for another hour.
- Repeat 2 more times (a total of 4 hours of rising with 3 sets of coil folds). You should end up with a smooth ball of dough.
- Turn the dough out onto a clean, unfloured or very lightly floured surface so the dough has just enough grip on the counter. Cup both hands around the back of the dough and gently pull it toward you, then rotate and repeat until it feels smooth, round, and slightly taut. Alternately, you could separate the dough into separate balls and shape each of them at this point, but I also just do one big ball and then divide it later.
- Coat the dough lightly in a drizzle of olive oil and return to the container. Bulk ferment in the fridge for 2-3 days until ready to divide into dough balls and use.
To make the pizza:
- Remove the dough from the fridge. Let it sit out on the counter at room temperature for 30 minutes, then divide the dough into 3 to 4 evenly sized balls. Preheat your oven, whether using a home oven or pizza oven.
- Shape each dough ball into a circle on a floured surface using your hands. If the dough is difficult to shape, let it rest for 15 minutes on the counter so the gluten can relax. My favorite technique is to use my fingers to press around the edges of the circle to create a crust border about 1/2-inch wide. Then I lift the dough and use my knuckles of both hands to gently stretch the dough into a circle (take rings off first!). You can also use gravity to help stretch out the dough until you get it thin enough and to a size you like. I do not recommend using a rolling pin (affiliate link).
- Home Oven Method: Preheat oven to 500℉ (260℃). Brush all over with olive oil and poke all over with a fork. Parbake for 8-10 minutes. Remove from oven, brush again with olive oil. Add a thin layer of tomato sauce and sprinkle with oregano and cheese. Add any additional toppings. Bake for another 8-10 minutes.tomato sauce + a sprinkle of oregano, freshly grated mozzarella cheese, your favorite pizza toppings
- Pizza Oven Method: Preheat your pizza oven thoroughly according to the manufacturer's directions. Do not poke the dough with a fork or parbake like in the regular oven method. Generously dust a pizza peel with flour or semolina, then transfer the stretched dough to the peel and give it a little shake to make sure it slides. Add a thin layer of sauce and sprinkle with cheese. Add any additional toppings. Work quickly once the dough is on the peel. The longer a topped pizza sits there, the more likely it is to stick. Launch the pizza into the hot oven and rotate as needed while it cooks, usually around 5-8 minutes.
Notes
- Nutrition Disclaimer: The nutrition information was calculated using an online tool just for the pizza dough and not including any sauce, cheese, or toppings. For the most accurate information, you might want to perform your own calculations.
- Using sourdough discard for pizza dough: You can also make this recipe using sourdough discard. Use 100 grams of sourdough discard in place of the active starter. Combine all of the dough ingredients in a bowl and mix well, then leave the dough to bulk ferment on the counter overnight. The next morning, perform the stretch-and-folds before continuing with the recipe. This is a great option when you have extra discard that needs to be used up.