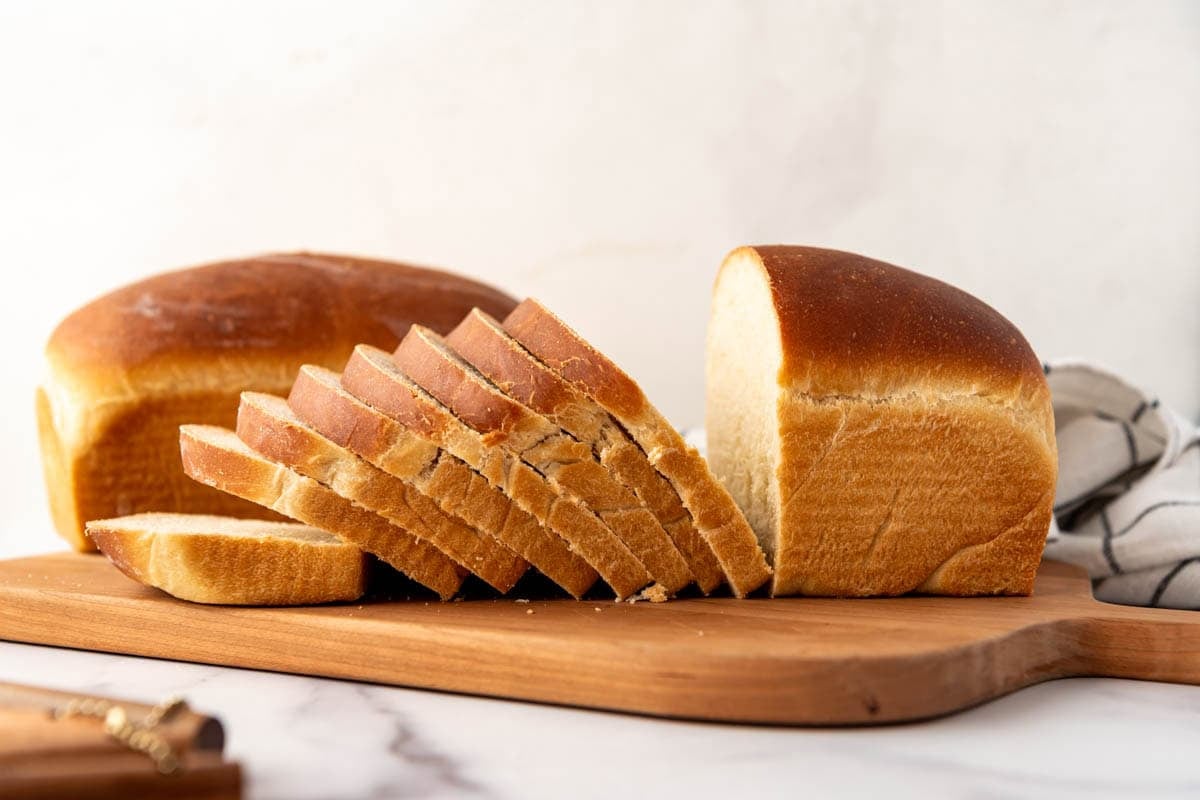
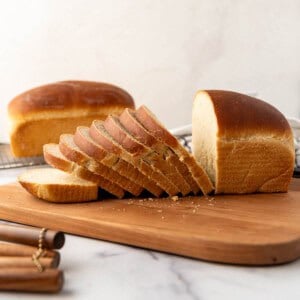
Stop buying bread from the store! Our go-to recipe for soft white bread with sourdough starter has just a hint of sweetness and light sourdough tang. It slices beautifully, is the perfect sandwich bread for PB&J’s or a ham & cheese, and the recipe makes two golden brown loaves so you can slice and freeze one for later.

I grew up with homemade bread being a regular thing at our house. There is nothing better than the smell of fresh baked bread coming out of the oven! After baking dozens and dozens of loaves of crusty sourdough bread, I realized that a sourdough version of our reader favorite Amish white bread was in order.
One thing I learned during the recipe testing process for this bread is that you want to be sure to include the honey to add flavor and just a touch of sweetness to balance out the sourdough.
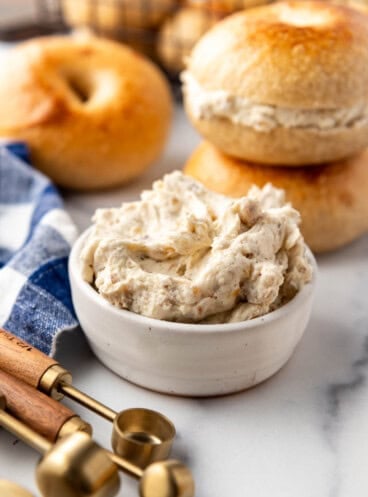
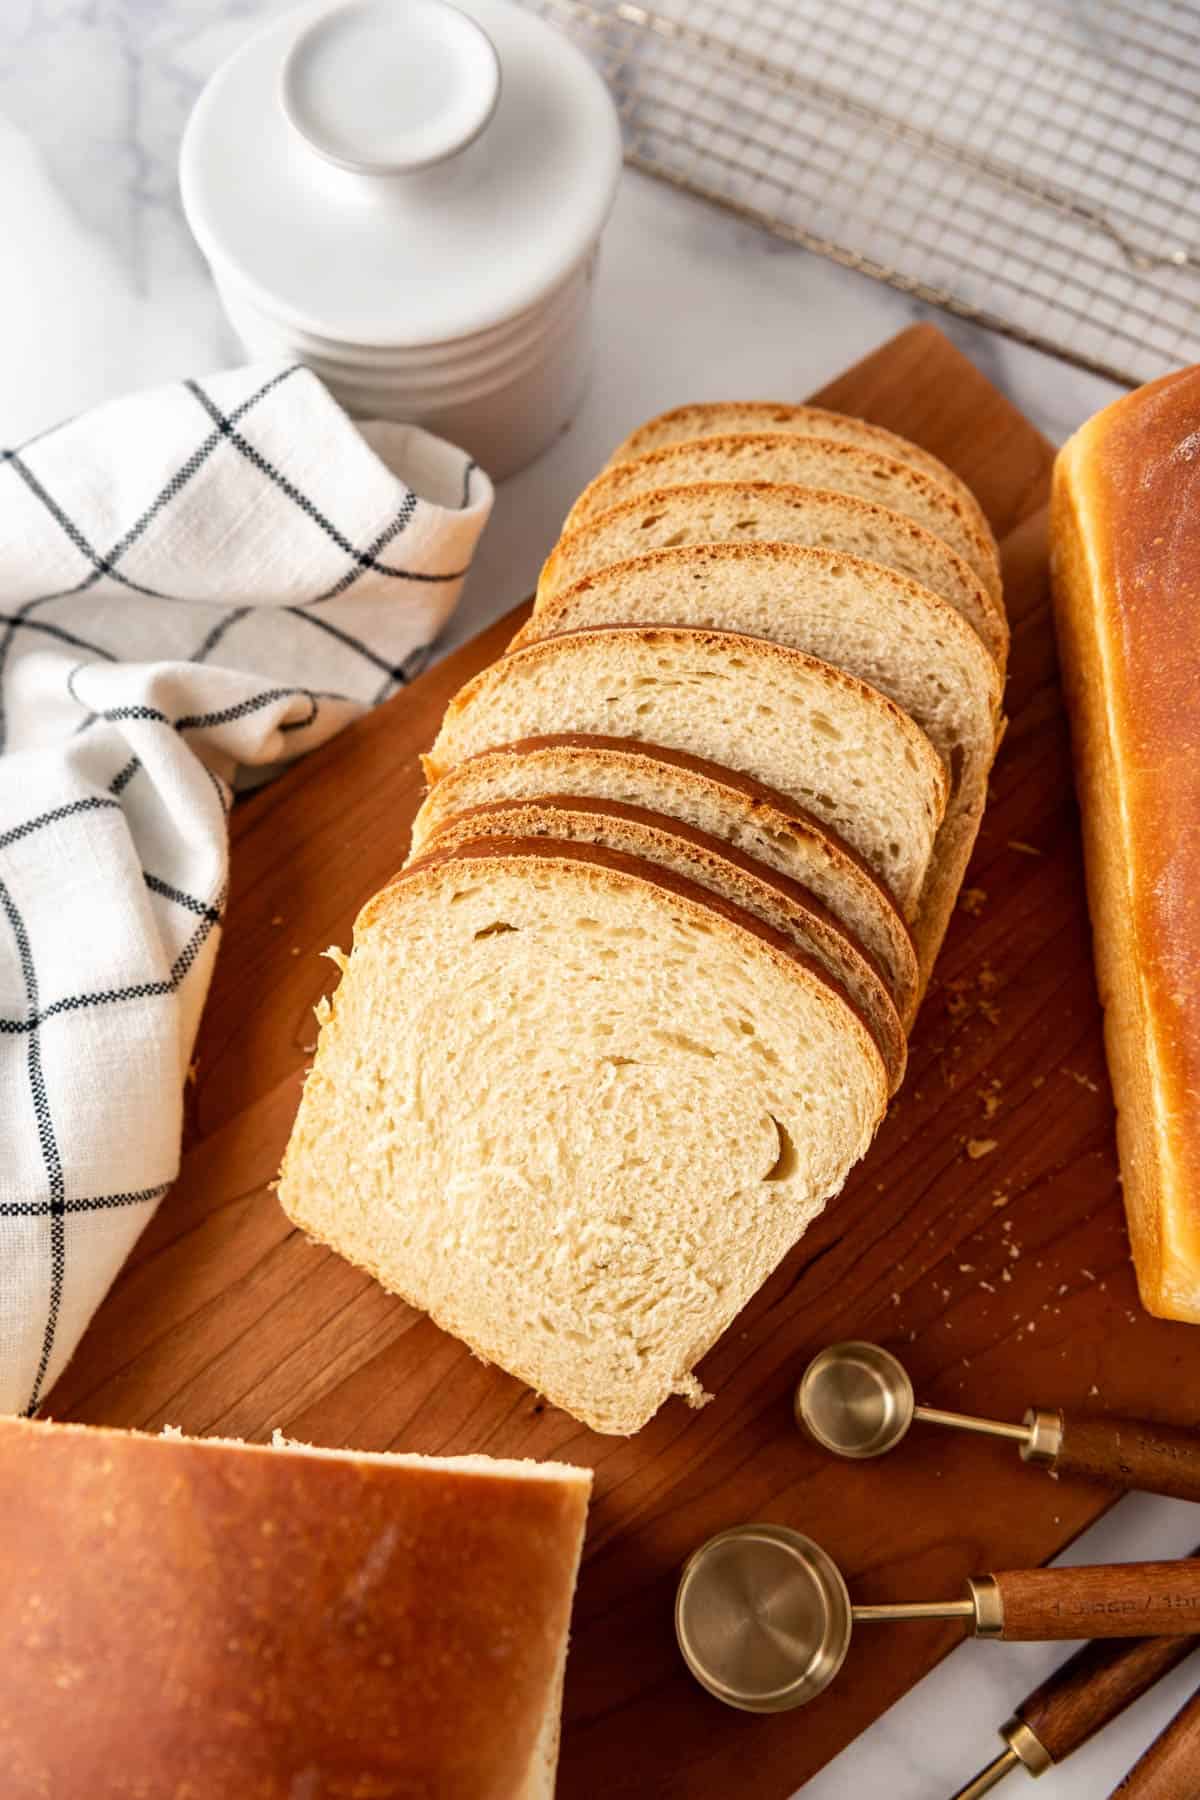
My kids especially love coming home from school and enjoying thick slices of fresh bread with butter and jam for an afternoon snack. I like slicing a loaf and sticking it in the freezer to have as backup for busy weeks so we always have homemade bread for breakfast toast or sandwiches!
You might never buy bread from the store again!

- Even the bakery can’t make bread as fresh as you can in your own home.
- If you have active sourdough starter on hand, you can make this bread today!
- There are no preservatives or unpronounceable ingredients, just real, wholesome food you’ll feel good giving your family.
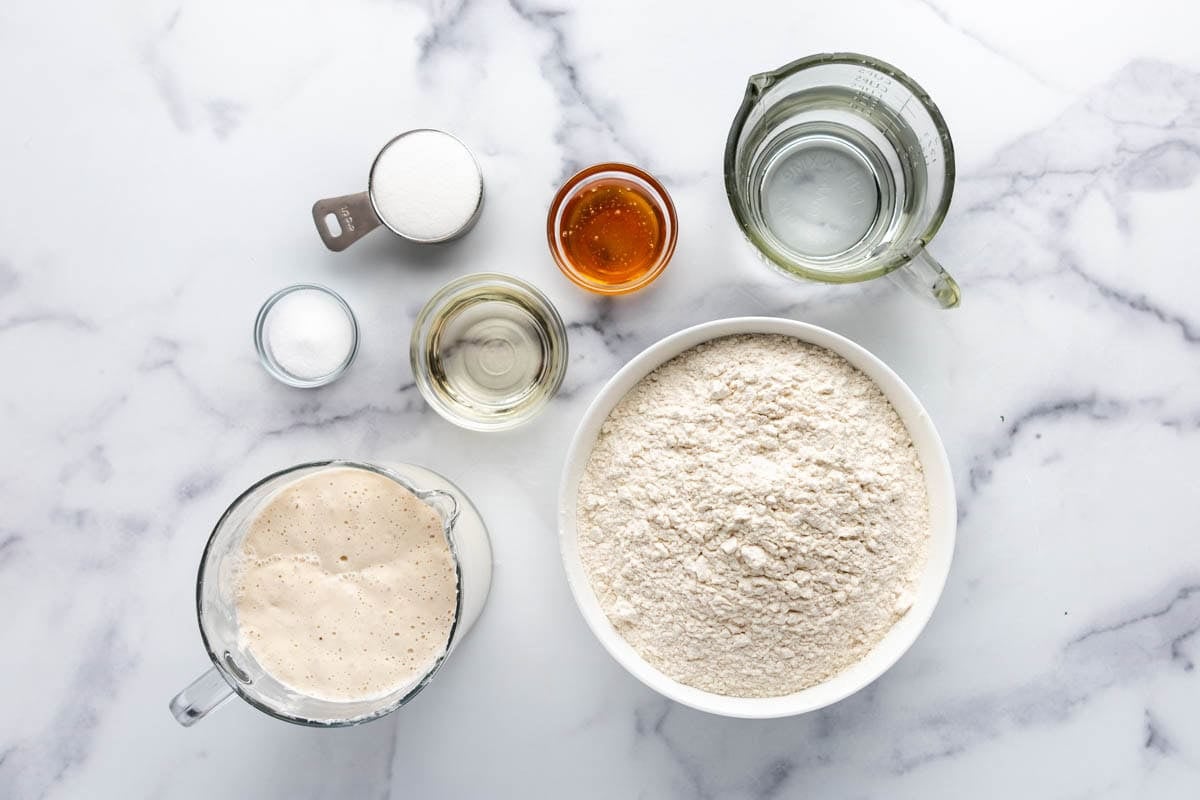
Gather Your Ingredients
- Sourdough Starter: You’ll want active, bubbly starter for this recipe so feed it the night before if you plan to make the bread in the morning and bake the same day, or feed it in the morning if you want to make the dough that night for shaping and baking the next day.
- Flour: I have made this with all-purpose flour, bread flour, and half white/half whole wheat flour and it turns out great every time with slight changes in texture and flavor.
- Sweeteners: I found that a combination of honey and a little granulated sugar gave the right amount of sweetness to balance the sourdough tang of the bread.
- Oil: A little canola oil or vegetable oil helps keep the bread moist and tender.
- Salt: An important addition so the bread actually tastes good and not bland.
Step-by-Step Overview
- Mix. Start by combining your starter and water in a large bowl. Give it a good mix to incorporate the starter into the water.
- Add. Add the sugar, honey, oil, salt, and most of the flour (I like to hold about 1 cup in reserve to add as needed).
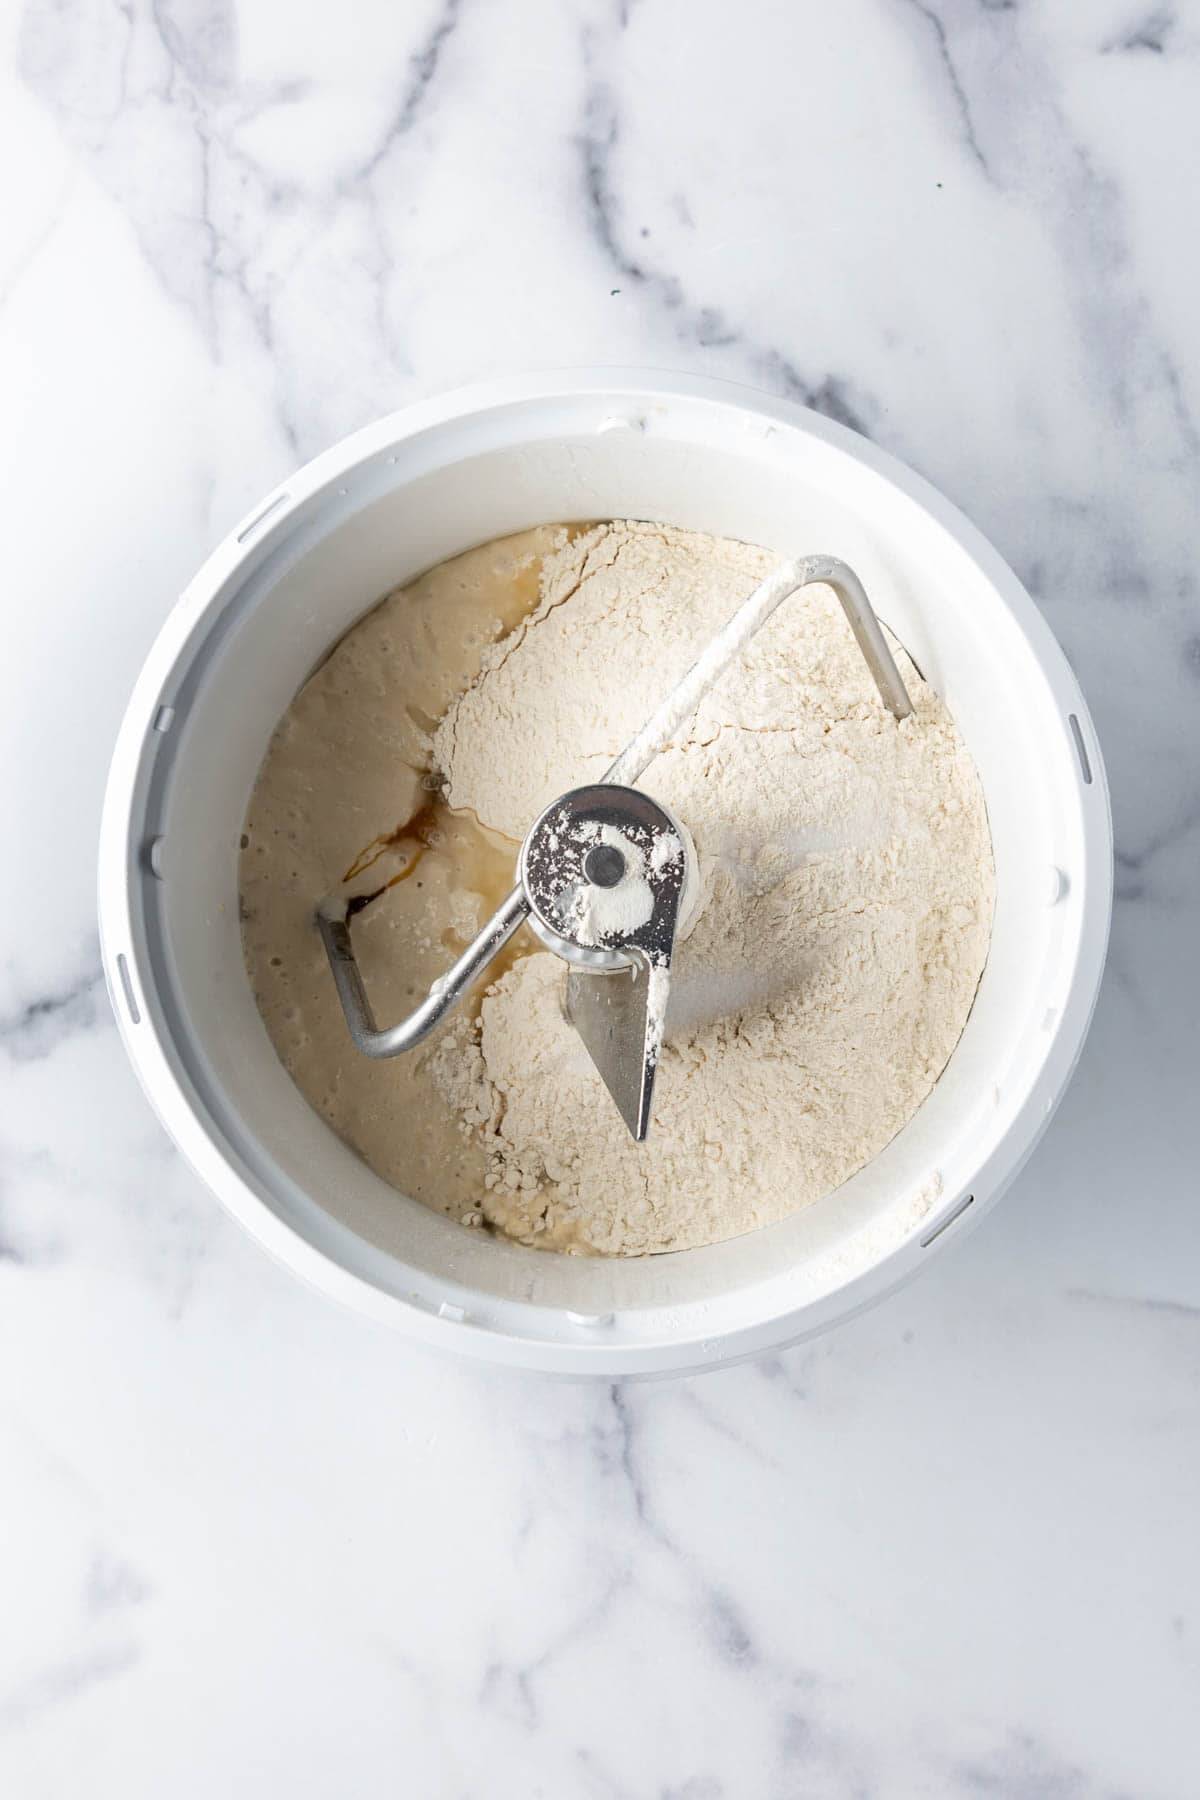
- Knead. Knead the dough for 6-8 minutes using a dough hook attachment or 10-12 minutes by hand until smooth. The dough should pass the windowpane test and be soft and tacky but not too sticky. Add the reserved flour a little at a time while kneading if it the dough is sticking to the sides of the bowl a lot.
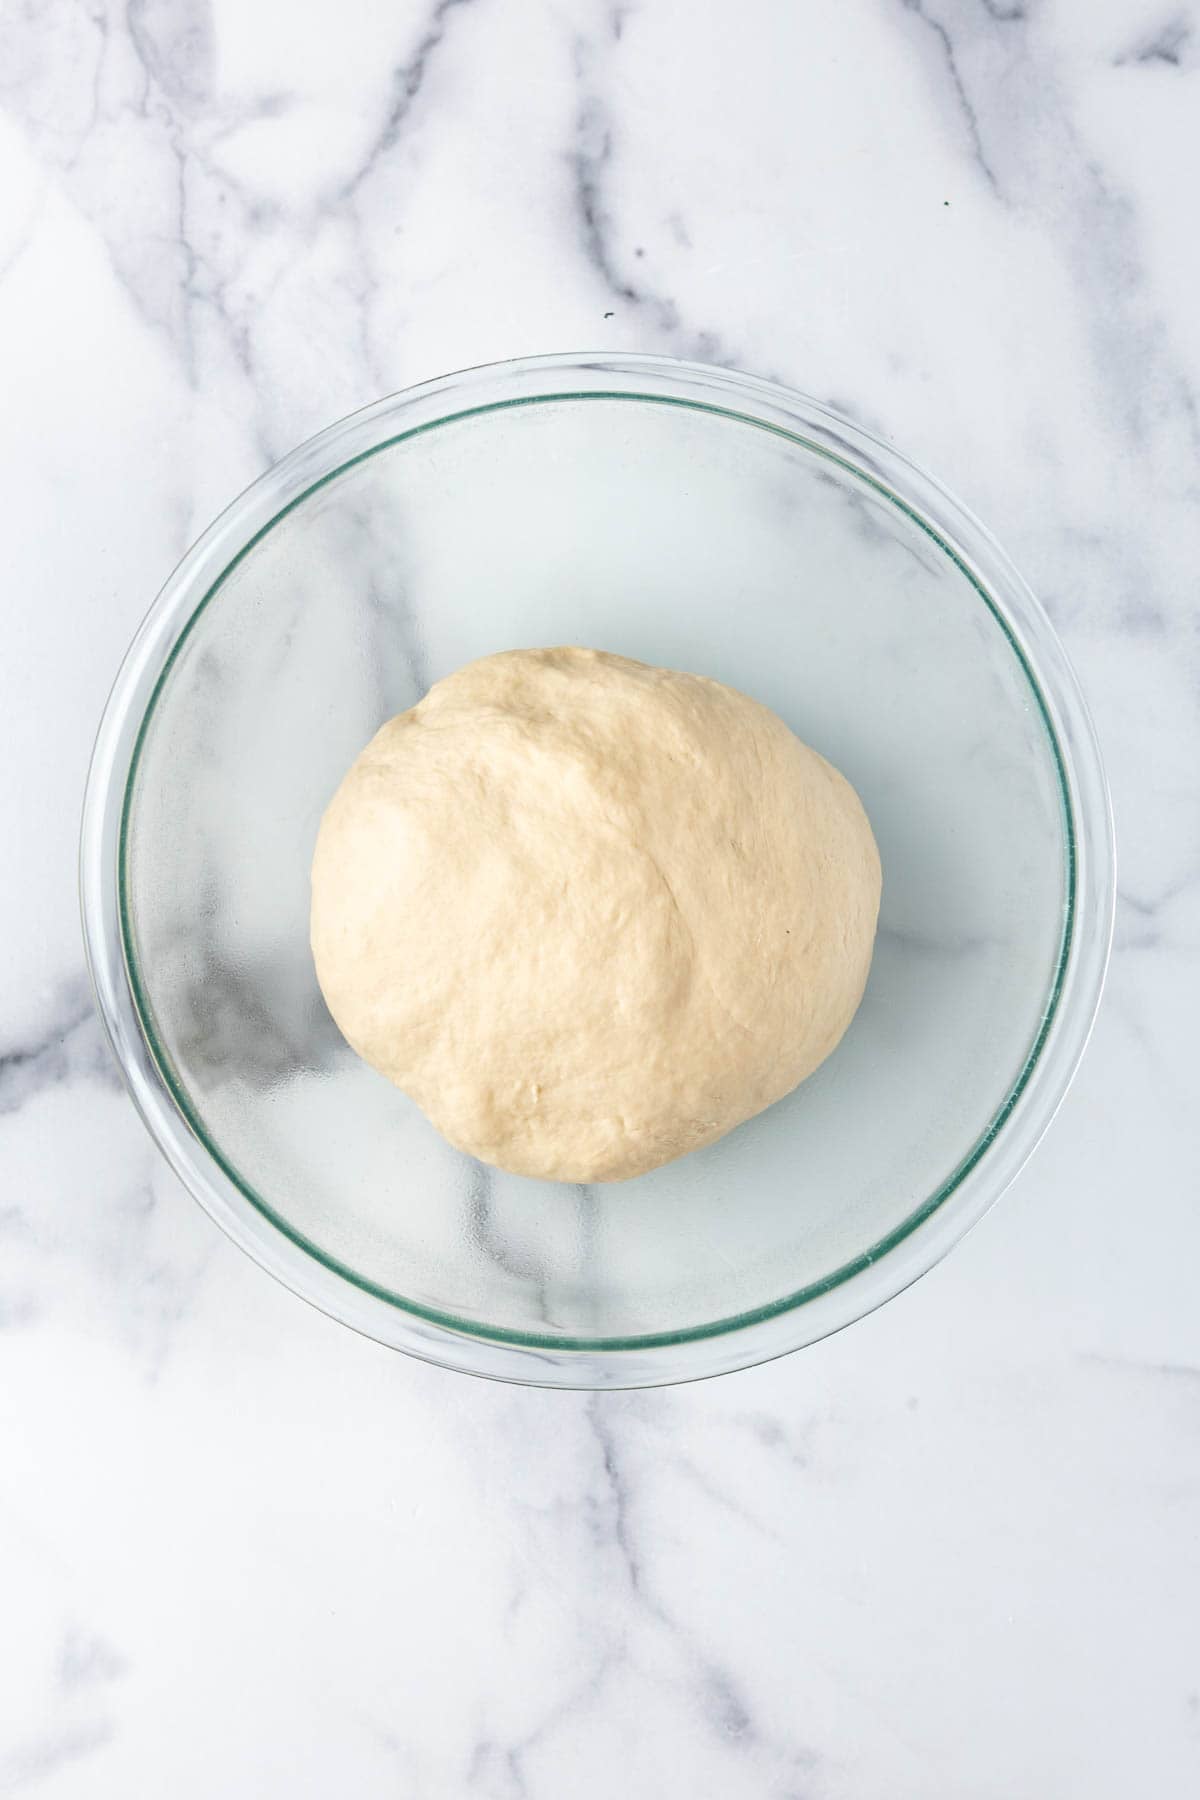
- Rise. Transfer the dough to a lightly greased bowl and cover with a kitchen towel or a piece of plastic wrap. Let the dough bulk rise until it fills the bowl and has risen until not quite double in size. If your dough hasn’t risen much, try placing it in a warmer spot for another hour or two.
If your house is on the cool side (around 68℉ to 70℉), the dough can take around 10-12 hours to rise until almost double in size. To speed things up, I like to use a proofing box and set the temperature to 76℉ to 78℉. This typically decreases the rise time to around 4-5 hours.
Pro Tip: At this point, you can shape the loaves or just stick the bowl of dough into the fridge for a long cold bulk rise overnight or up to 18 hours before shaping the dough then proceeding with the second rise and normal bake.

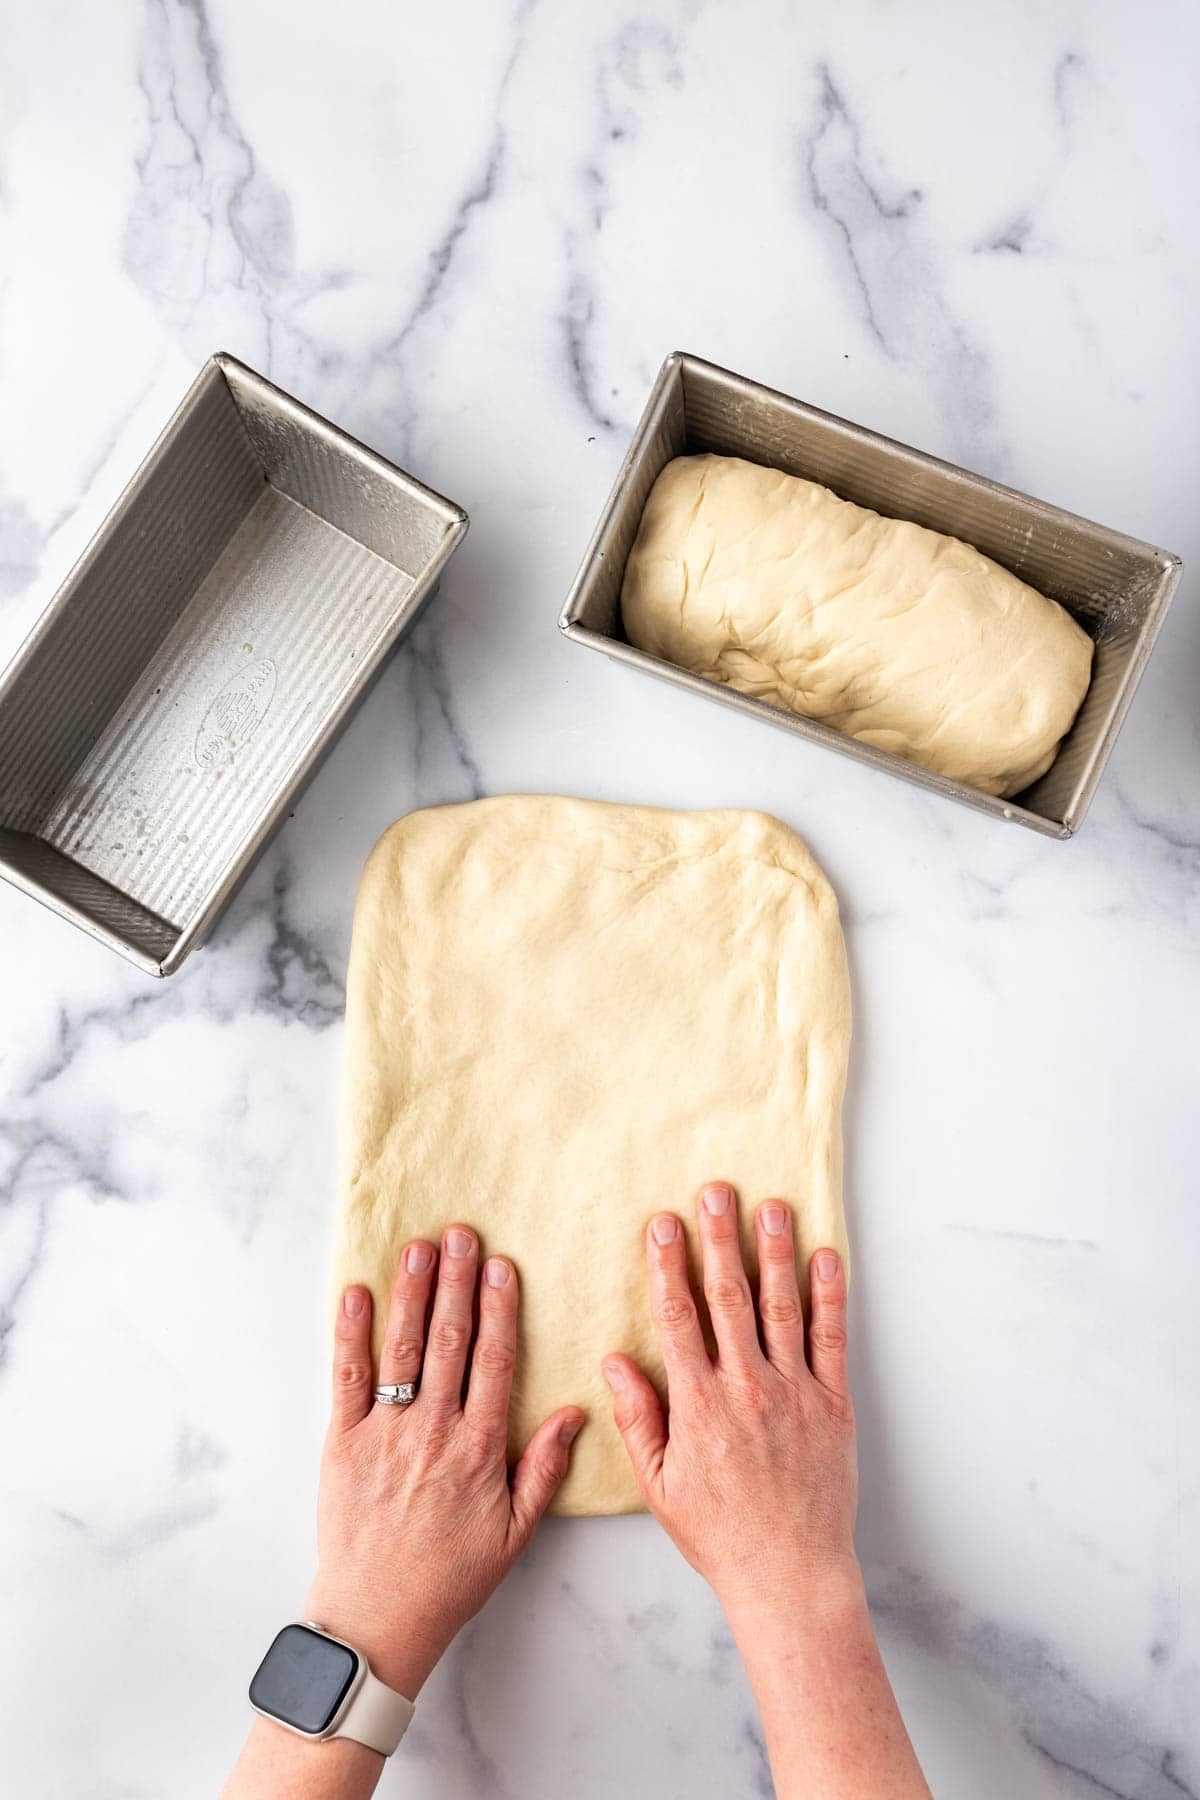
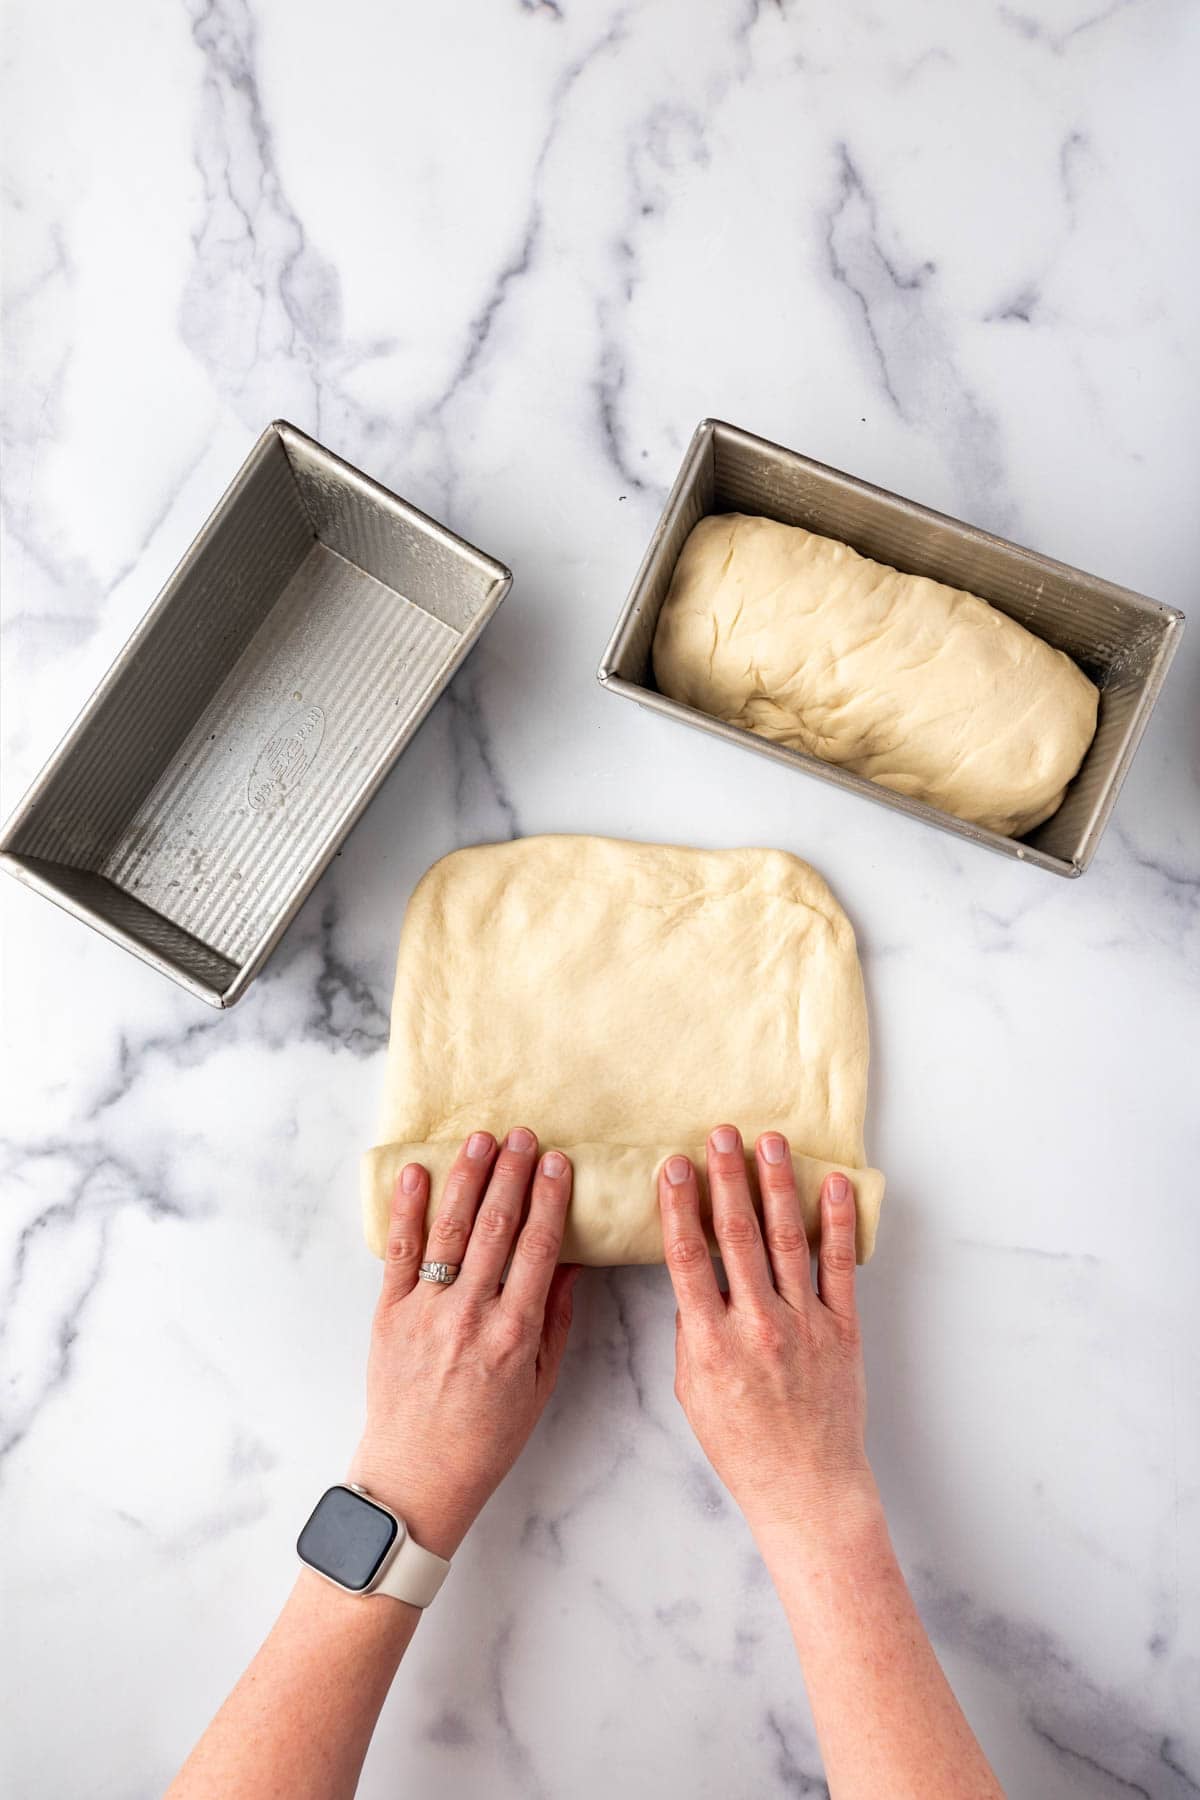
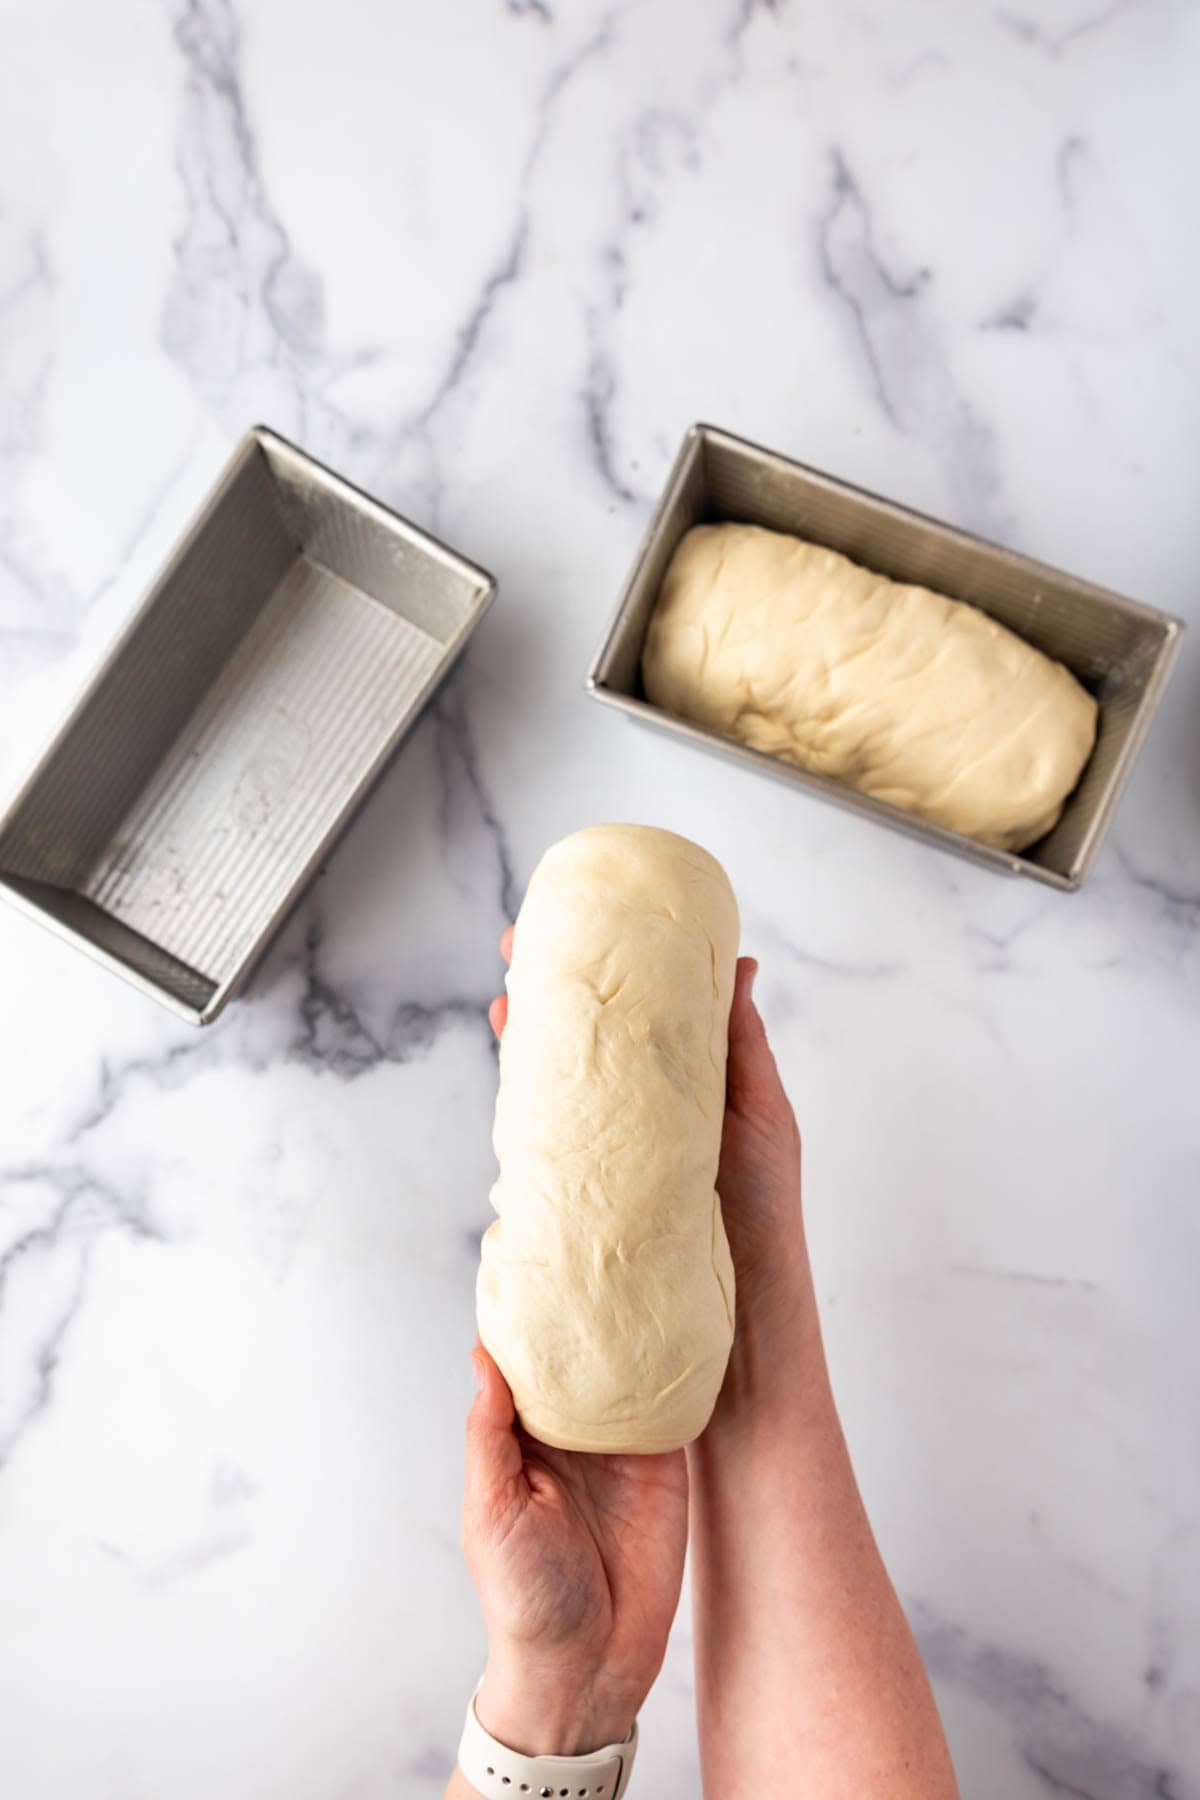
- Shape. Divide the dough into two equal portions. Pat half of the dough into a rectangle about as wide as the length of your bread pan. Roll the dough up into a log on the short side to shape the loaf, then transfer it to a prepared loaf pan that has been lightly greased or sprayed with baking spray. Repeat with the remaining dough.
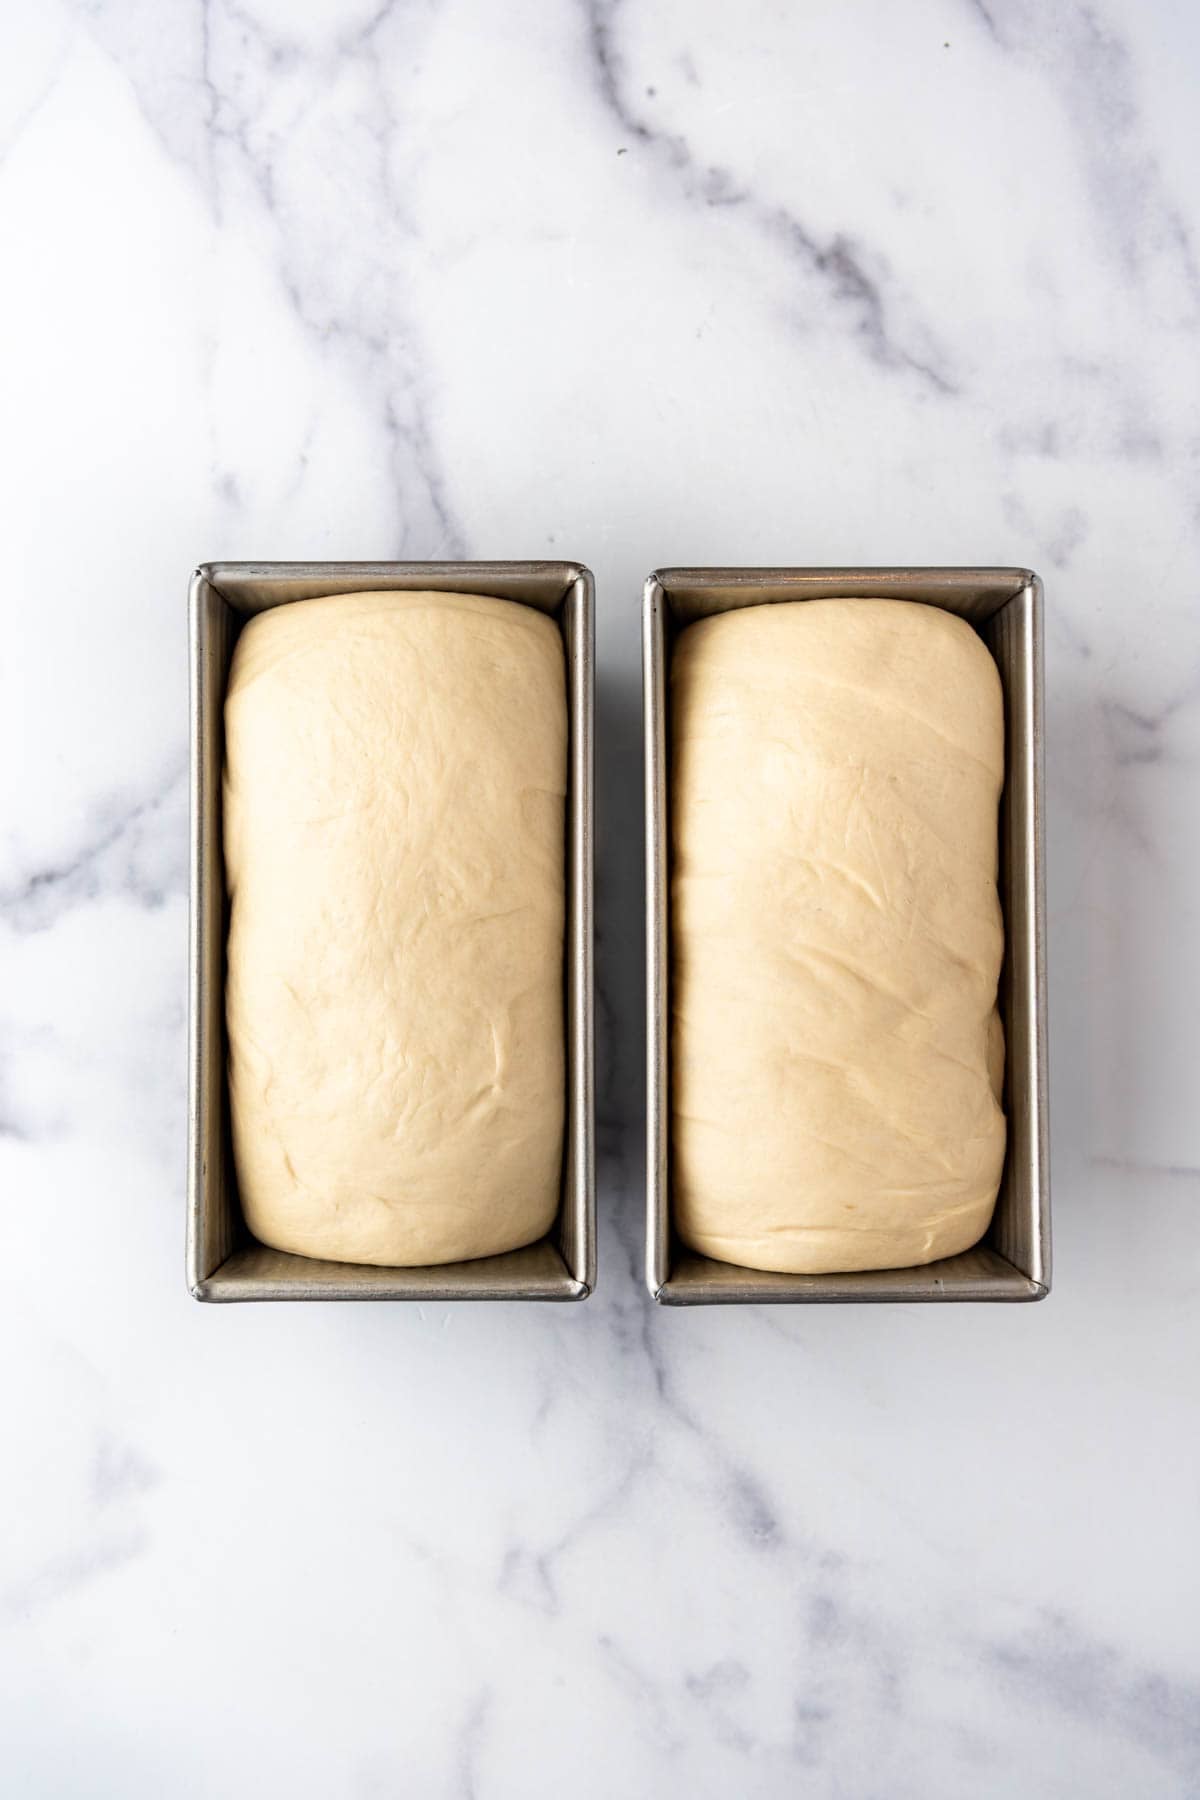
- Second Rise. Lightly cover the loaves with a kitchen towel or piece of plastic wrap and let them rise until puffy and the dough has risen over the edges of the loaf pans. This can take anywhere around 4-8 hours, depending on the time of year, how warm it is in your house, and how active your starter is. If you press a finger into the dough, it should leave a little indentation instead of springing back immediately when the loaves are ready to bake. I have found that I can shape my loaves just before bed, let them rise overnight, and bake them first thing in the morning.
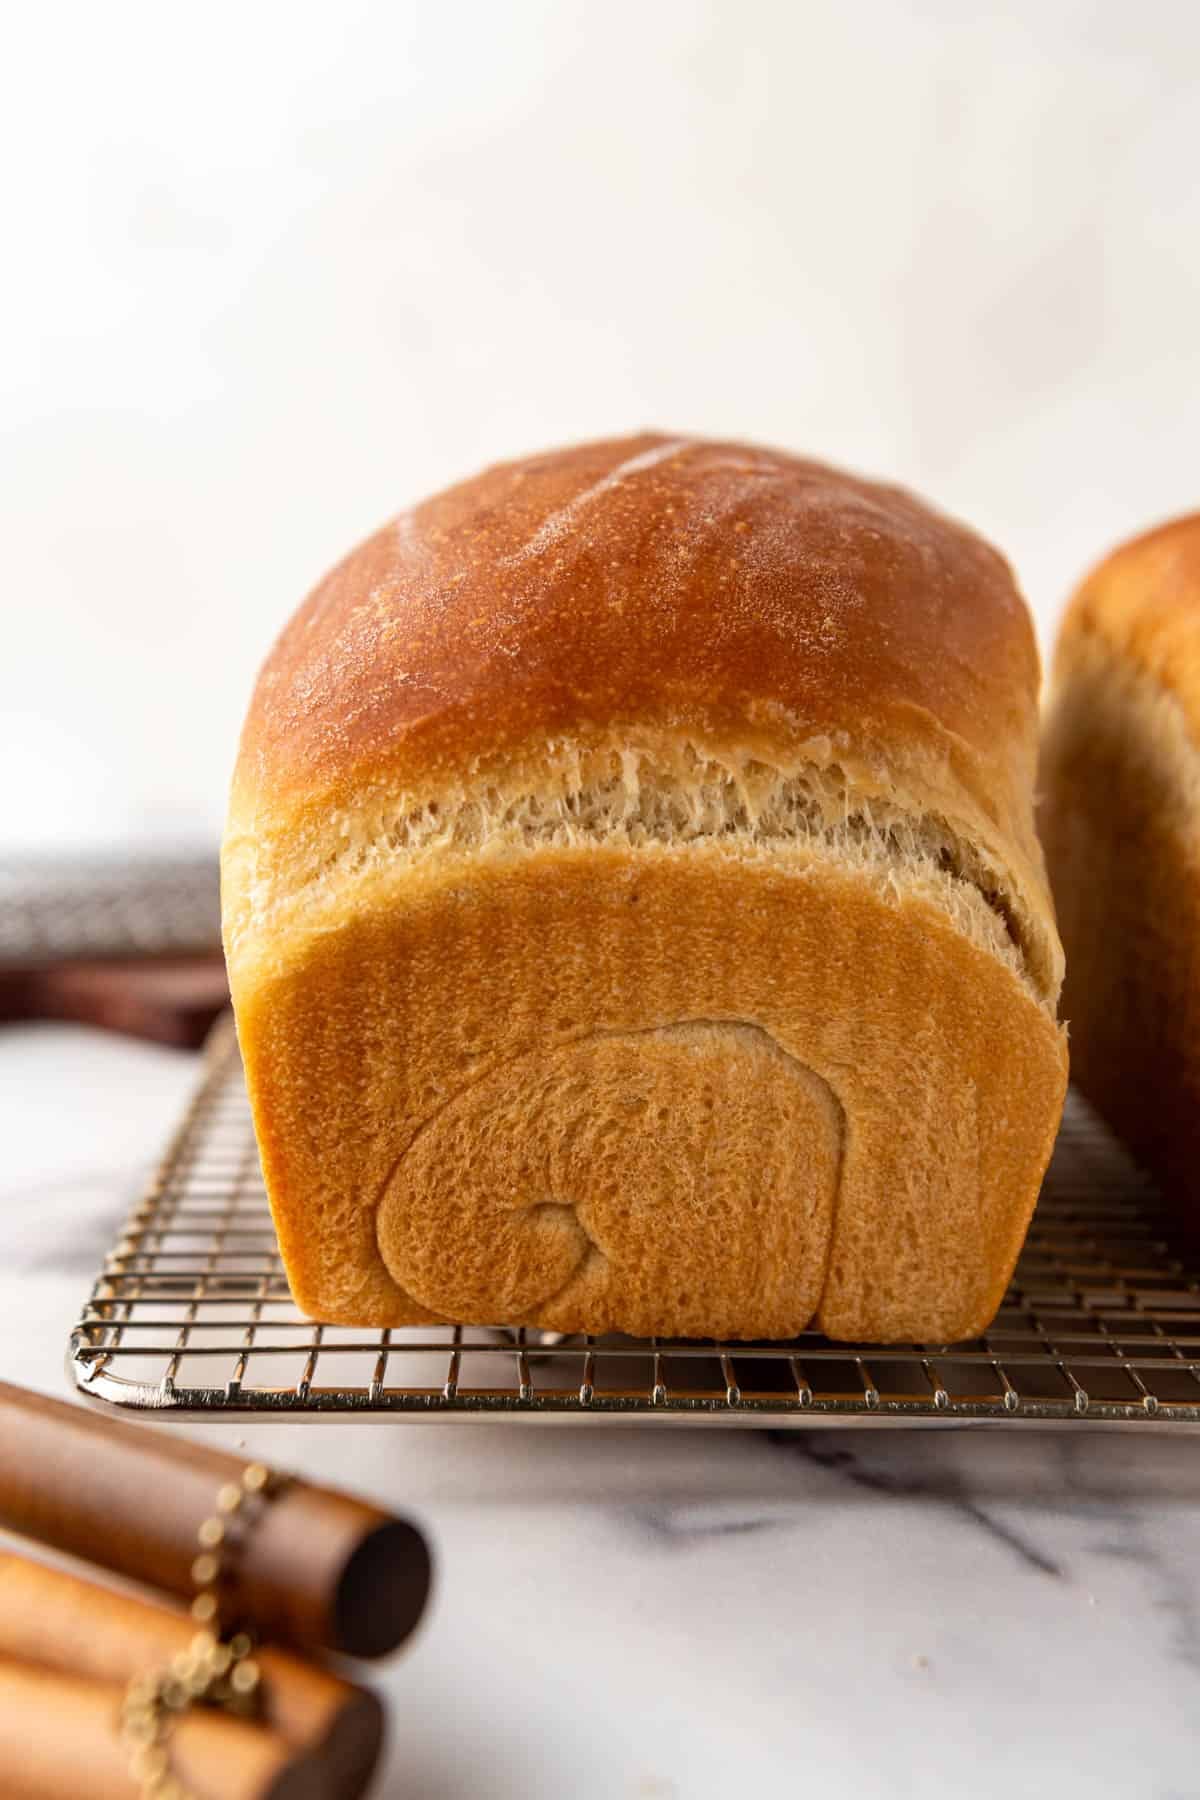
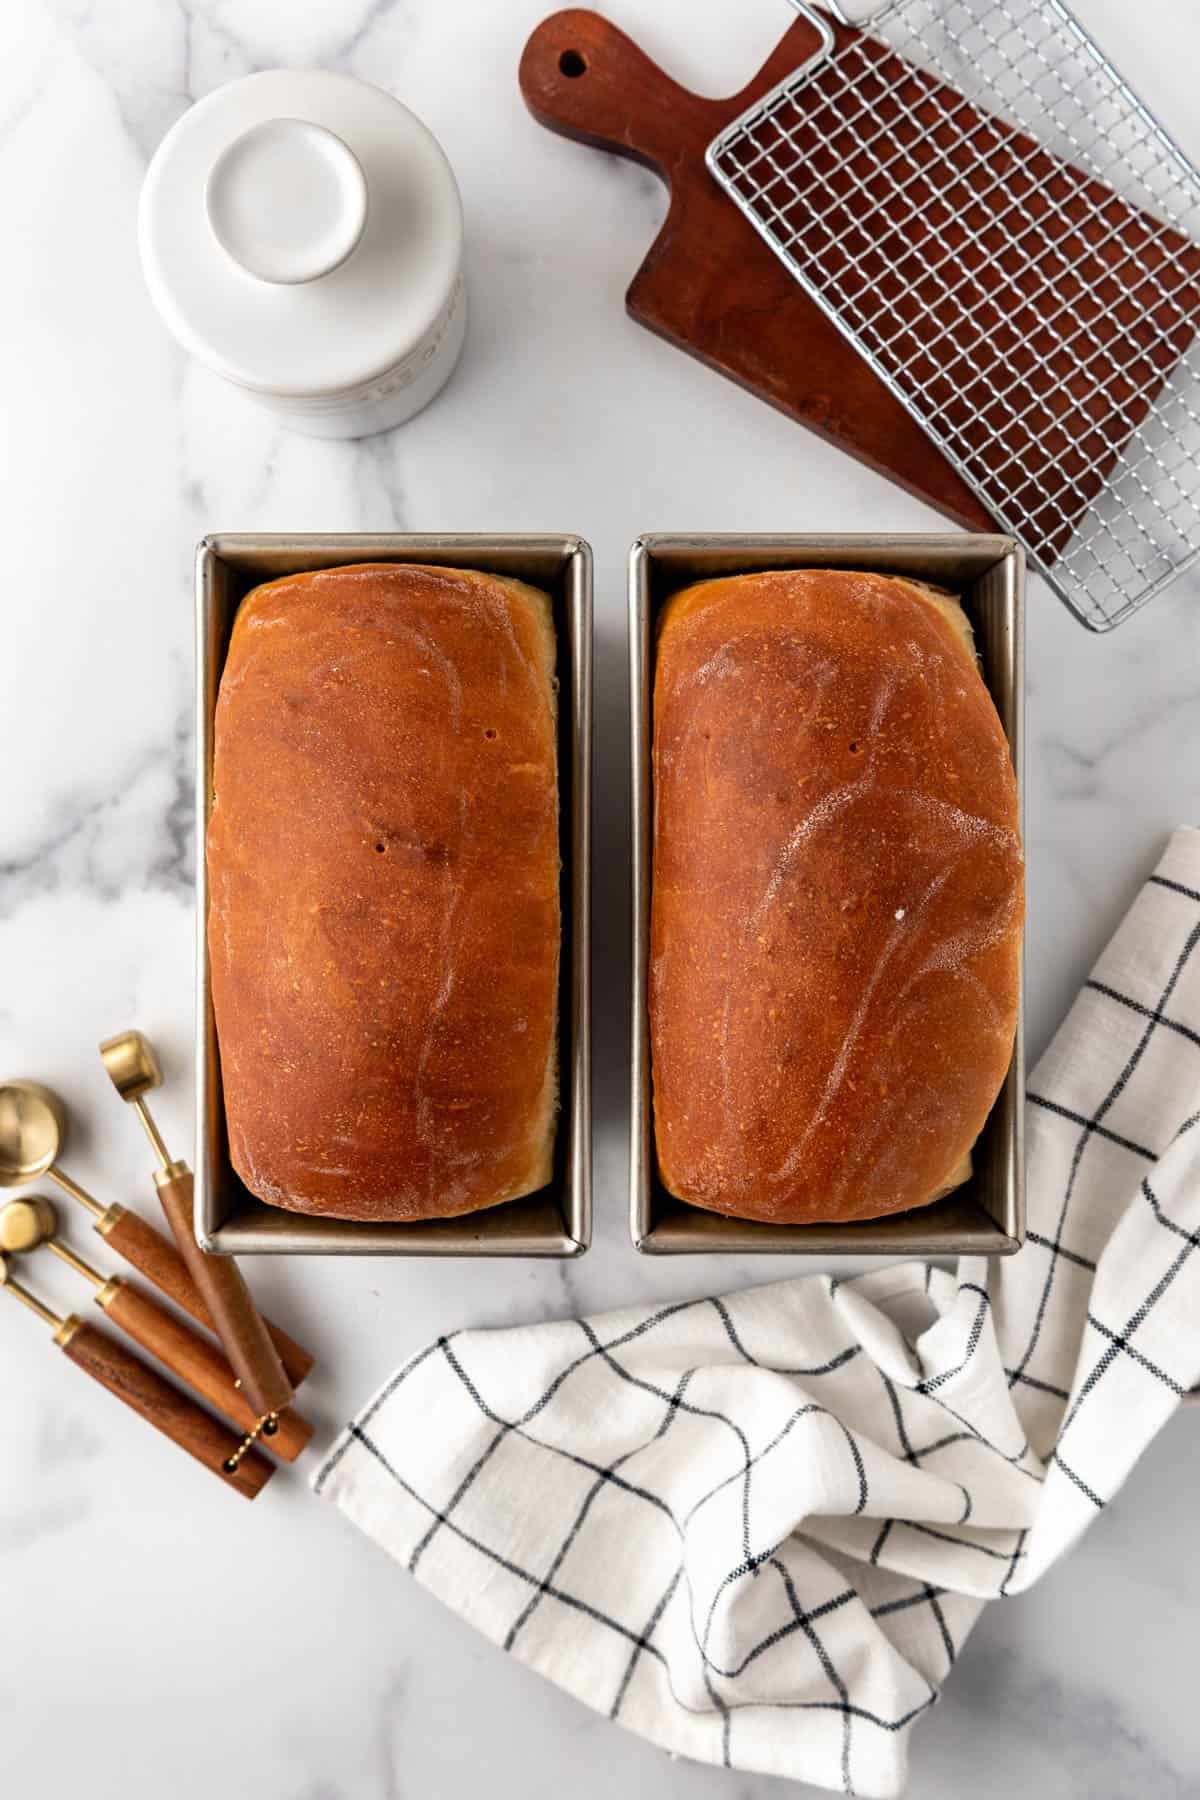
- Bake. About 30 minutes before you are ready to bake the loaves, preheat the oven to 375℉. Bake for around 40-45 minutes or until the loaves are golden brown and an instant read digital thermometer reads 190℉ when inserted into the center of a loaf. Rub a little softened butter over the top of each loaf as soon as it is removed from the oven for a nice, buttery soft top.
- Cool then slice. It will be so tempting to slice right into a loaf of warm bread, but resist the urge! These loaves need to cool completely to fully set up and be ready to enjoy.
Recipe FAQ’s
This recipe does best with an active sourdough starter and time. If your room is on the cool side, try moving the dough to a warmer spot like in the oven with a light on or in a bread proofer. When I was learning sourdough bread making, I realized that my house runs very cool and most recipes took me much longer than I anticipated to get the rise I needed for soft, fluffy loaves. This bread proofer was a game changer and I use it on a weekly basis. When I’m not using it, it folds up flat for easy storage.
I don’t recommend using cold starter. Instead, pull the starter out a day or two before you want to bake with it and feed it twice, making sure it doubles or triples in size before using to make this or other sourdough recipes.
Tips for Success
- Don’t rush the rise. If you are new to working with sourdough starter, it can take much longer to rise than commercial active yeast. When in doubt, I like to place my dough in a warm spot and let it rise for another 1-2 hours.
- Knead to develop gluten. This can be done just as effectively by hand as with a machine, but my Bosche mixer works great for kneading bread and is just easier. I have also used my KitchenAid with the dough hook attachment and the metal bowl. The dough should be smooth and tacky when it is ready.
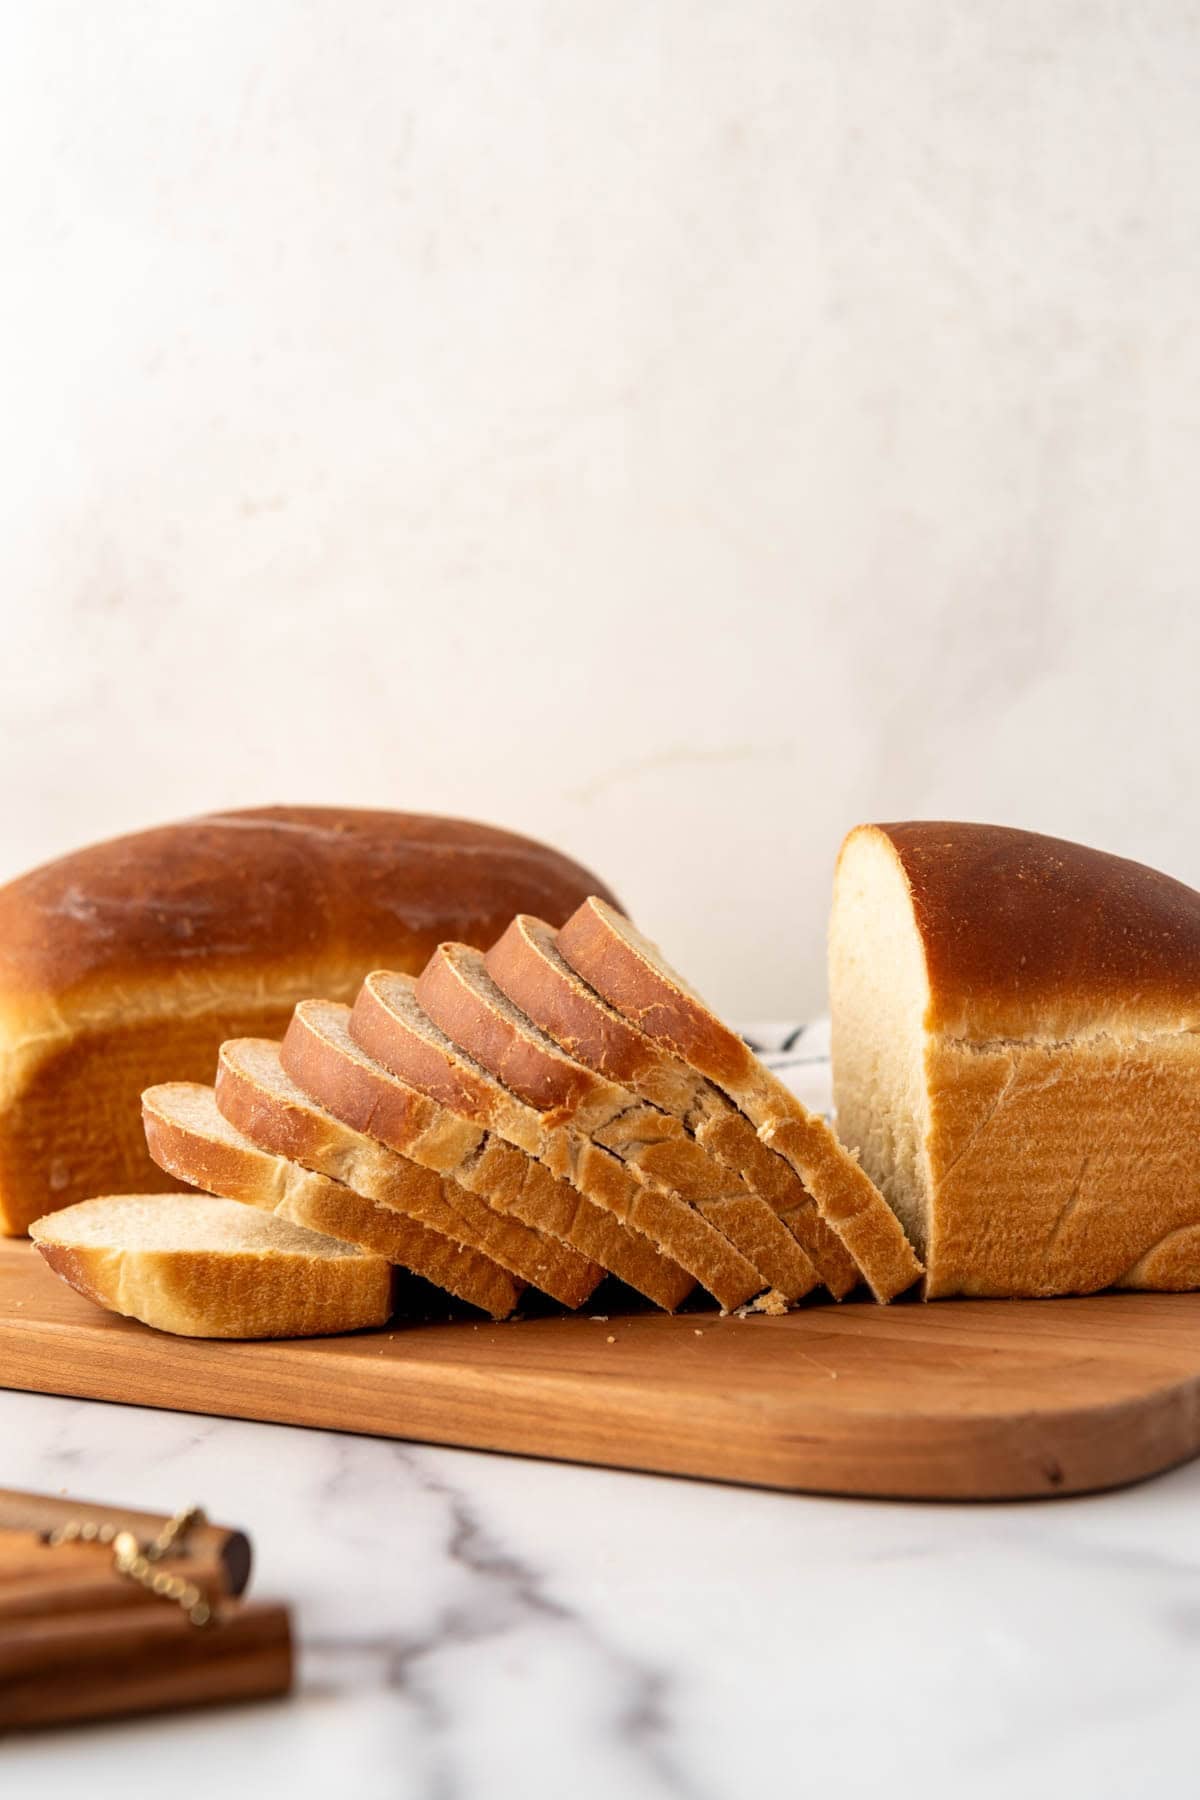
- Freeze sliced loaves. I have found that slicing a loaf first and then freezing the whole loaf that way works best for us because then we can pull out as many slices of bread as we need without thawing the entire loaf if we don’t think we are going to eat the whole thing. Because homemade bread doesn’t have preservatives, it won’t last as long on the counter as storebought bread.
- Use a bread slicer or serrated knife for clean, even cuts. A long bread knife makes a big difference when slicing a loaf of fresh bread.

More Bread Recipes
Soft Sourdough Sandwich Bread Recipe
Ingredients
- 400 grams bubbly and active sourdough starter (about 1 ¾ to 2 cups)
- 1 1/3 cups (330g) lukewarm water
- 1/3 cup (67g) granulated sugar
- 2 Tablespoons (42g) honey
- 1/4 cup vegetable or canola oil
- 2 teaspoons (18g) salt
- 6 to 7 cups (846g to 987g) bread flour

Instructions
- In a large bowl, combine the water and starter. Mix well.400 grams bubbly and active sourdough starter, 1 ⅓ cups (330g) lukewarm water
- Add the sugar, honey, oil, salt, and 6 cups of the flour, stirring well to evenly moisten.⅓ cup (67g) granulated sugar, 2 Tablespoons (42g) honey, ¼ cup vegetable or canola oil, 2 teaspoons (18g) salt, 6 to 7 cups (846g to 987g) bread flour
- Knead the dough in a mixer fitted with a dough hook attachment for 6-8 minutes until smooth (around 10-12 minutes if kneading by hand). The dough should be soft and tacky but not too sticky, and it should pass the windowpane test. Add the reserved flour a little at a time as needed while kneading if it the dough is sticking to the sides of the bowl a lot.
- Transfer the dough to a lightly greased bowl and cover with a kitchen towel or a piece of plastic wrap. Let the dough bulk rise at room temperature (around 68℉ to 70℉) until it fills the bowl and has risen until not quite double in size, around 10-12 hours. If your dough hasn't risen much, try placing it in a warmer spot for another hour or two. At this point, you can shape the loaves or just stick the bowl of dough into the fridge for a long cold bulk rise overnight or up to 18 hours before shaping the dough then proceeding with the second rise and normal bake.
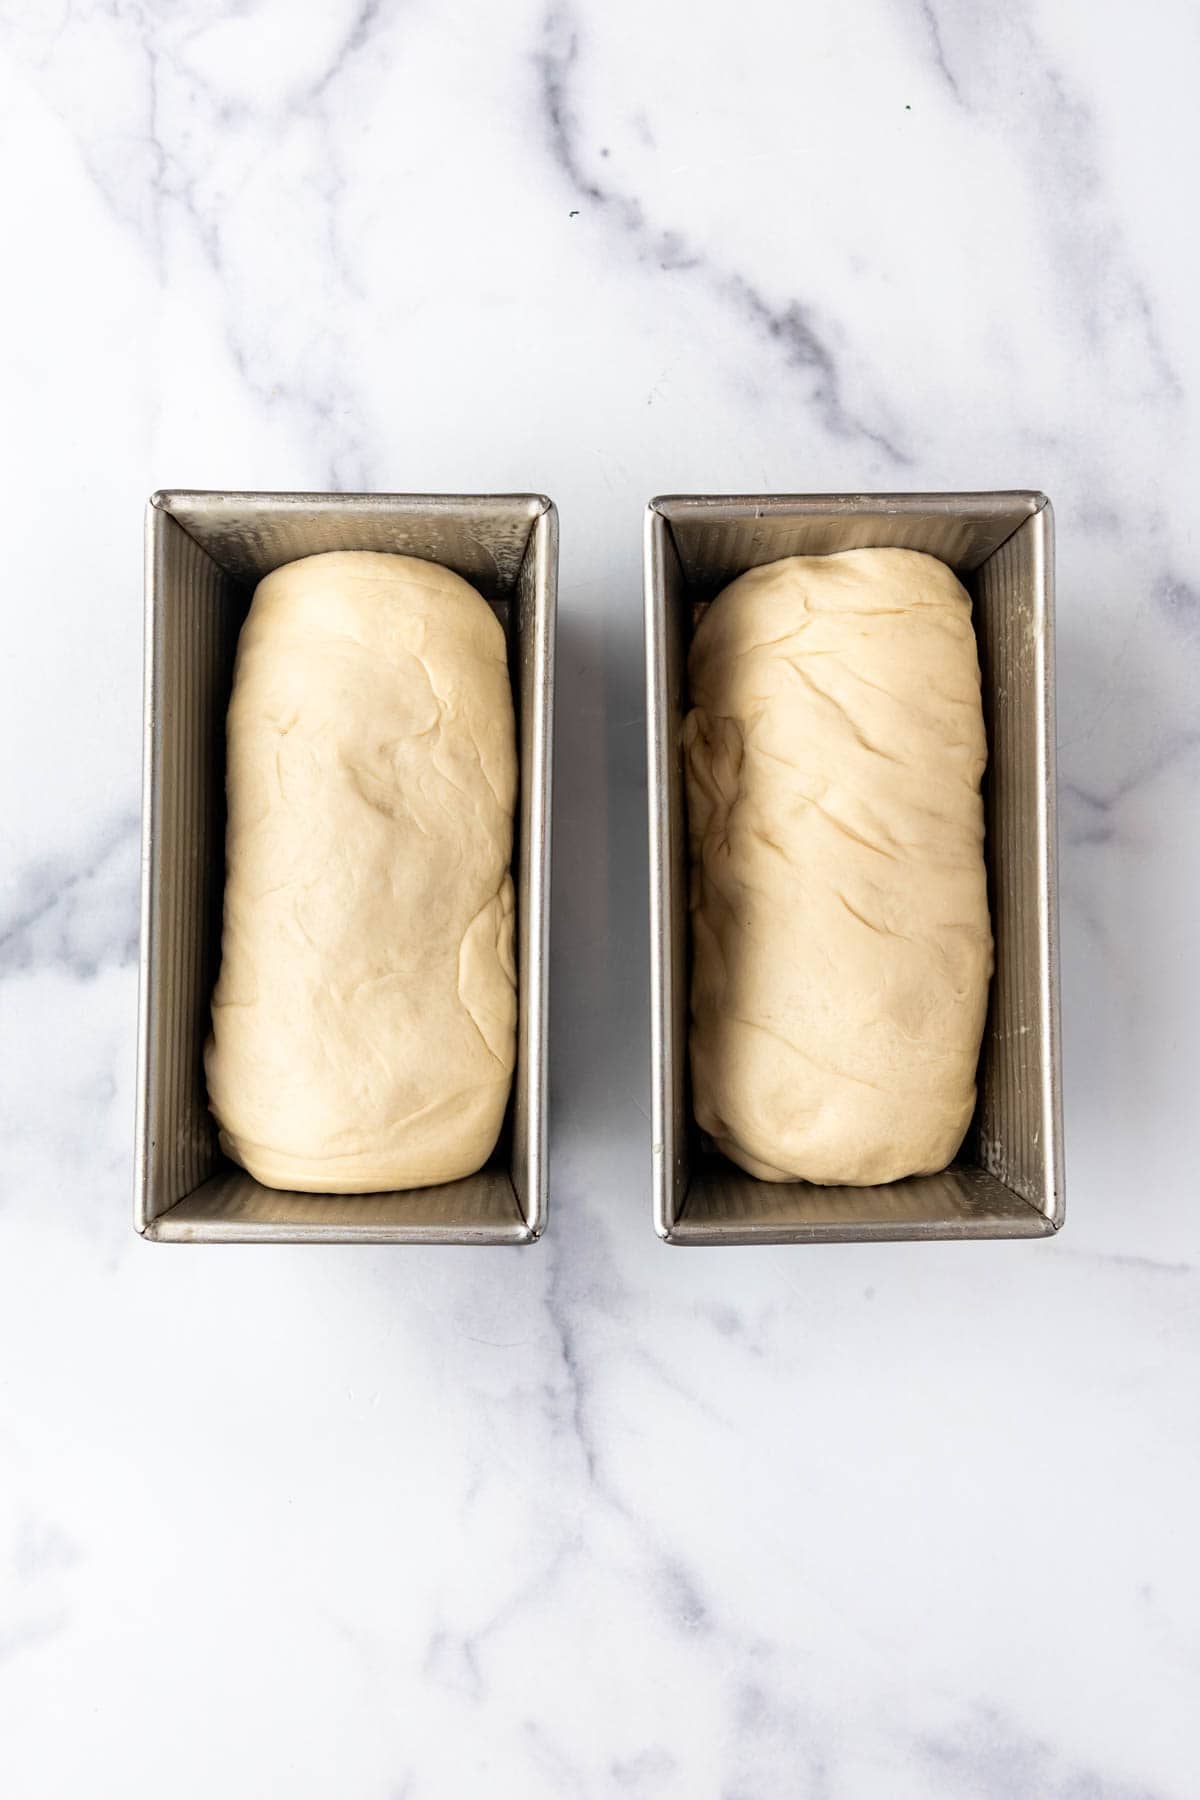
- Lightly grease two 8.5×4.5-inch loaf pans with butter or spray with baking spray. Divide the dough into two equal portions. Gently press half of the dough into a rectangle about 8×12-inches wide. Roll the dough into a log on the short side, tucking the ends under to shape the loaf, then transfer it to a prepared pan with the seam side down. Repeat with the remaining dough.
- Cover the loaves with a kitchen towel or a loose piece of plastic wrap and let rise at room temperature until puffy and risen over the edges of the pan, around 4-8 hours. If you press a finger into the dough, it should leave a little indentation instead of springing back immediately when the loaves are ready to bake.
- About 30 minutes before baking, preheat the oven to 375℉ (191℃). Bake for around 40-45 minutes or until the loaves are golden brown and hollow sounding when thumped. An instant read digital thermometer should read 190℉ when inserted into the center of a loaf.
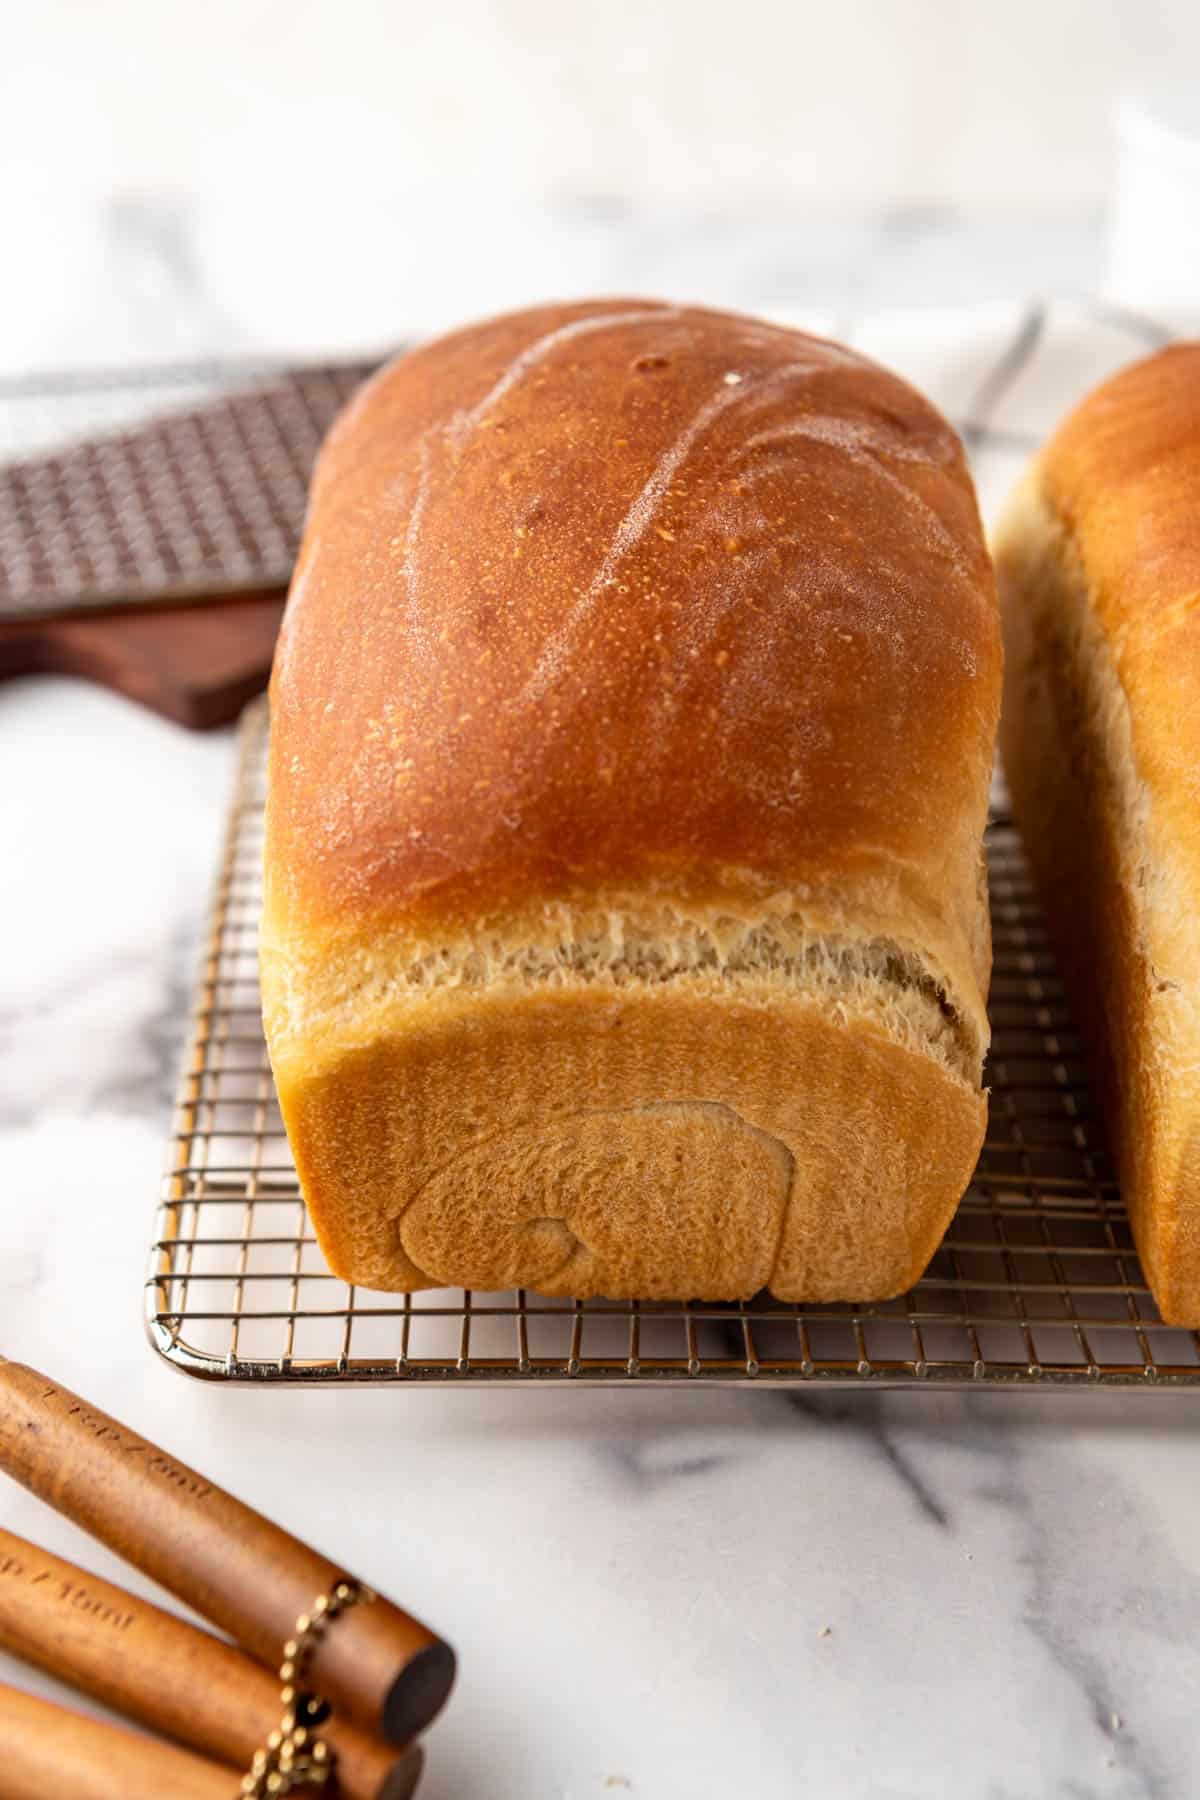
- Immediately rub the top of each loaf with some softened butter while hot, then let cool in the pan for 10 minutes before turning the loaves out onto a wire rack to cool completely before slicing.
- Store for up to 3 days in a plastic bag at room temperature or freeze for up to 2 months.
Notes
- Use a kitchen scale. For best results, I highly recommend investing in a kitchen scale and following the weight measurements instead of cup measurements, especially if you find yourself baking a lot of sourdough or other bread recipes.
- Using a bread proofer: To speed things up, you can use a proofing box and set the temperature to 76℉ to 78℉. This typically decreases the rise time to around 4-5 hours.
- Flour: If you want to use all-purpose flour, you might need a little extra beyond what is already called for. If using whole wheat flour, you might need a little less than what is already called for.
- Oil Substitution: You can replace the oil with an equal amount of melted butter or melted coconut oil, if desired.