Impress your friends with a homemade Baked Alaska piled high with toasted marshmallow meringue topping over your favorite ice cream flavors and moist cake. This iconic make-ahead dessert is a fun bucketlist bake for any home baker!
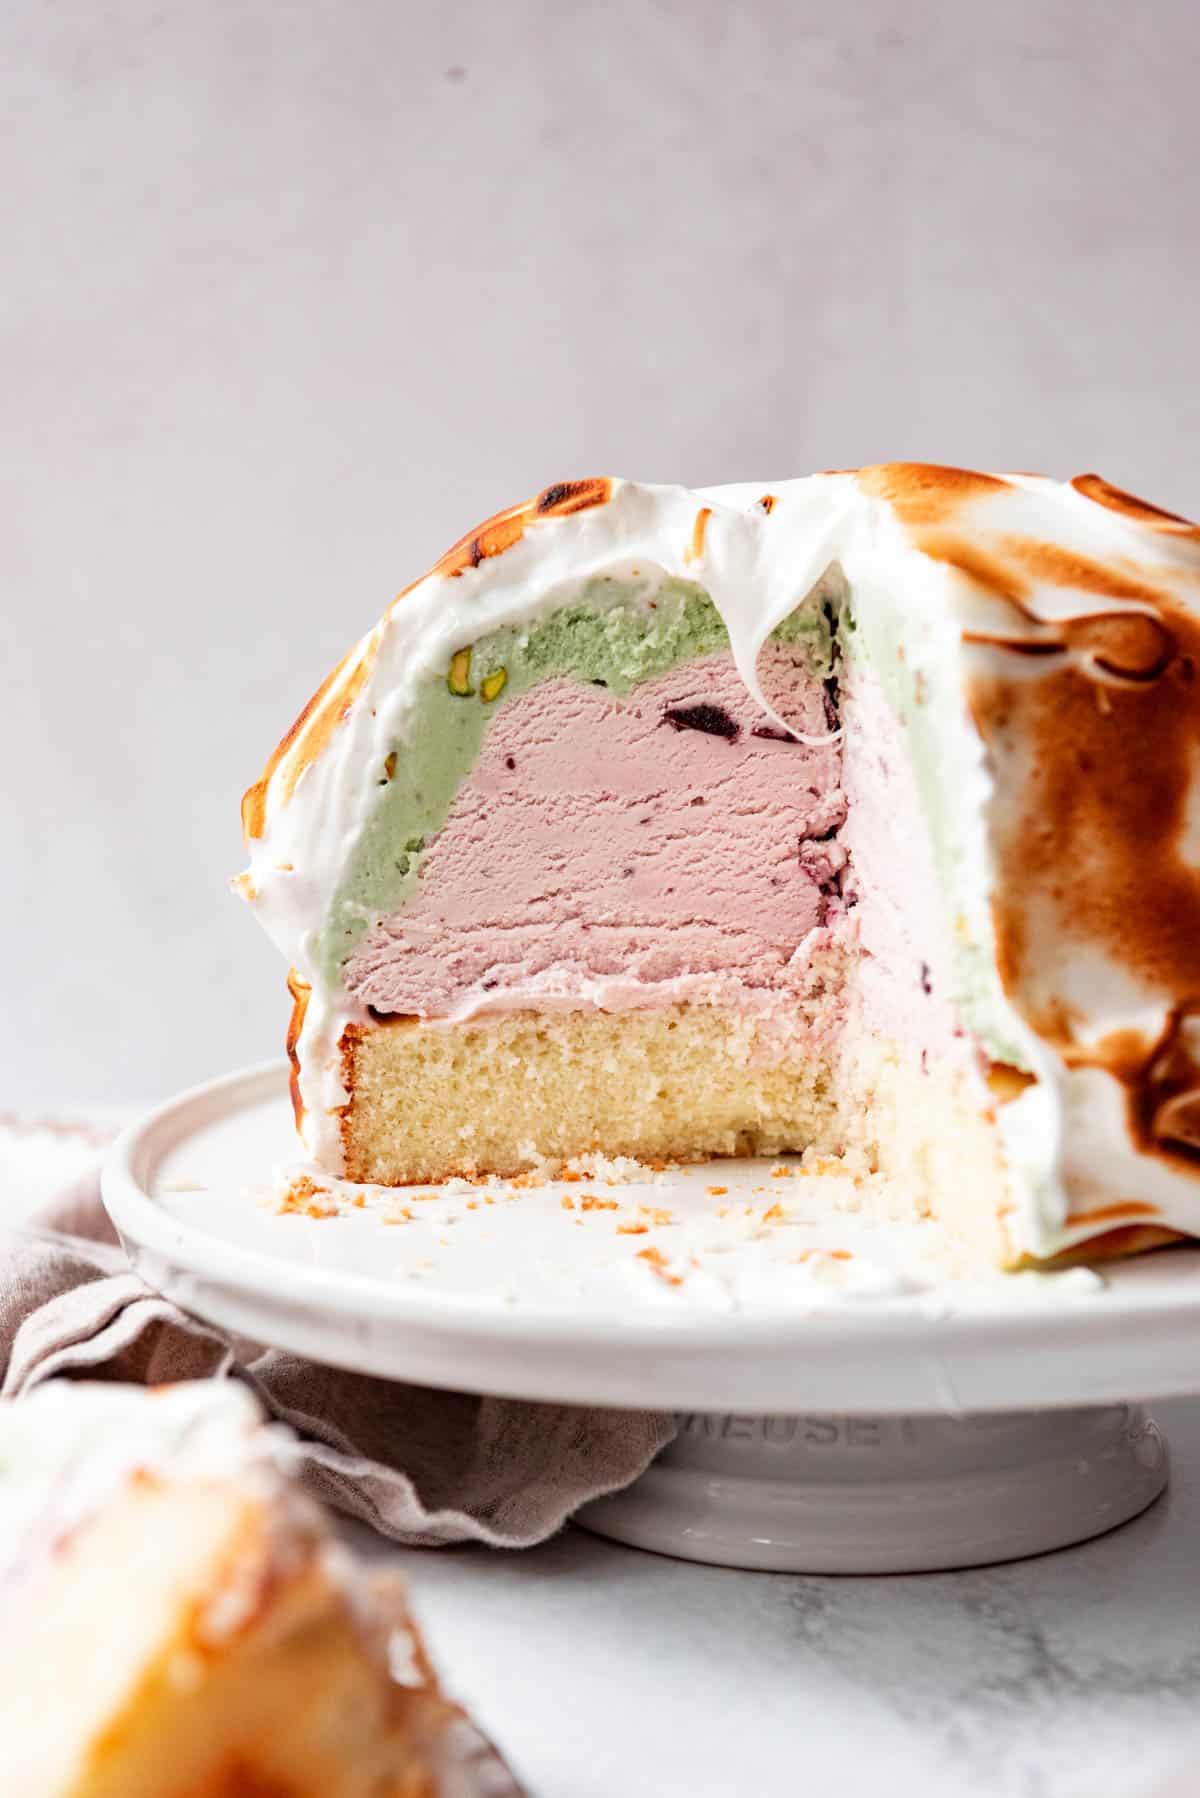
Table of Contents
What is Baked Alaska?
Baked Alaska has three main components: cake, ice cream, and meringue. There is no truly right or wrong way to make a baked Alaska, but this is my favorite version. It’s so good that our youngest daughter, Rose, has started requesting baked Alaska for her birthday cake!
The dessert is assembled by placing your ice cream into a large bowl lined with plastic wrap and freezing it until it’s nice and firm to create a dome shape. Then you add a cake or brownie layer and invert the whole thing to unmold it onto a serving plate. A thick layer of billowy marshmallow meringue covers the whole thing in place of frosting, then it gets torched with a kitchen torch just before serving so it is toasty and slightly warm on the outside while the ice cream stays frozen on the inside.
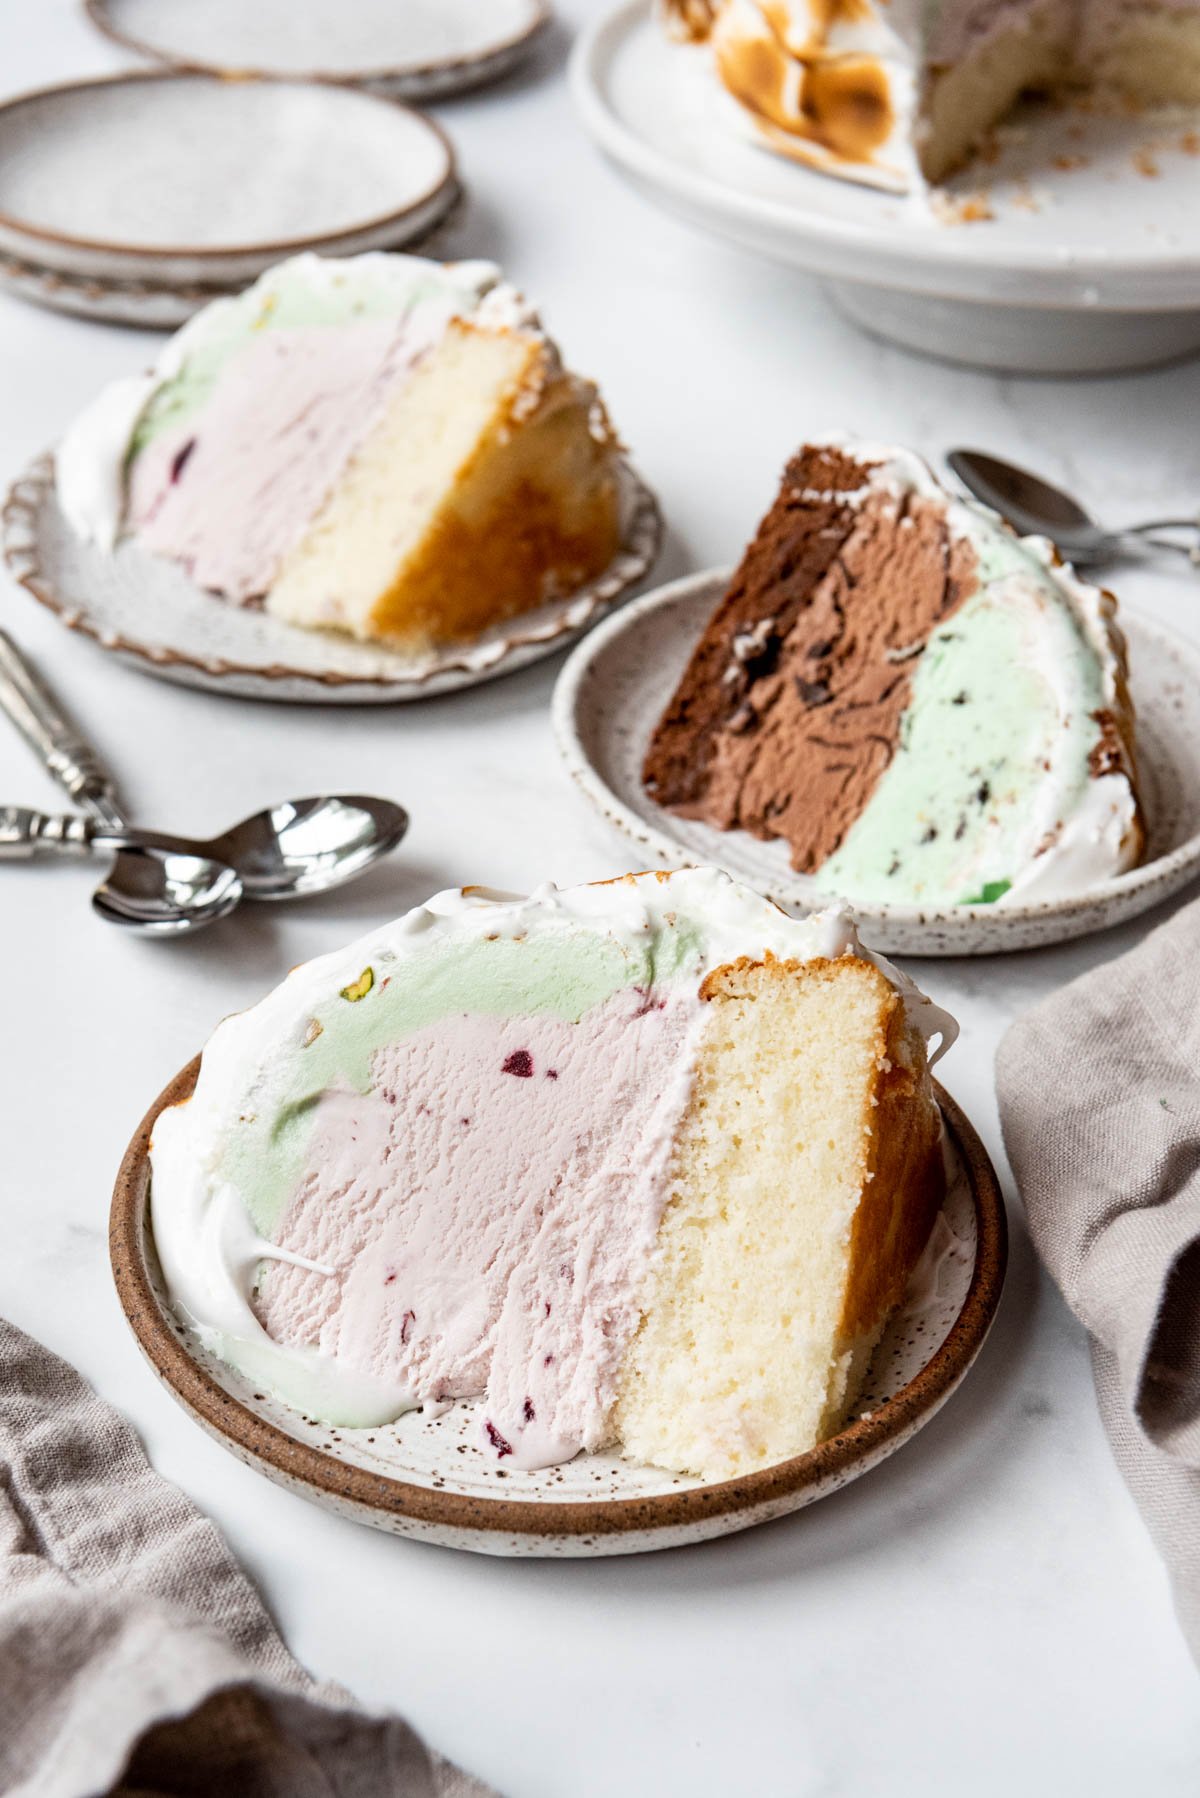
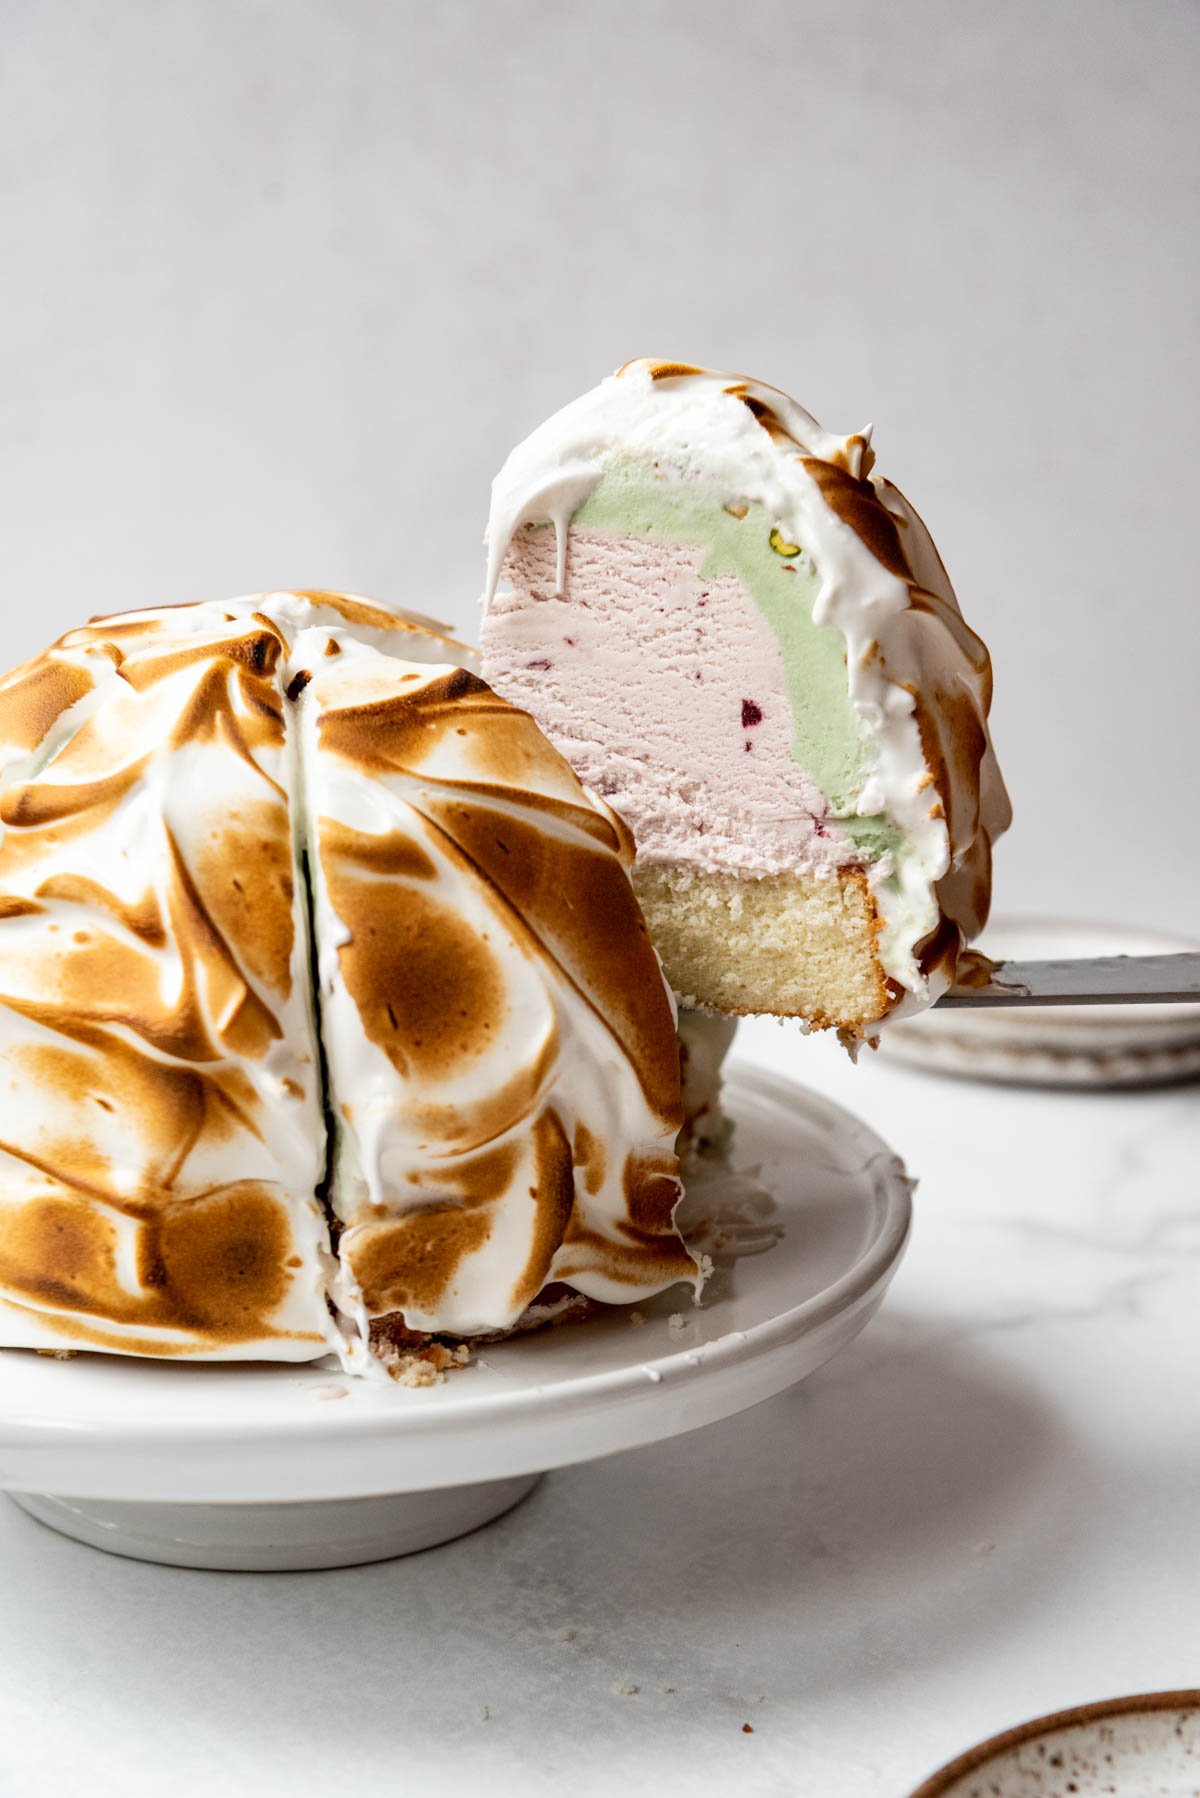
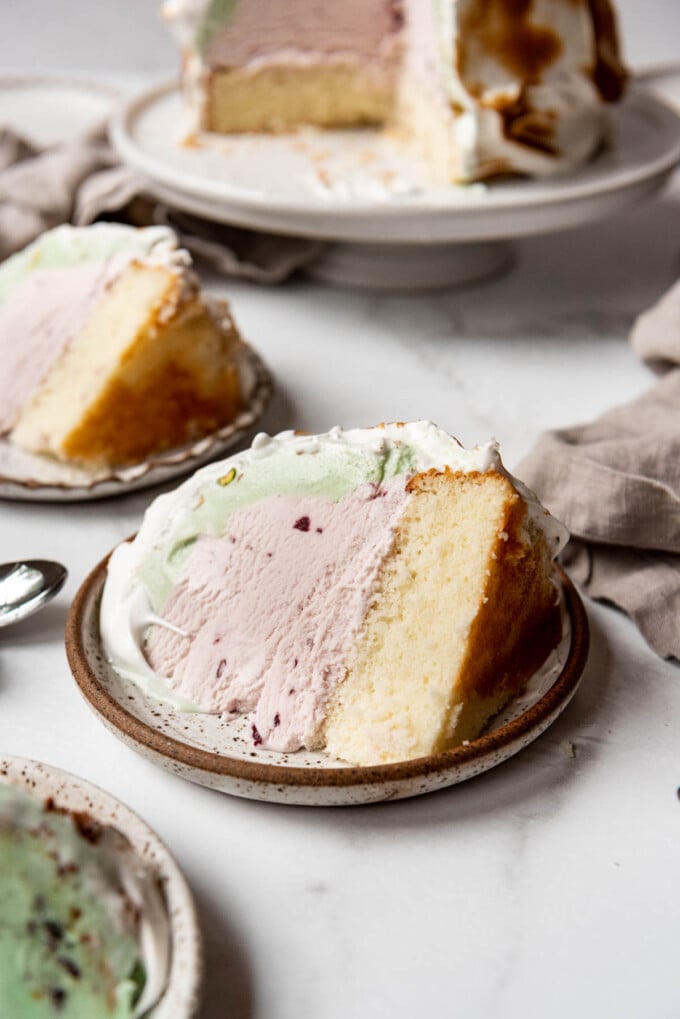
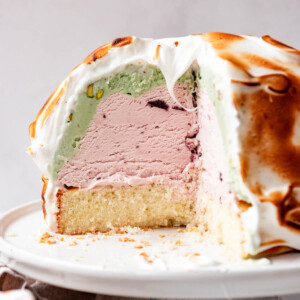
Just imagine torching it right at the table before serving to your friends! Who needs birthday candles when you’ve got homemade meringue and a kitchen torch? Then, as if that presentation wasn’t enough, you slice in to the baked Alaska to reveal layers of different flavored ice cream and brownie or cake.
Baked Alaska can’t help showing off, but you can’t help but love it. The contrast of the warm, toasted meringue with the cold ice cream and cake is really unique and just amazing.
If you love ice cream desserts, you might also like our Easy Grasshopper Ice Cream Pie, a Tin Roof Sundae, or our Homemade Fried Ice Cream.
What You’ll Need
Scroll down to the recipe card below this post for ingredient quantities and full instructions.
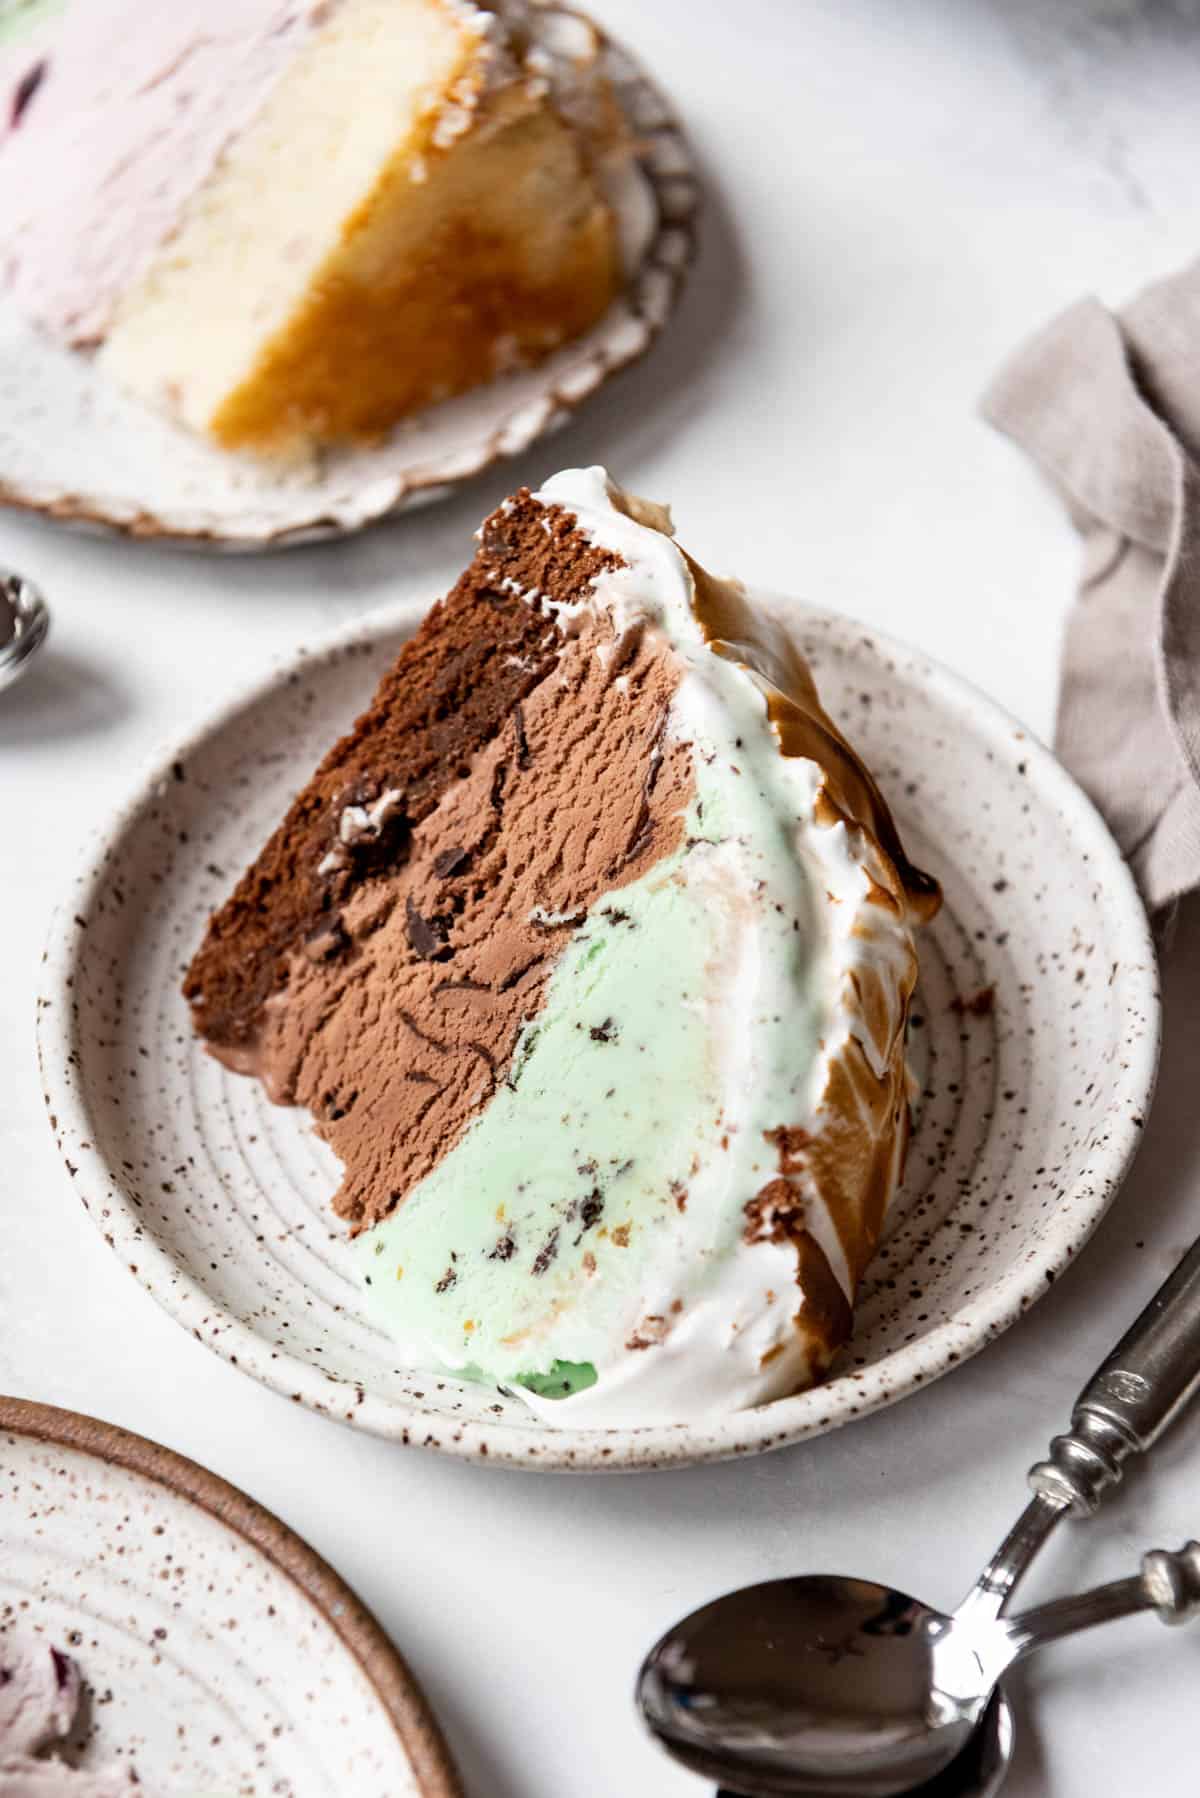
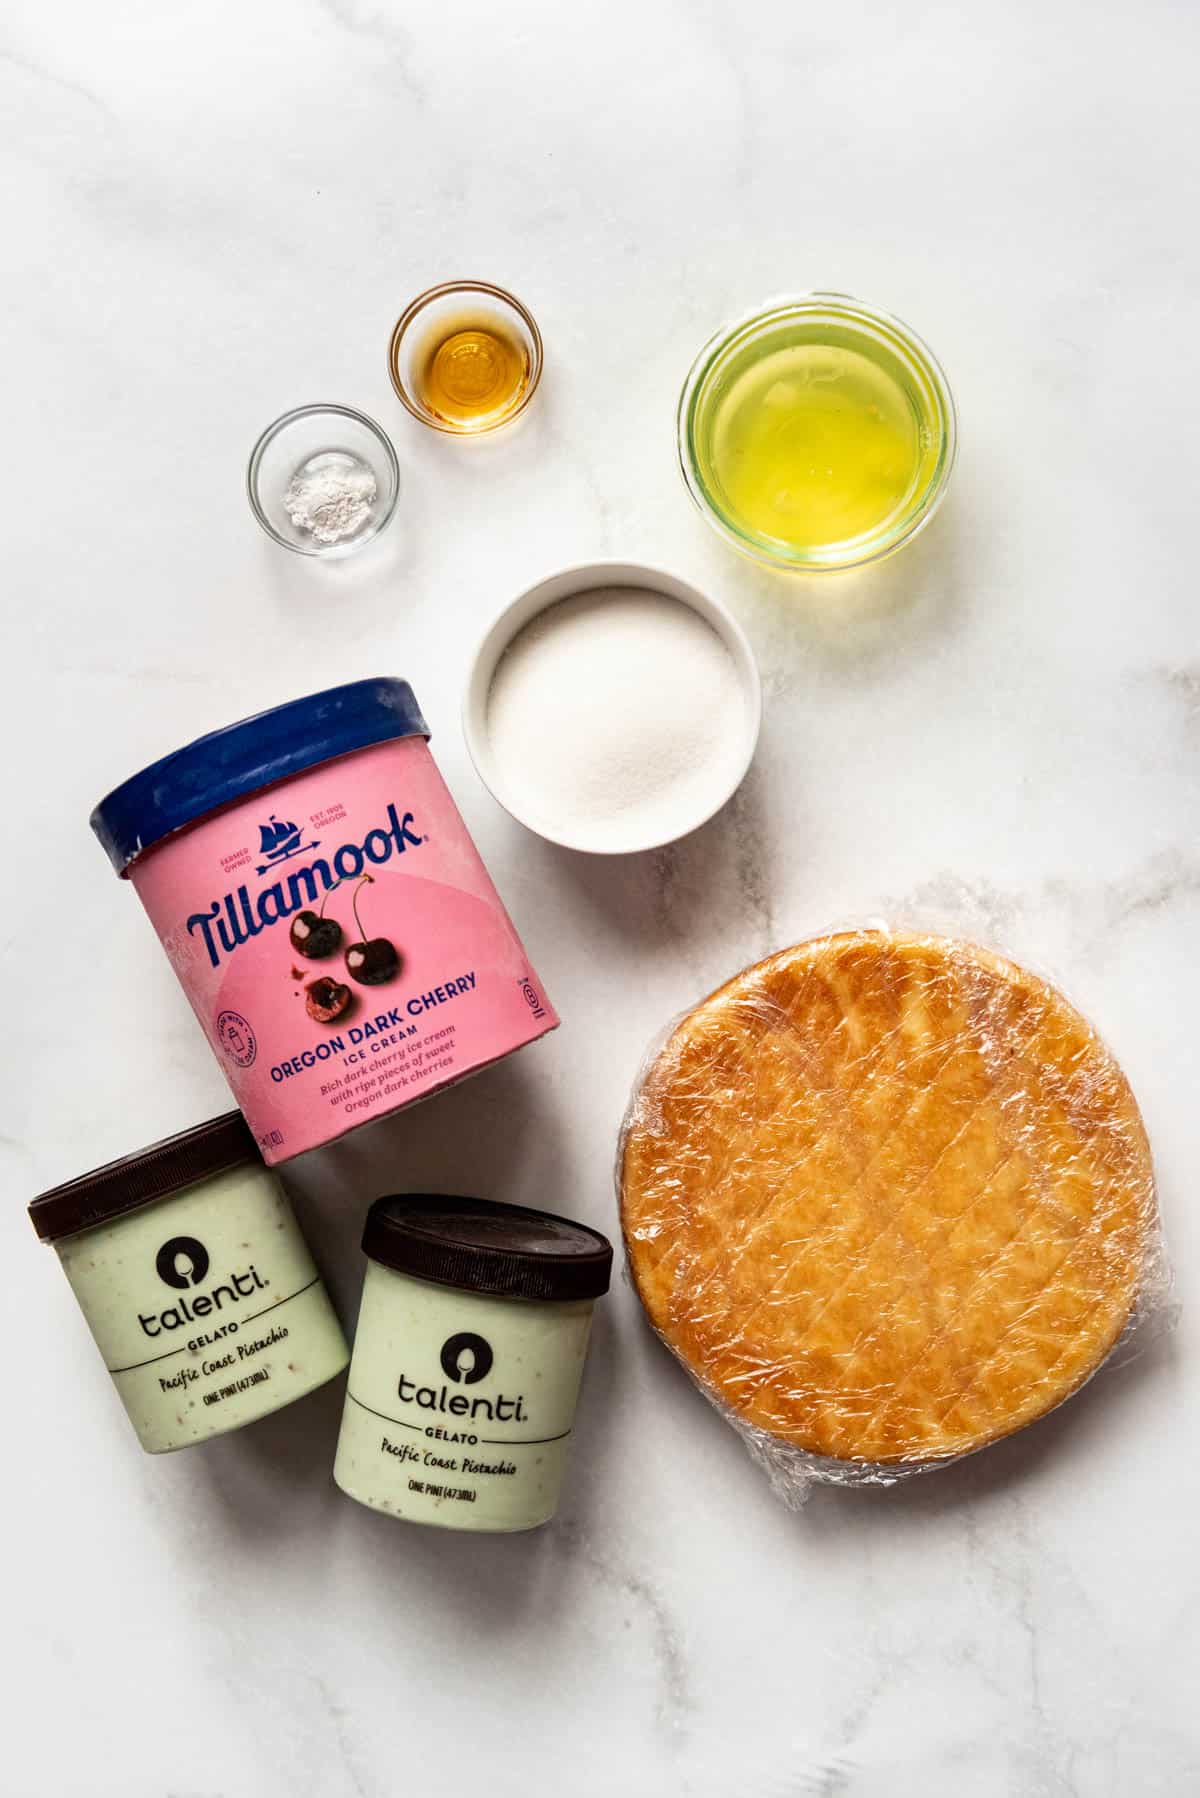
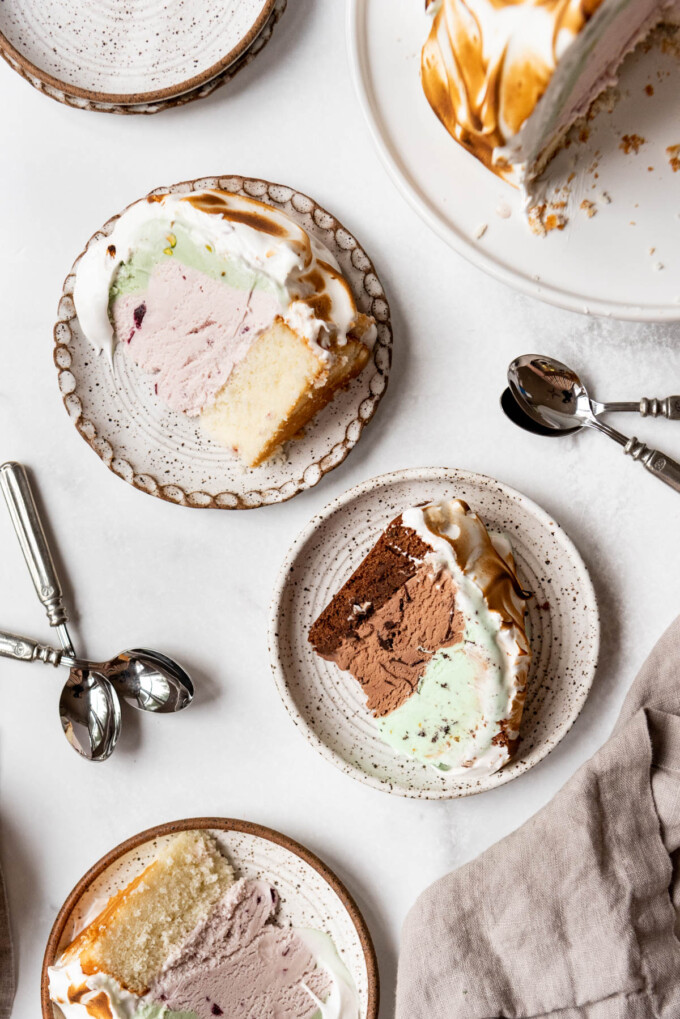
- Ice Cream – Choose two complimentary flavors of ice cream for your baked Alaska. You might also want to think about the color of each flavor and select ones that will give clear and distinct lines to show off the design inside the baked Alaska once you slice it. For the two versions in this post, I used cherry & pistachio and fudge brownie & mint chip.
- Cake or Brownie Layer – You can use one 8-inch layer of any cake you like. Most any of my homemade cake recipes make two 8-inch layers, so you can either halve the recipe or bake the whole thing and simply wrap one up and store it in the freezer for up to 3 months for something else. I’m including an adapted version of one of my favorite brownie recipes below that I used to make the mint chocolate brownie baked Alaska shown here.
- Egg Whites – These make up the basis of the meringue topping. Save the yolks for a batch of Easy Homemade Lemon Curd or Vanilla Pastry Cream (aka Creme Patisserie)!
- Granulated Sugar – Adds just the right amount of sweetness to the egg whites for a delicious marshmallow flavor.
- Cream of Tartar – This ingredient helps stabilize the meringue topping.
- Vanilla Extract – Adds flavor to the meringue. You could switch this out for another extract like almond or peppermint, if you prefer.
How to Make Baked Alaska
- Make your cake or brownie layer. You can use a box brownie or cake mix and bake it in a round 8-inch pan (a full cake mix makes 2 layers so you will have one leftover cake layer). But I promise that my homemade yellow cake, funfetti cake (sans sprinkles pictured here), chocolate cake, or homemade brownies are going to give superior results. And since baked Alaska is kind of a showstopper dessert, I think it’s important that it taste every bit as amazing as it looks.
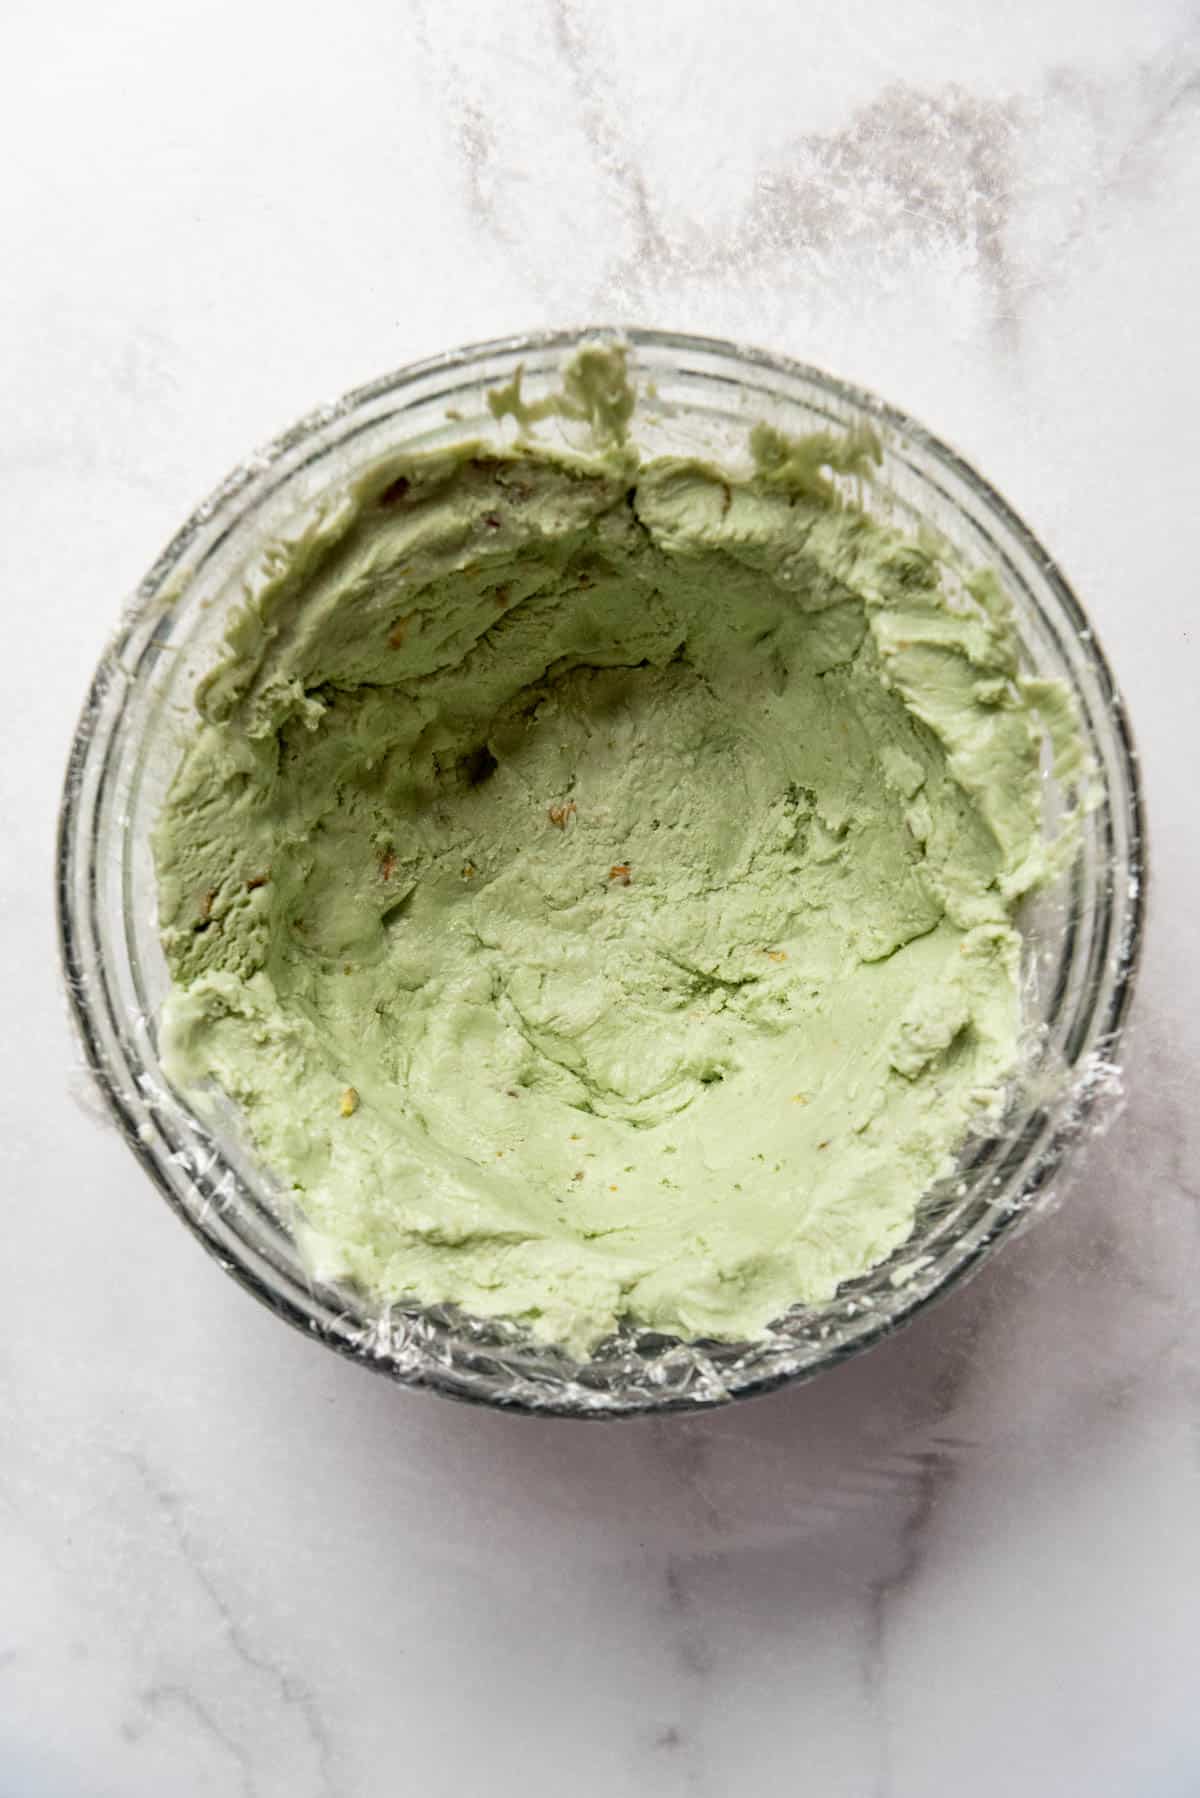
- Make the ice cream dome. Start by choosing a bowl that has an 8-inch diameter at the widest point. Line it with a couple layers of plastic wrap to make it easy to remove the ice cream later on. Scoop slightly softened ice cream into the bowl, pressing it in firmly to push out any air gaps.
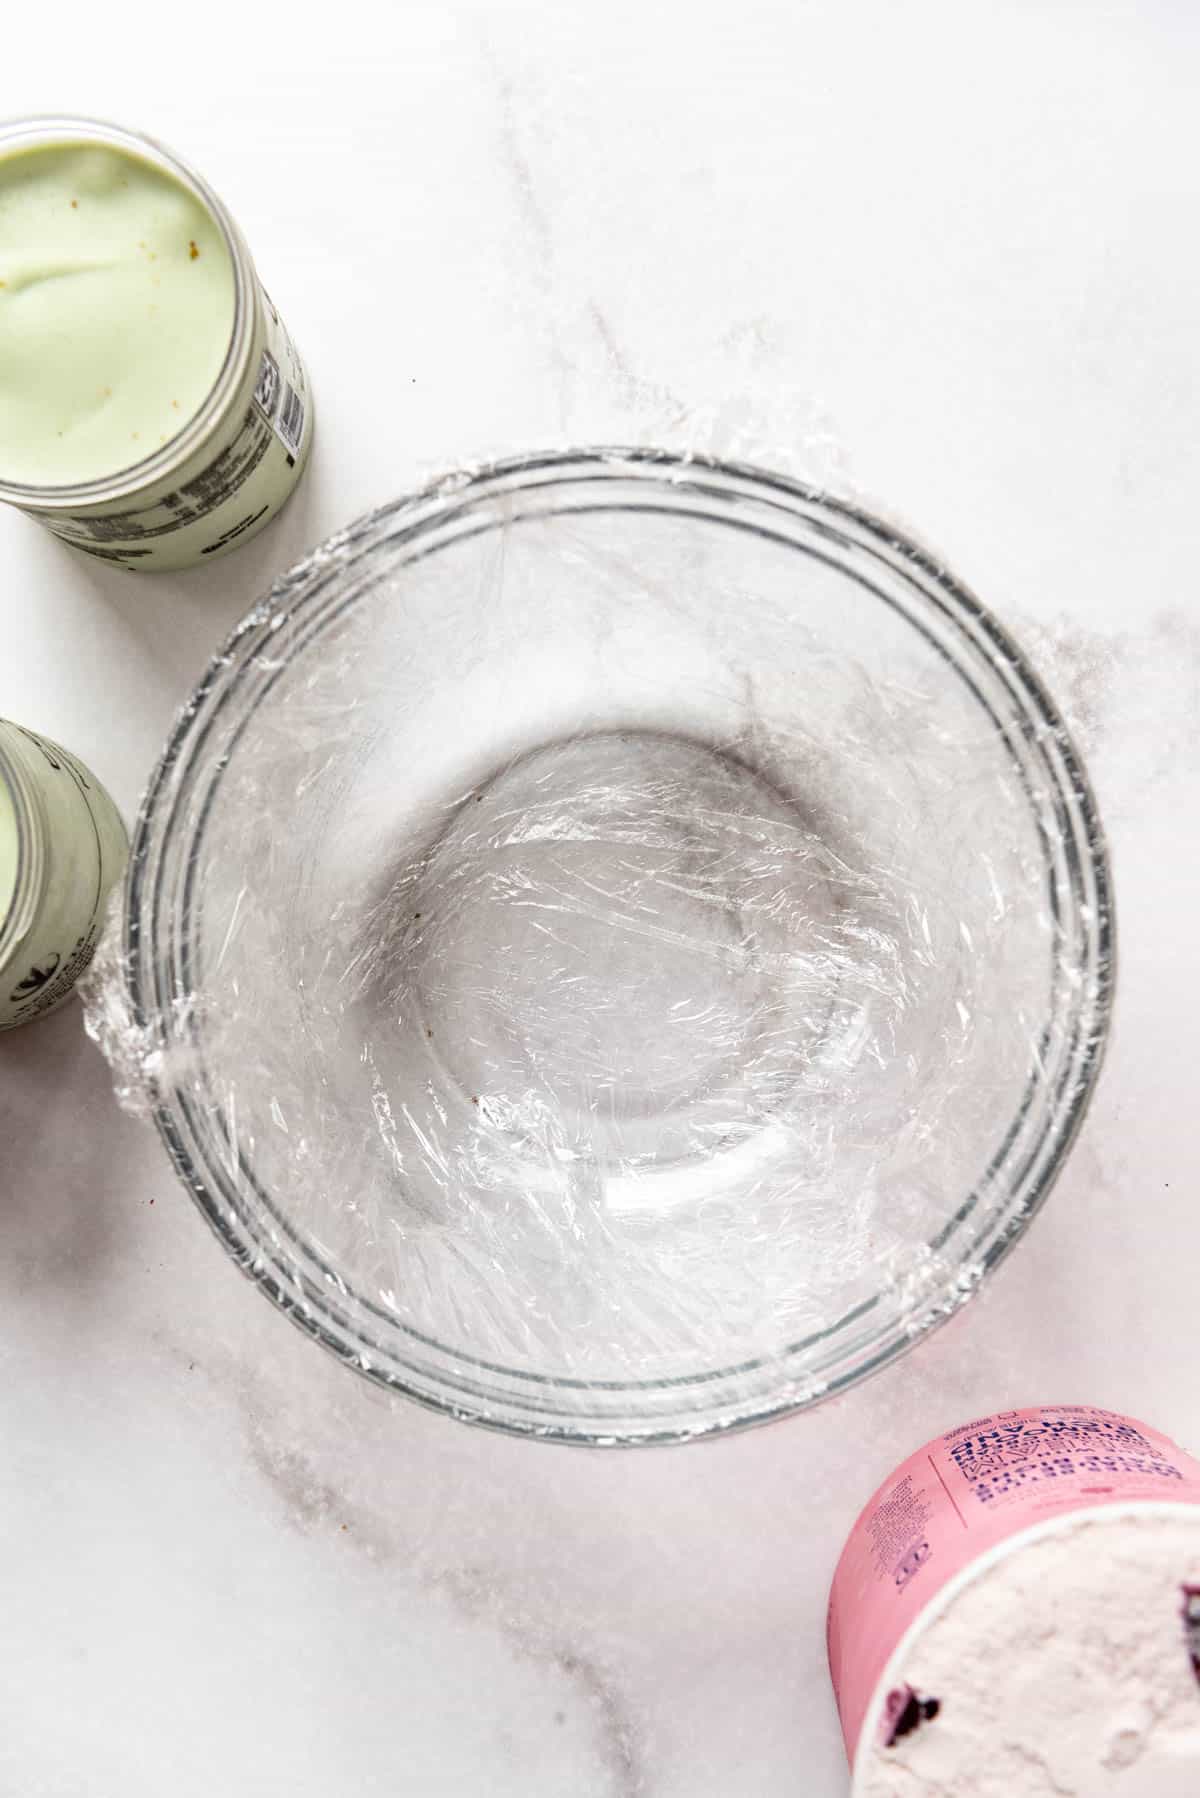
PRO TIP: Think about creating a visually pleasing design once you slice into the baked Alaska. You can use only one ice cream flavor or choose two contrasting colors.
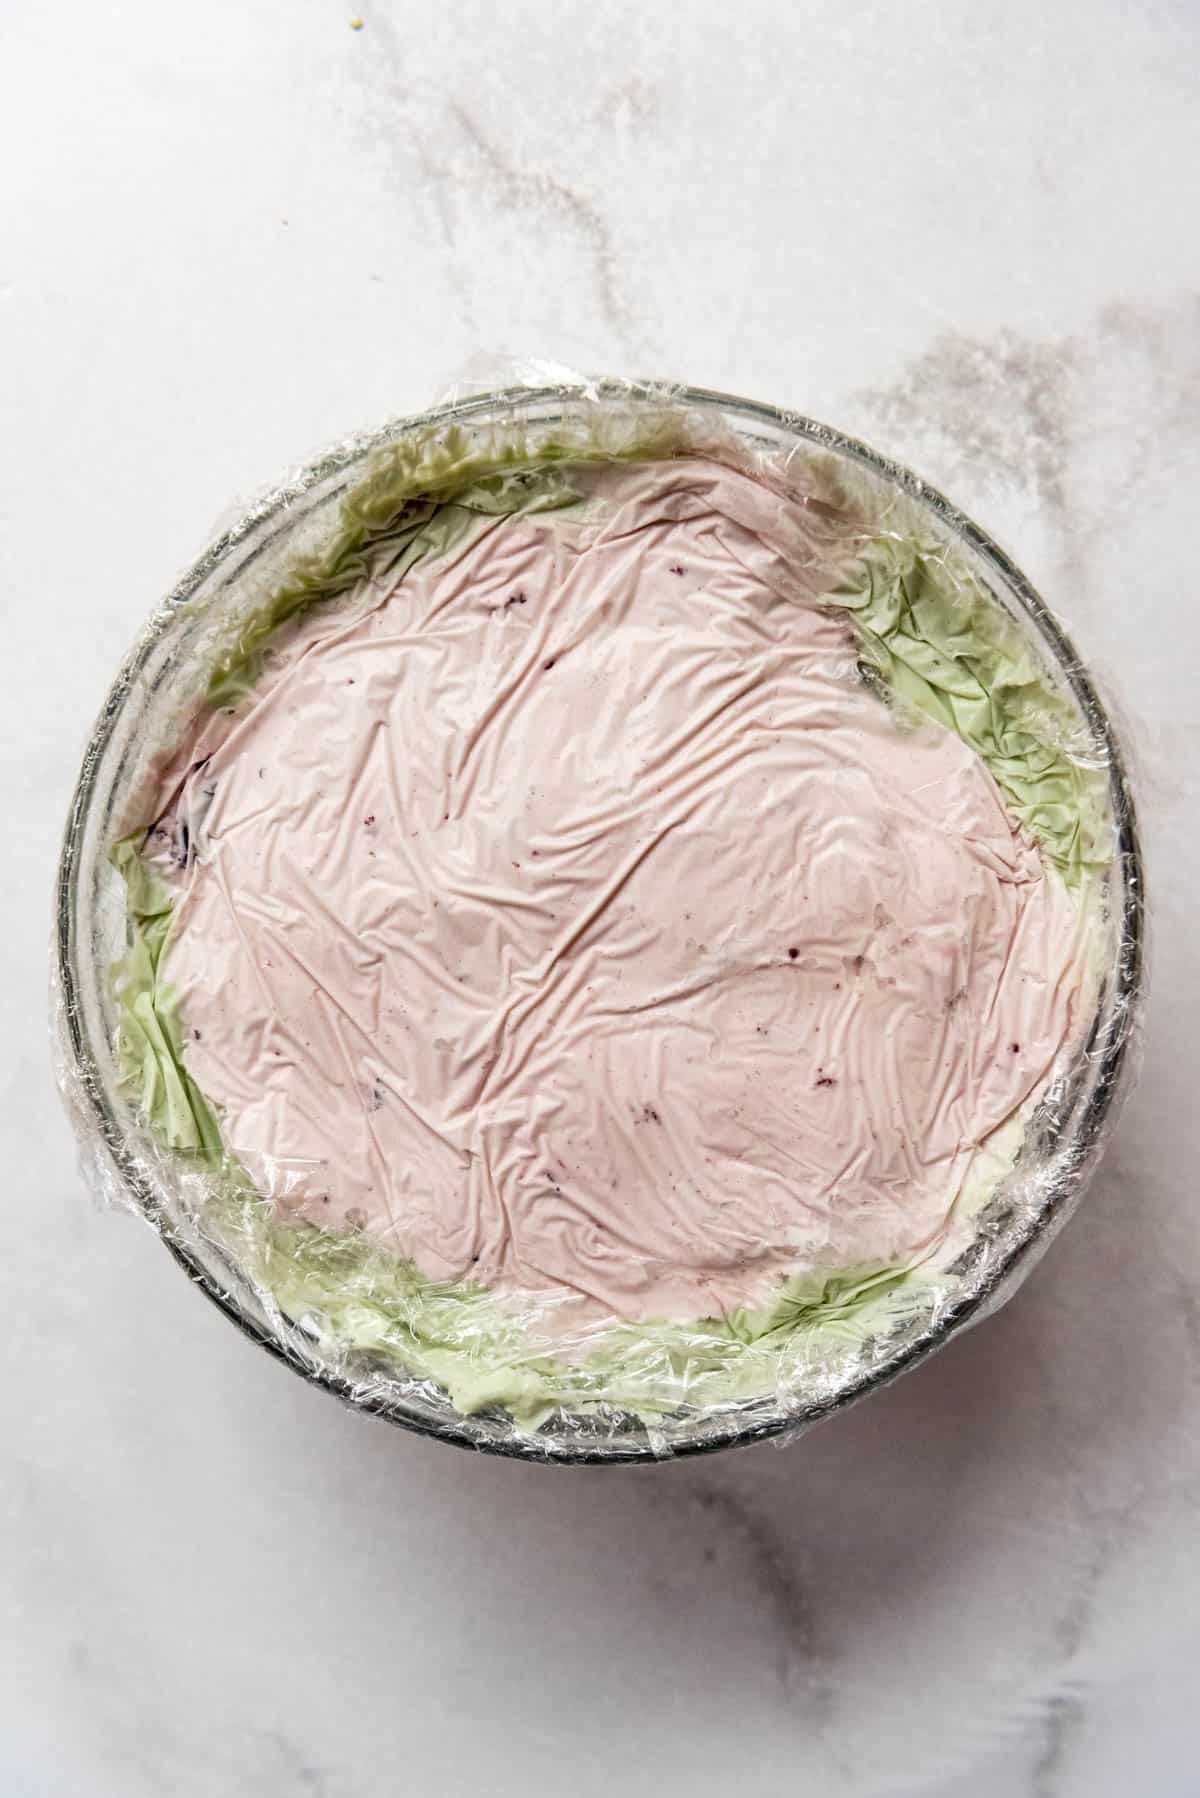
In this pistachio and cherry baked Alaska, I molded the pistachio ice cream around the edges of the bowl to create space for the cherry ice cream in the middle for a different look.
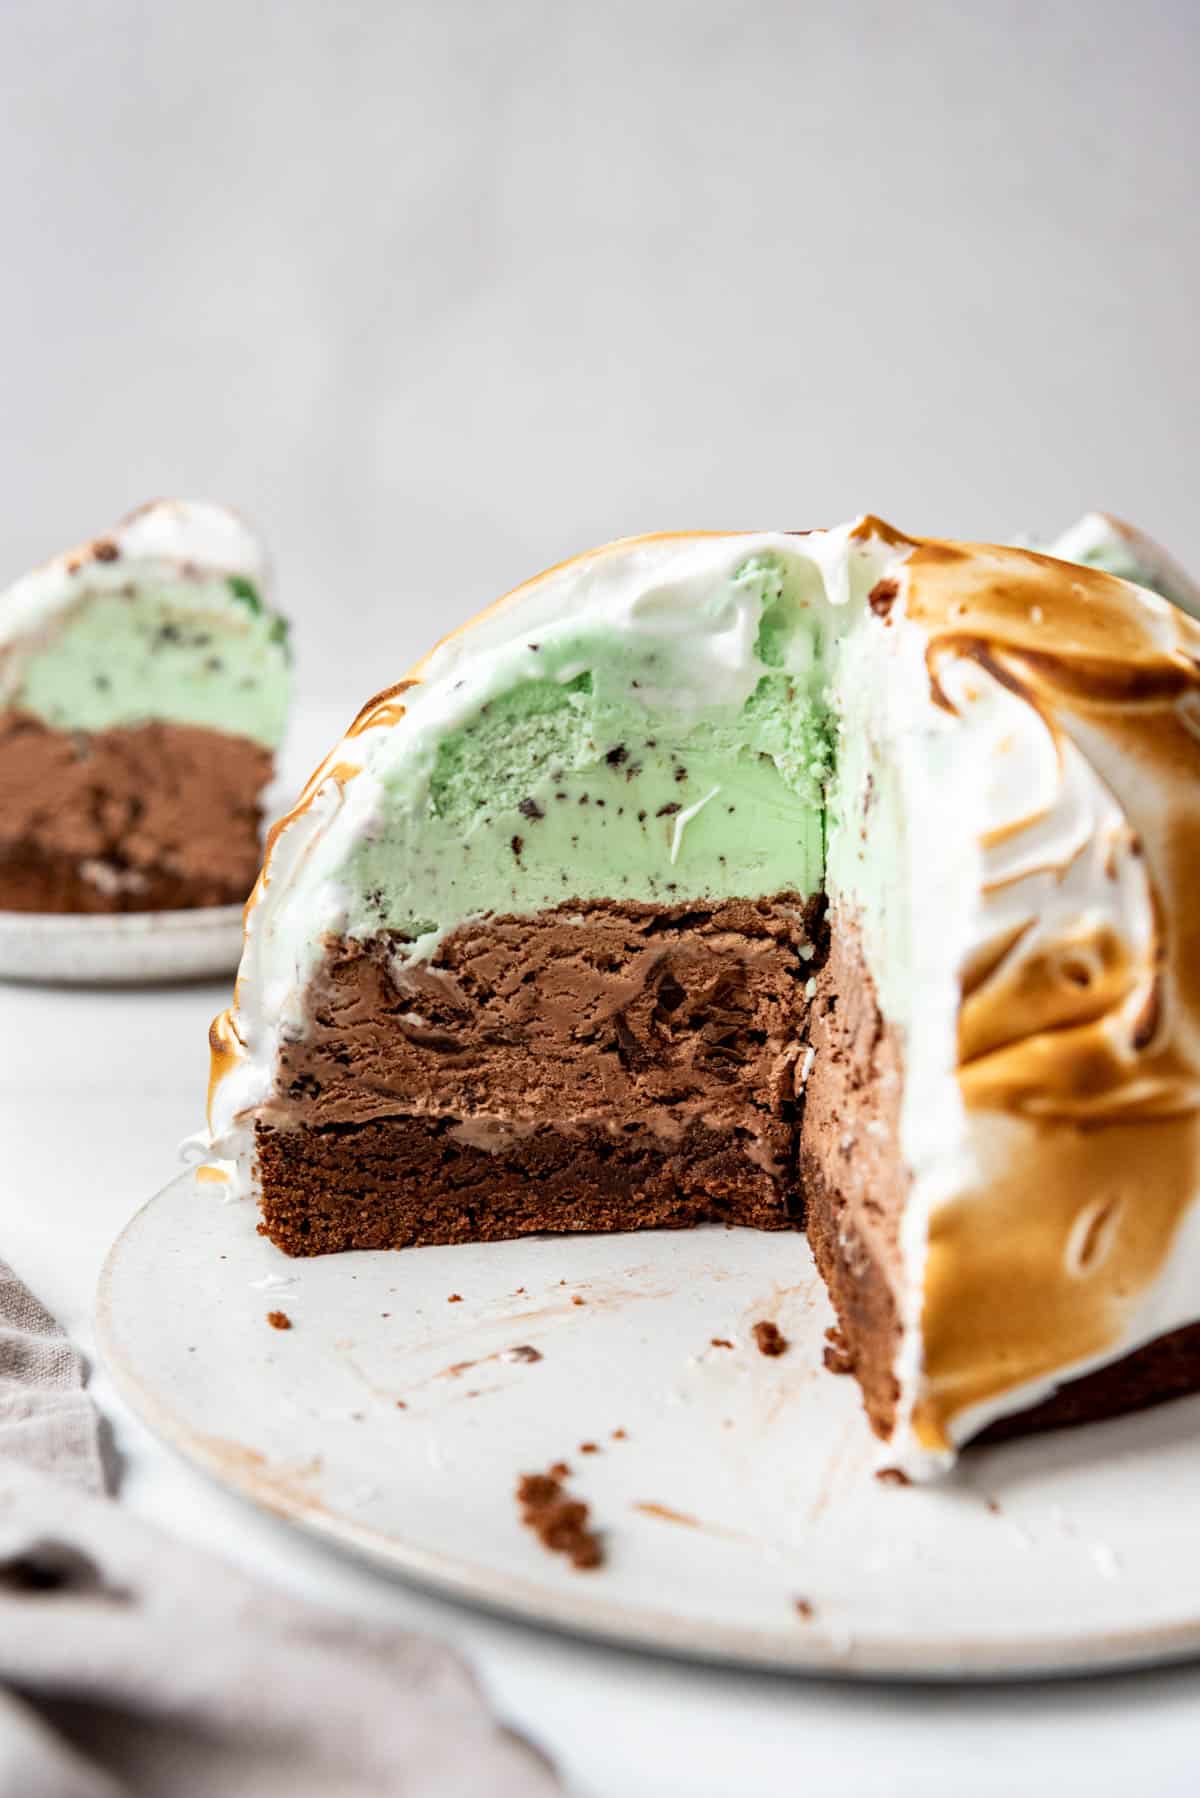
In the mint and chocolate baked Alaska, I went with the simpler method of flat layers, which was way easier and I think I actually like the look even better.
- Freeze completely. Once the softened ice cream is in the bowl, cover it with plastic wrap and freeze overnight until very firm again.
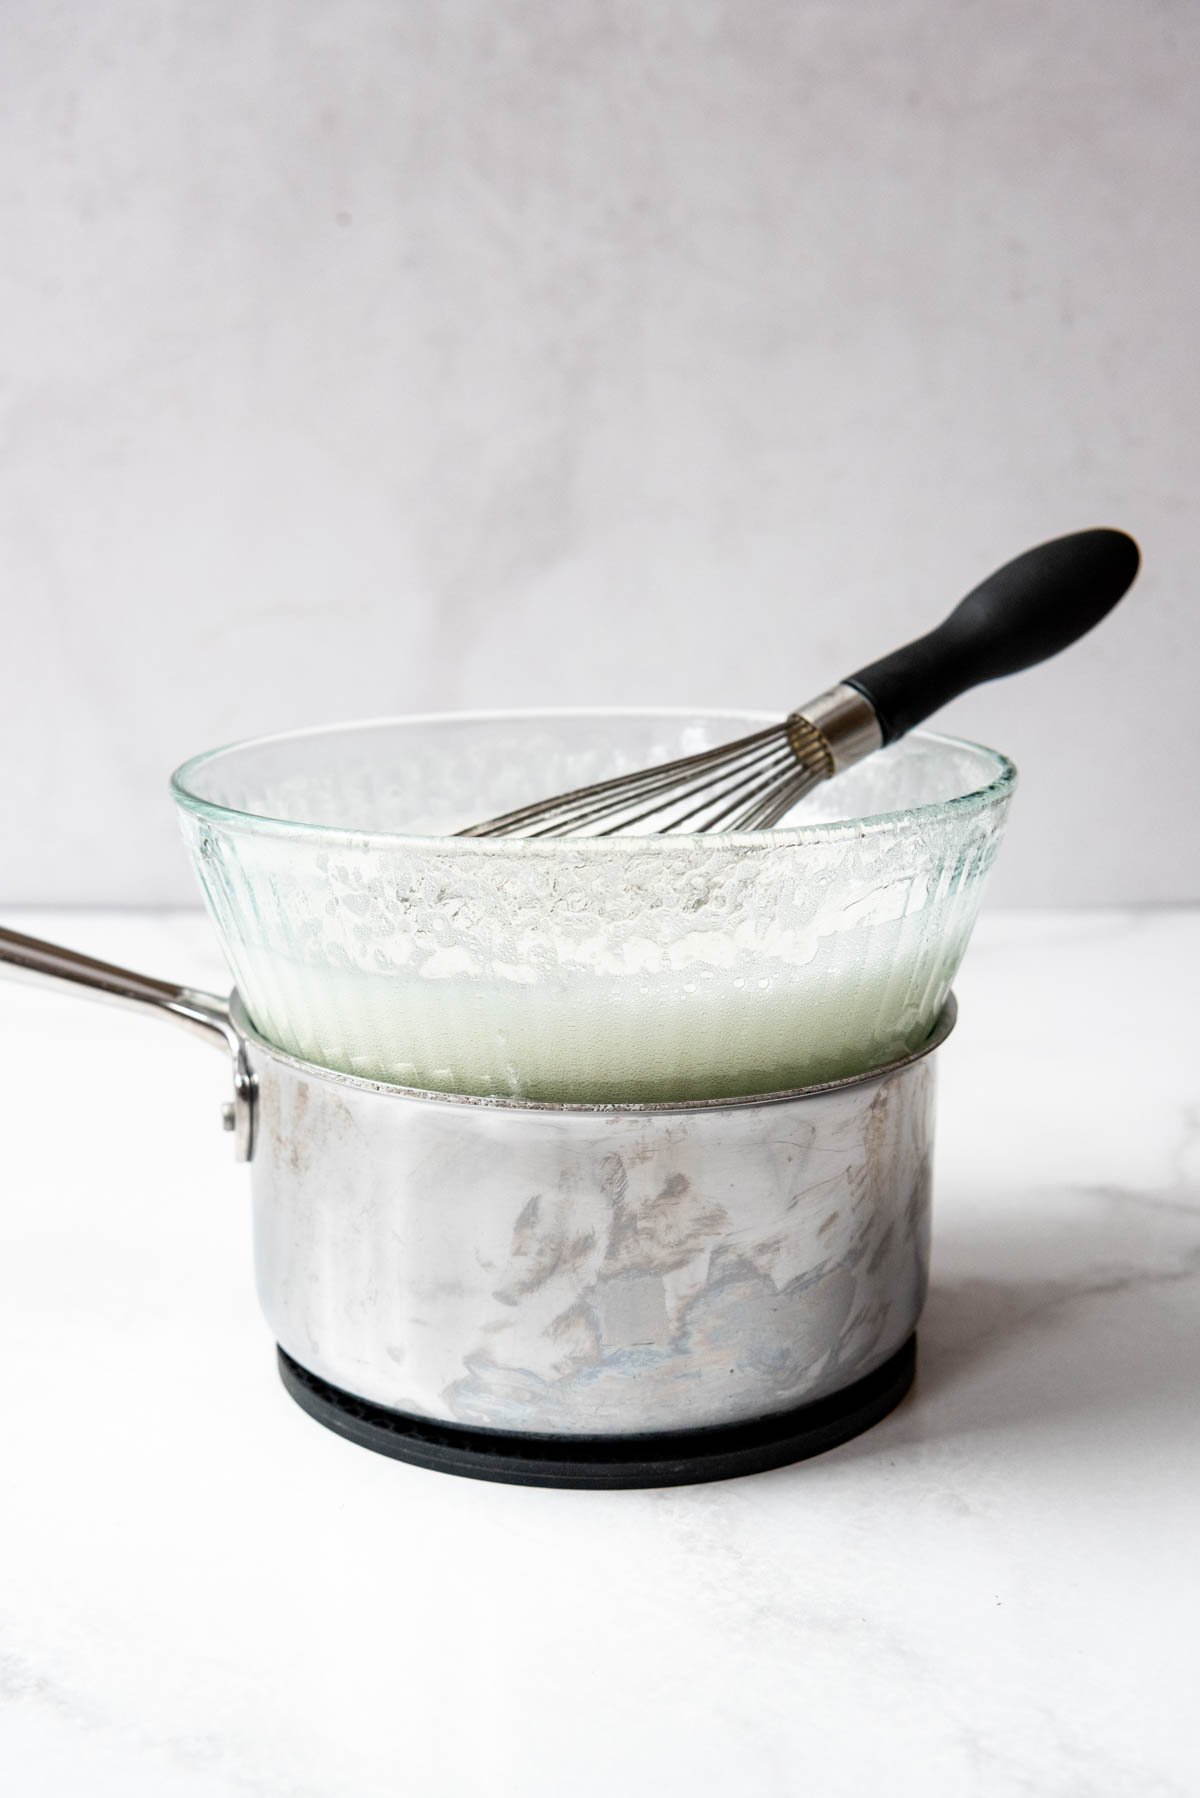
- Combine meringue ingredients. Combine egg whites, sugar, cream of tartar, and salt in a large glass bowl set over a medium saucepan of simmering water. This is called a bain-marie. The bottom of the bowl should not be touching the water.
- Cook meringue topping. While whisking, cook the egg whites and sugar for about 5 minutes until the mixture reaches 160°F. This serves both to cook the egg whites until they are safe to eat while also dissolving the sugar so the meringue isn’t gritty. You should be able to rub the mixture together between your fingers without feeling sugar granules.
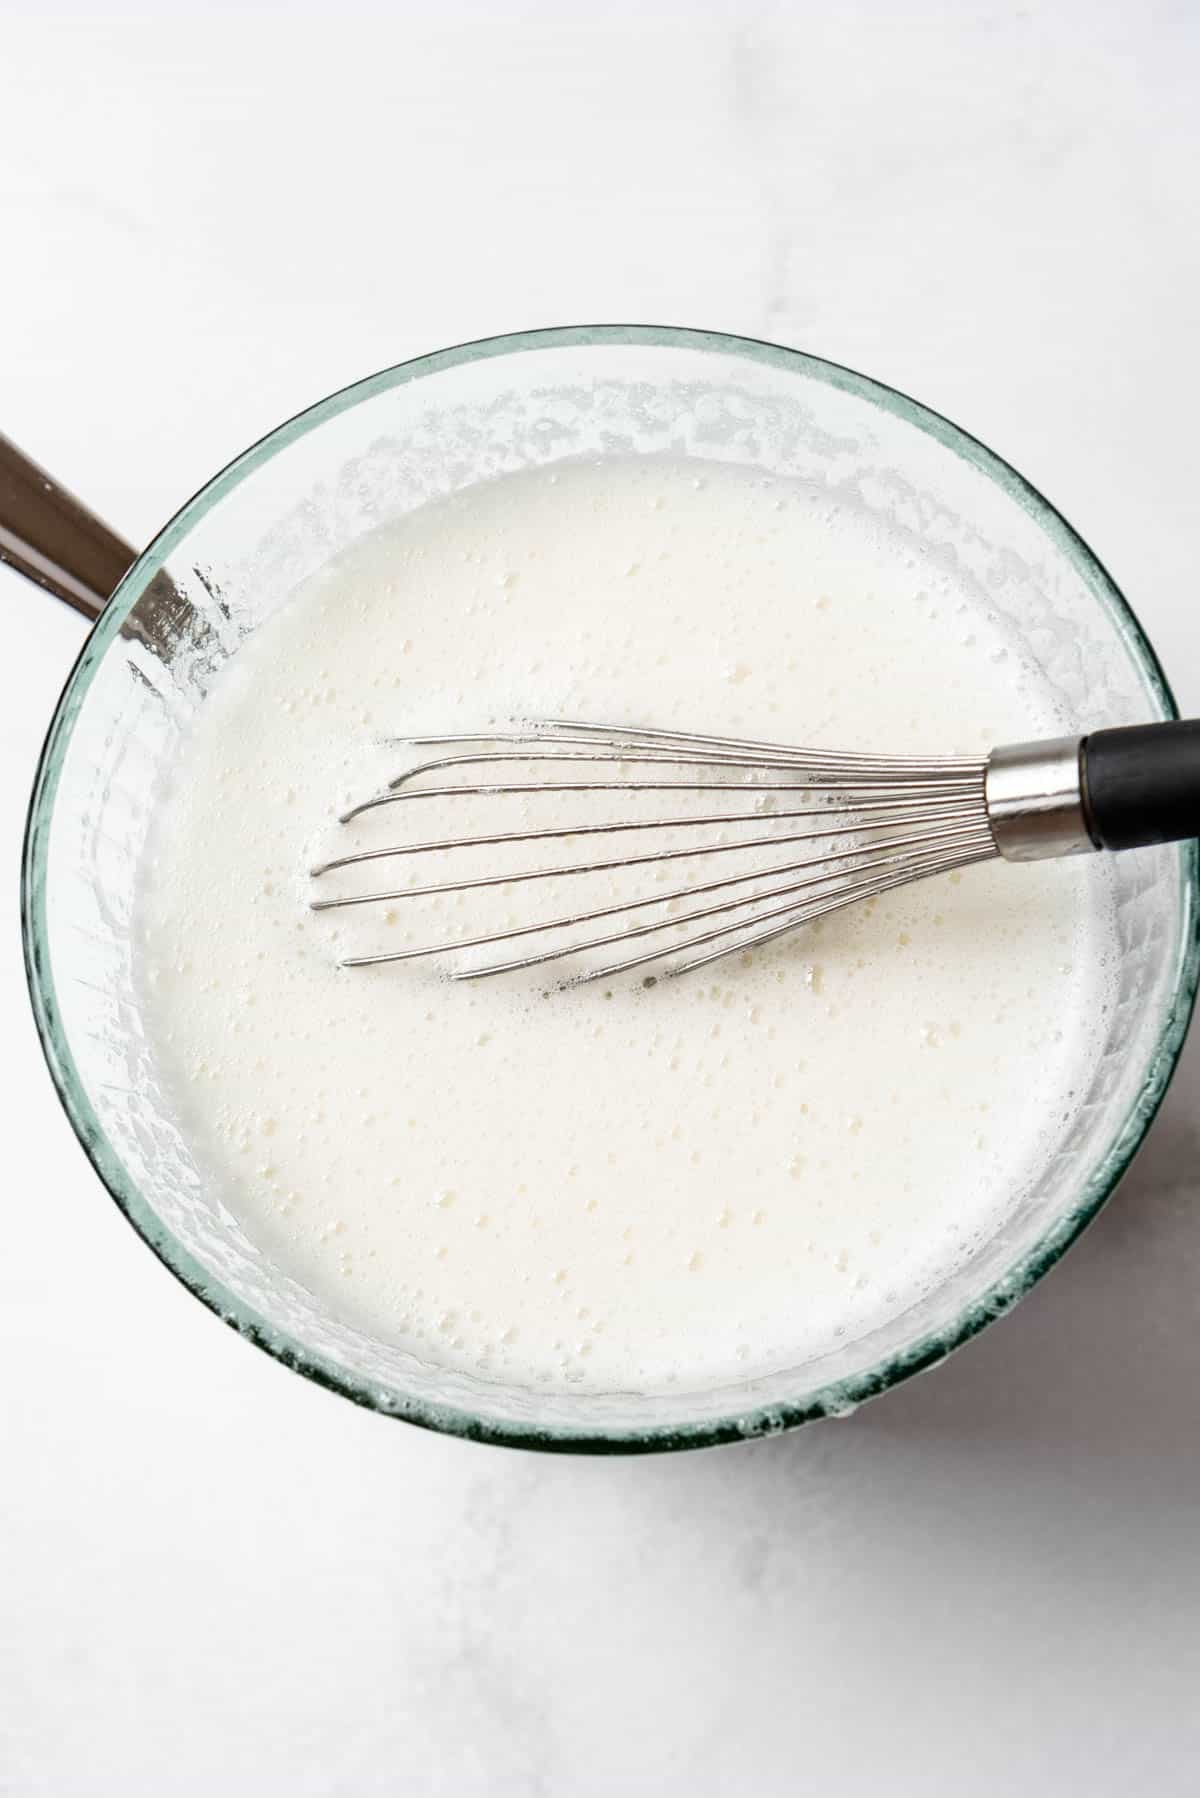
- Beat to stiff peaks. Remove the bowl from over the water and beat the egg whites on high speed with an electric mixer for 5-7 minutes until glossy stiff peaks form. Add vanilla extract during the last minute of mixing. By this point the meringue should be pretty much cool to the touch.
- Top. Spread the meringue over the ice cream, using a spoon or knife to create peaks and swirls for interest and extra toasting surface.
PRO TIP: Stiff peaks means that when you lift your beaters out of the mixing bowl, the meringue peaks don’t flop over on themselves but instead should stand up tall and proud without drooping. If your don’t beat the meringue all the way until stiff peaks, it will be much more likely to slide off your baked Alaska, ruining the effect. It will still taste delicious, but end up being more of a marshmallow ice cream topping than a true baked Alaska.
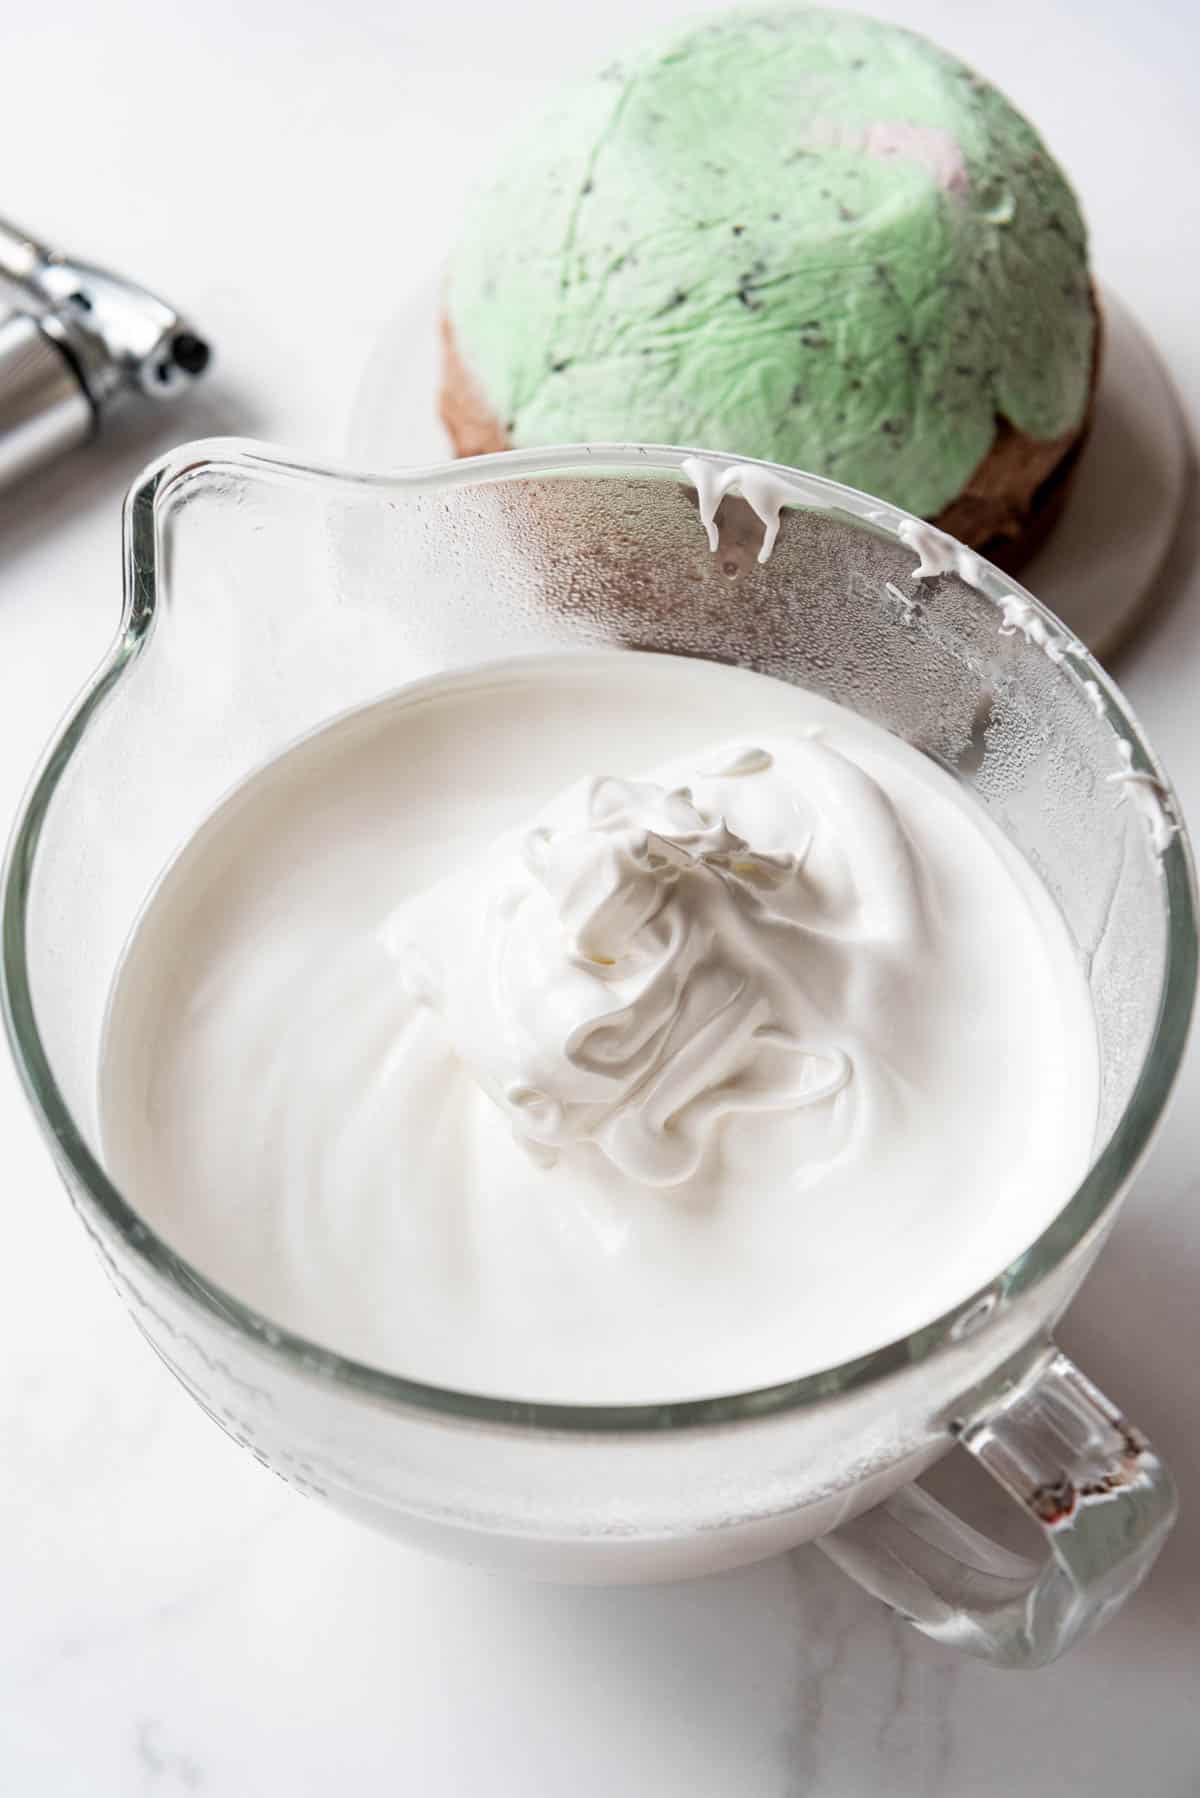
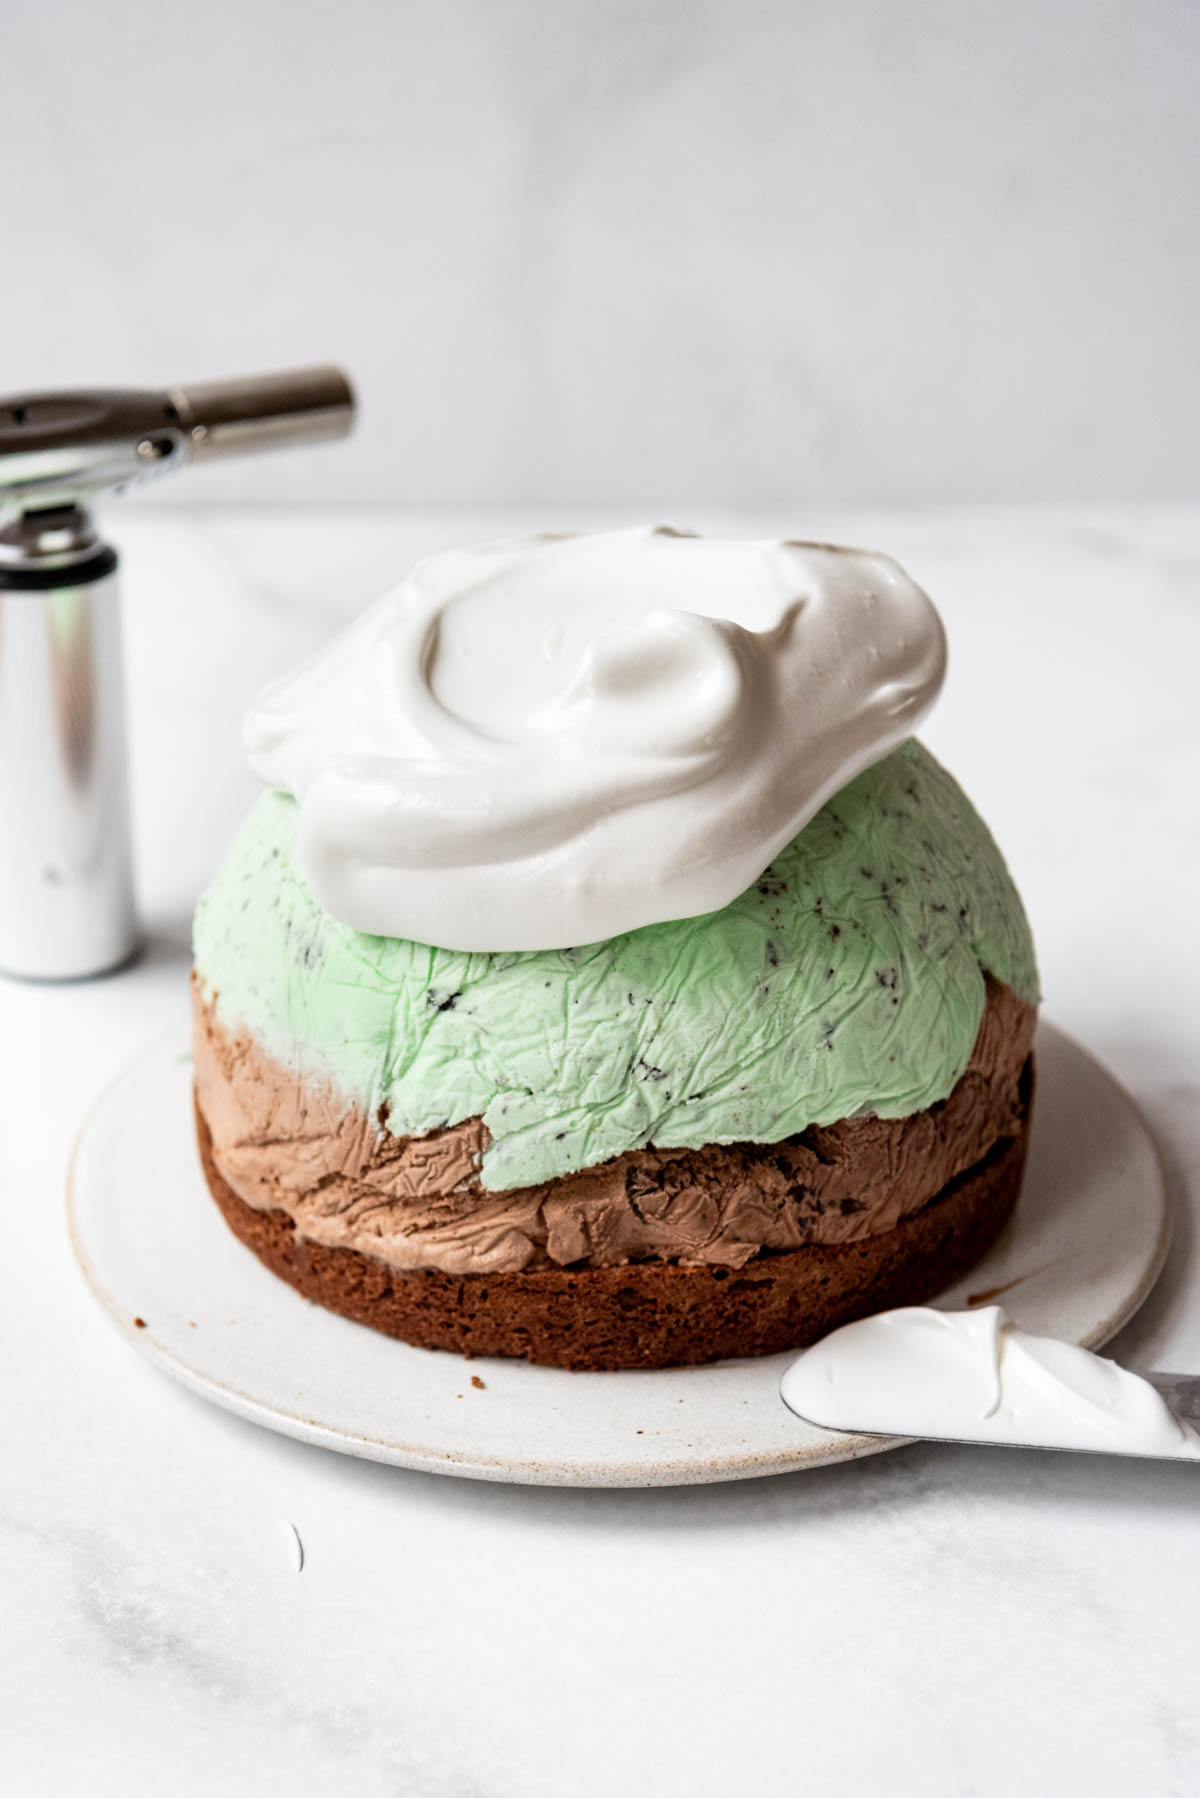
- Toast. Lightly torch the meringue with a brulee torch or broil in the oven about 12 inches from the broiler for 1-2 minutes until golden brown. If using a broiler, you may want to have long oven-safe gloves so you can reach in and rotate the baked Alaska to get the meringue coating to brown more evenly. A kitchen torch is definitely the easiest approach and worthwhile to have on hand for other dessert recipes if you like to bake!
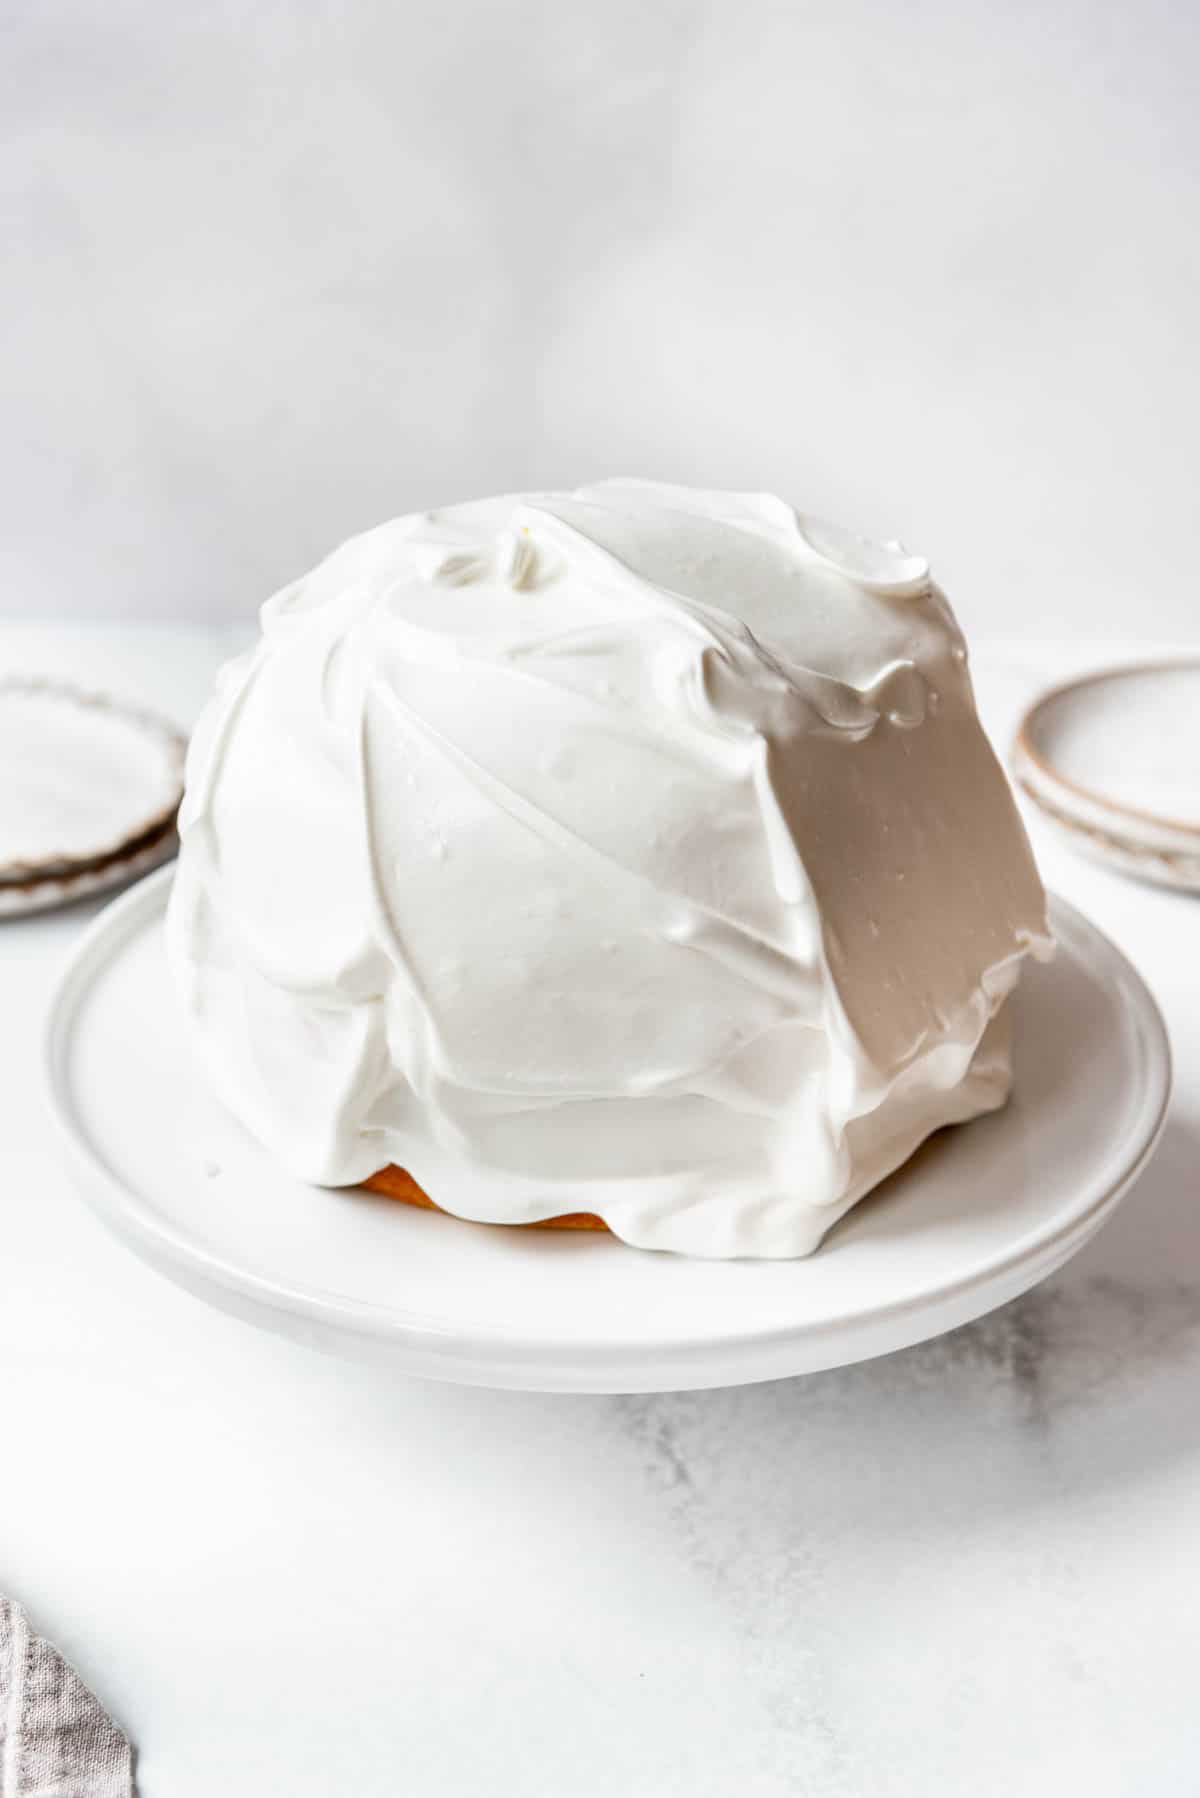
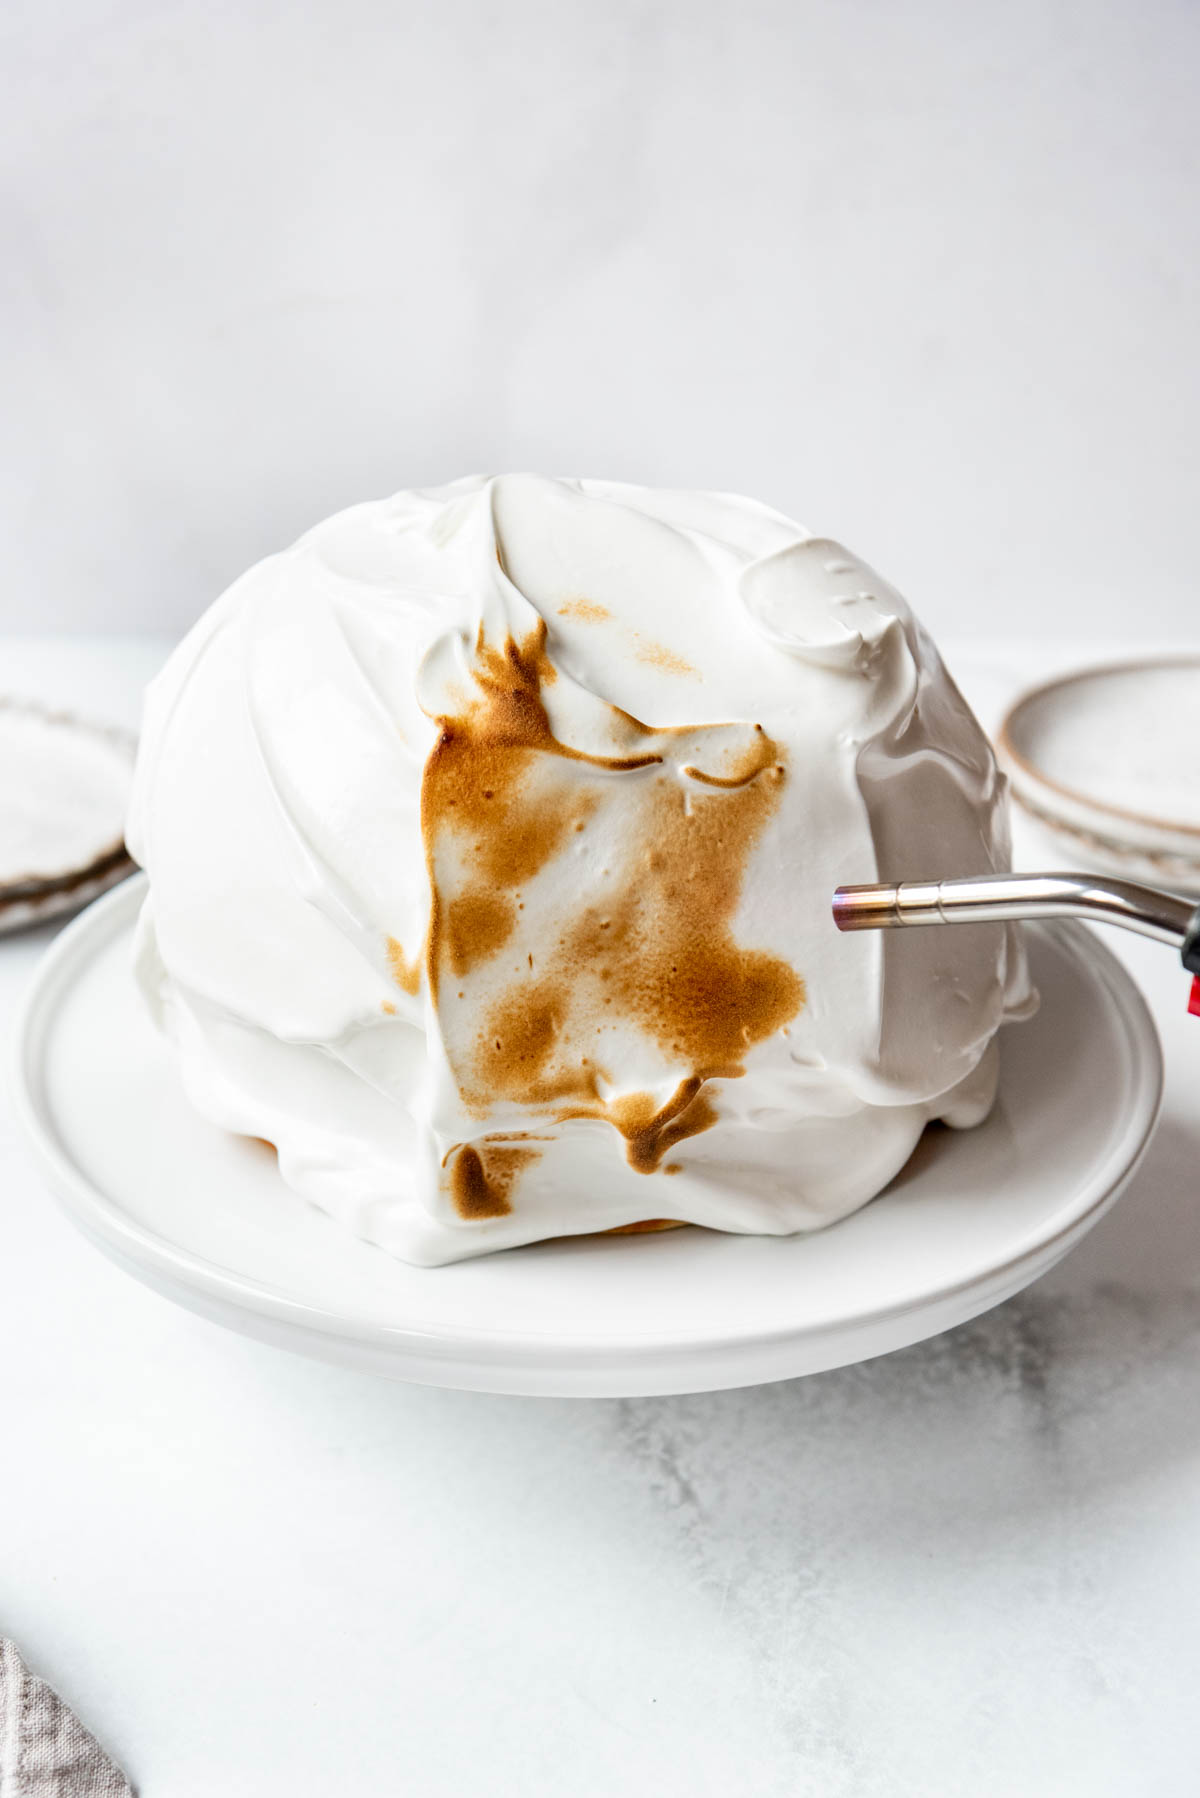
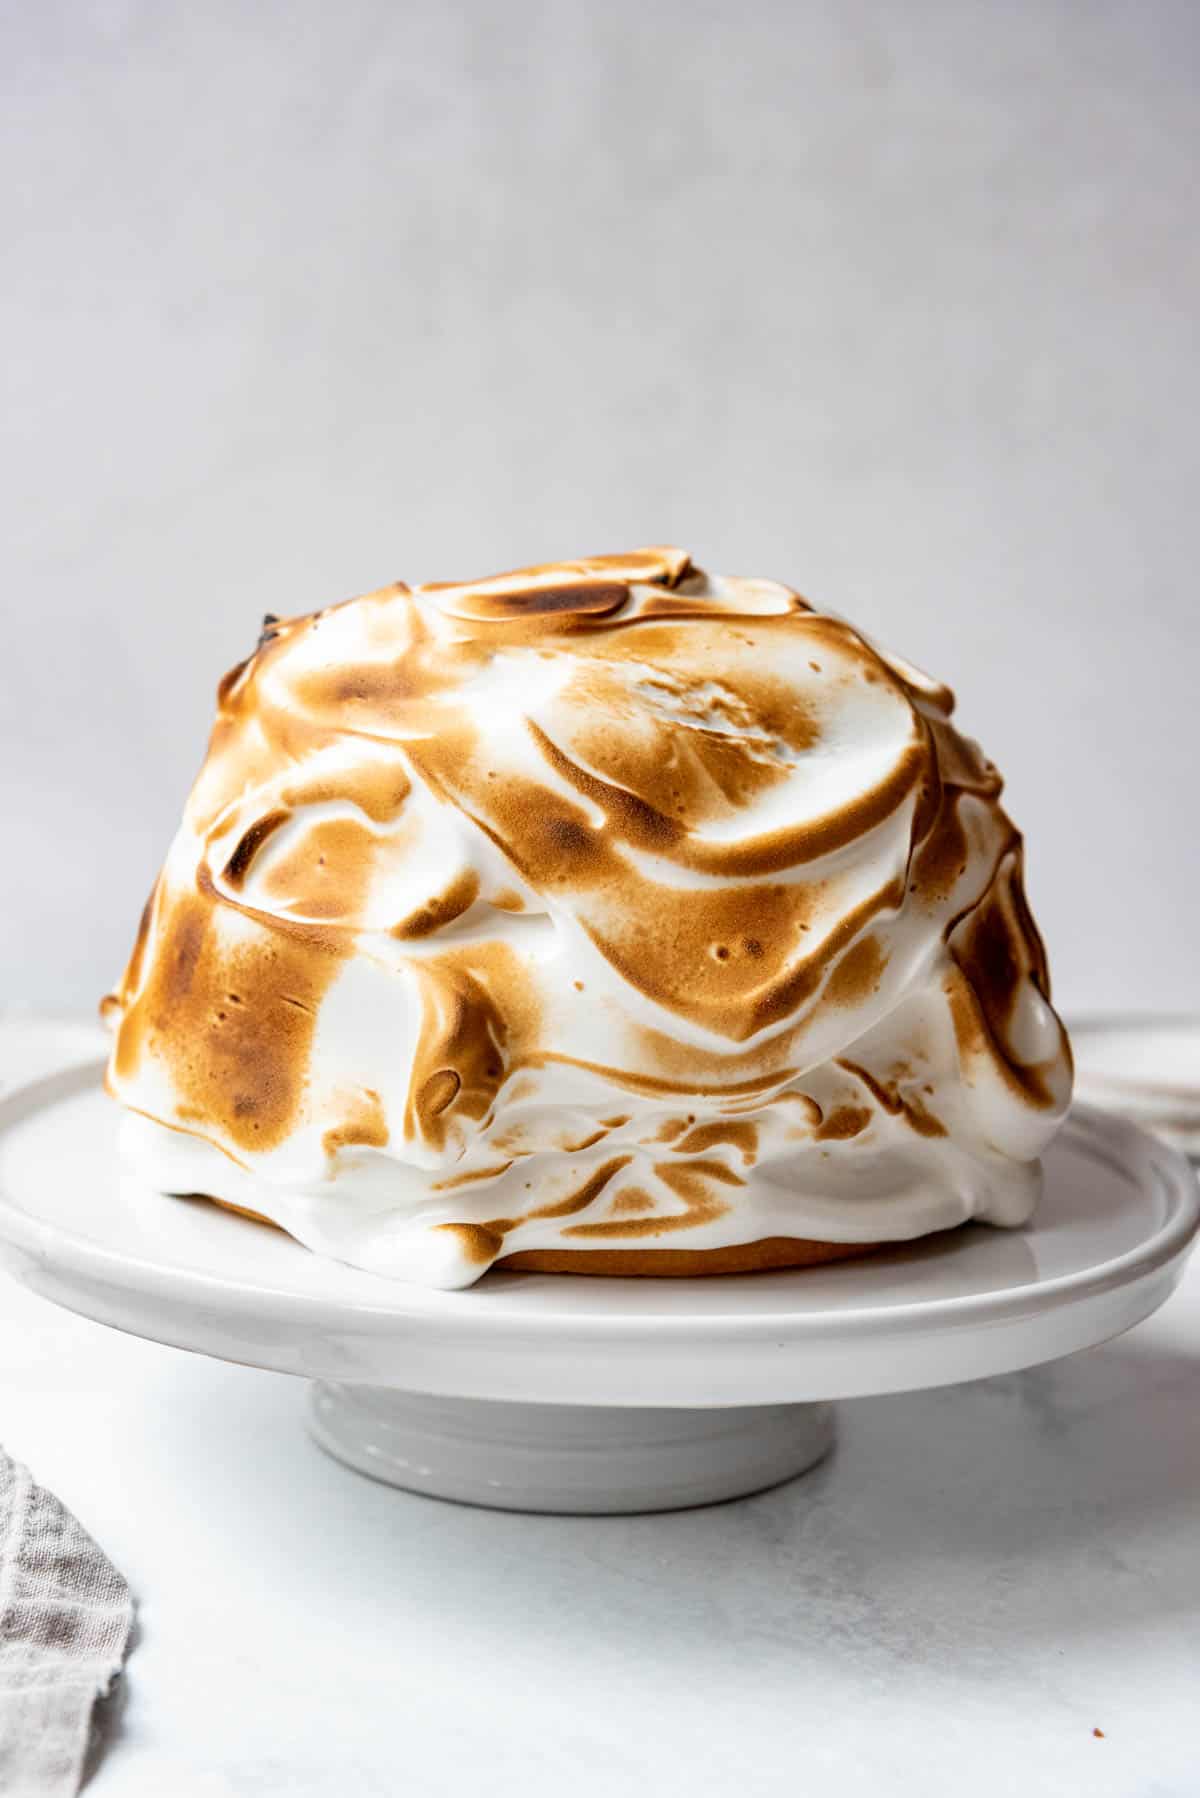
- Serve. It’s best to serve baked Alaska right away when the meringue is still warm on the outside from toasting and the ice cream is frozen hard underneath. The longer the baked Alaska sits out, the softer the ice cream will get. But you can also return any uneaten baked Alaska to the freezer and save it for a few days and the meringue will stay deliciously soft.
Recipe FAQ’s
Baked Alaska is a classic dessert with murky origins, although many claim it was first introduced by a pastry chef in New York at a restaurant called Delmonico’s around 1867 and possibly given its whimsical moniker to celebrate the Alaska Purchase from Russia around the same time.
No, not really. There is always some melting once the ice cream is out of the freezer, which is why you shouldn’t remove and unmold it until after the meringue is done, but once the meringue is on top it actually acts as a barrier to the heat source and the ice cream underneath since it doesn’t conduct heat very well.
Best Flavor Combos for Baked Alaska
Let your imagination run wild and choose your favorite ice cream flavors, or use one of the pairings mentioned here based on some of our favorite combinations.
- Vanilla cake with cherry and pistachio ice cream
- Brownie base with mint chip and fudge brownie ice cream
- Chocolate cake with strawberry and cookie dough ice cream
- Spice cake with butter pecan and pumpkin ice cream
- Funfetti cake with cookies & cream and vanilla ice cream
- Brownie base with peppermint and vanilla or chocolate ice cream
- Strawberry cake with rocky road and toasted almond ice cream
PRO TIP: Cake is usually soft enough, even when frozen, to be enjoyable to eat as part of Baked Alaska, but I have found that not all brownie recipes work as well. Fudgy brownies can freeze pretty hard and very chewy and aren’t as nice and slightly more cakey brownies in this application. I shared my favorite brownie recipe for baked Alaska in the recipe card below.
How to Store Baked Alaska
Keep any uneaten baked Alaska in the freezer, covered loosely with plastic wrap, for up to 4-5 days. I like to press the plastic wrap against the sliced, exposed portion so the cake doesn’t dry out and the ice cream doesn’t get ice crystals on it.
More Dessert Recipes
Did you make this recipe?
Let me know what you thought with a comment and rating below. You can also take a picture and tag me on Instagram @houseofnasheats or share it on the Pinterest pin so I can see.
Baked Alaska
Equipment
Ingredients
Ice Cream
- 2 (1.5-quart) containers ice cream any flavor
Brownie Option
- 1/2 cup salted butter softened
- 1 cup granulated sugar
- 2 large eggs
- 1 teaspoon vanilla extract
- 3/4 cup all-purpose flour
- 1/4 cup cocoa powder
Meringue
- 4 large egg whites
- 1 cup granulated sugar
- 1/4 teaspoon cream of tartar
- 1/4 teaspoon salt
- 2 teaspoons vanilla extract

Instructions
Ice Cream
- Line a freezer-safe bowl with an 8-inch diameter with a couple layers of plastic wrap to make it easy to remove the ice cream later on. Scoop slightly softened ice cream into the bowl, pressing it in firmly to push out any air gaps. Add another layer of contrasting ice cream on top of the first, pressing it into another even layer.2 (1.5-quart) containers ice cream
- Once the softened ice cream is in the bowl, cover it with plastic wrap and freeze overnight until very firm again.
Brownie Option
- Preheat oven to 350°F. Line a round 8-inch cake pan with a parchment paper circle and spray with baking spray.
- In a large bowl, beat the butter and sugar together until creamy and light. Add the eggs and vanilla, mixing well until combined. Stir in the flour and cocoa powder.½ cup salted butter, 1 cup granulated sugar, 2 large eggs, 1 teaspoon vanilla extract, ¾ cup all-purpose flour, ¼ cup cocoa powder
- Bake brownie layer for 25-30 minutes until a toothpick inserted into the center comes out clean with just a few crumbs. Let cool completely.
Meringue
- Combine egg whites, sugar, cream of tartar, and salt in a large glass bowl set over a medium saucepan of simmering water. This is called a bain-marie. The bottom of the bowl should not be touching the water.4 large egg whites, 1 cup granulated sugar, ¼ teaspoon cream of tartar, ¼ teaspoon salt
- Cook, whisking constantly, for about 5 minutes until the mixture reaches 160°F to dissolve the sugar. You should be able to rub the mixture together between your fingers without feeling sugar granules.
- Remove the bowl from over the water and beat the egg whites on high speed with an electric mixer for 5-7 minutes until glossy stiff peaks form. Add vanilla extract during the last minute of mixing.2 teaspoons vanilla extract
- Spread the meringue over the ice cream, using a spoon or knife to create peaks and swirls for interest and extra toasting surface. Toast the meringue with a brulee torch or broil in the oven about 12 inches from the broiler for 1-2 minutes before serving.
Notes
- Storage: Keep any uneaten baked Alaska in the freezer, covered loosely with plastic wrap, for up to 4-5 days. I like to press the plastic wrap against the sliced, exposed portion so the cake doesn’t dry out and the ice cream doesn’t get ice crystals on it.
- Favorite Flavor Combos:
- Vanilla cake with cherry and pistachio ice cream
- Chocolate cake with strawberry and cookie dough ice cream
- Spice cake with butter pecan and pumpkin ice cream
- Funfetti cake with cookies & cream and vanilla ice cream
- Brownie base with peppermint and vanilla or chocolate ice cream
- Strawberry cake with rocky road and toasted almond ice cream
- Brownie base with mint chip and fudge brownie ice cream



This recipe was fantastic! I made the brownie base and used only cherry ice cream. My guests were very impressed! Definitely a keeper recipe.
Thanks Lauren! It’s such a fun treat to make.