

This post was created as in partnership with Imperial Sugar. All thoughts and opinions are 100% my own.
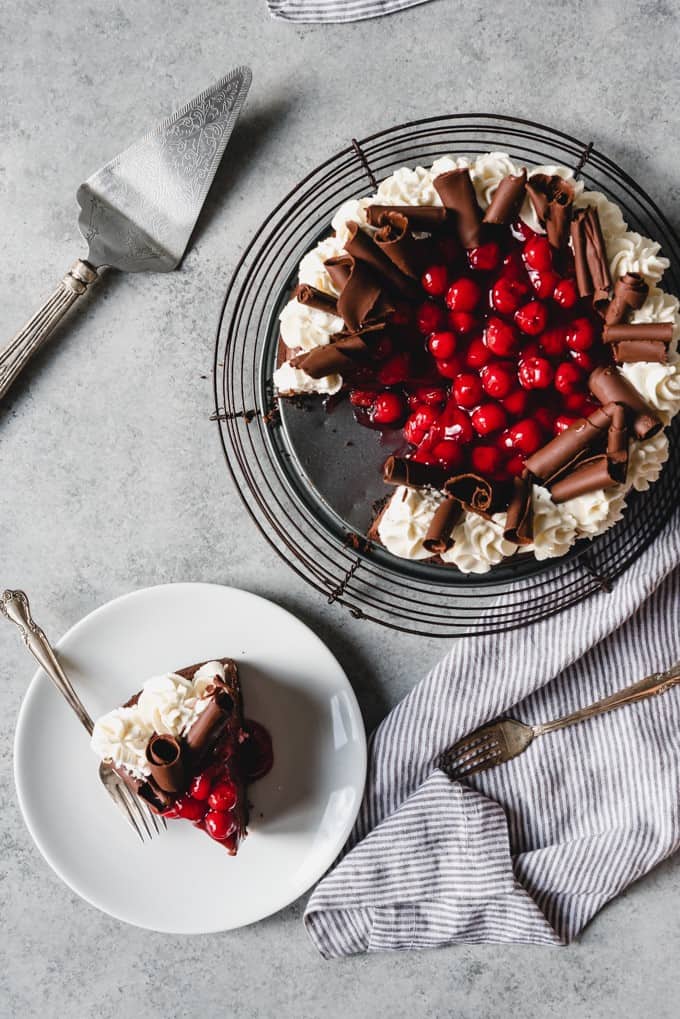
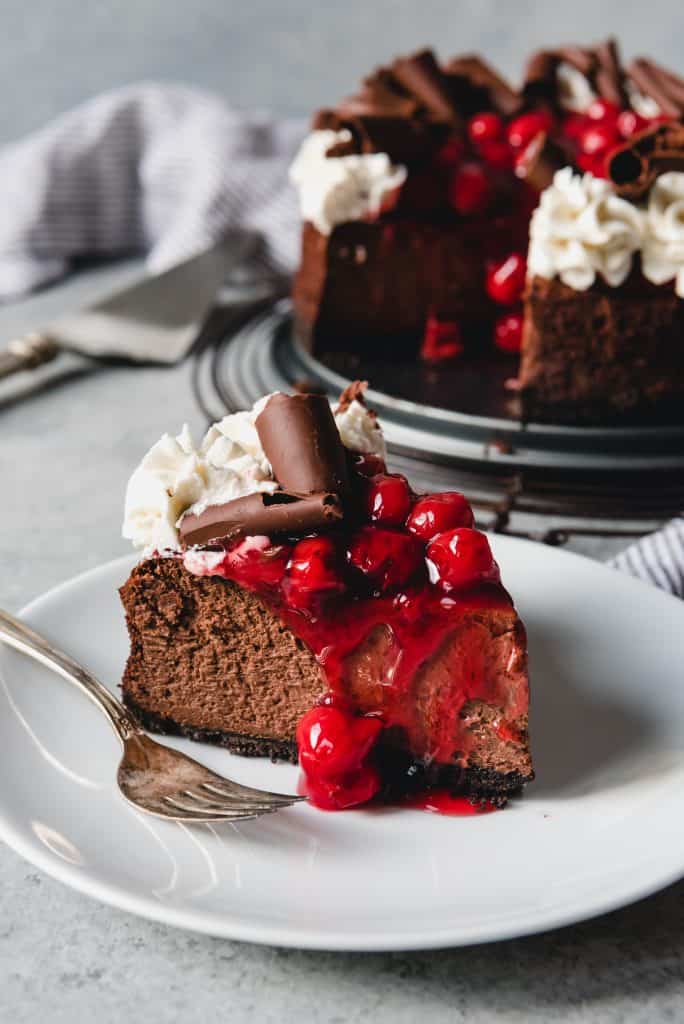
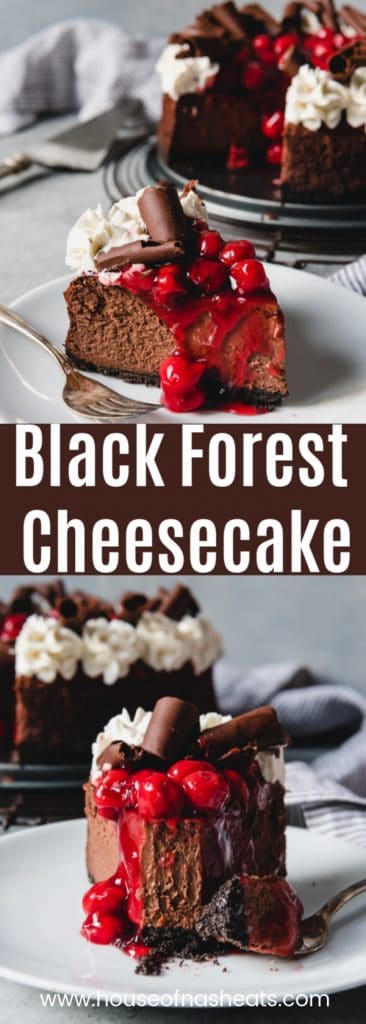
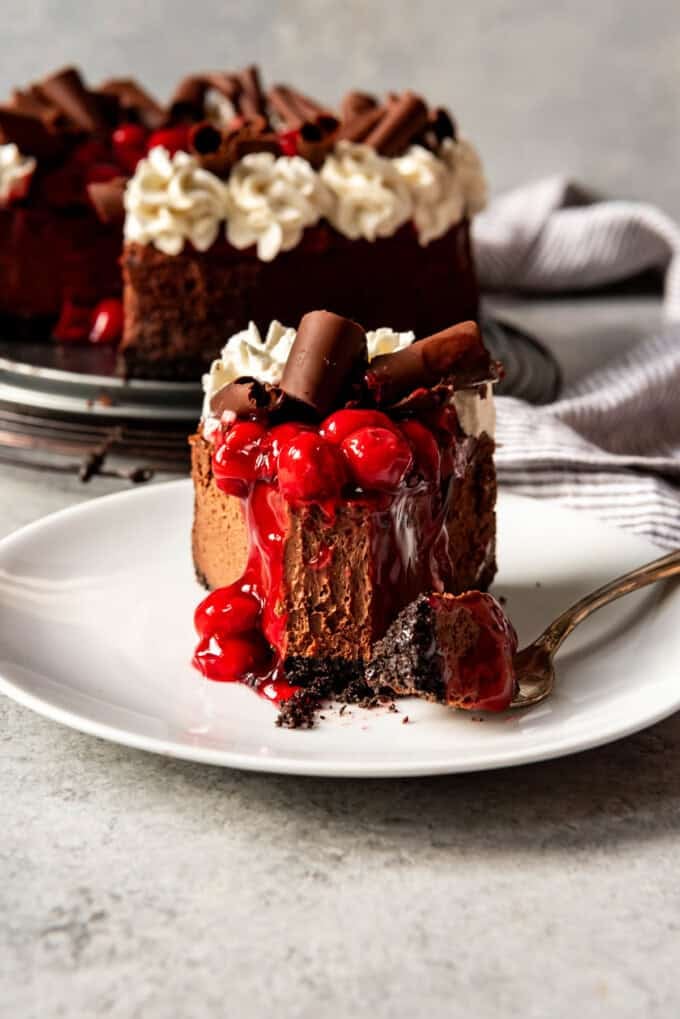
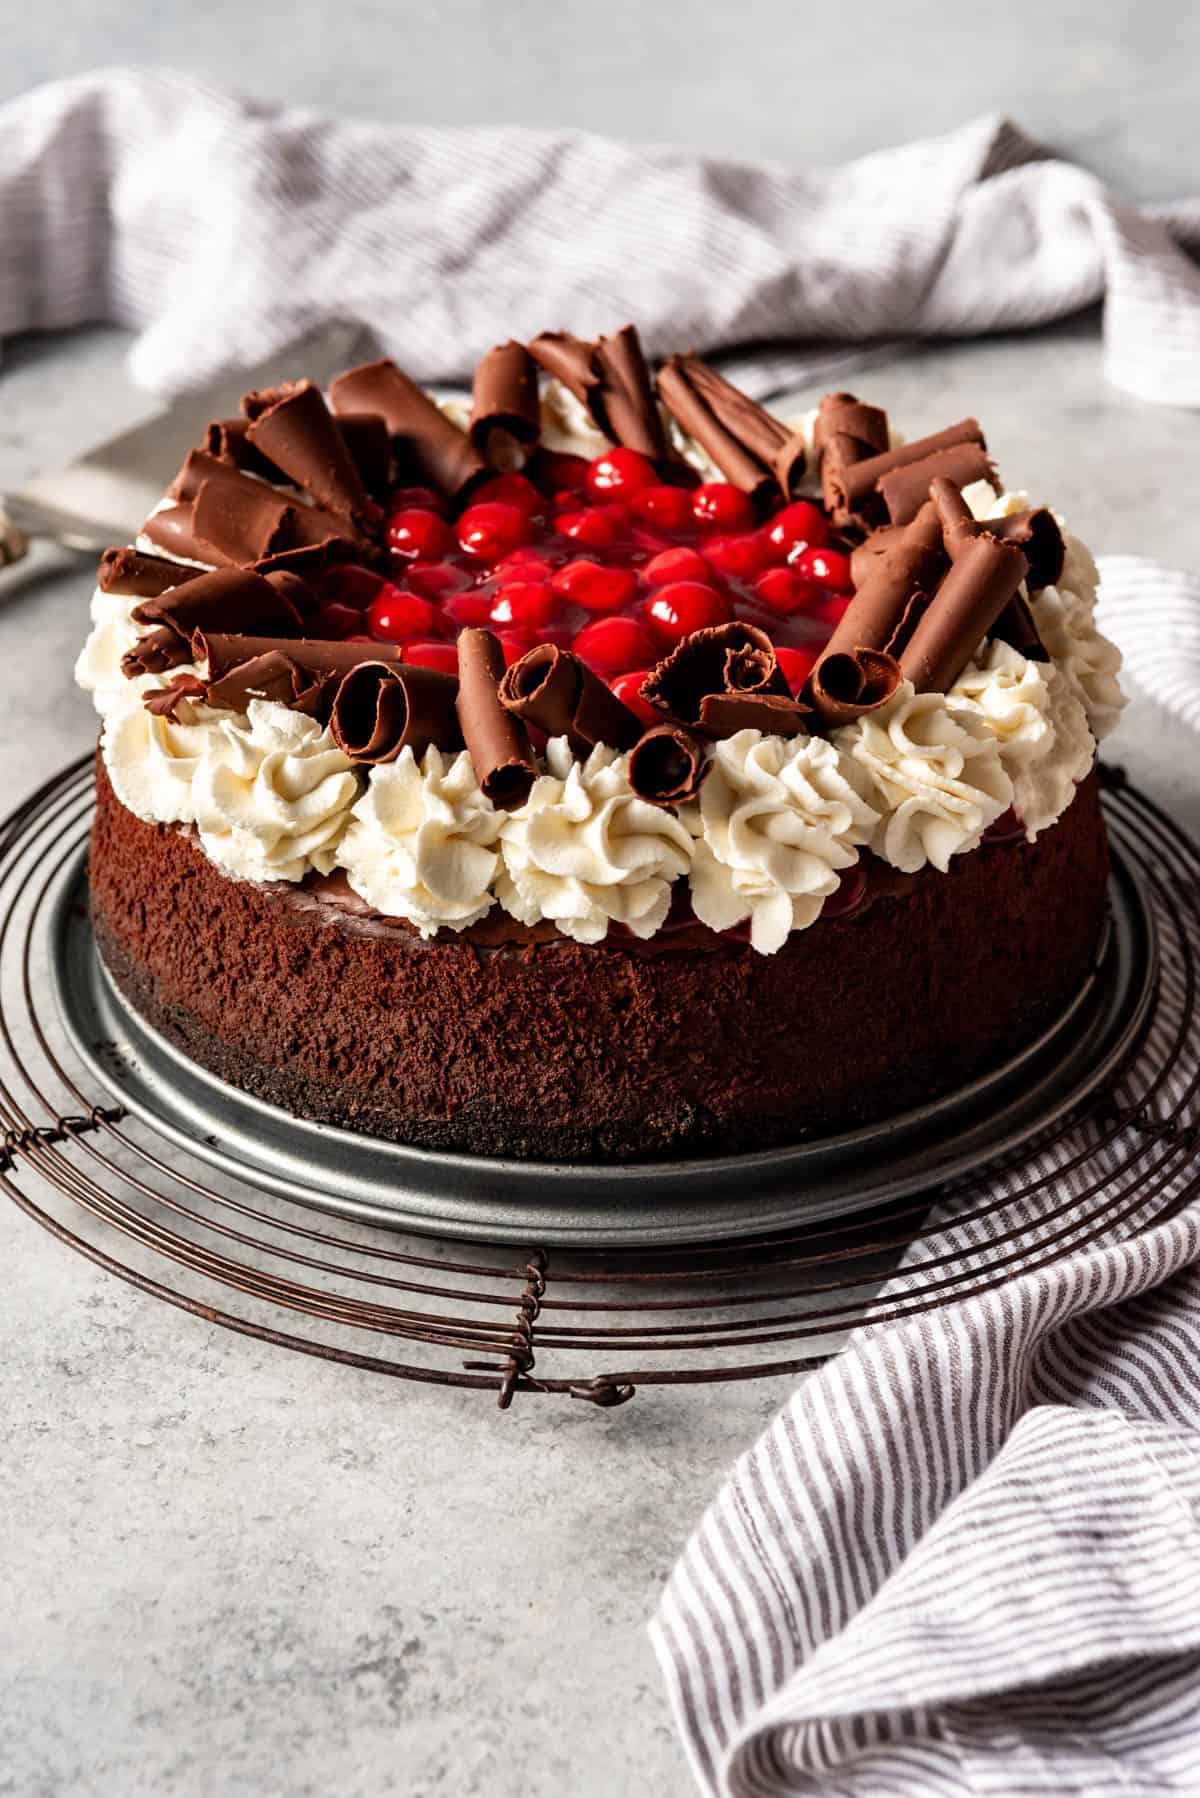
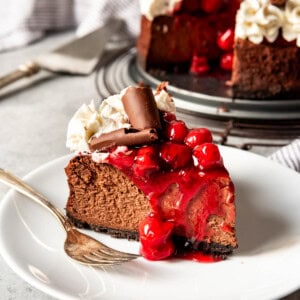
Treat yourself to a slice of heaven with this decadent Black Forest Cheesecake! Featuring a smooth and creamy chocolate cheesecake nestled on a rich chocolate Oreo crust, it’s topped with luscious cherry pie filling, pillowy whipped cream, and delicate chocolate curls. Perfect for special occasions or when you just need an impressive dessert, this recipe brings together the timeless charm of a classic Black Forest cake with the irresistible allure of cheesecake!

Table of Contents
Black Forest Cheesecake is a dreamy twist on the traditional Black Forest cake from Germany’s Black Forest region. Known for its layers of chocolate sponge, whipped cream, cherries, and kirsch, the original gets an indulgent upgrade here. By blending these iconic flavors with creamy cheesecake, this recipe transforms a beloved dessert into a rich, velvety treat that feels irresistibly luxurious.
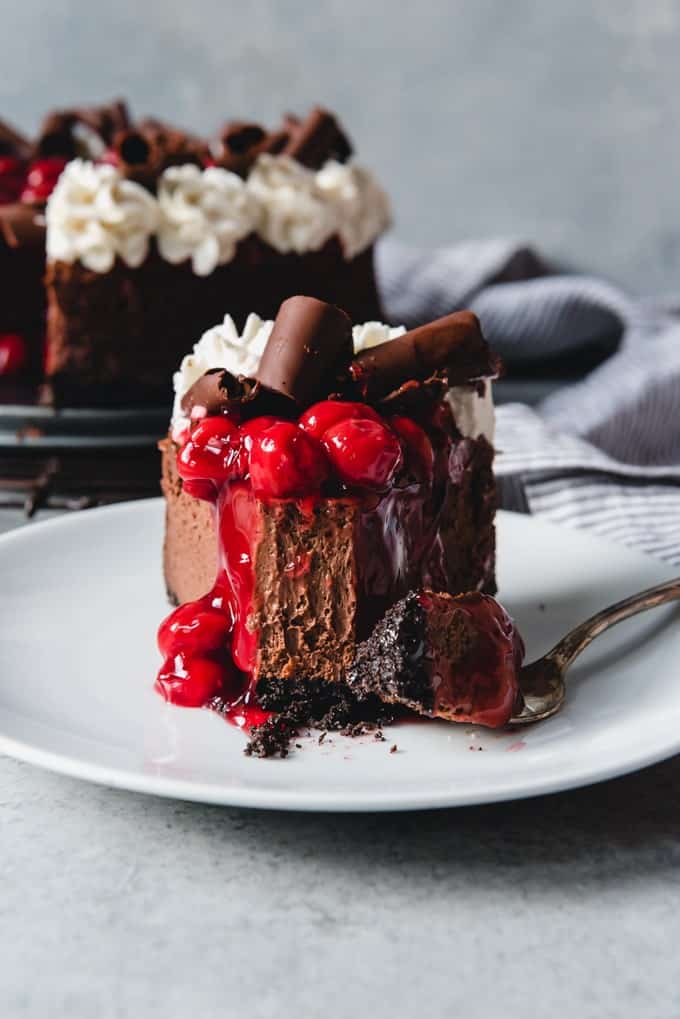
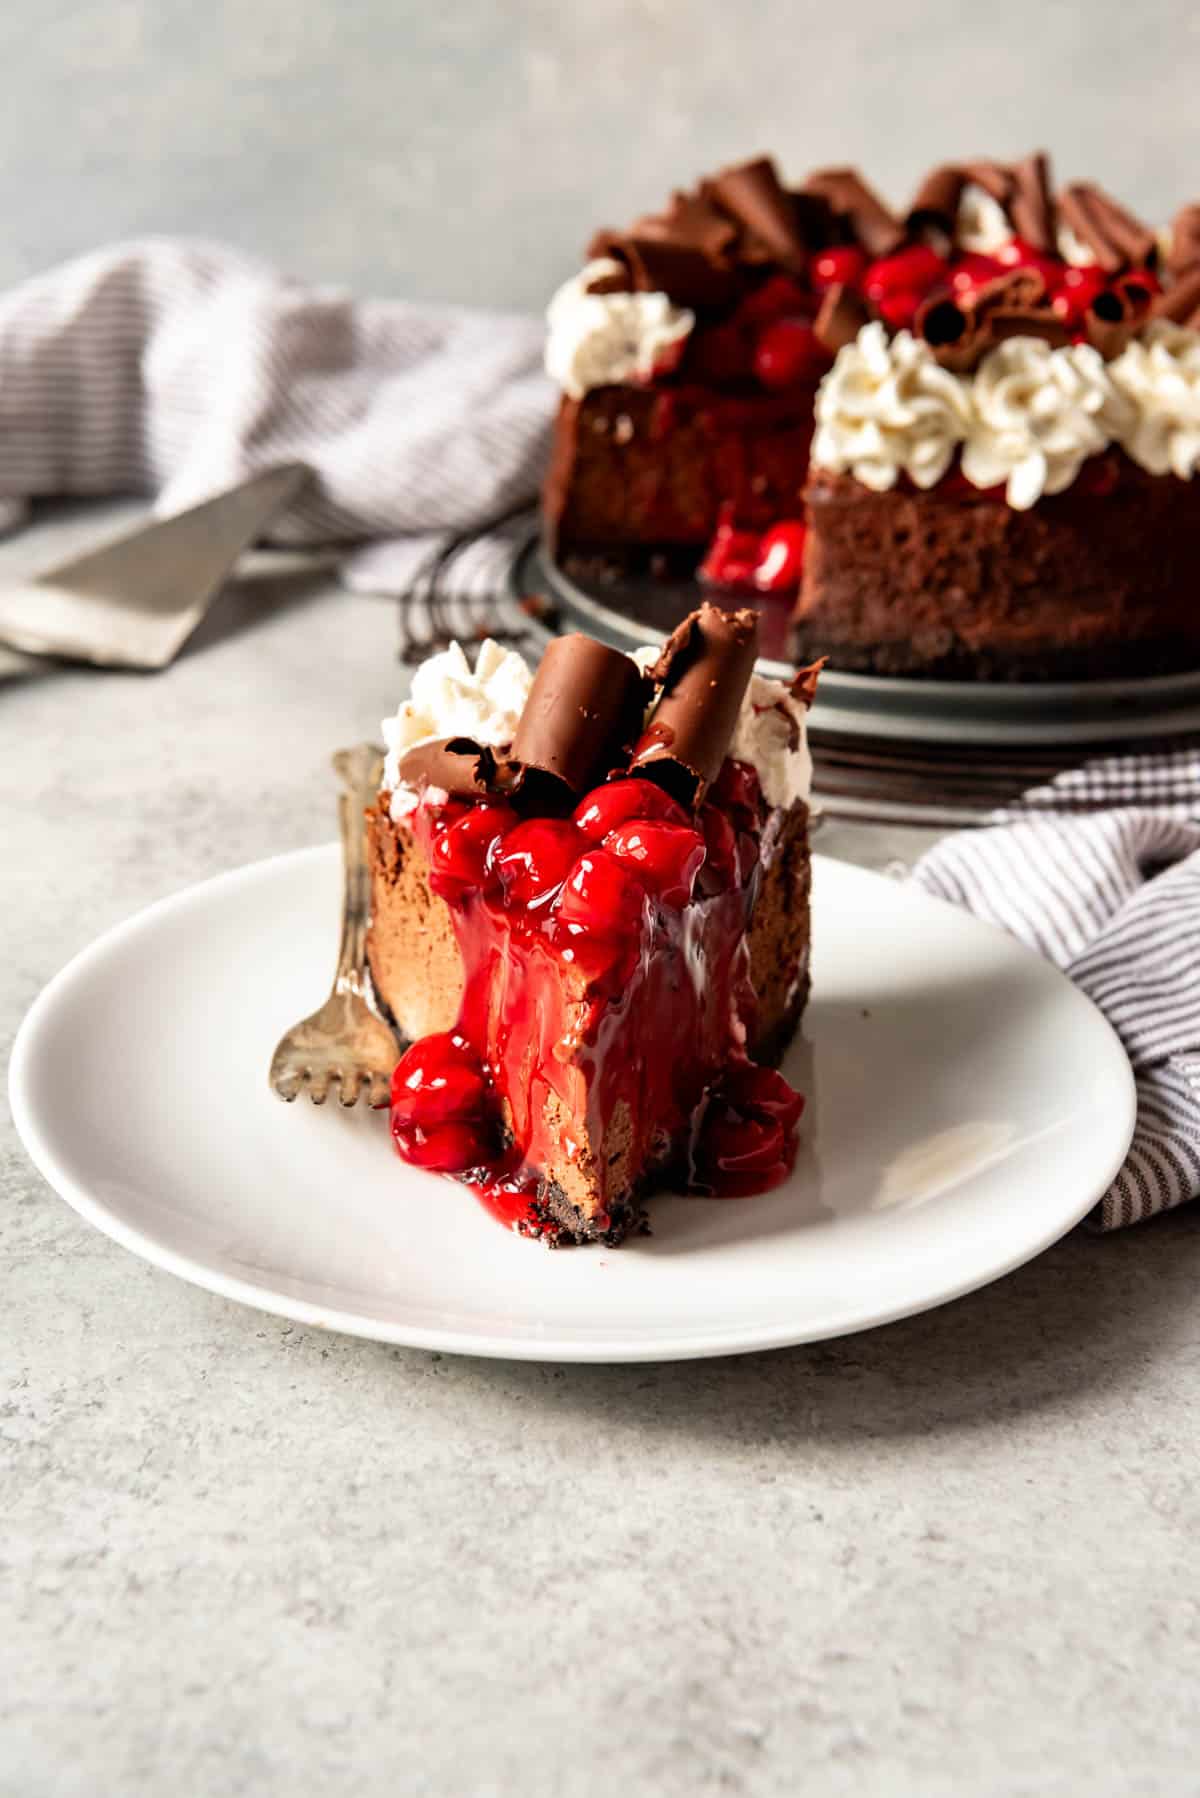
The silky chocolate cheesecake filling is rich and velvety, perfectly balanced by the sweet-tart burst of cherry pie topping. A buttery chocolate Oreo crust provides just the right amount of crunch to complement the creamy layers. And let’s not forget the final flourish—whipped cream swirls and chocolate curls—that makes this dessert truly irresistible.
This Black Forest Cheesecake isn’t just a dessert; it’s a declaration of love for chocolate and cherries! Whether it’s for Valentine’s Day, a dinner party, or just because, this cheesecake is guaranteed to impress.
If cherries are your jam, you’ll love these irresistible recipes: Aunt Becky’s Black Forest Cherry Cake, Chocolate Cherry Dump Cake, Cherry Brownies, Chocolate Cherry Hand Pies, and my Best Homemade Cherry Pie Recipe!
Why We Love This Recipe
- The rich, creamy chocolate cheesecake filling melts in your mouth, perfectly balanced by a tart cherry topping that adds the perfect fruity contrast.
- The buttery chocolate Oreo crust adds a satisfying crunch that pairs beautifully with the velvety texture of the cheesecake, making every bite an indulgent experience.
- It’s an impressive dessert for special occasions like Valentine’s Day or dinner parties, yet surprisingly easy to make—even if it’s your first time baking a decadent cheesecake!
What You’ll Need
Scroll down to the recipe card below this post for ingredient quantities and full instructions.
- Crushed Oreos – The base of this cheesecake, these fine crumbs create a chocolate cookie crust that’s buttery and delicious.
- Salted Butter – Melted and mixed into the crust for the perfect balance of sweet and savory.
- Granulated Sugar – Adds just the right hint of sweetness to the crust and filling.
- Bittersweet Chocolate – The star of the show, melted into the cheesecake for a rich, deep chocolate flavor.
- Milk – Helps create a smooth, silky chocolate mixture.
- Cream Cheese – Softened to perfection for the creamy cheesecake filling. Always go for full-fat cream cheese for the best results.
- Cocoa Powder – Boosts the chocolatey goodness in every bite.
- Vanilla Extract – A little splash enhances the overall flavor.
- Eggs – Bind the filling together for that perfect, sliceable texture.
- Cherry Pie Filling – Sweet and tart, it’s the quintessential Black Forest topping. Go the extra mile with my easy Homemade Cherry Pie Filling Recipe!
- Heavy Cream – Whipped into soft peaks for that airy, luxurious finishing touch.
- Powdered Sugar – Sweetens the whipped cream to perfection.
- Chocolate Curls – Optional but irresistible, they add flair and even more chocolate.
How to Make Black Forest Cheesecake
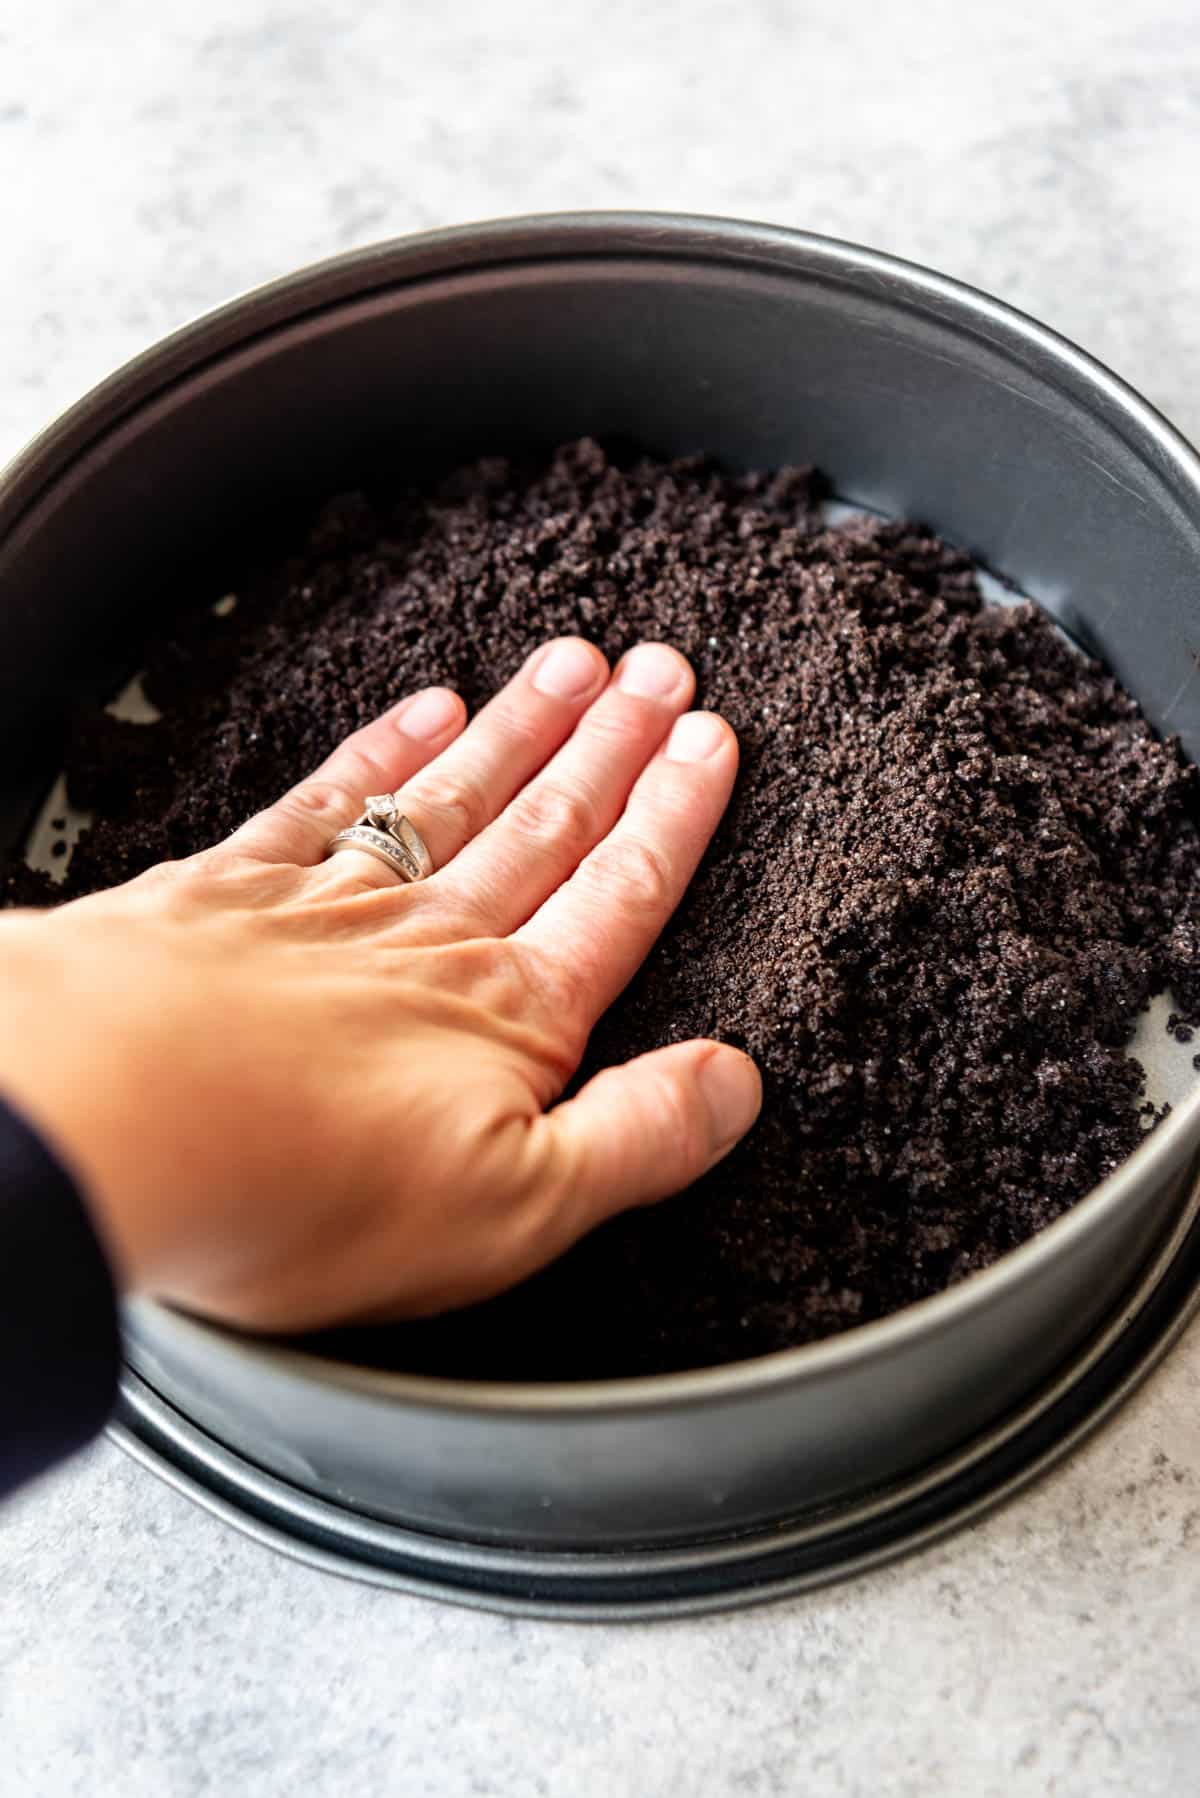
- Prepare equipment and crust. Start by preheating your oven to 350°F and grabbing your trusty 9-inch springform pan. Mix the crushed Oreos, melted butter, and a touch of sugar in a large bowl until it resembles damp sand. Press this mixture evenly into the bottom of the pan to form a chocolate cookie crust. Bake for 5 minutes to set it, then let it cool while you prepare the cheesecake filling.
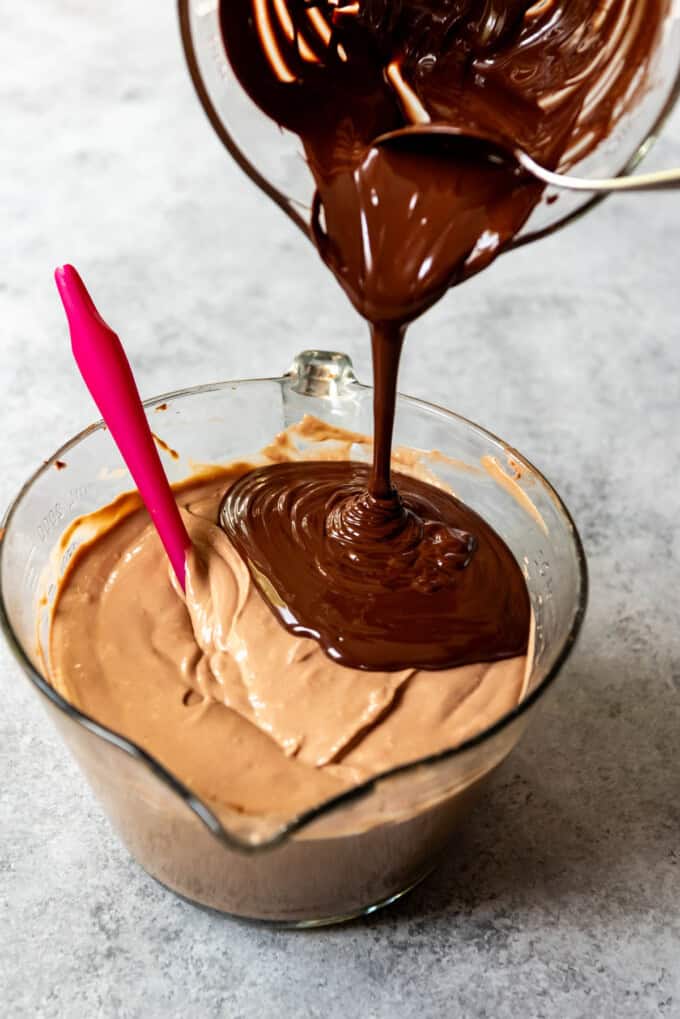
- Melt chocolate. In a microwave-safe bowl, combine the bittersweet chocolate and milk. Heat in 20-30 second intervals, stirring each time, until it’s silky smooth. Set aside to cool slightly—it’s going to transform your cheesecake into pure chocolate bliss.
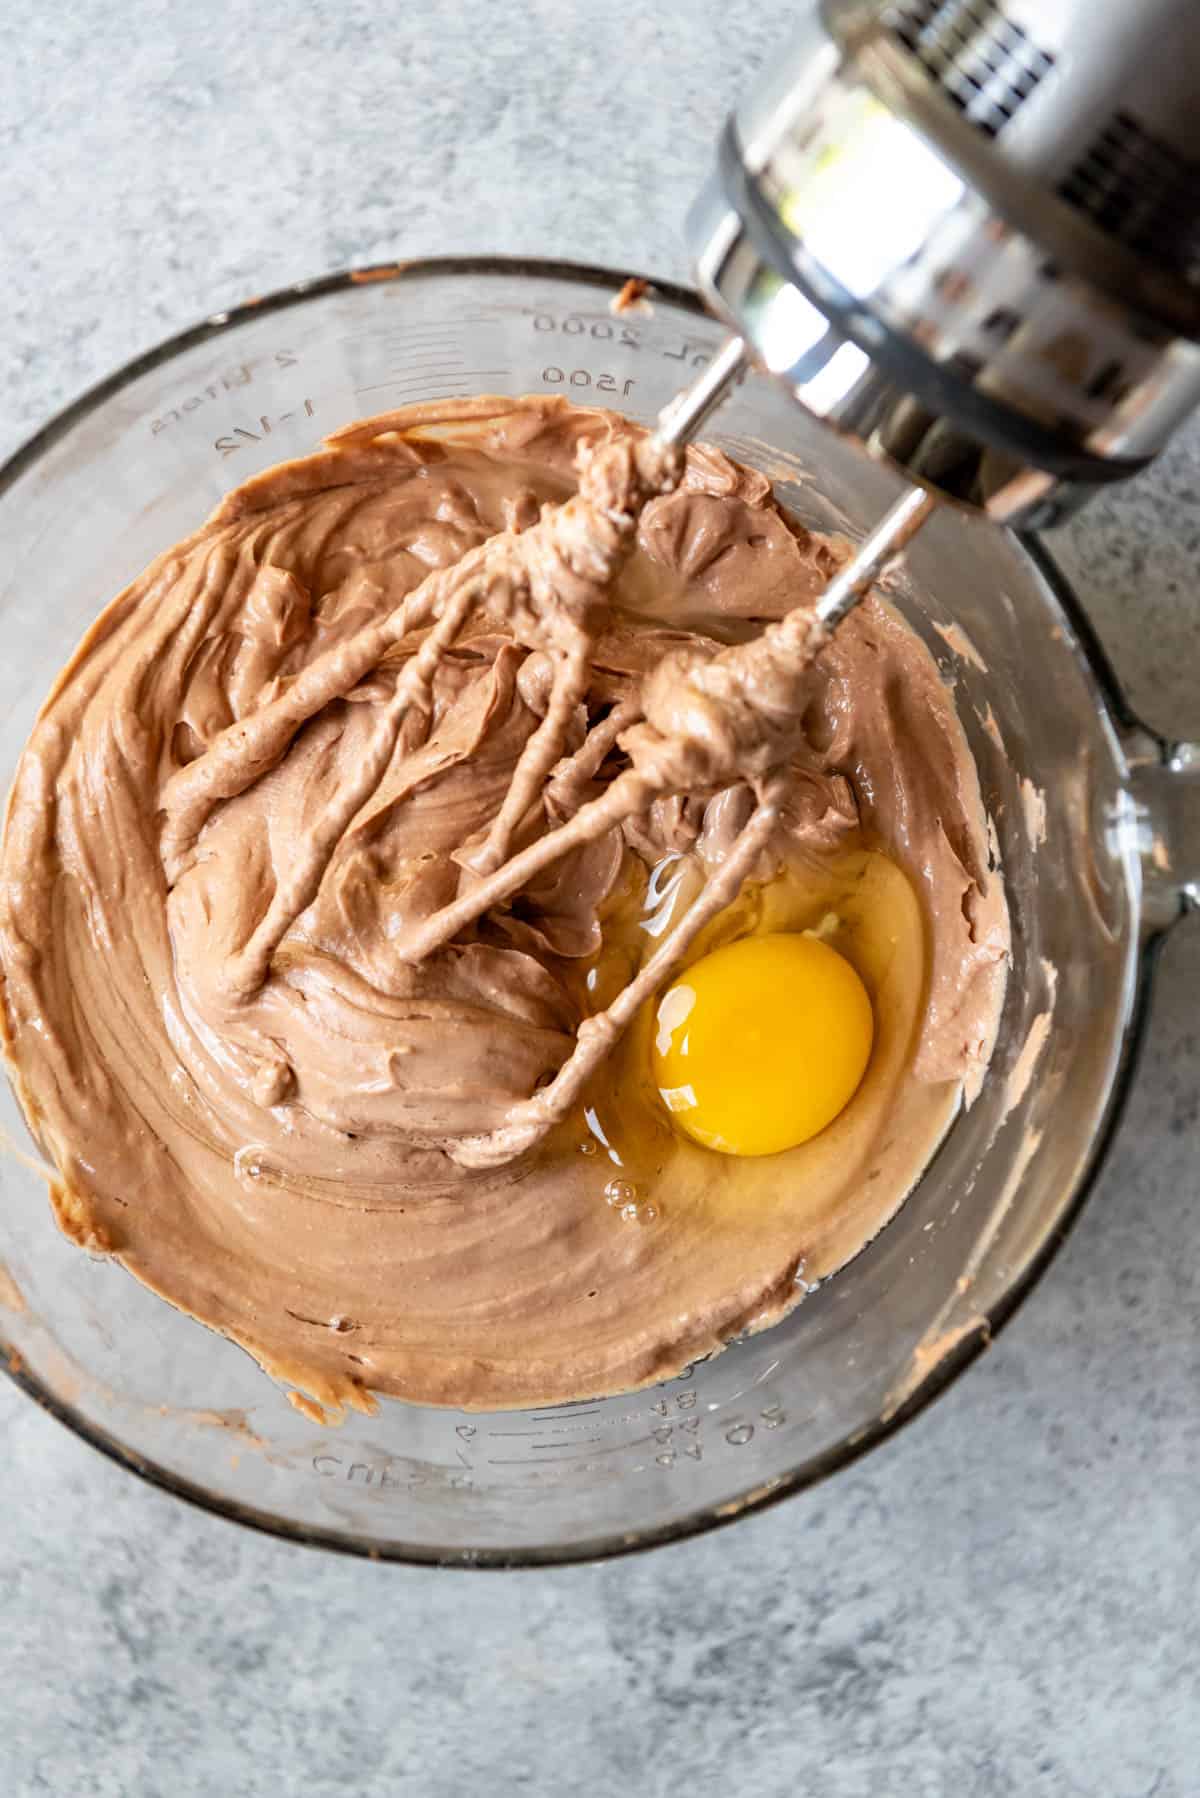
- Make cheesecake filling. In a large mixing bowl, beat the softened cream cheese, sugar, cocoa powder, and vanilla extract with an electric mixer on medium speed until smooth. Scrape the sides of the bowl to make sure there are no lumps! Add the eggs one at a time, mixing on low speed after each addition just until incorporated. Don’t overmix—this keeps your cheesecake creamy, not airy.
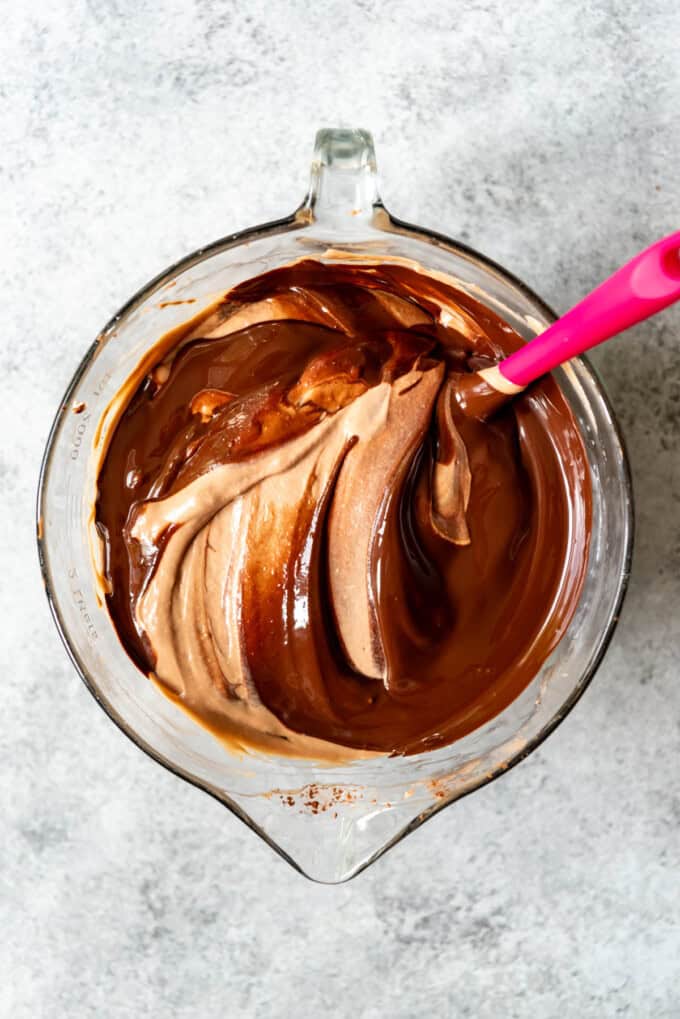
- Add melted chocolate. Finally, pour in the melted chocolate and gently fold it into the batter until combined.
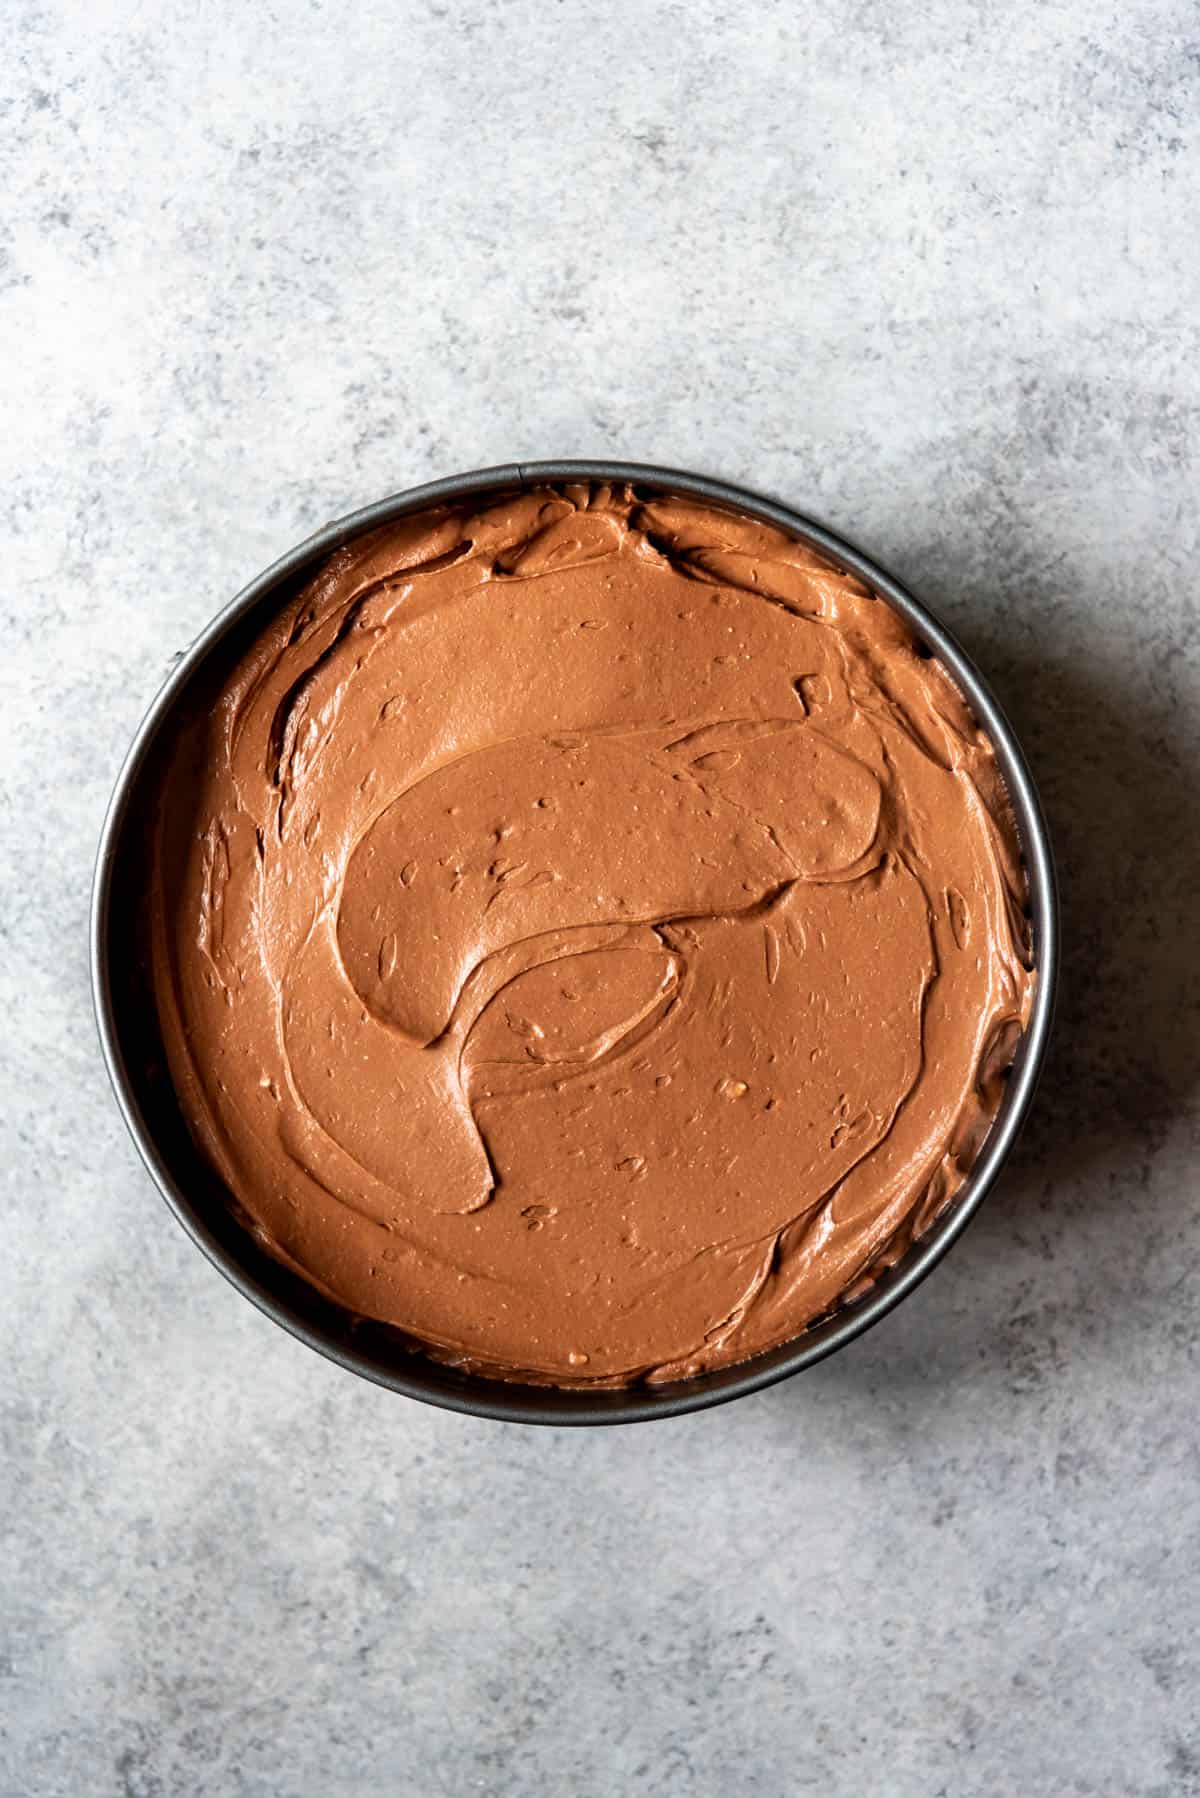
- Assemble. Pour the cheesecake batter over your cooled crust, spreading it into an even layer. Place the springform pan in a roasting pan and carefully pour hot water around it to create a water bath (optional but highly recommended for even baking).
- Bake. Bake the cheesecake for 50-60 minutes, until the edges are set but the center still jiggles slightly when shaken. Turn off the oven and crack the door open, letting the cheesecake cool gradually for about 10 minutes. This slow cooling helps prevent dreaded cracks!

- Chill. Once the cheesecake has cooled to room temperature, cover it with plastic wrap and refrigerate for at least 6 hours or overnight. When ready to garnish, release the sides of the springform pan.
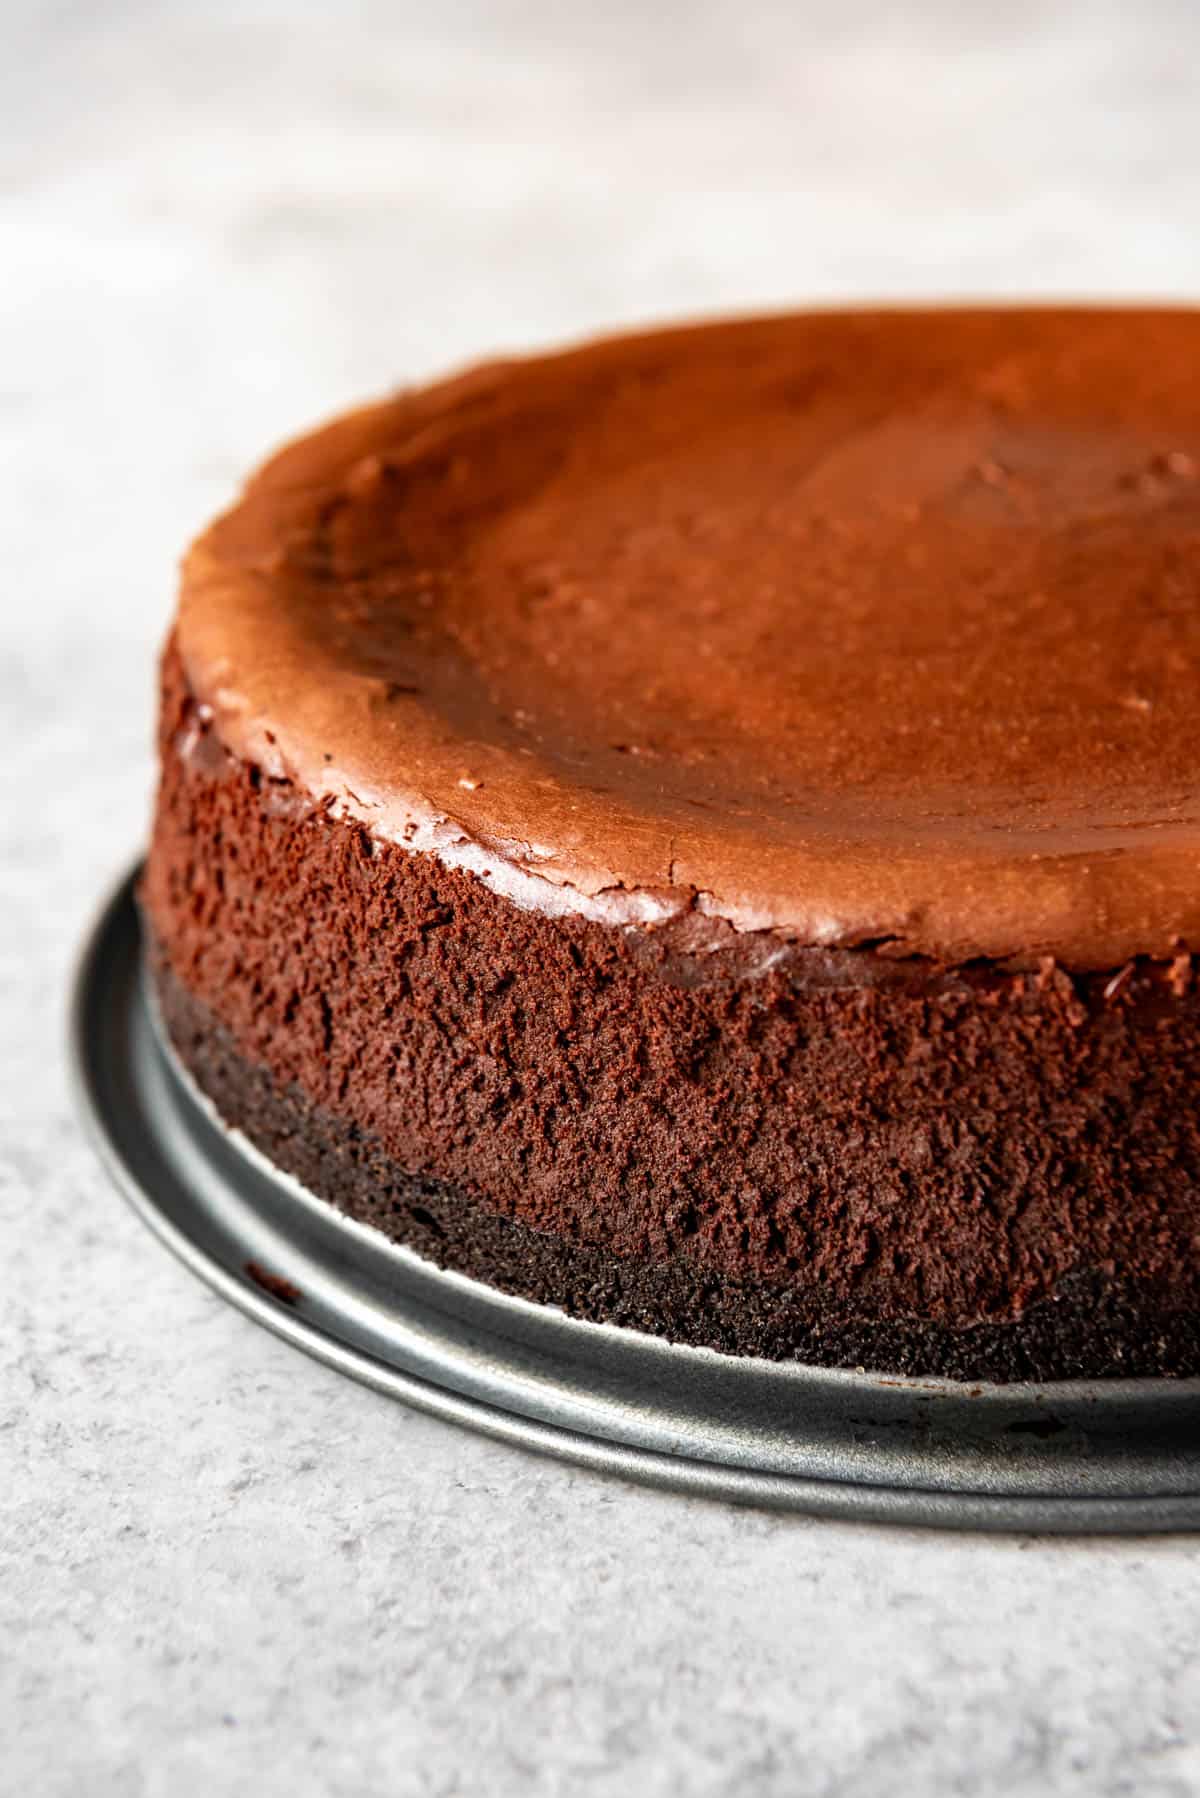
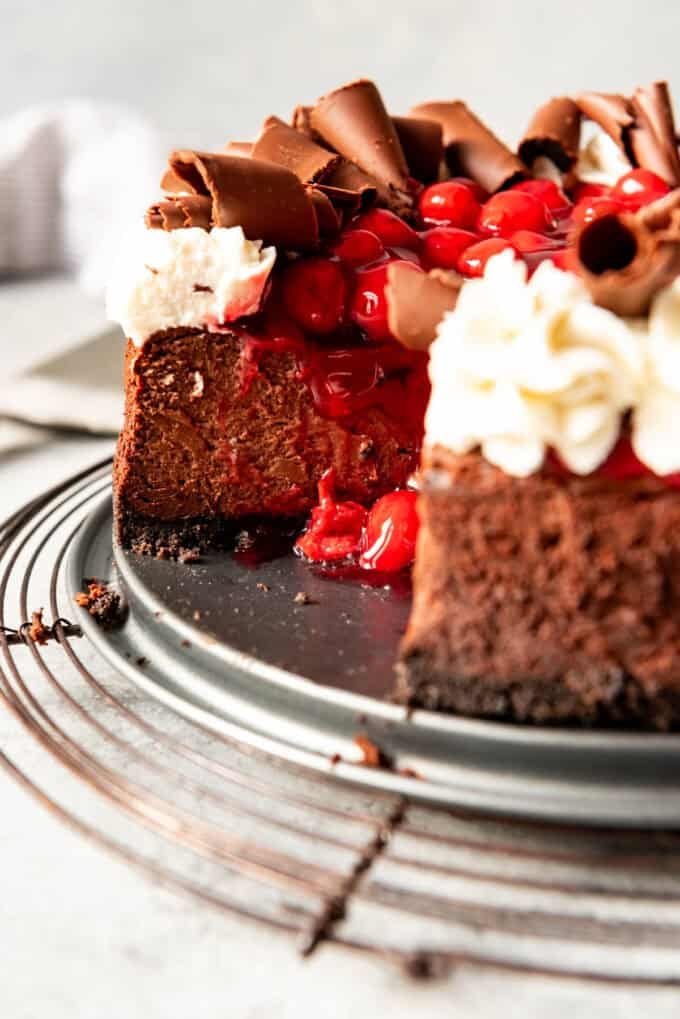
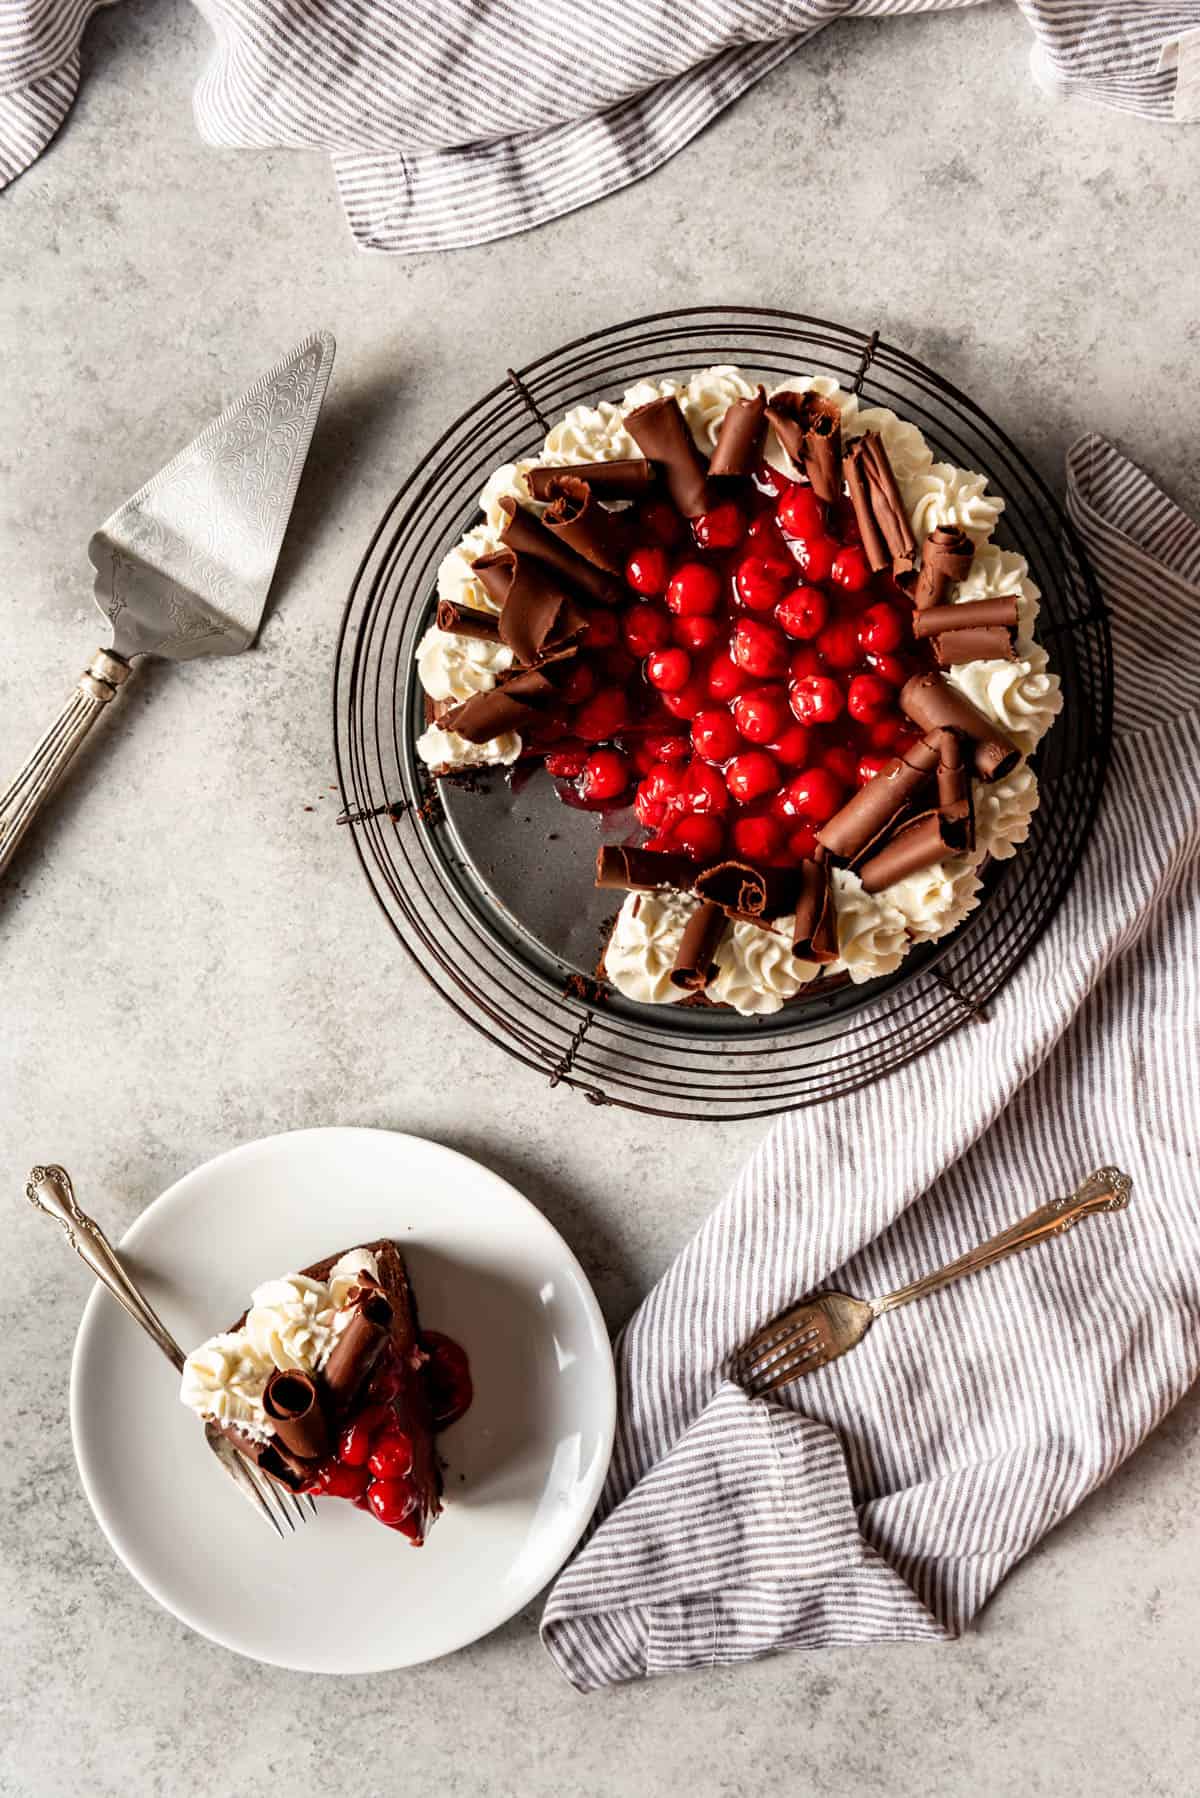
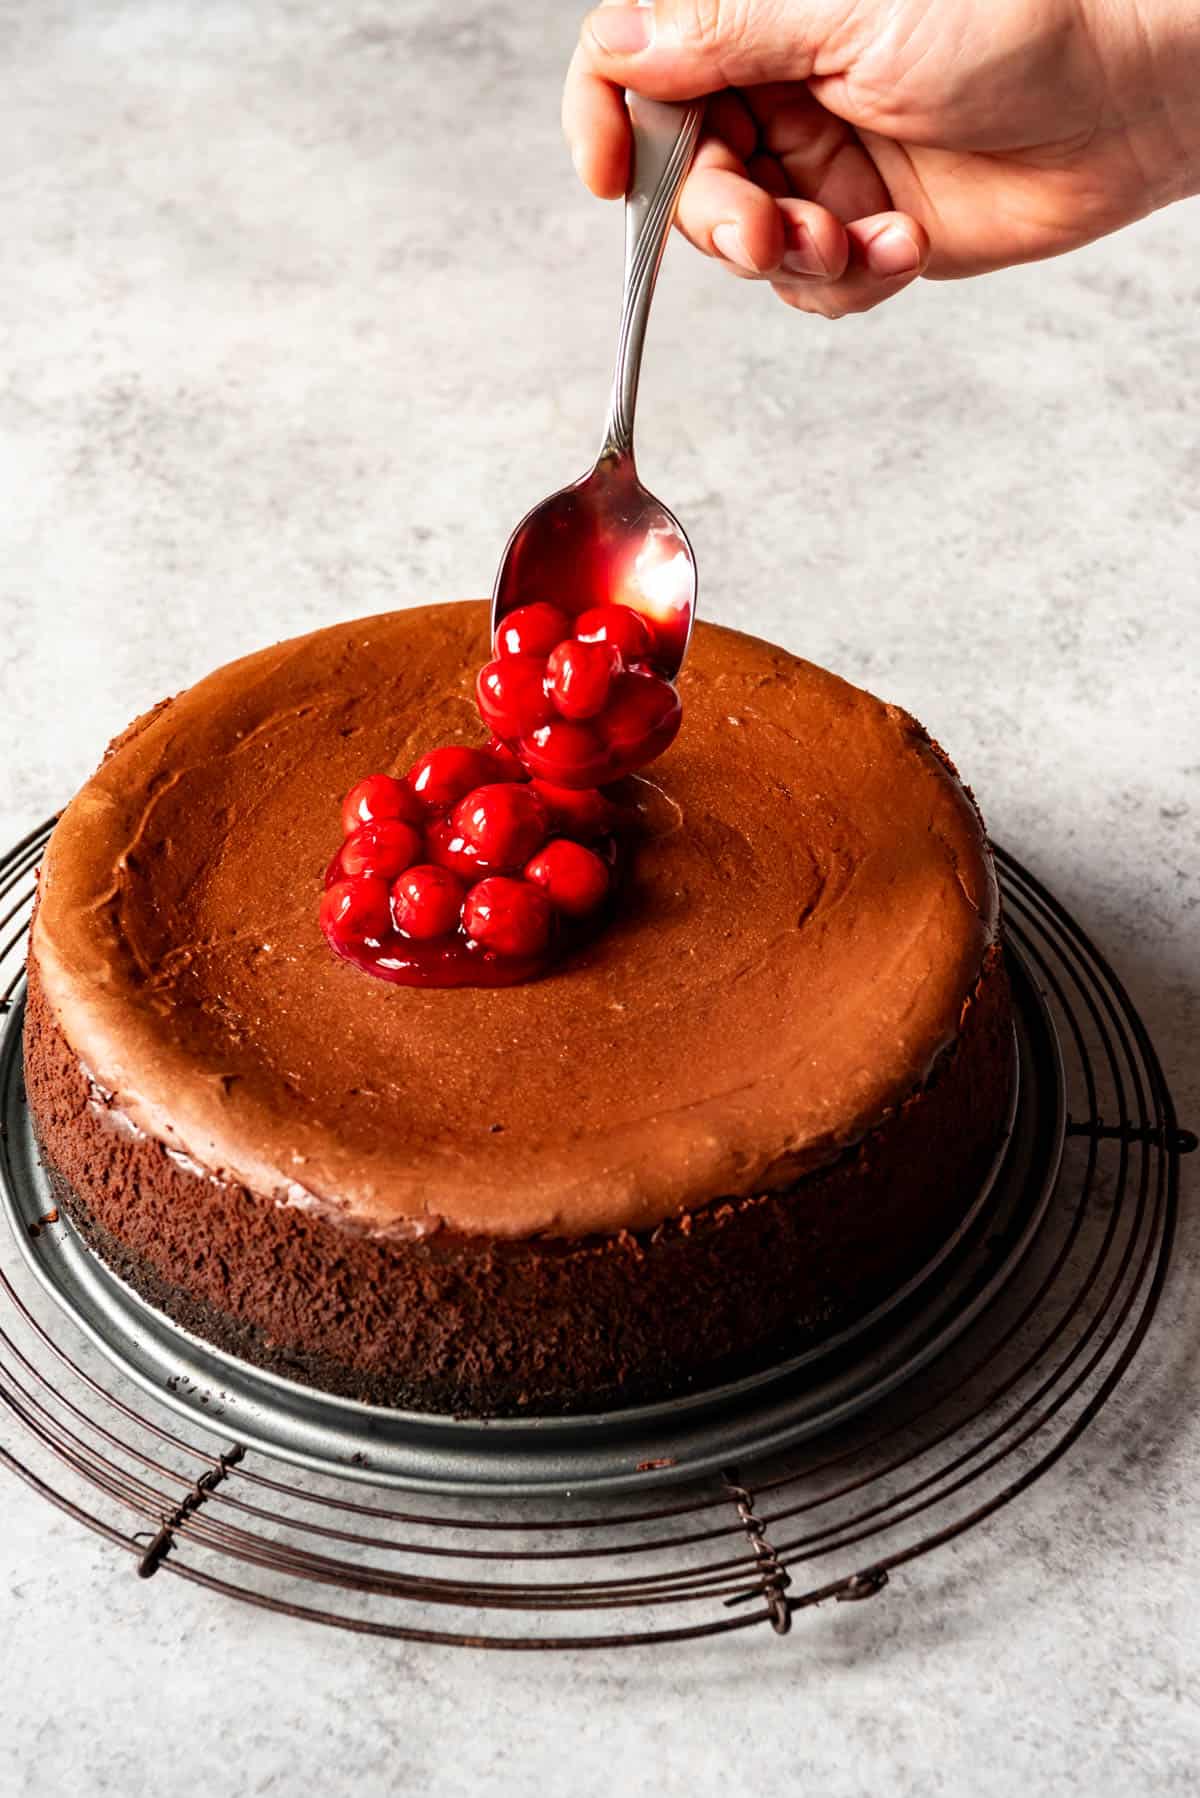
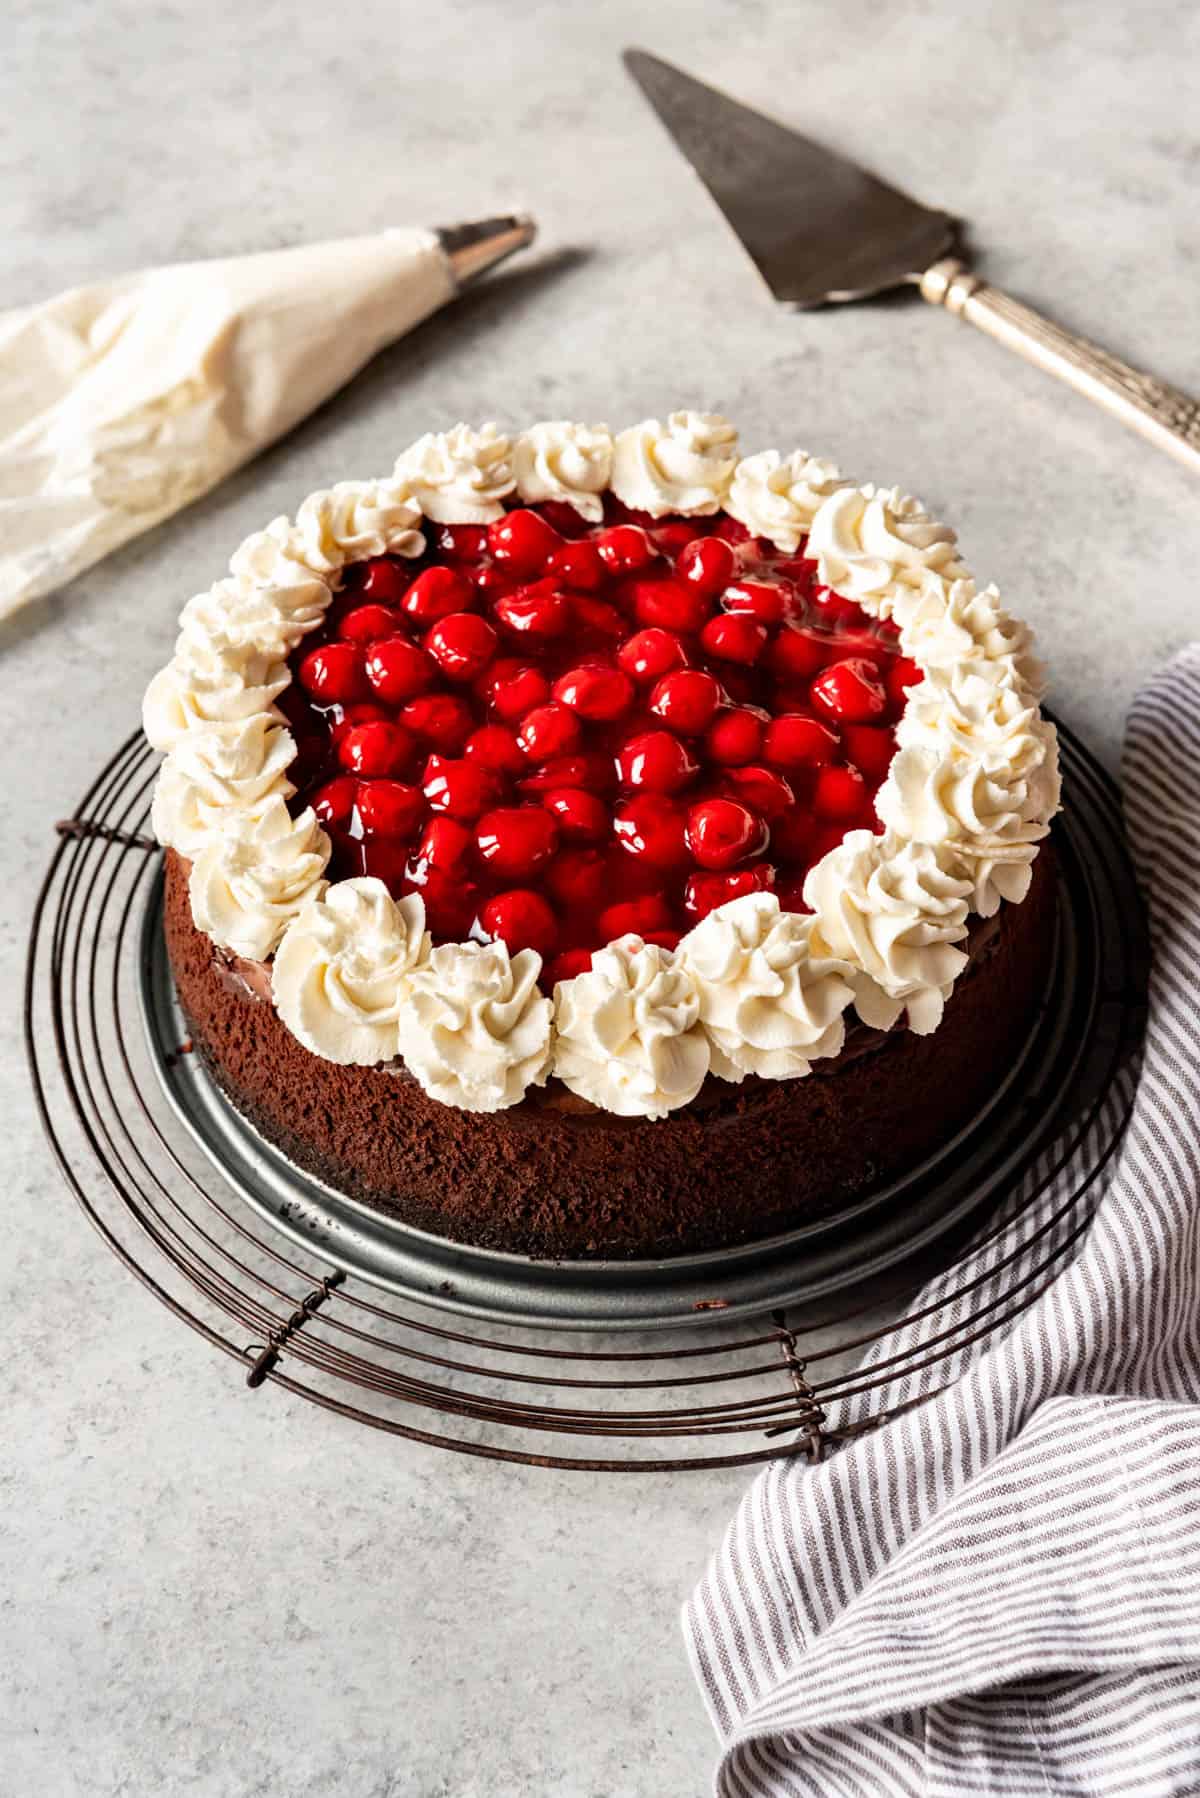
- Add cherry topping. Top the cheesecake with cherry pie filling, spreading it evenly and mounding the cherries in the center for a classic Black Forest look.
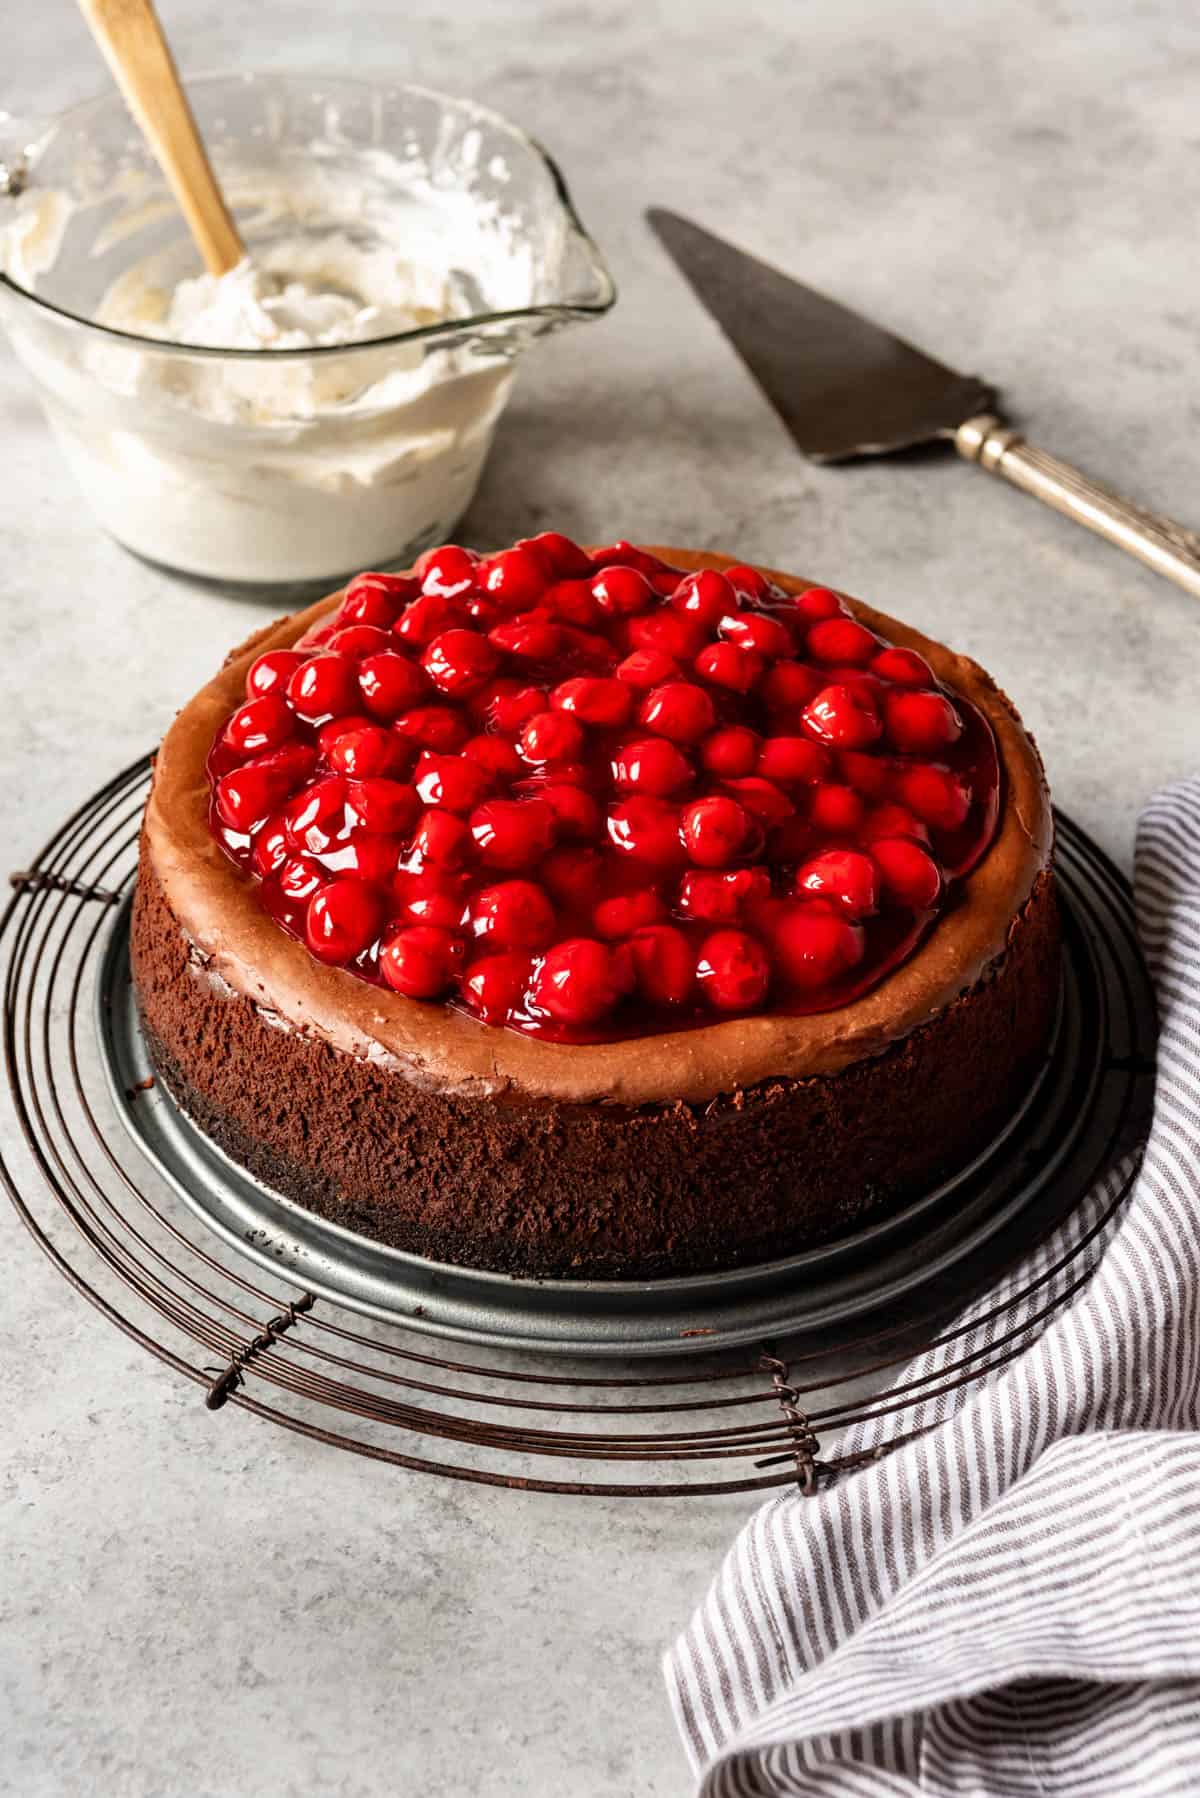
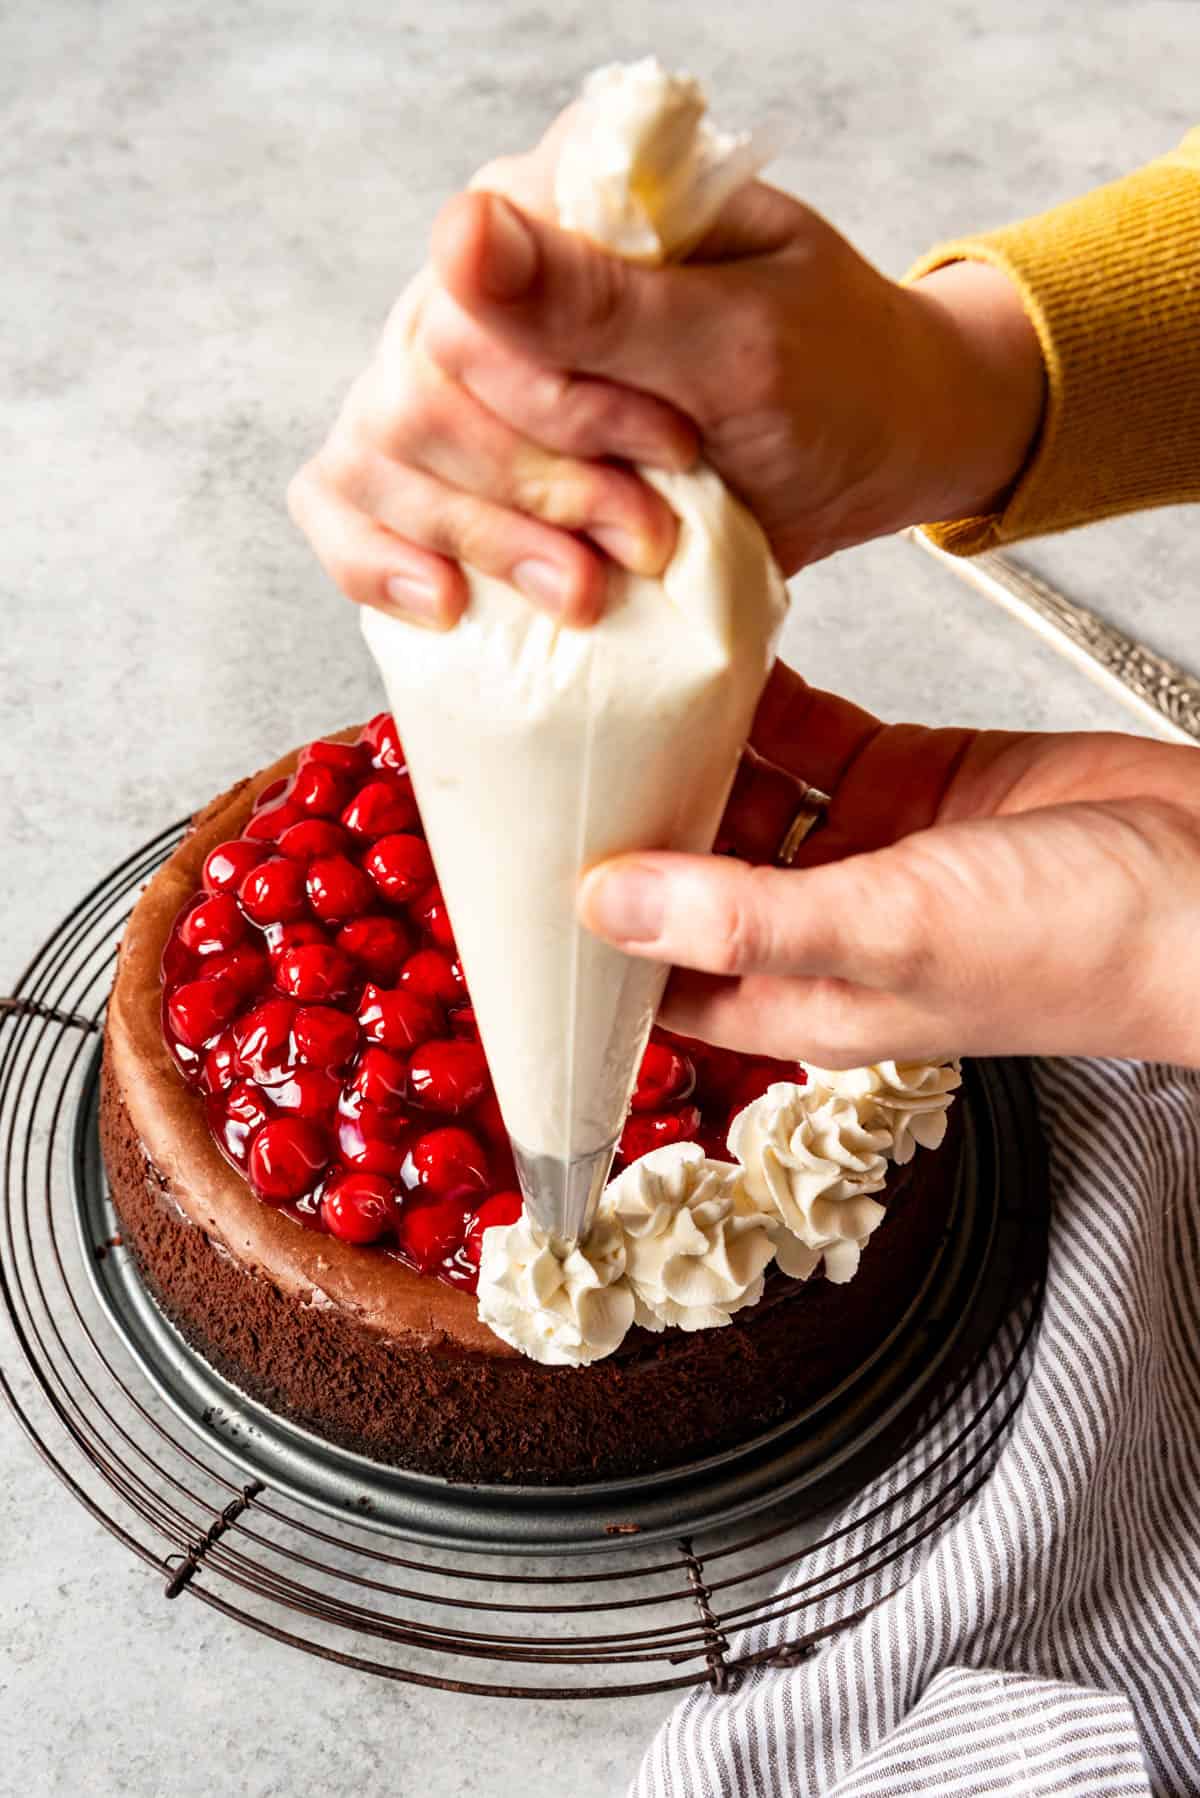
- Add piped cream. Whip heavy cream, powdered sugar, and vanilla extract until soft peaks form. Pipe decorative swirls around the edge of the cheesecake for a professional touch.
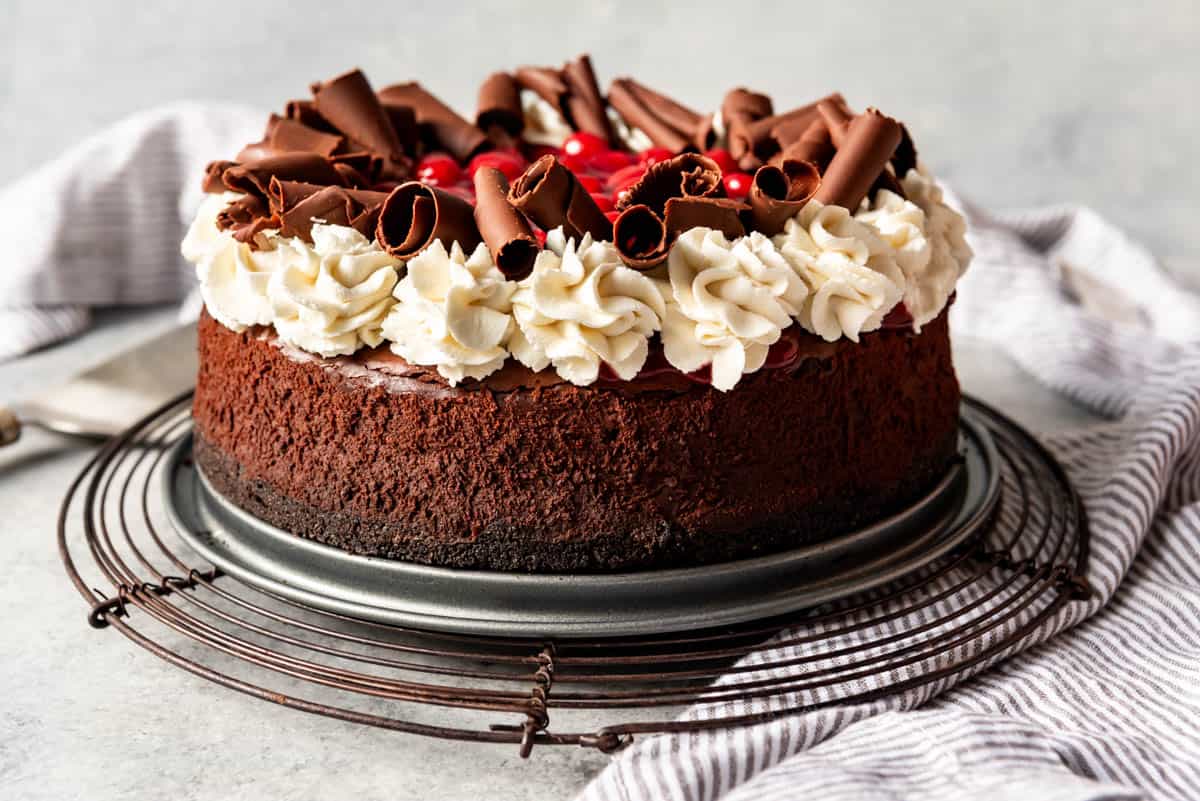
- Finishing touches. Finally, sprinkle chocolate curls or shavings on top for a gorgeous finish. Now slice, serve, and bask in the glory of your Black Forest Cheesecake masterpiece!
Recipe FAQ’s
Start with room-temperature ingredients, don’t overmix once you add the eggs, and cool the cheesecake slowly. If a crack happens, don’t stress—just cover it up with cherry pie filling and whipped cream.
Not necessarily! While a water bath helps prevent cracks and ensures even baking, this recipe works well without one. Just be sure to cool the cheesecake slowly and avoid overmixing the batter.
Yes, and it’s even better that way! Cheesecake needs time to chill and set, so making it a day or two in advance is ideal. Store it in an airtight container in the refrigerator until ready to serve.
Keep leftover cheesecake in an airtight container in the refrigerator for up to three days. If you’ve topped it with cherries and whipped cream, it’s best to add those just before serving for maximum freshness.
Definitely! Wrap the fully cooled, undecorated cheesecake in plastic wrap and then foil before freezing. Thaw in the fridge overnight and add your toppings just before serving.
Tips for Success
- Always use room temperature ingredients, as softened cream cheese and room-temperature eggs mix more smoothly, with the result that your cheesecake batter will be irresistibly creamy and free of lumps.
- Don’t overmix after adding the eggs. While it’s tempting to keep the mixer running, overmixing adds air to the batter, which can lead to cracks during baking.
- Cool the cheesecake slowly. After it’s baked, leave it in the oven with the door cracked open for about 10 minutes; as a result, the cheesecake cools gently without sudden temperature changes. Consequently, this gradual process helps prevent cracks and ensures the texture stays velvety smooth.
- Run a knife around the edge of the pan while the cheesecake is still warm. As a result, this small step ensures the cheesecake doesn’t stick to the sides as it cools and contracts, reducing the chance of cracks and keeping your cheesecake flawless and smooth.
- Decorate just before serving. Whipped cream and chocolate curls are best added fresh, so save those final touches until you’re ready to impress.
Substitutions and Variations
- Swap bittersweet chocolate for semi-sweet chocolate if you like a slightly sweeter cheesecake, or go for dark chocolate for a more intense flavor.
- Replace the chocolate Oreo crust with a graham cracker crust or a nutty biscuit base to change up the texture and taste. Chocolate wafer cookies or even ginger snaps make an excellent crust alternative that still complements the chocolate and cherries.
- Use homemade cherry pie filling for a fresher, more tart topping, or try a sour cherry compote for an extra tangy twist.
- If you’re short on time, substitute heavy cream with Cool Whip for an easy and fluffy topping.
- Add a splash of kirsch or cherry liqueur to the cheesecake batter or cherry topping for a grown-up version of this classic flavor combo.
- Try adding a layer of chocolate ganache between the cheesecake and cherry topping for an even richer and more indulgent dessert.
More Baked Cheesecake Recipes You Need to Try
- Nutella Cheesecake
- Peach Cobbler Cheesecake
- Best Cheesecake Recipe (No Water Bath!)
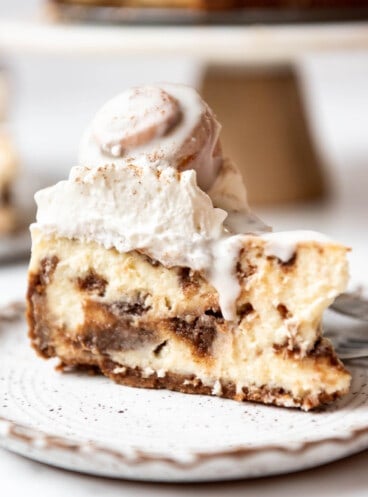
- Cinnamon Roll Cheesecake
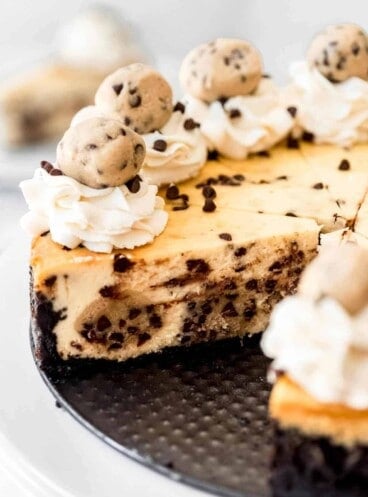
- Chocolate Chip Cookie Dough Cheesecake
- Best Chocolate Cheesecake Recipe
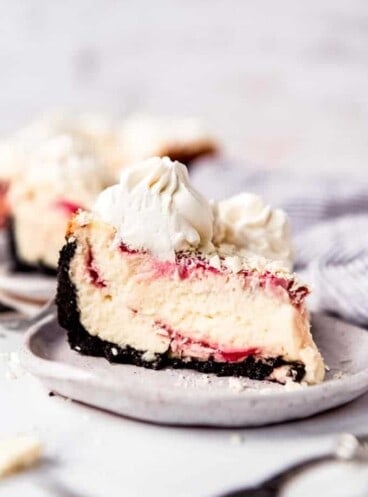
- Raspberry White Chocolate Cheesecake
- Peppermint Bark Cheesecake
Did you make this recipe?
Let me know what you thought with a comment and rating below. You can also take a picture and tag me on Instagram @houseofnasheats or share it on the Pinterest pin so I can see.
Black Forest Cheesecake
Equipment
Ingredients
Crust
- 1 ½ cups crushed Oreos (about 24 cookies)
- 4 Tablespoons salted butter melted
- 1 Tablespoon granulated sugar
Filling
- 10 ounces bittersweet chocolate chopped
- ¾ cup milk
- 3 (8-ounce) packages cream cheese softened
- 1 ¼ cups granulated sugar
- ¼ cup cocoa powder
- 2 teaspoons pure vanilla extract
- 4 large eggs
Topping
- 1 (21-ounce) can cherry pie filling
- 1 cup heavy cream
- 3 Tablespoons powdered sugar
- 1 teaspoon pure vanilla extract
- Chocolate curls for decoration

Instructions
- Preheat the oven to 350°F.
- In a large bowl, mix chocolate cookie crumbs, butter, and sugar together. Press into the bottom of a 9-inch springform pan.1 ½ cups crushed Oreos, 4 Tablespoons salted butter, 1 Tablespoon granulated sugar
- Bake the crust for five minutes until set. Set aside to cool while making cheesecake.
- Prepare cheesecake: In a medium microwave-safe bowl, combine milk and chocolate and heat in the microwave 20-30 seconds at a time, stirring each time, whisk until mixture is completely smooth. Set aside.10 ounces bittersweet chocolate, ¾ cup milk
- In a large bowl, mix cream cheese, sugar, cocoa powder, and vanilla using an electric mixer until smooth, scraping sides of bowl as needed.3 (8-ounce) packages cream cheese, 1 ¼ cups granulated sugar, ¼ cup cocoa powder, 2 teaspoons pure vanilla extract
- Add eggs, one at a time, mixing on low speed after each addition until just mixed. Don’t overmix.4 large eggs
- Mix in melted chocolate until combined. Pour cheesecake batter over the crust and spread evenly.
- Bake for 50-60 minutes or until the center is almost set. The center will still jiggle while edges will be set.
- Turn the oven off and crack the oven door to allow cheesecake to cool slowly for 10 minutes, then remove cheesecake and carefully run a sharp knife around the rim of the pan to loosen the cake.
- Allow cheesecake to cool at room temperature for at least an hour, then cover and refrigerate for six hours or overnight.
- Decoration: Release sides of springform pan. Top chilled cheesecake with cherry pie filling, mounding cherries toward the center.1 (21-ounce) can cherry pie filling
- In a medium bowl, combine cream, sugar, and vanilla and beat using an electric mixer until thick, but still soft. Transfer to a piping bag with a decorative tip. Pipe swirls around the border of cheesecake.1 cup heavy cream, 3 Tablespoons powdered sugar, 1 teaspoon pure vanilla extract
- If desired, make chocolate shavings or curls by placing a chocolate bar in a warm place (~78°F) for about one hour. Or alternatively, heat the chocolate bar in a microwave oven for 1-2 seconds. Using a vegetable peeler, shave chocolate bar into curls or shavings and place on cheesecake just before serving.Chocolate curls
Notes
Storage & Make Ahead
- Store: Keep your cheesecake fresh by storing it in an airtight container in the refrigerator. It will stay delicious for up to three days, but let’s be honest—it probably won’t last that long!
- Freeze: To save your cheesecake for later, wrap it tightly in plastic wrap, followed by a layer of foil. You can freeze the whole cheesecake or individual slices for up to three months. Thaw in the refrigerator overnight before serving.
- Reheat: While cheesecake isn’t reheated, you’ll want to bring it to its best serving temperature. Let it sit at room temperature for 20-30 minutes before slicing to ensure it’s creamy and perfect.
- Make Ahead: This dessert is the ultimate make-ahead treat. Prepare the cheesecake up to two days in advance, refrigerate it, and add the toppings just before serving for a stress-free, showstopping dessert.
Nutrition
This recipe was originally published December 10, 2018. It has been updated with additional helpful tips and information.


Ok, this is seriously the prettiest cheesecake that I’ve ever laid my little eyeballs on!! I’ve never had a ‘black forest cheesecake, so clearly I’ve been missing out. This one looks beyond creamy and so perfect for the holidays! This would disappear so fast 🙂
Thank you, Dawn!
This is calling my name!! Looks SO fantastic!!
Black Forest cake is my mom’s favorite birthday treat! Will have to give her this recipe to try!
how soon would you put the topping and cream on top ?? Would this last left over with the cream ?? That is the most beautiful cheesecake I have ever seen !!!!! Thanks for posting
I wouldn’t put the cream on top until right before serving. The cream doesn’t last well unless you do a stabilized whipped cream.
would the cheesecake freeze well for several weeks without the toppings.
Yes, absolutely! Just thaw overnight in the fridge and then top the next day.
Thank you for sharing! This cheesecake turned out EXACTLY like yours! Our guest were completely “wowed”, everyone loved it! I will keep this recipe close to my heart. Delicious!
I’m so glad!
Do you grease your pan bore adding the crust mixture to it?
No, I do not. As long as it’s a springform pan, I’ve never had trouble with an Oreo crust sticking.
My husband has a Christmas birthday and when I asked what he wanted he requested a black forest cake but enthusiastically agreed to cheesecake when I found this recipe. It turned out wonderful–so delicious and beautiful!
I’m so glad!
Just curious – if there’s a concern of over-mixing after adding eggs, why are we adding the chocolate after the eggs? To give it more time to cool? Any reason I shouldn’t go ahead and add it before the eggs?
I think you would be fine to add the chocolate before adding the eggs.
Best hack ever, use a turkey bag, roll the sides down and set your springform pan in it and into the water bath. Fool proof.
You’re welcome.
Love it! That’s a great idea.
I make a Killer Cheesecake ,I’m going to try this one. I’ll let you know how it turns out. P S. I use a water bath
Please do!
I do not see the recipe. Where can I find it??
Hi! I partnered with Imperial Sugar, a brand I love and use all the time, for this Black Forest Cheesecake recipe. If you scroll to the end, you can find the link for the full recipe and details to their site. https://www.imperialsugar.com/recipes/black-forest-cheesecake?utm_source=House%20of%20Nash%20Eats&utm_medium=Blog%20%2B%20Social&utm_campaign=Black%20Forest%20Cheesecake
I found a great tip on Pinterest for doing a water bath…and no layers of heavy duty aluminum foil…that still lets water seep in! You place your springform pan in a slightly larger pan..I’ve found a small size “ roasting pan” at Dollar Tree. Then place that pan in a 9×13 pan filled with about 2” of very hot water. Works every time.
Hi! Thanks for sharing this recipe with us.
I live in Europe and cherry pie filling isn’t easy to find here, so what can I substitute it for so I can achieve the same/very similar taste?
Thanks in advance 😊
Hi Kate! I have a post all about how to make cherry pie filling! I just updated this post with additional links to help out. It just takes tart cherries, sugar, and cornstarch (or cornflour, which is what I think it is called in Europe) and can easily be made on the stovetop!
This is an amazing cheesecake, but too large for a Valentine’s Day dessert for two. do you know how to cut the recipe down for a 6” cheesecake?
Great question! You just make half of the recipe and bake for maybe 10 minutes less for a 6″ cheesecake.