

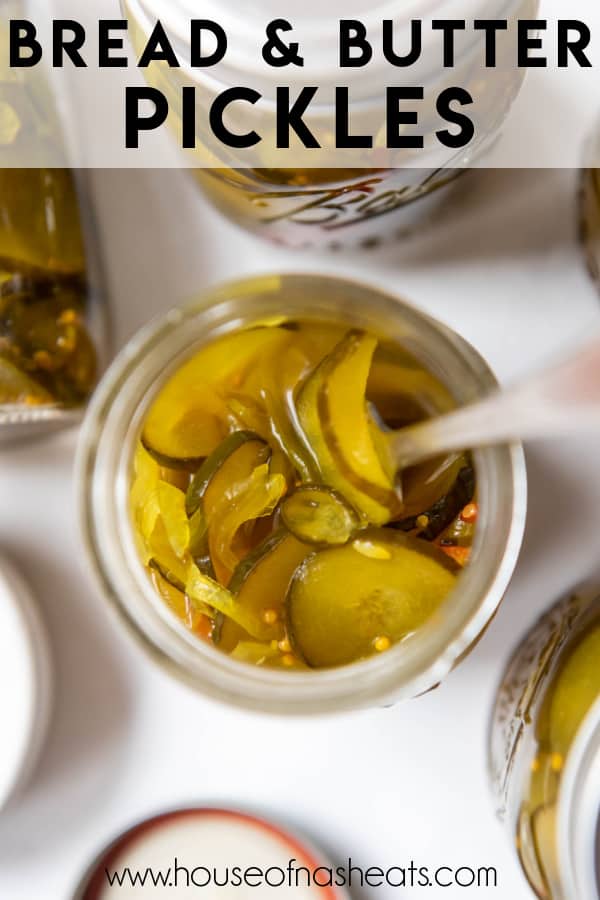
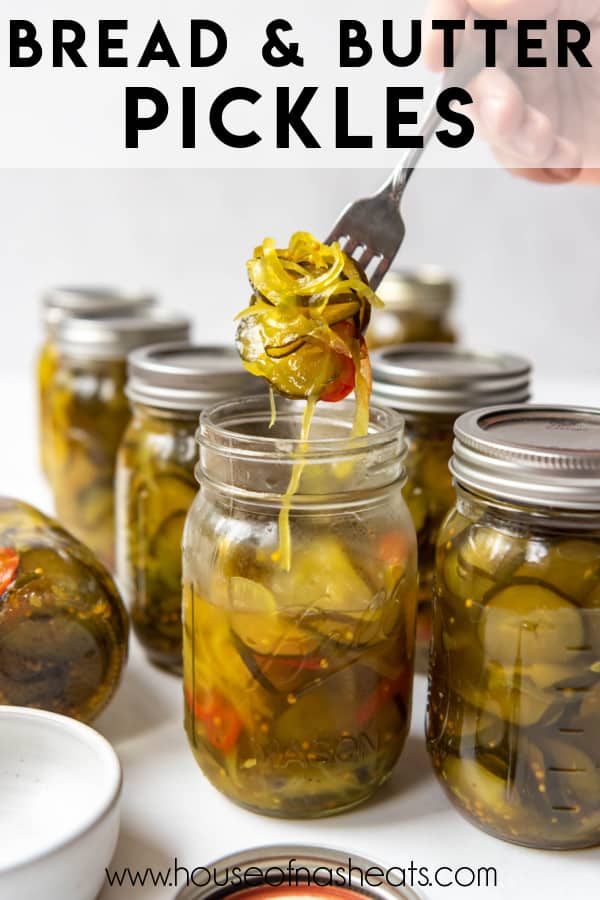
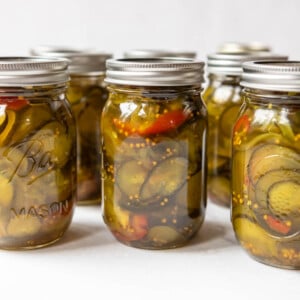
Homemade Bread & Butter Pickles have the perfect balance of sweet, savory, and tangy flavors. They are simple and delicious, and you can enjoy them on sandwiches, with meat, or any number of ways.
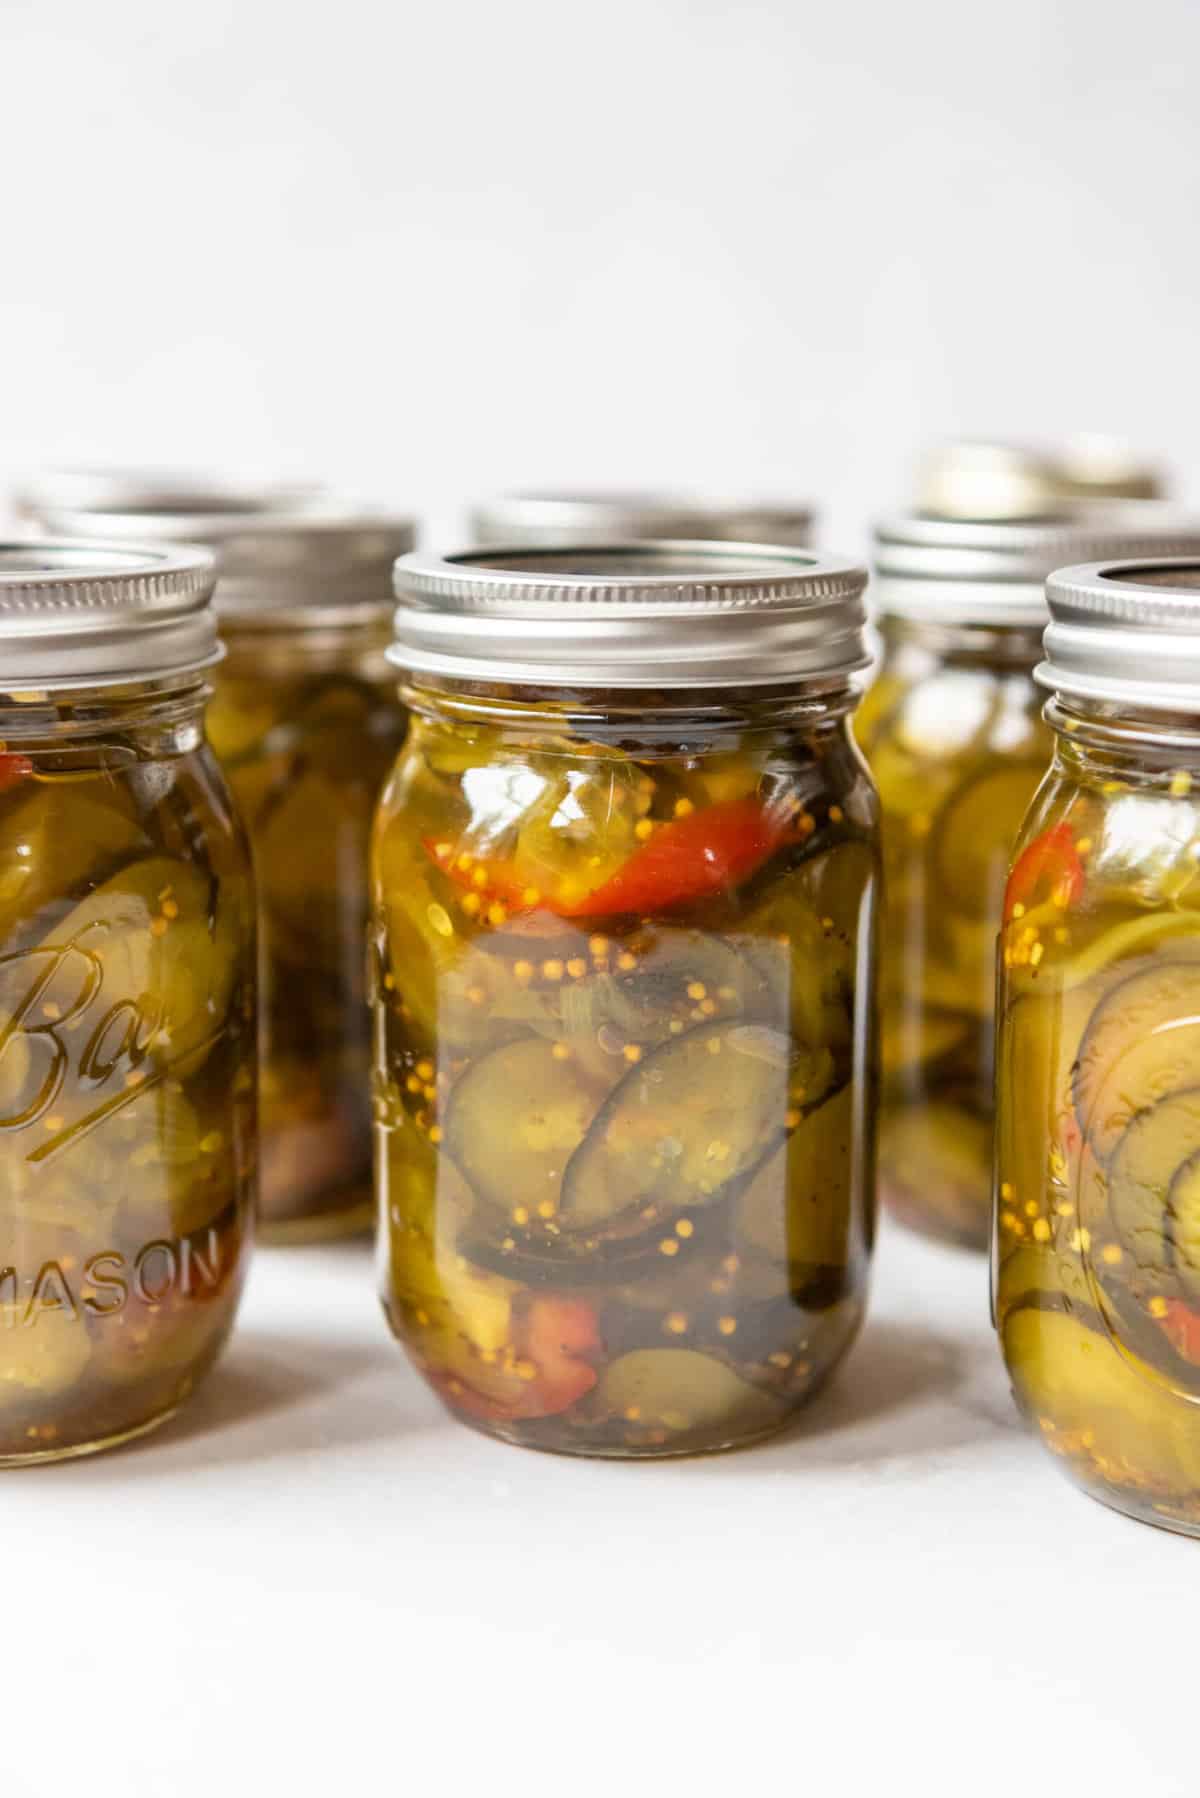
Table of Contents
These Old-Fashioned Bread & Butter Pickles are a time-honored staple in our home and one of my husband’s favorite things ever. This recipe is from Paul’s Grandma Robertson by way of my mother-in-law. They are so popular in fact that when Paul asked for a dozen jars of these bread & butter pickles for Christmas, his brothers joined in and everybody ended up with jars of pickles under the tree! If that’s not a testament to how beloved a recipe is, I don’t know what is!
We always have an opened can in the fridge, and at least one on the cupboard shelf ready to go for a tuna sandwich, which is our favorite way to eat these. You can dice them into the tuna salad or do what we do and just heap them on top of the tuna before closing the sandwich with a top slice of bread.
Try adding them to a Juicy Grilled Bison Burger or Crispy Chicken Sandwich for a sweet & sour burst of flavor and crunch. Or add them to a charcuterie board with salted meats, crackers, and cheese for a fantastic flavor and texture contrast.
If you find yourself with a surplus of cucumbers from your garden this summer or you see them being sold for a great price at the farmer’s market, this is my favorite way to use them!
And if you love pickles, you need to try my Mississippi Kool-Aid Pickles and these crispy Fried Pickles!
Why We Love This Recipe
- Adjust the sweetness to your liking, so you can make perfect homemade pickles every time.
- You only need a few simple ingredients for these sweet pickles, but they are way better than the store-bought version!
- Pickles will last in an open jar for up to 3 months in the refrigerator, or for a few years in a properly sealed (canned) and unopened jar!
What You’ll Need
Scroll down to the recipe card below this post for ingredient quantities and full instructions.
- Cucumbers – We’ll be pickling slices of medium-sized cucumbers in this recipe. The method will work with any size though.
- Onions – Use a thinly sliced onion to add a depth of savory flavor.
- Pepper – Use a combination of green bell pepper and red bell pepper for a fresh and slightly sweet flavor.
- Salt – I used coarse Kosher salt, but you can also use canning salt to enhance the sweet and tangy flavors of these pickles.
- Vinegar – White vinegar is best for pickling here.
- Granulated Sugar – This adds to the overall sweetness of the pickles.
- Seasoning – Fresh garlic cloves, mustard seeds, ground turmeric, and celery seeds are all you need to pack these pickles with flavor.
How to Make Bread & Butter Pickles
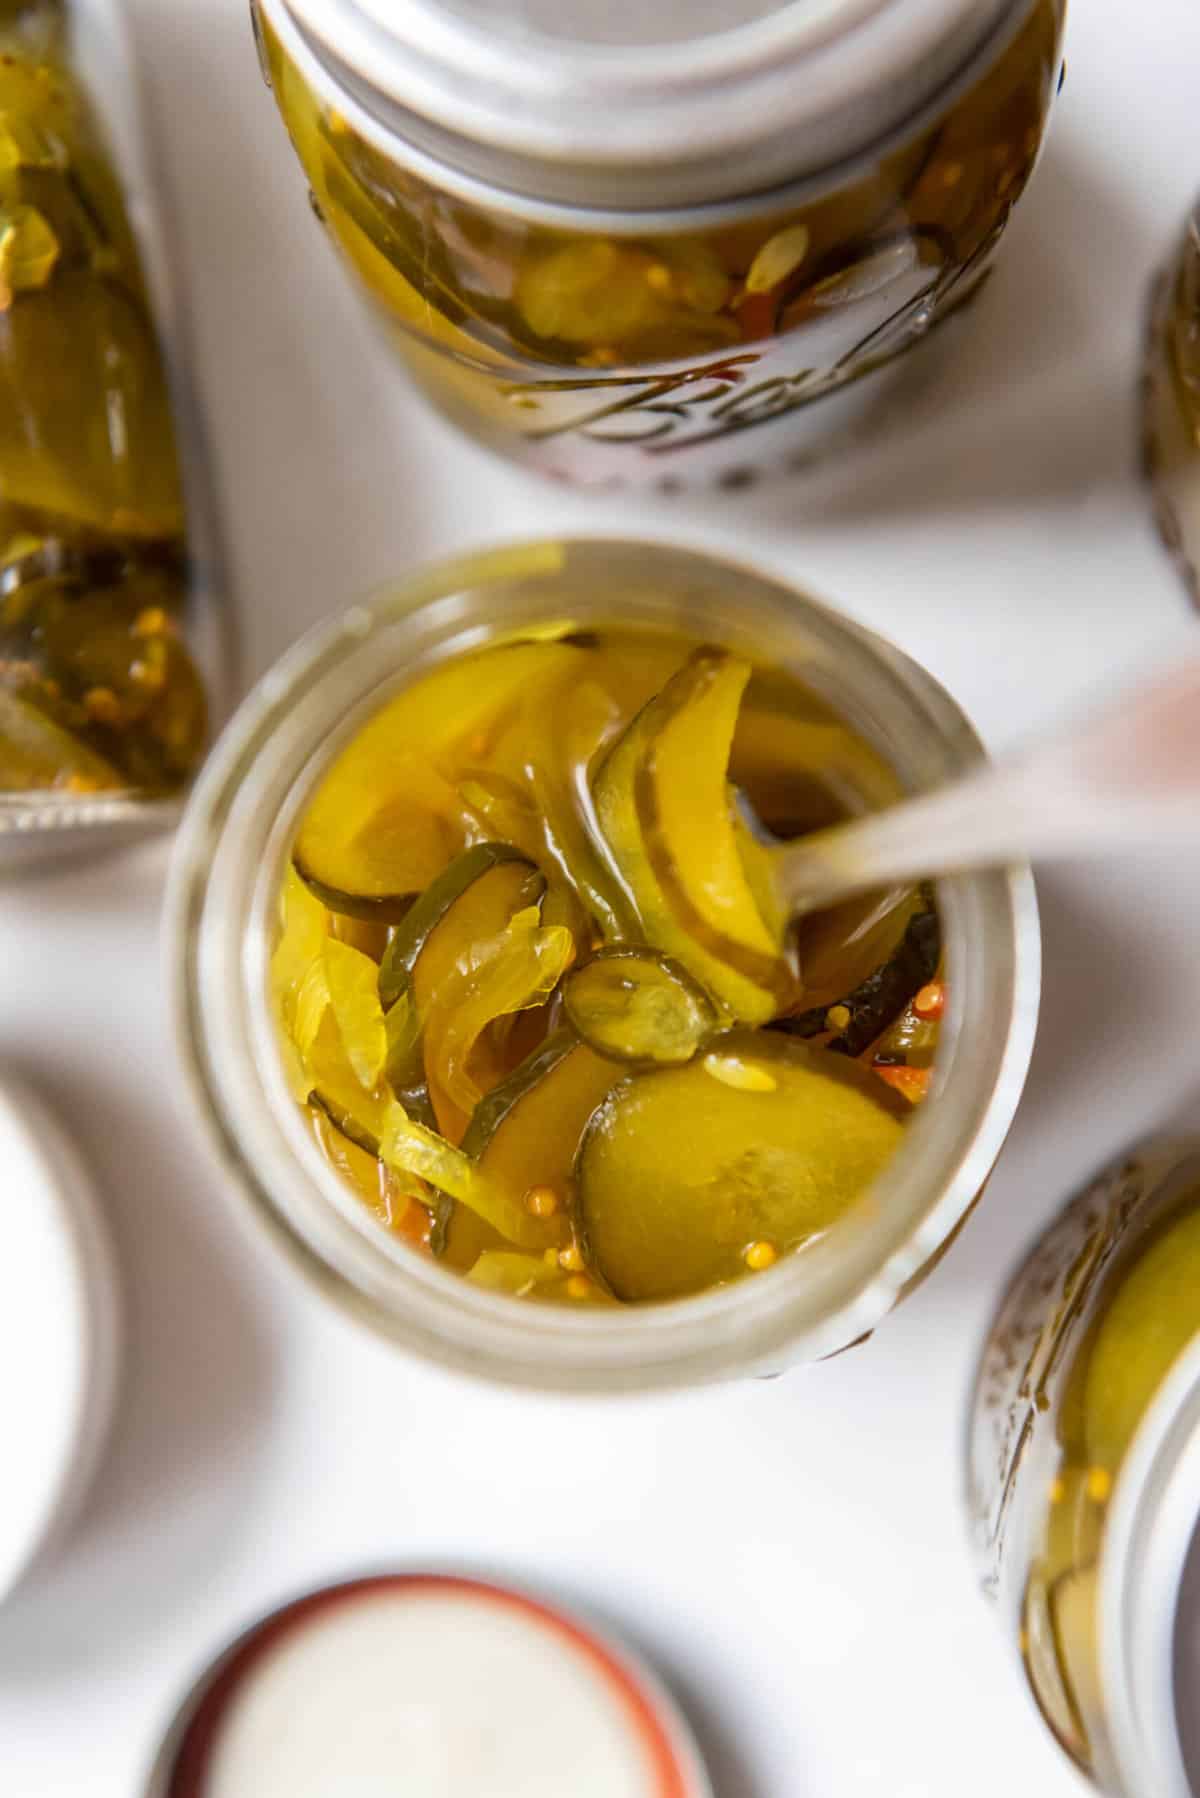
- Prep ingredients. Slice cucumbers into thin discs. Cut onions in half, then slice them into strips. Slice green and red bell peppers into strips.
- Combine veggies and salt. Combine cucumbers, onion slices, and peppers in a large bowl, tossing to evenly distribute the vegetables so they are mixed together. Sprinkle with the coarse salt, then toss to evenly distribute the salt. Cover the top of the cucumbers with a layer of ice about an inch or two thick. This process is called “slaking” the cucumbers and it helps leach out their natural watery juices so the pickles stay crisp.
- Refrigerate. Transfer the bowl to the fridge and let the vegetables sit for 3 hours, then discard the ice. Rinse the vegetables thoroughly with cold water and drain well.
- Heat pickling mix. Combine sugar, vinegar, garlic, celery seed, mustard seed, and turmeric in a large pan over medium heat. Bring to a boil.
- Cook. Add the cucumber and onion mixture and heat just until it starts to boil again. Don’t overcook – the cucumbers should still be crisp.
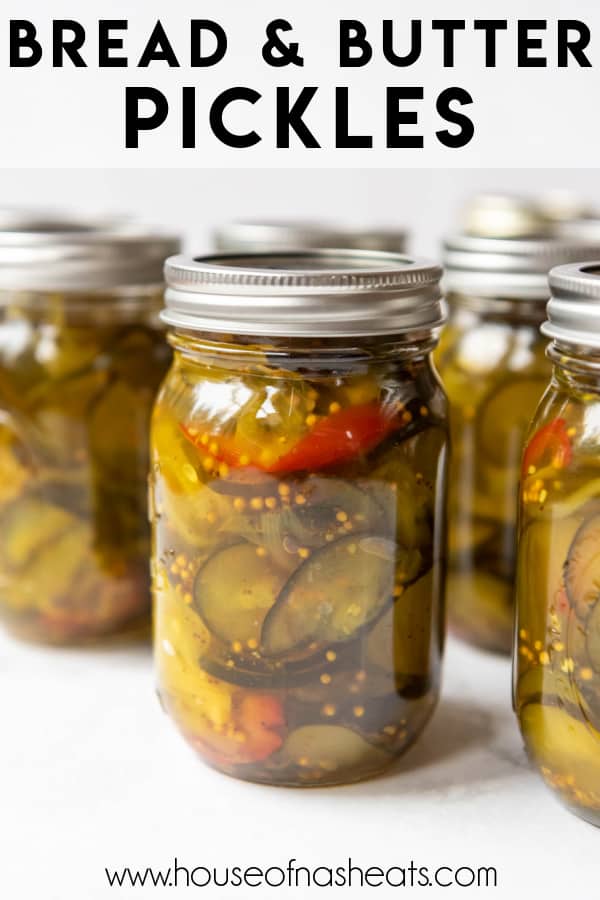
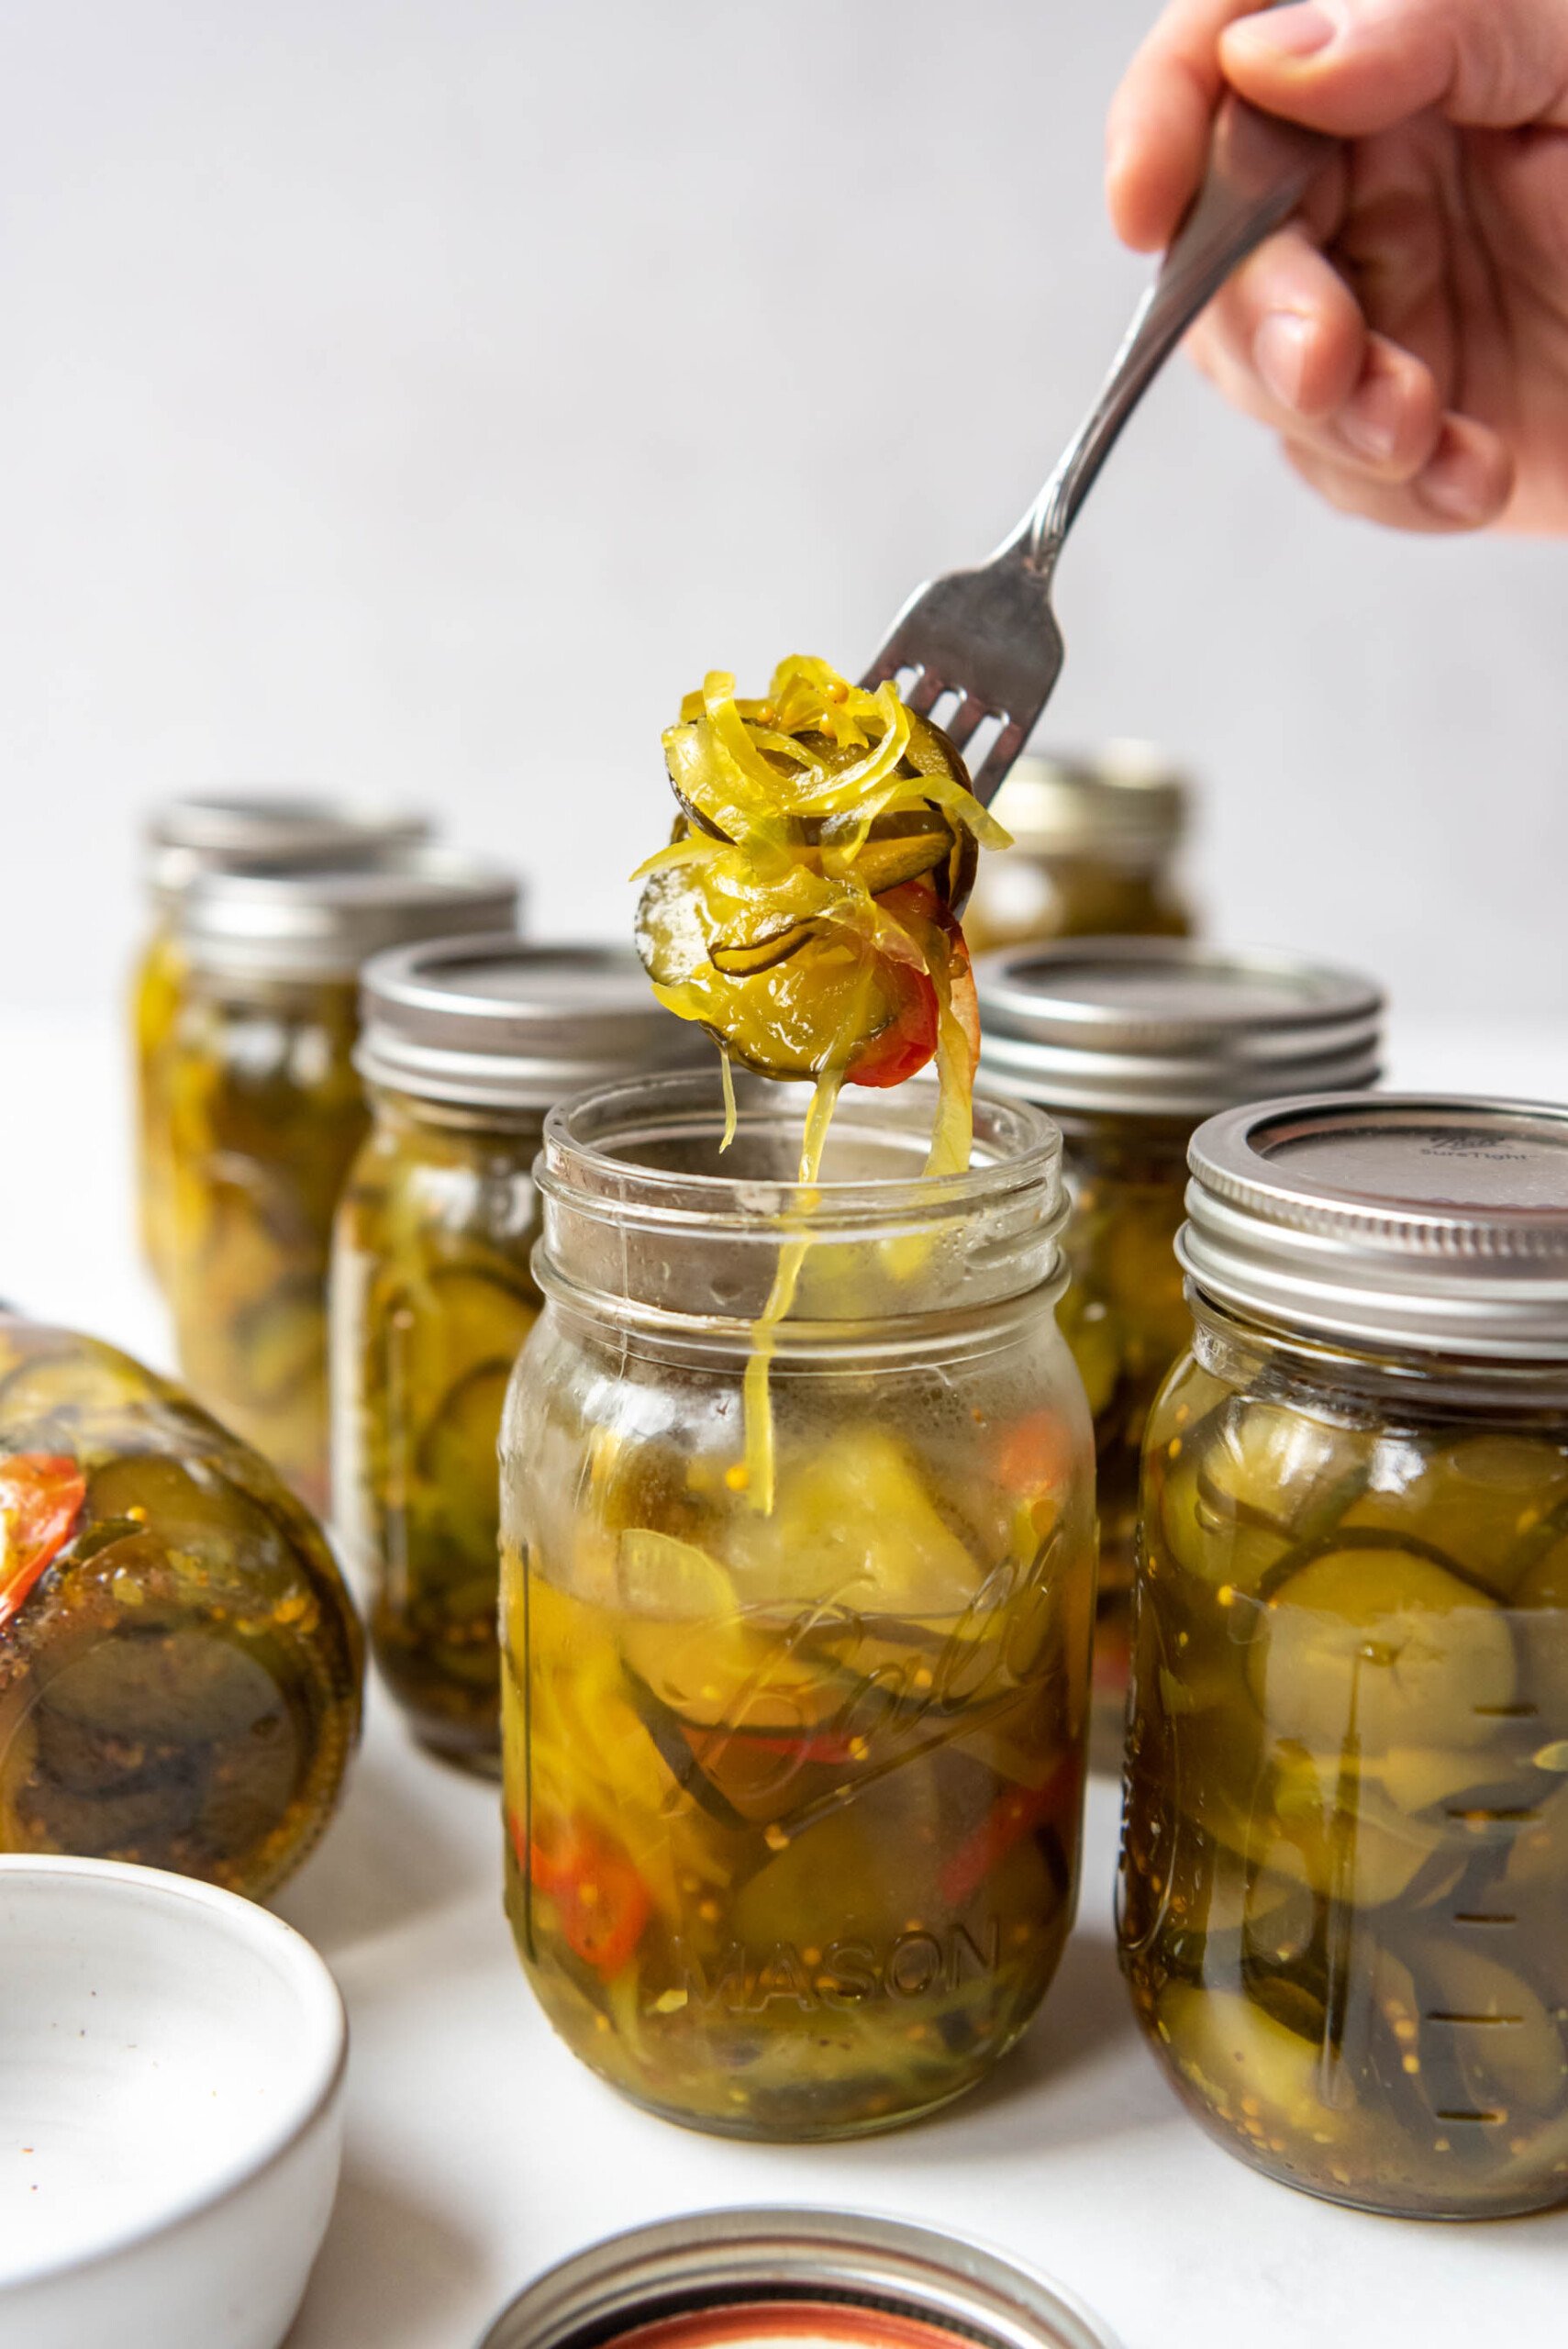
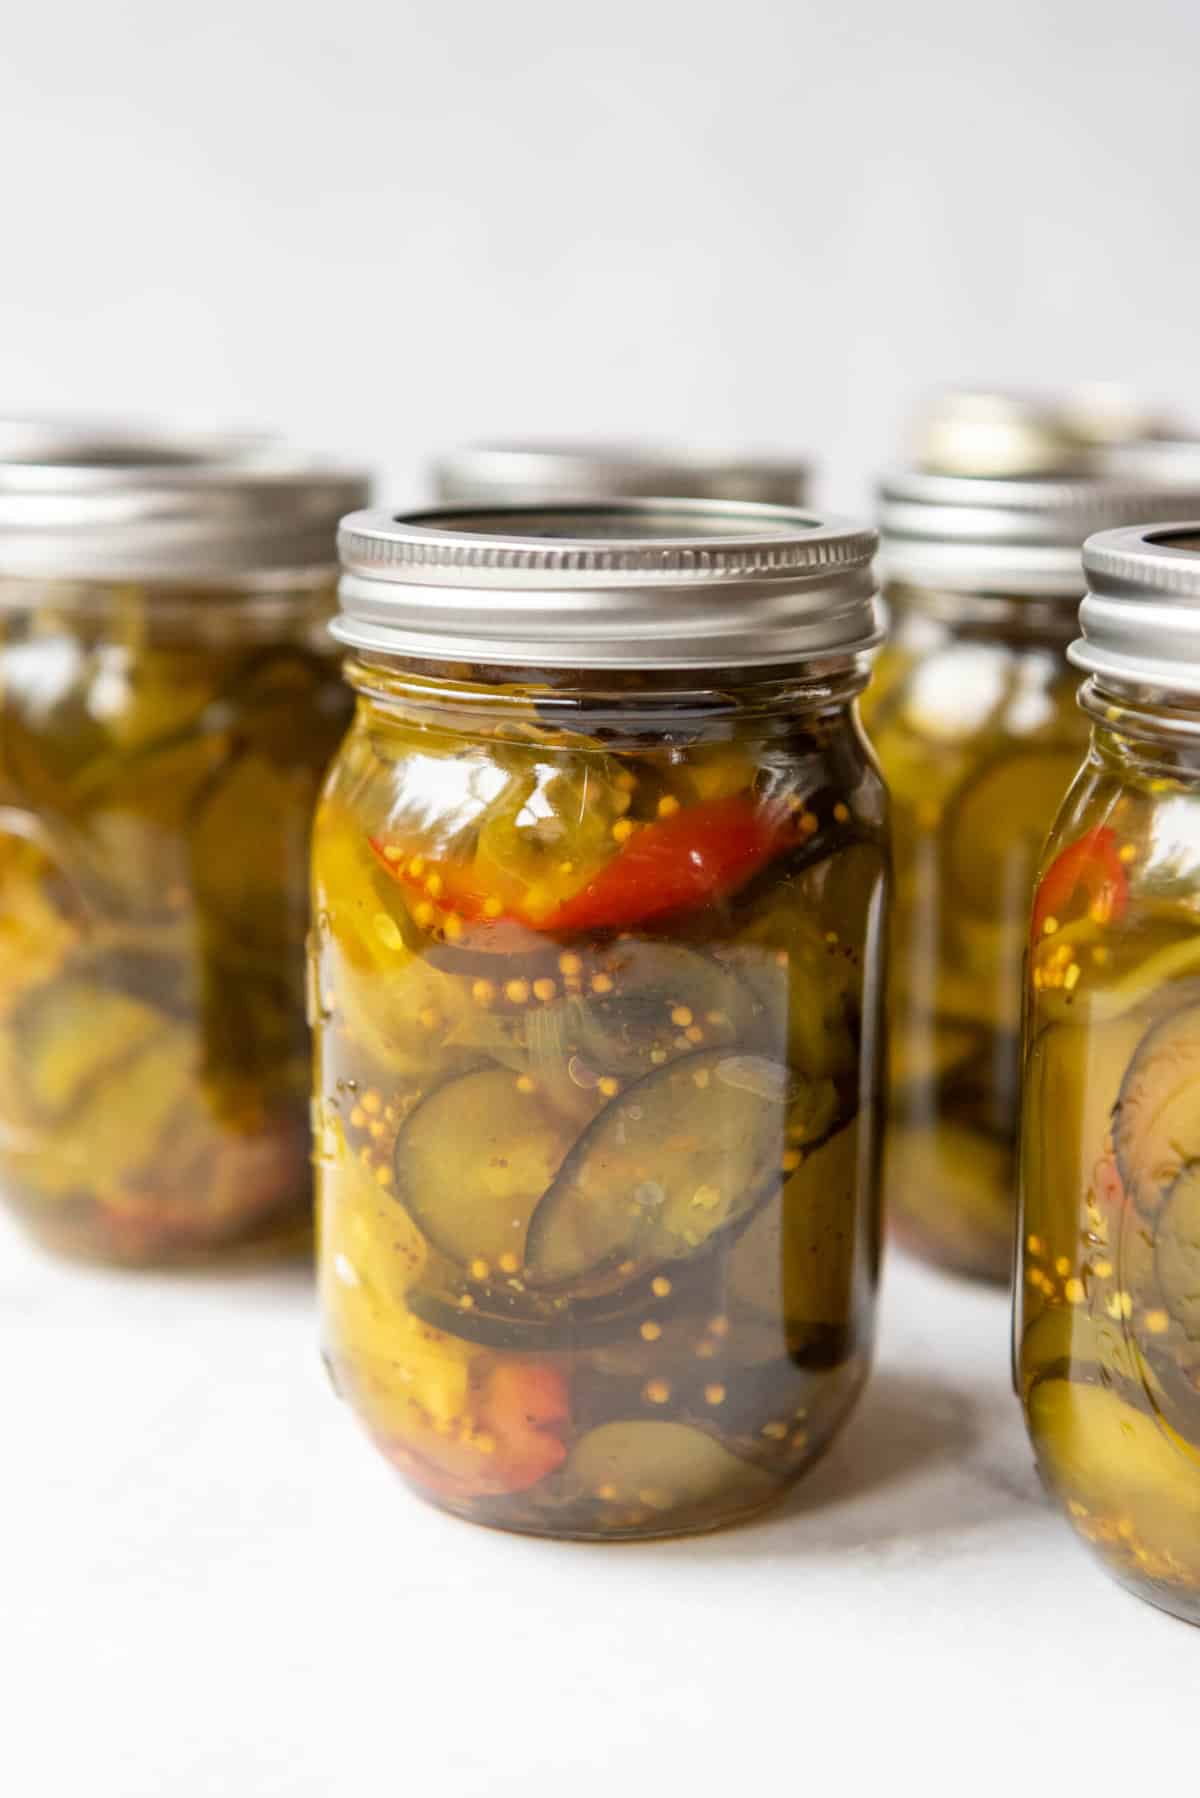
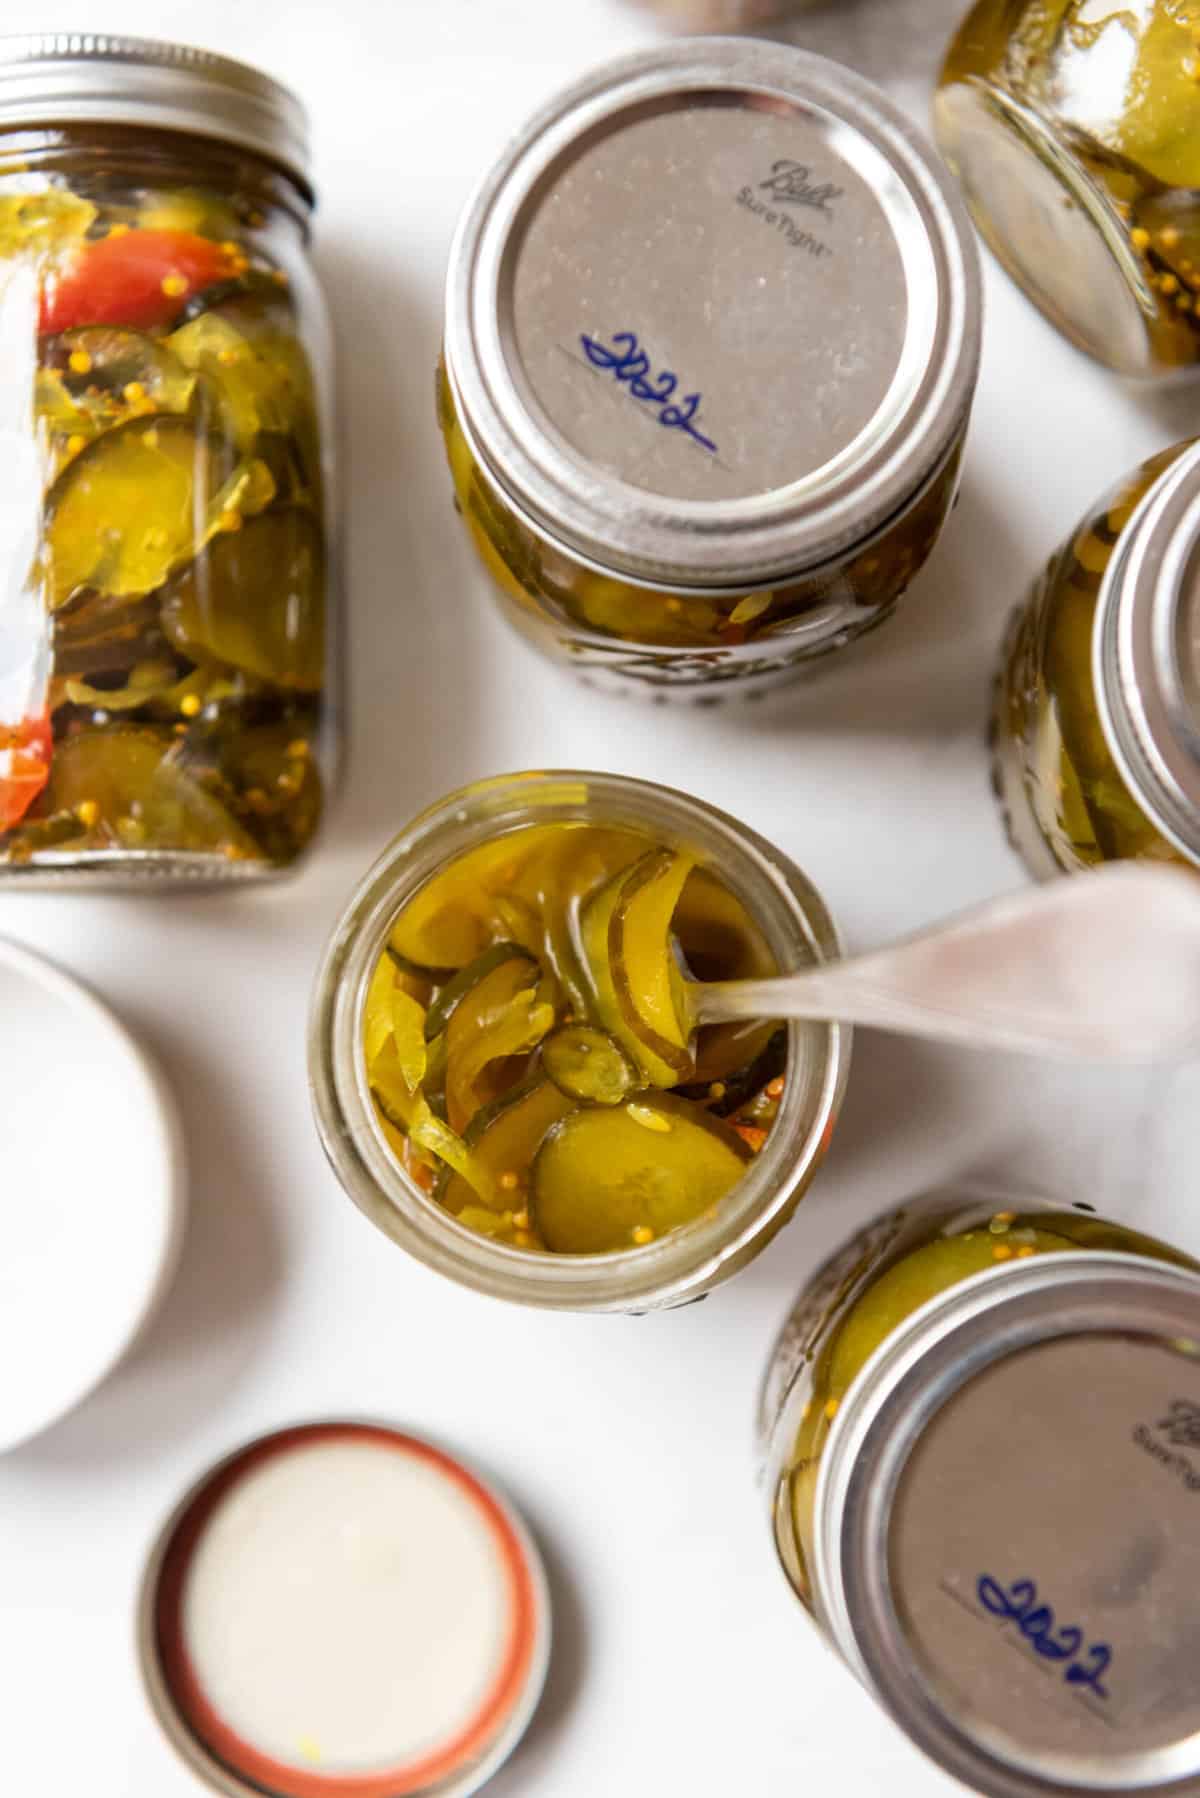
- Add to jars. Transfer the cucumbers and onions to clean, sterilized canning jars while still boiling hot. Fill to within about 1 inch of the brim, then pour some of the pickling liquid over the vegetables until the jar is filled about ½ inch from the brim.
- Seal jars. Make sure the rim is clean by wiping it with a clean towel so it will seal properly. Place a clean lid on each jar and secure it with the metal rings.
- Hot water bath. Arrange the jars in a large pot filled with hot water. The water should cover the jars by a full inch. Bring to a boil for 15 minutes to seal. Carefully remove each hot jar from the water using tongs or a jar lifter.
- Cool and store. Let the jars cool completely to room temperature. They should make a popping sound as their lids seal. If any of the jars don’t seal properly, store them in the refrigerator and enjoy the pickles within 3 months.
Recipe FAQ’s
Bread & Butter pickles were first trademarked in the 1920s by Omar and Cora Fanning, a couple who lived in Illinois and grew fresh cucumbers, but the recipe itself is likely much older than that. The story goes that the Fannings would sometimes barter their ‘sweet and sour pickles’ in exchange for essentials like bread and butter during difficult times. Another explanation of the unique name is that the ‘bread and butter pickles’ were good enough to eat with nothing more than bread and butter with them.
From what I can tell, it was Omar who did the pickling in the family with his mother-in-law’s recipe, and the pickles got noticed at a church potluck. After recognizing the interest in the pickles, Omar was able to grow a business around them that was eventually sold and branded Mrs. Fanning’s Bread and Butter Pickles, probably in a branding attempt to sound more domestic.
You can store these pickles for a few years in a properly sealed (canned) and unopened jar! Once opened, or if you choose to not seal them with a water bath, they will last for up to 3 months in the refrigerator.
Tips for Success
- Use good-quality cucumbers like Persian cucumbers or Japanese cucumbers; you should be able to find these at farmer’s markets if not at your local grocery store.
- Use a canning salt, coarse kosher salt, or sea salt. Don’t use regular table salt as it contains additives that will discolor your pickles.
- This recipe yields about 8 pints of bread and butter pickles. You can half, double, or triple it as necessary!
- You can enjoy your bread and butter pickles 24 hours after making them, but their flavor matures with time. They have the best flavor after they have been sitting for at least 1 week (ideally 3 weeks).
- Once you drain your cucumbers after their salt bath, you can dab them dry with a paper towel or cloth to dry them even more. This will help them to stay a bit crispier to get a decent crunch.
Sterilizing, Pickling & the Hot Water Bath
If you are pickling cucumbers to can them using a hot water bath, you do not need to sterilize the jars beforehand as they will get sterilized during the process. However, if you are just putting the pickled cucumbers into jars and in the fridge, you’ll want to sterilize them first. You should always wash the jars with hot soapy water regardless of storing method.
Substitutions and Variations
- Add some heat. Add some red pepper flakes to the other pickling seasonings for a bit of a spicy kick!
- Spices. Add some allspice or a cinnamon stick to the pickling mix for a spiced flavor.
- No water bath. The hot water bath will seal the pickle jar and allow them to be kept fresh just by storing them in your cupboard or at room temperature on your shelf. If you’re going to eat pickles straight away, you can skip the water bath and store the pickles in the fridge.
More Great Recipes To Try
- Southern Cheese Straws
- Pretzel Dogs
- Smoked Pork Belly Burnt Ends
- Tomato Basil Bruschetta
- Southern Hush Puppies
- Smoked Brisket Burnt Ends
Did you make this recipe?
Let me know what you thought with a comment and rating below. You can also take a picture and tag me on Instagram @houseofnasheats or share it on the Pinterest pin so I can see.
Homemade Bread & Butter Pickles
Ingredients
- 4 quarts sliced medium-sized cucumbers (16 cups)
- 6 onions sliced
- 1 green bell pepper sliced
- 1 red bell pepper sliced
- ⅓ cup coarse Kosher salt
- 3 cups white vinegar
- 5 cups granulated sugar
- 3 garlic cloves
- 2 tablespoons mustard seed
- 1½ teaspoons ground turmeric
- 1½ teaspoons celery seed
Instructions
- Slice cucumbers into thin discs. Cut onions in half, then slice them into strips. Slice green and red bell peppers into strips.4 quarts sliced medium-sized cucumbers, 6 onions, 1 green bell pepper, 1 red bell pepper
- Combine sliced cucumbers, sliced onions, and peppers in a large bowl, tossing to evenly distribute the vegetables so they are mixed together. Sprinkle with the coarse salt, then toss to evenly distribute the salt. Cover with a layer of ice about an inch or two thick.⅓ cup coarse Kosher salt
- Transfer the bowl to the fridge and let the vegetables sit for 3 hours, then discard the ice. Rinse the vegetables thoroughly with cold water and drain well.
- Combine sugar, vinegar, garlic, celery seed, mustard seed, and turmeric in a large pan over medium heat. Bring to a boil.3 cups white vinegar, 5 cups granulated sugar, 3 garlic cloves, 2 tablespoons mustard seed, 1½ teaspoons ground turmeric, 1½ teaspoons celery seed
- Add the cucumber and onion mixture and heat just until it starts to boil again. Don’t overcook – the cucumbers should still be crisp.
- Transfer the cucumbers and onions to clean, sterilized jars while still boiling hot. Fill to within about 1 inch of the brim, then pour some of the pickling liquid over the vegetables until the jar is filled about ½ inch from the brim.
- Make sure the rim is clean by wiping it with a clean towel so it will seal properly. Place a clean lid on each jar and secure it with the metal rings.
- Arrange the jars in a large canning pot filled with hot water. The water should cover the jars by a full inch. Bring to a boil for 15 minutes to seal. Carefully remove each hot jar from the water using tongs or a jar lifter.
- Let the jars cool completely to room temperature. They should make a popping sound as their lids seal. If any of the jars don’t seal properly, store them in the refrigerator.
Notes
- Yield: This recipe yields about 8 pints of bread and butter pickles.
- Skipping the hot water bath (No-Canning Approach): If you want to skip canning these, they can be stored in the fridge for up to 3 months. I would recommend doing a ¼ – ½ of a batch for this, rather than the full recipe (unless you’re planning to give some away).
- Storage: You can store these pickles for a few years in a properly sealed (canned) and unopened jar! Once opened, or if you choose to not seal them with a water bath, they will last for up to 3 months in the refrigerator.


Garlic is in the ingredient list but it’s never mentioned again in the instructions. Do you add the garlic with the onions and peppers? Is the garlic sliced? Minced?
Hi! It’s listed in step #4. “Combine sugar, vinegar, garlic, celery seed, mustard seed, and turmeric in a large pan over medium heat. Bring to a boil.” I keep it as whole cloves but you are more than welcome to slice the garlic or mince the garlic, whichever you prefer! Let me know if you have any more questions!
I made these for my son and he loved them, I just reduced the sugar a bit.
Can I leave the salt out and still can? Need heart healthy recipe sans salt.
Hmmm it might be hard to omit the salt on this one. The salt helps preserve the pickles for canning. You can reduce the amount of salt and probably still be ok but I don’t think it would work omitting it completely from this recipe.
These are so good. We made them the first time last season and are making many more this season. They are worth the work!!
That’s great to hear! They are worth the work and so good!
Can I make these in quart jars? I’m trying to deliver to food pantries and gift to neighbors who are less fortunate
Oh that’s a great idea! Yes you can put them in any jar you want! Just make sure If you are pickling cucumbers to can them using a hot water bath, you do not need to sterilize the jars beforehand as they will get sterilized during the process. However, if you are just putting the pickled cucumbers into jars and in the fridge, you’ll want to sterilize them first. You should always wash the jars with hot soapy water regardless of storing method. Also, be familiar with the canning methods if you are planning to eat right away vs the hot water bath to make them shelf stable. Let me know if you have any more questions!
This is now a third year in a row that I’m making these. Awesome recipe! Just adding a bit less sugar (31/2 cups) as we don’t need these so sweet. Easy to make too! Thank you! 🙏
Thank you for continuing to make them Ava! That is so fun!