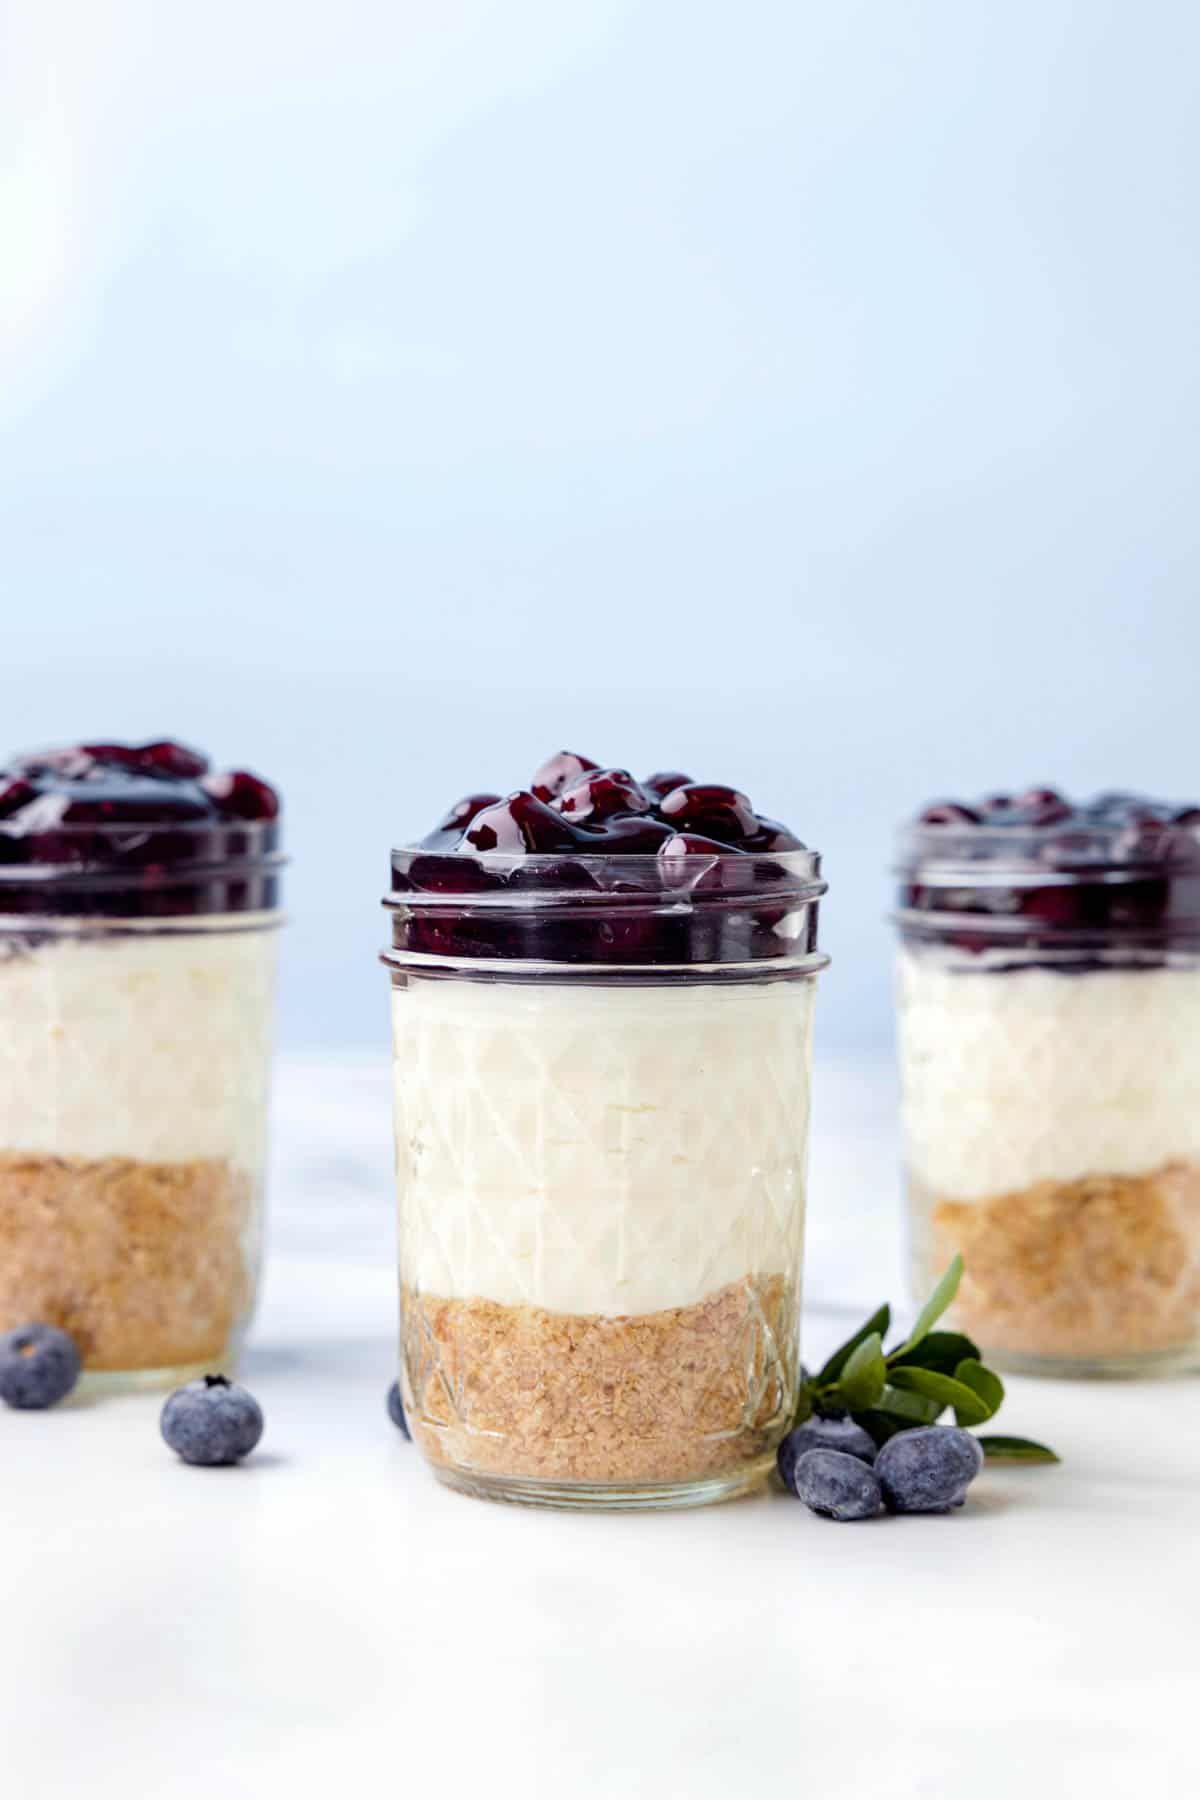
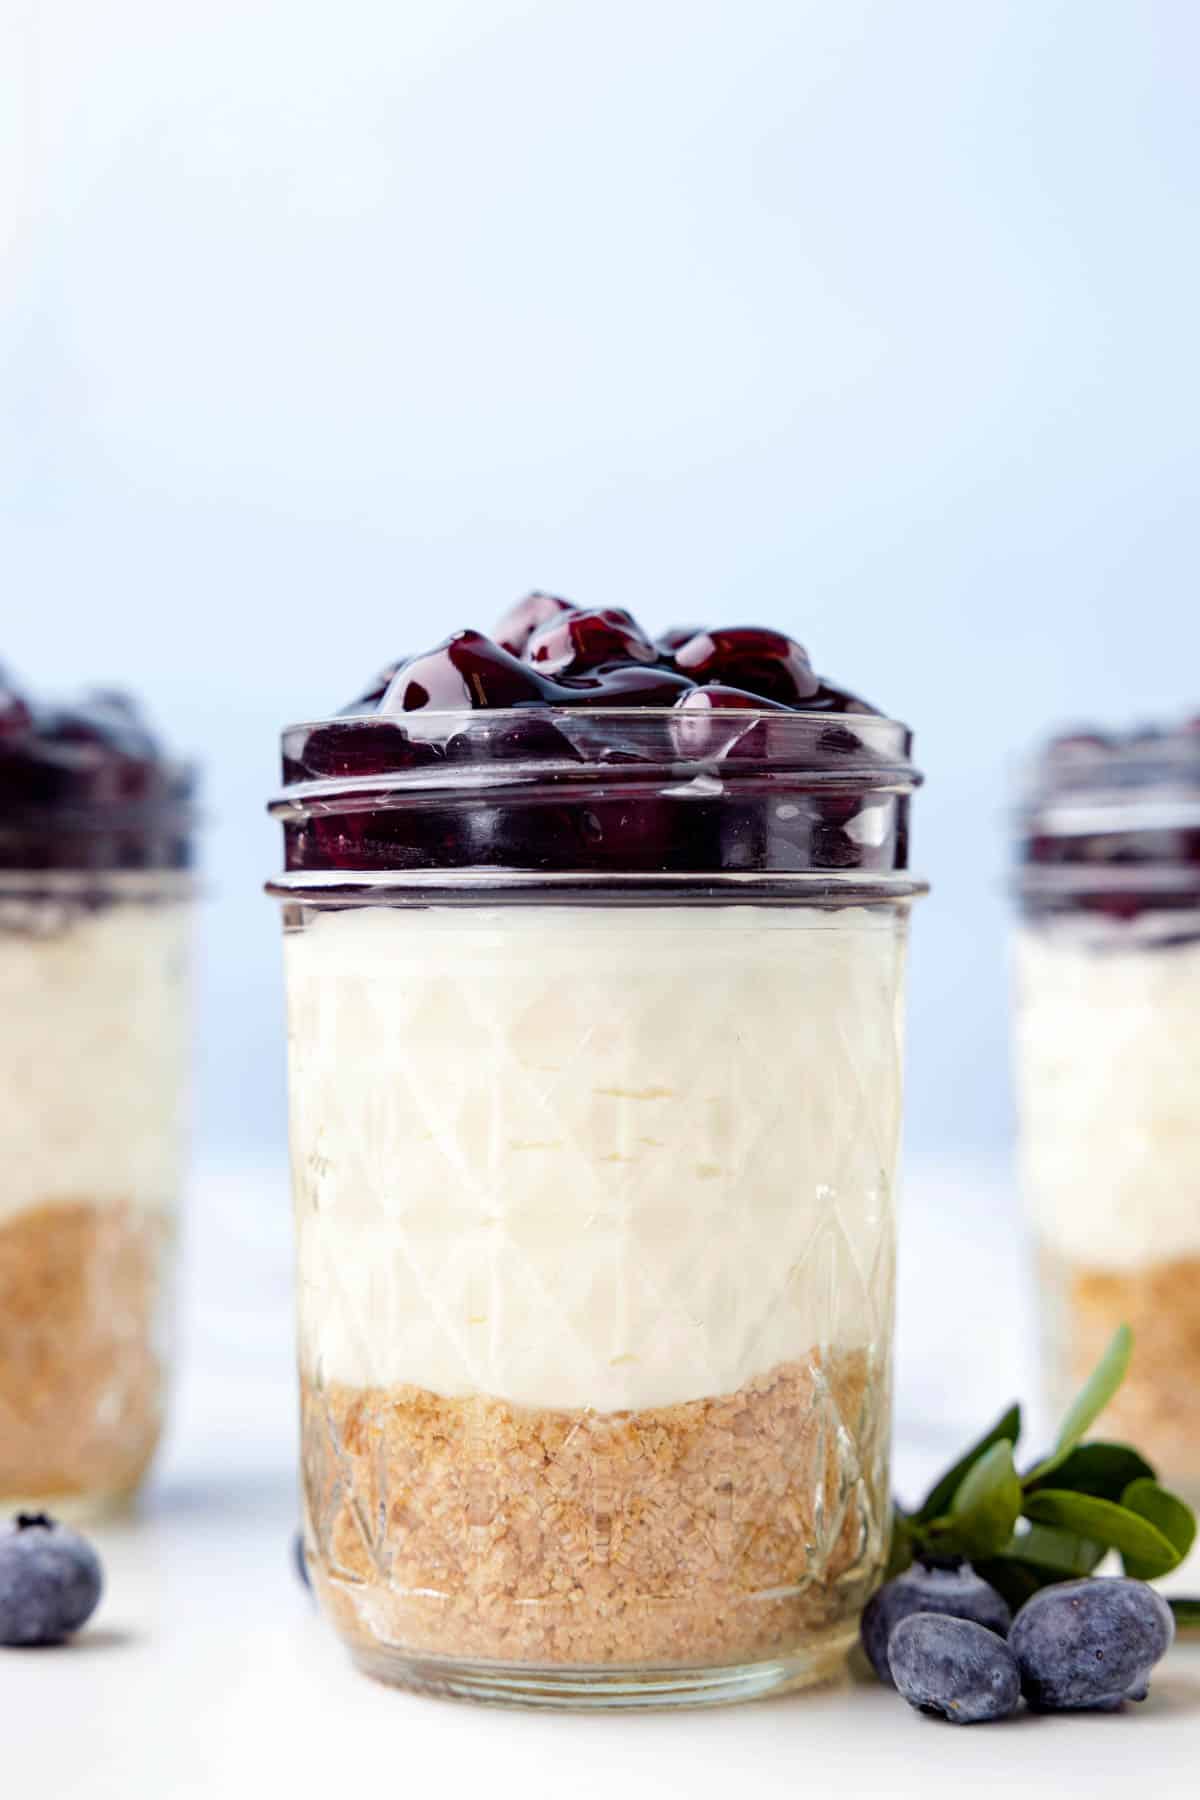
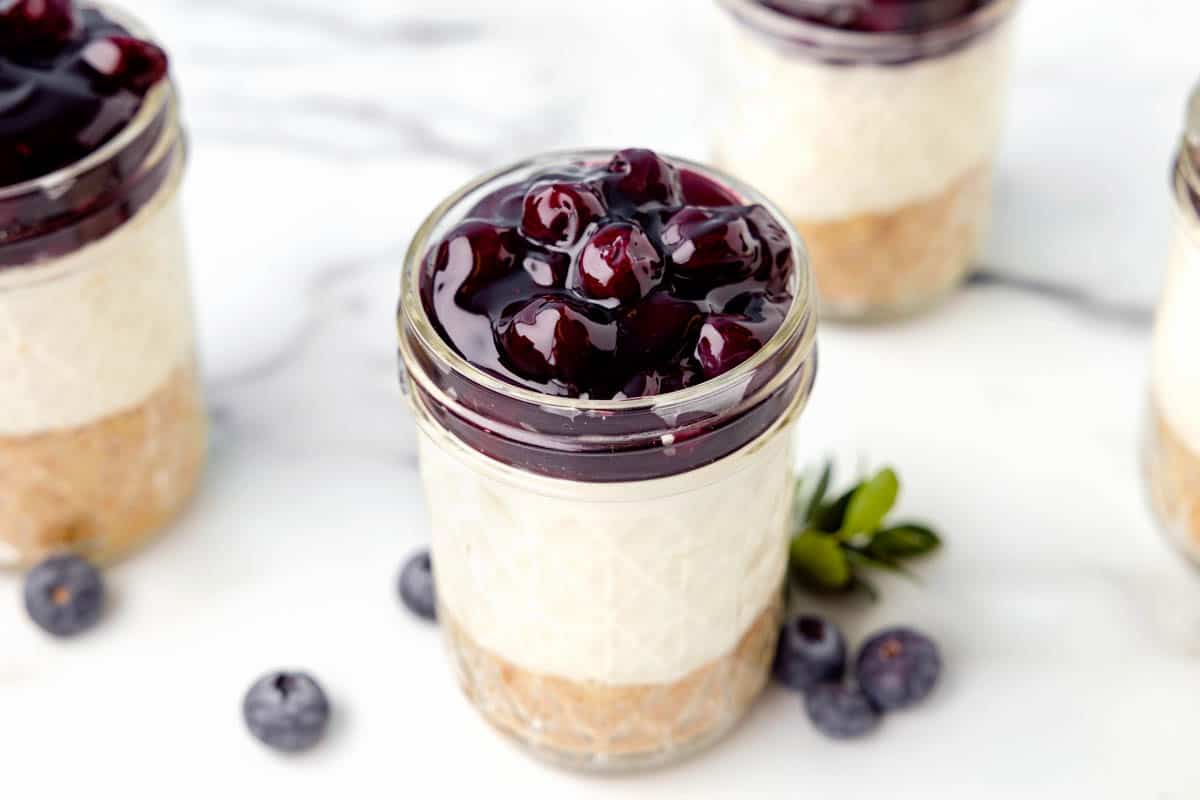
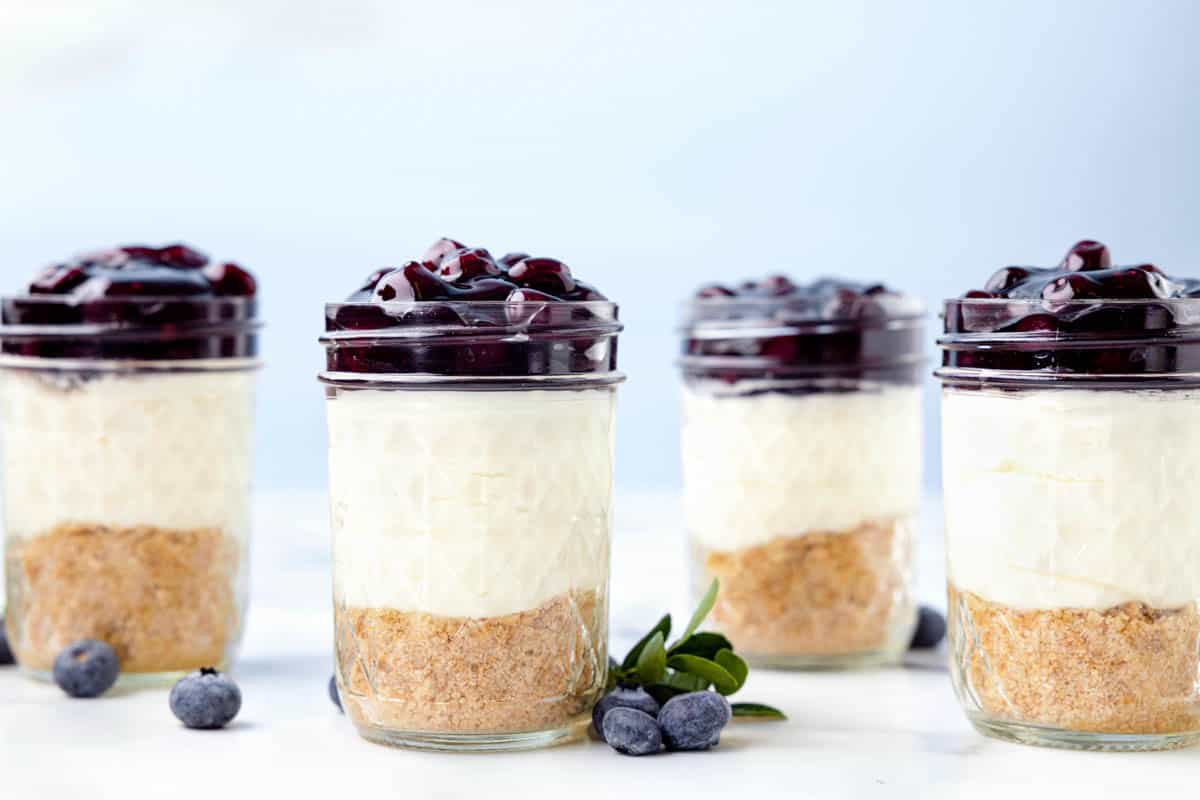
These No-Bake Cheesecake Jars are like the creamiest, smoothest cheesecake in individual cup servings! You’ll love the presentation with layers of buttery graham cracker crust, light cream cheese filling, and fruit topping that make this a wonderful dessert for any occasion!
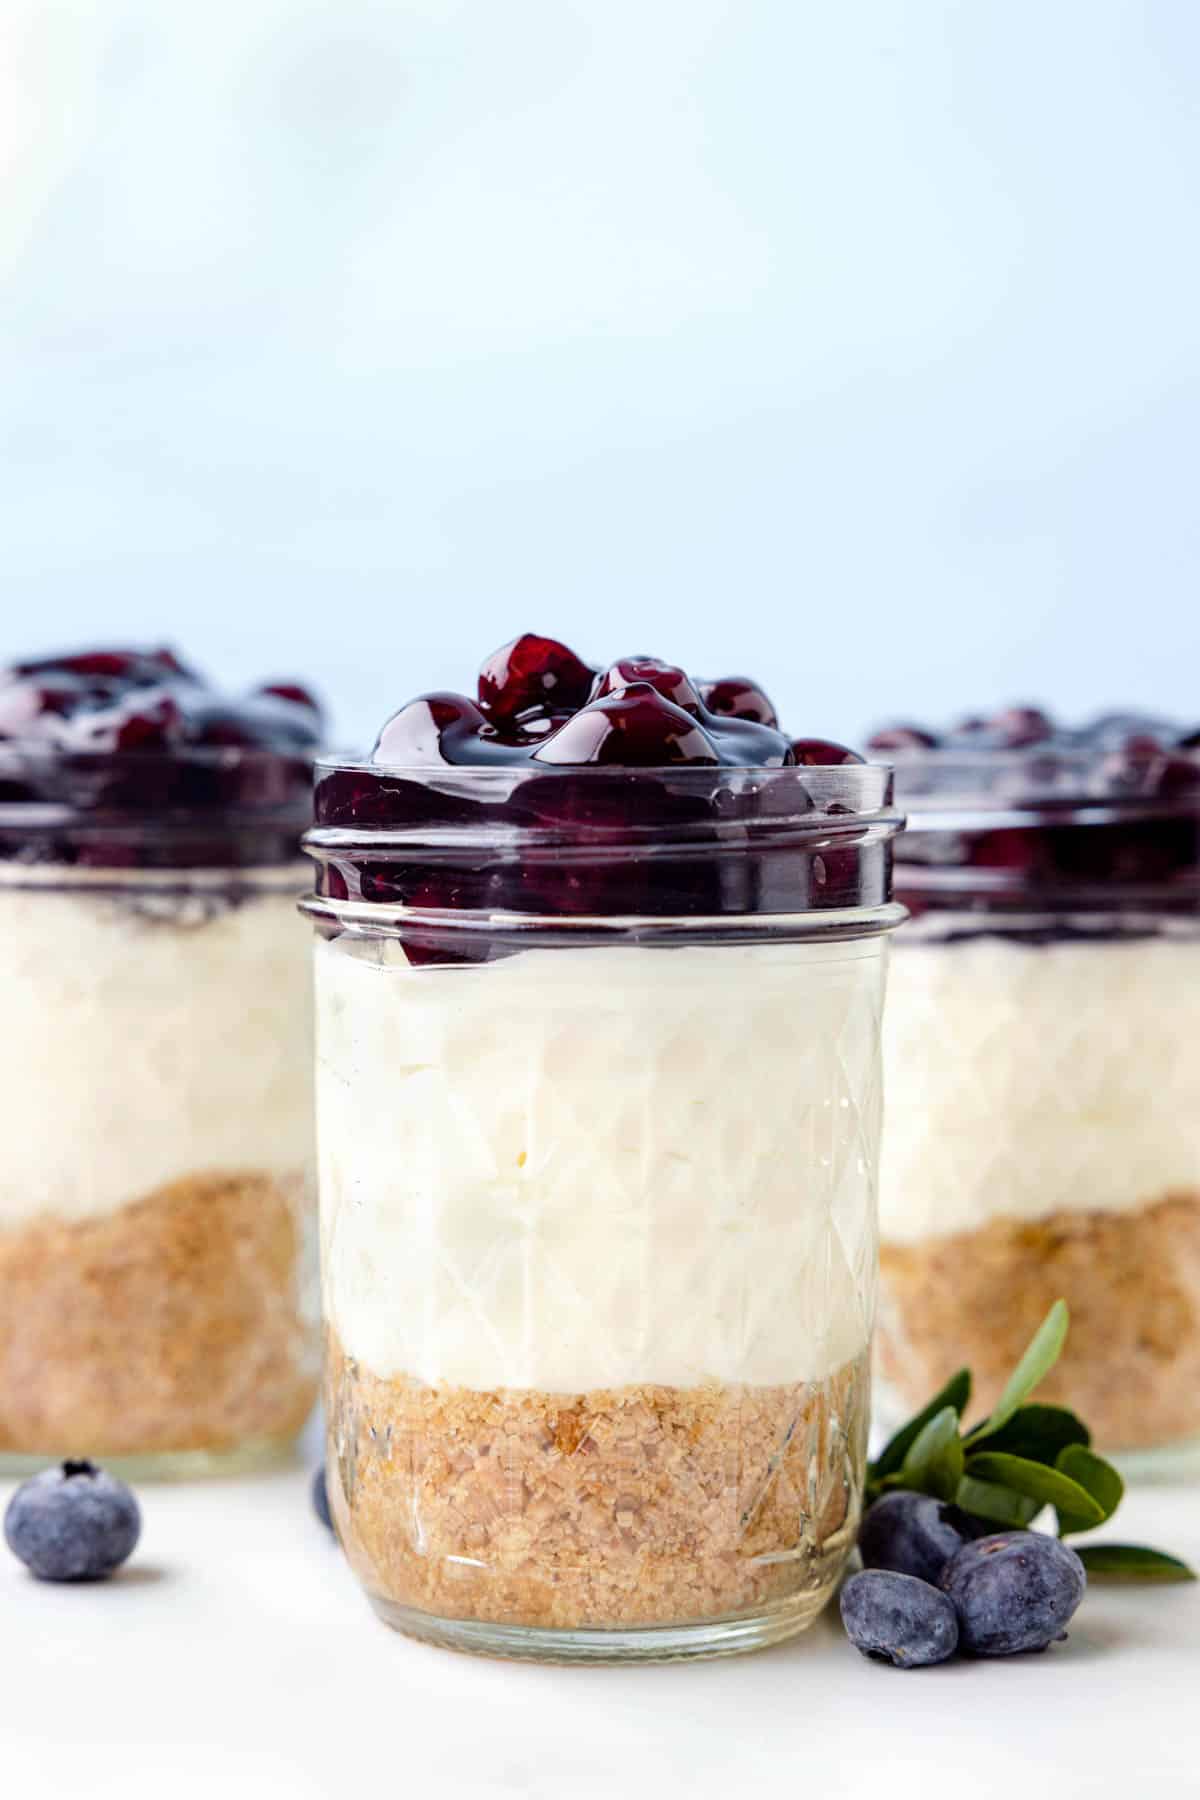
Table of Contents
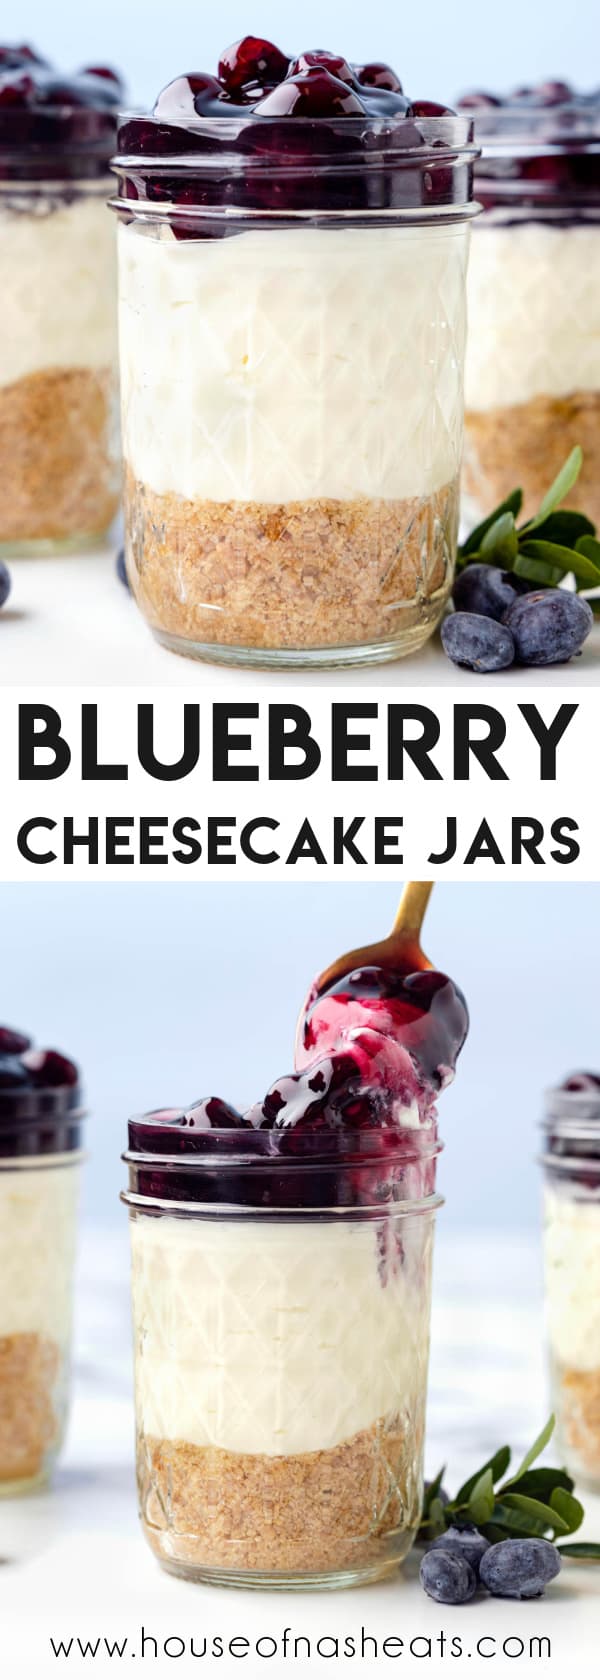
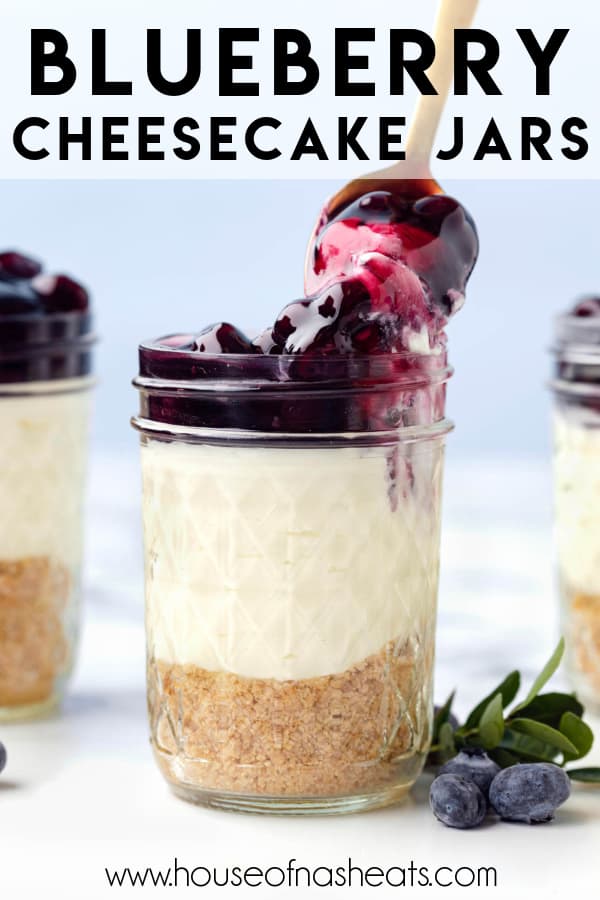
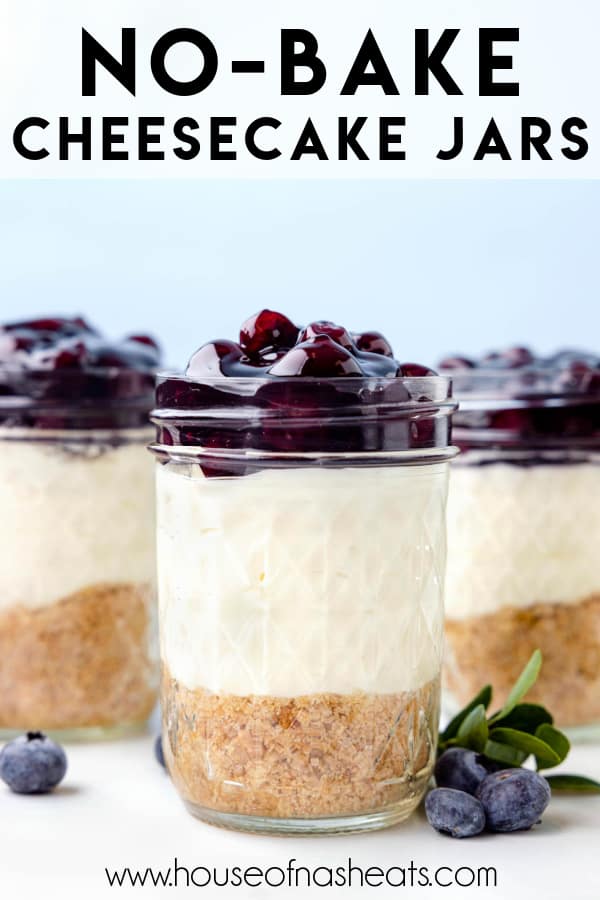
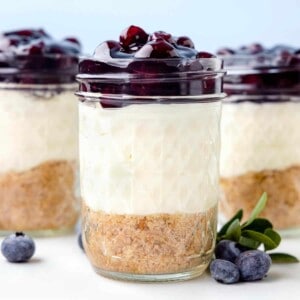
Cheesecake in a jar is quite possible my favorite way to eat cheesecake. These no-bake blueberry cheesecake jars are inspired by the Philadelphia cheesecake cups at the store. But not only do these taste even better because they are homemade with fresh ingredients, but you can top them any way you like and aren’t limited to just one or two flavors!
This is the perfect individual treat for the cheesecake lover in your life and the presentation is so fun when you serve them in cute little jars like these jeweled mason jars.
Blueberry pie filling is my personal favorite topping because I love blueberry cheesecake, but different flavors like cherry pie filling, apple pie filling, raspberry pie filling, salted caramel, or even just fresh fruit like sliced strawberries, raspberries, and fresh blueberries are all amazing ways to top your cheesecake in a jar!
We usually top all of our jars with the same topping just for ease, but if you are doubling or tripling the recipe for a crowd you could easily provide multiple topping options and let everyone finish their own jar with a different topping of their choice!
Why You’ll Love This Recipe
- Quick & easy – You can whip these up in under 25 minutes and enjoy immediately or refrigerate for an even denser, no-bake cheesecake experience that is great for making ahead for a party.
- Perfectly portioned – Because who doesn’t love an easy dessert that comes individually sized in a jar?
- No-Fuss – There is no worrying about cracks or a water bath like with a typical baked cheesecake when you make these no bake cheesecake jars instead!
What You’ll Need
Scroll down to the recipe card below this post for ingredient quantities and full instructions.
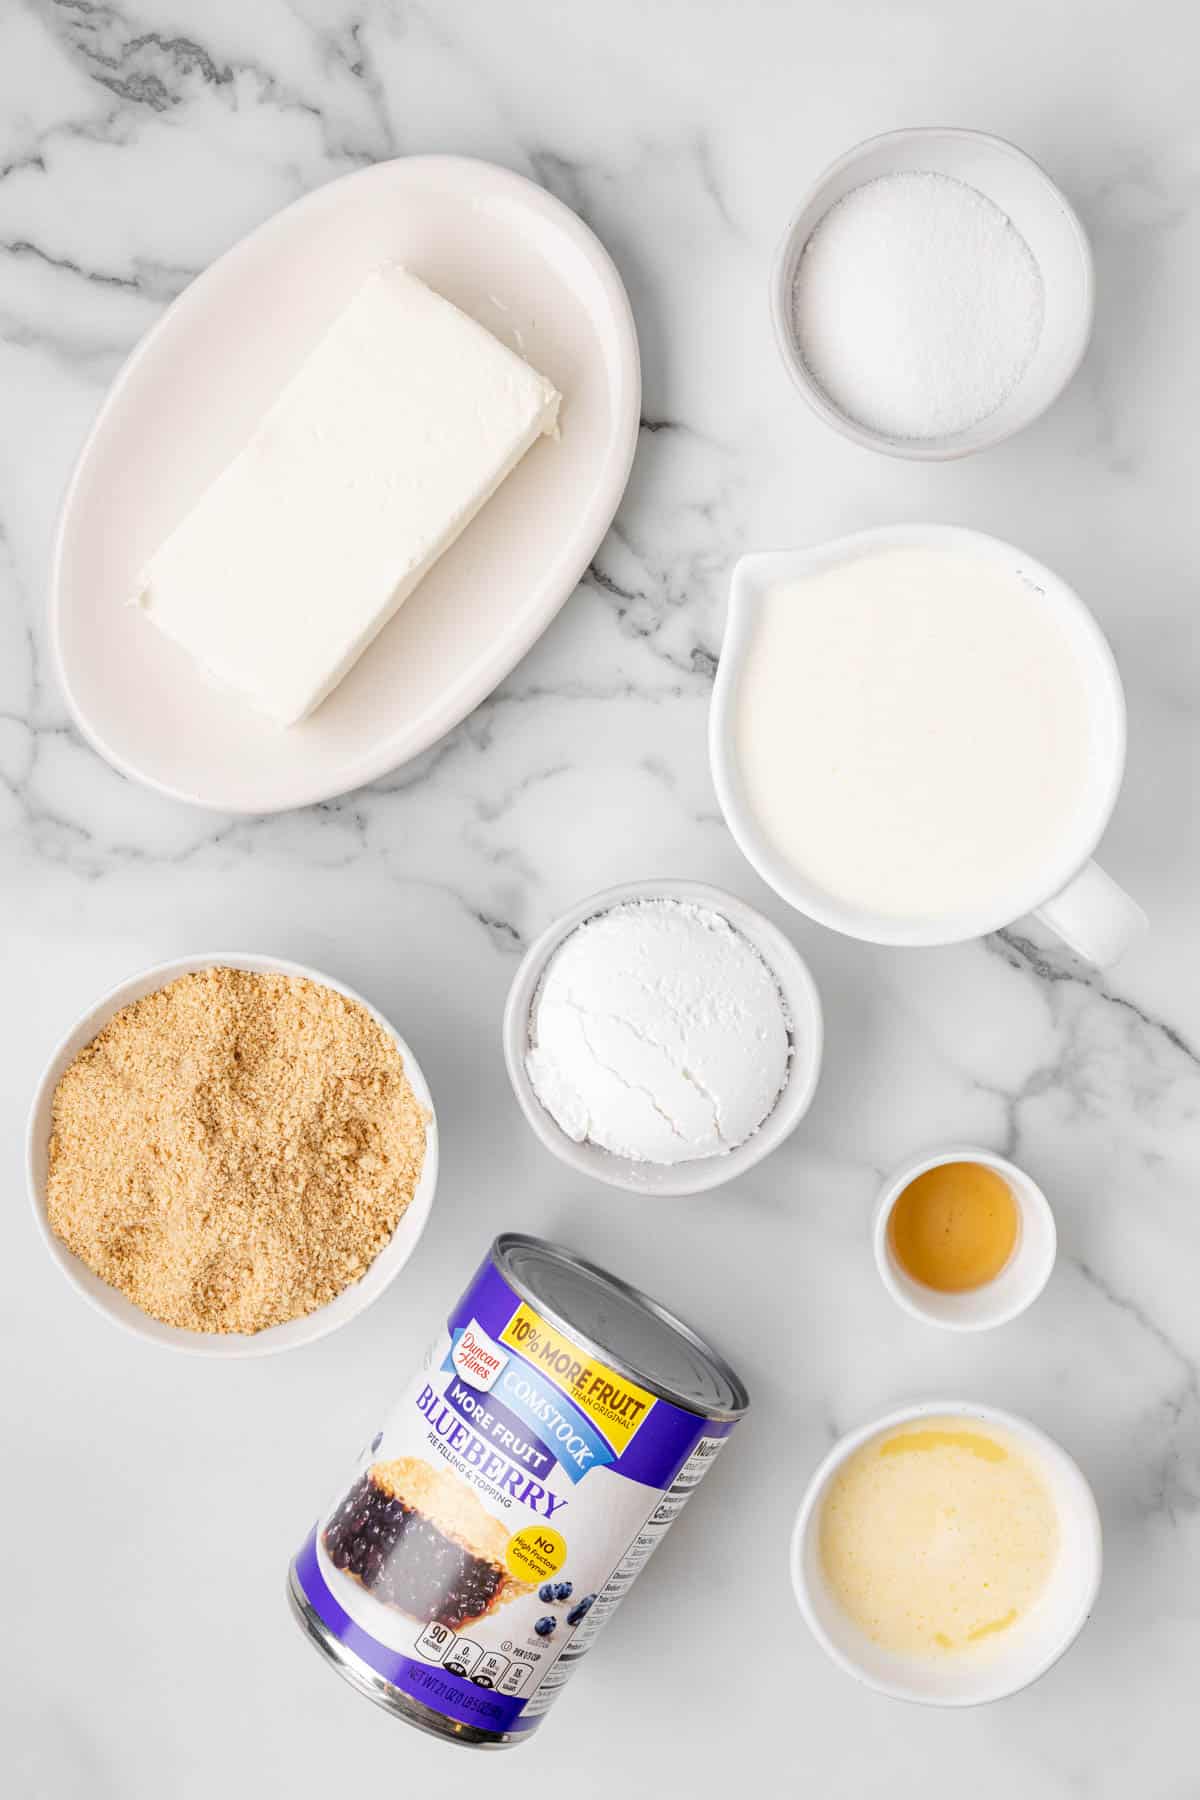
- Cream cheese – We recommend using full-fat cream cheese, although you can make these with reduced fat neufchatel and they will still turn out delicious.
- Heavy cream
- Sugar – You’ll use granulated sugar to sweeten the graham cracker crumb base and powdered sugar (also known as confectioner’s sugar) for the easy no-bake cheesecake filling.
- Graham cracker crumbs – Or you could use crushed Oreos, Biscoff cookies, Nilla Wafers, or Nutter Butters to change up the flavor.
- Vanilla extract
- Blueberry pie filling
How to Make Cheesecake Jars
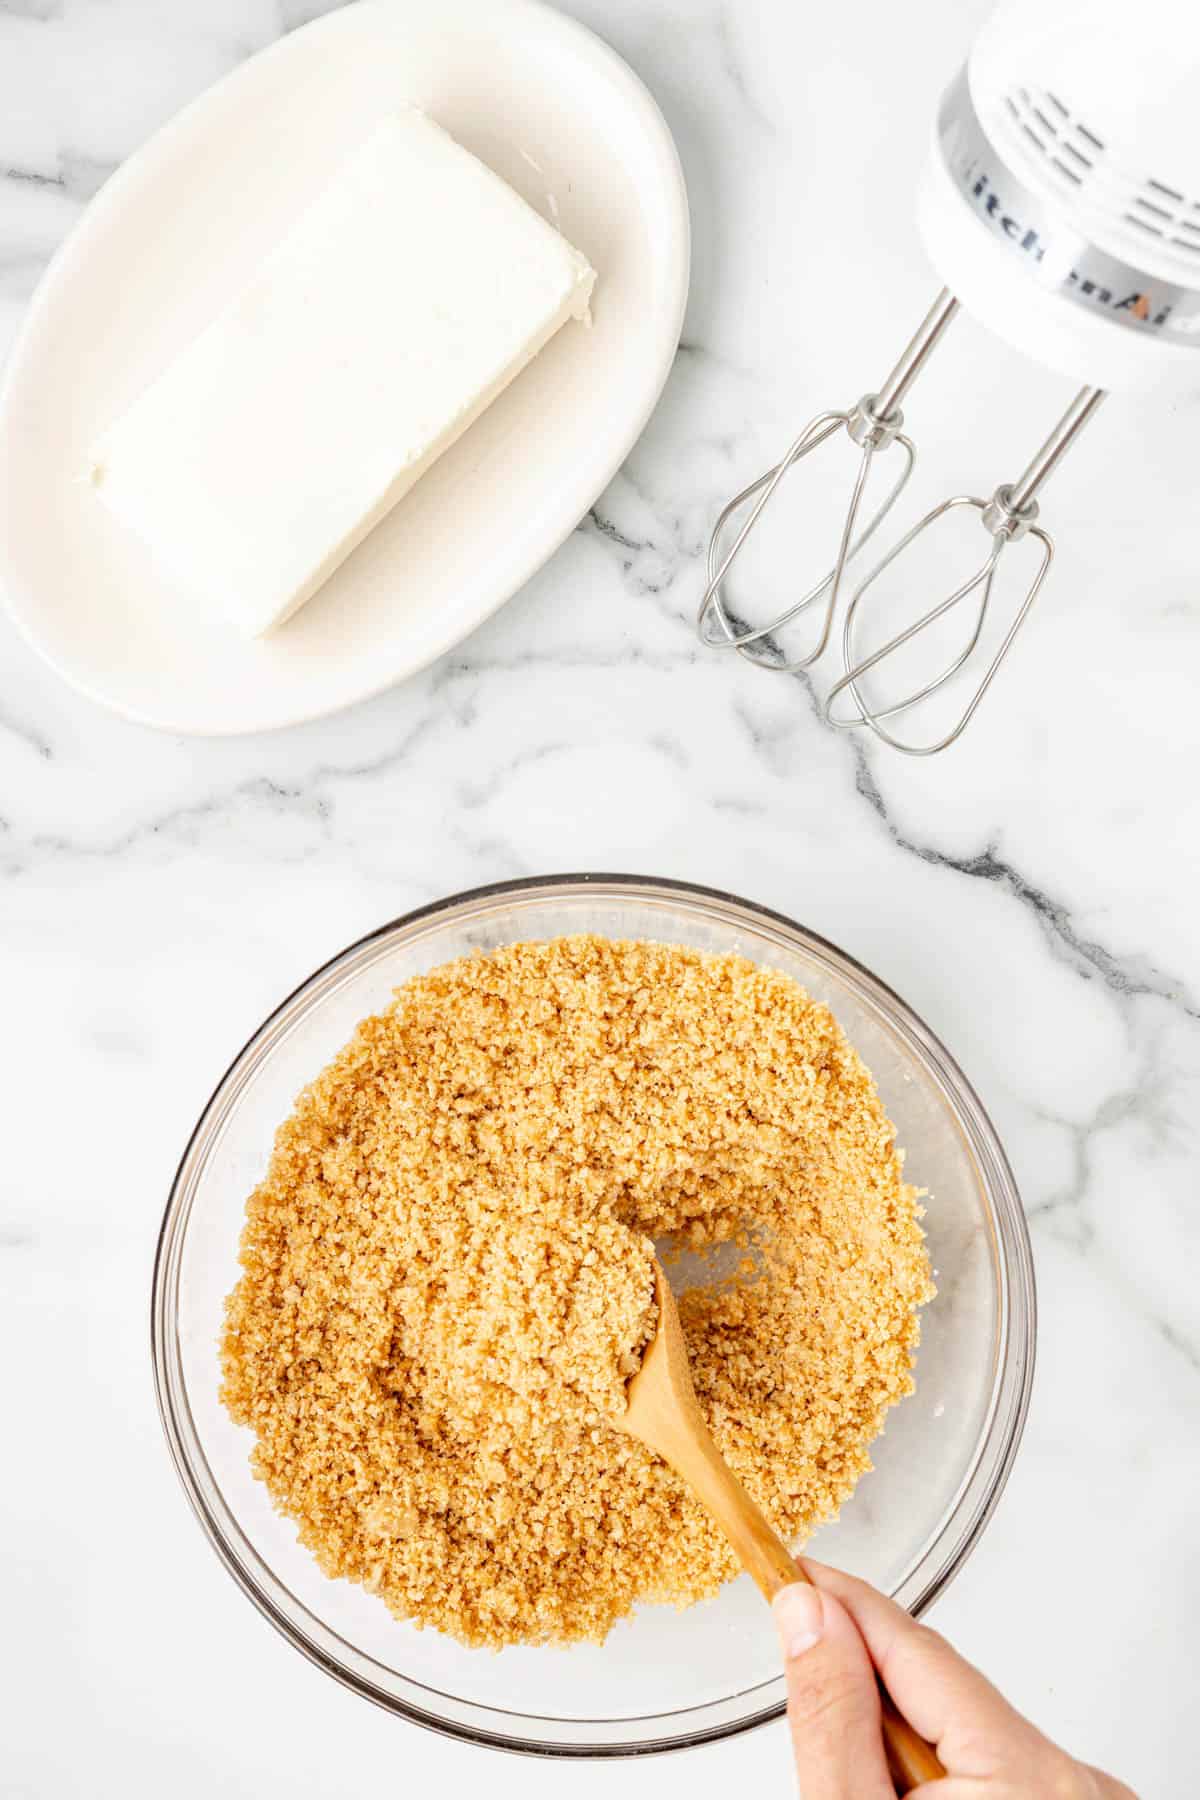
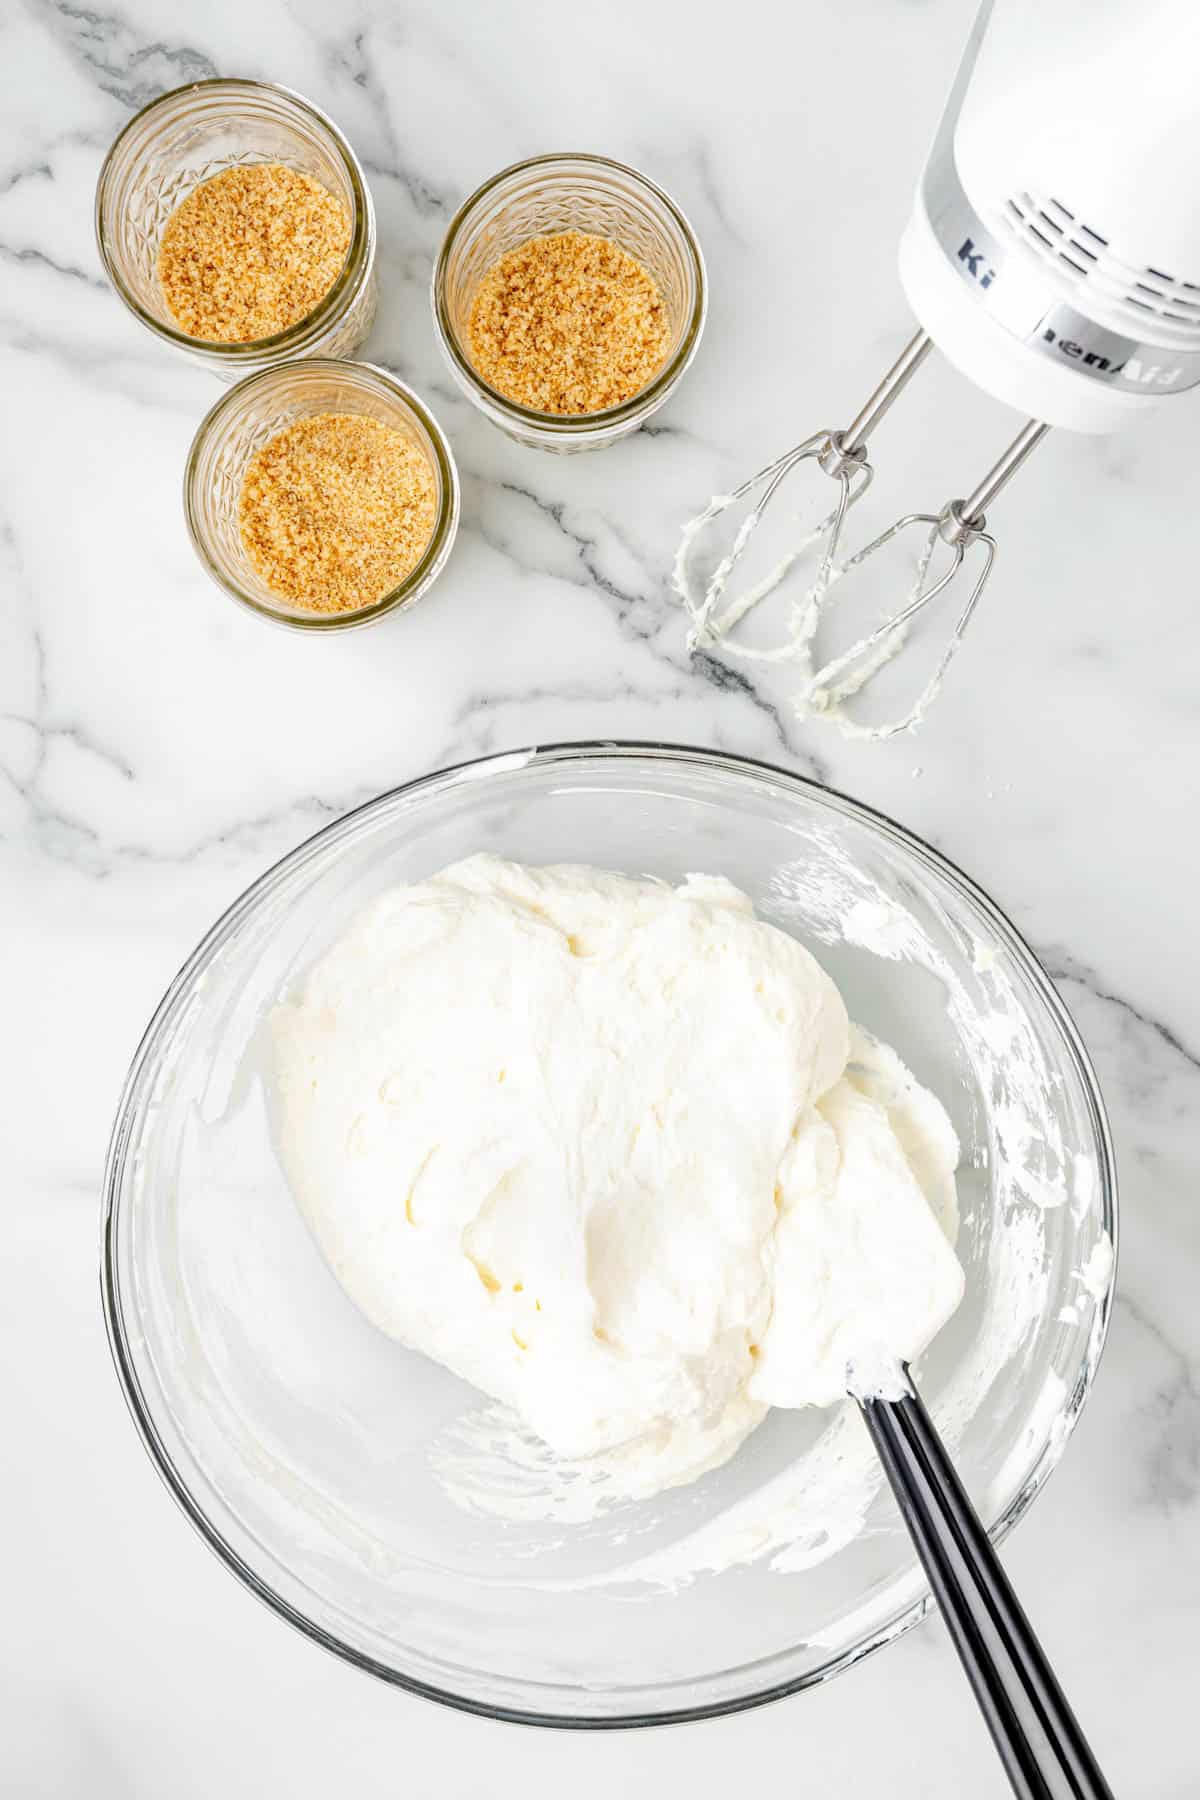
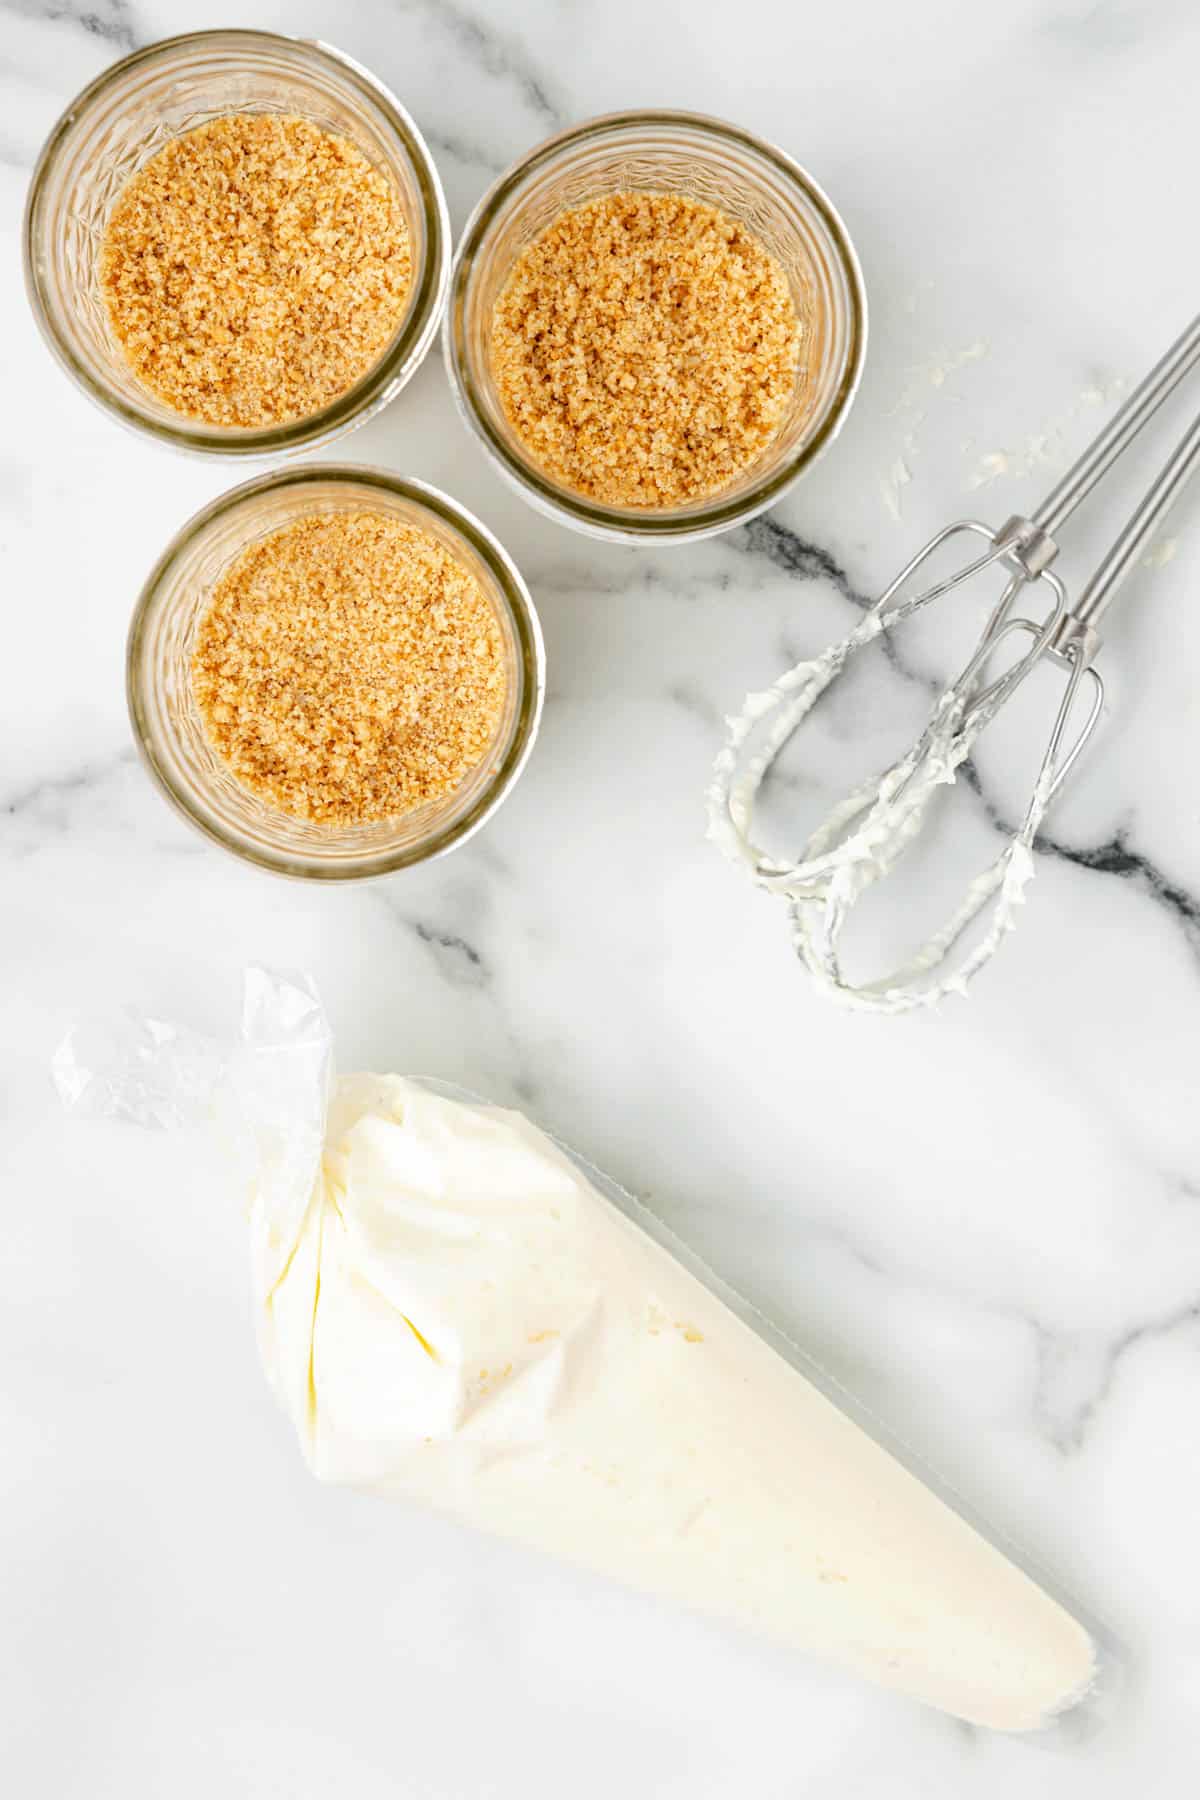
Make the graham cracker crust layer. This is as easy as combining some finely crushed graham cracker crumbs with a little sugar for sweetness and melted butter to help it stick together and give a buttery taste. Once the graham cracker crumbs are evenly moistened just divide them between six 8-ounce jars.
Use a narrower flat-bottomed cup or the back of a spoon to help press the graham cracker crumbs into the bottom of the jars. I actually have a tamping tool that came with our blender that is perfect for this that I use.

Make the cheesecake layer for the filling. Start by beating softened cream cheese with the powdered sugar and vanilla extract in a large bowl using an electric mixer until it is creamy and smooth. There’s not really a worry of overbeating like when you are making a traditional cheesecake recipe since this version won’t be baked!
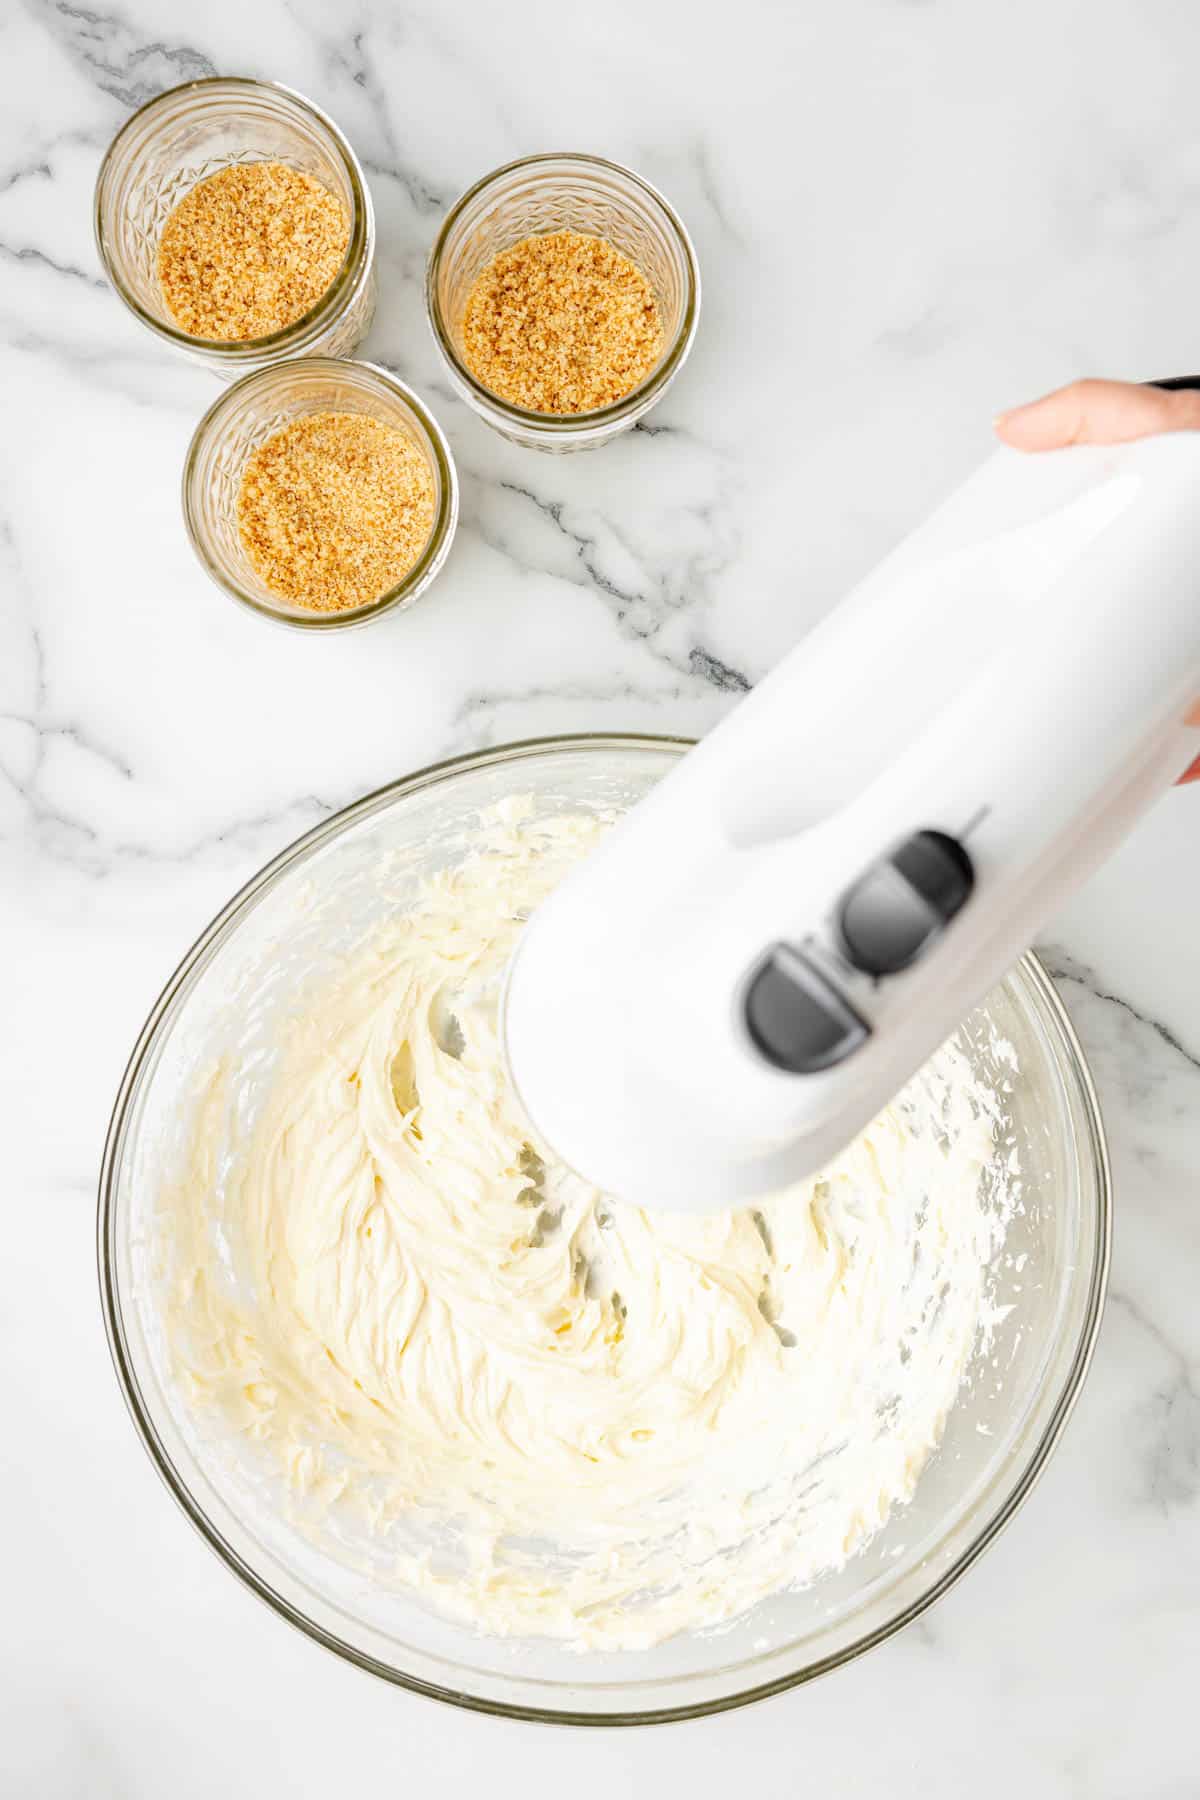
Beat the heavy cream in another medium mixing bowl until medium peaks form. That just means that when you lift the beaters out of the whipped cream that it holds it shape but flops over a bit on top and isn’t too stiff. Don’t beat too long or you will end up with stiff peaks and the whipped cream won’t fold into the cream cheese filling quite as nicely.
You’ll get the best results and your cream will whip more easily using heavy cream that is very cold. Some people even like to chill the bowl and beaters they use to whip cream first.
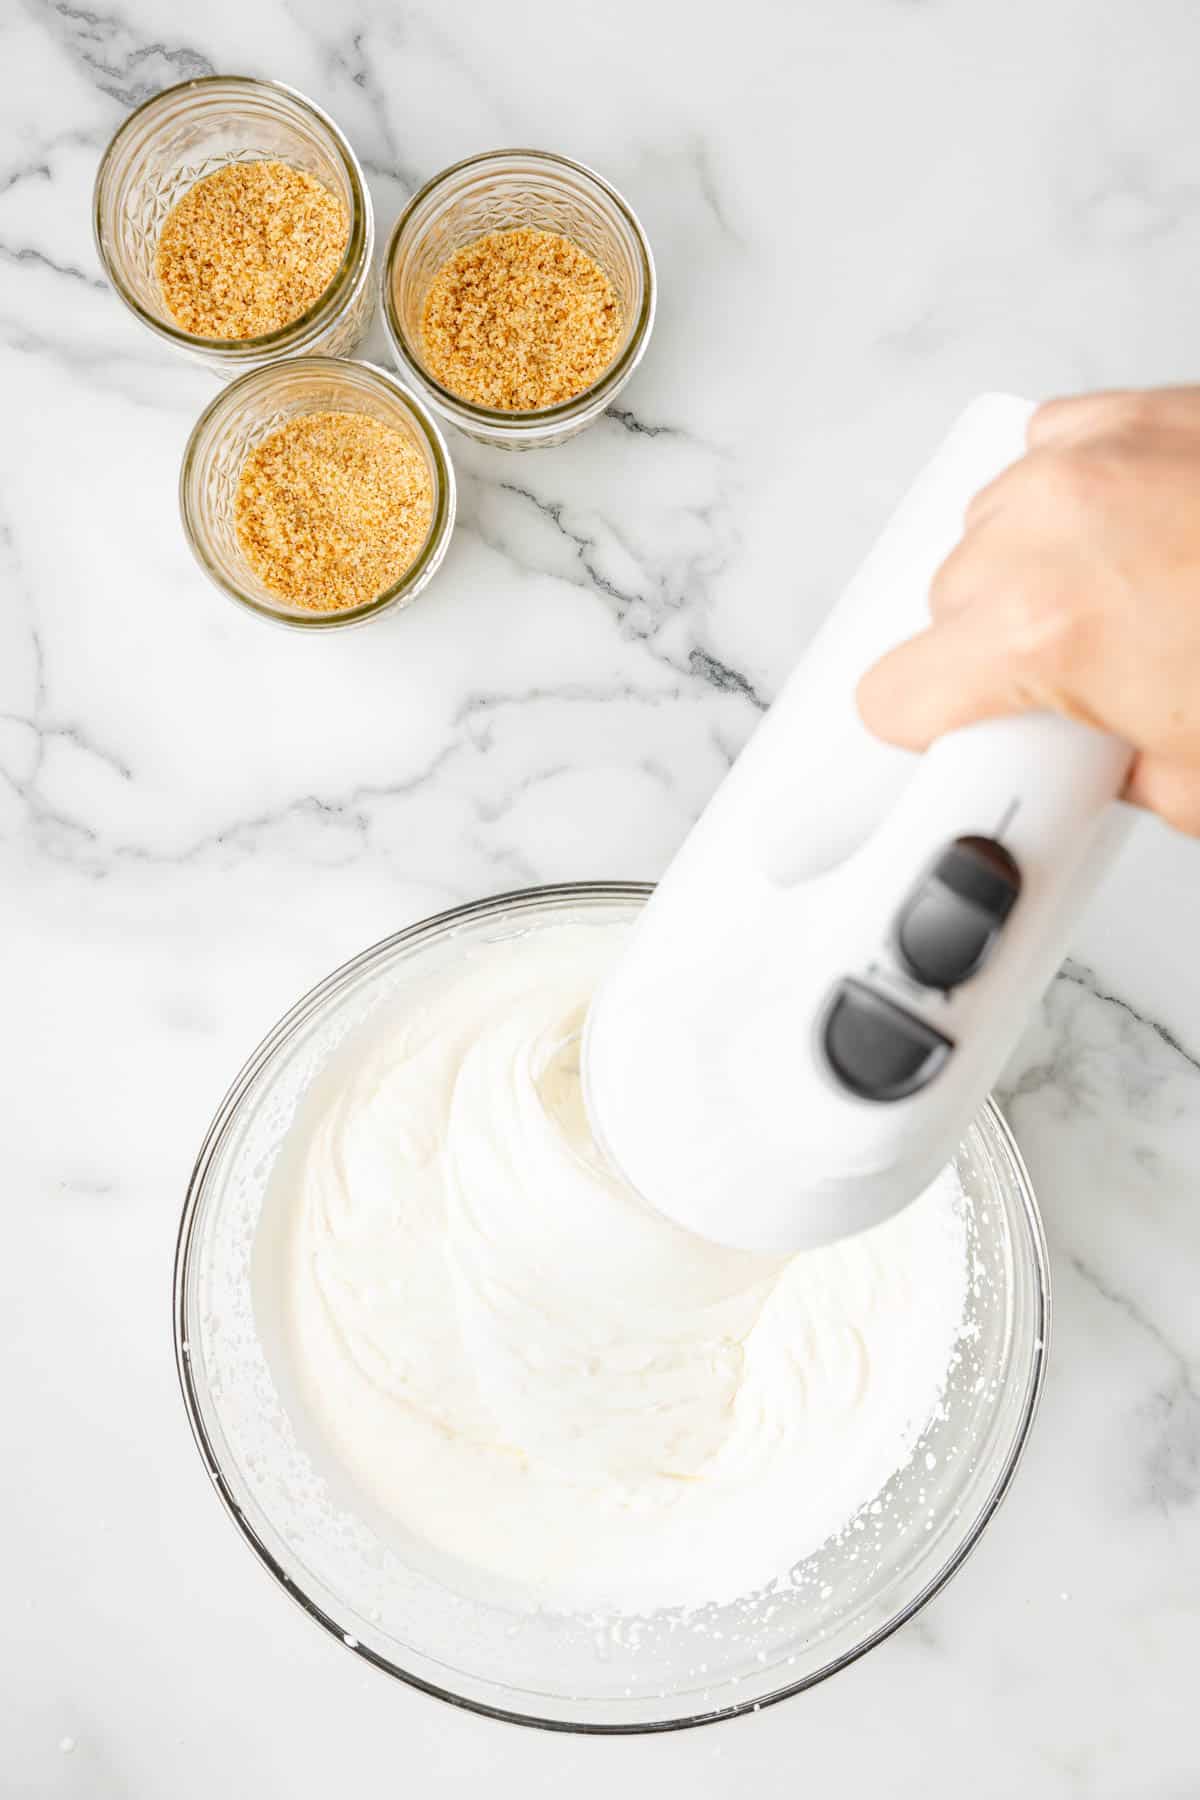
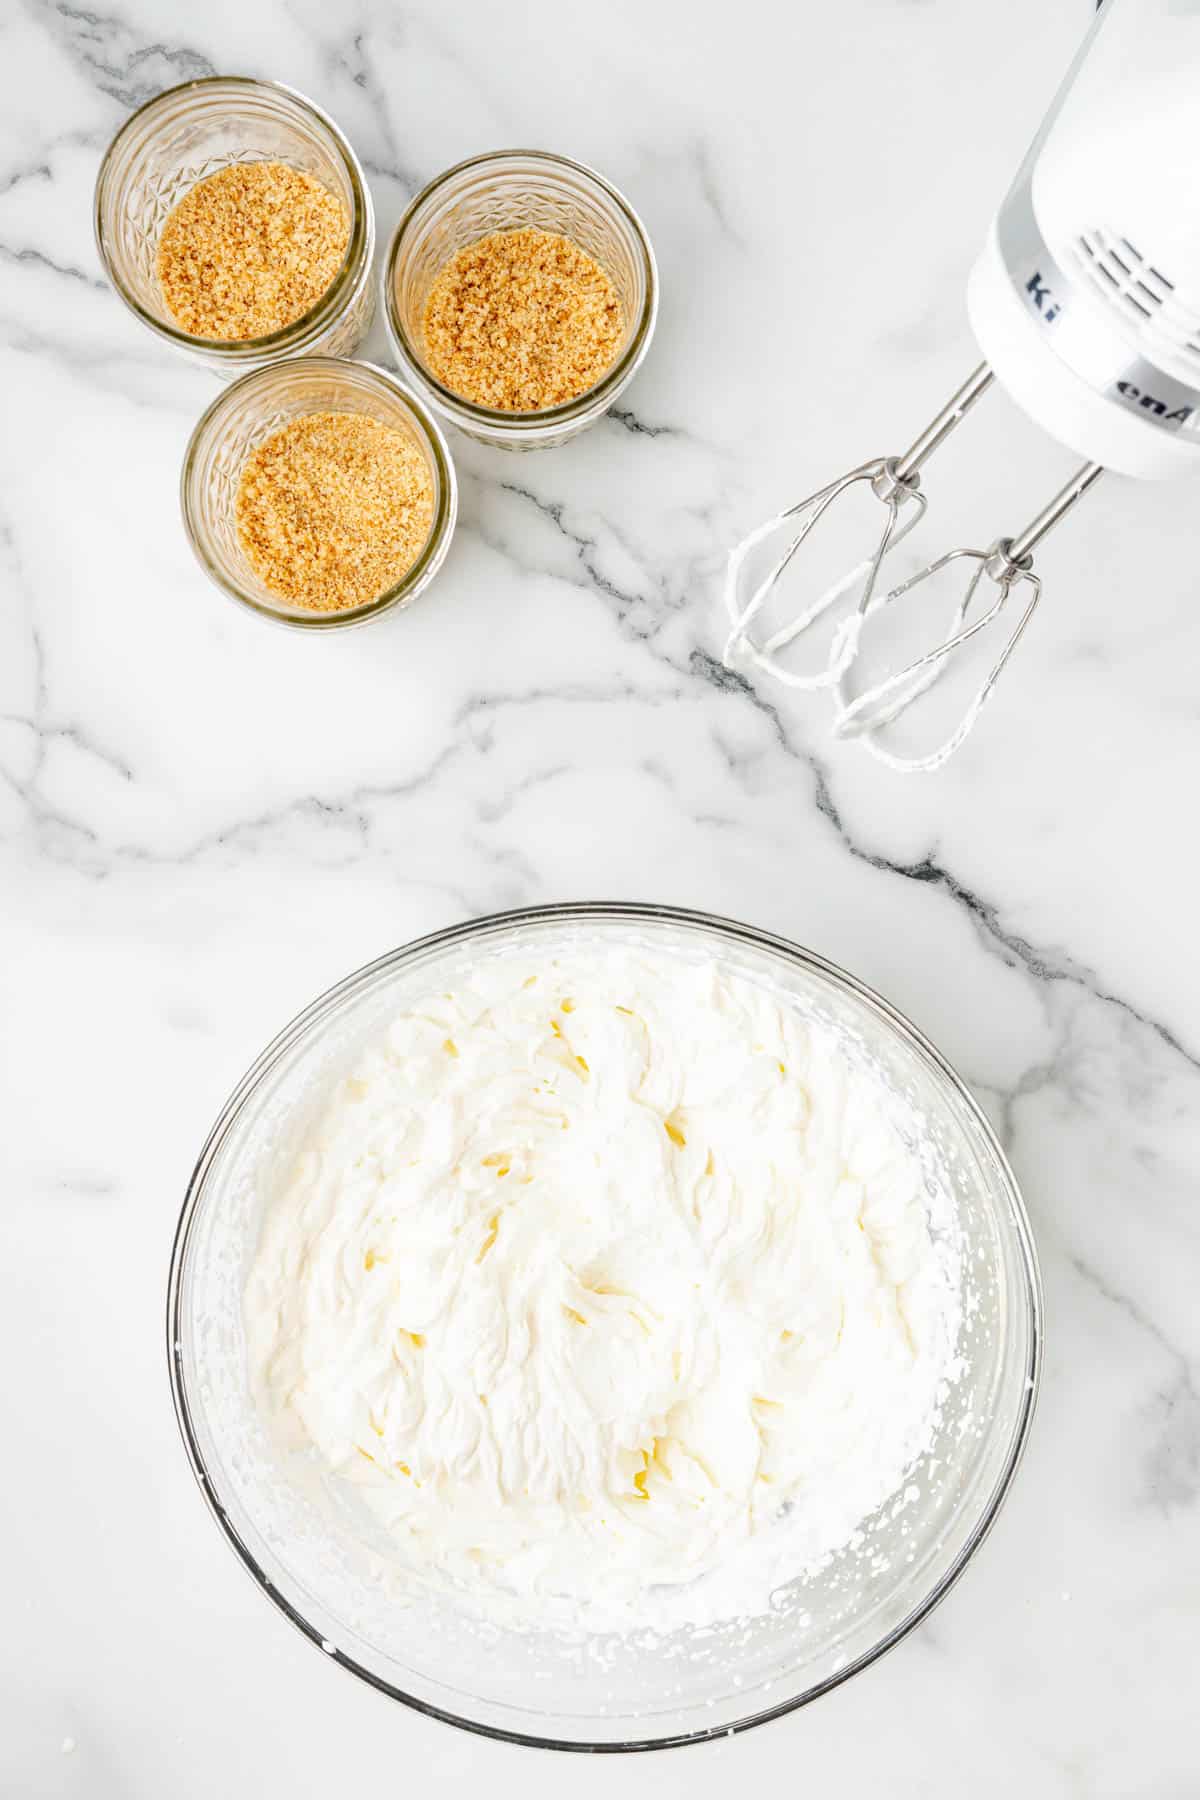
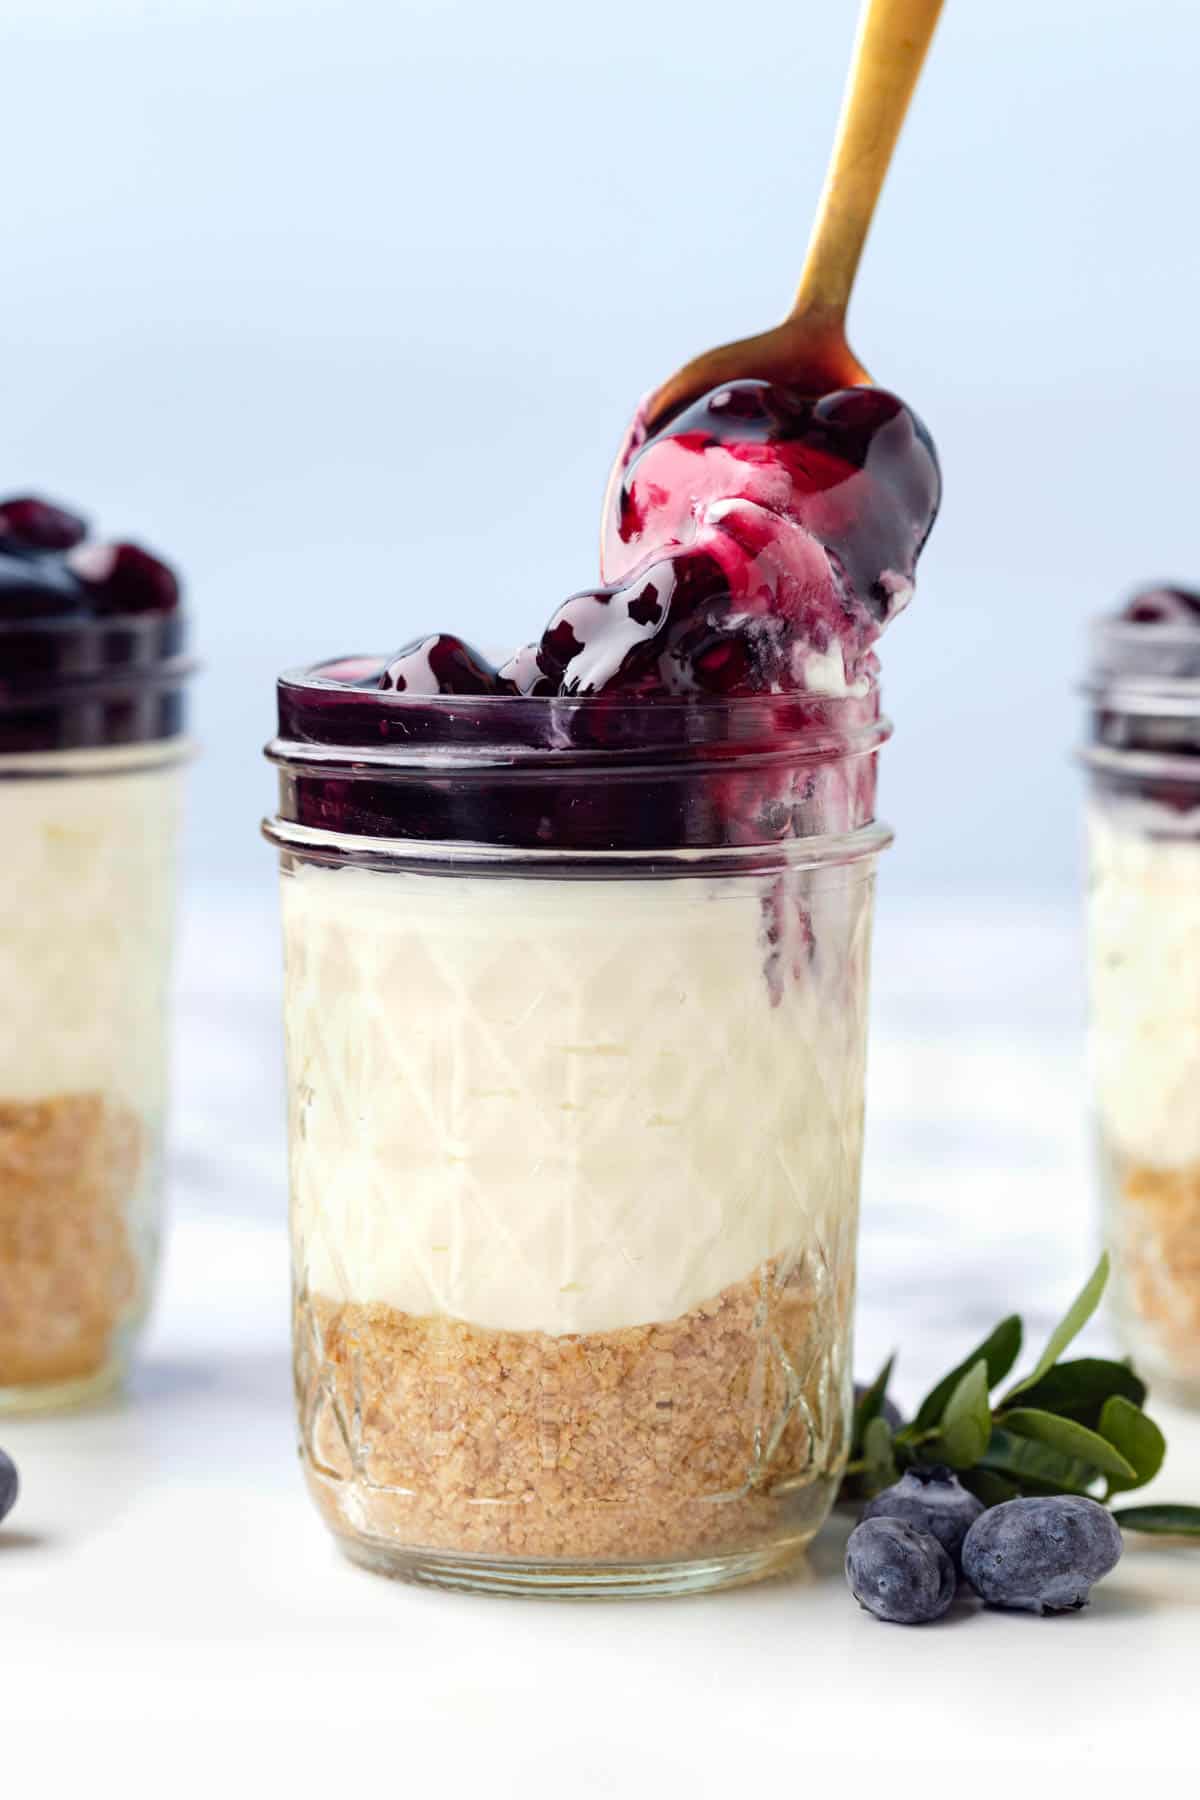
Fold the whipped cream into the cream cheese mixture with a rubber spatula until combined. Then spoon the filling into a large piping bag or even just a large ziploc bag. Snip off the end of the bag so you can easily pipe the filling into the individual jars. You could also spoon the filling into the jars, but it’s easier to get a clean look with the piping approach so I definitely recommend it.
Top with your favorite topping or filling! You can eat these right away, although the texture will be closer to a mousse than a cheesecake, so I recommend refrigerating for at least 1 hour before serving so they have a chance to set up a bit.
Recipe FAQ’s
Yes, if you’re a fan of Cool Whip, you can forgo the heavy cream and fold the Cool Whip into the cream cheese mixture. You will need one 8-ounce container of Cool Whip thawed.
Yes! You can make gluten-free cheesecake jars just by using gluten-free graham crackers for the crust.
You can place graham crackers into a food processor or blender and pulse until you get fine crumbs. You can also put them into a freezer ziptop bag and crush them with a rolling pin. I like to buy mine at the grocery store in the baking section.
You can spoon the mixture into the jars carefully. If you pipe the mixture into the jars, it doesn’t make any mess on the sides, and they come out evenly.
I am using the 8-ounce mason jars, and you can get them at most grocery stores or big box stores. You can also get them here on Amazon.
You can layer this recipe if you want so you get a little bit of the crust, filling, and topping in each bite. Layer half of the graham cracker mixture into the bottoms of the jars, followed by half of the filling, and half of the topping. Then repeat for a second layer! You can also make cheesecake cups in smaller disposable plastic cups or in 4-ounce mason jars for easier eating as well even with just a single layer.
Tips for Success
- Don’t feel limited to only using mason jars. You can serve these in fancy no-stem wine glasses, little parfait cups, or even simple clear plastic cups for a party.
- Use room temperature cream cheese. If your cream cheese is cold, it’s much harder to get it to smooth out even with a blender and you might end up with lumpy bits of cream cheese in your filling. If you can remember to pull out the cream cheese an hour before you start making these you will have the best results.
Storage & Freezing
Your cheesecake jars should last for up to 5 days in the fridge. You can also freeze these no-bake cheesecake jars for up to three months without the topping. When you want to enjoy your cheesecakes, place them in the refrigerator to thaw overnight and top them with your favorite fruit topping before serving.
I don’t recommend freezing them with the fruit topping because they won’t thaw as well.
More Cheesecake Recipes
- Pecan Pie Cheesecake Bars
- Triple Chocolate Cheesecake
- Easy No-Bake Cheesecake (+ 8 Simple Homemade Toppings!)
- Black Forest Cheesecake
Did you make this recipe?
Let me know what you thought with a comment and rating below. You can also take a picture and tag me on Instagram @houseofnasheats or share it on the Pinterest pin so I can see.
Easy Cheesecake Jars
Ingredients
- 1 1/4 cups graham cracker crumbs
- 1/4 cup salted butter melted
- 1/4 cup granulated sugar
- 1 (8-ounce) package cream cheese softened
- 1/2 cup powdered sugar
- 1 teaspoon vanilla extract
- 1 cup heavy cream
- 1 (21-ounce) can blueberry pie filling (or cherry, raspberry, or apple pie filling, fresh fruit, salted caramel, or other cheesecake toppings)
Instructions
- Combine graham cracker crumbs, melted butter, and granulated sugar in a medium bowl. Stir until graham cracker crumbs are evenly moistened. Divide the graham cracker mixture between six 8-ounce jars and gently press the mixture into an even layer in the bottom of each jar.1 ¼ cups graham cracker crumbs, ¼ cup salted butter, ¼ cup granulated sugar
- Beat cream cheese, powdered sugar, and vanilla extract with an electric mixer on medium-high speed until smooth and creamy.1 (8-ounce) package cream cheese, ½ cup powdered sugar, 1 teaspoon vanilla extract
- Beat heavy cream in a separate bowl until medium peaks form. Do not overbeat the whipped cream.1 cup heavy cream
- Fold the whipped cream into the cream cheese mixture until combined. Transfer the cream cheese filling to a large piping bag.
- Evenly divide the cream cheese filling between the six jars, piping it in to create an even layer.
- Top each jar with a few tablespoons of blueberry filling or whatever topping you like best. Refrigerate for 1 hour before serving for a more dense, cheesecake-like texture.1 (21-ounce) can blueberry pie filling
Notes
- You can enjoy these right away without refrigerating before serving, but the texture will be more mousse-like.