
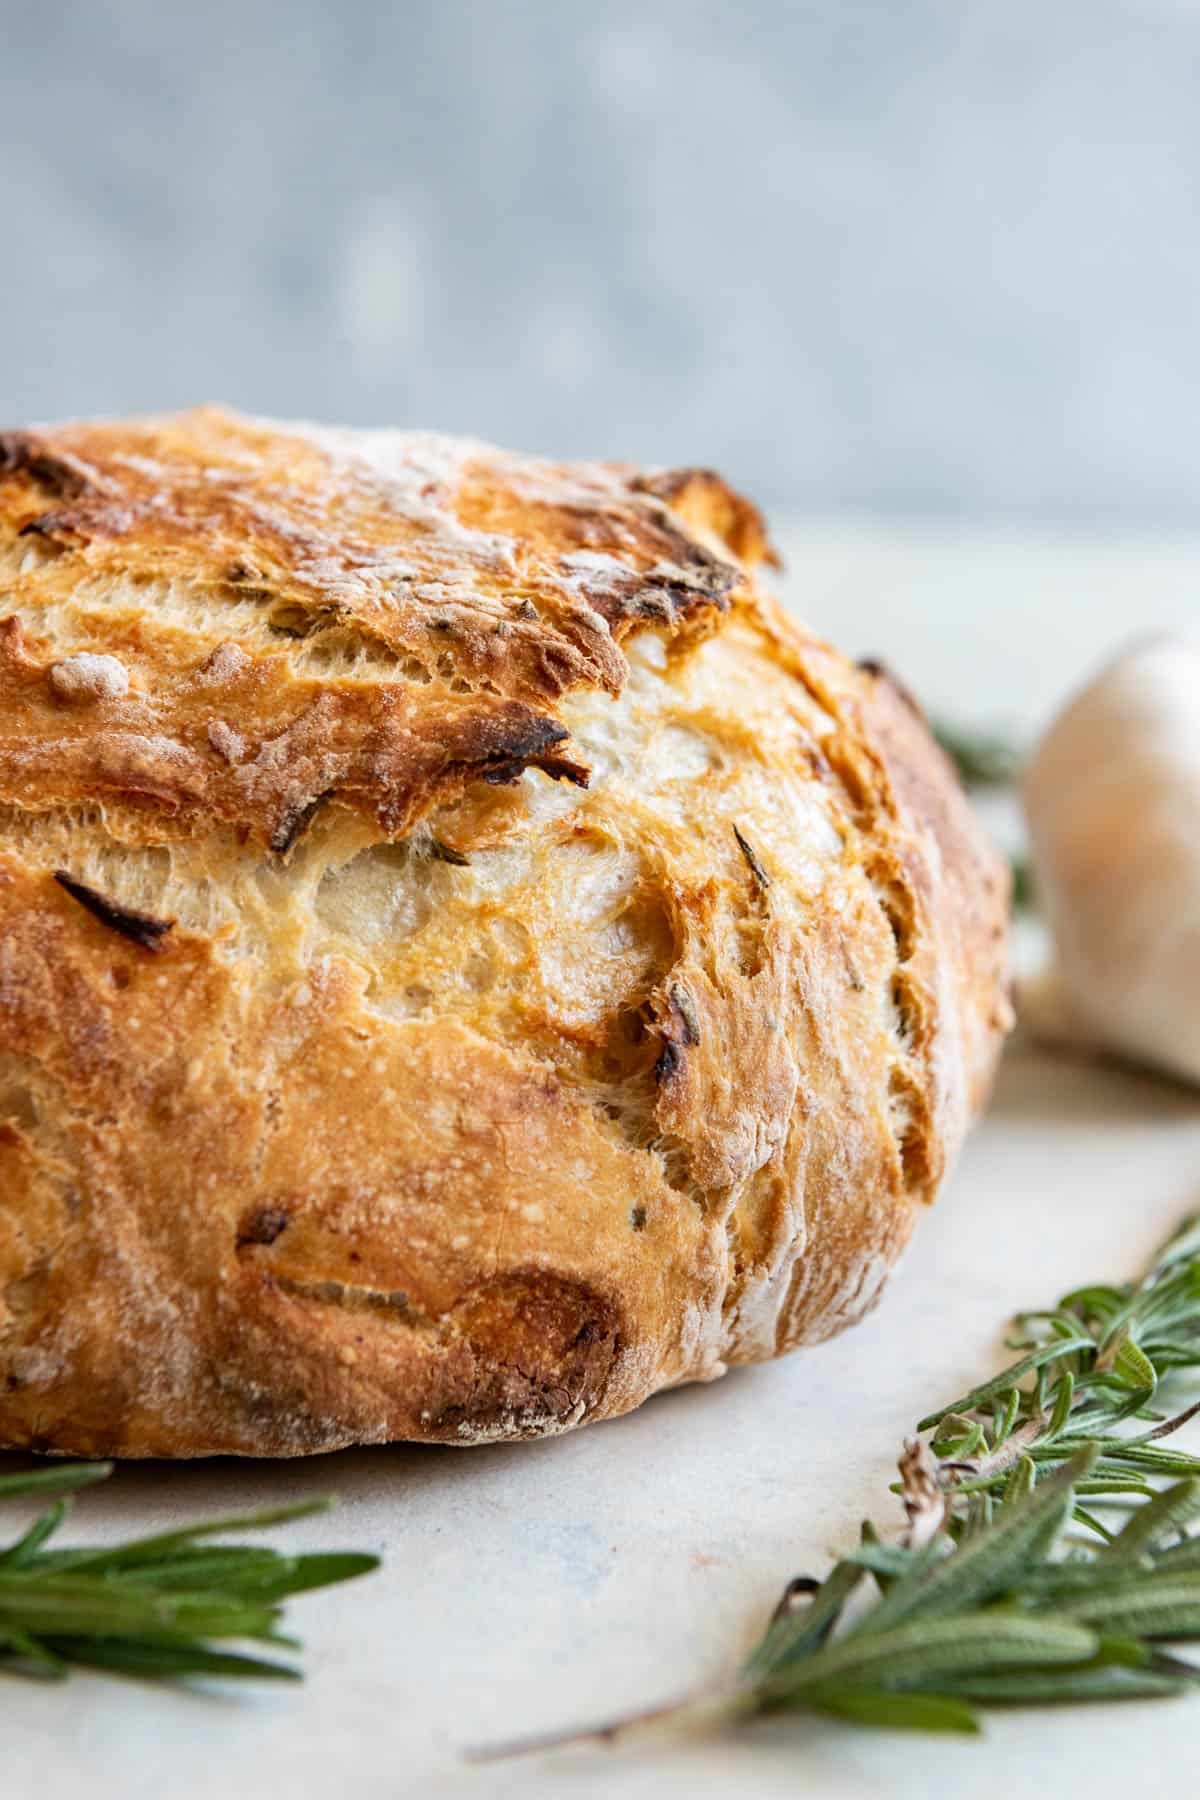
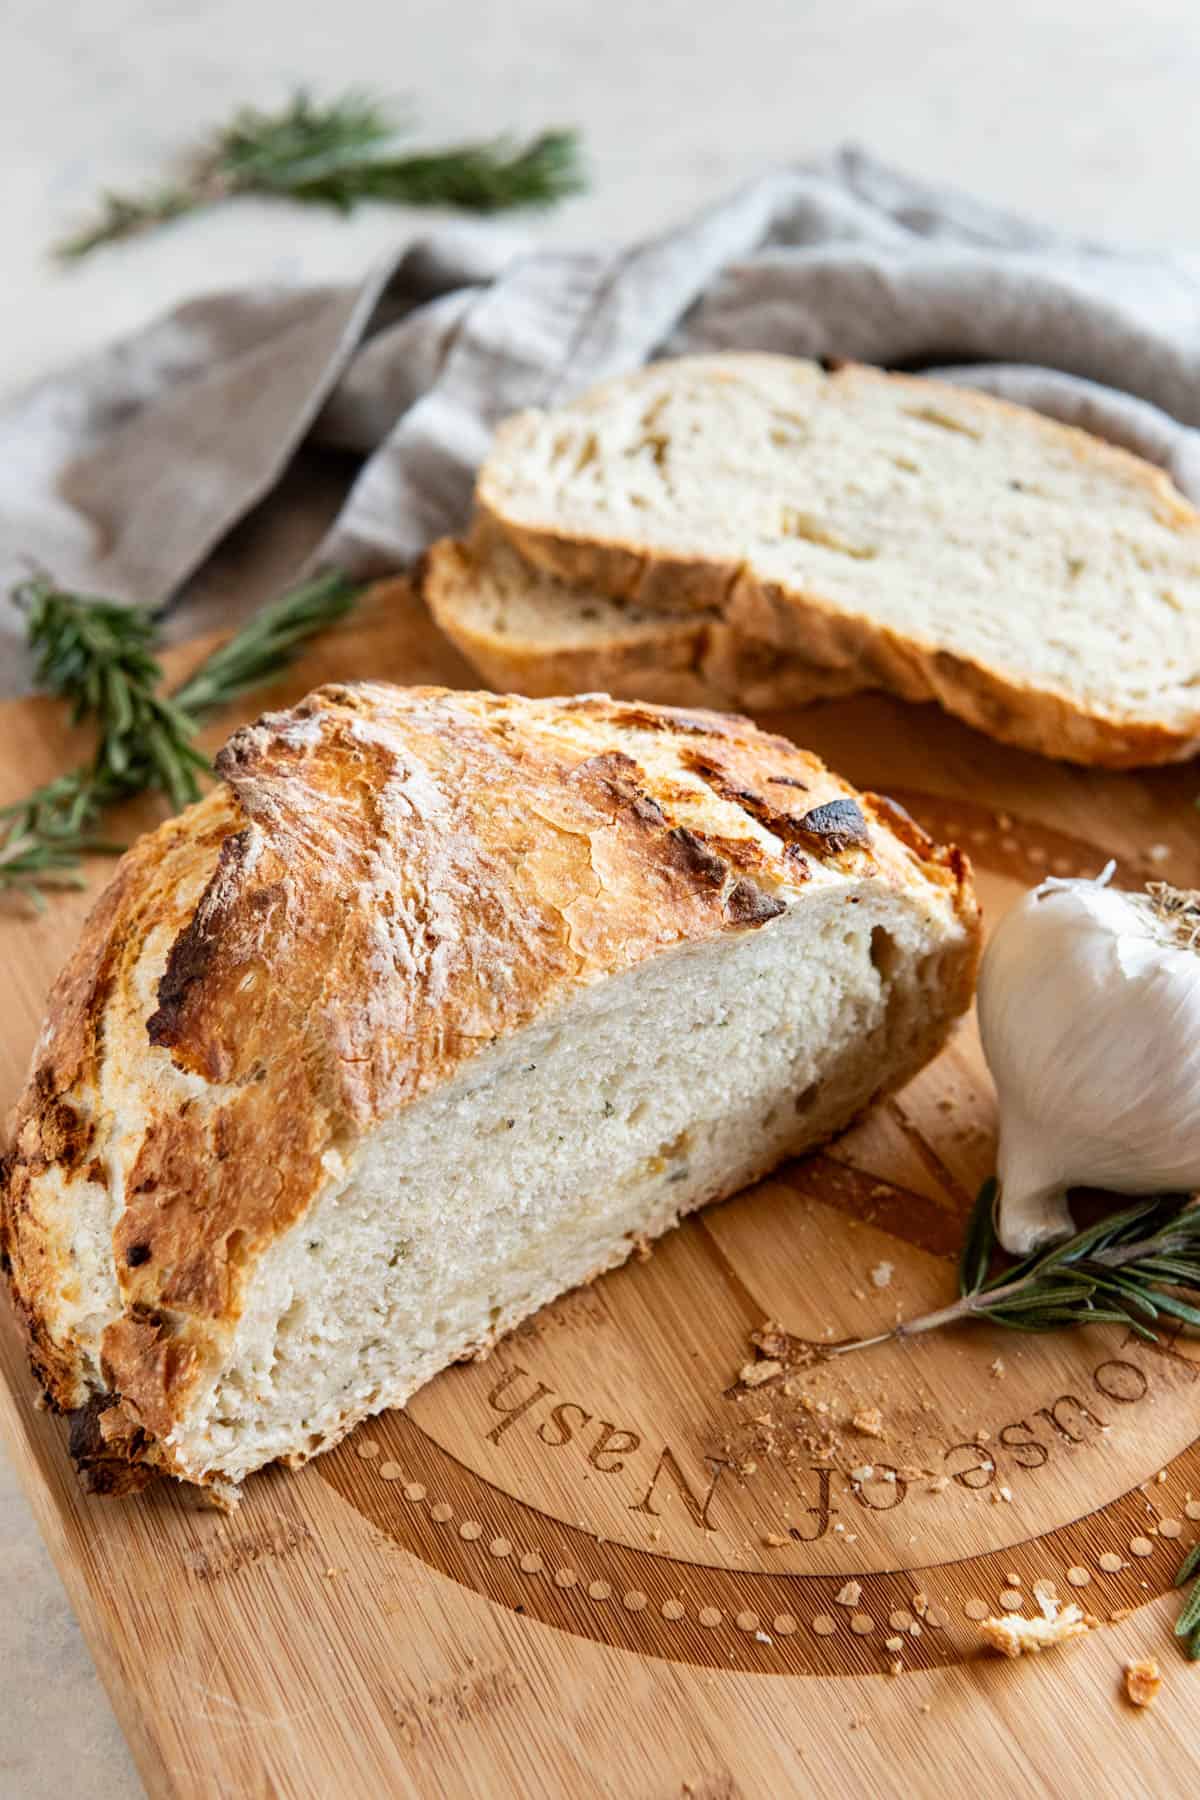
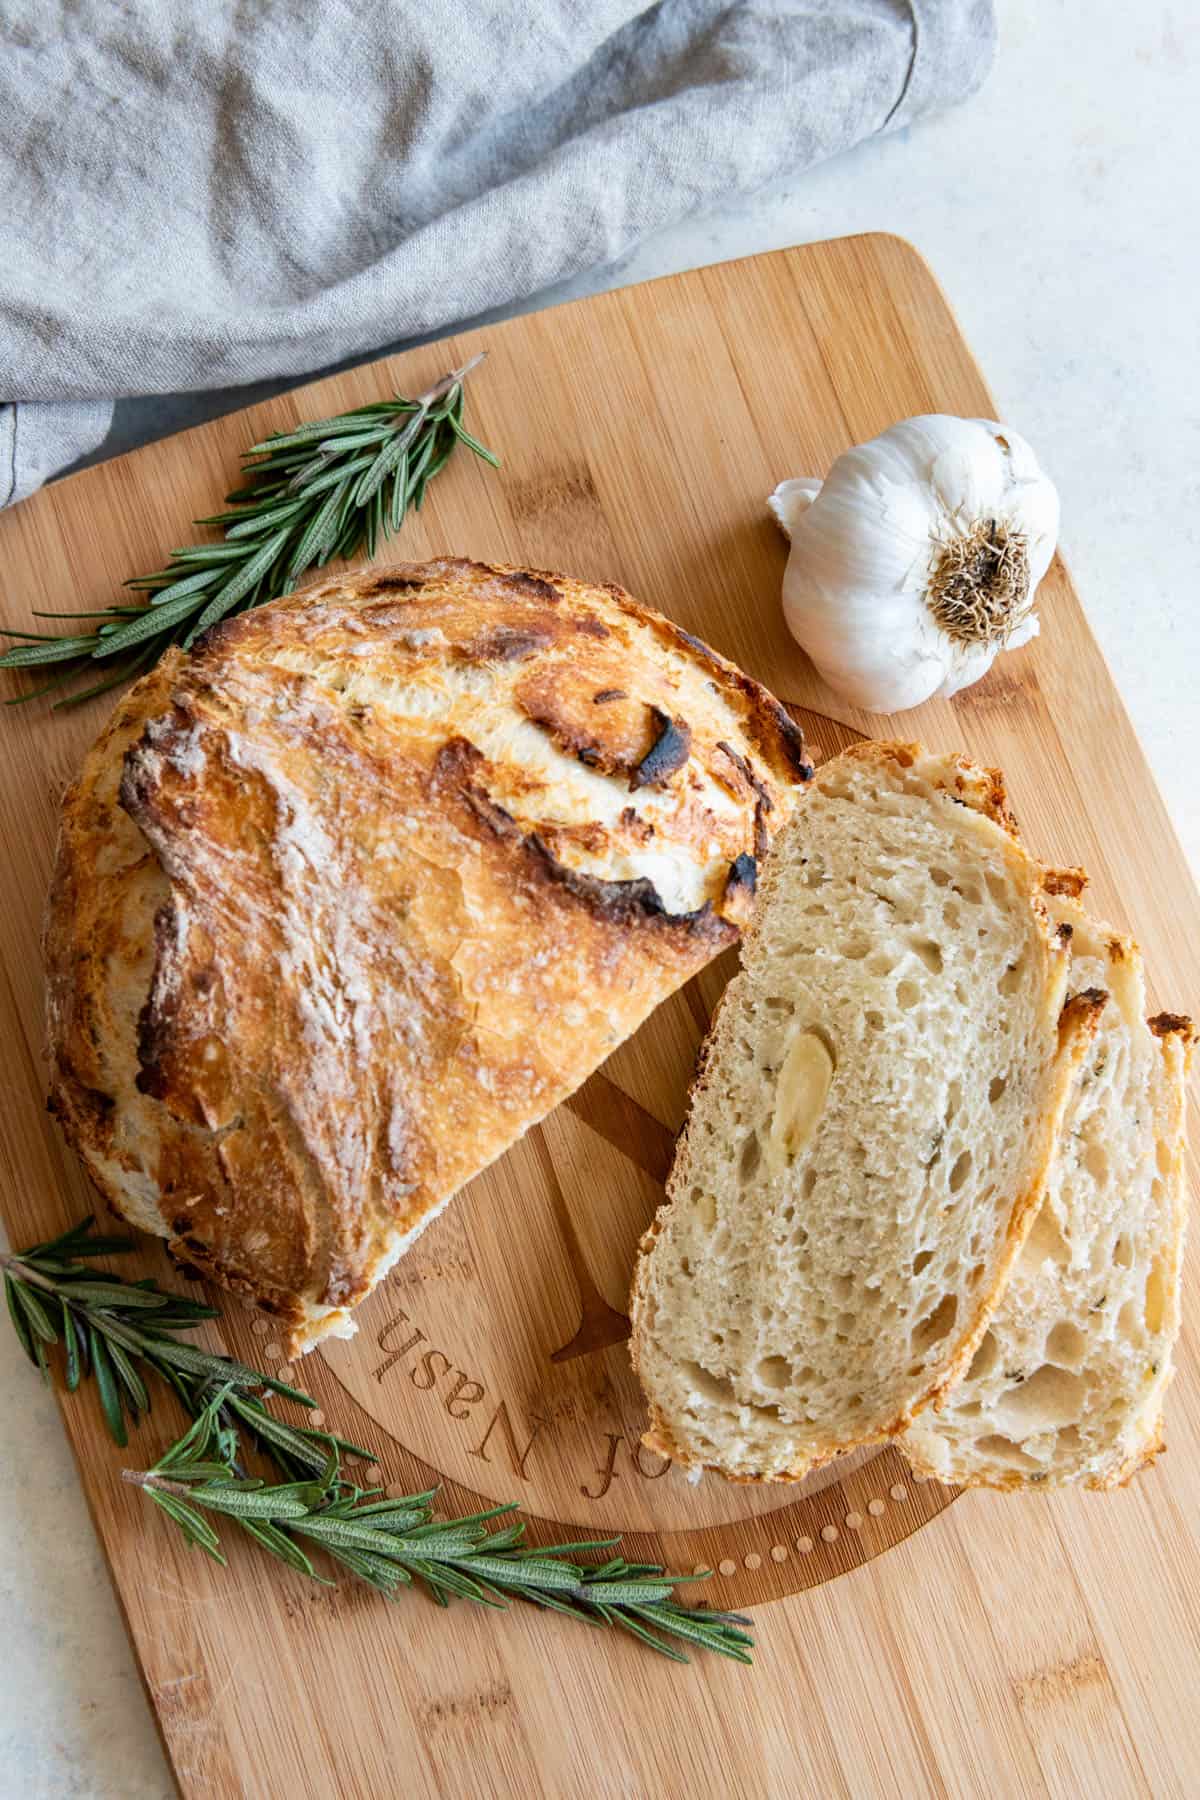
Roasted Garlic & Rosemary No-Knead Artisan Bread has gorgeous, golden brown crusty exterior and a soft, airy texture inside and is loaded with flavor from buttery, roasted garlic and fresh rosemary! It’s such an easy rustic bread recipe that you will wonder why you haven’t tried making no knead artisan bread before!
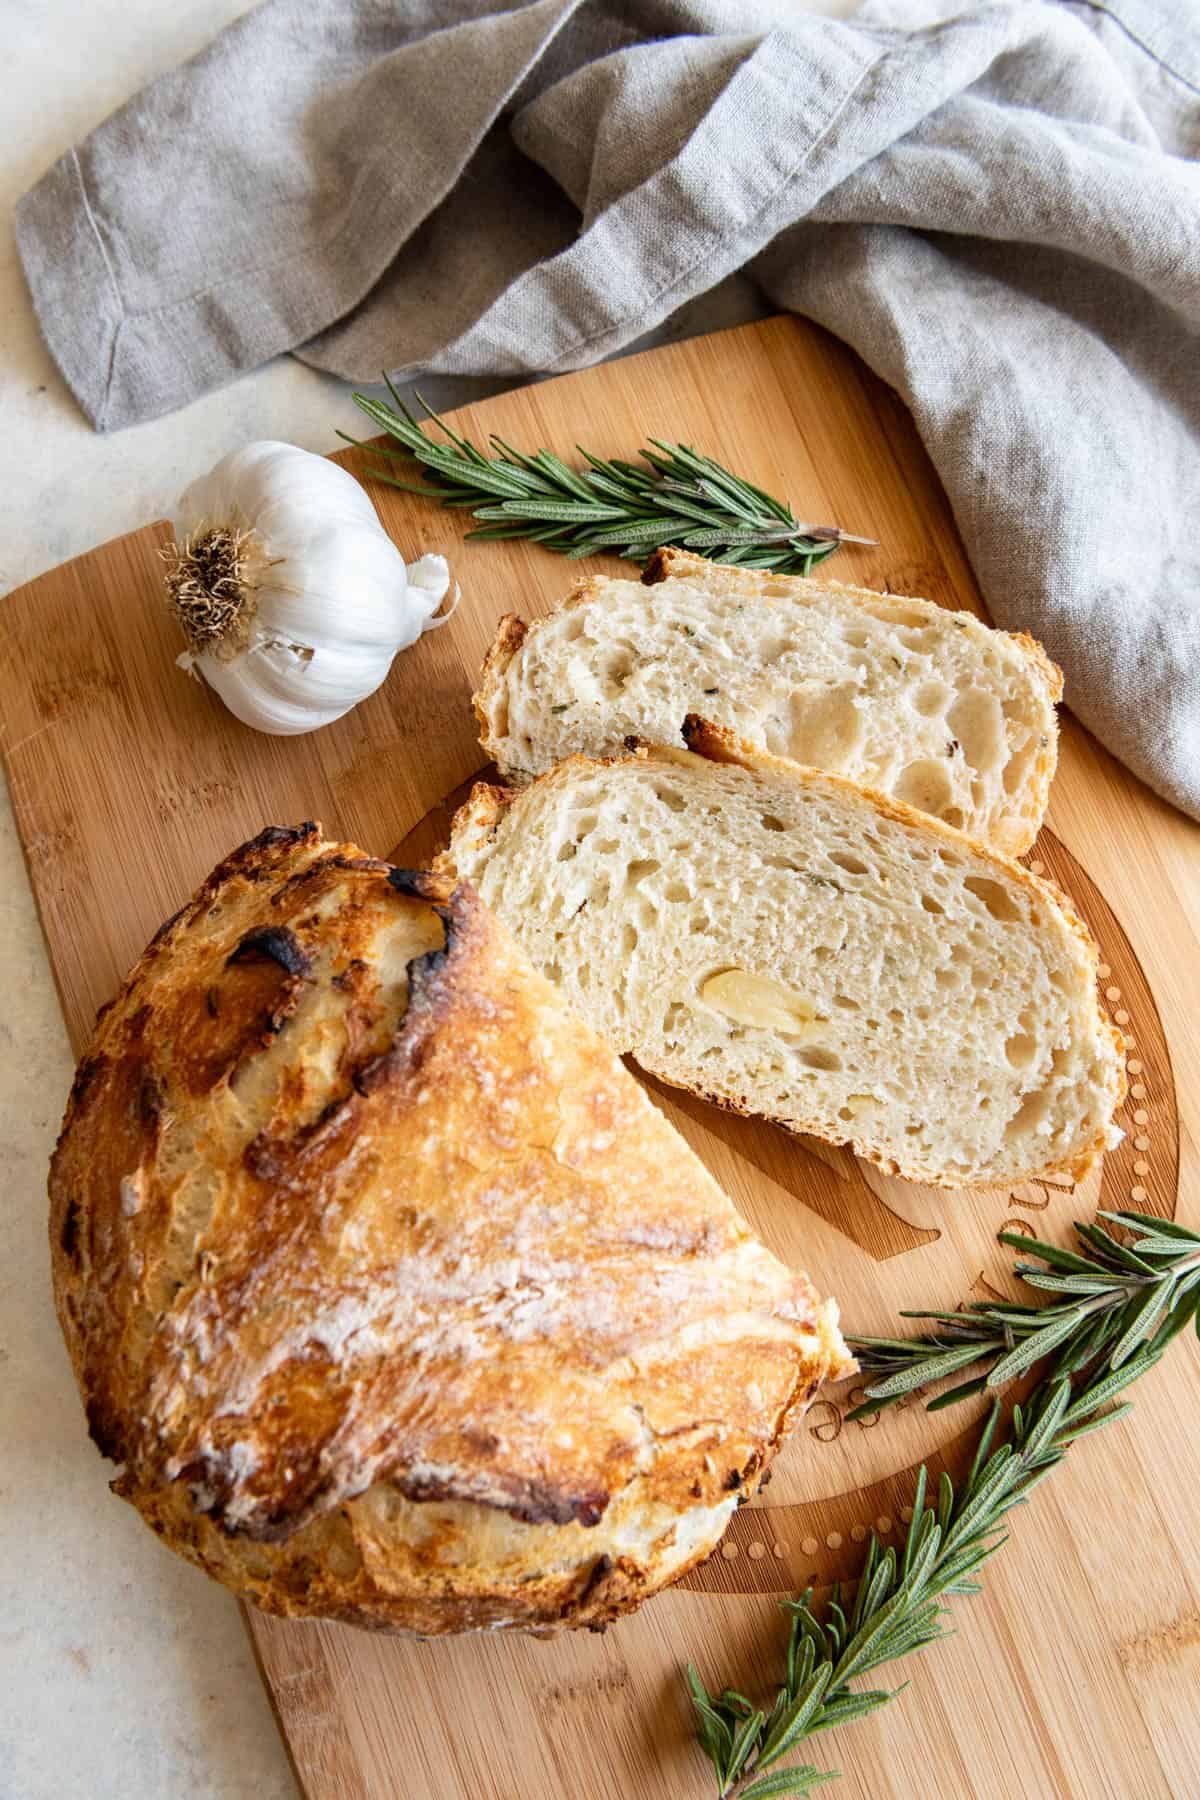
If you love crusty bread like I do, especially super flavorful breads that are great for dipping in balsamic vinegar, slathering with butter, or using to make elevated grilled cheese sandwiches, you are going to adore this easy Roasted Garlic & Rosemary No Knead Artisan Bread!
The Easiest Yeast Bread That Anyone Can Make

- There is no proofing yeast involved.
- There is no kneading required.
- It’s as simple as stirring everything together in one bowl and then leaving it alone.
- No need to assess the stickiness or smoothness or elasticity of the dough.
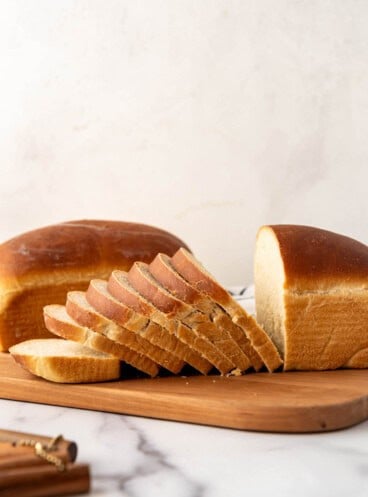
- And no need for fancy scoring on top of the loaf before it bakes, although you could dust the top of the loaf with flour and score a pattern or “X” shape in the top if you get really ambitious (which, as you can see from these photos, I did not).
If you are feeling comfortable with this bread, you might want to move on to another easy bread recipe like my Sweet Molasses Brown Bread, Amish White Bread, or Easy Rosemary Focaccia Bread!
A thick slice of this crusty bread is amazing with a bowl of lasagna soup or zuppa toscana.
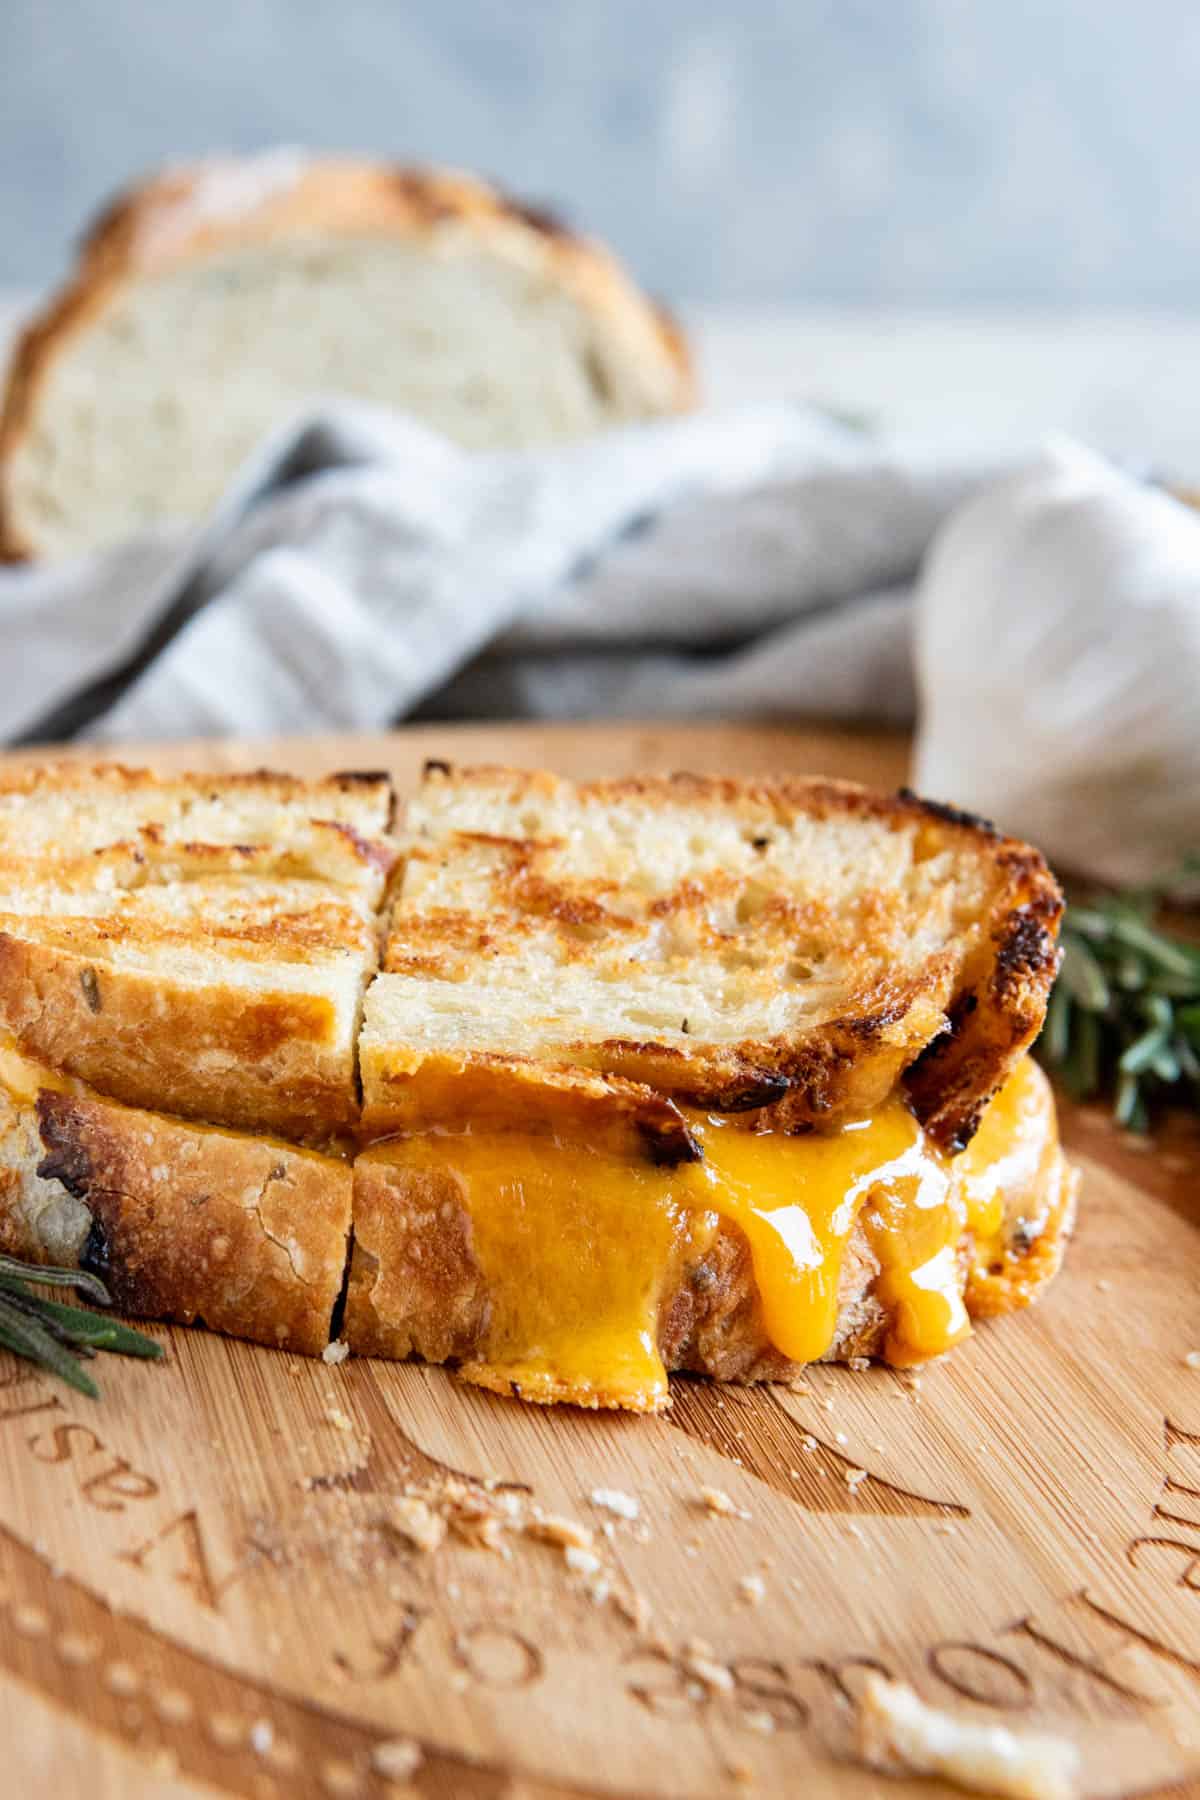
And it really does make my favorite grilled cheese sandwiches ever with some cheddar melted between two buttered slices of this bread and then toasting it all on the griddle.
No Knead Artisan Bread Variations
Try adding 1 to 1 ½ cups of mix-ins in the following combinations in place of the roasted garlic & rosemary for a totally different and delicious bread!
Cranberry Pecan
Hazelnuts & Dried Cherries
Cheddar Jalapeño
Cranberry, Orange Zest, & Sliced Almonds
Raisin Walnut Cinnamon
Pumpkin, Sunflower, & Poppy Seeds
Sun-dried Tomato with Chopped Basil
Lemon Zest, Thyme, & Asiago
Pepperoni & Mozzarella
Dark Chocolate, Dried Cherry, Pecan
Or leave out any mix-ins for a perfectly wonderful plain loaf that will go with any soup, salad or dinner!

Notes on Baking No Knead Artisan Bread
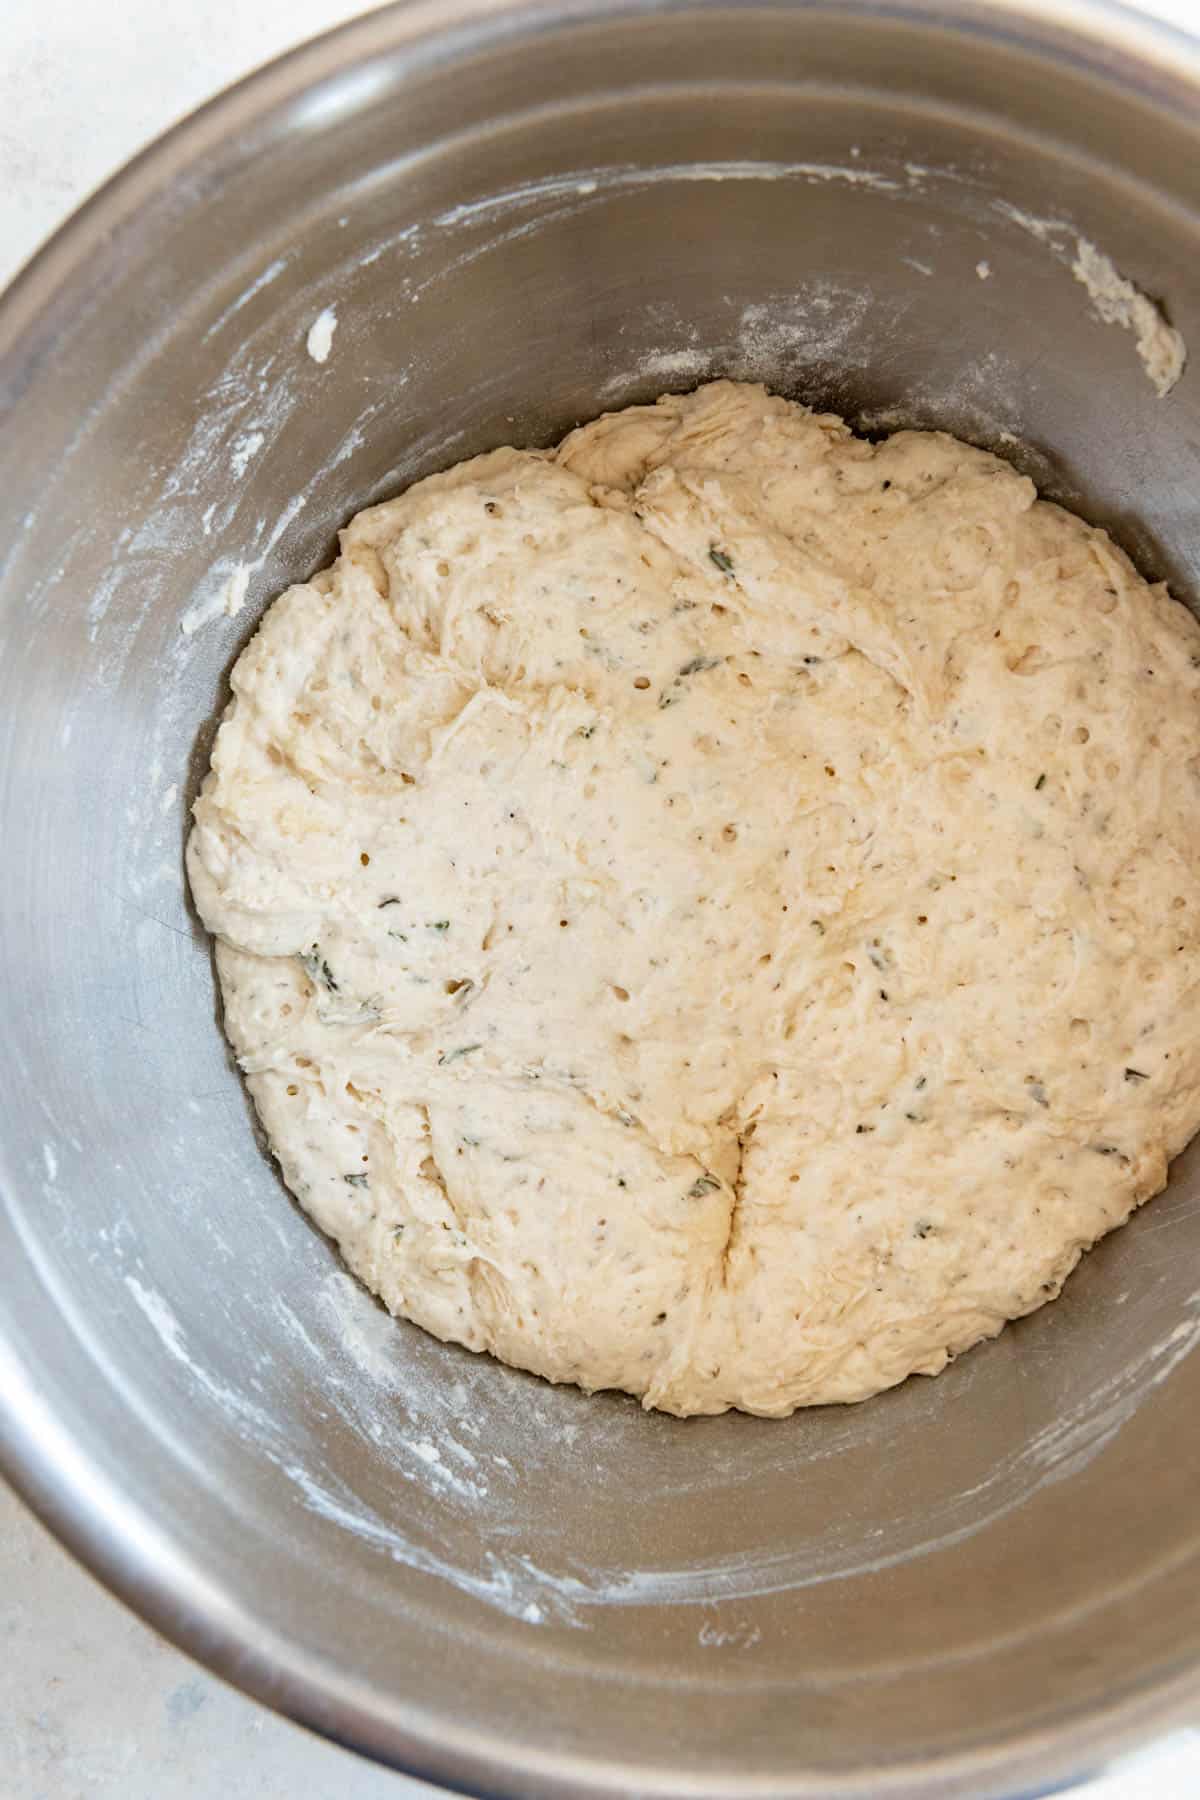
Mixing the dough together is pretty much as easy as it gets. All of the ingredients (including mix-ins) gets dumped into a bowl, stirred up, and then left on the counter for 12-18 (or even up to 24 hours).
“Shaping” the loaf consists of dumping the sticky dough onto a well-floured surface and forming it into a roughly ball-shaped lump.
The bread rises slowly as the gluten and flavor develop over a long period of time. Then, when you are ready to bake, there are two approaches that I have used and both work well.
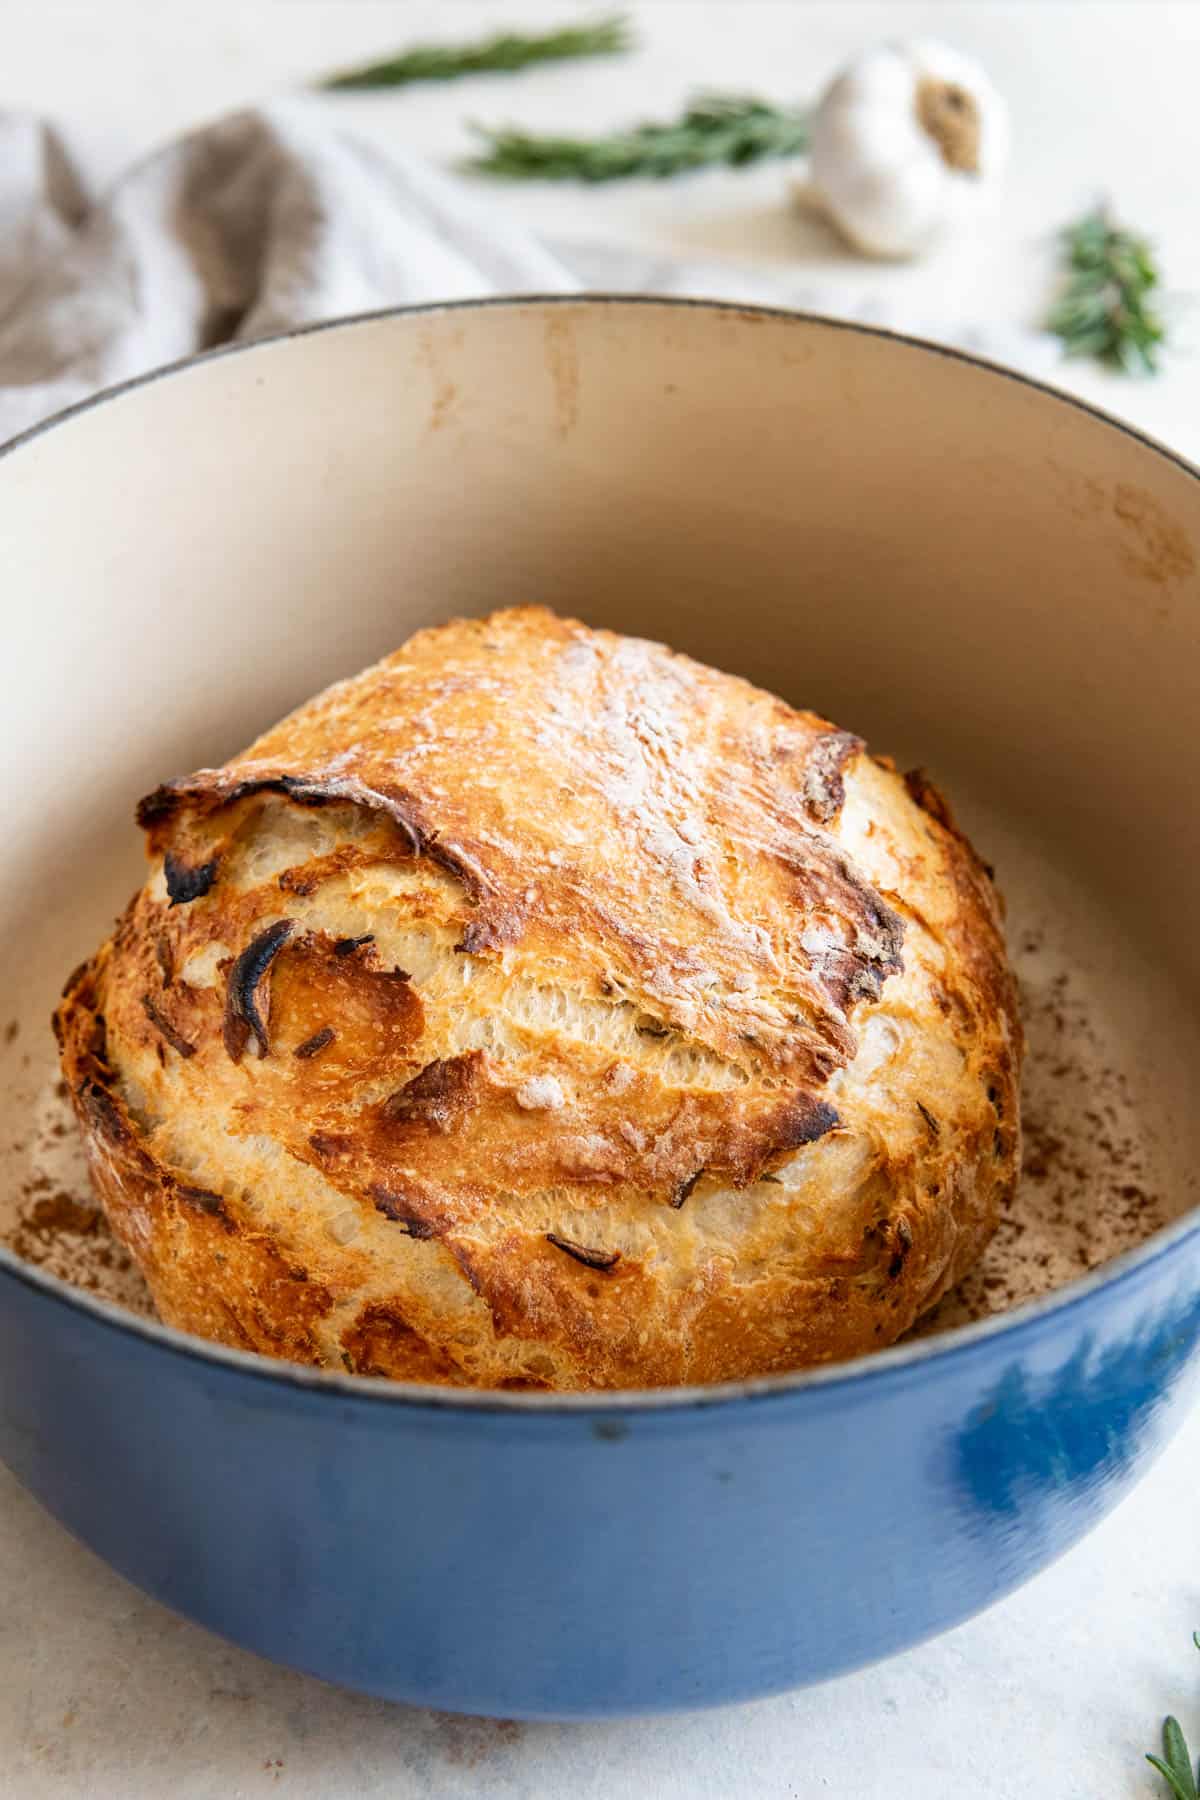
METHOD 1: My preferred method is to use a 5.5 quart enameled cast iron Dutch Oven with a lid (I have this one but less expensive options work just fine!) but you could also use a baking dish covered with aluminum foil, your crockpot insert, stainless steel pot with a lid, a pizza stone with an oven-safe bowl big enough to cover the bread, and an old cast iron Dutch oven that you probably only pull out for camping trips.
The lid (or aluminum foil) traps moisture in with the bread while it bakes for 30 minutes, then you uncover the loaf and bake for an additional 10-15 minutes at the end to let it get golden brown on top.
METHOD 2: Alternatively, you could bake this roasted garlic & rosemary no knead artisan bread on a baking sheet with no lid. But you will want to create steam in the oven by placing a cast iron or metal pan on the rack below the one where you plan to bake the bread while the oven preheats.
Then, when you are ready to bake the bread, place the loaf on a baking sheet inside the hot oven and pour 1 cup of water into the hot cast iron or metal pan on the rack below the bread and immediately close the oven door to trap the steam and bake for 25-35 minutes, until the crust is golden brown.
I have even heard that instead of using a pan, you could just throw a handful of ice cubes in the bottom of the hot oven instead, but I haven’t tried that approach yet.
Once you have tried making this Roasted Garlic & Rosemary No Knead Artisan Bread, try something a little different where you can practice your kneading with these Cheesy Garlic Mozzarella Swirl Rolls! Or if you forget to prep this the night before, try my Easy Rosemary Focaccia Bread that is almost as easy and is ready in under an hour!

More Homemade Bread Recipes
- Homemade Potato Bread Recipe
- Easy Homemade Rye Bread
- Sweet Molasses Brown Bread
- Homemade French Bread
- Best Challah Bread Recipe
Roasted Garlic & Rosemary No Knead Artisan Bread
Ingredients
- 1 head garlic roasted
- 1 Tablespoon olive oil
- 3 cups (423g) all-purpose flour
- 1 1/2 teaspoons kosher salt
- 1/2 teaspoon active dry yeast
- 1 1/2 cups room temperature water
- 1 Tablespoon fresh rosemary chopped
Instructions
- To roast the garlic, heat the oven to 425°F. Slice the top off the head of a garlic bulb to expose the cloves, then drizzle with 1 tablespoon of olive oil over the exposed garlic cloves. Wrap in tinfoil and roast for 45 minutes, then remove from oven and cool until the soft garlic can be squeezed out of the papery skin.1 head garlic, 1 Tablespoon olive oil
- In a large bowl, combine the flour, salt, yeast, rosemary, and roasted garlic. Add the water and stir to combine, just until it starts to come together in a very shaggy dough. Cover tightly with plastic wrap and let it sit on the counter at room temperature for 12-18 hours.3 cups (423g) all-purpose flour, 1 ½ teaspoons kosher salt, ½ teaspoon active dry yeast, 1 Tablespoon fresh rosemary, 1 ½ cups room temperature water
- When you are ready to bake the bread, place a dutch oven, pizza stone, or other oven-safe pan in the oven to preheat and heat the oven to 450°F.
- Working on a clean, well-floured surface, turn the dough out onto the counter or table and shape into a ball using floured hands. The dough will be very sticky.
- Drop the ball of dough into the preheated dutch oven or other baking dish, cover with lid or an oven-safe bowl, and bake for 30 minutes with the lid on. Remove the lid and bake for another 10-15 minutes, until golden brown and crusty on top.
- Remove bread from the dutch oven to cool completely before slicing.
Notes
- I have switched it up and used bread flour in place of all-purpose flour with good results, or some combination of the two, if you prefer bread flour for making bread.
- Preheating the dutch oven prevents the bread from sticking to the bottom, but if you are concerned, you can slide the ball of dough onto a piece of parchment paper before placing in the dutch oven.
- Adapted from The Comfort of Cooking via Simply So Good (and probably countless others – the basic recipe for this crusty bread has definitely made the rounds and is so simple that bread has likely been made this way for centuries before food bloggers came on the scene).


Looks like this could be our ‘pandemic’ bread for the duration. My question: how much does the loaf grow in the oven? I only have 2.5 quart (2.5 liter, actually) covered casserole dishes. Do I need to divide the dough into smaller loaves? Thx!
The loaf doesn’t grow a ton in the oven, but you could easily divide and make smaller loaves. I’ve even made rolls with it!
What temperature and how long should I bake rolls?
I haven’t done this as rolls, but I would guess about 15-20 minutes at 450 degrees F.
If I try the jalapeno cheese bread how much of each should I use? Can I use a cast iron deep well pot with lid?
It depends on how spicy you want the bread, but I would say to use probably 2 jalapenos with the steams and seeds removed and maybe 1 1/2 cups of cheese. And yes, any heavy pot or pan with a lid will work.
I tired this today and found the amount of flour may not have been enough as it was quite “soupy”. Also I did bake it on parchment paper in a Dutch oven, but it hadn’t said to grease either the Dutch oven or the paper so it stuck to the paper. Still, the aroma while baking was wonderful and now I’m waiting impatiently for it to cool so I can slice it!
Hello!
I’ve made this bread 4 times with different additions! Soooo yummy thank you so much!
I did run into a problem recently and wanted to see if you had any insight.
I added 3tbsp of poppy seeds and 3tbsp of rosemary.
Let it rise.. but had to go to work in the morning so I didn’t bake it until later. It was on the counter for about 24 hours (maybe a bit more) .
I put a towel over it this time instead of plastic wrap.
the dough didn’t seem to rise at all. And there was a dry crust like top when I went to add it to the Dutch oven, but the middle was soft and doughy.
Not sure what happened but it baked like a semi flat rock haha.
Any ideas?
Thanks !
That’s surprising that you would have such a different result on your fourth time! My guess is that if you used a damp towel instead of a dry towel it would prevent the crust from forming before baking it. So weird!
Can you please use a large cast Iron frying pan with a lid?
Sure!
Will it be a problem if the bread only rises overnight- about 8 hours?
It might be slightly more dense a loaf, but otherwise should work.
This recipe did not work for me at all. I followed the measurements exactly and it created a lumpy, dry, crumbly mess which did exactly nothing. Except waste all my ingredients.
I had to add extra water to get the right consistency for the bread. When it gets a little sticky, cover it and let it ride overnight.
Why is only the one rise necessary
It’s just the nature of this type of bread. The long, slow rise allows the gluten strands to develop without an additional rise.
Have my garlic in the oven now roasting to mix up a loaf, the only thing I’m leaving out is the rosemary to use it for a bowl to serve a spinach dip in for the 4th of July. I will dry the cubes of bread that is pulled out to use for a bowl then use the cubes to dip into the spinach dip.
Oh my goodness- so good, and so easy! I made the original recipe first (yummy) and then the pecan and dried cranberry one today. I added just a couple tablespoons of raw sugar to that one. Got rave reviews and a request for the recipe.
If I wanted to make this recipe into small single serving cob loaves, how would I do that. Should I break it up before it proves?
If you are making single serving loaves, then yes, I would divide it up before proofing.
If you wanted to cook this recipe in less than 12-18 hrs, say 6hrs, would you kneed it and let it do a second rise?
Yes, you would also want to increase the amount of yeast by at least double for a faster rise. The bigger problem is that this type of bread develops flavor during the long, slow rise, which you won’t get by speeding up the process. It will still probably taste good because of the addition of the rosemary and roasted garlic, but it won’t be quite the same.
Wondering if you could make this as loaves, baguette types the boule? If so, how? Thanks
I haven’t tried, but I think it would be possible by gently stretching out the dough into the correct shape. The key will be to not overhandle it, which would knock out the trapped gas.
I saw someone else asked if this could be proofed in the refrigerator. This is actually the only way I make artisan breads of all kinds. The slow, cold proof method (18 hours min and up to 3 days) allows the slow fermentation and ends up creating the large air bubble holes which help keep artisan bread chewy but less “thick” or dense. Not light like a regular bread loaf, but sheer perfection. As well, instant yeast will yield the same results as active dry, though I was a little surprised you didn’t start your yeast in the water first. Any particular reason why?
I find that with this type of artisan bread, there’s no need to proof the yeast since it has such a long time to develop overnight that it doesn’t need proofing.
this is the perfect bread recipe, i’ve gotten much praise, and directed all of the loaf-admirers to your wonderful blog post 🙂 thank you for the delicious and simple recipe!
GARLIC BULBS COME IN MANY SIZES , HOW MANY tS or TS?
I would say it’s a medium to large size garlic bulb.
“total time 50 MINUTES”
“let it sit . . . for 12-18 hours”
Thank you for pointing that out! I’ve edited the instructions to reflect the overnight waiting period.
Dose it have to sit for 12 hours?
Yes.
Hi! I would love to try this this weekend!
Can I substitute all purpose flour with whole wheat all purpose flour? I
I haven’t tried that before, but it should work although you might need to add a little additional water. I think I would start with half whole wheat and half white flour, then proceed from there.
I’ve made this bread probably 10 times, and I love it. When others eat it, they always ask for the recipe. I’ve tried different toppings such as cheese and it has turned out just as good.
Thank you, Keisha, for the glowing review!
Made this today. Great flavour!! I used 12 grain for half the flour. Going to be great with stew tonight.
I love this bread recipe! It’s so easy and quick to prep the night before. The garlic & rosemary is delicious but I usually leave those out and then my 3yo devours it. So yummy!!
my question is do i need to bake with a lid?
Yes, you need a lid to trap the steam in with the bread to give it the signature crust and texture.
Hi, can’t wait to make this bread! Can I substitute whole wheat flour for the white? Didn’t know if it would throw anything off.
Thanks,
Sue
Yes you can substitute whole wheat flour but honestly it will change the flavor a bit. It’s also a different texture of flour so you have to adjust the measurements accordingly. I found this online that explains how to do it…. Start by swapping one-third of the amount of flour in your recipe for whole wheat (if your recipe calls for one cup flour, use ⅓ cup whole wheat and ⅔ cup all-purpose). If that result is good, increase to use half all-purpose flour and half whole wheat flour.
Because whole wheat flour is ground from the entire wheat kernel to retain more nutrients and fiber, it also has a coarser texture, which doesn’t work as well when you’re trying to bake something airy and light.
Hope that helps!
I just mixed my first one! Do I wrap the whole ball tightly in plastic (didn’t seem to leave it any room to grow) or do I put the ball in a container and cover that tightly with plastic?
Just put it in a bowl or container and cover that with plastic.
Very good
Looks wonderful.
Going to try as soon as possible, as it does look so simple, and without the need to have strong wrists to maneuver the dough which is often difficult as you grow older.
Thank you
Oh then this recipe will be great! I hope you enjoy it!
I have been making this recipe for years! I’ve tried using both the AP and bread flour with great results. I don’t notice the difference between the two. I just use what I have on hand. I don’t always have rosemary on hand so sometimes I just use the garlic and it’s great. I actually use 2 heads of garlic and I don’t find it over powering. I’ve used other fillings too. It’s a very versatile recipe. I use a Dutch oven to bake. If I could give this recipe more than 5 stars I would.
So very good.
I’m sorry but I just made it and plan to cook it tomorrow. But I did want you to know that roasting my garlic at your instructions burnt the whole thing. So I tried it again at 400 for 30 minutes. I added another half bulb, thank goodness. Because half of this tray burned also. You didn’t have this problem?
Now I’m Leary on temperature and time to cook it tomorrow.
Hmm I haven’t had this problem! I’m sorry your garlic burned! Did you wrap the garlic in tin foil? Some ovens do bake hotter and a great way to check if the temperature is accurate is an inexpensive oven thermometer. You may just have to cook them at a lower temperature for a little longer. Let me know how it goes!
I’m assuming the garlic is minced after cooling and removing the covering? How fine do you mince? Or do you just crush it. The recipe didn’t specify
No, you don’t mince the garlic at all. It’s honestly so soft that it almost smooshes into a paste a lot of the time, but the whole cloves, once roasted, are so mild and tender that there is no need to mince.
Can you use instant yeast?
Yes.
I was gifted a loaf of Garlic-Rosemary bread, and it was so amazing that I literally dreamt about it for weeks! She wouldn’t give me the recipe, so I scoured the internet for something that sounded remotely similar, and I stumbled upon this recipe. IT IS SO GOOd. As good, or better than the one haunting my dreams!
Now, I gift it to people.
I want to try the raison, walnut, cinnamon one. Do you add more sugar, or brown sugar, with the cinnamon?
Thank you so much!
I’m glad your dreams are no longer haunted 😉 It’s such an easy bread and a great one to make and give away! You could do a mix of sugar and brown sugar or do more just plain sugar.
Too easy, have to try once.
Let me know how it goes when you make it!
I made this today and it was very good. I don’t know how to wrap it- also I used parchment however the bottom is hard. Not a problem because it will all be eaten. I mean how to store it. Thanks !! Brenda
So tasty and super easy. Perfect for any beginner bread maker. And the flavour options are delicious 😋
Thank you!
Love this recipe! It’s so easy and delicious ❤️
Hi Amy, could you possibly include metric conversion into the recipes posted as it would definitely be great help in order to achieve the desired baking results. By the way, they’re all wonderful recipes, TQ.
I have been trying to do this with newer recipes and going back to old ones as well. Thanks for the reminder!
So soupy
Added more flour
Fingers crossed
Used scale for measuring 😵💫
Hope it turns out🤞
Can I substitute fresh rosemary with a reduced amount of ground rosemary?
Yes, you can use ground rosemary. I would do 1 tsp of ground rosemary.
Hi – can the dough proof for 24 hours before baking? Should it be refrigerated for the 24 hours ?
Thank you!
Yes, if you want to let it proof longer then you should transfer it to the fridge.