

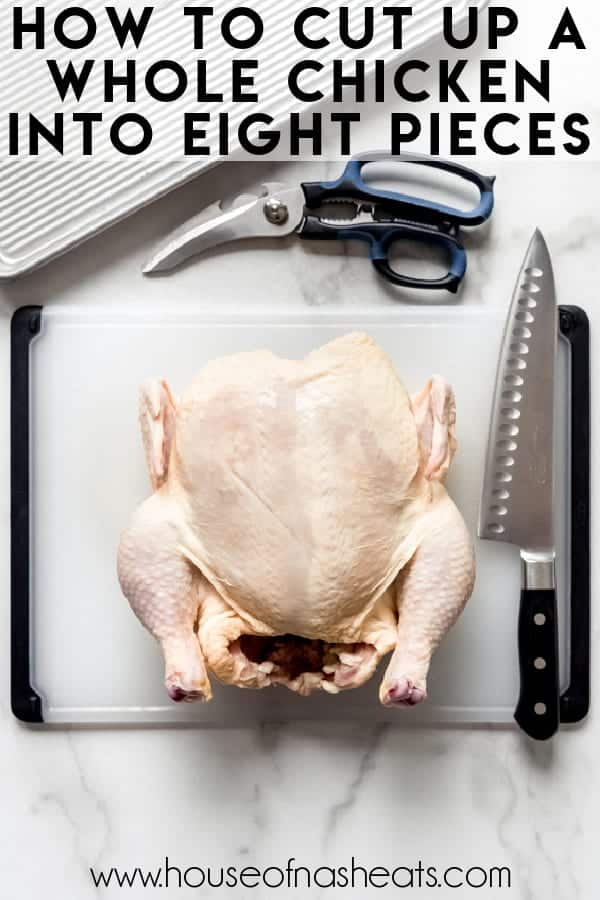
It’s easy and a lot cheaper than buying chicken parts to learn how to cut up a whole chicken into 8 pieces on your own! Plus, we enjoy having a variety of different pieces to grill or fry so everyone can choose what they like best and the carcass can be used for homemade chicken stock or bone broth! This step-by-step photo tutorial will show you how it’s done!
If your chicken dinner routine has gotten boring and bland, I guarantee that cutting up a whole chicken and using some pieces other than boneless, skinless chicken breasts will rekindle your love for this protein. Some of our favorite chicken recipes are Crispy Cast Iron Skillet Chicken Thighs, Southern Fried Chicken, and Cambodian Chicken Red Curry.
Remember when there was a national meat shortage and everybody freaked out and stocked their freezers? I found myself at the grocery store and Costco on our one and only grocery run in over 3 weeks and there was no chicken at all except for a bunch of whole ones.
Since I knew I wouldn’t be going back to the store for quite a while again, I decided I would just buy the whole chickens, take them home, and cut them up into pieces myself! And it was so easy and actually kind of fun that I thought I would share how it’s done. Besides, it actually saves money to break down whole chickens at home instead of buying separate pieces from the store.
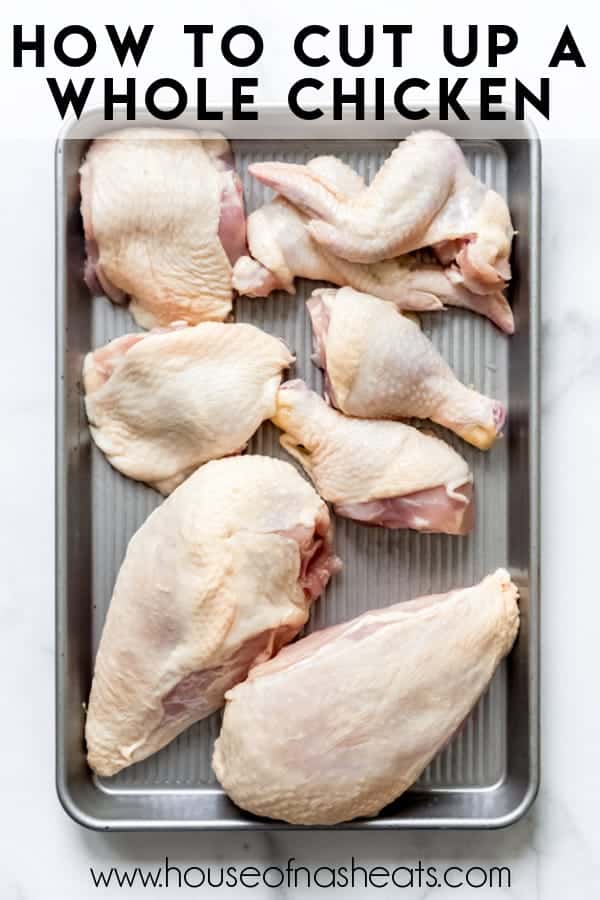
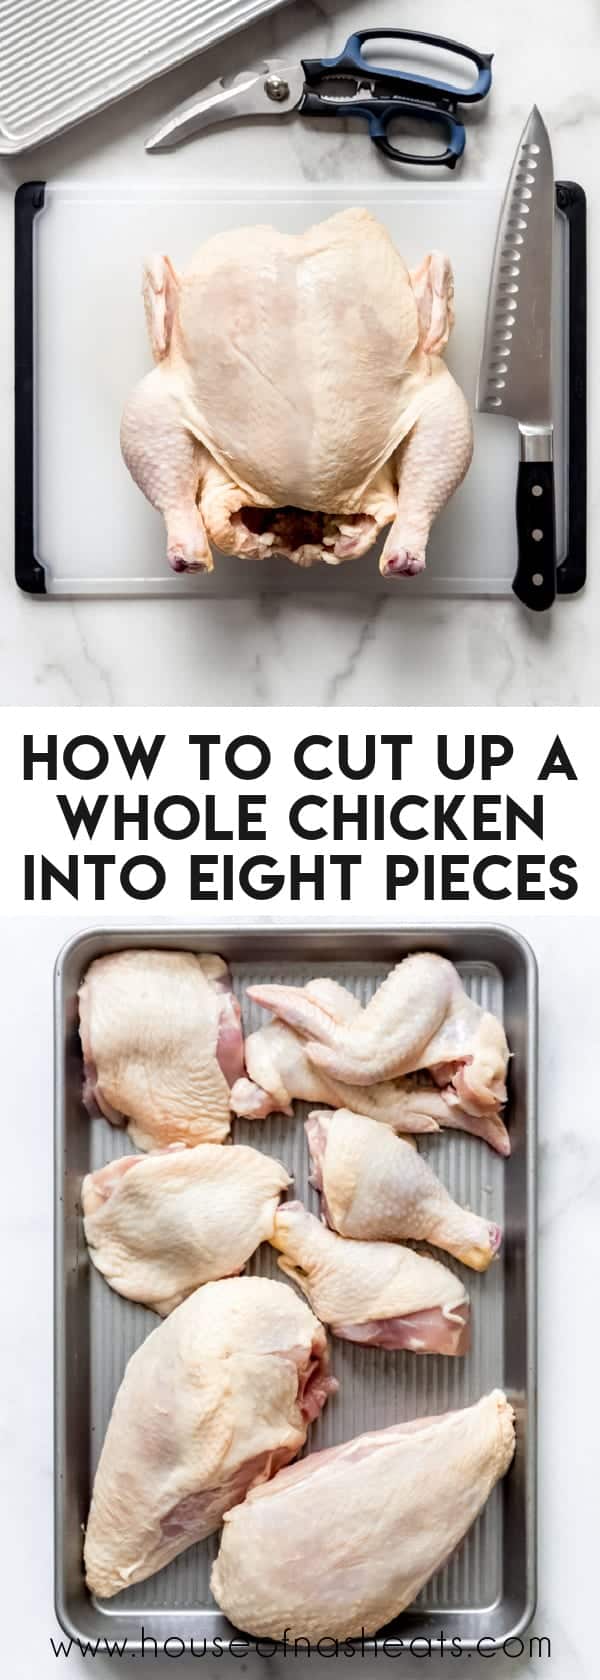
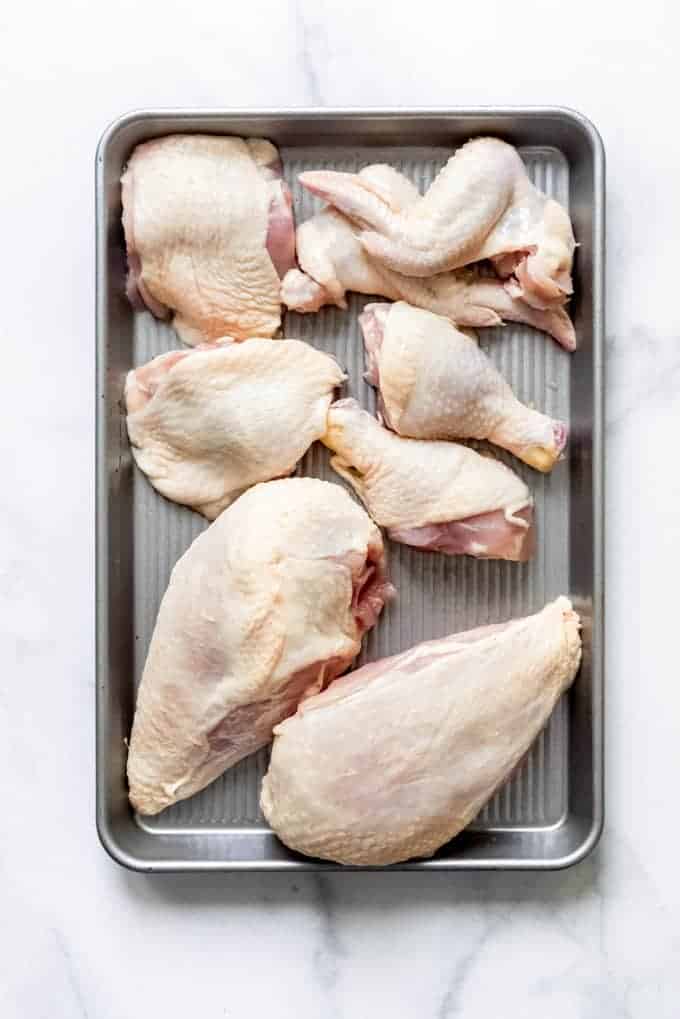
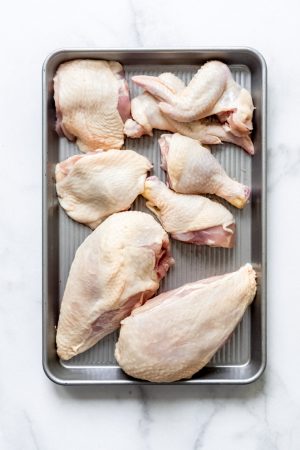
Breaking down a whole chicken gets you 8 pieces plus the bonus backbone which can be saved for stock. You will get 2 breasts, 2 thighs, 2 drumsticks, and 2 wings.
You don’t need crazy knife skills or a whole lot of muscle or elbow grease to cut up a chicken into parts. Just follow this step-by-step tutorial to see how!
Reasons why you should break down your own chicken
- It’s fun! Seriously, I actually really get a kick out of doing this. And if it’s not something you enjoy doing, then just buy them broken down for you at the store.
- It’s economical! Have you ever noticed that it’s way cheaper to buy a whole chicken than it is to buy a package of all thighs or all breasts? Because it’s usually a significant cost difference saving you lots of money to cut up a whole chicken.
- You can use the whole thing! Don’t throw away the carcass because you can make chicken stock or bone broth with it. This is a great way of avoiding food waste.
- Get the parts you want. I love, love chicken leg quarters where the thigh and leg are still attached for grilling especially but I can’t always find them at the store. When I’m breaking down a whole chicken, I don’t always separate those two pieces so I have the leg quarters I want. Another cut that many people love is a boneless, skin-ON chicken breast, but those are practically impossible to find unless you do it yourself.
Pro Tip: If your chickens are frozen, be sure to completely thaw in the fridge for at least a day or two before breaking them down. Plan on 24 hours for every 5 pounds. Pat the chicken dry inside and out before you start cutting.
Tools you’ll need
- Chef’s knife: You’ll want a sharp chef’s knife for easy cutting. It’s a great investment to get a professional grade chef’s knife, but there are lots of affordable options as well!
- Knife sharpener: It’s always a good idea to sharpen your chef’s knife before beginning to disassemble your chicken.
- Cutting board: An extra large cutting board with a groove around the edges will help contain the mess so you don’t get liquid on your counters. I love this one inexpensive one on Amazon because I can throw it in the dishwasher when I’m done for easy clean up and disinfecting.
- Kitchen shears: I find it’s easier to remove the backbone using strong kitchen shears, although you really could use your chef’s knife for the whole process.
- Baking sheet or storage containers: If you will be using all of the chicken pieces immediately, you just need a large baking sheet to place the chicken on as you break it down into pieces. Otherwise, I recommend glass storage containers with lids to keep the fresh chicken in the fridge or freezer-safe reusable silicon bags to store it in the freezer.
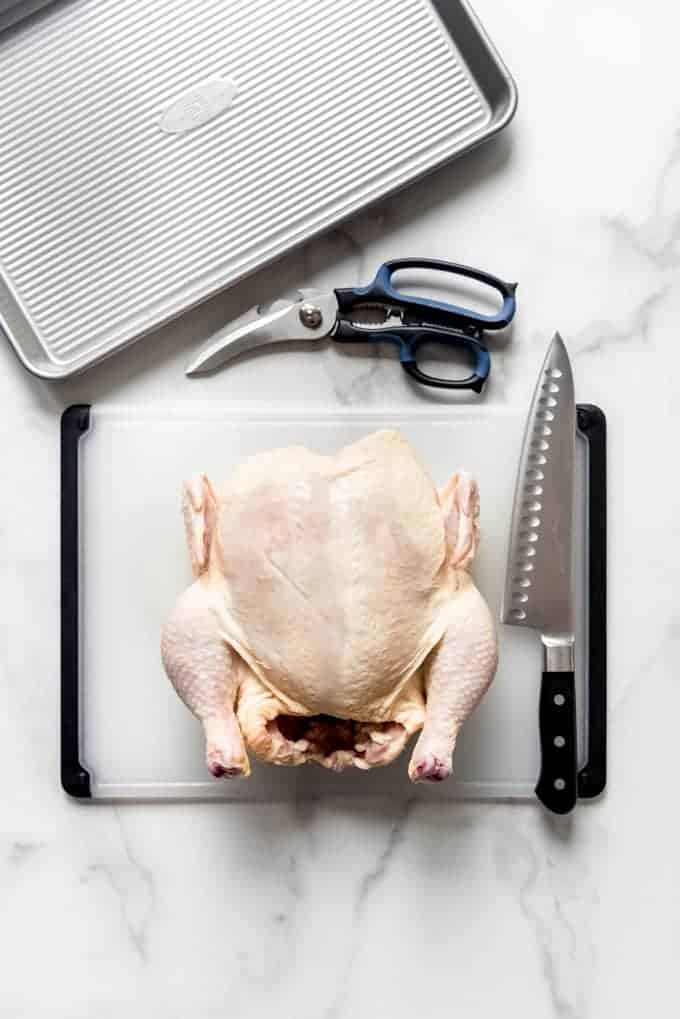
Let’s get started!
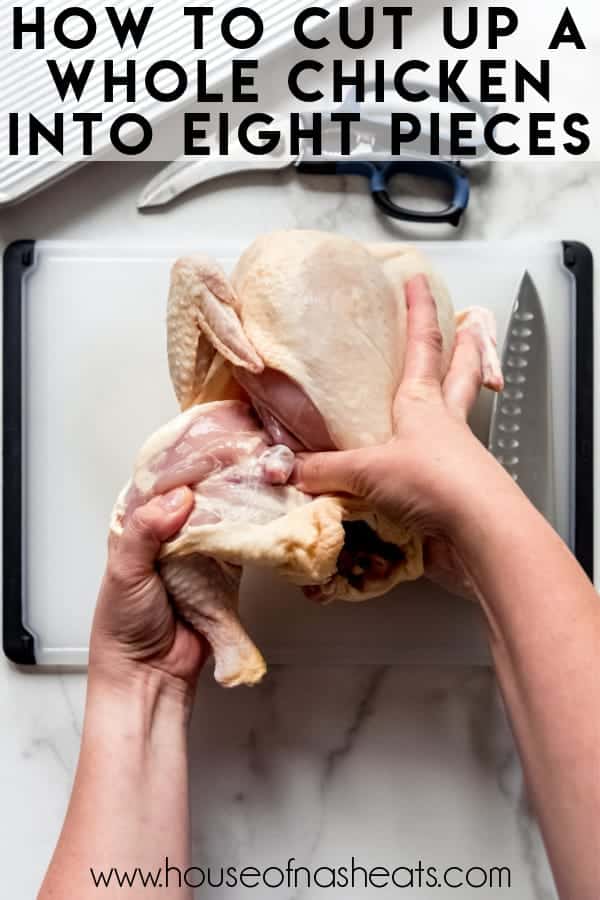
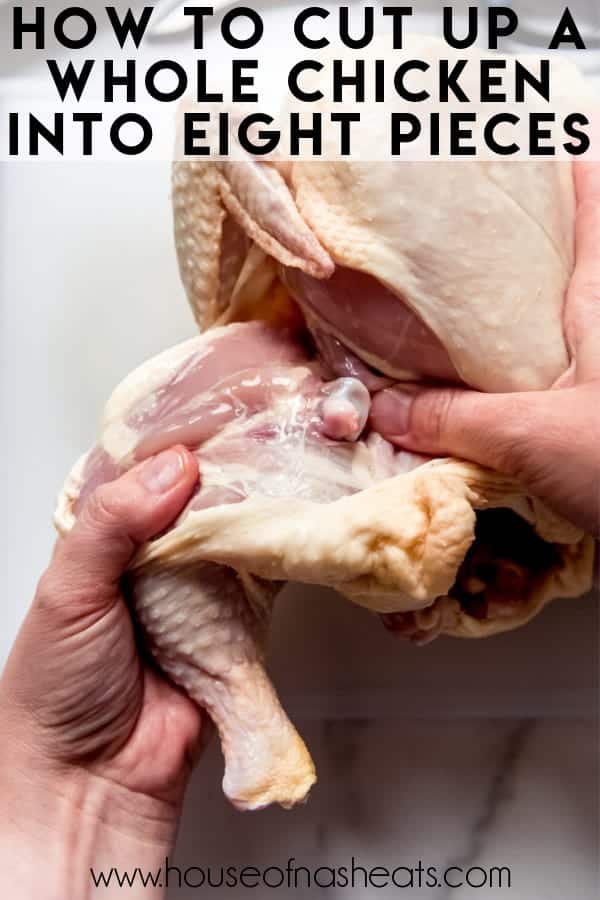
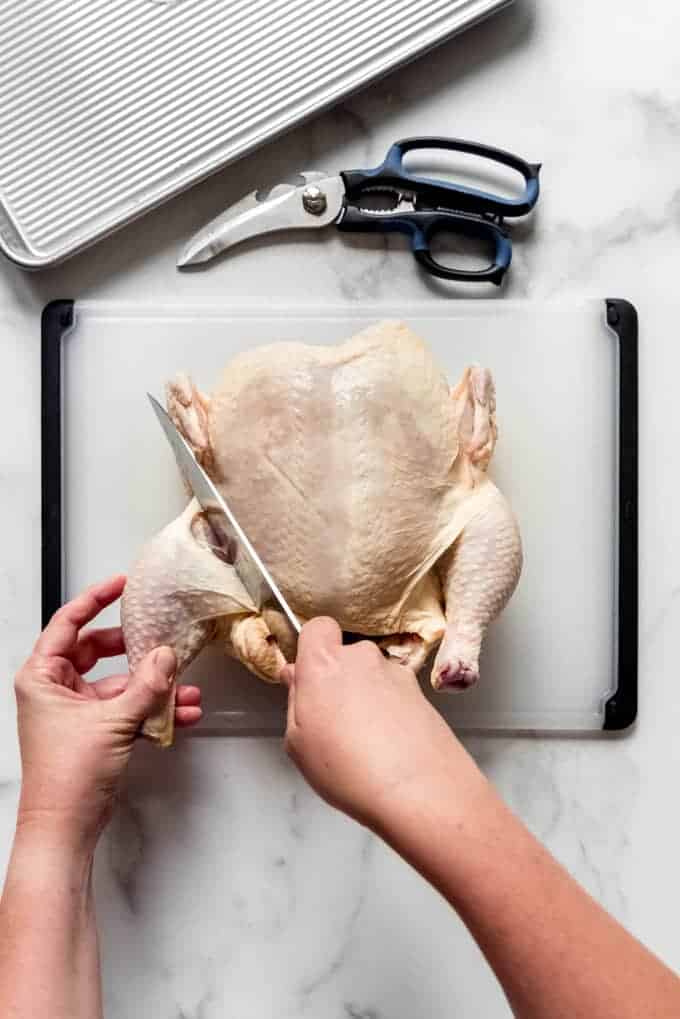
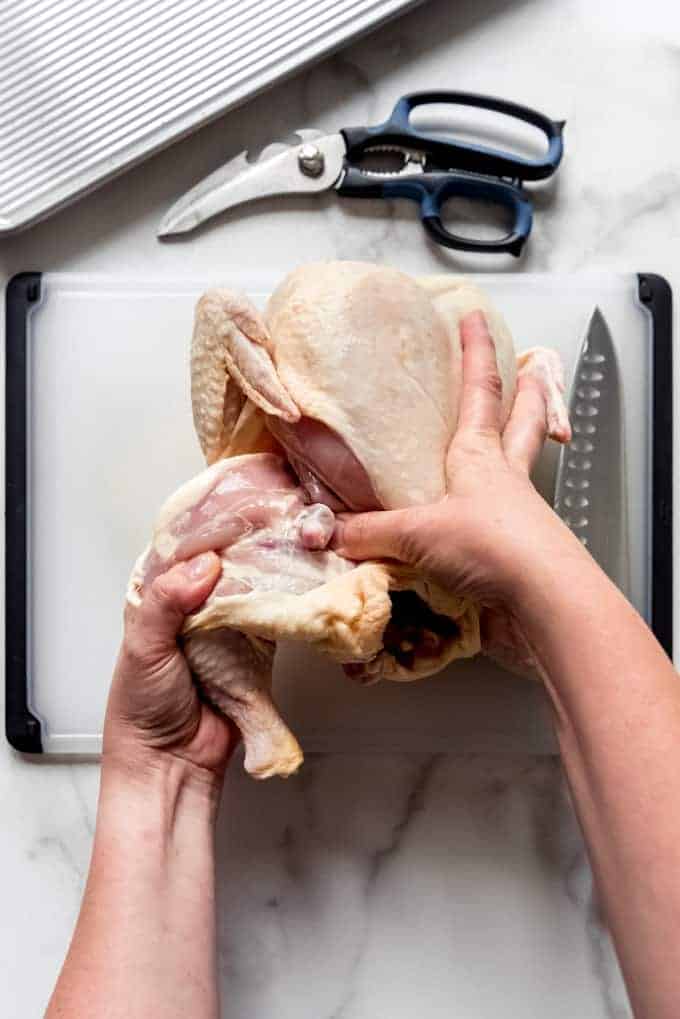
- Begin with the breast side up and legs pointing towards you. Use your sharp chef’s knife to slice into the skin between the leg and the body of the chicken. At this point, you are only cutting the skin. Bend the leg back until the bone pops up out of the thigh joint.
- Use your knife to slice off the leg quarter from the body of the chicken. You shouldn’t feel any resistance at all and should be able to easily cut right through. Then repeat on the other side with the other leg quarter.
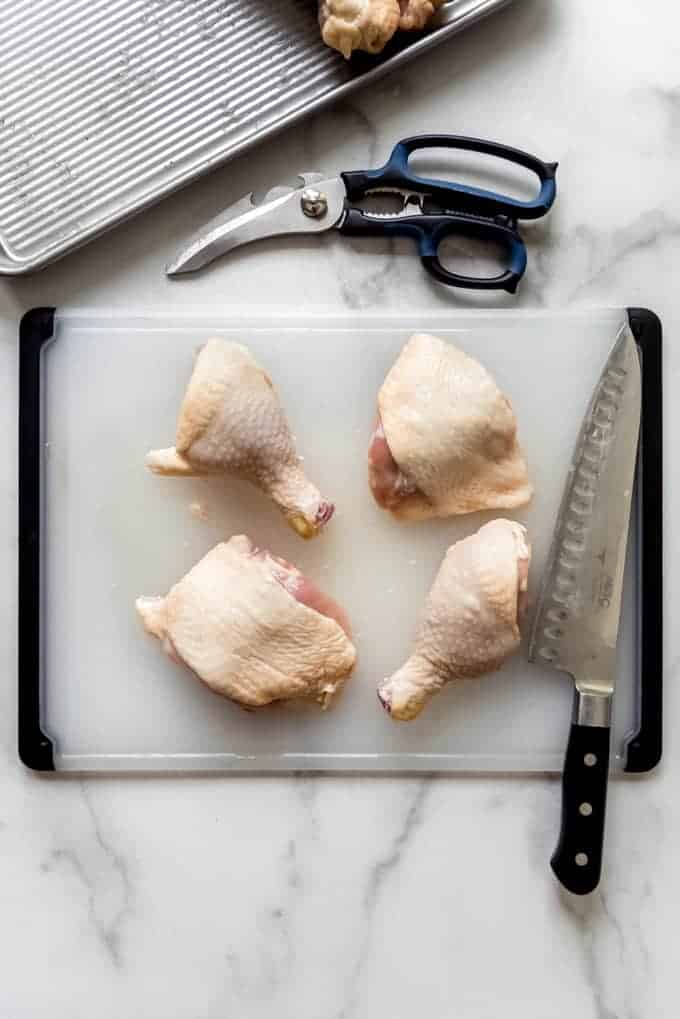
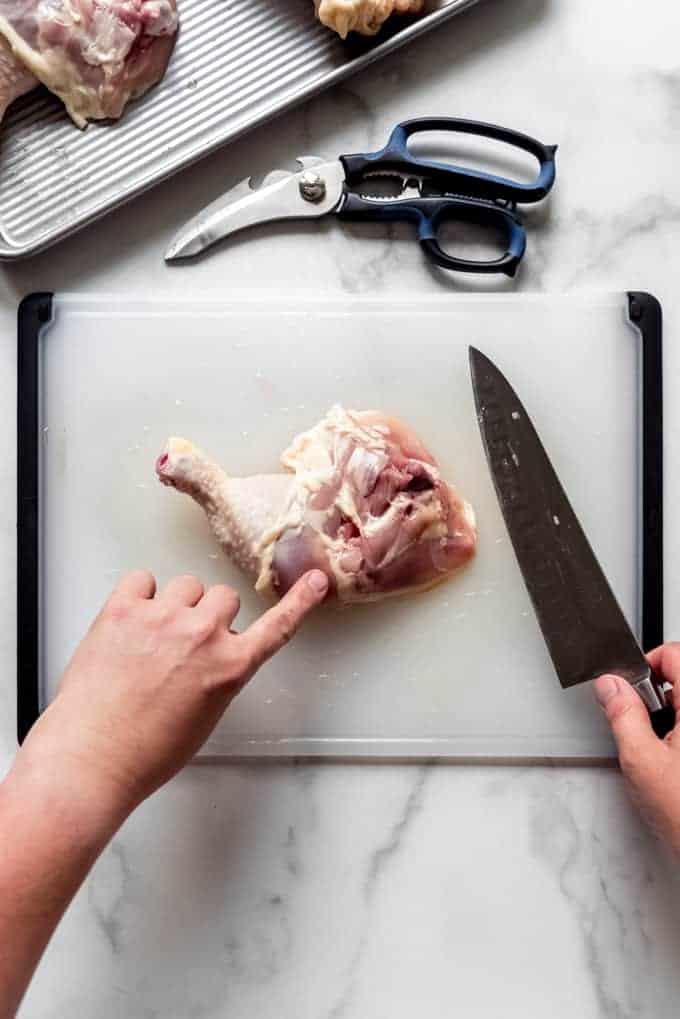
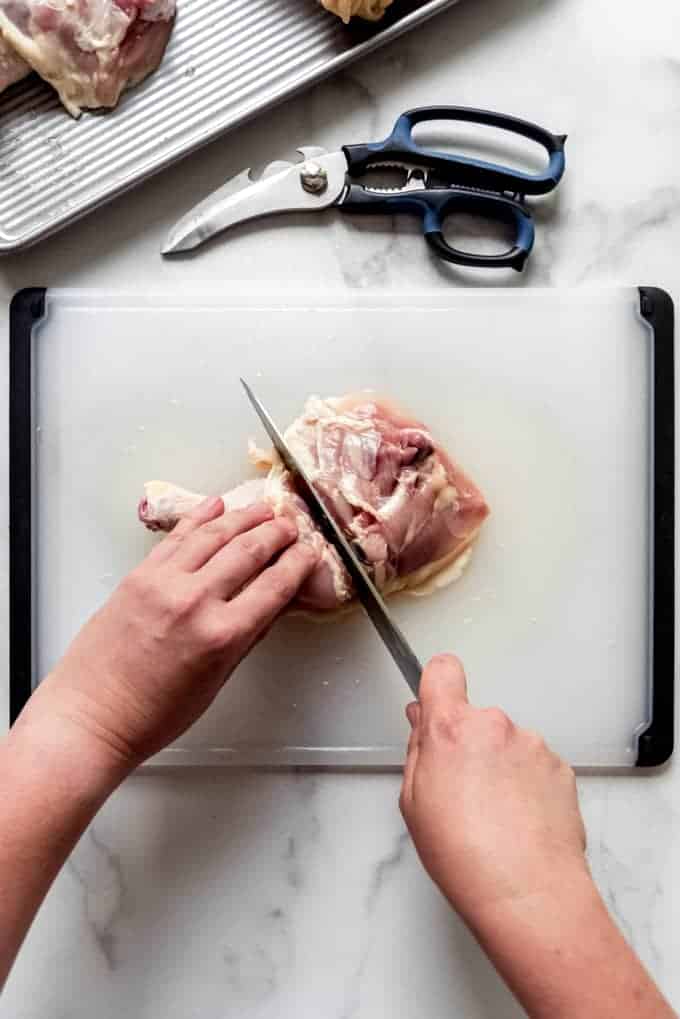
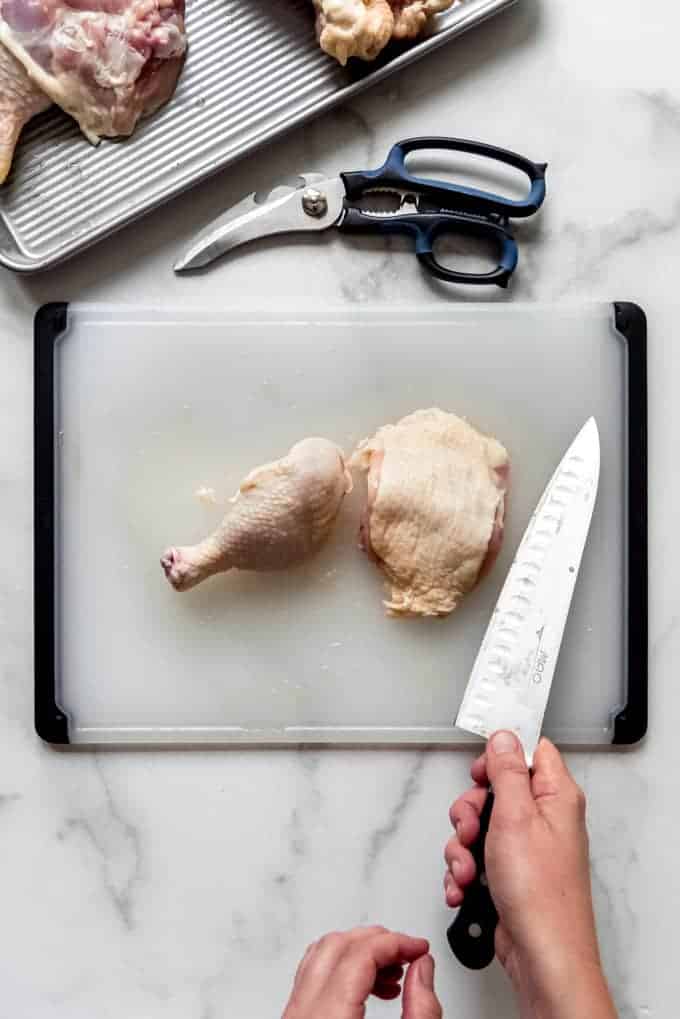
- Either keep the leg quarters whole or follow the fat lines to separate the drumstick and thigh. To do this, flip the leg quarter skin side down and look for the line of white fat running between the drumstick and thigh. This is your guide for where to cut! You can also use your fingers to feel for the joint between the two (feels kind of like the knuckles on your fingers). Use your knife to slice along that fat line to separate the drumstick from the thigh, then repeat with the other leg quarter.
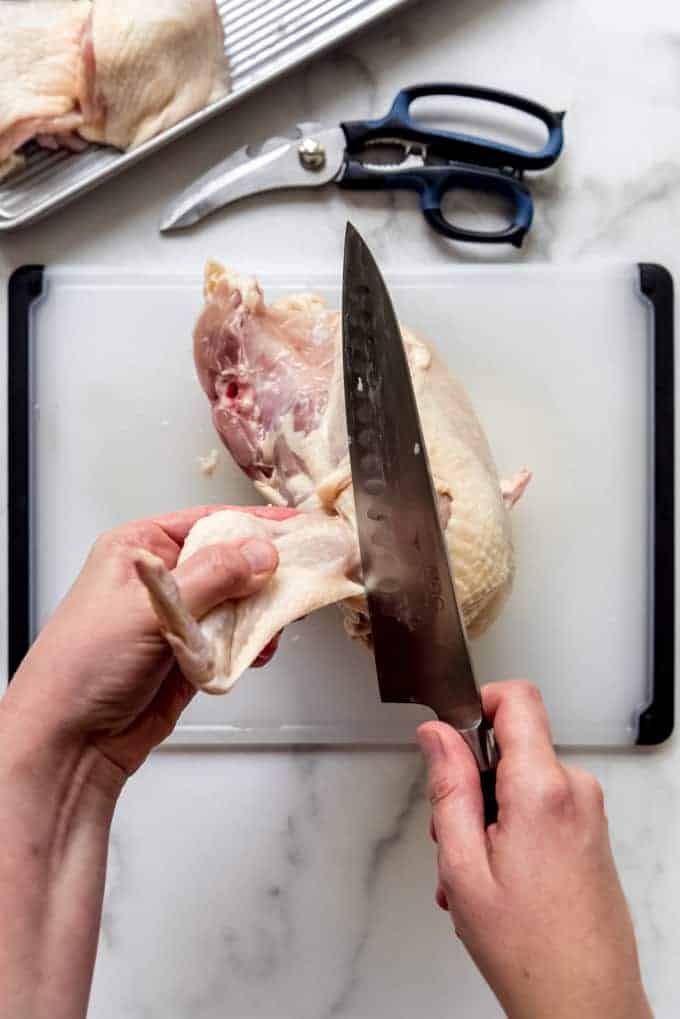
- Time to tackle the wings! Turn the chicken on its side and lift up one wing, pulling it away from the body. Cut through the joint to separate the wing, then flip and repeat on the other side. It helps to slice the skin first, then you can feel and see the joint better and easily slice right below that to remove the wing from the body.
Pro Tip: Let gravity do a lot of the work for you! Hold up the chicken by the wing and the weight of the body will provide some tautness that will make it even easier to cut.
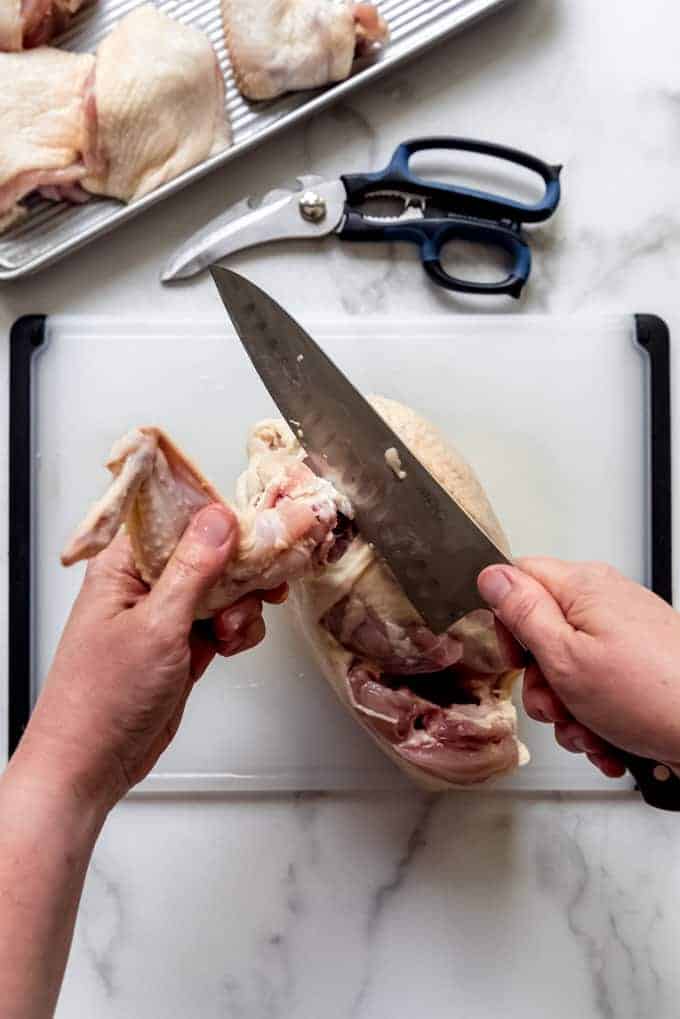
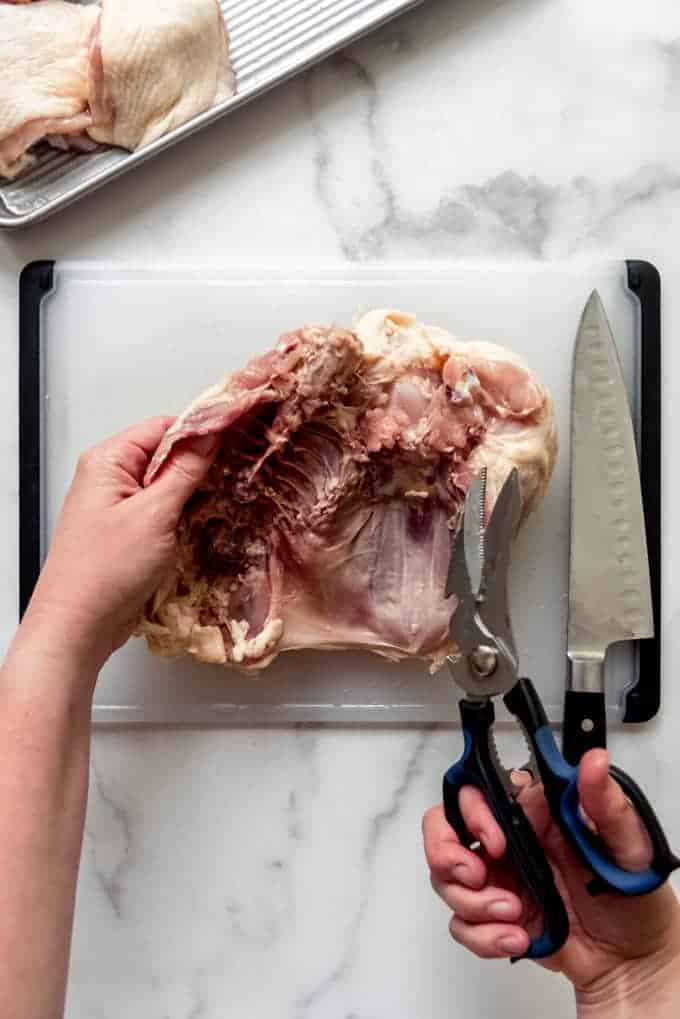
- Cut out the backbone. Flip the chicken onto it’s side and look for a white line of fat running down the side. This is your guide for where to cut, similar to when we were separating the drumsticks and thighs. I find it easiest to use a pair of strong kitchen shears to cut along the line on both sides to remove the backbone, but your chef’s knife will work as well.
Pro Tip: If you prefer boneless breasts, you can skip cutting out the backbone altogether. Instead, use long, sweeping strokes of your knife close along the ribcage to slice away the breast meat in one whole piece on each side.
Pro Tip: Save the backbone in the freezer until you have a few of them, then throw them in a pot and cover completely with water. Simmer for about an hour to make homemade chicken stock. You can also throw in vegetable scraps from celery, carrots, and onions, along with some of your favorite herbs.
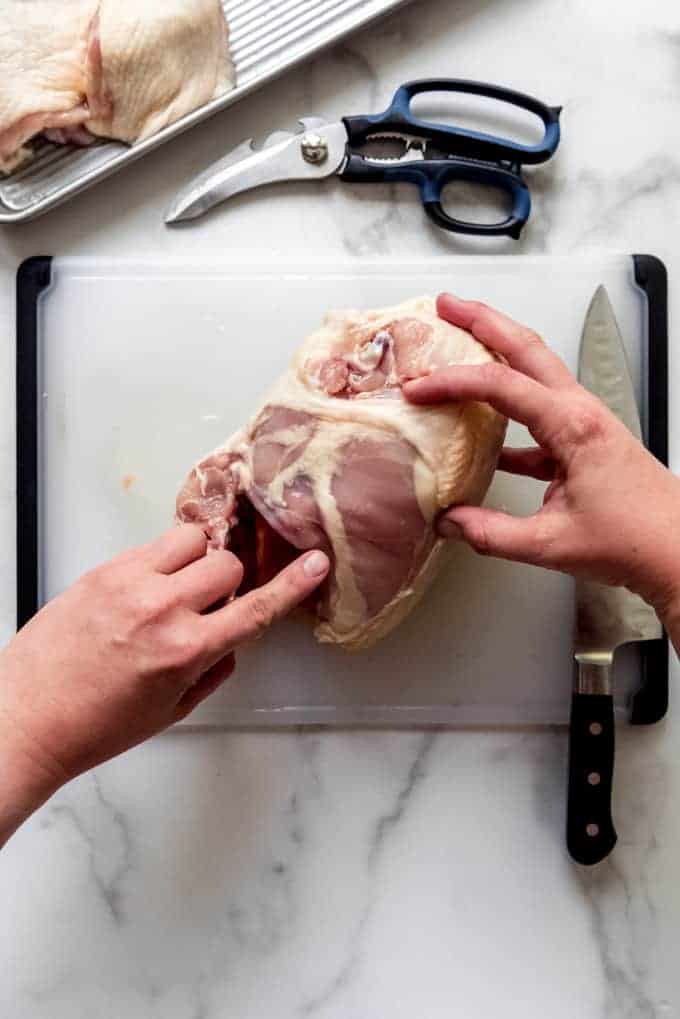
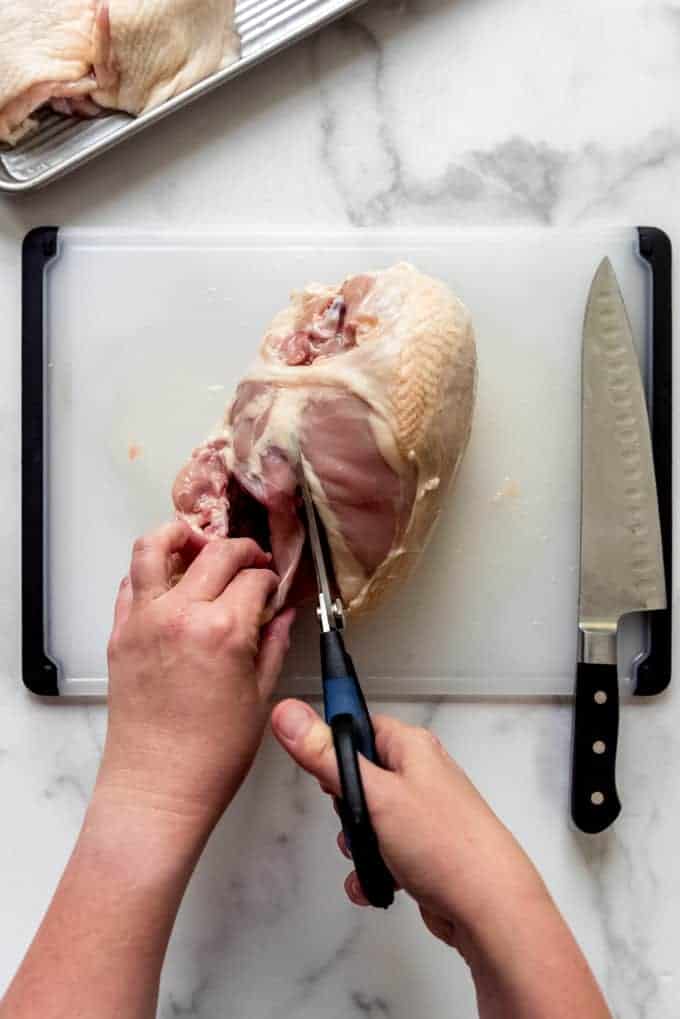
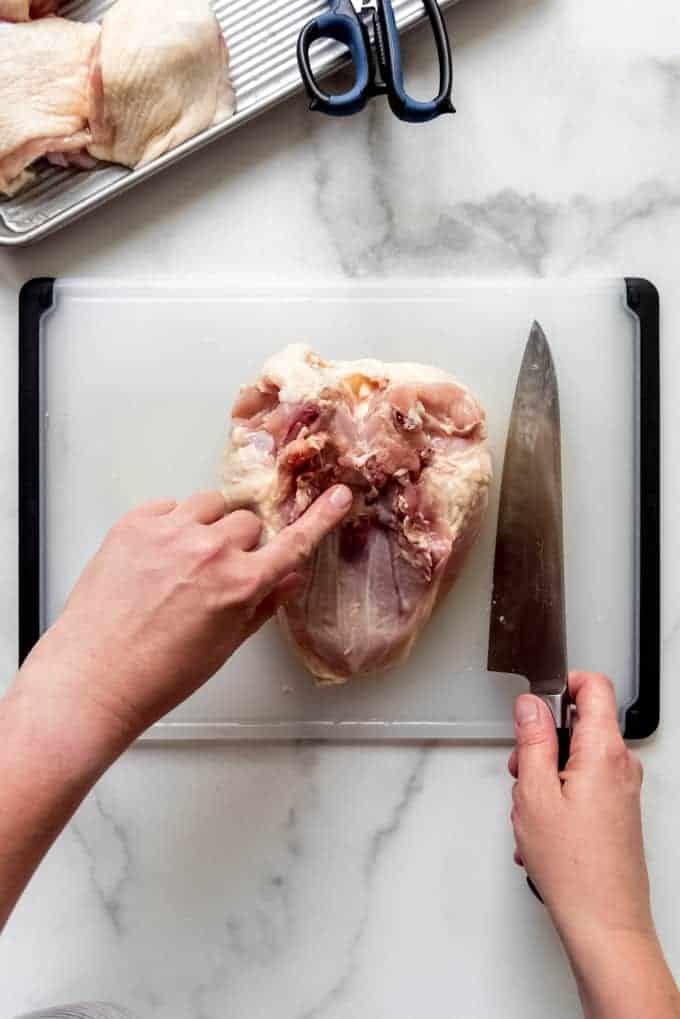
- Separate the breasts. At this point all you are left with to break down are the chicken breasts. With the chicken breasts skin side down, make a slit right in the center of the rib area where there is some cartilage. Then flip it over and it should lay flat with just a press in between the breasts with the heel of your hand. Slice right between the breasts to separate them and you are done!

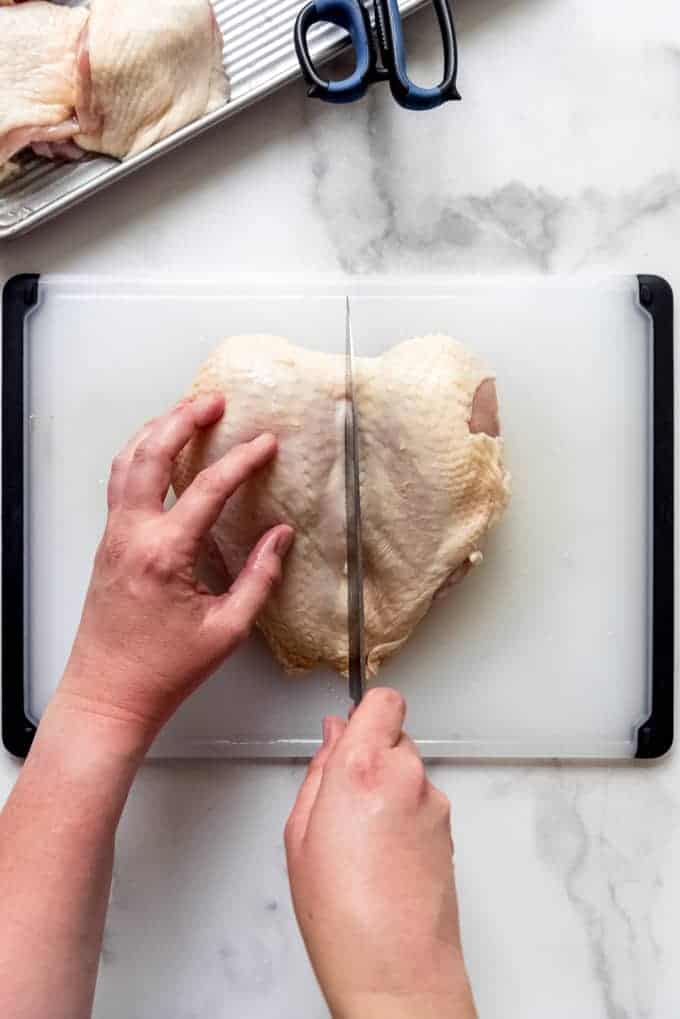
Pro Tip: If you are planning to make fried chicken, I recommend going one step further and slicing each breast in half so they will cook more evenly and take about the same amount of time as the thighs.
Storage
Once you have broken down your chicken, you can keep the pieces in the fridge for up to 3-4 days in airtight containers. Or wrap well and freeze for up to 6 months, if the chicken has not already previously been frozen.
Clean up
Be sure to clean up using a bacteria killing disinfectant after cutting up your chicken. A cutting board with a groove around the edges is a huge help in containing juices, but I never want to risk preparing food on a contaminated surface, so I always disinfect my work area immediately after cutting up a chicken.
And that’s it! It might seem intimidating the first time, but once you have done it once, you’ll realize how easy it is!
If you like cutting up a whole chicken, you might also be interesting in my post on smoking a spatchcock chicken!
More Like This
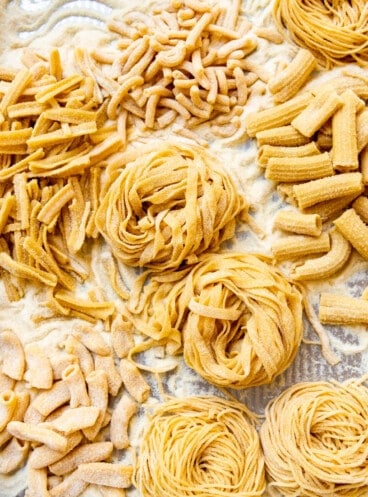
- How to Make Homemade Pasta
- How to Make Pesto Sauce
- How to Make Caramelized Onions
- How to Make Roasted Garlic

Fish & Seafood
How to Cook Lobster Tails (4 Ways)
Tutorial
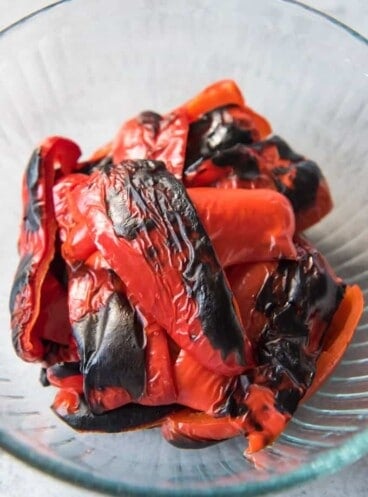
How to Make Roasted Red Peppers
Fish & Seafood
How to Cook Snow Crab Legs (4 Ways)
How to Cut Up a Whole Chicken
Equipment
- cutting board
- Large sharp knife
- Kitchen shears
- Airtight containers, for storage
Ingredients
- 1 whole chicken
Instructions
- Remove packaging from fully thawed chicken and pat dry inside and out with paper towels. Place chicken breast-side up in the center of a cutting board with a groove for catching juices.1 whole chicken
- Use a large, sharp knife to slice into just the skin between the leg and the body of the chicken. Bend the leg back until the hip bone pops up out of the socket. Cut with the knife just past the joint to slice off the leg quarter from the body of the chicken. You shouldn’t feel any resistance at all and should be able to easily cut right through. Then repeat on the other side with the other leg quarter.
- To separate the drumsticks and thighs, flip the leg quarter skin side down and look for the line of white fat running between the drumstick and thigh. Use your knife to slice right along that fat line to separate the drumstick from the thigh, then repeat with the other leg quarter. Again, there should be no resistance. If there is, shift your knife just a bit until it goes through the joint easily.
- To remove the wings, turn the chicken on its side and lift up one wing, pulling it away from the body. Cut through the joint to separate the wing, then flip and repeat on the other side. It helps to slice the skin first so you can feel and see the joint better and easily slice right below that to remove the wing from the body.
- To remove the backbone, flip the chicken onto it’s side and look for a white line of fat running down the side. Cut down the fat line with strong kitchen shears to remove the backbone, then discard or save in a freezer-safe back for making stock or bone broth later.
- To remove the breasts, make a slit right in the center of the rib area where there is some cartilage with the skin-side down. Then flip the chicken over, breast skin-side up and press in between the breasts with the heel of your hand to flatten. Slice right between the breasts to separate them and you are done! See note for boneless breasts.
Notes
- If you prefer boneless chicken breasts, then after Step 4, rather than removing the backbone, use long strokes of your knife to slice the breast away from either side of the ribs, keeping the knife close to the bones to get as much meat as possible.


Amy, thank you for your helpful advice! Purchasing the entire bird saves money over purchasing boneless individual pieces such as thighs and breasts. However, I believe that properly slicing the chicken requires skill and patience.