


These Red Velvet Chocolate Chip Cookies have that classic buttery-sweet, light cocoa flavor of red velvet cake, but in cookie form and studded with white chocolate or semisweet chocolate chips! Perfect for Valentine’s Day, Christmas, the 4th of July, or just because!
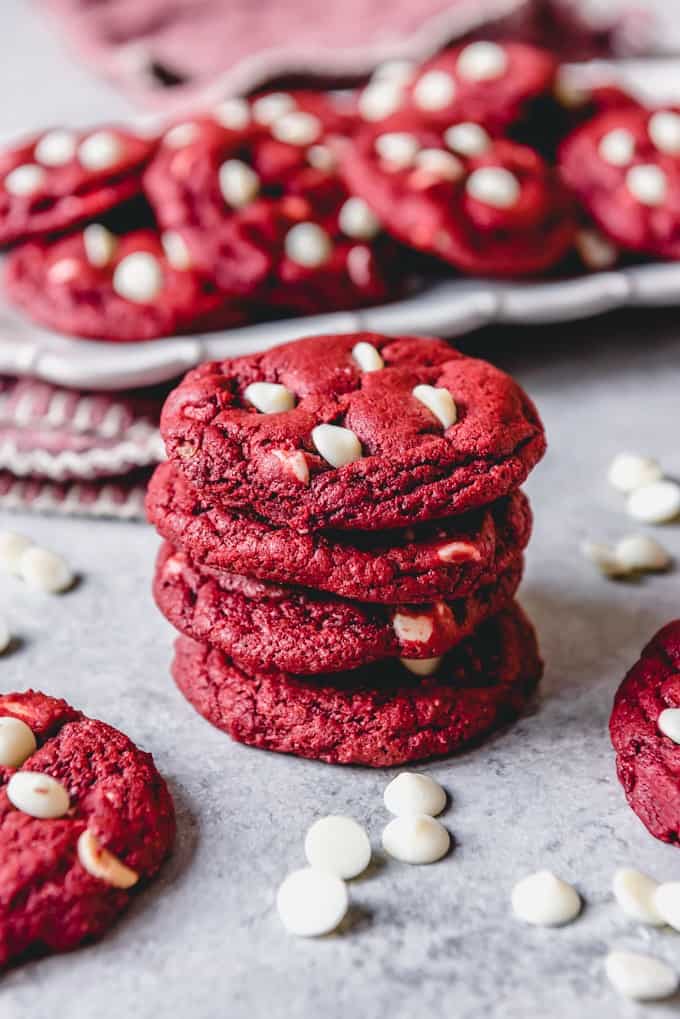
Table of Contents
You’ll love these gorgeously fun Red Velvet Chocolate Chip Cookies
If you enjoy the buttery cocoa taste and vibrant color of classic red velvet cake, you’re going to love these simple red velvet chocolate chip cookies! They are crisp around the edges and chewy in the middle with that classic red velvet color and taste in an easy drop cookie that you can make in under 30 minutes!
If you love red velvet desserts, then you are also going to love Red Velvet Whoopie Pies, Easy Red Velvet Cupcakes, and my homemade Red Velvet Cake with Cream Cheese Frosting!
Make no mistake, the deep red hue of these cookies comes from food coloring (affiliate link), not a chemical reaction between cocoa powder and buttermilk or some other substance.
But the classic red velvet flavor is there in full effect! It can be difficult to put into words, but I think of it as sweet and buttery with a hint of cocoa that that doesn’t need to live up to the reputation of “chocolate” in order to be delicious and uniquely it’s own flavor.
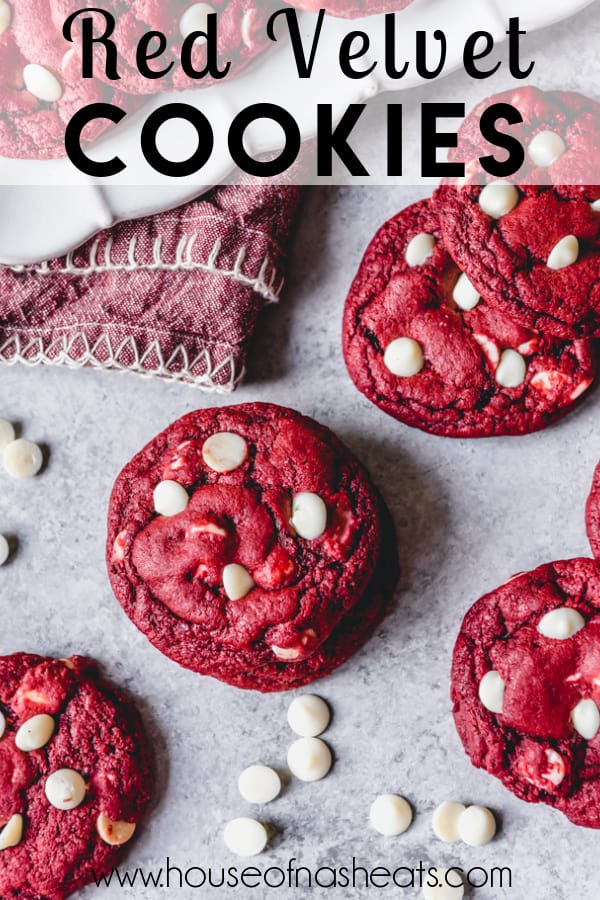
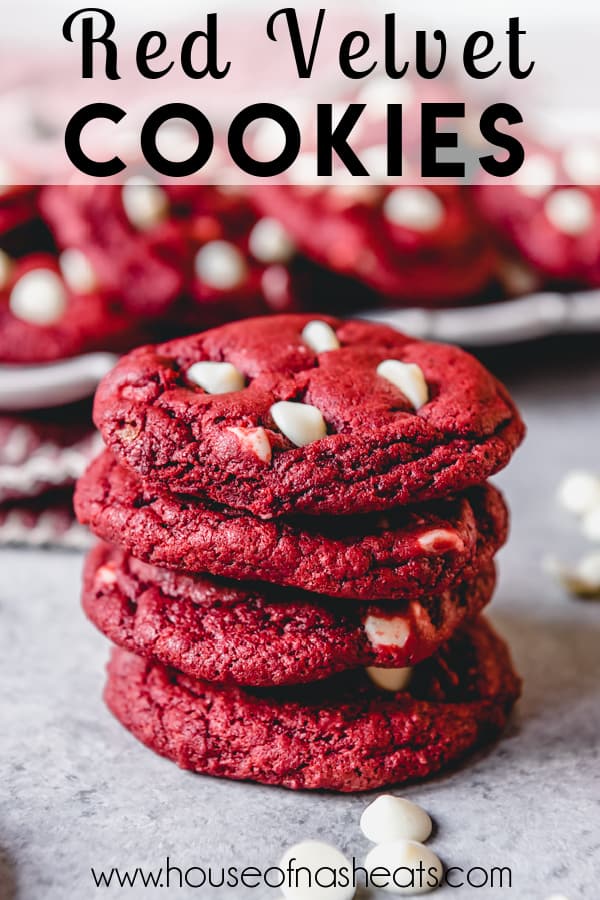
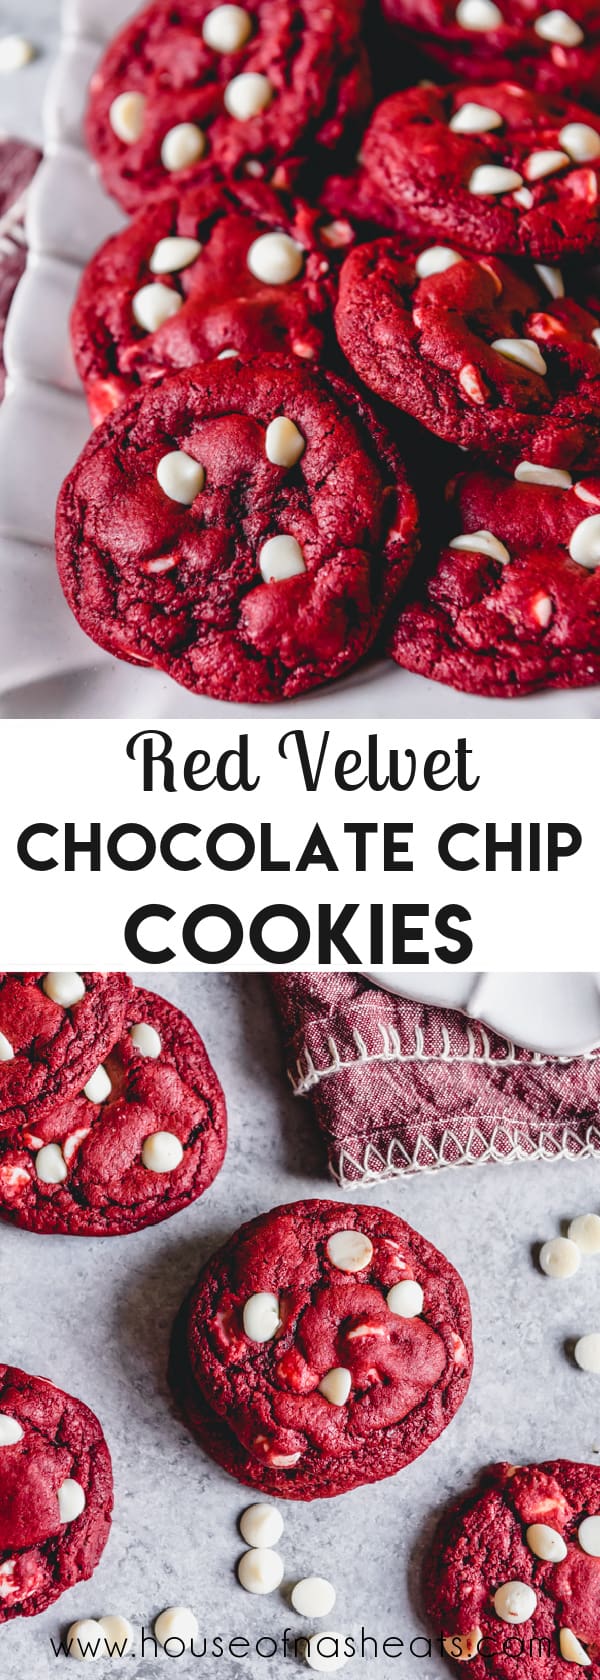
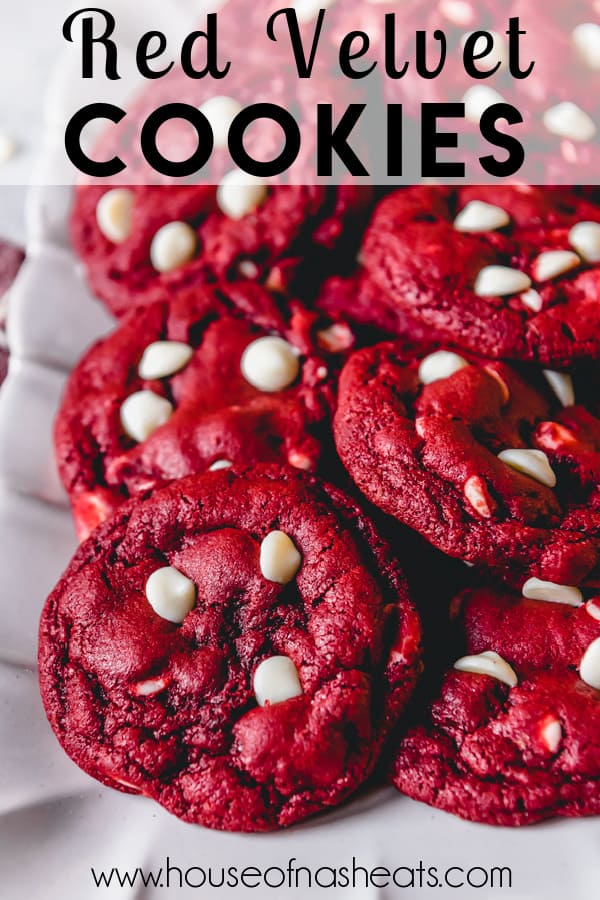
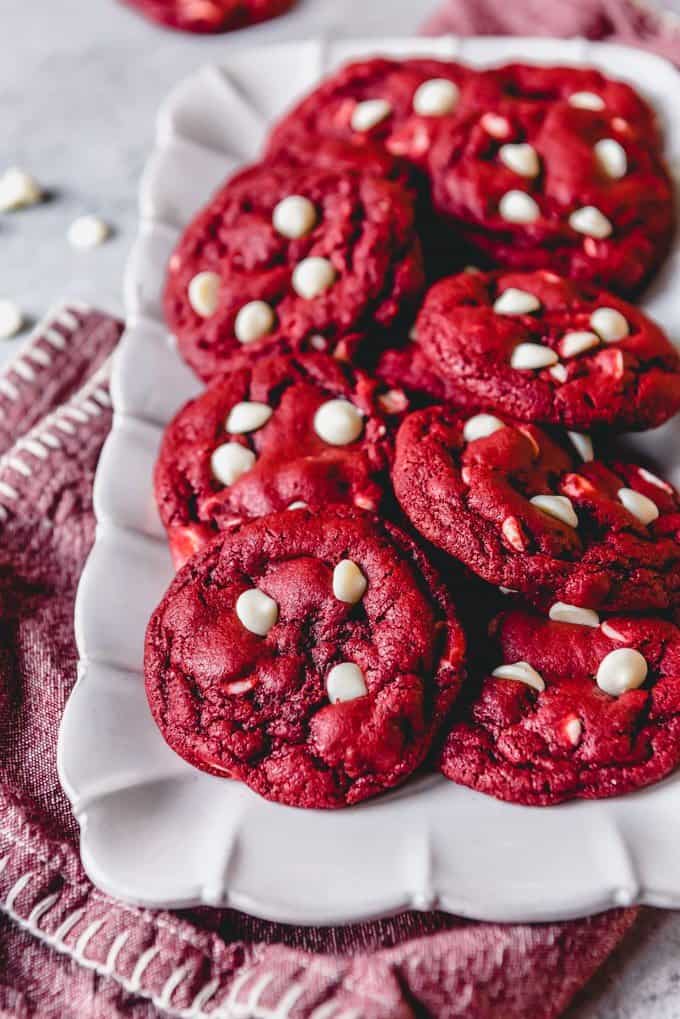
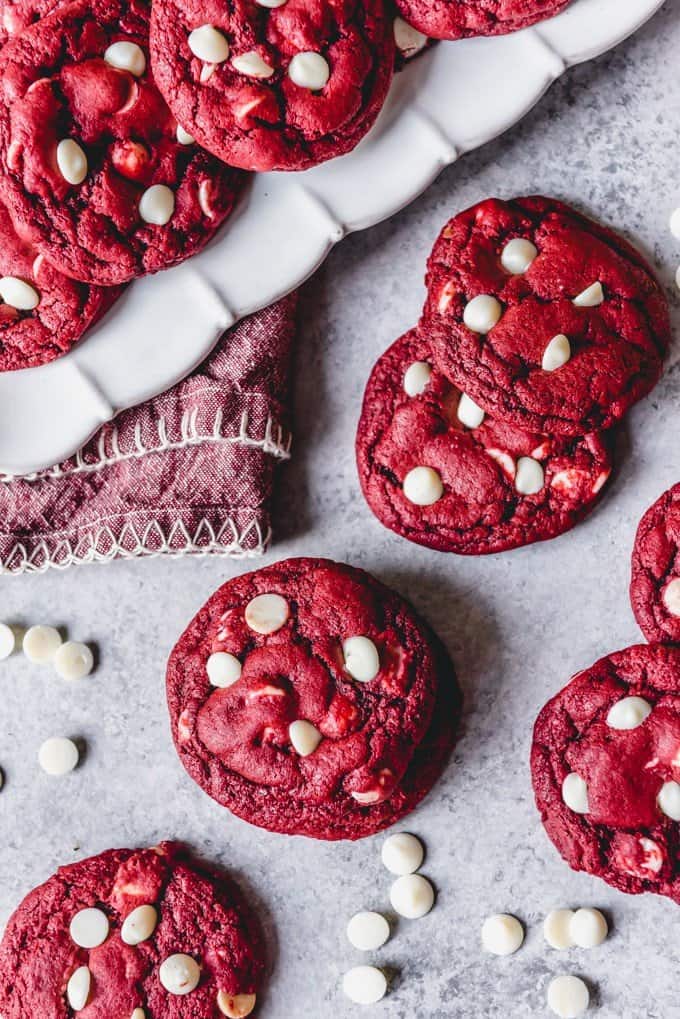
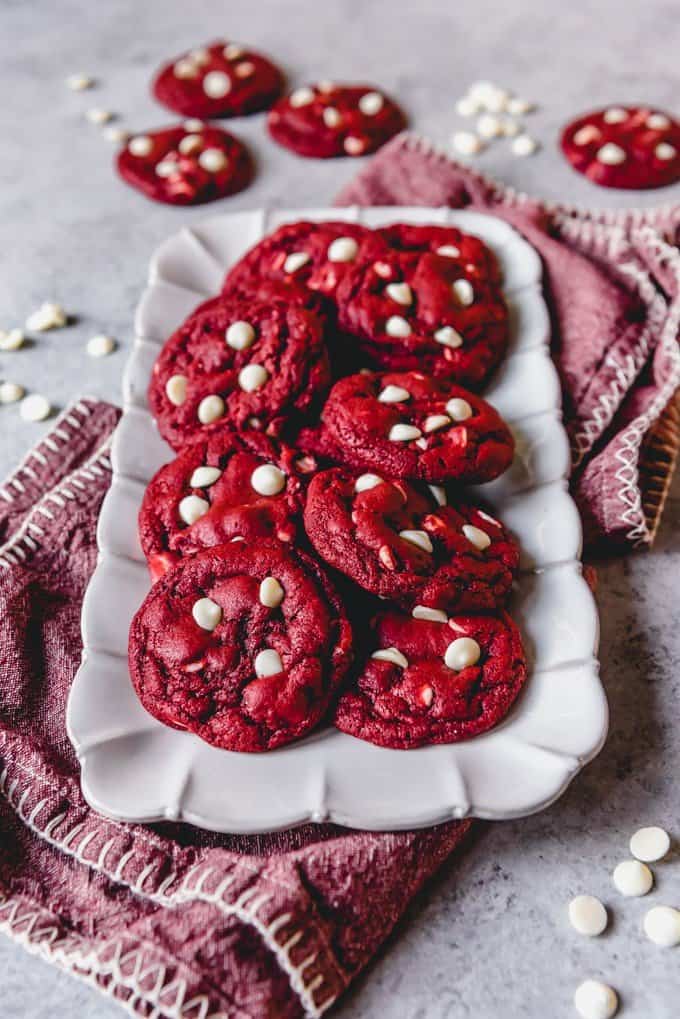
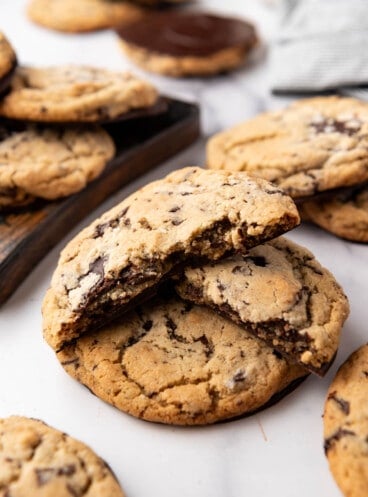
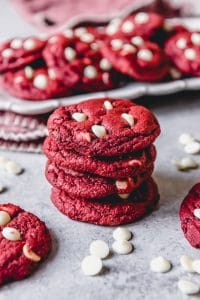
However, I will say that if you add semisweet chocolate chips to these red velvet cookies, it definitely will tip the scale in the chocolate direction and really up the ante. I most often make them with white chocolate chips though, partially because I love the flavor of white chocolate, but also largely because they make such a pretty visual impact that works well for lots of festive occasions and holidays!
Red Velvet Cookies Recipe Ingredients
- Flour: Like most of my cookie recipes, this one uses all-purpose flour.
- Cocoa powder: I use regular unsweetened cocoa powder to make these cookies. Ghiradelli makes one of my favorite cocoa powders, but Hershey’s works just fine too and is widely available. The amount should be enough for a noticeable, but light cocoa flavor.
- Butter: I always use salted butter in my baking, unless otherwise noted.
- Sugar: Equal parts light brown sugar and granulated sugar give a great balance of flavor and just the right amount of sweetness to these cookies.
- Eggs: These are for binding and help keep the cookies chewy.
- Vanilla extract: I have been using my homemade vanilla extract in my baking and it gives great results! If you haven’t tried making your own vanilla, I highly recommend it!
- Baking Soda: For leavening so the cookies puff up a bit while baking.
- Salt: For flavor, because nobody likes bland cookies!
- Red food coloring (affiliate link): You can really use however much you like depending on how vibrant you want the red color to be. I tend to use gel food coloring (affiliate link) because it’s more potent and you need less of it than the liquid kind.
- Chocolate chips: You can see in the pictures that I used white chocolate chips, but semisweet, milk, or dark chocolate chips will all work just as well and give a different flavor. Choose whichever you like best!
How to make Red Velvet Cookies
- Cream butter and sugars: Beating the butter and sugars together until light is an important step in making cookies! If your butter isn’t completely softened, just beat it a little longer and it will soften up.
- Add eggs, vanilla, and food coloring (affiliate link): Beat in the eggs and vanilla, then go ahead and add the food coloring (affiliate link) to get the color you like. I do this before adding the flour and cocoa powder because we don’t want to overwork the cookie dough once we add the dry ingredients and it’s difficult to get even coloring otherwise.
- Mix in dry ingredients: Go ahead and add the flour, cocoa powder, baking soda, and salt, pulsing the mixer on low speed to combine. Once the dough is mostly coming together, go ahead and stir in the chocolate chips until they are evenly dispersed.
- Chill the dough: Chilling cookie dough is one of my pet peeves, but this particular dough does benefit from at least a short 1 hour chill in the fridge. They bake up a bit better and the dough is easier to work with, although if you really must, you could bake the cookies right away and skip the chilling. They just might flatten out a bit more.
- Bake: Scoop the cookie dough onto parchment-lined baking sheets, spacing them a couple inches apart. Bake for 10-12 minutes at 350°F until set around the edges and just starting to lose the glossy sheen on top. I always prefer to underbake cookies so they stay soft, but it can be difficult to tell with these cookies because you can’t see them brown as well on top to know when they are done.
Red Velvet Cookie Recipe Tips
- Quality Ingredients: Use high-quality ingredients for the best flavor. This includes real cocoa powder, pure vanilla extract, and good-quality red food coloring (affiliate link).
- Creaming Butter and Sugar: Cream the butter and sugar together until light and fluffy. This step is crucial for creating a tender and soft cookie texture and making sure the cookie dough mixes evenly.
- Don’t Overmix: Once you add the dry ingredients to the wet ingredients, mix until just combined. Overmixing can lead to a tougher texture and cookies that end up dry or stale tasting.
- Use Parchment Paper: Line your baking sheets with parchment paper to prevent cookies from sticking and make for easier cleanup.
- Evenly Sized Cookies: Use a cookie scoop or tablespoon to ensure that your cookies are similar in size. This helps them bake uniformly.
- Watch Baking Time: Red velvet cookies can go from perfectly baked to overdone quickly. Start checking for doneness a minute or two before the suggested baking time. The edges should be set, and the centers should be slightly soft.
Storing Red Velvet Cake Cookies
Like most chocolate chip cookies, these red velvet cookies keep best at room temperature on the counter in an airtight container for 4-5 days.
Red velvet chocolate chip cookies freeze really well! Store them in a freezer-safe airtight container for up to 2-3 months in the freezer and thaw on the counter before enjoying. I like to pop mine in the microwave for 10 seconds to reheat just a bit.
You can also freeze the dough itself before baking. Just scoop individual balls of dough onto a parchment lined baking sheet and pop them in the freezer. Once the balls are frozen (after just a couple hours), you can transfer them to a freezer-safe silicon bag for longer term storage. Then when a cookie craving hits you, you can bake straight from frozen just by adding an extra minute or two to your bake time!
How to decorate a Red Velvet Cookie
I always press a few extra white chocolate chips into the hot cookies right as they come out of the oven for a pretty presentation.
But another idea would be to leave off the chips, let the cookies cool completely, then frost them with cream cheese icing on top and sprinkle with festive sprinkles!

More Cookie Recipes
- White Chocolate Macadamia Nut Cookies
- Double Lemon Glazed Cookies
- Chewy Brownie Cookies
- Rocky Road Cookies
- Pecan Chocolate Chip Cookies
- Andes Mint Cookies


Did you make this recipe?
Let me know what you thought with a comment and rating below. You can also take a picture and tag me on Instagram @houseofnasheats or share it on the Pinterest pin so I can see.
Red Velvet Cake Cookies
Ingredients
- 2 1/4 cups all-purpose flour
- 1/4 cup cocoa powder
- 1 teaspoon baking soda
- 1/4 teaspoon salt
- 3/4 cup salted butter softened
- 3/4 cup light brown sugar packed
- 3/4 cup granulated sugar
- 2 large eggs room temperature
- 2 teaspoons pure vanilla extract
- 1 Tablespoon red liquid food coloring (affiliate link) or 1 teaspoon red gel food coloring (affiliate link)
- 1 cup semisweet chocolate chips milk chocolate chips, or white chocolate chips

Instructions
- Beat butter, granulated sugar, and brown sugar together until creamy and light, about 2-3 minutes. Add the eggs, vanilla, and food coloring (affiliate link), then beat again, scraping down the sides and bottom of the bowl.¾ cup salted butter, ¾ cup light brown sugar, ¾ cup granulated sugar, 2 large eggs, 2 teaspoons pure vanilla extract, 1 Tablespoon red liquid food coloring (affiliate link)
- Add the flour, cocoa powder, baking soda, and salt, mixing just until combined. Stir in chocolate chips.2 ¼ cups all-purpose flour, ¼ cup cocoa powder, 1 teaspoon baking soda, ¼ teaspoon salt, 1 cup semisweet chocolate chips
- I highly recommend you cover and chill the dough for 1 hour, as it has a tendency to be stickier than other doughs, thanks to the food coloring (affiliate link).
- Preheat the oven to 350°F. Line two baking sheets with parchment paper.
- Use a medium cookie scoop to scoop balls of cookie dough onto the parchment lined baking sheets, spacing them a couple inches apart so the cookies have room to spread. Bake for 10-12 minutes until set around the edges and the cookies are just starting to lose their glossy shine in the centers.
- Immediately upon removing the cookies from the oven, press a few extra chocolate chips into the tops of each cookie for effect. Transfer to a wire cooling rack to cool completely.
Notes
- Store the cookies in an airtight container on the counter for 3-5 days or in the freezer for up to 3 months.
- You can freeze individual balls of cookie dough and bake straight from frozen. Just add an extra minute or two to the bake time.


Made these for Valentine’s Day and the February Chocolate Challenge. They did not disappoint. Such a fun and tasty change up to our regular cookie recipes, plus I LOVE white chocolate.
I’m so glad you chose to make these, Tiffany! I know some people pooh-pooh white chocolate but I think it’s so good too!
Tasty batter, but the cookies didn’t flatten out in the oven. They stayed very puffy — more bonbon-shaped than cookie-like.
How many tablespoons is a medium scoop?
Mine is about 2 tablespoons.
Hi my cookies don’t seem to come out as red as yours as they become awfully brown when the cocoa is mixed in. Do you have any suggestions for this? (I use Hershey)
It all comes down to how much food coloring you use. You can really use however much you like depending on how vibrant you want the red color to be. I tend to use gel food coloring because it’s more potent and you need less of it than the liquid kind. I don’t know if you were using gel food coloring but they seem to be more red when I use the gel. Let me know if you have any more questions!
I followed the recipe exactly and the cookies are the best red velvets we’ve ever had!
very yummy just made them this afternoon, red velvet is my boyfriends favourite so I’m waiting to see what he thinks of them
very rich cookies but I used unsalted butter but salted butter would definitely balance out the sweetness better
Red velvet is so good! I hope your boyfriend likes them!
These were good, but not as soft and chewy as i expected.