
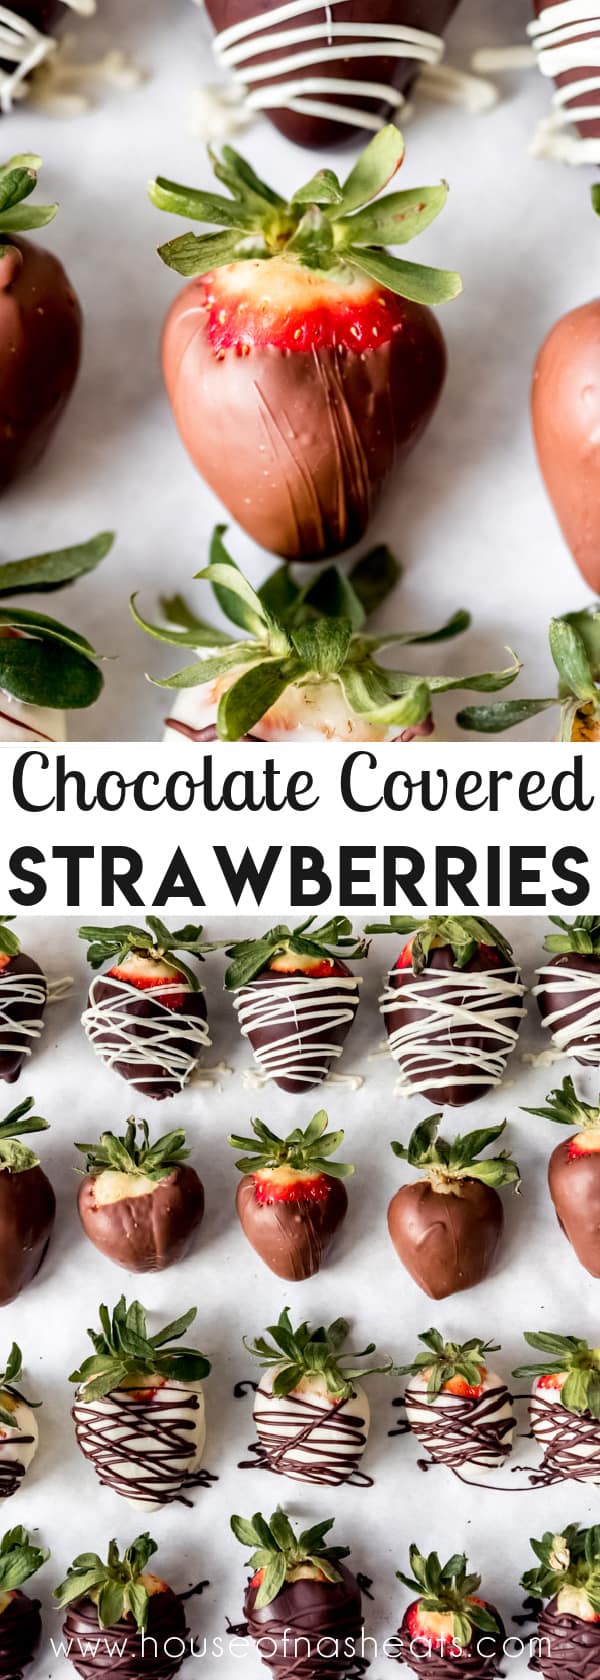
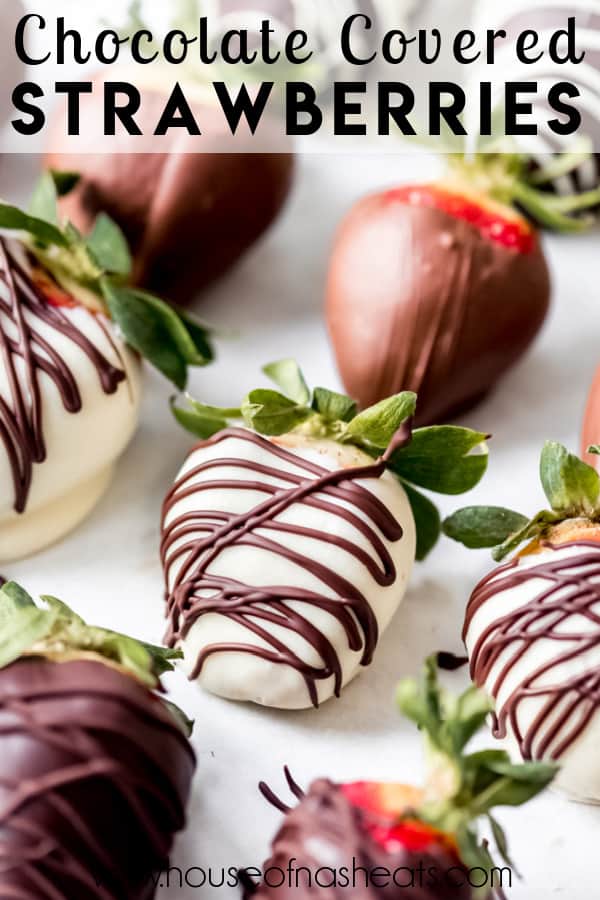
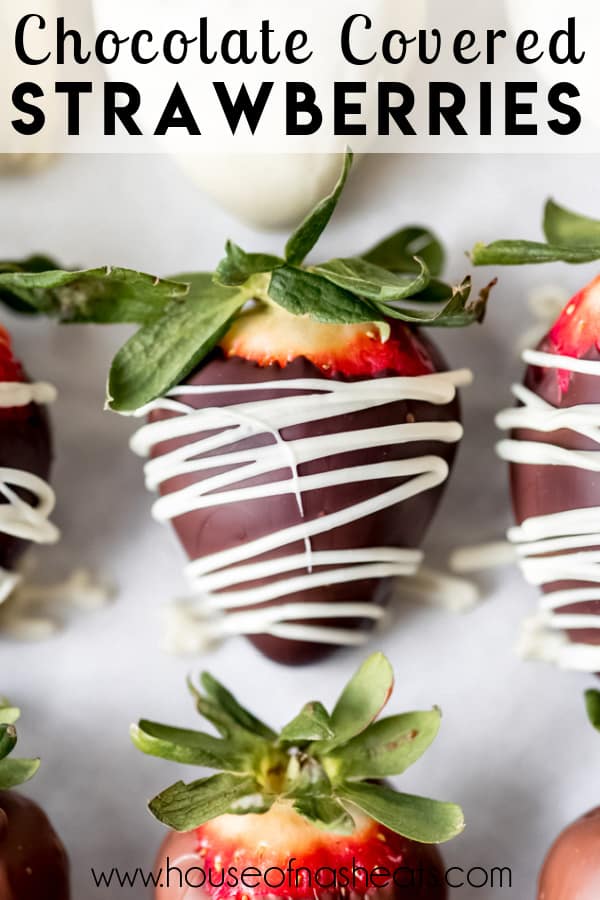


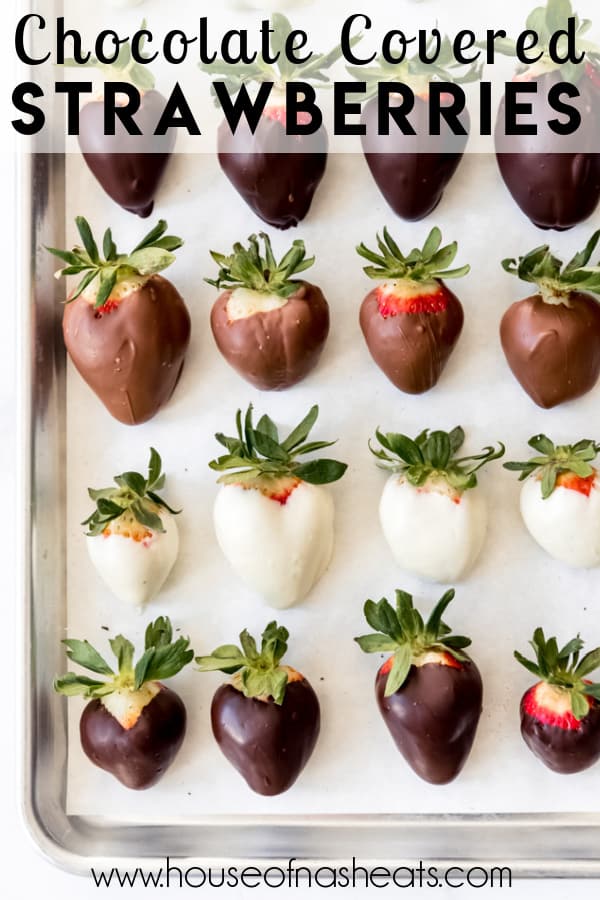
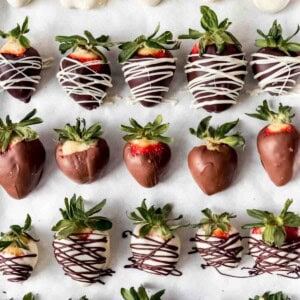
Chocolate Covered Strawberries are perfect for Valentine’s Day & Mother’s Day, using on top of cakes, cupcakes, cheesecake, or brownies for a stunning dessert presentation, or just as a special treat! Learn how to make chocolate covered strawberries with dark, milk or white chocolate and you’ll save a bundle versus buying them!
I adore chocolate-covered strawberries. They are easily one of my all-time favorite treats. But they are so expensive! Like, sometimes $4 or even more for just one strawberry! It’s crazy!
So a few years ago I figured, why not learn how to make them myself? How hard could it be? This is where I went down the chocolatiering rabbit hole.
I have tried numerous approaches, including the popular (but ultimately disappointing) approaches of chocolate chips melted with coconut oil or shortening and just using almond bark or candy coatings. But the BEST way to make legitimate gourmet chocolate covered strawberries is with REAL chocolate using a simple technique for tempering it so it dries hard and shiny. These are every bit as good as the high quality ones you would pay and arm and a leg for at a good chocolate shop!
If you love these chocolate covered strawberries, you might enjoy using them to top Strawberry Cupcakes! Or use your new-found chocolate tempering skills to make Chocolate-Covered Pretzel Rods or Oreo Truffles and sprinkle them with red & white hearts for another easy Valentine’s Day dessert!
It’s easier than you think!
To be fair, this chocolate covered strawberries recipe is hardly a recipe at all. Making chocolate covered strawberries is so much easier than you might think and something that absolutely anyone can do!
It turns out I’m a bit of a snob when it comes to chocolate. It also turns out that tempering REAL chocolate and using it to make chocolate covered strawberries isn’t that difficult!
At least, not when you use a technique that is sometimes called the “seeding method”. If you have watched “The Great British Bake off”, you’ve probably seen it in action there. The idea is to take already tempered chocolate and melt only part of it. Then you slowly bring the temperature back down by adding additional tempered, solid chocolate and stirring until it is melted as well.
There is a whole science-y explanation for the crystalline structure of tempered chocolate, but the reason for approaching chocolate this way is that it will set up all on it’s own without needing to be refrigerated. Plus, it dries and hardens to a glossy finish without streaks of white (which are telltale signs that chocolate was not properly tempered).
Tempered chocolate also has a fantastic “snap” when you bite into it. None of the chocolate + shortening approaches come close and instead have an almost chewy texture that just can’t compare.
Almond bark and candy melts do a better job of achieving the texture of tempered chocolate, but they can’t compare flavor-wise.
Best chocolate for chocolate covered strawberries
My favorite place to get chocolate for dipping strawberries is Trader Joes. If you have one near you, they sell one pound blocks of excellent dark or milk chocolate at a very good price of around $5/block. You can make dozens of chocolate covered strawberries for the price of maybe one strawberry from a fancy chocolatier or candy store.
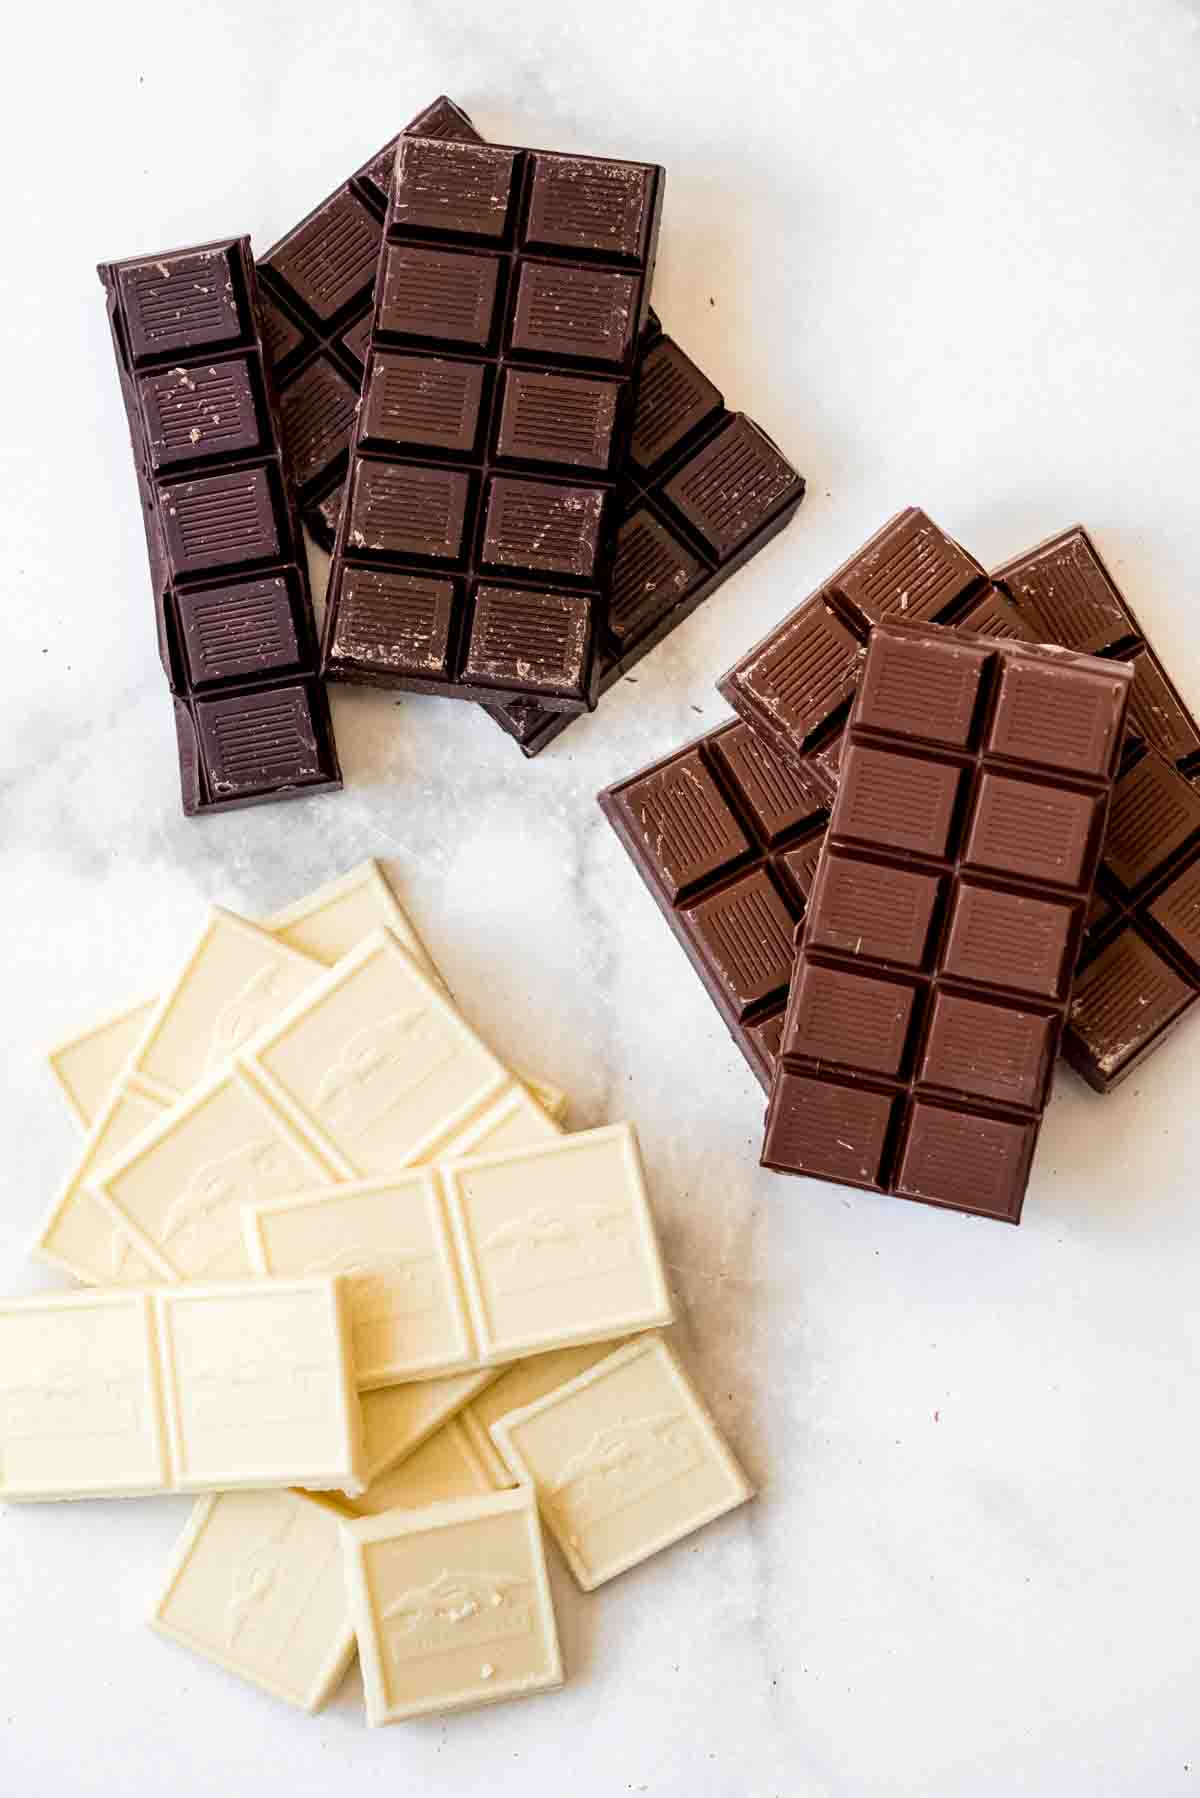
If you don’t have a Trader Joe’s, you can order good quality chocolate online or find it in kitchen supply stores. Or just buy your favorite bars of quality chocolate at the supermarket, as long as they are just solid chocolate without anything mixed into them.
Ghiradelli makes fantastic chocolate and they are my go-to choice for white chocolate bars. Another brand I love is Guittard.
It is easier to temper larger quantities of chocolate at a time, rather than trying to do just enough for 6 strawberries or so.
If you don’t want dozens of chocolate covered strawberries on your hands (not the worst problem in the world), you could always dip the number of strawberries you want, then pour any remaining chocolate into a bar (I just pour it in a vaguely bar-ish shape on some parchment paper, then let it solidify – it doesn’t have to be pretty) to be reused in the future, since it can be melted down and re-tempered again.
Or use up excess chocolate dipping pretzels or tossing in almonds or other nuts and dropping them into clusters on parchment paper. Store these in an airtight container after the chocolate sets.
How to Melt Chocolate for Dipping
You can melt chocolate either in the microwave or on the stovetop. Both work great, although I tend to use the stovetop method more often when dipping strawberries.
In the microwave
To melt chocolate in the microwave, add ¾ of your chopped chocolate to a microwave-safe bowl. Heat in 20-30 second increments, stirring between each burst of heat, until the chocolate has melted. Just like with melting chocolate in a double boiler on the stovetop, we are going for a temperature of 115°F for dark chocolate or 110°F for milk or white chocolate on a digital thermometer.
Add the reserved chocolate to the melted chocolate and stir frequently until it is melted, without any additional heating in the microwave. The goal is to bring the temperature of the chocolate down to 90°F for dark chocolate or 87°F for milk or white chocolate.
On the stovetop
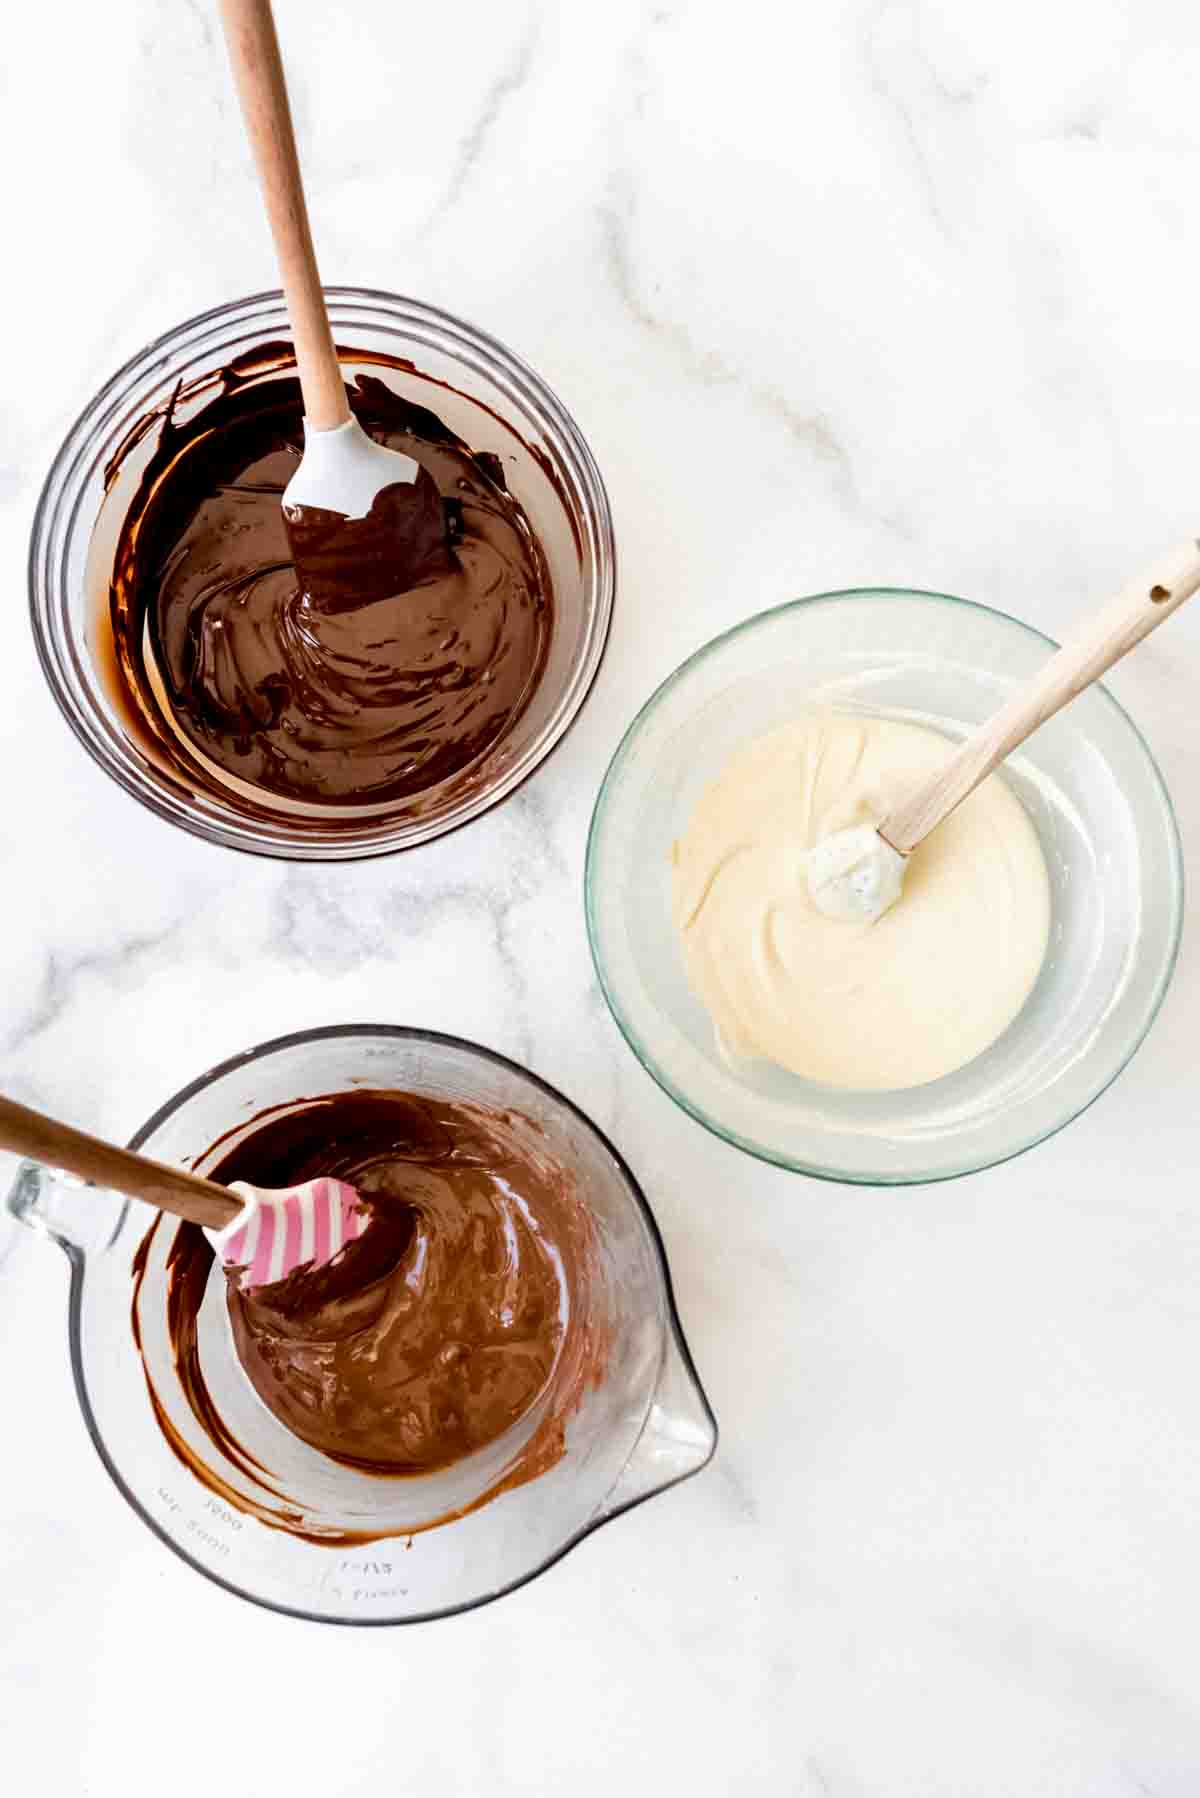
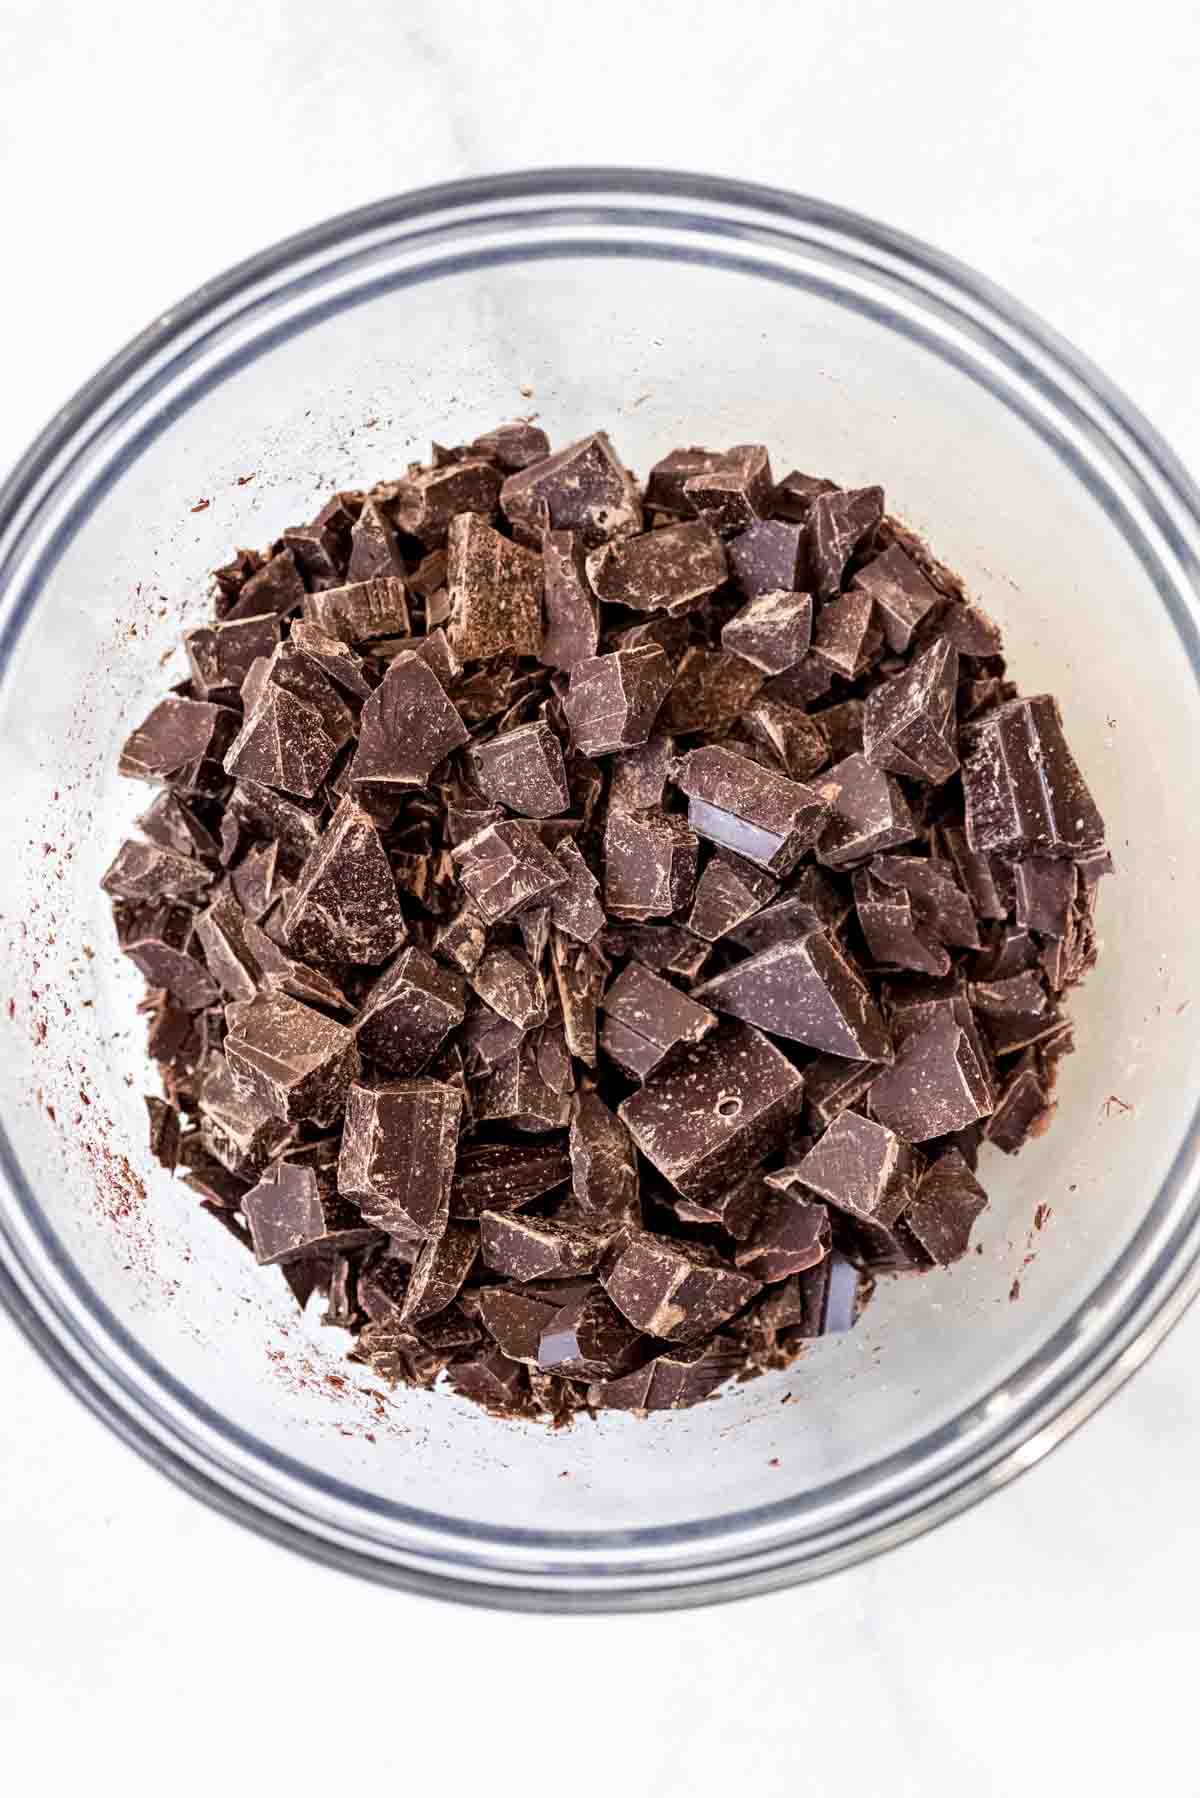
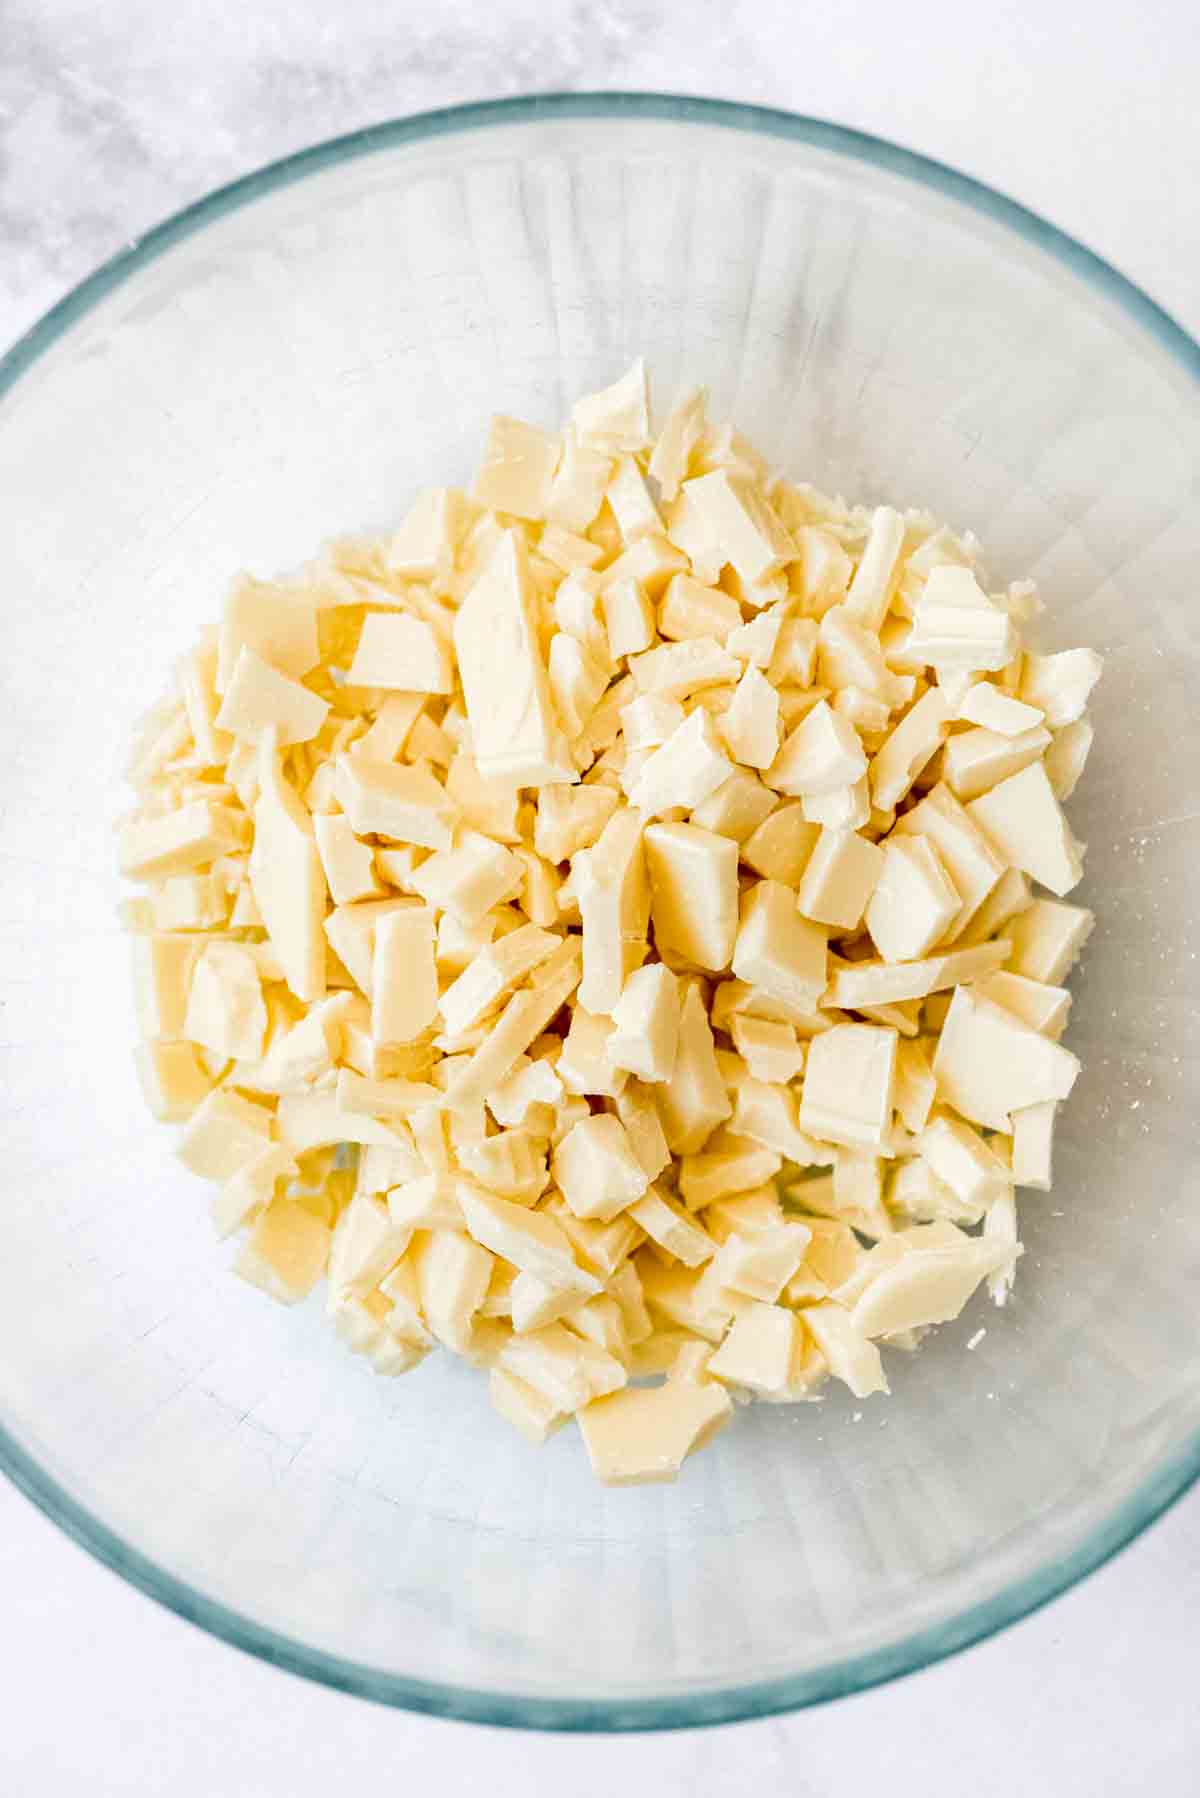
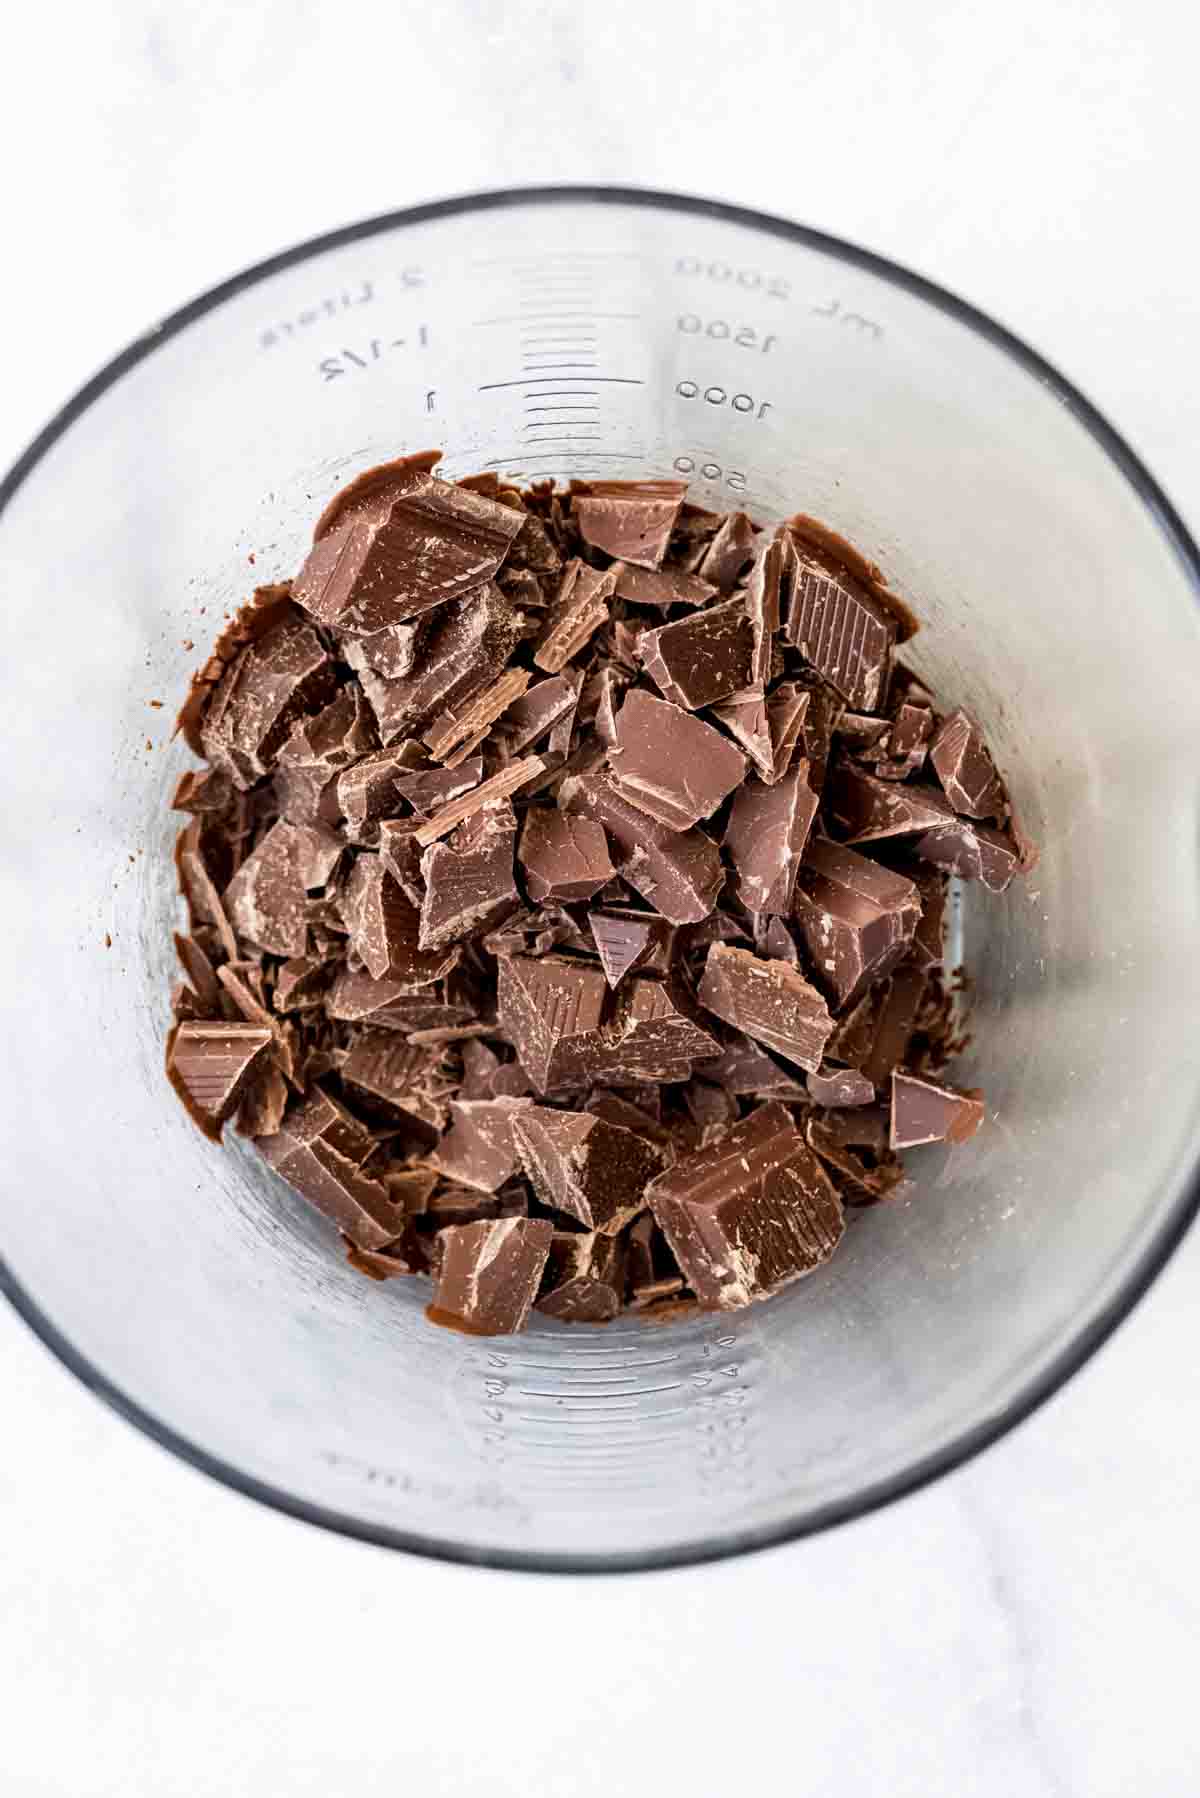
To melt and temper chocolate using the seeding method, start by chopping ¾ of your total chocolate, reserving ¼ of the chocolate for later.
Make a double boiler by transferring the chopped chocolate into a clean, dry bowl. If you have a double boiler, you can use that. If not, a heat-safe glass bowl will work great. The bowl needs to be larger than a pot you can use to boil water on the stove.
Fill a pot about ¼ of the way with water. Bring the water to a low boil, then reduce the heat to a simmer. Set the bowl of chocolate on top. There should be an inch or so between the water and the bottom of the bowl. The water should be hot but not boiling while the chocolate is melting.
When the chocolate starts looking about halfway melted, using a dry rubber spatula to stir the chocolate. The warmer chocolate from the edges will start to melt the cooler chocolate on the inside as you stir. Just be careful not to slosh any water into the chocolate while doing this. You can even take the bowl out of the water and set it on a dry towel on the counter while you stir, then return it back to the water if that helps.
Leave the bowl over the hot water, stirring periodically, until the chocolate is completely melted. It needs to reach 115°F for dark chocolate or 110°F for milk or white chocolate on a digital thermometer.
Try not to let the chocolate go over this temperature, especially if using white chocolate. Otherwise you risk the chocolate seizing up.
At this point, remove the bowl of melted chocolate from the hot water and add the reserved solid chocolate.
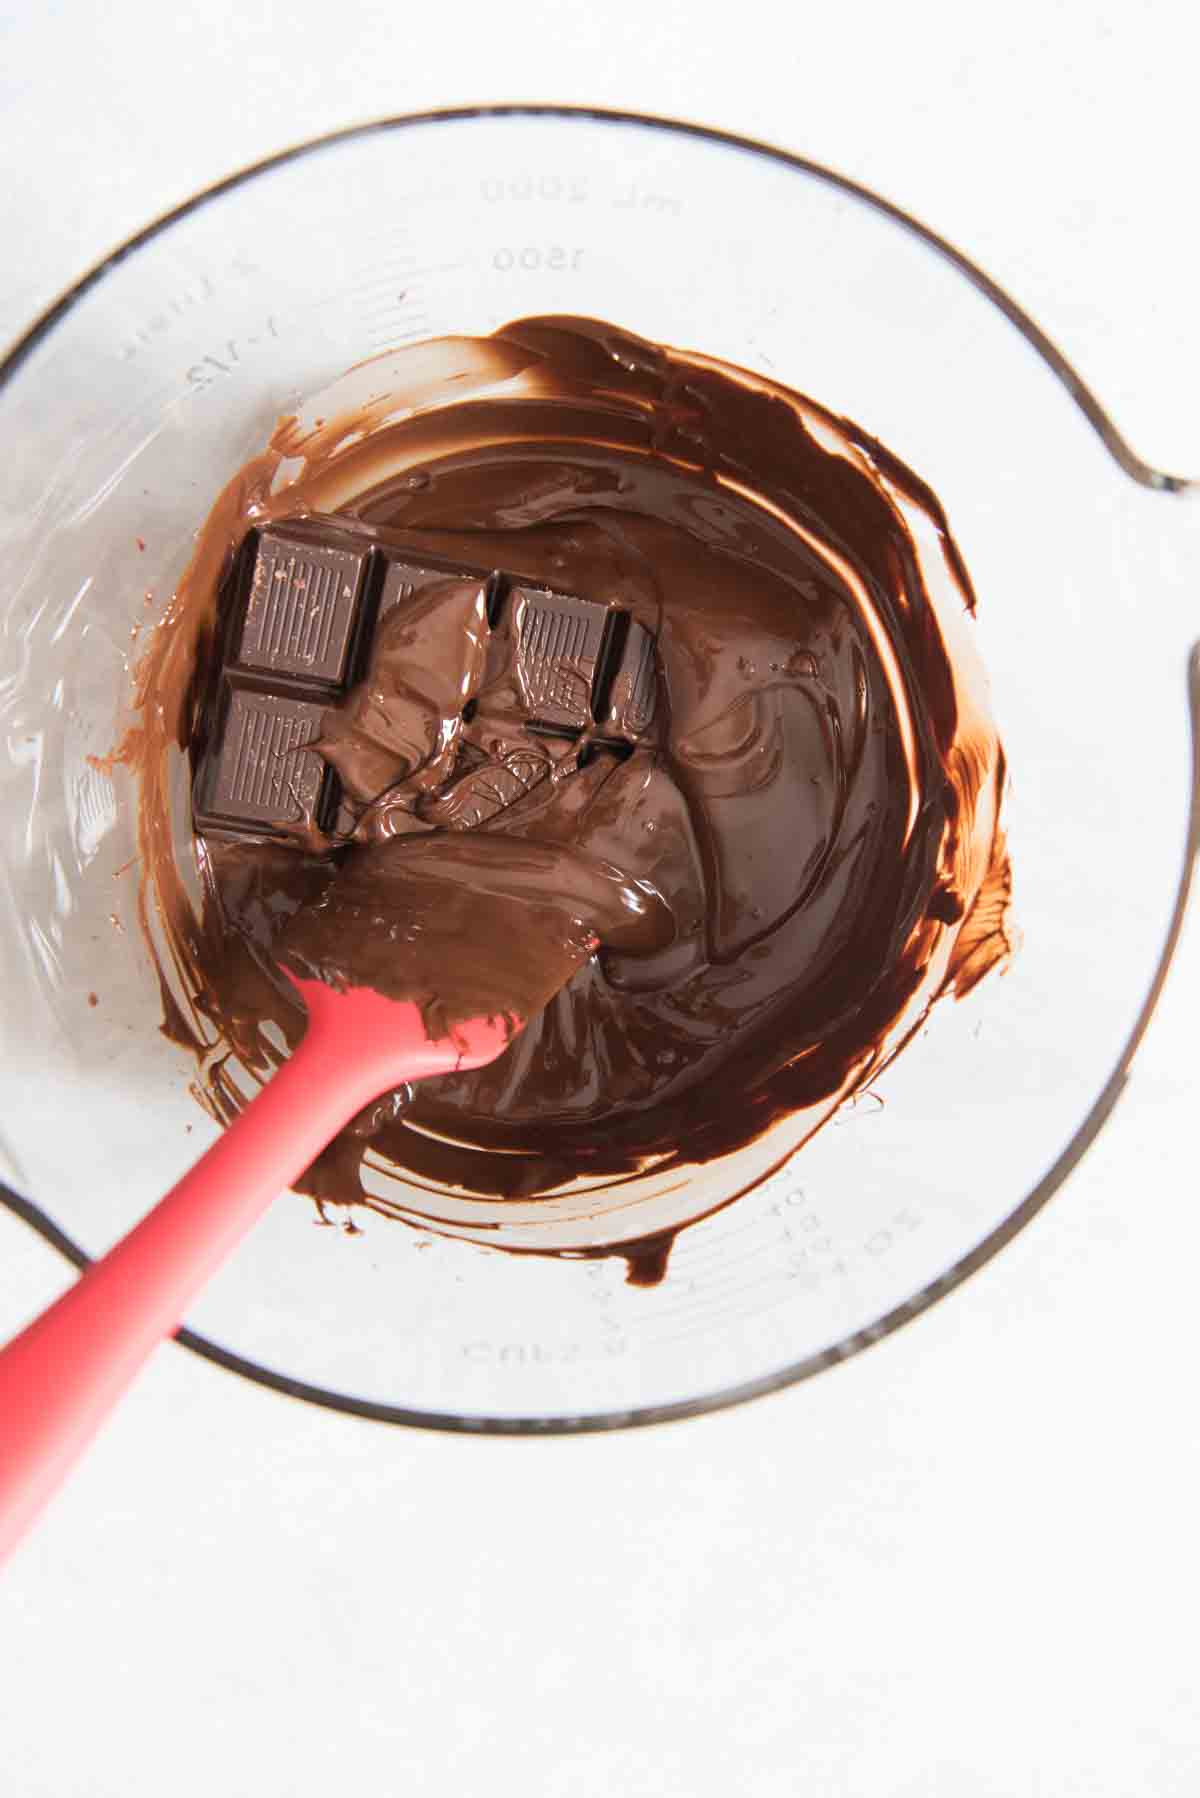
As you stir, the residual heat from the warm chocolate melts the additional hard chocolate that is already in temper. This helps to both encourage the melted chocolate to form the necessary crystalline structure for properly tempered chocolate while gently lowering the temperature of the melted chocolate. The goal is to bring the temperature of the chocolate back down to 90°F for dark chocolate or 87°F for milk or white chocolate.
If you dip your strawberries immediately without “seeding” in the reserved chocolate, you won’t get the same results. It only takes 5-10 minutes to bring the chocolate into temper and there is a science behind achieving the snap and sheen of properly tempered chocolate. Totally worth it and interesting, right? Yay science!
Now for the fun part! It’s time to dip strawberries!
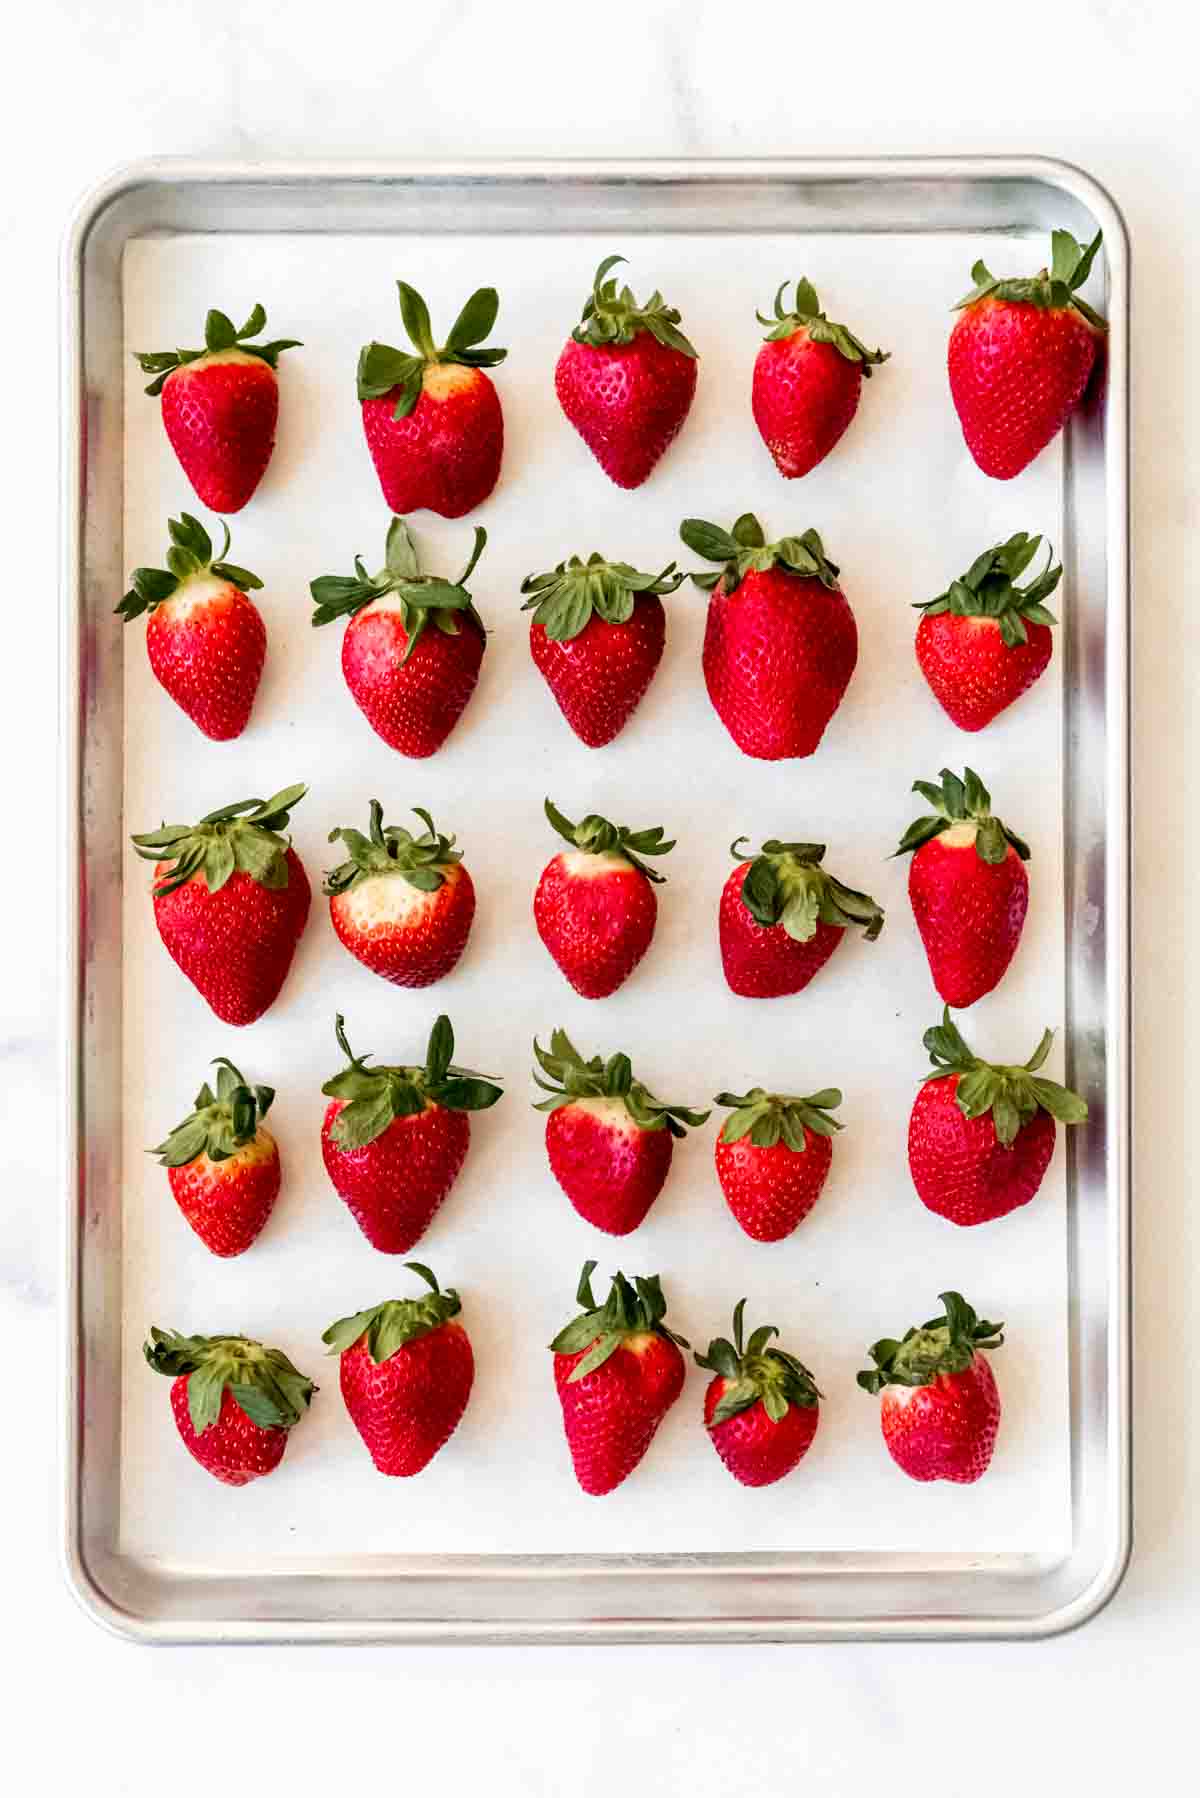
First, start by using room temperature strawberries rather than cold ones straight out of the fridge. Gently wash the strawberries and pat them dry with paper towels. It’s important not to skip this step as any water that gets into the melted chocolate can cause it to seize up. Be sure to use fresh berries and remove any that have soft spots.
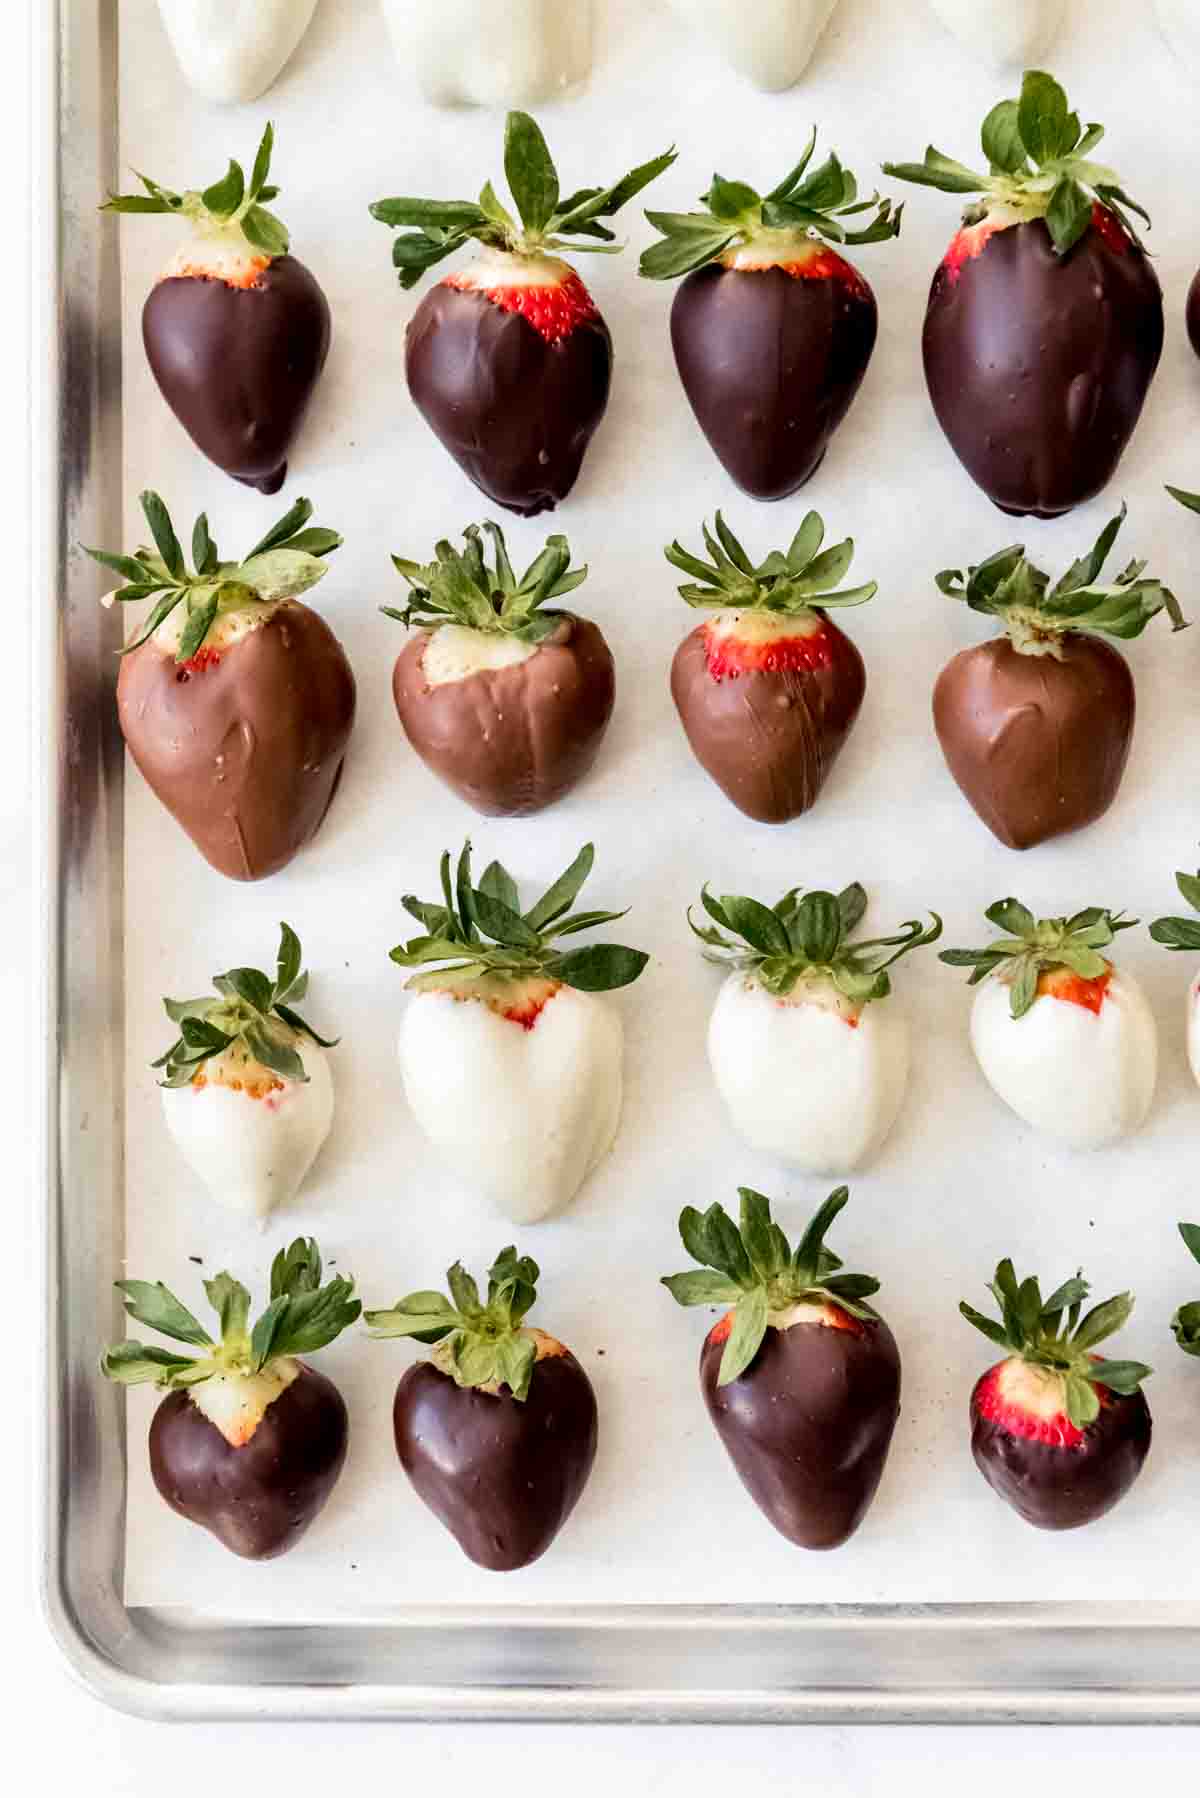
Line baking sheets with parchment paper so the dipped strawberries don’t stick and leave behind precious chocolate once set up.
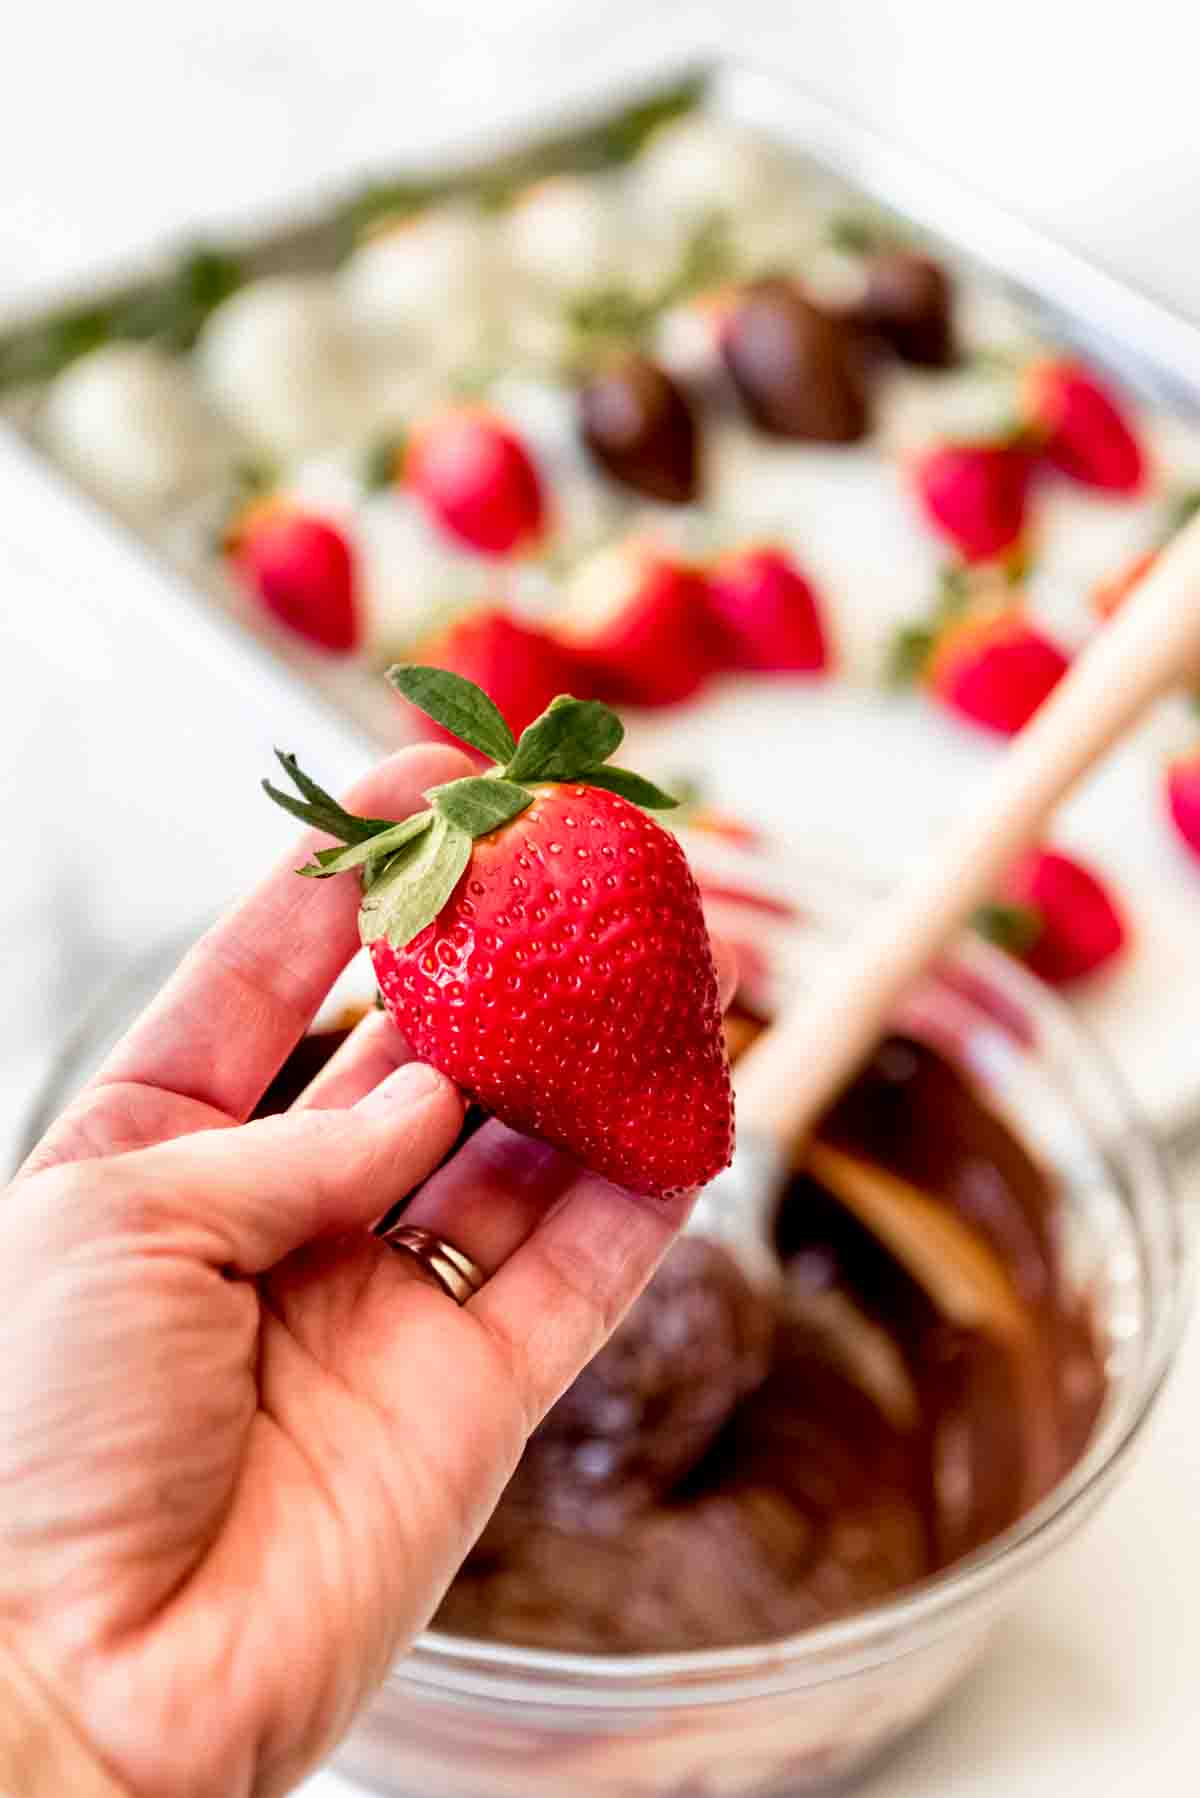
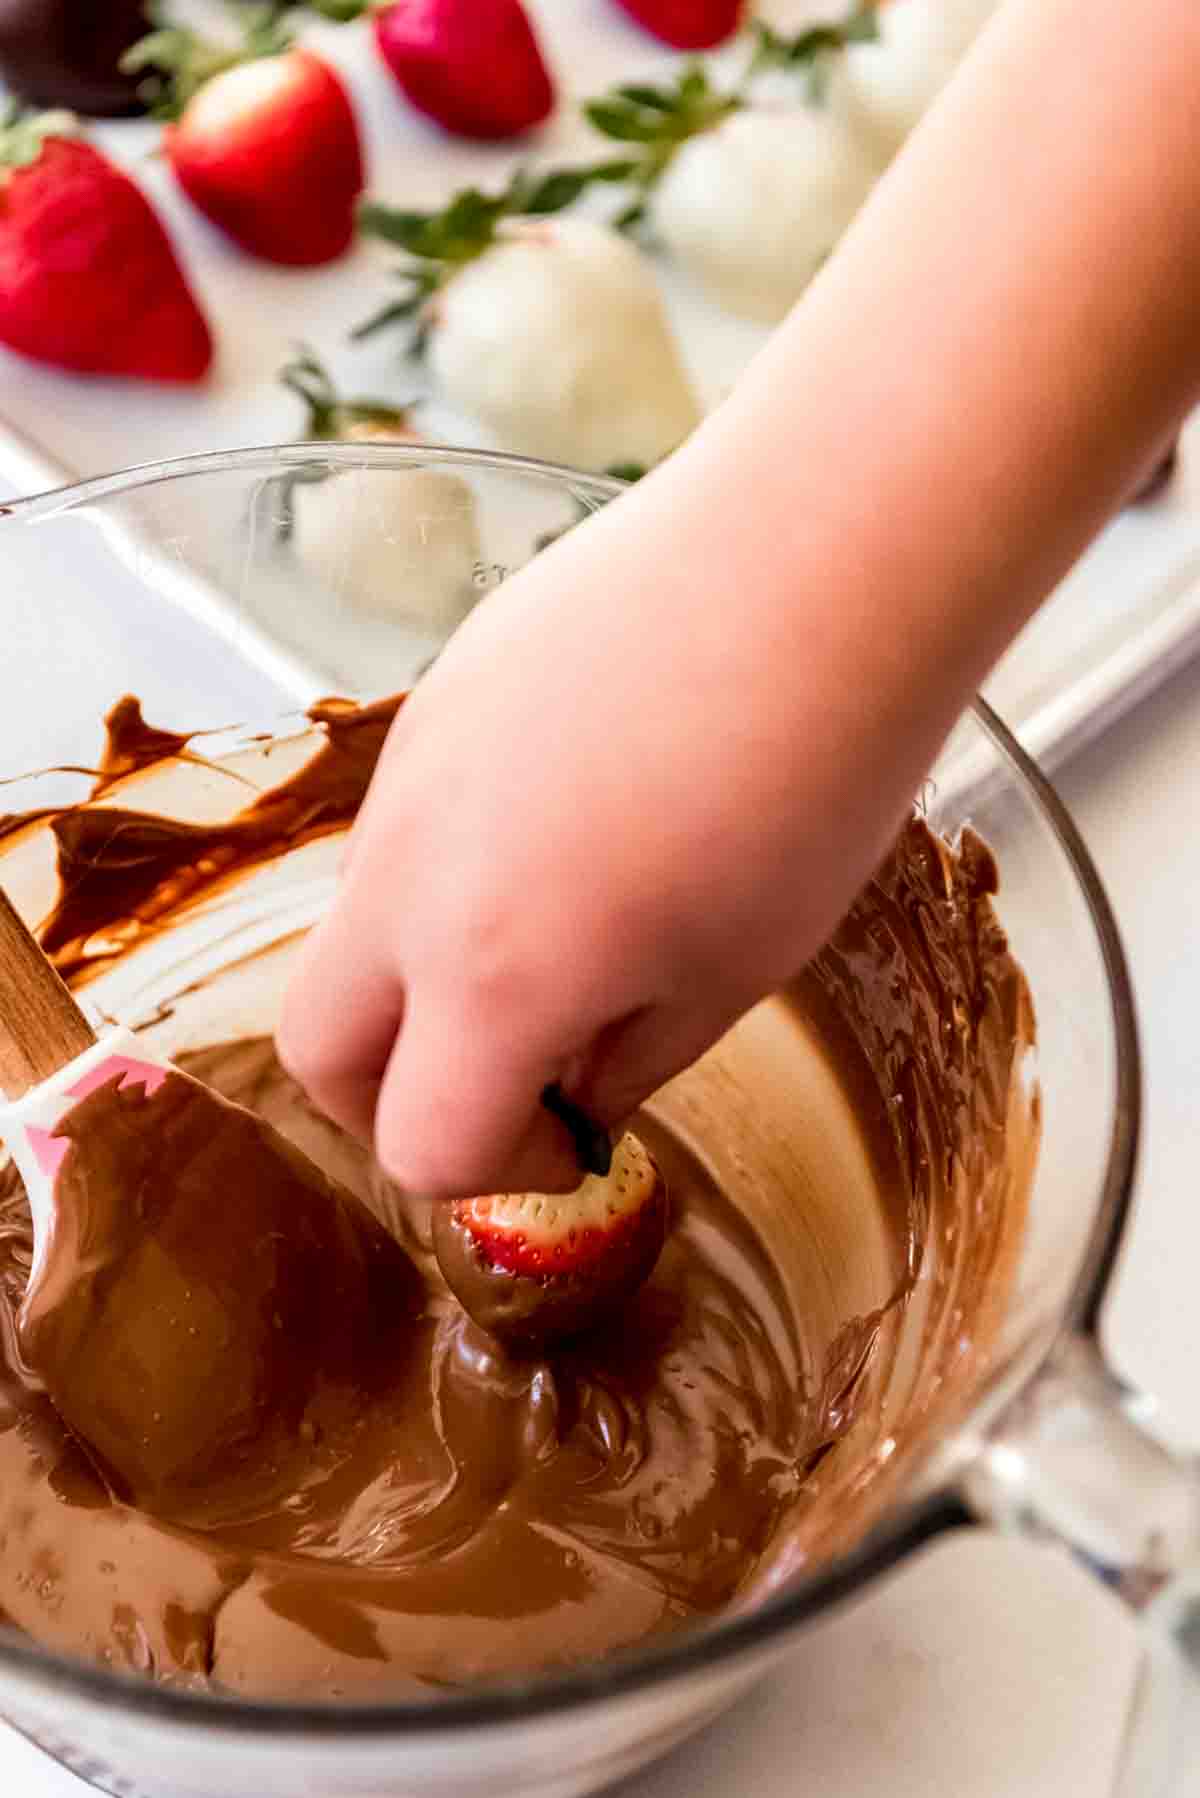
Grasp each strawberry by the top green part and dip it into the melted chocolate. Tilt the berry to coat or spoon the chocolate over the sides. Gently shake or tap off excess chocolate, then transfer to the parchment-lined baking sheet. Repeat with the remaining berries.
What to do if the chocolate starts to get too thick:
As you dip the berries, the tempered chocolate will continue to cool. After dipping a dozen or so berries, it helps to set the chocolate back over simmering water for 30-60 seconds. Stir it to warm it up a bit without bringing it out of temper.
The chocolate should set up at room temperature within about 15-30 minutes, depending on the temperature of the room. I generally find that by the time I’m done dipping all of my strawberries, the first ones are set enough to go back and decorate with the remaining melted chocolate.
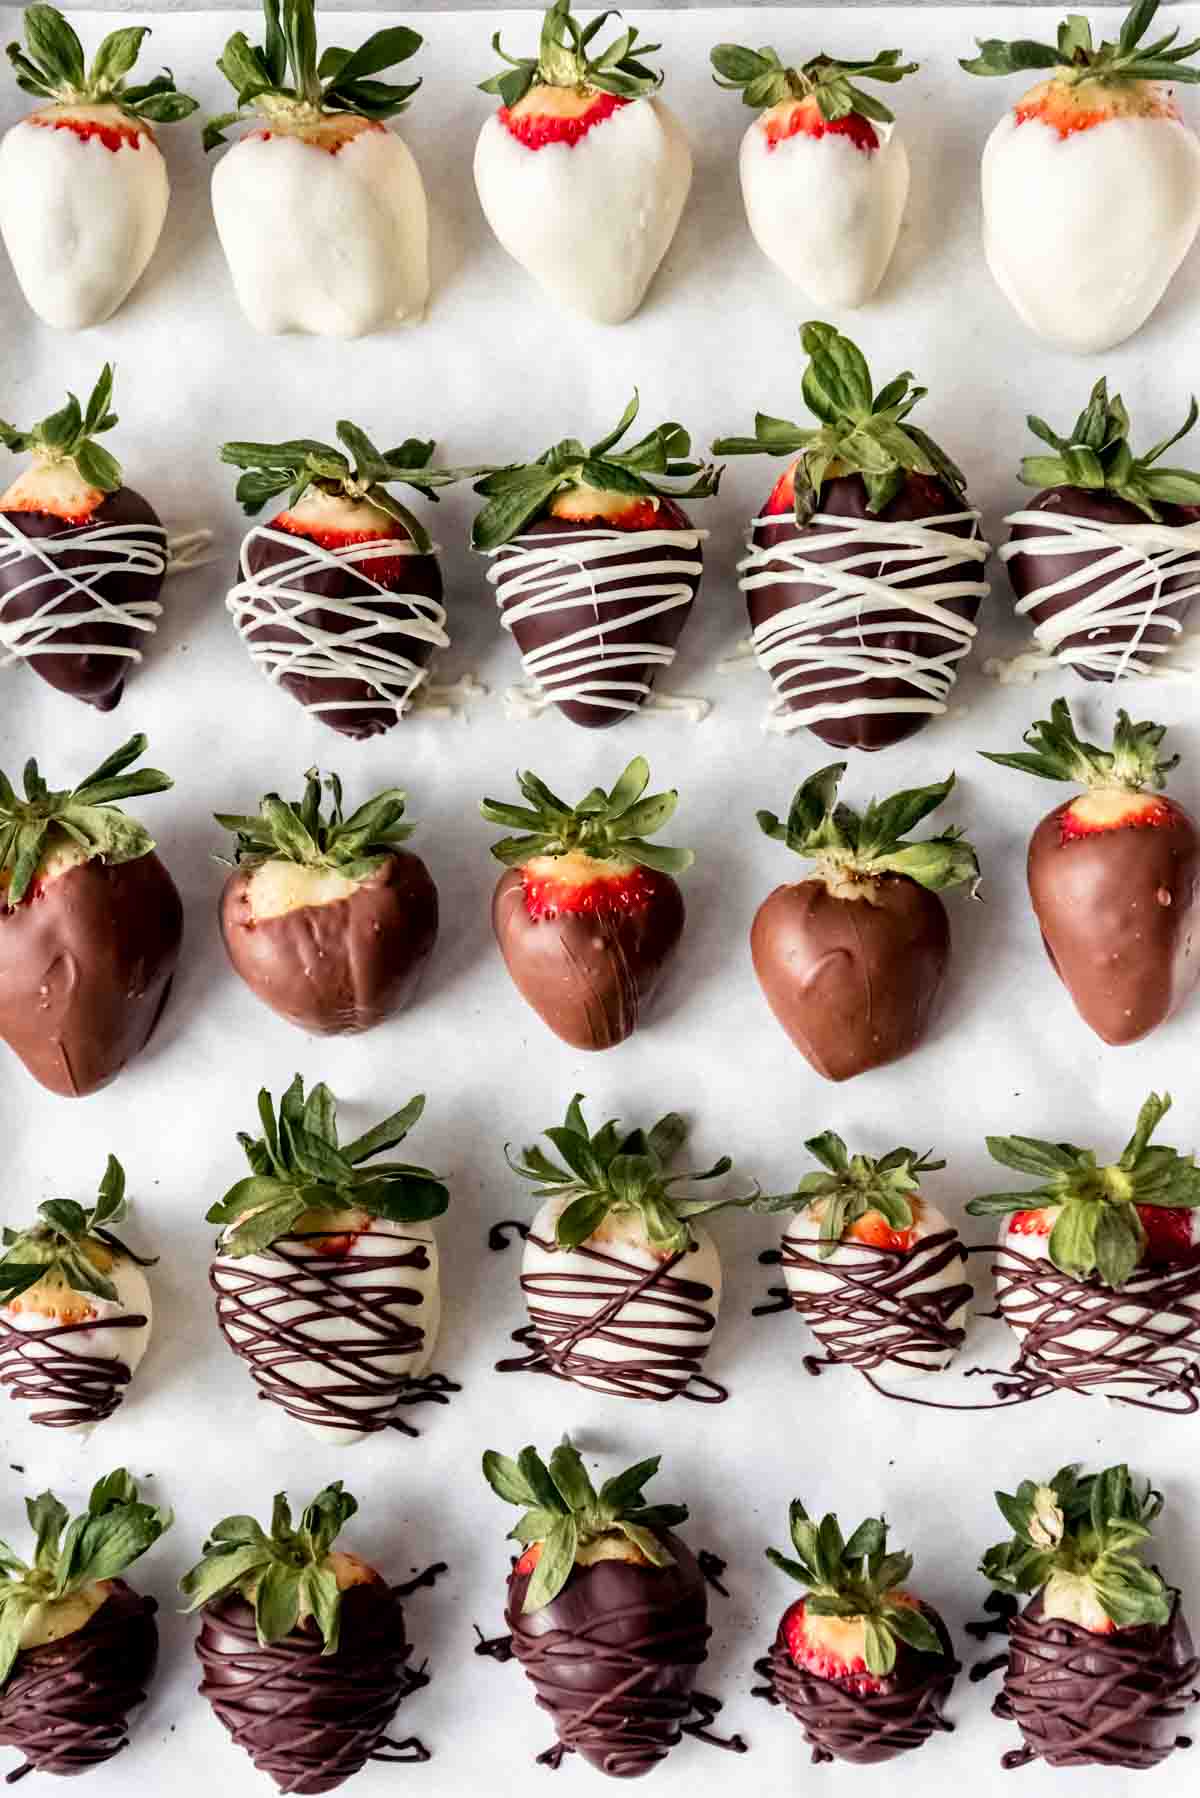
Decorating ideas for chocolate covered strawberries
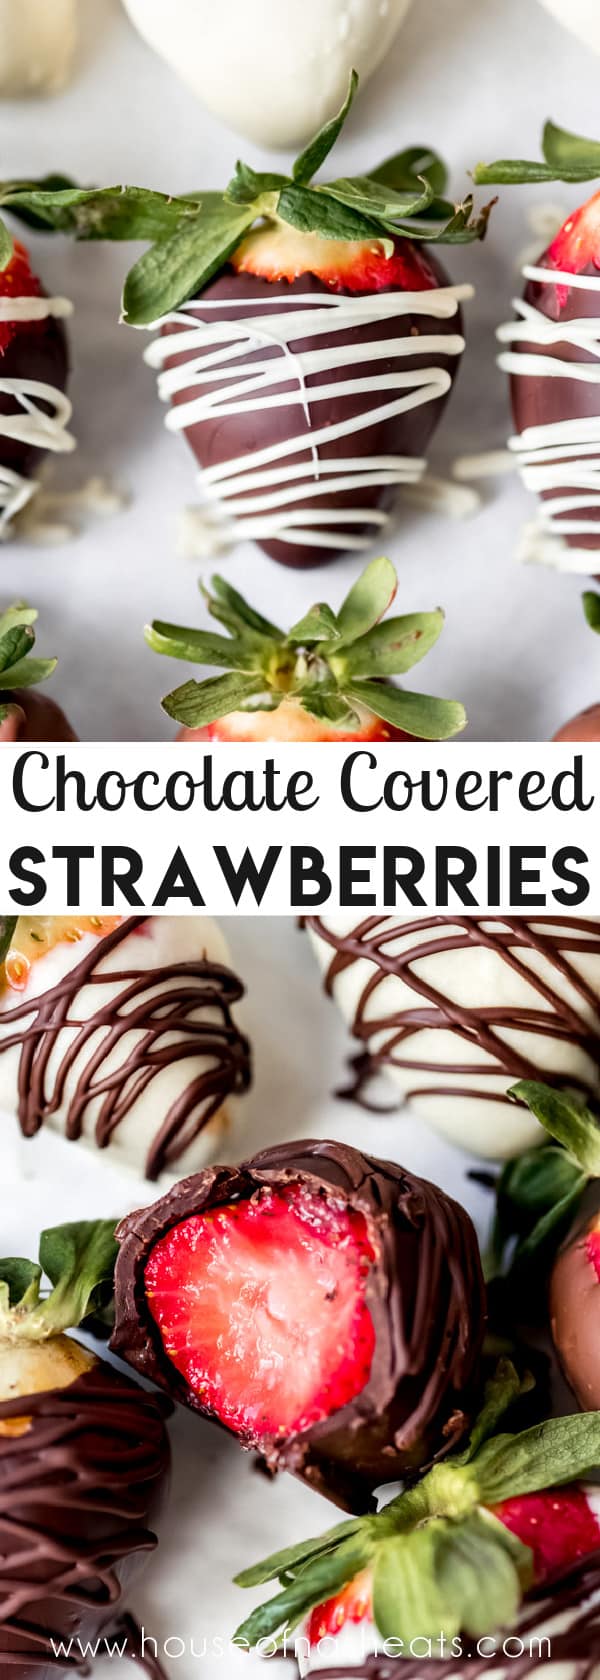
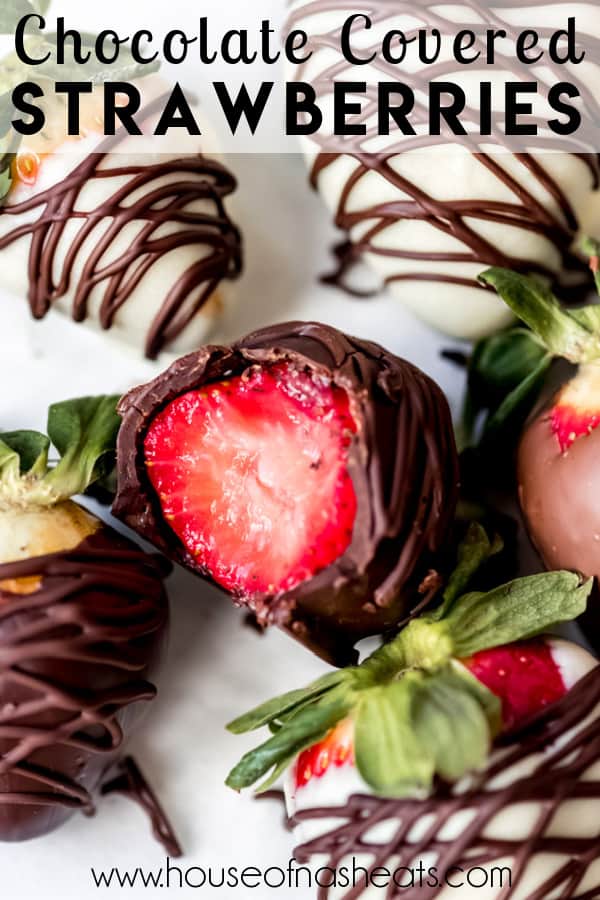
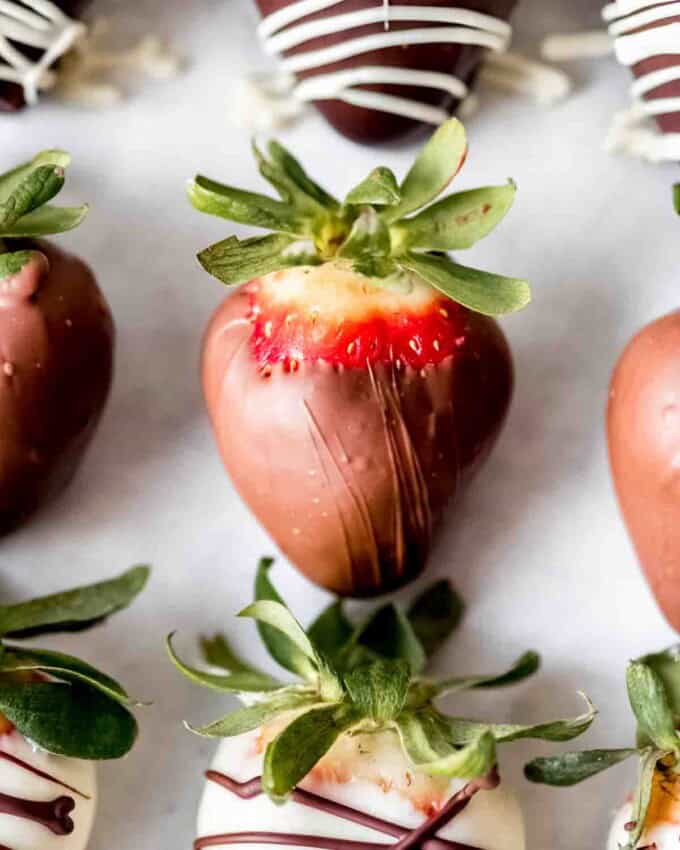
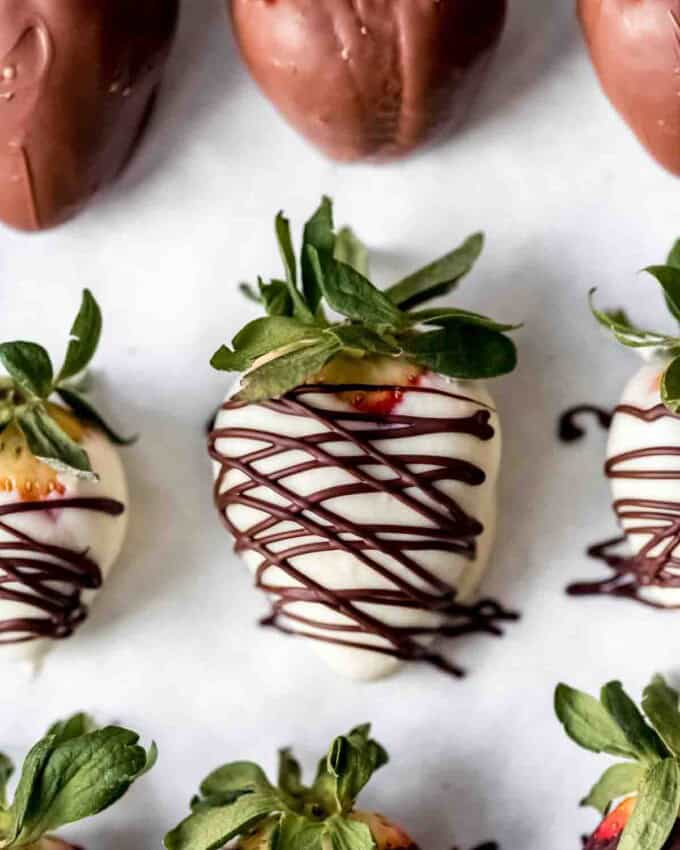
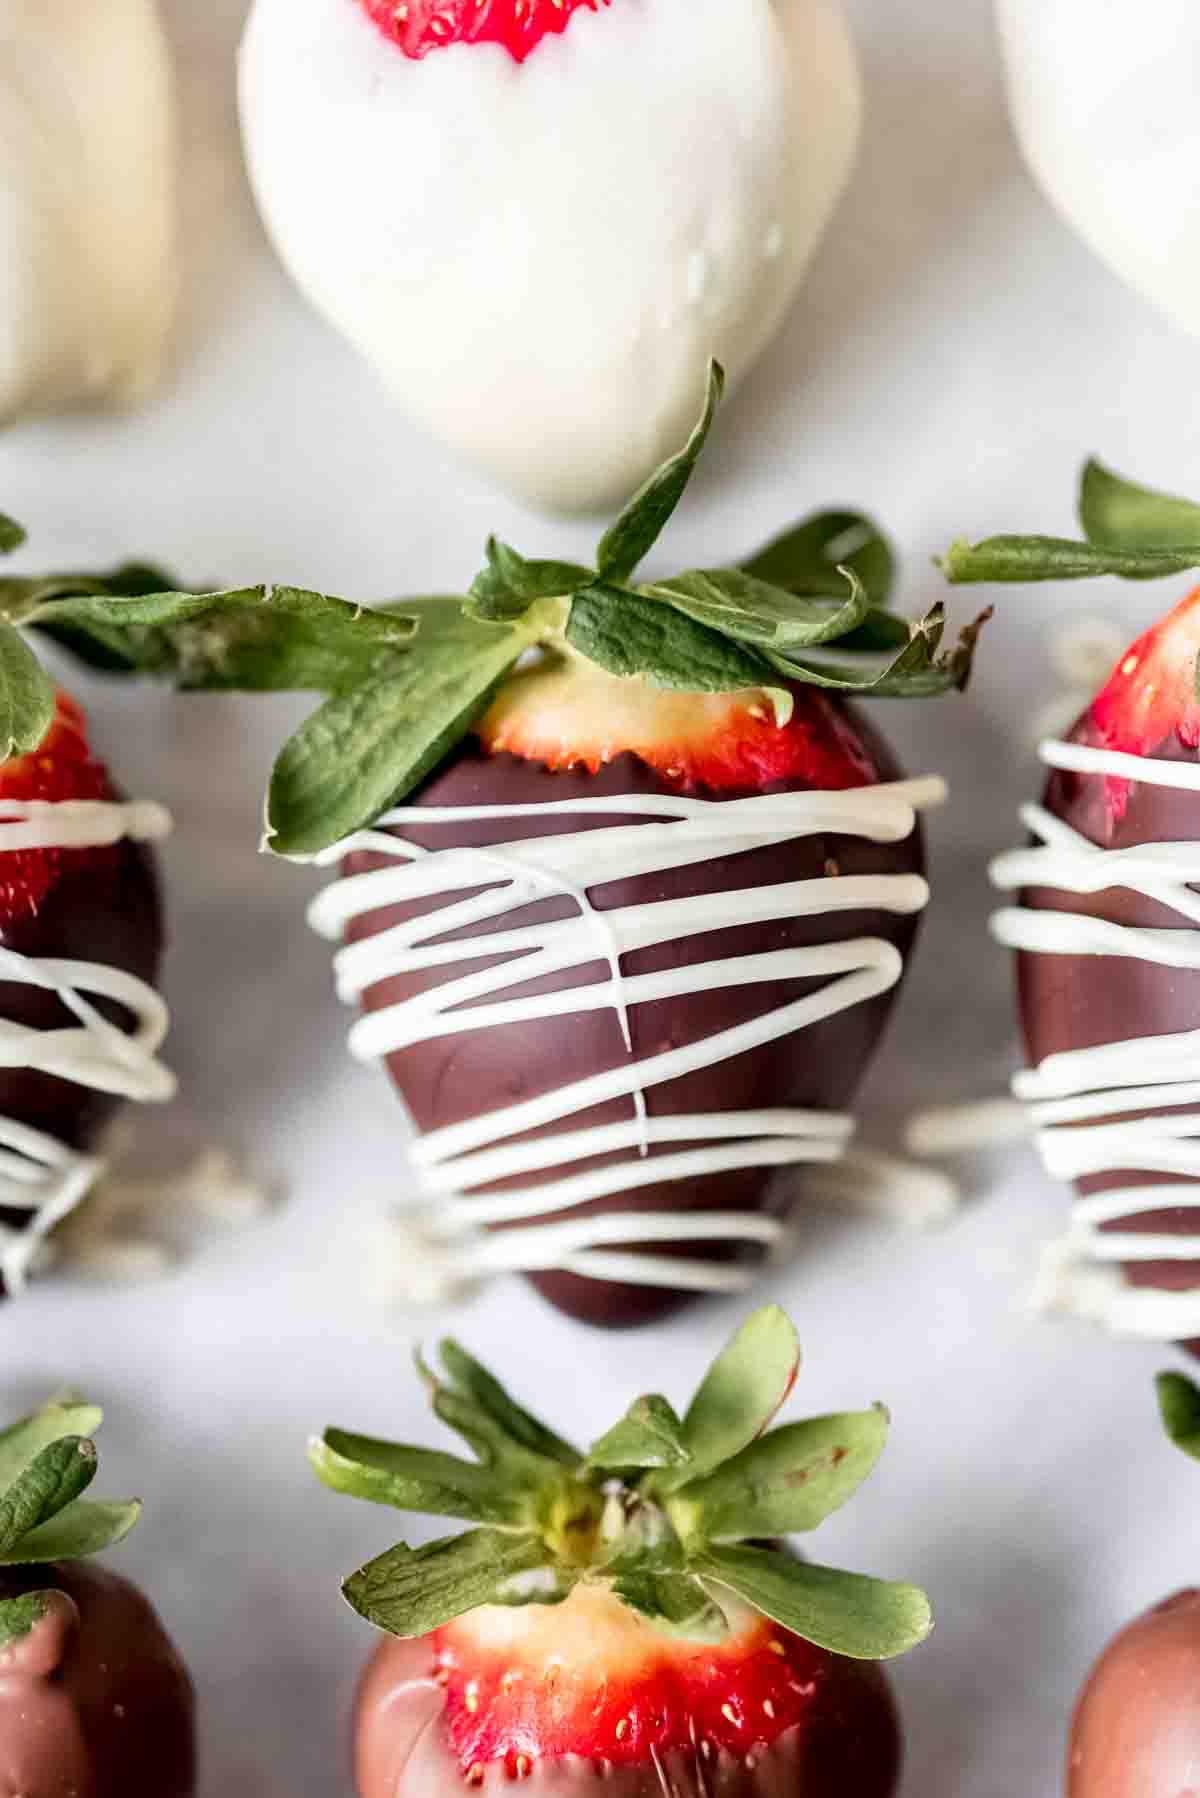
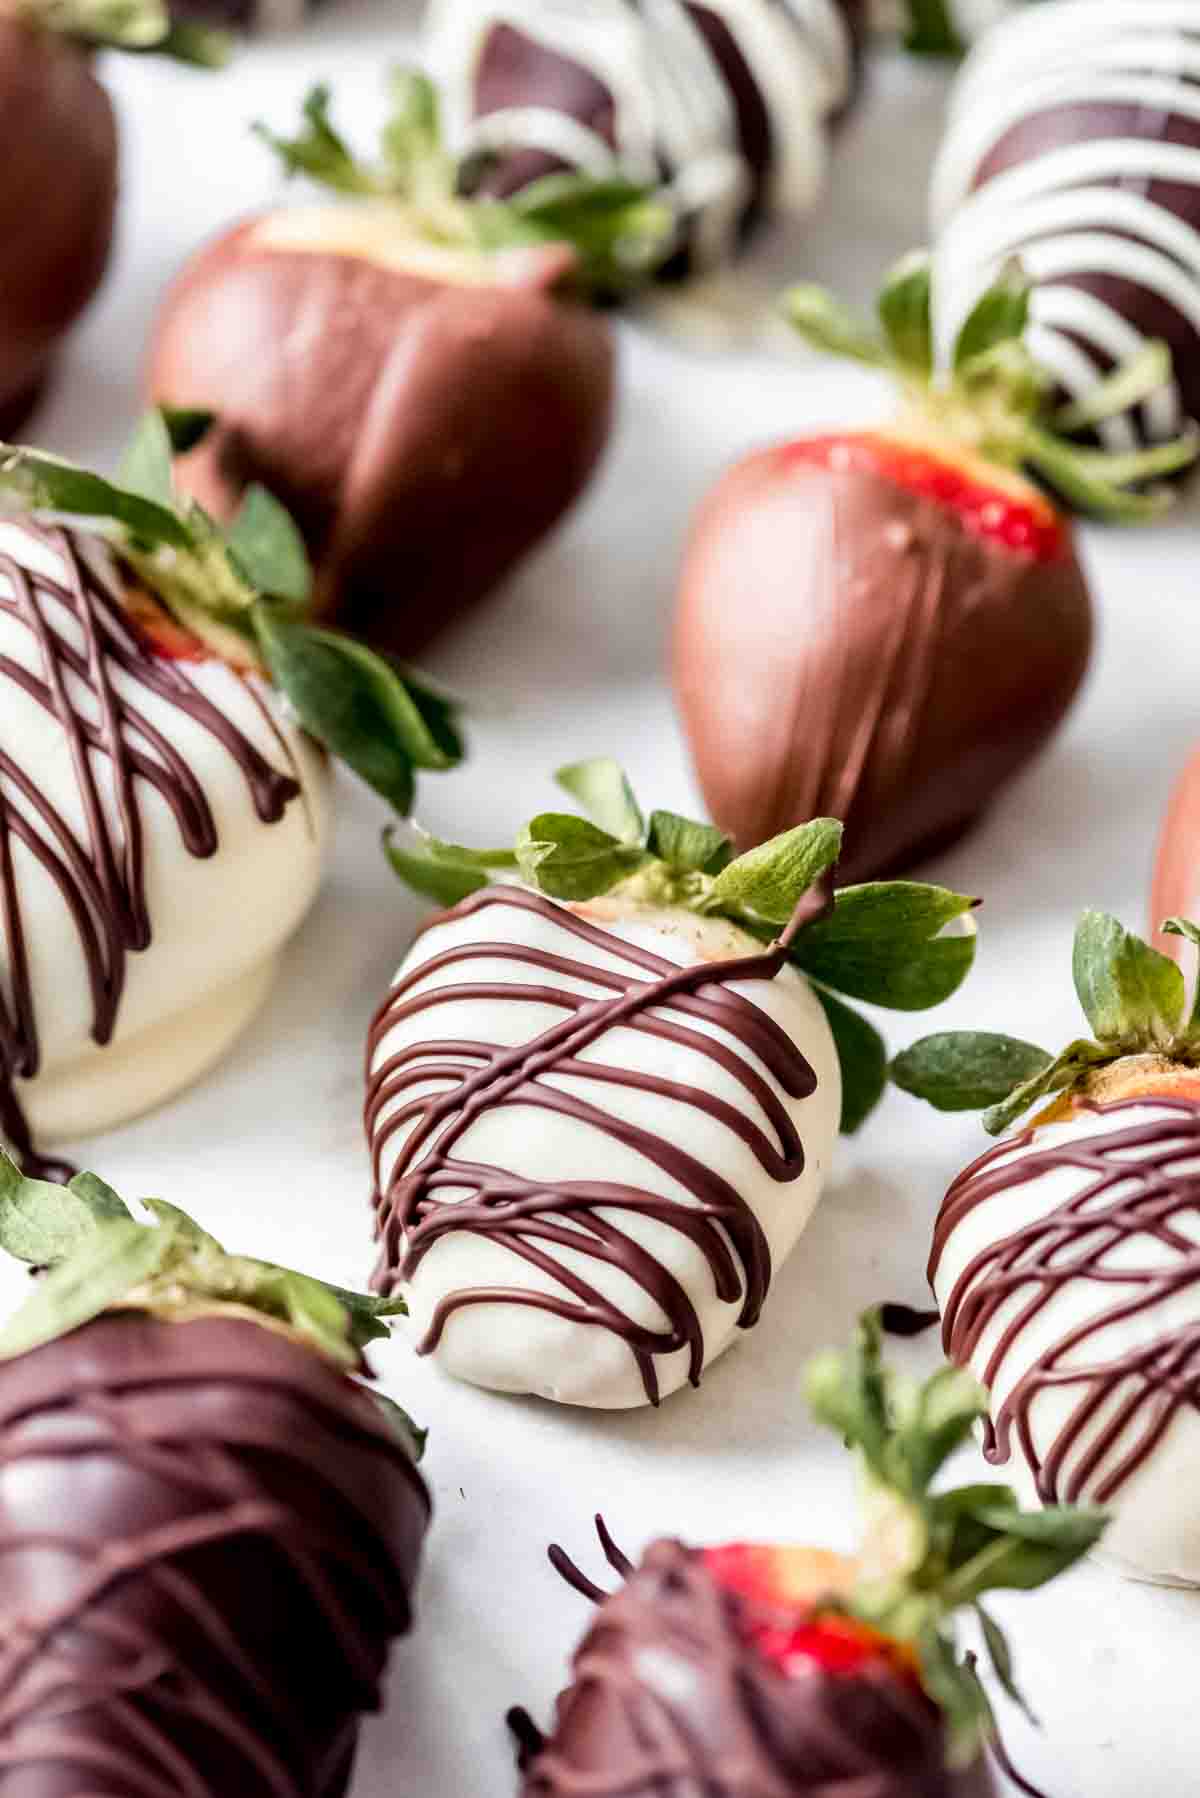
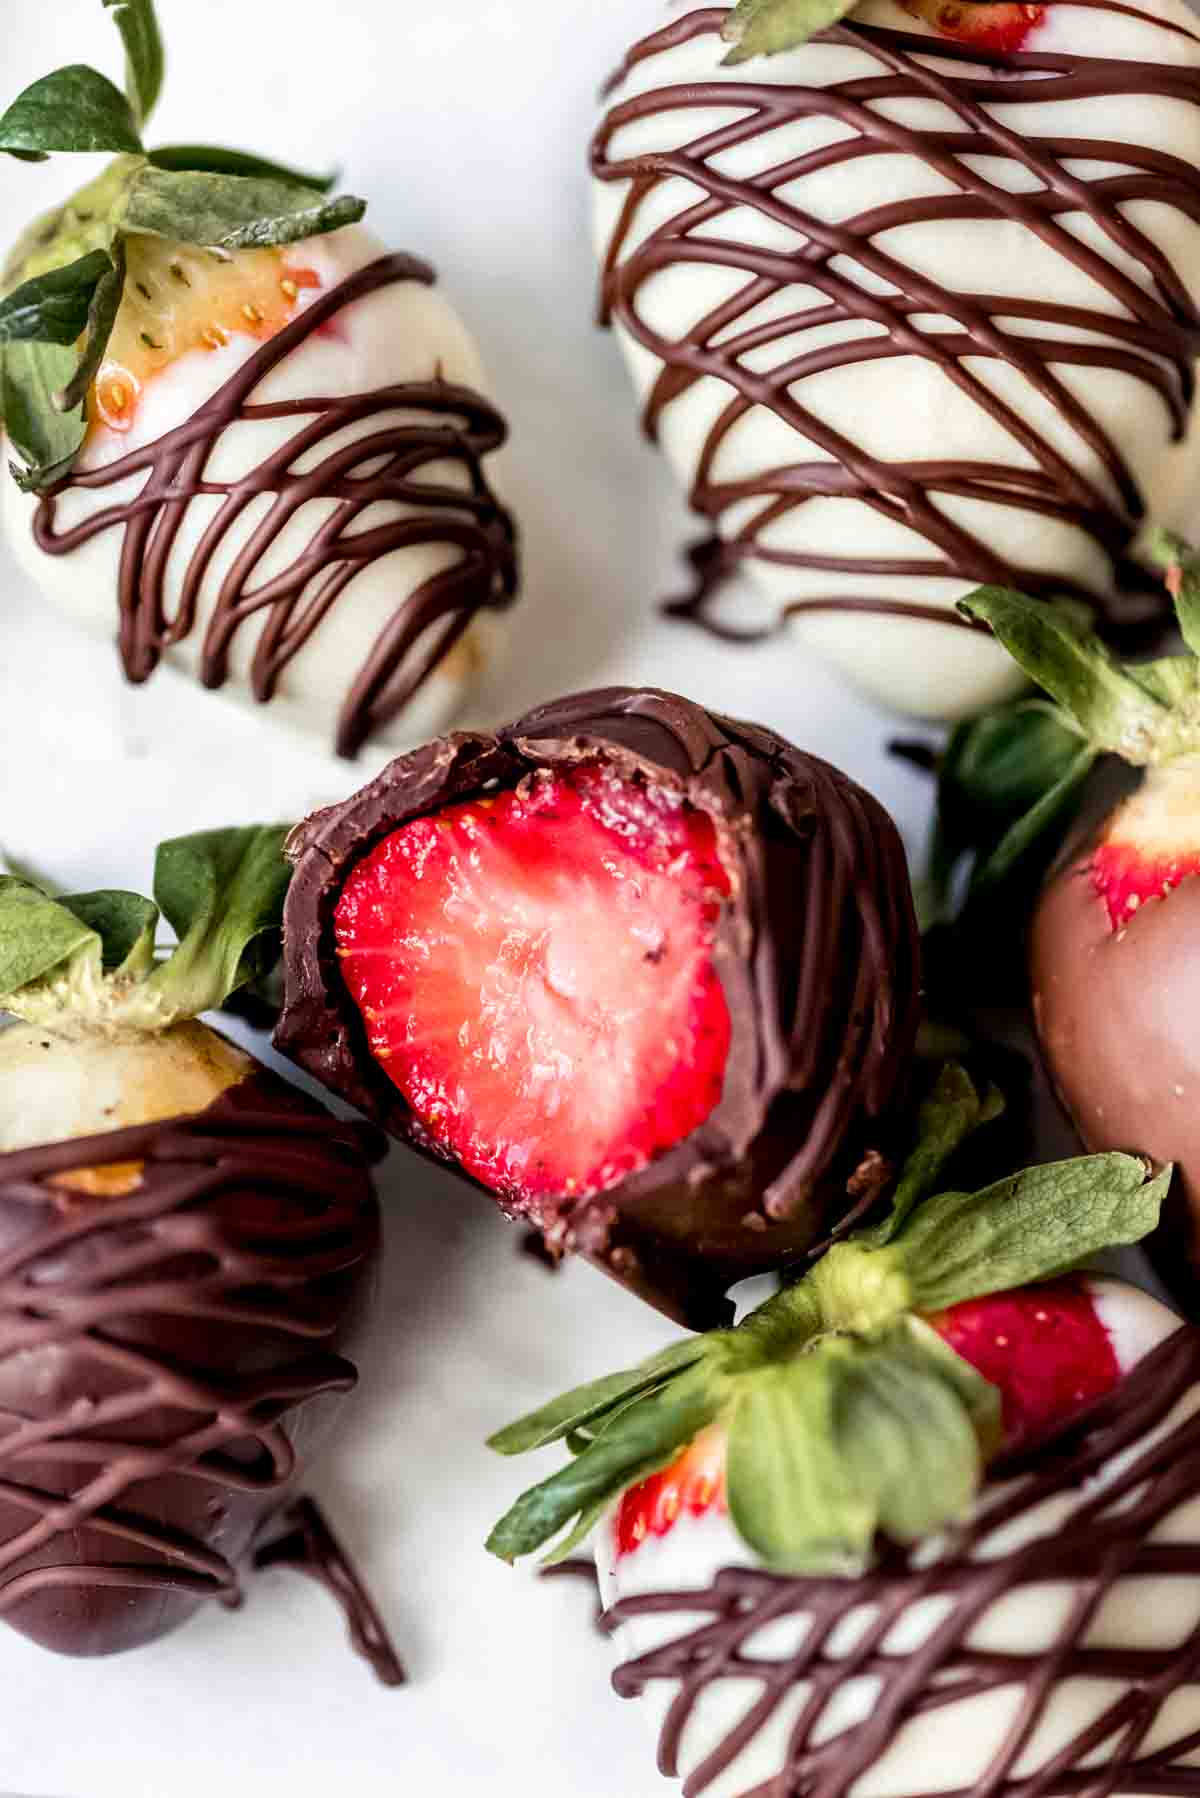
Just dipping large, ruby red strawberries in melted chocolate is enough tempt anyone. A drizzle of additional melted chocolate either in matching or contrasting colors really adds that “wow” factor though.
Take your chocolate covered strawberries to the next level by decorating freshly dipped strawberries with any of these toppings. Think caramel apples, but in strawberry form. Just be sure to add them while the chocolate is still wet before it has a chance to set.
- Mini chocolate chips
- Crushed Oreo cookies
- Graham cracker crumbs
- Sprinkles
- Toasted coconut
- Chopped nuts
- Toffee bits
- Chopped candy bars
Easter Chocolate Covered Strawberries
While we prefer the classic look and flavor of dark or milk chocolate, using pastel pink and purple colored candy melts is popular at Easter time.
Yellow dipped strawberries with little orange piped beaks and chocolate eyes look like chicks! And strawberries dipped in orange candy melts look like carrots!
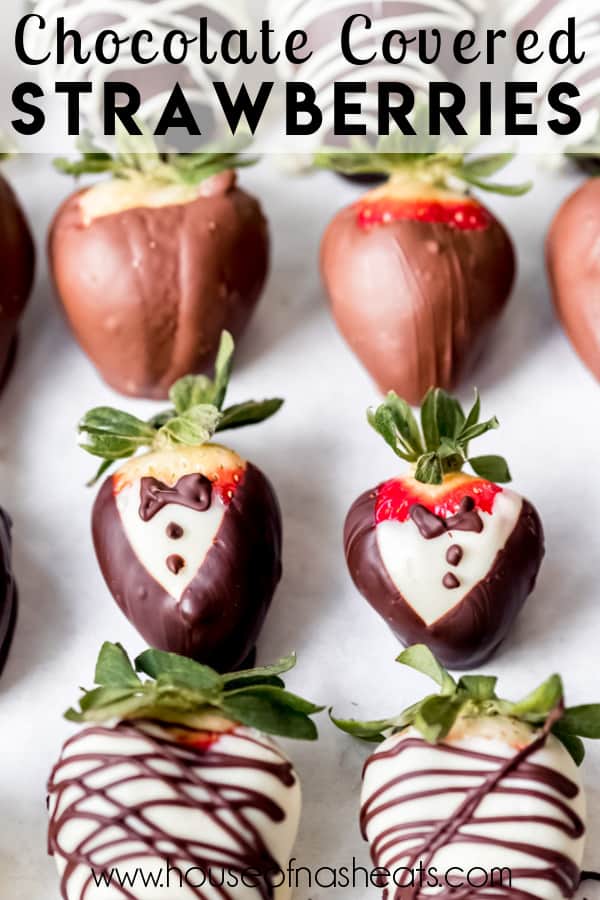
Tuxedo Chocolate Covered Strawberries
I have never been good at making tuxedo strawberries, but I always try a few in the hopes of improving my skills. The trick is dipping the front of your strawberry in melted white chocolate, then dipping each side of the strawberry in melted dark chocolate on an angle to create a “V” shape down the front. Pipe on a few buttons and a bowtie and you’ve got a fun look that never fails to impress! These are perfect for bridal showers, weddings, and other fancy events.

Storing chocolate covered strawberries
It’s really best to enjoy your chocolate covered strawberries on the same day they are made. Really within about 12 hours although they will last up to 24. If your house is cool enough, just keep them uncovered on the counter at room temperature.
You can keep them in the fridge, uncovered, for one day, if you need to make them in advance, but be sure to pull them out at least an hour before enjoying them so they have a chance to warm up a bit. The flavor of both the chocolate and the berries themselves is much better when it isn’t too cold.
Any longer than a day or two and the strawberries start to release moisture. So making these too much in advance is not recommended.
Tips & Troubleshooting for the Best Chocolate Covered Strawberries
- Don’t splash water when melting! Be careful not to get water into your chocolate when melting or it can seize up.
- Use a digital thermometer to check the chocolate’s temperature. It really does make a big difference and takes the guess work out of tempering chocolate.
- Use large, fresh strawberries. The size of your berries will influence the chocolate to fruit ratio. Plus, bigger berries are more impressive for this treat. I recommend getting more strawberries than you need and picking through for just the best ones. Eat the rest plain for a snack or throw them in your cereal!
More Chocolate Recipes for Chocolate Lovers
- Best Chocolate Buttercream Frosting
- The BEST Homemade German Chocolate Cake
- One-Bowl Chocolate Cake Recipe
- Chocolate Peanut Butter No Bake Cookies
- Chocolate-Dipped Almond Biscotti
- Double Chocolate Crinkle Cookies
- Easy Homemade Chocolate Crepes
- Southern Biscuits and Chocolate Gravy
- Raspberry Chocolate Tart
- Best Fudgy Chewy Chocolate Brownie Cookies

Did you make this recipe?
Let me know what you thought with a comment and rating below. You can also take a picture and tag me on Instagram @houseofnasheats or share it on the Pinterest pin so I can see.
Chocolate Covered Strawberries
Ingredients
- 2 pounds strawberries washed and patted dry
- 1 pound high quality dark, milk or white chocolate
Instructions
- Line a couple of baking sheets with parchment paper. Gently wash the strawberries and pat them completely dry with paper towels. Fill a medium pot about ¼ full of water and bring to a low boil, then reduce to a simmer.2 pounds strawberries
- Chop the chocolate with a sharp knife. Place ¾ of the chocolate into the top of a double boiler or heat-safe glass bowl that is larger than the pot you plan to use. Keep the remaining chocolate in reserve.1 pound high quality dark, milk or white chocolate
- Place the bowl of chocolate over the simmering water. The water shouldn’t touch the bottom of the bowl. Gently stir the chocolate with a dry rubber spatula, being careful not to let any water get into the melting chocolate.
- Once the chocolate has melted, use a digital thermometer to check its temperature. Once it reaches 115°F (for dark chocolate) or 110°F (for milk or white chocolate) remove the bowl from over the water.
- Add the reserved chopped chocolate to the melted chocolate. Stir while the chocolate melts and the temperature gently lowers to 90°F (for dark chocolate) or 87°F (for milk or white chocolate).
- Once the chocolate is tempered, dip your strawberries into the tempered chocolate one at a time. Hold them by the leaves or stem at the top of the berry, then dip to evenly cover the majority of the berry, avoiding the leaves. Gently shake the dipped strawberry to get rid of excess chocolate so it won’t puddle as the chocolate sets. Transfer the chocolate covered strawberries to the parchment-lined baking sheet and repeat with the remaining strawberries.
- When properly tempered, the chocolate will set within about 20 minutes at room temperature (unless the room is very warm). Store on the counter or in the fridge for up to 12-24 hours. Chocolate covered strawberries are best served at room temperature on the day they are made.
Notes
- Testing for temper: You can test whether your chocolate is in temper by spreading a small amount of it onto a piece of parchment and letting it sit at room temperature. It will start to set and lose some of its glossy shine, taking on a more matte look within about 4-6 minutes if in temper.
- What to do if the chocolate is cooling down too much while dipping: If the temperature of the chocolate falls below the 85°F range while dipping, set the bowl back over simmering water for 30-60 seconds to let the chocolate at the bottom of the bowl warm up a bit, then stir it again to mix the warm chocolate from the bottom with the cooler chocolate on top.
- What to do with leftover chocolate: There is always some extra chocolate from dipping since you will reach a point where there just isn’t enough to evenly and coat the large strawberries. You can pour the remaining tempered chocolate onto parchment paper in a bar shape, then store it in a cool, dry place to be used the next time you want to temper chocolate. Or use it to dip truffles or pretzels or almonds or whatever else sounds yummy!
Nutrition
This post was originally published in May, 2017. The photos and content were updated in February, 2021.


Delicious idea Amy!
This is AWESOME. Usually when I see stuff like this, it features some sort of quick-fix easy chocolate sauce or spread. Frankly, that doesn’t really do it for me. But when I saw that you gave detailed and highly useful information on tempering chocolate (an essential kitchen skill for any chocolate lover, in my opinion), I was pretty psyched. You’ve done an amazing job with this resource – kudos.
Great tips on keeping your chocolate at the right temperature for tempering! I did temper chocolate for a recipe once but I need to do it again sometime. Everything’s better dipped in chocolate!
Simple and delicious 🙂
I am the queen of seizing chocolate. Seriously. My best chances are when I microwave it in 15 second bursts, stirring between each nuke. Every time I do the double boiler method — it invariably seizes up — just one drop of water (or steam) and it’s done. This sounds like an interesting way to temper it — I like the “seeding” and I get the science… Will have to try this method.
This was super helpful. I didn’t know there was science behind tempering chocolate. I thought the goal was just to melt it. Thanks for this, saving this for reference!
Wow! Your instructions for tempering chocolate are bang-on amazing! I learned how to temper chocolate at culinary school and I remember it being such a process that first time, and after you get a feel for it, it’s really no big deal and sure does make a world of difference in the finished product!
I always wondered how to temper chocolate! You make it seem so doable! I also love chocolate dipped strawberries and have paid ridiculous amounts of money for them! Now, I know that I can make my own. Just in time for Valentine’s Day!
What great instructions on tempering chocolate – thank you!! And I hear ya, sometimes those little babies can be prrriicceeyyy but when you want that undeniably delicious taste of a chocolate covered strawberry, you’ve just gotta give in! Not when you can make your own now though, thanks to your great recipe!!
What a fantastic tutorial on proper chocolate tempering techniques. I remember when I was first starting out cooking, I figured that I would just melt down some chocolate chips on their own, in the microwave, and dip my strawberries in them. That didn’t turn out well at all. haha. I love the glossy sheen properly-tempered chocolate has. Your strawberries are gorgeous!
Ive never used this seeding method…. which probably explains why my dipped truffles are just not quite right. Your instructions are so clear and specific Im going to make chocolate dipped strawberries and truffles for Valentines day for my husband… I’m looking forward to being happy with the appearance and the deliciousness of both of them!
They look just perfect and ideal for Valentine’s day which is rapidly approaching! Love the tips for properly tempering chocolate. It is always SO worth buying good quality – the cheap stuff is simply not worth the calories.
Such a perfect dessert for Valentine’s Day or for anytime for me, since they are a favorite of mine! So simple, but so elegant. Lovely photos in this recipe and now I HAVE to make these for Valentines!
Perfect for garnish or just to eat by themselves!
This is the perfect recipe!! The chocolate breaks when you bite into it, and tastes so much better than when using the bark I have used in the past. Loved them!!
How can you go wrong with chocolate and strawberries? They look amazing.
These are something I’ve never made, but always enjoy eating! I should give them a try soon. I love the ones with the little tuxedos.
It’s been way too long since I’ve had a chocolate-covered strawberry! Probably because there have been no parties or gatherings over the past year! Perhaps I’ll just have to make a few of these to eat by myself!!!
I admit, tempering chocolate is intimidating. Your tips and tricks are fabulous. I’m saving this post!
Chocolate and strawberries just go together so well. I need to get some of both and make these for the hubby (ok more for me than him)!
Looks like I need to head to Trader Joes to grab that chocolate. The berries are beautiful!
My husband always buys me a couple chocolate covered strawberries for Valentine’s Day and Mother’s Day. This year, I’ll be sending him your recipe… wonder if he’ll attempt it! 🙂
I can’t wait until strawberries are in season so I can make these, they are so pretty and you are sharing great tips for the perfect chocolate covered strawberries.
I love all your tips! I have never made these before and I know all of this will be helpful when I make these for valentine’s day!
I love that these are two-toned chocolate! Perfect for any special occasion.
The epitome of love and romance…..chocolate covered strawberries. YUM