
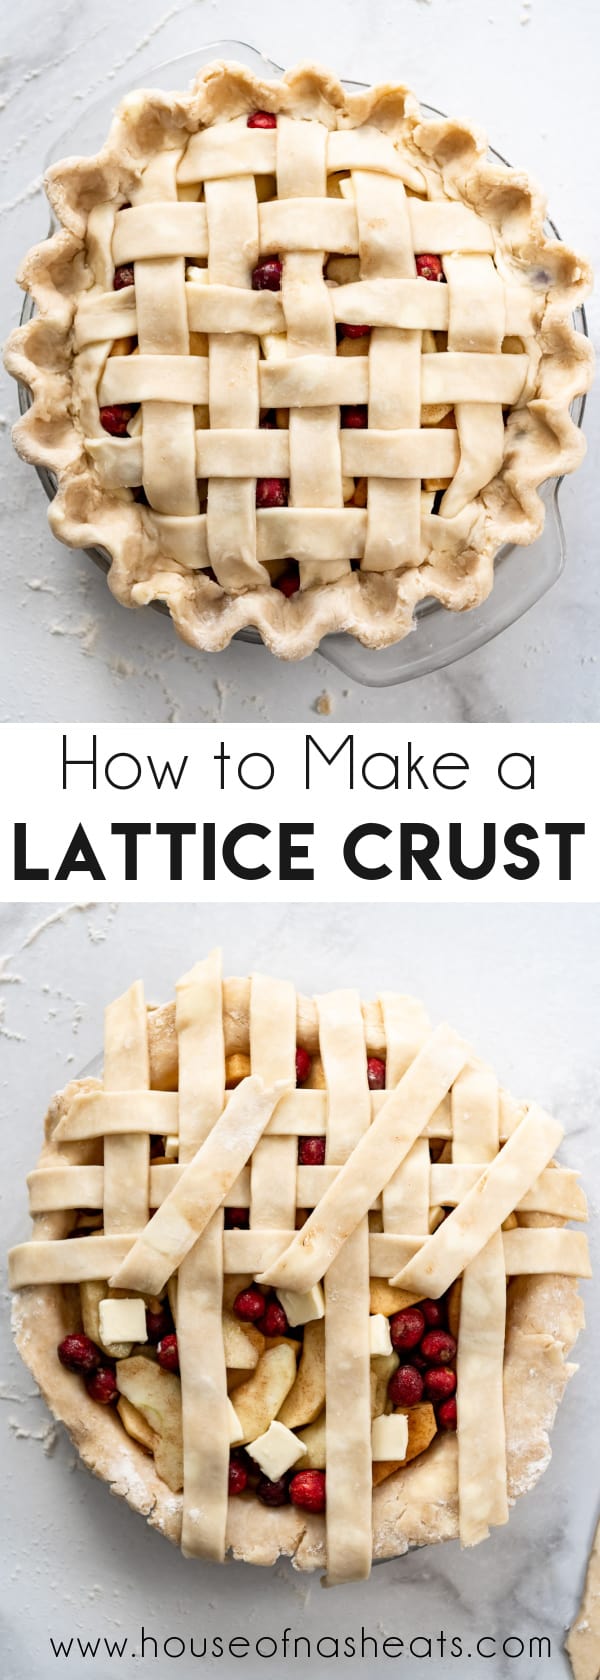
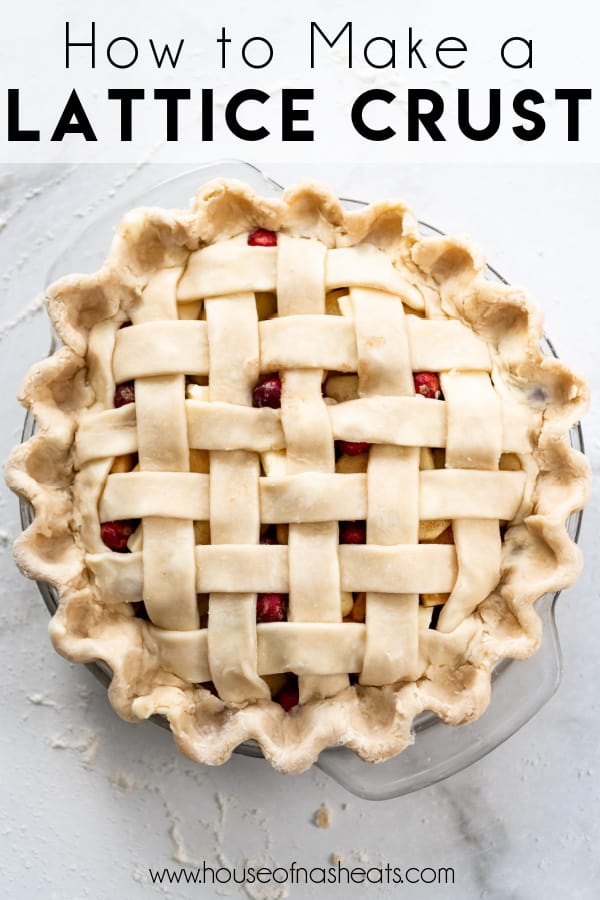
If you dream of flaky golden pie crusts criss-crossed over jewel-colored fruit fillings, this step-by-step guide will help you learn how to make a lattice pie crust with ease!
A woven lattice pie crust is a trick that makes even the most average baker look like a total rockstar and results in oohs and ahhs from guests. And it really is so easy to achieve!
We use it to top apple pie, strawberry rhubarb pie, cherry pie, peach pie, and many more. I may not be much of a cake decorator, but I can make the prettiest pie around with this easy technique for pie crust design.
You might also find my Perfect Homemade Pie Crust Recipe and tutorial for How to Blind Bake Pie Crust to be helpful resources if you are new(ish) to pie-baking.
Best Pie Dough for Lattice Crusts
You can make a lattice crust with any pie dough, whether you prefer an all-butter crust or rely on my tried-and-true pie crust recipe that uses both butter and shortening for maximum flakiness and flavor.
You can even use a refrigerated store-bought refrigerated or frozen pie crust if you prefer. Just make sure to thaw it first in the fridge or on the counter before attempting to weave it into a lattice pie crust.
Equipment Needed
- Rolling pin (affiliate link)
- Pie plate (affiliate link): Metal, ceramic, or glass pie plates all work! I use standard sized 9-inch glass or metal pie plates most often.
- Pastry wheel, pizza cutter, or even a sharp knife: A pastry wheel has ruffled edges for decorative cutting, but a simple pizza cutter works just as well.
- Bench scraper or thin metal spatula: This is helpful for scraping the dough off the counter if it gets stuck.
- Pastry brush: This tool is handy for brushing on egg wash for a golden brown finish.
Step-by-Step Photos
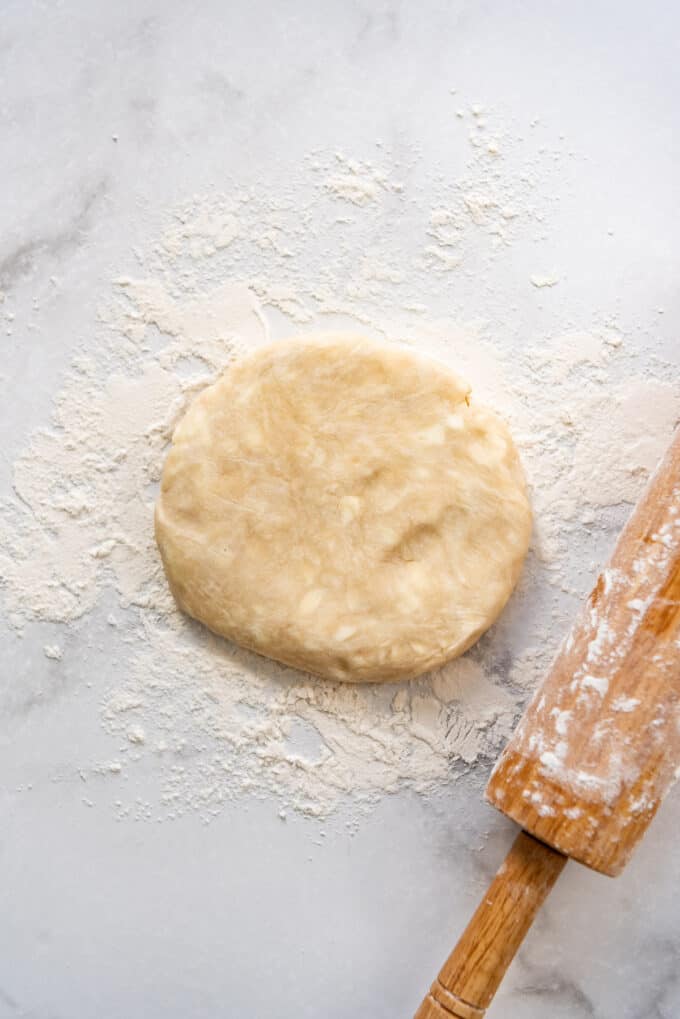
- Roll out the bottom crust on a lightly floured surface and transfer it to a 9-inch pie plate (affiliate link). It should overhang slightly by about 1/2-inch or so. Do not trim of finish the crust edges at this point. Fill with your pie filling, which should be cooled completely if previously cooked (like some apple, blueberry, or cherry pie fillings).
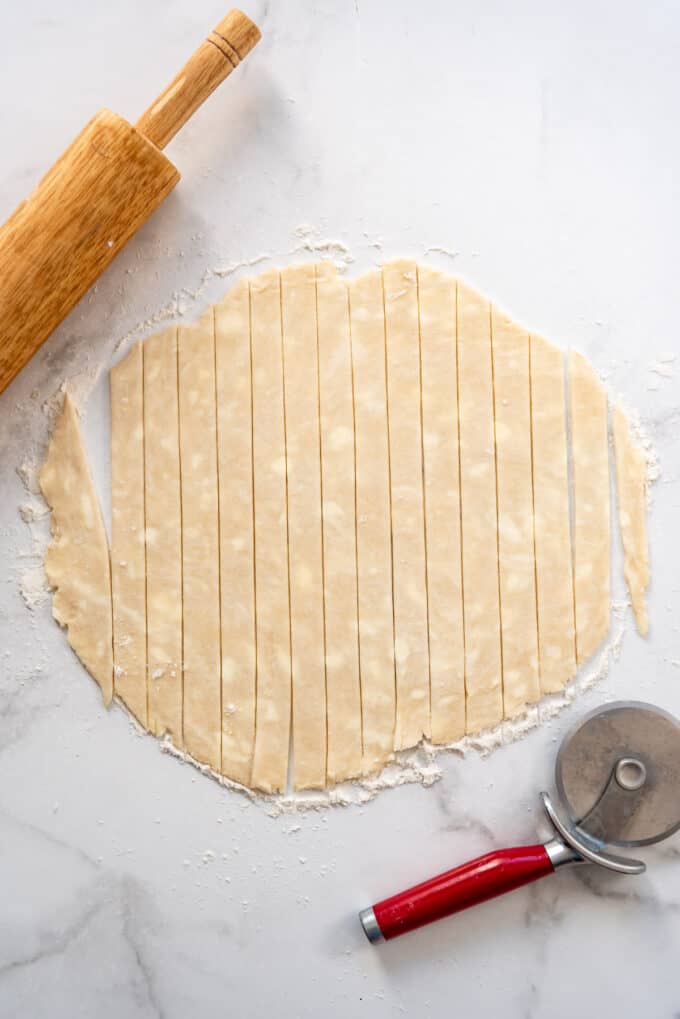
- Roll out the top crust on a floured surface until it is about 3-inches larger in diameter than your pie plate (affiliate link) (so about 12-inches in diameter). Use a pastry cutter or pizza cutter to slice strips of pie dough for the crust. They can be a uniform width or you can vary the width for visual interest or a more unique pie design. I tend to stick to a fairly traditional ¾ to 1 1/4-inch wide strip for my lattice crust as it is easier to work with than narrower strips. A ruler certainly helps maintain straight lines and even strips, or you can just eyeball it if you have a steady hand.
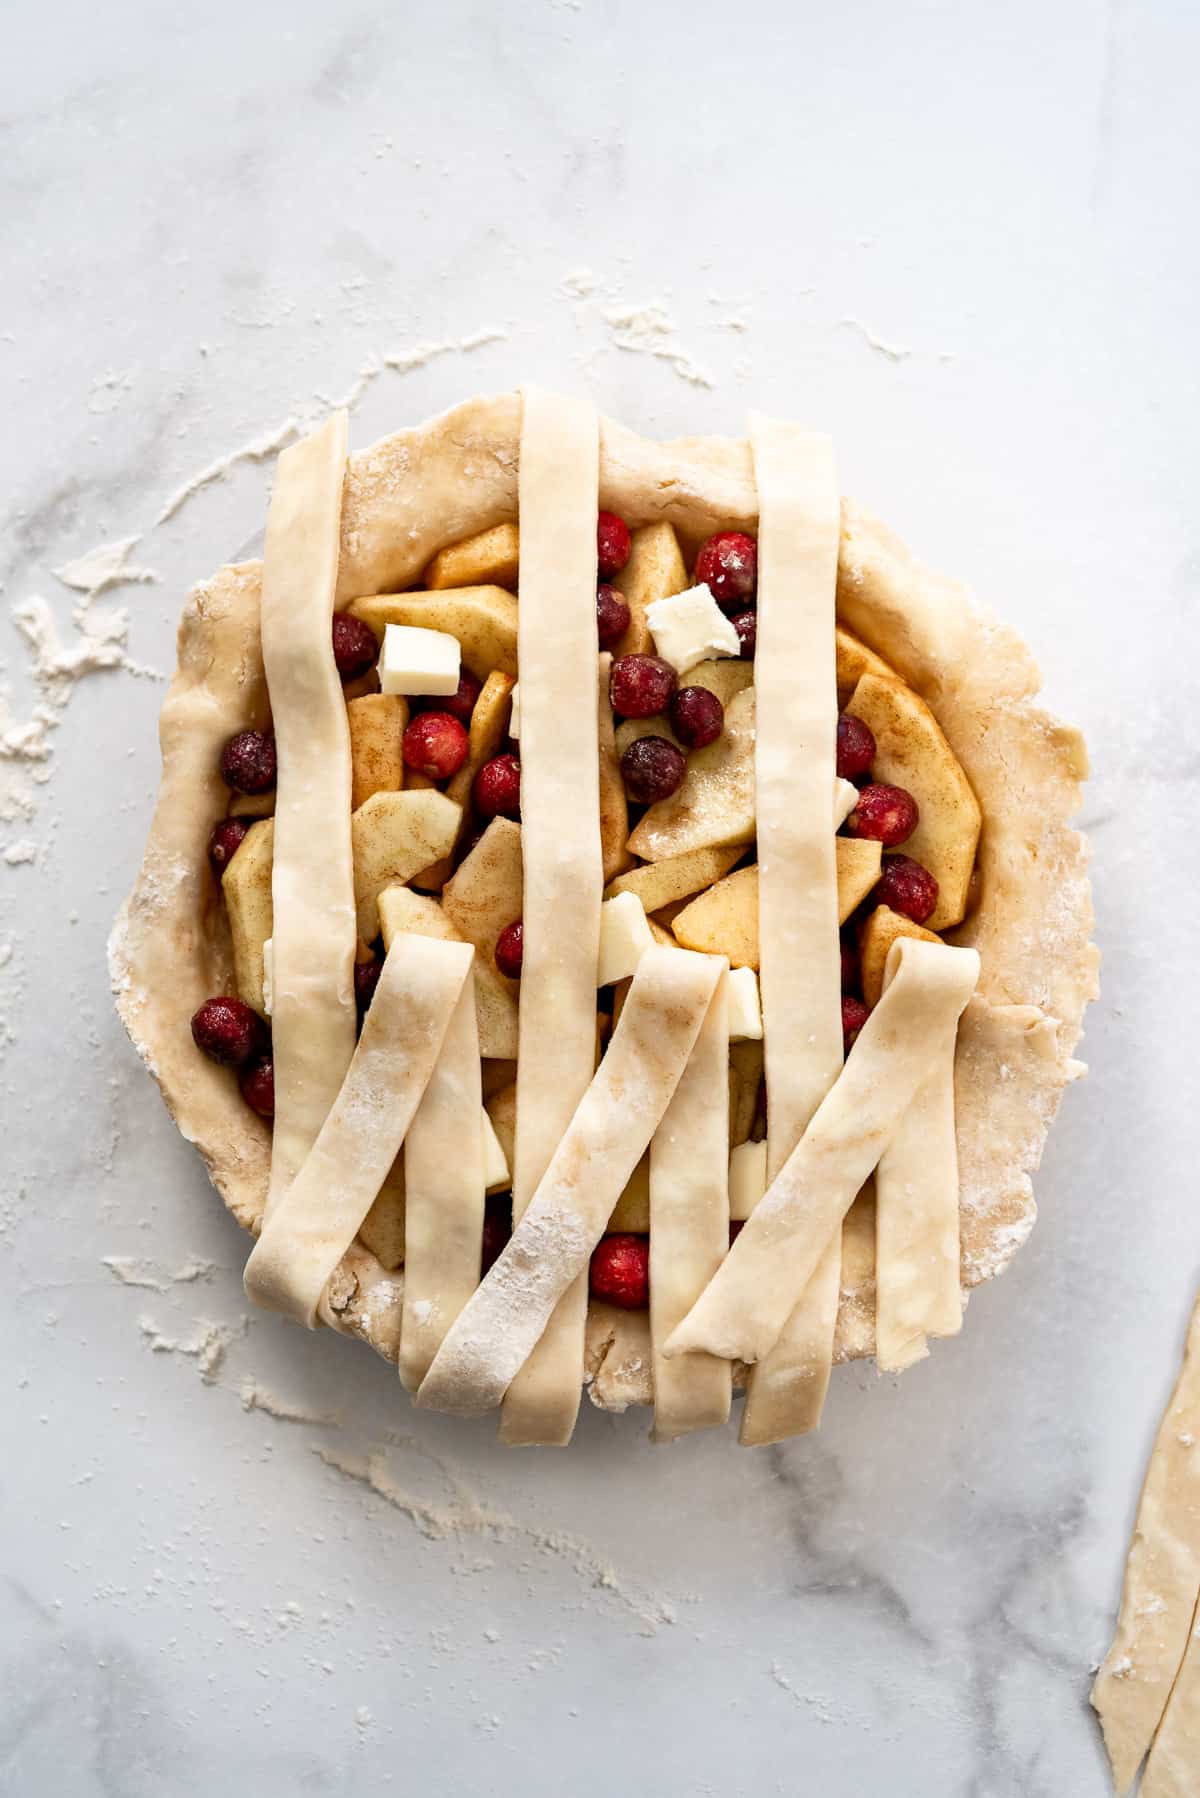
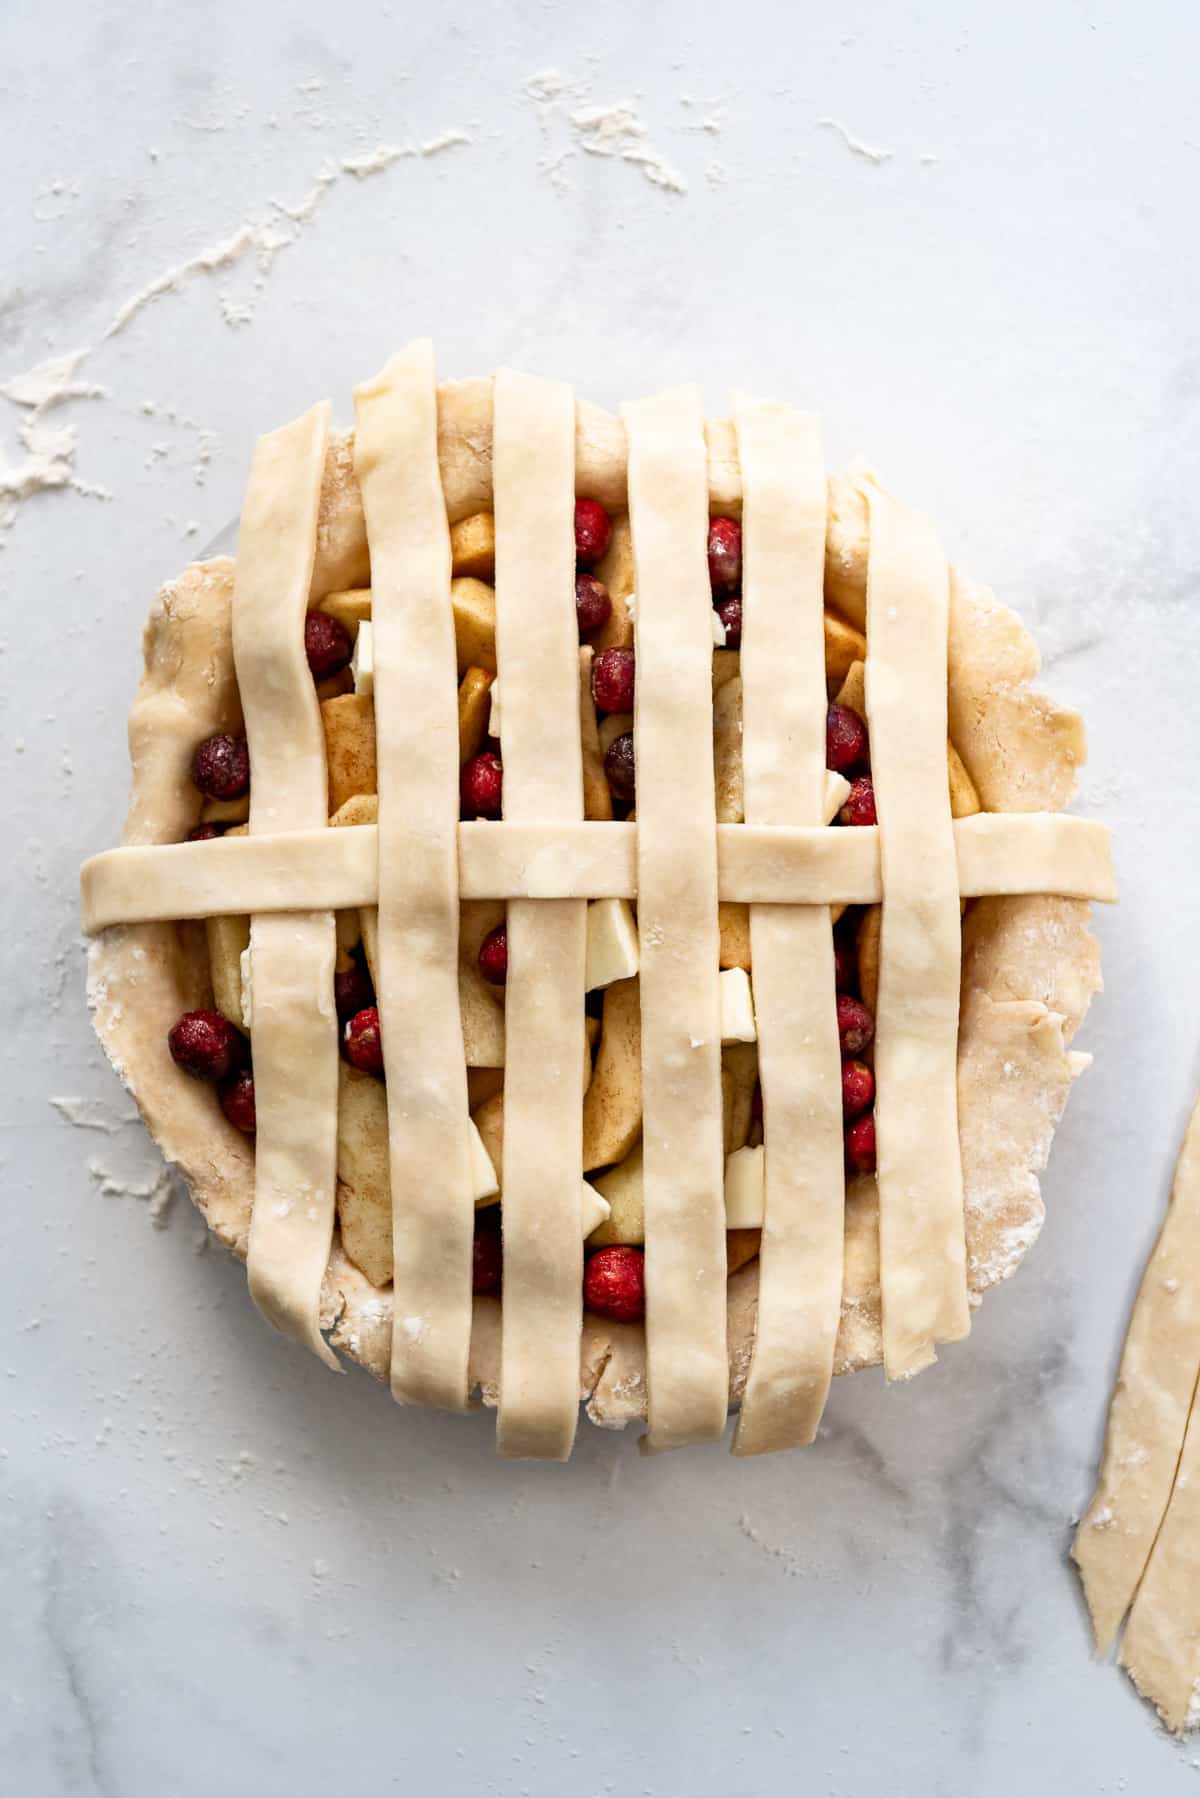
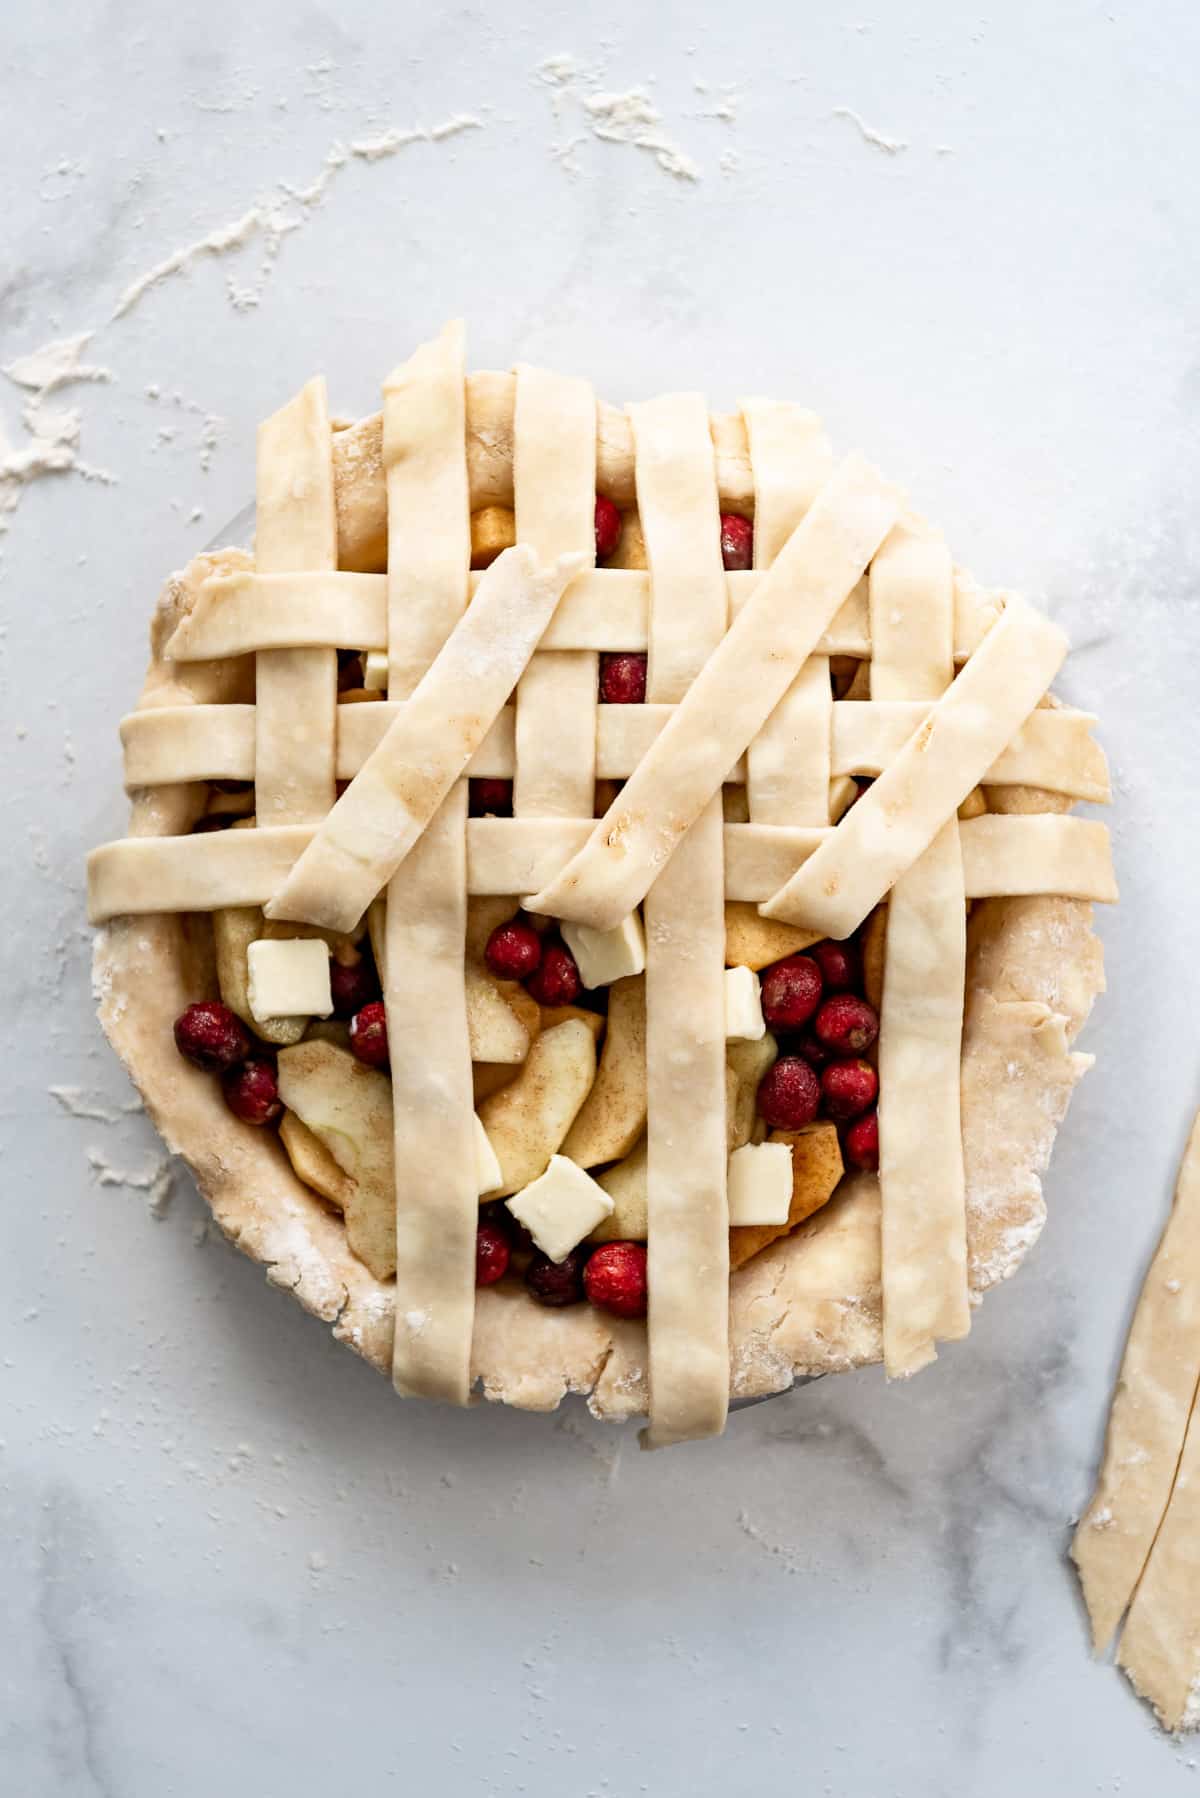
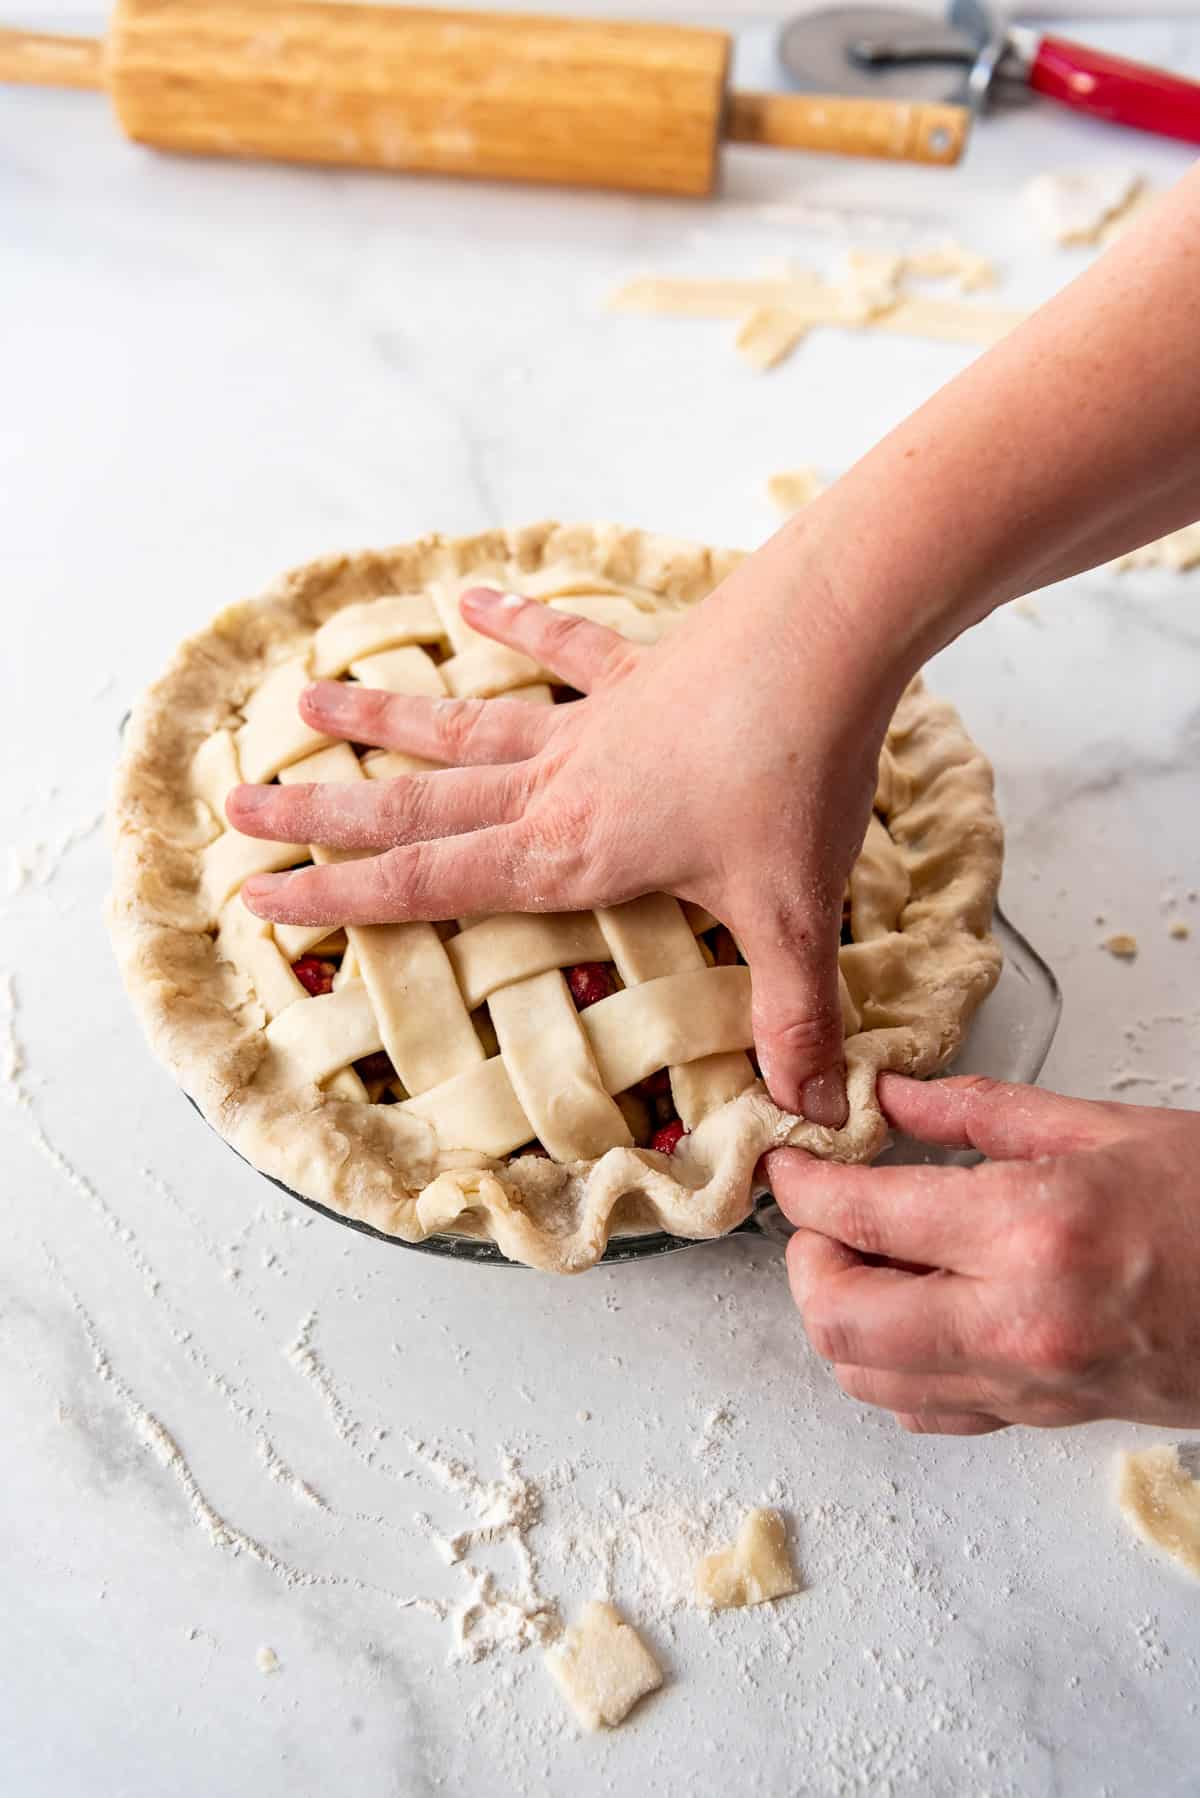
- Lay 4 to 7 strips (depending on how narrow or wide your strips are) going one direction across your pie (I prefer vertical, but it doesn’t matter), spacing them slightly apart. Use longer strips for the middle of the pie and shorter strips as you work your way toward the edges. Fold back every other strip halfway.
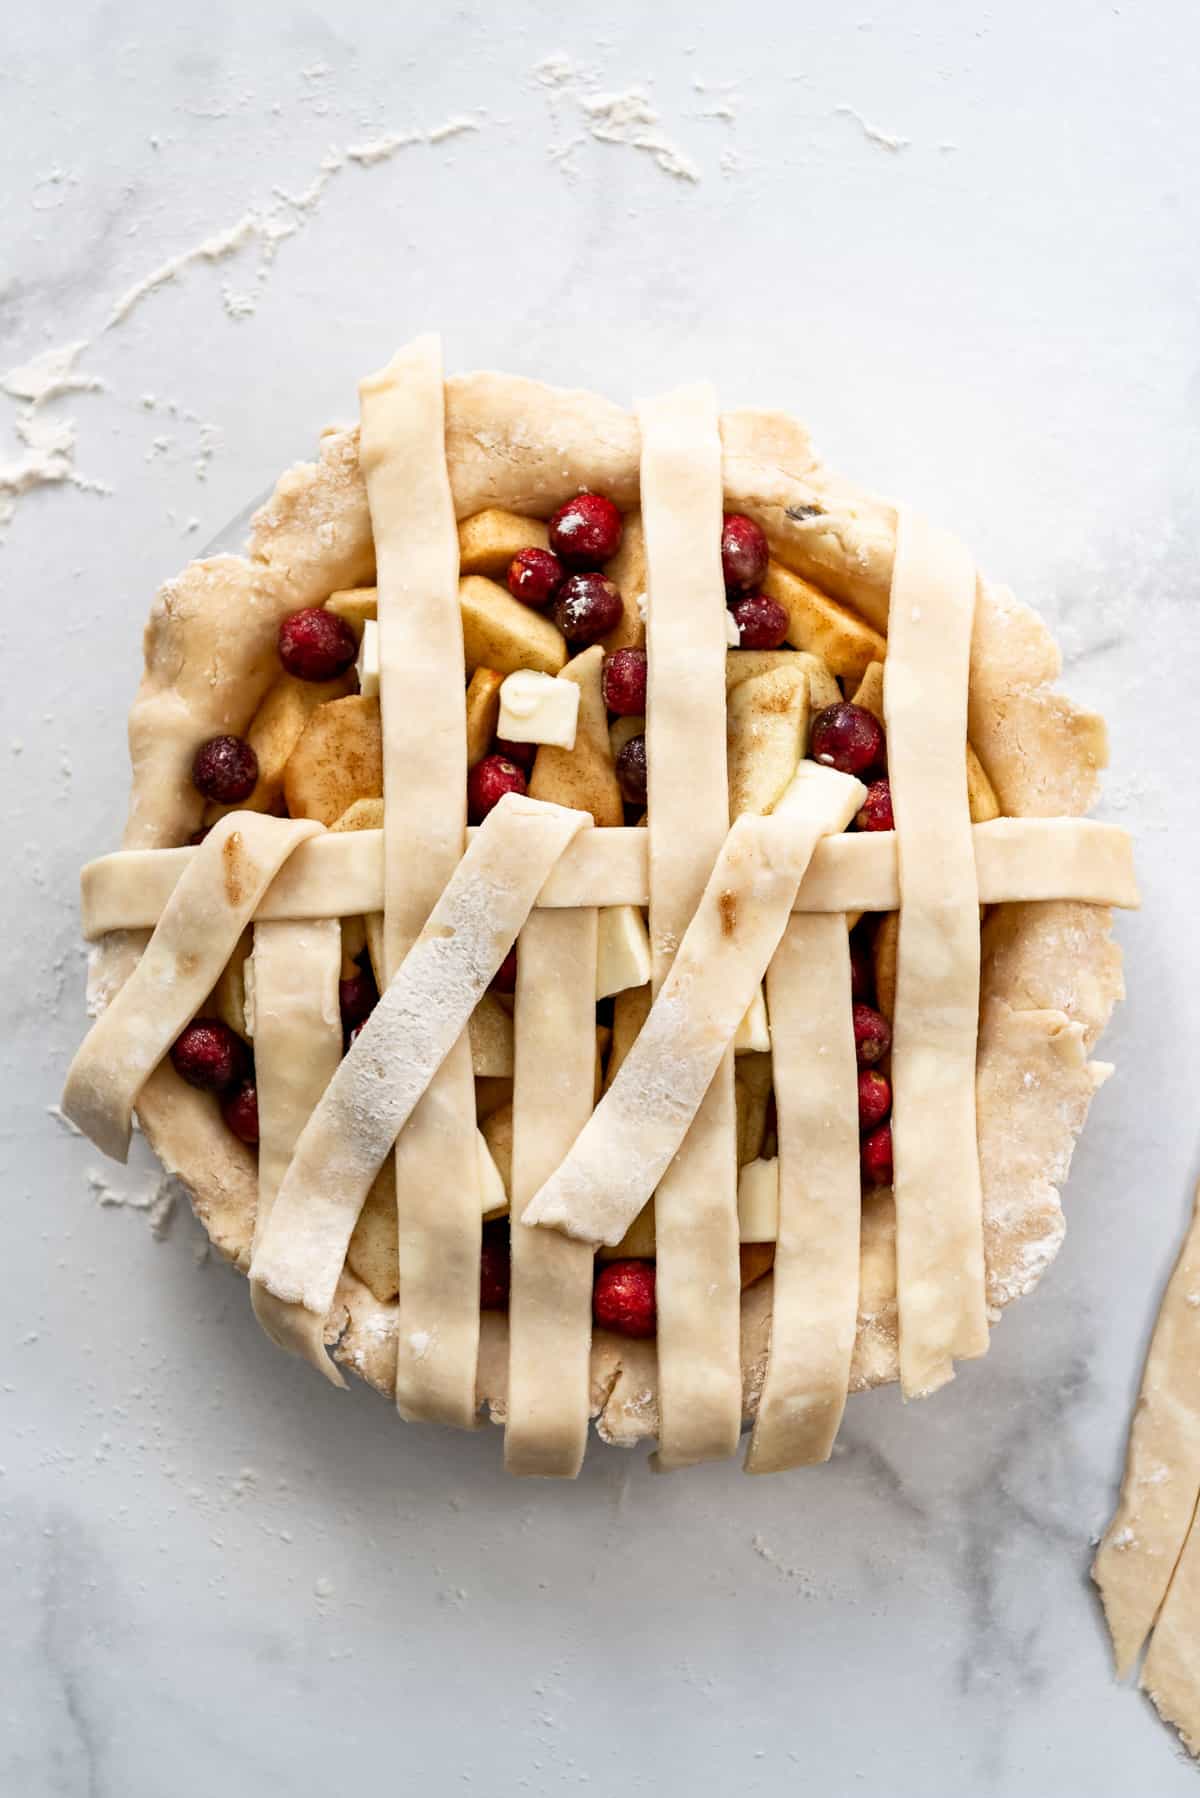
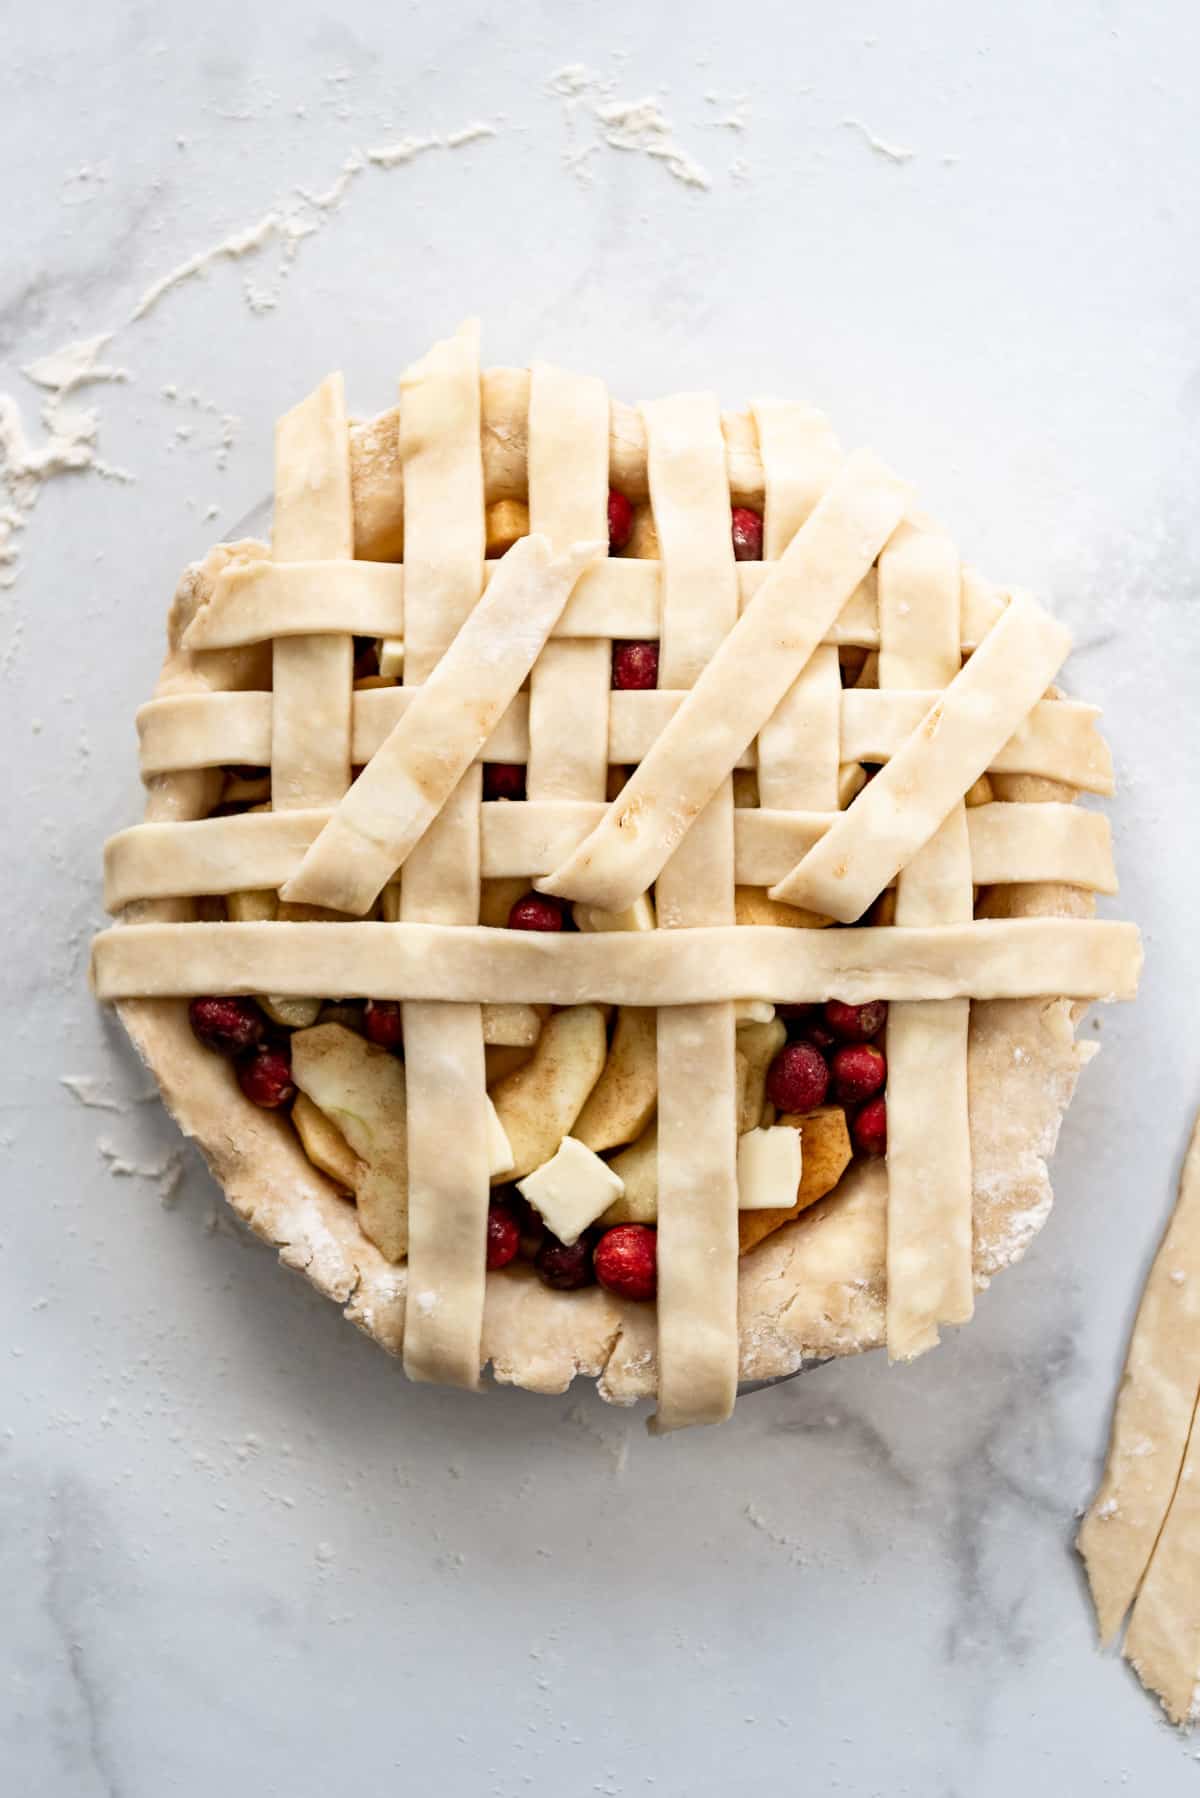
- Add your longest strip of unused pie dough perpendicularly across the other parallel strips. Return the folded strips back to their original position. Fold back the alternate parallel strips over the perpendicular strip.
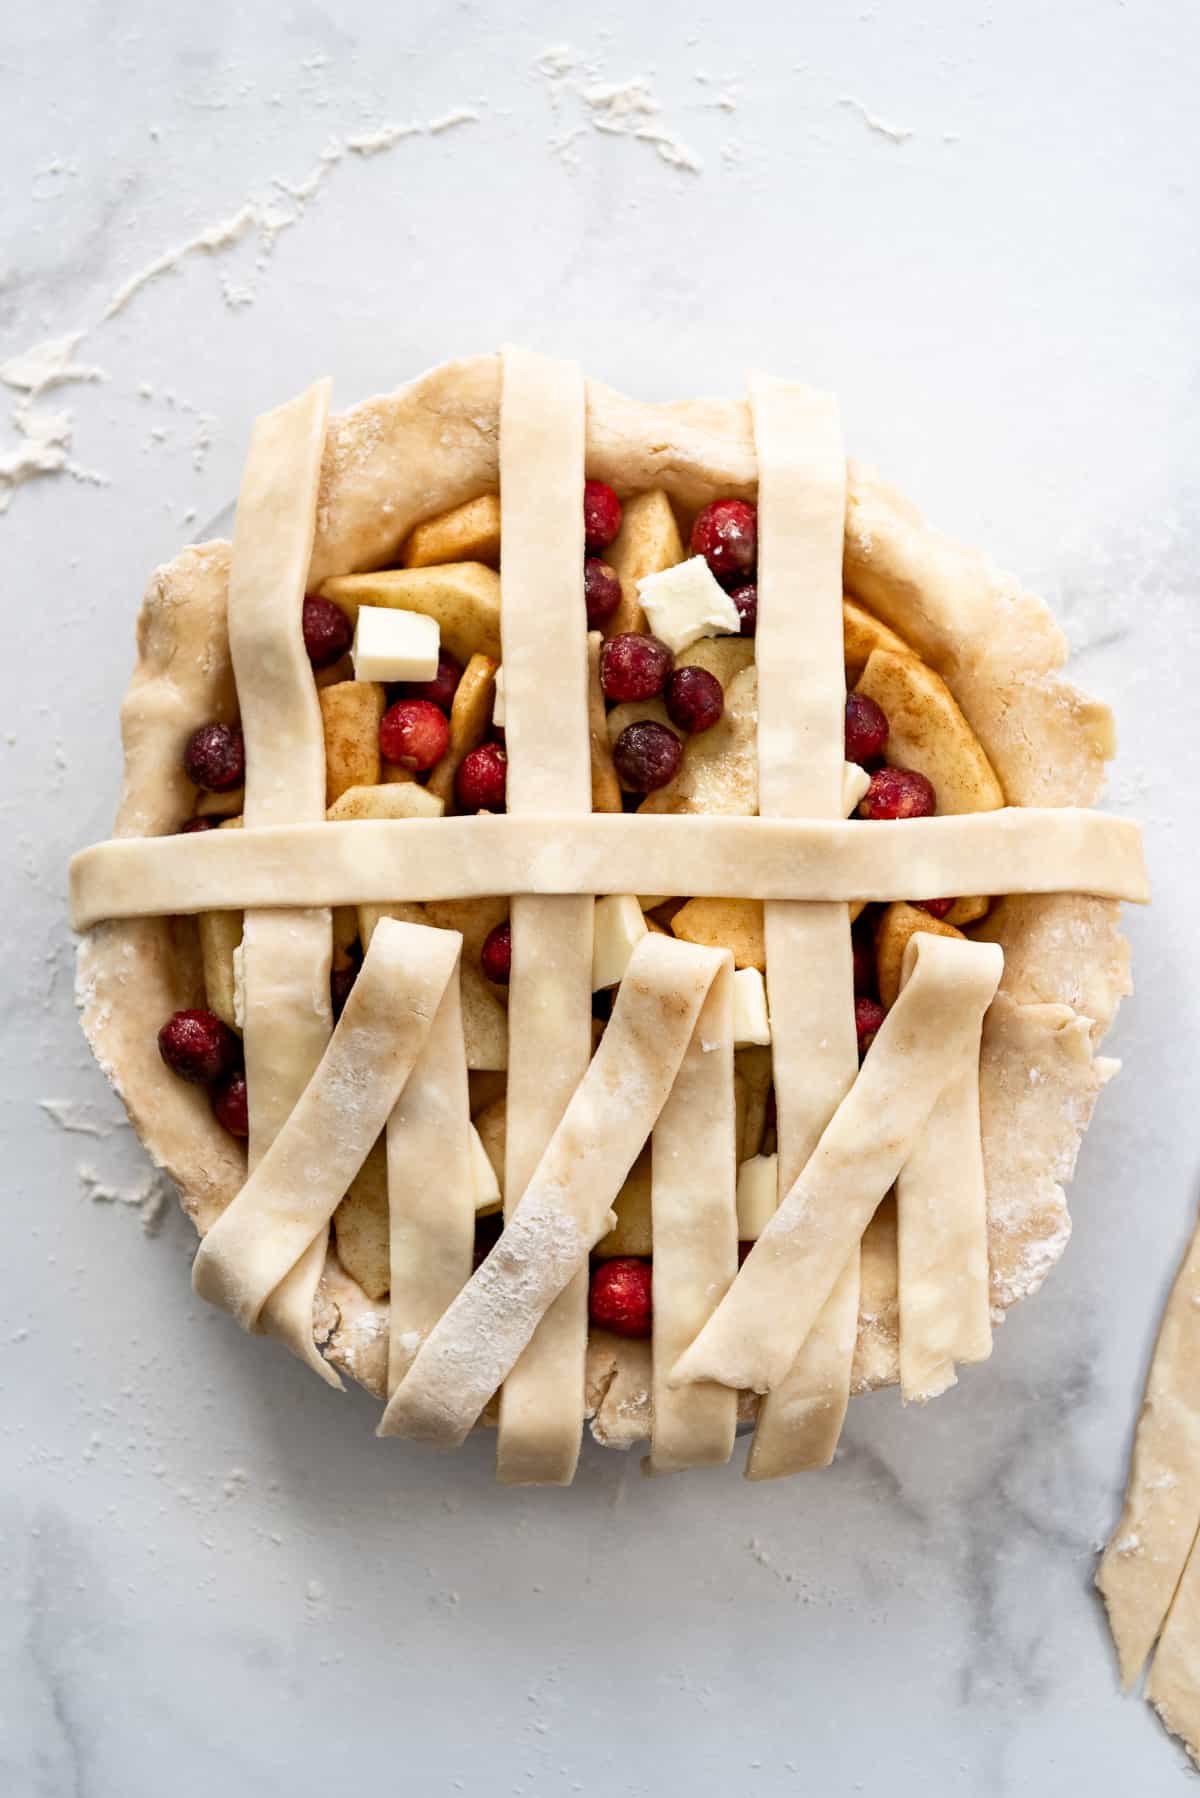
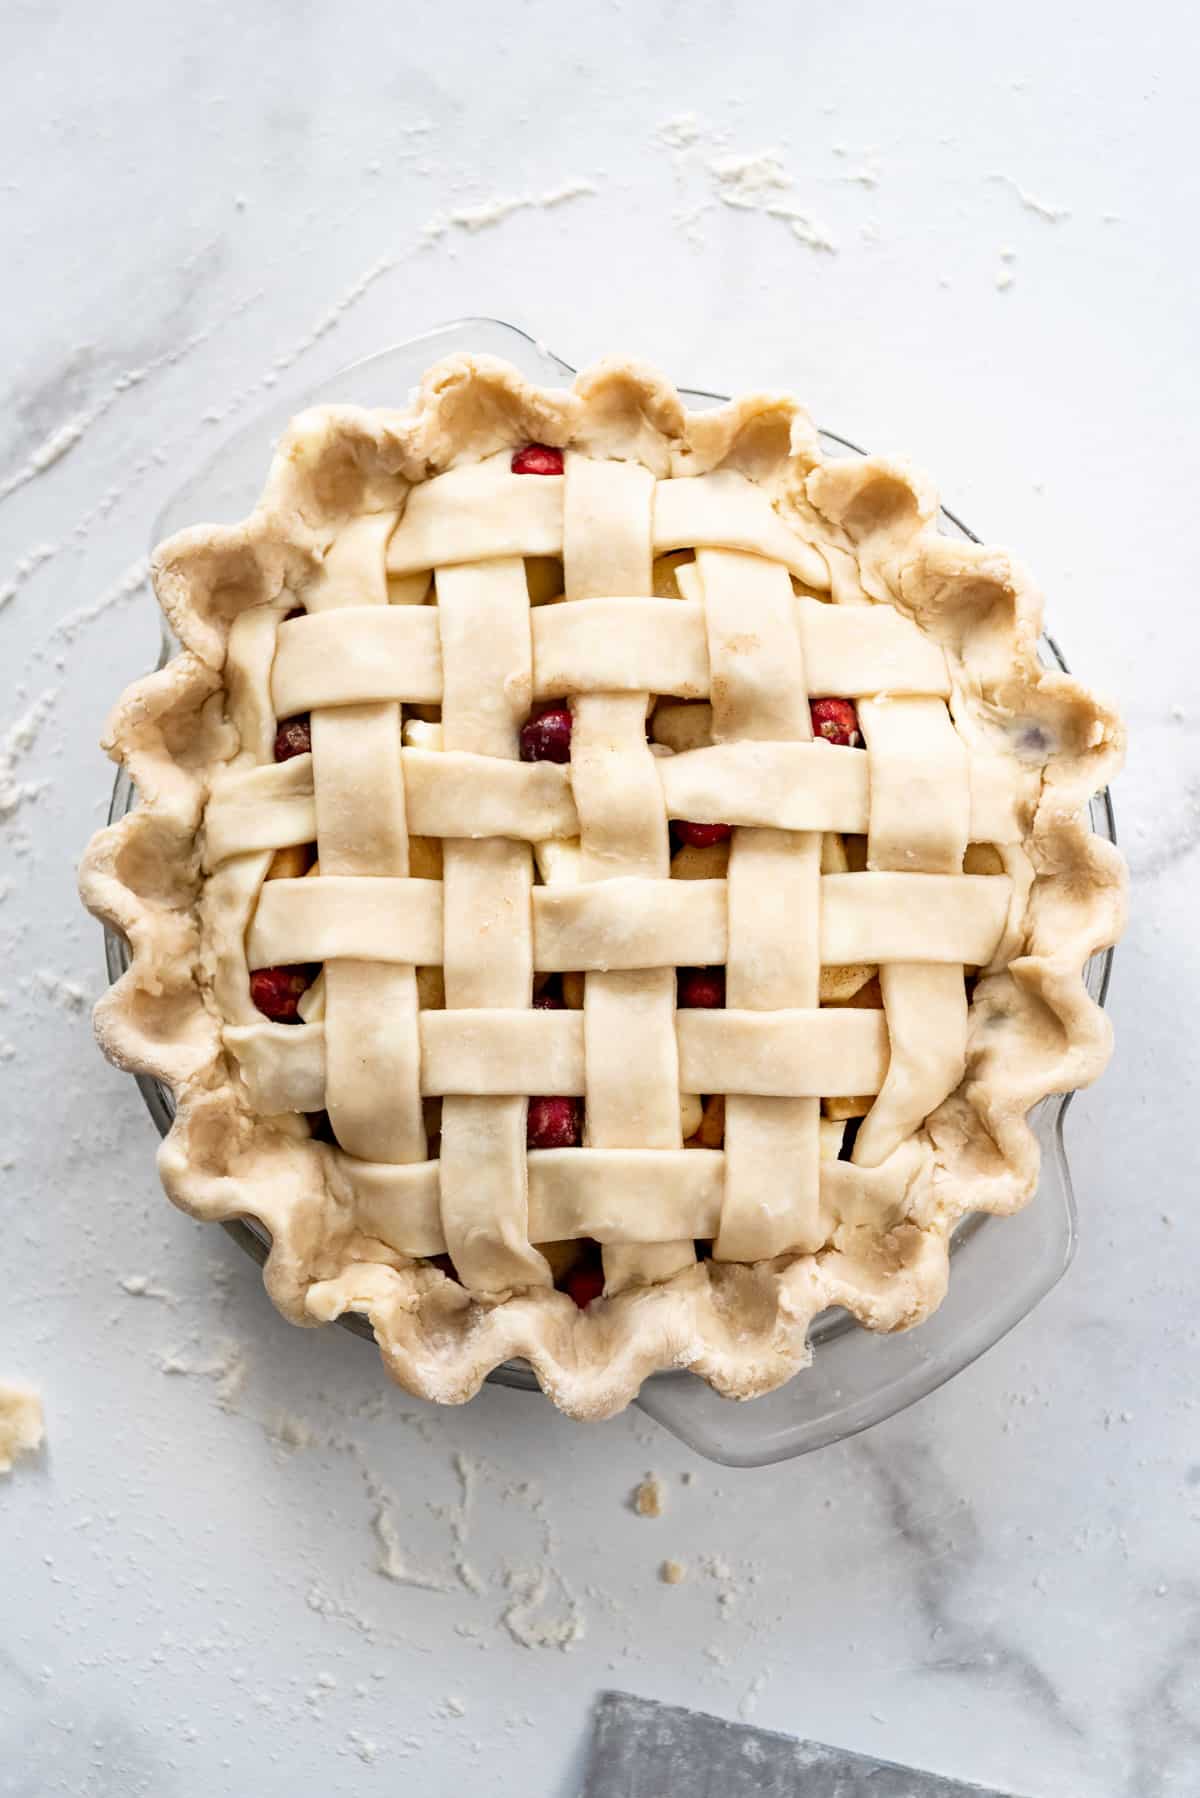
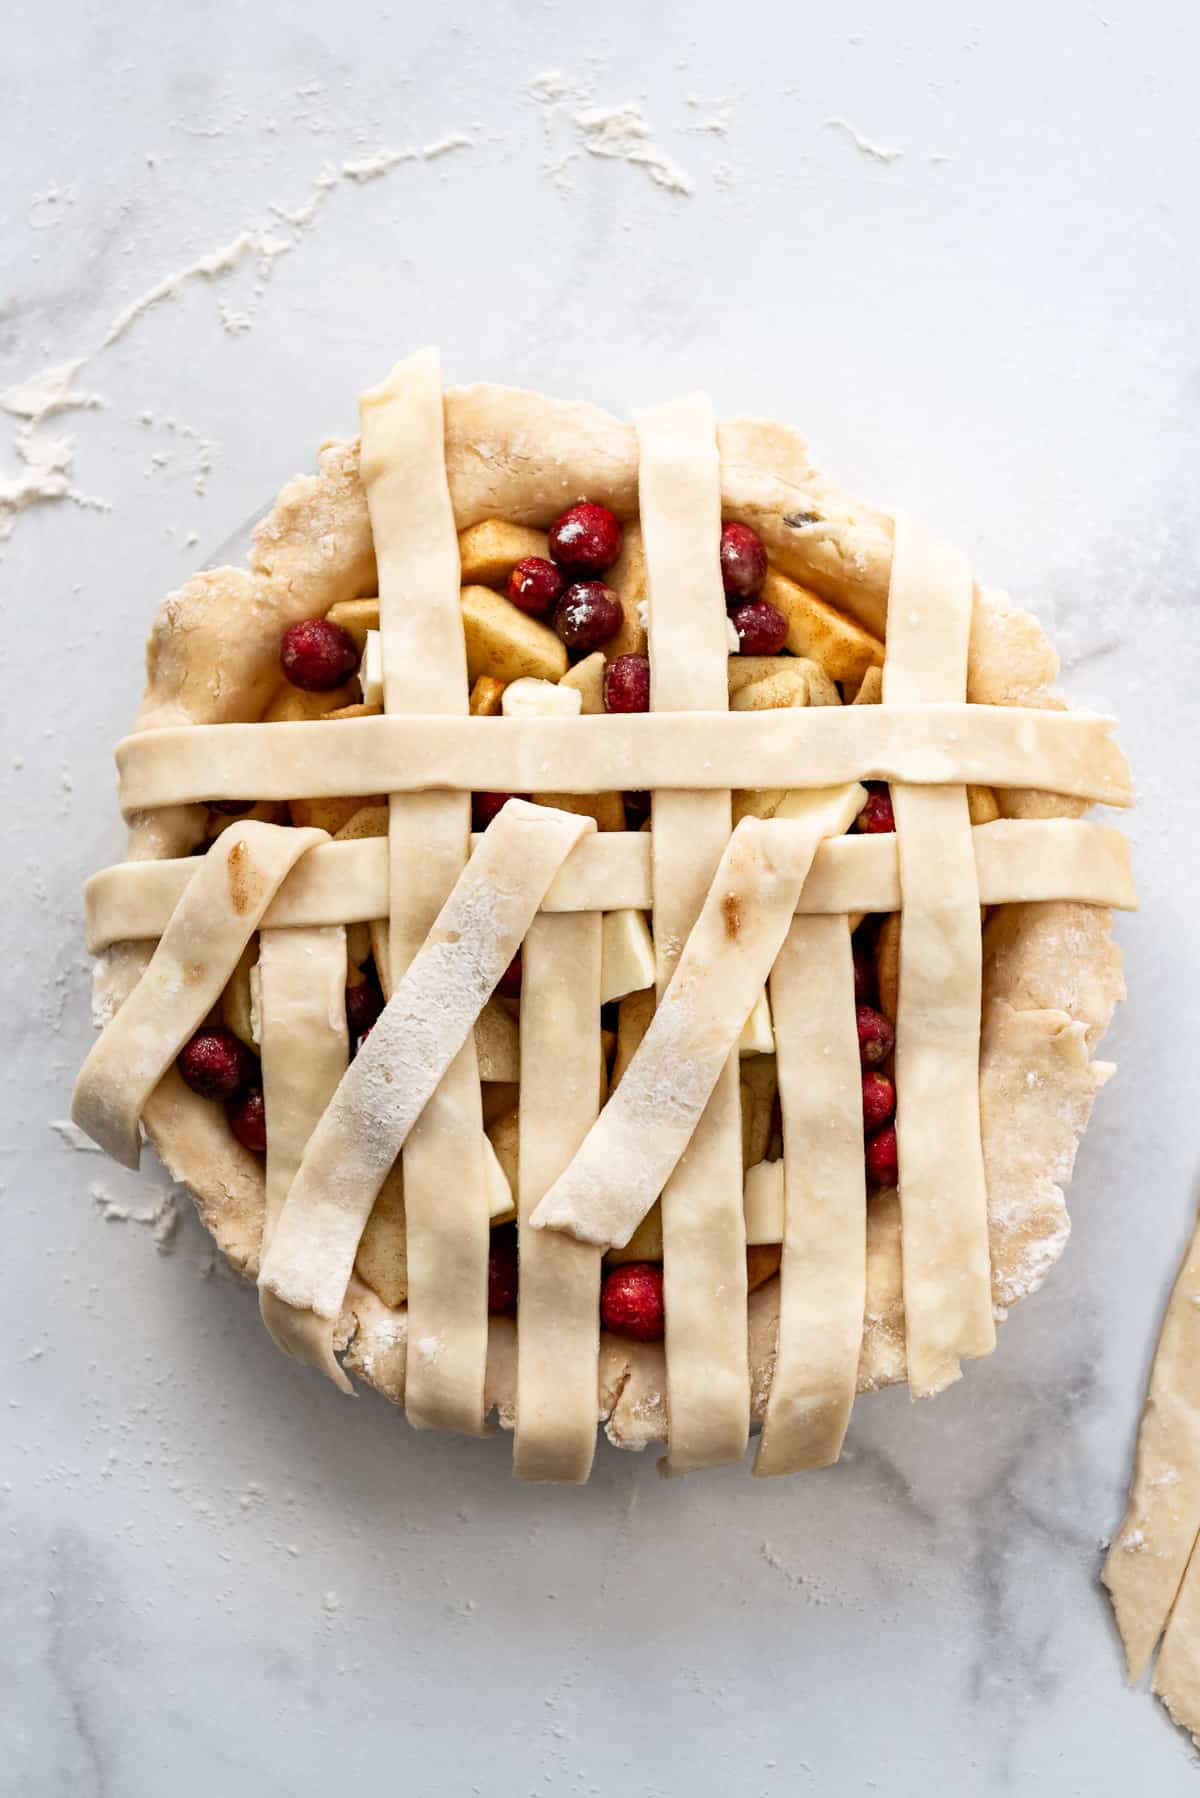
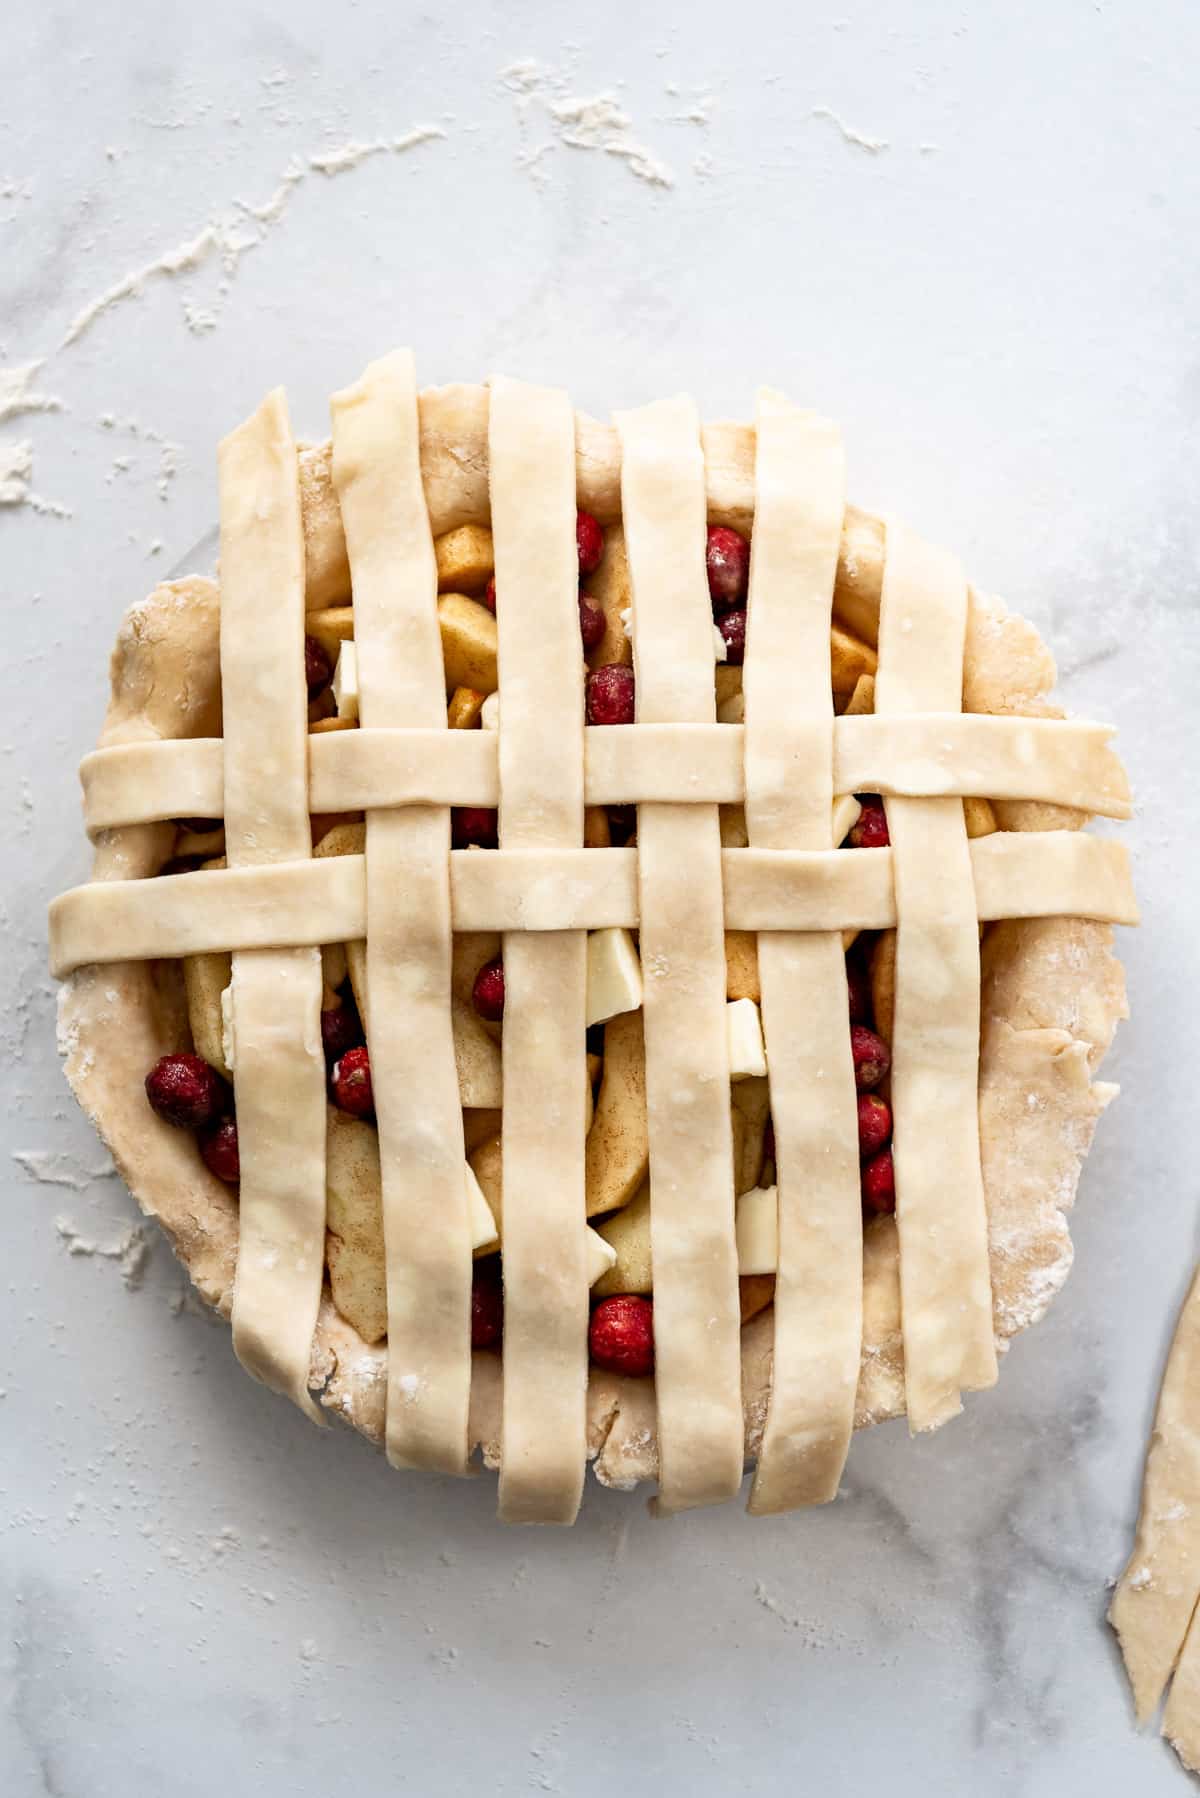
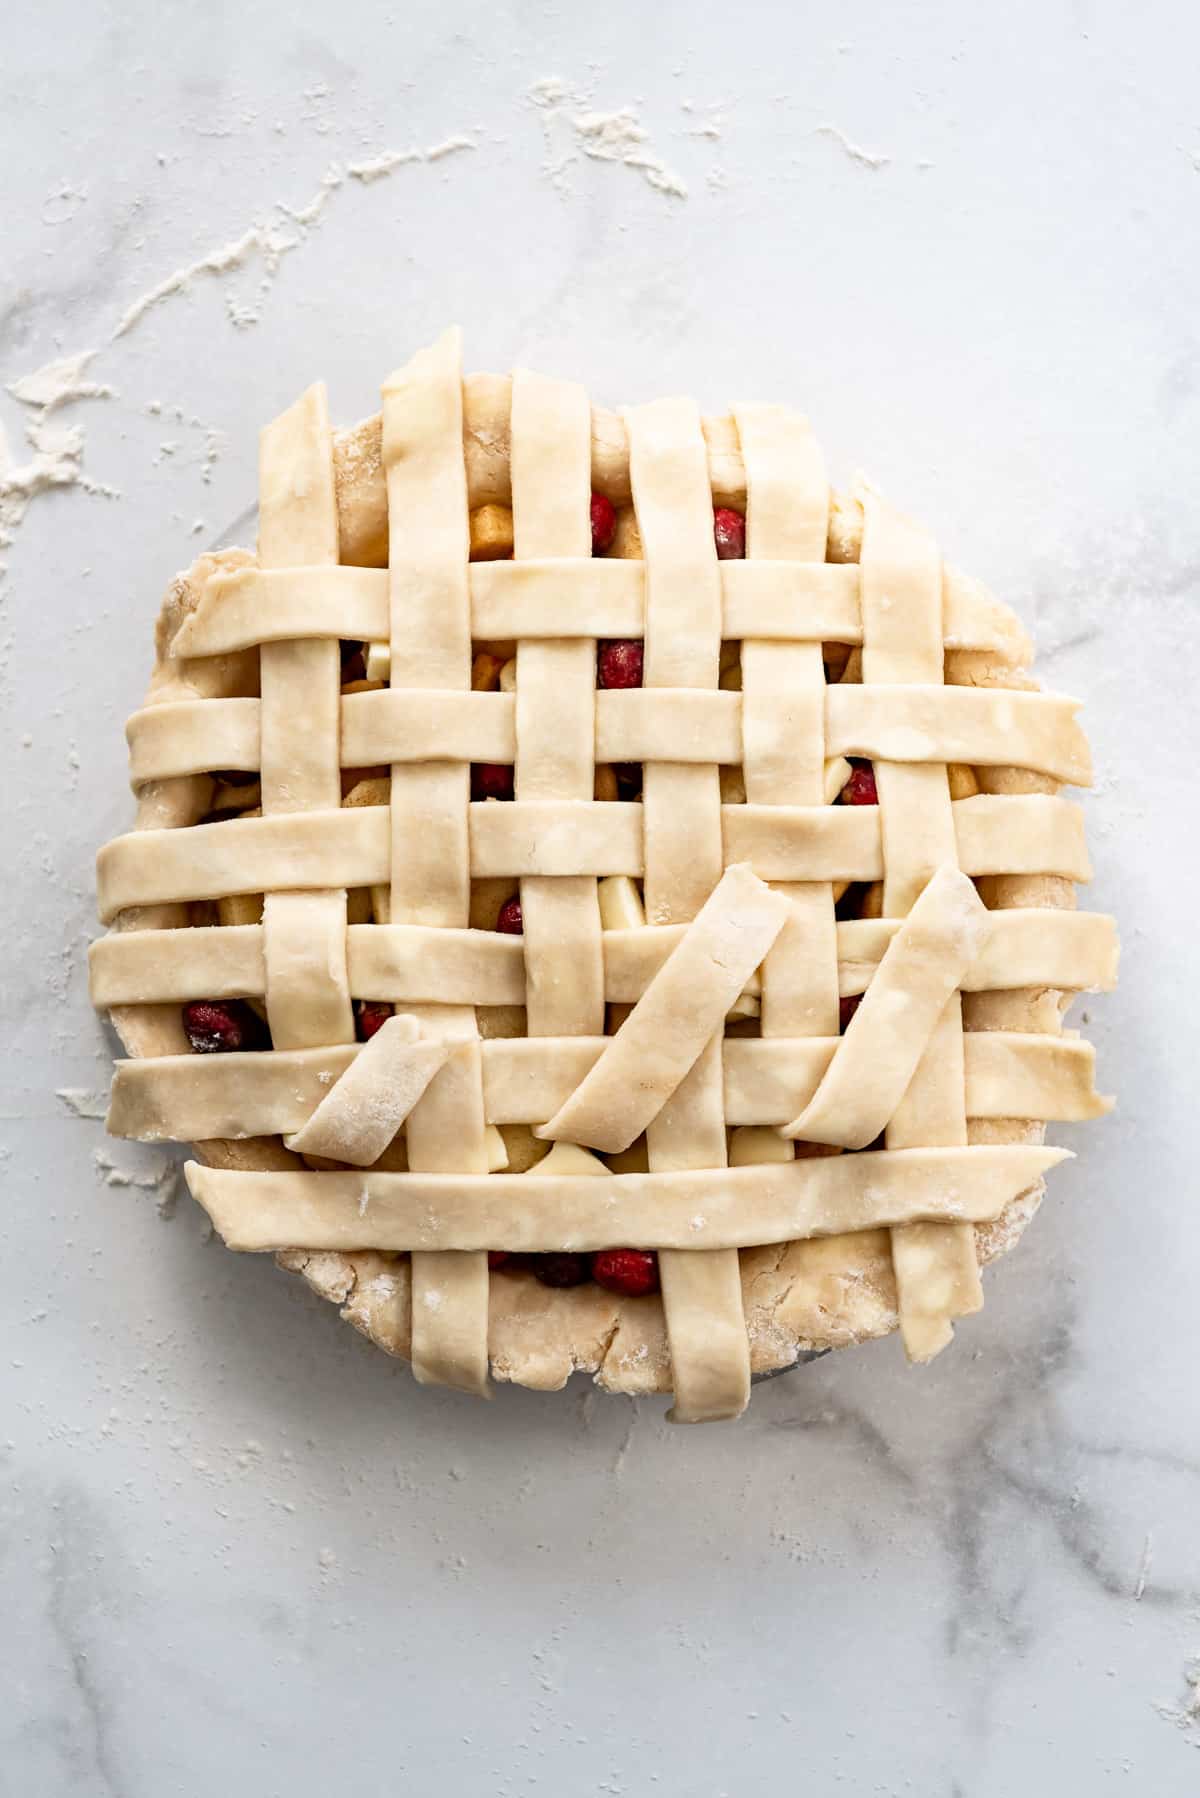
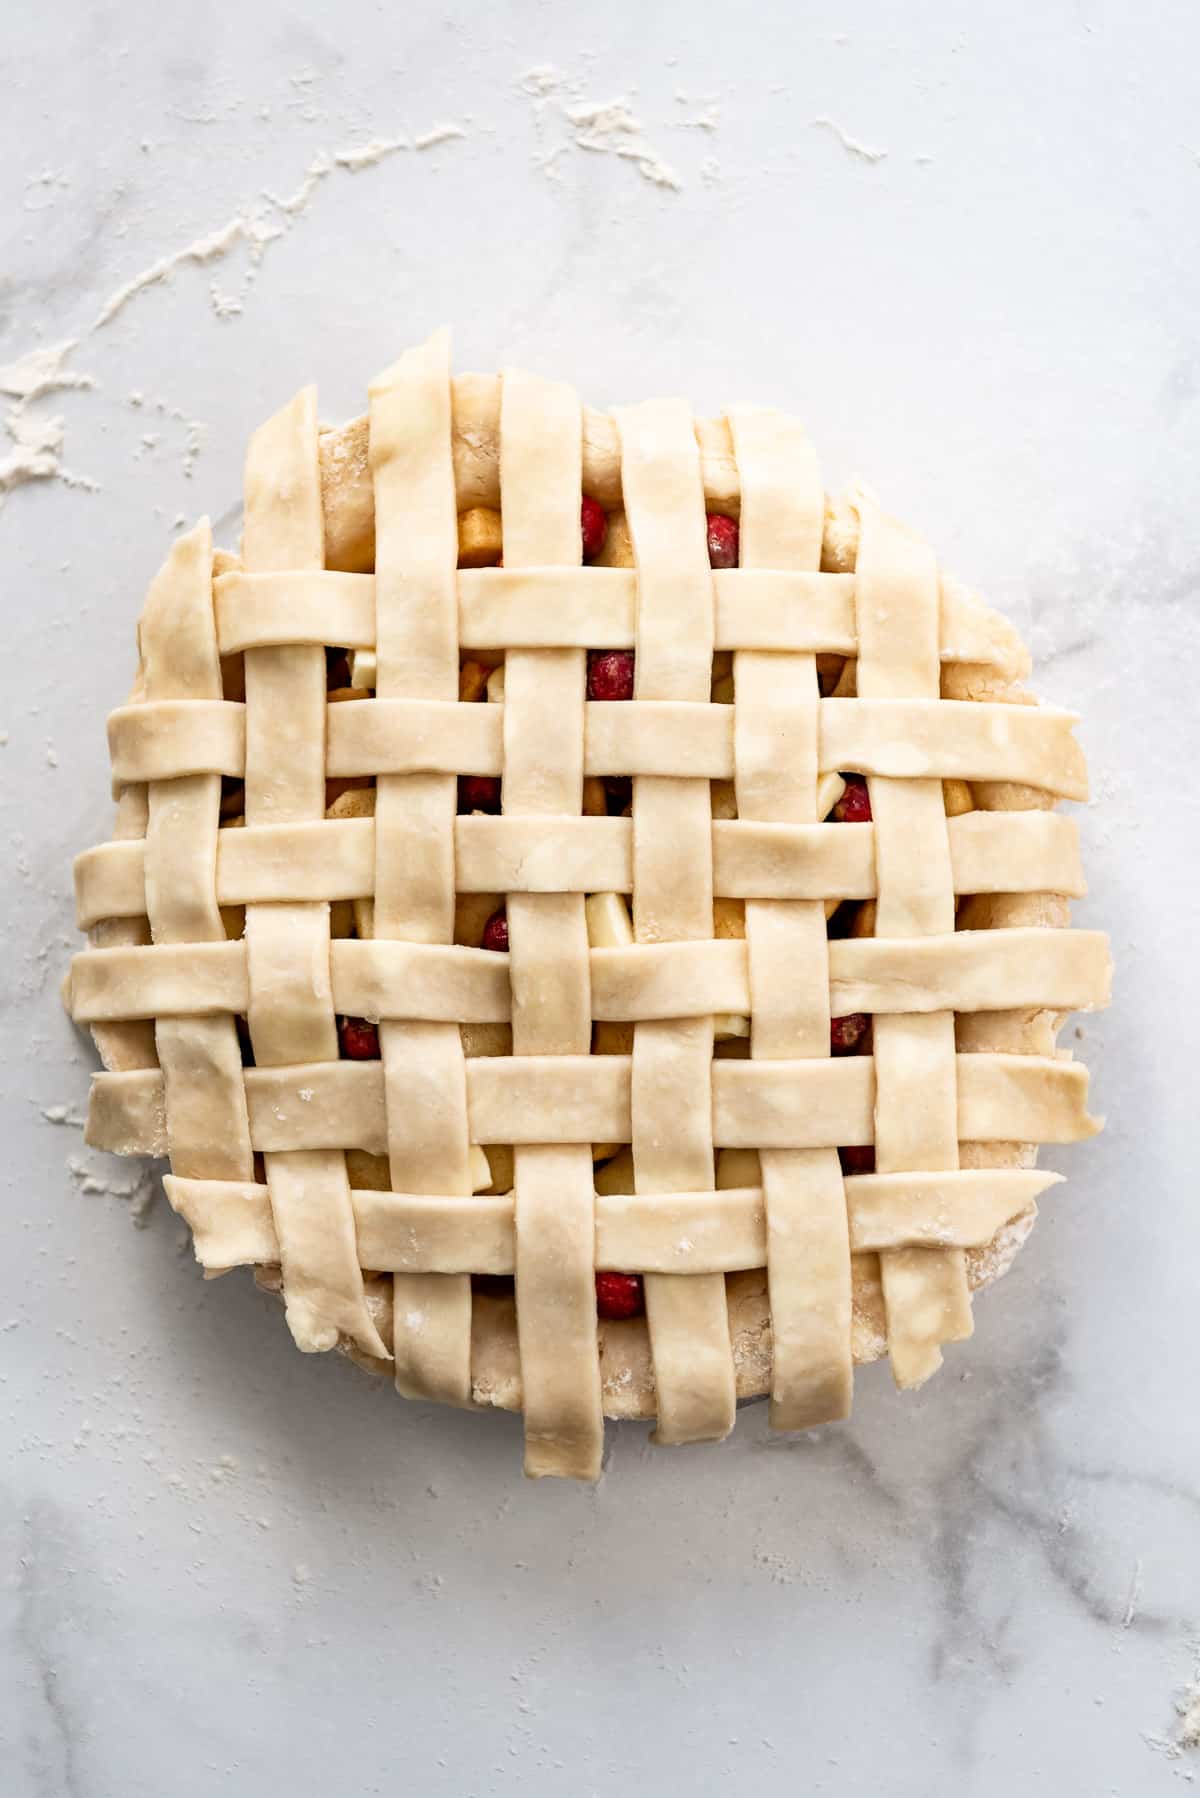
- Add another perpendicular strip across the initial parallel strips of dough, then return the folded strips back to their position. Continue on with this pattern, working your way from the middle out to the edge on both sides until you have used up all of your pastry or covered the top of the pie with a woven lattice crust.
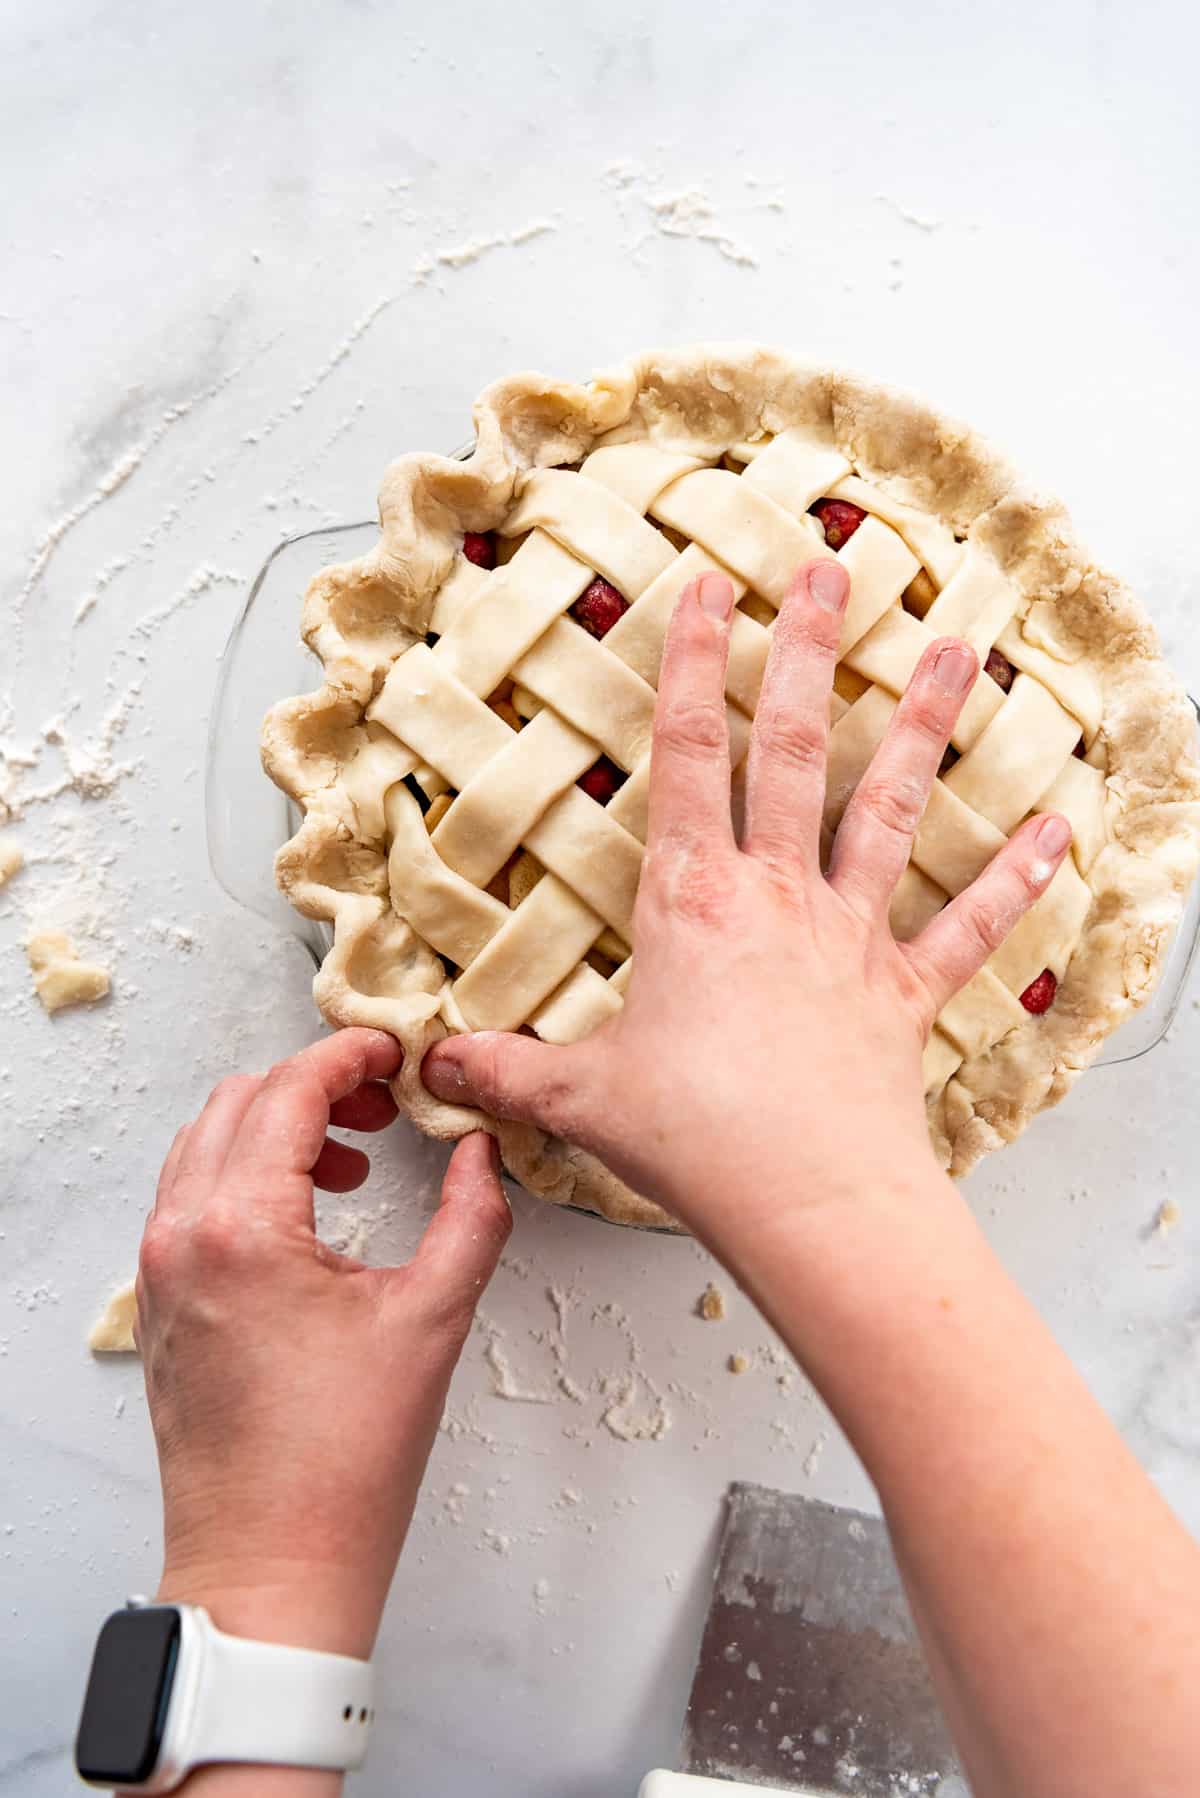
- Trim the lattice strips around the edges, then fold the bottom crust over the ends of the strips and crimp around the circumference of the pie for a finished look. Alternately, you could fold the lattice strips and bottom crust under for a different look and skip crimping.
- Refrigerate for 30 minutes before baking. Pie crust bakes best when it is cold and the handling and time it takes to weave a lattice crust usually allows the dough to warm up enough that you will want to refrigerate the unbaked pie for a bit to make sure that the lattice design holds its shape while baking.
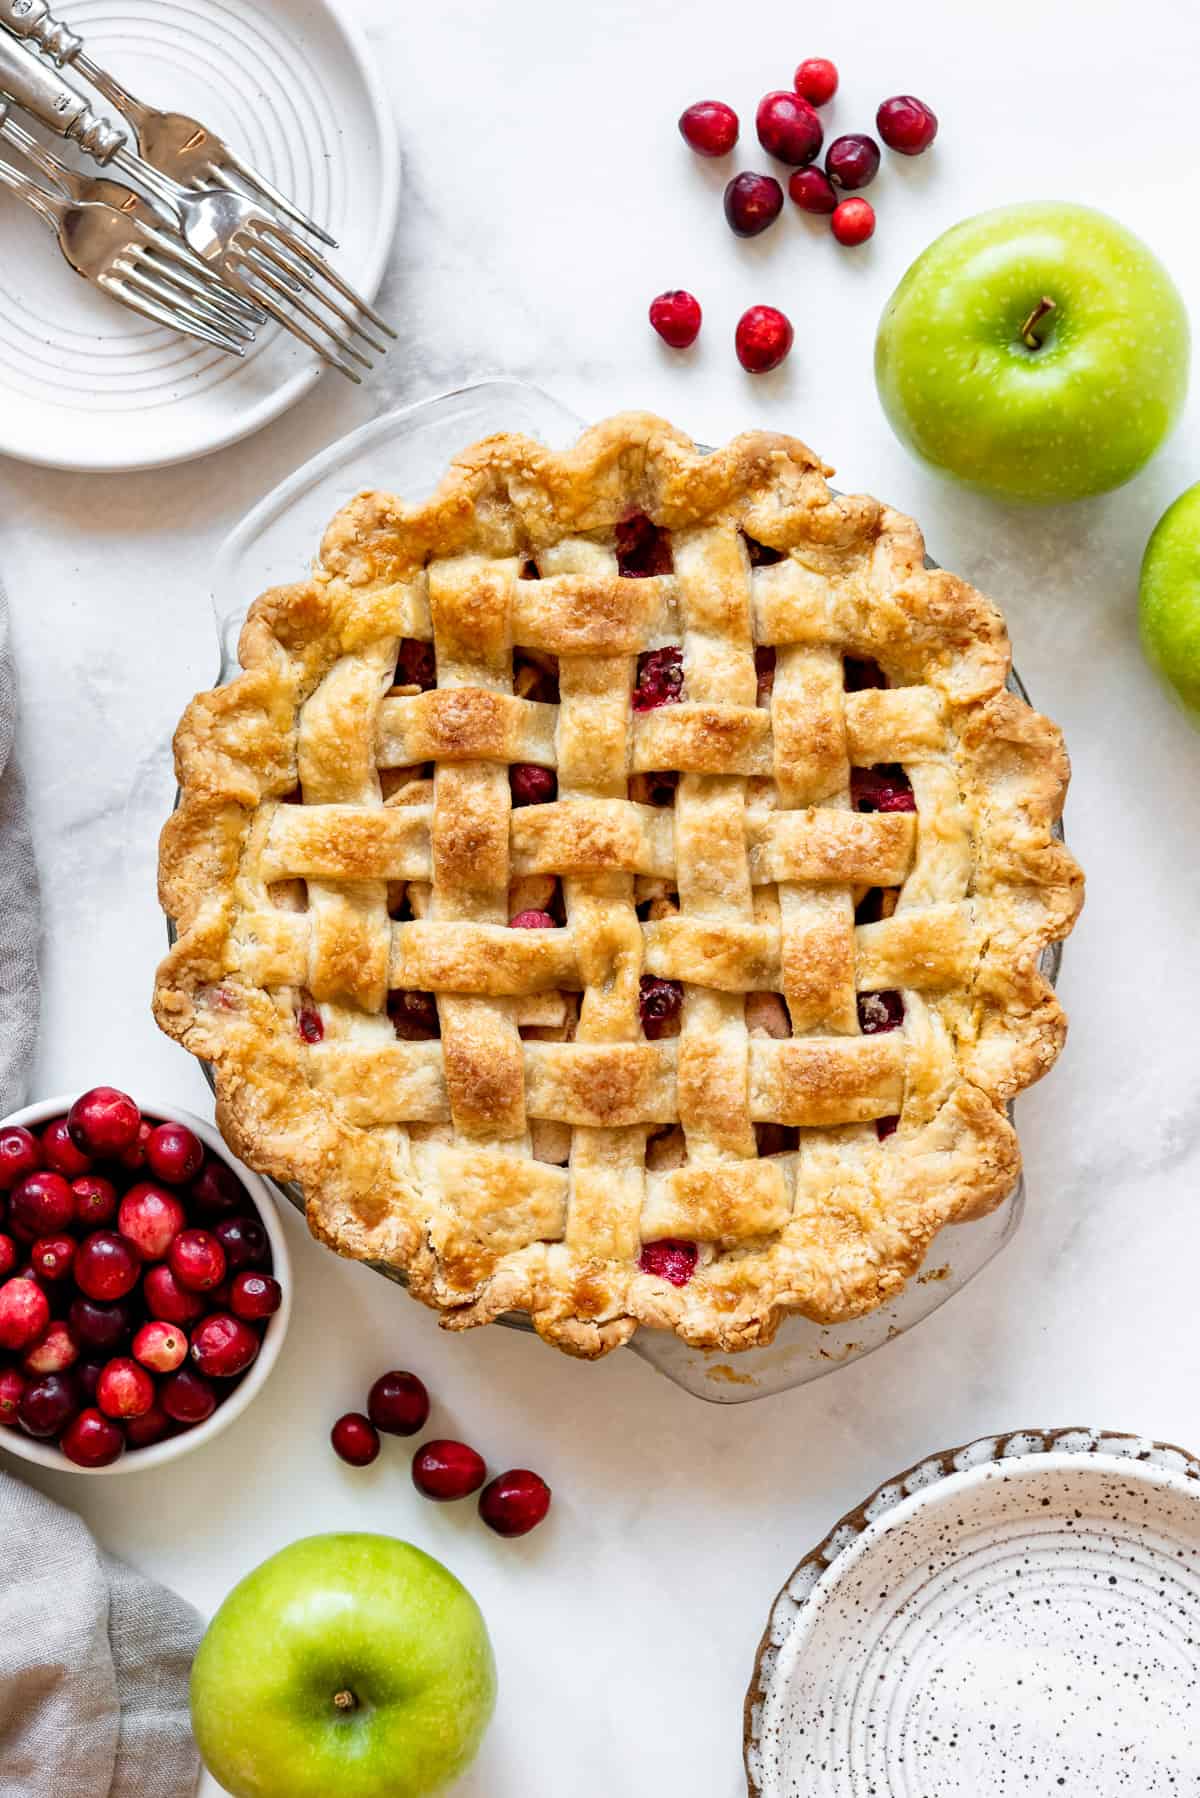
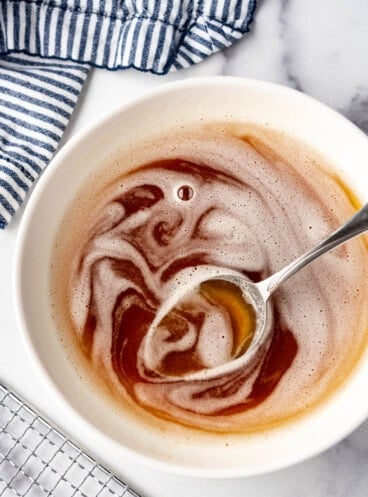
- Brush the top of the pie crust with an egg wash made from 1 egg beaten with 1 tablespoon of milk or water so it will bake up golden brown. Bake according to directions listed in the recipe you are using.
FAQ’s
The short answer is whenever you want to, but there is actually a purpose behind a lattice crust. The many holes actually allow more moisture to escape from the pie while it is baking compared to a solid top crust. This is great for juicy fruit pies where you run the risk of a soggy bottom crust or liquid filling.
If you have trouble with the edges of your pie crust getting too dark before the rest of the pie is baked, an easy solution is to shield them with some aluminum foil wrapped around the edges. Or you can buy an inexpensive pie shield, which is what I use. I have a couple of silicon pie shields that work great!
Pro Tips
- Don’t try to add a woven lattice pie crust onto hot filling. If you have just made cherry or blueberry pie filling and it’s still warm when you try to assemble the pie, the fat in the pie crust will melt as you try to weave the pie crust and it could be a disaster! Let the filling cool COMPLETELY before using it and assembling your pie.
- Give your lattice pie crust a finished look by brushing it with an egg wash made from one egg beaten with one tablespoon of milk or water. Sprinkle a little granulated sugar over the egg wash if you want more of a crackly glaze or use coarser turbinado or sanding sugar for more sparkle and crunch.
- Check your pie crust partway through the bake. If the edges look like they are getting darker faster than the rest of the pie, use a pie shield or wrap them in aluminum foil so they don’t burn.
- If the dough strips break, don’t worry! Chances are you can cover up the tear with another strip. And even if you can’t, once you bake it I bet hardly anyone will even be able to tell where the flaws are.
I used my Cranberry Apple Pie as the model for this particular lattice crust, but my Raspberry Peach Pie is another favorite and you can see in that post how simply varying the width of the pie dough strips can create a totally new look using the same weaving technique laid out here.
More Pie Recipes
Did you make this recipe?
Let me know what you thought with a comment and rating below. You can also take a picture and tag me on Instagram @houseofnasheats or share it on the Pinterest pin so I can see.
How to Make a Lattice Pie Crust
Ingredients
- 1 unbaked pie crust
- additional flour for work surface
- egg wash (1 egg beaten with 1 Tablespoon water or milk)
- sugar, for sprinkling on top of the crust
Instructions
- Roll out the bottom crust on a lightly floured surface and transfer it to a 9-inch pie plate (affiliate link). It should overhang slightly by about 1/2-inch or so. Do not trim of finish the crust edges at this point. Fill with your pie filling, which should be cooled completely if previously cooked (like some apple, blueberry, or cherry pie fillings).
- Roll out the top crust on a lightly floured surface until it is about 3-inches larger in diameter than your pie plate (affiliate link) (so about 12-inches in diameter). Use a pastry cutter or pizza cutter to slice strips of pie dough for the crust. They can be a uniform width or you can vary the width for visual interest or a more unique pie design. I tend to stick to a fairly traditional ¾ to 1 1/4-inch wide strip for my lattice crust as it is easier to work with than narrower strips. A ruler certainly helps maintain straight lines and even strips, or you can just eyeball it if you have a steady hand.
- Lay 4 to 7 strips (depending on how narrow or wide your strips are) going one direction across your pie (I prefer vertical, but it doesn't matter), spacing them slightly apart. Use longer strips for the middle of the pie and shorter strips as you work your way toward the edges. Fold back every other strip halfway.
- Add your longest strip of unused pie dough perpendicularly across the other parallel strips. Return the folded strips back to their original position. Fold back the alternate parallel strips over the perpendicular strip.
- Add another perpendicular strip across the initial parallel strips of dough, then return the folded strips back to their position. Continue on with this pattern until you have used up all of your pastry or covered the top of the pie with a woven lattice crust.
- Trim the lattice strips around the edges, then fold the bottom crust over the ends of the strips and crimp around the circumference of the pie for a finished look. Alternately, you could fold the lattice strips and bottom crust under for a different look and skip crimping.
- Refrigerate for 30 minutes before baking. Pie crust bakes best when it is cold and the handling and time it takes to weave a lattice crust usually allows the dough to warm up enough that you will want to refrigerate the unbaked pie for a bit to make sure that the lattice design holds its shape while baking.
- Brush the top of the pie crust with an egg wash made from 1 egg beaten with 1 Tablespoon of water or milk so it will bake up golden brown. Bake according to directions listed in the recipe you are using.
Notes
- Freezing: You can assemble and freeze entire pies with a lattice pie crust, then bake straight from frozen. You just need to add an additional 20-30 minutes to the bake time for most pies. I have done this with peach, strawberry rhubarb, and blueberry pies with good success.


Thank you Amy, this was such a great tutorial and you have taken the fear out of trying one!
This pie crust is so delicious and I loved wowing my family with my lattice skills! I’ve always been intimidated in making my own crust and now I don’t know why! I’ll never buy another one.
I was trying to figure out how to make a lattice top for my pies at Thanksgiving and found yours. Followed your instructions (pics were sooo helpful!) and it came out great! No as pretty as yours but way better than I would have been able to do myself! THANK YOU!
Awesome Amy😊 Thank you for All your tips👍
Thank you Amy! You are the hostess with the mostess. Your tips are helpful and Greatly appreciated!
Happy Baking 😊❤️
Lol, I’m glad the info I shared is helpful!
Hi Amy, I have cooked a d baked for years. I continue to learn every time I read your tips and recipes. Thanks for your desire to improve our skills.
I’m so happy to hear that!
This tutorial makes me wonder why I was ever afraid to try a lattice pie crust. It came out a little wonky but that only added to the homemade charm. I even had enough leftover pieces to cut out flower petals to decorate with. Thank you so much!
It really is so much easier than people think! The flower petals sound cute! Good job!