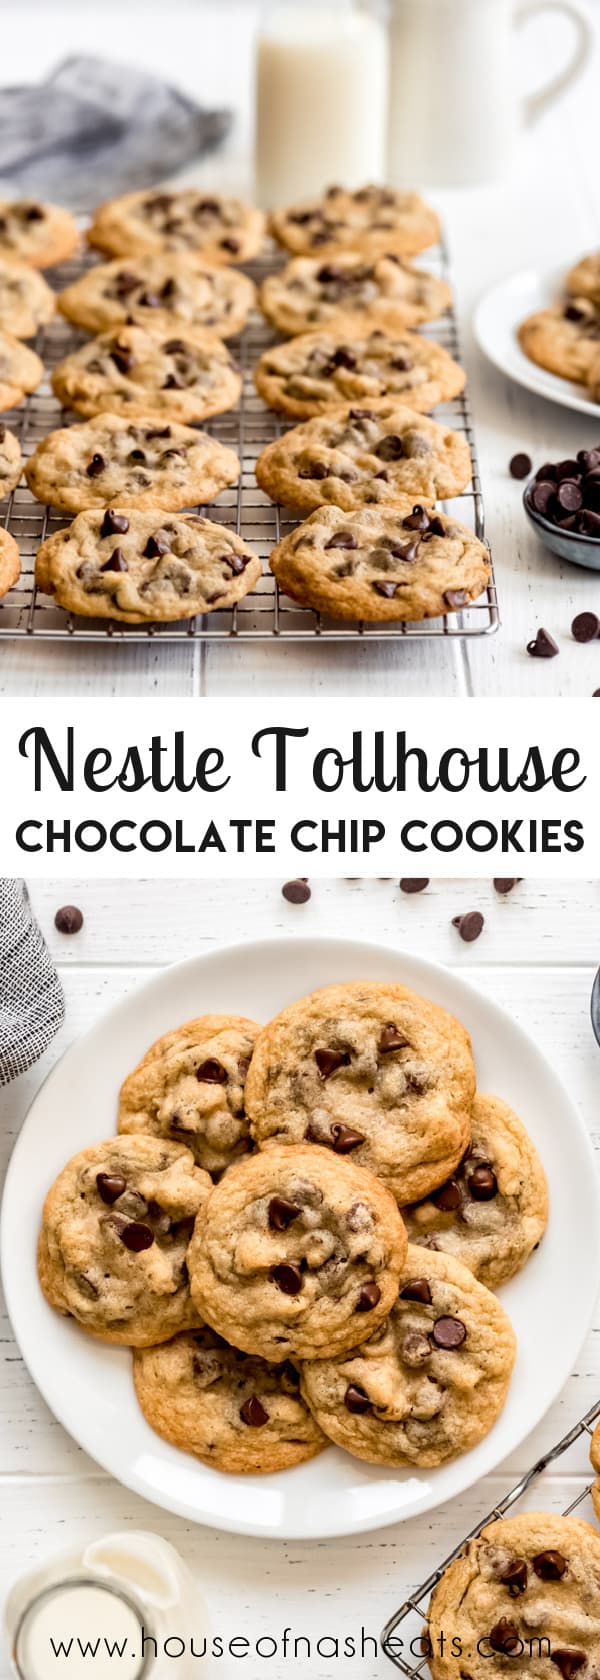
NESTLÉ® TOLL HOUSE® Cookies are classics for a reason! They have a delicious buttery, toffee flavor and are crisp just around the edges with soft centers and plenty of semisweet chocolate chips!

The Origins of Toll House Chocolate Chip Cookies
It’s almost hard to believe that chocolate chip cookies weren’t around until they were first created by Ruth Wakefield at the Toll House Inn in Whitman, Massachusetts in the 1930’s. The inn itself had been around since 1709 and was situated between Boston and New Bedford. Ms. Wakefield initially called her cookies “chocolate crunch cookies” and made them with a bar of chopped up Nestle semisweet chocolate. It was included in her 1936 cookbook of “tried and true” recipes.
Now it’s America’s favorite cookie and everyone has their favorite version, whether it’s thick, almost scone-like Levain Bakery chocolate chip cookies, soft & chewy chocolate chip cookies, or the classic Toll House recipe that has been printed on the back of bag of Nestle’s semisweet morsels since they started being sold in 1939.
We always have chocolate chips in the pantry so we can make these cookies! Be sure to check out these reader favorite chocolate chip recipes like Chocolate Chip Scones, Chocolate Chip Cookie Dough Fudge, and Bakery Style Chocolate Chip Muffins.

It’s Ms. Wakefield’s classic recipe I’m sharing today for it’s slightly thinner cookies with their prominent buttery flavor (Ms. Wakefield adding her chocolate bits to a butter drop cookie, which was her base to begin with after all), crispy outer edges, and chewy centers. And yes, this version even includes walnuts, just like the original, although they are optional and can be left out if you prefer, and has one slight difference from the version on the back of the bag.
I wanted to include this recipe as part of my American Eats series where I’m sharing some of the most popular and iconic recipes from each state, one state at a time. Massachusetts has a long history of delicious food that it is well-known for, and these Nestle Toll House cookies had to be included on that list!


Classic Toll House Cookies Recipe Ingredients
- Flour: Regular all-purpose flour is all you need for a batch of these cookies. The amount is slightly less than in my soft & chewy chocolate chip cookies, which results in thinner cookies with crispier edges.
- Sugar: Both granulated sugar and brown sugar are used in harmony for perfectly sweet cookies.
- Butter: In the original recipe it just specifies “butter” but doesn’t say salted or unsalted. In the past, unsalted butter was more important in baking because salted butter would be up to 10 times saltier to help preserve it. Nowadays there isn’t a hugely noticeable difference in baking so I always just use salted butter to makes things easier.
- Baking soda: Baking soda helps the cookies spread a bit so they have just the right texture. The original recipe called for dissolving the baking soda in water but at some point Nestle decided to skip that step, which makes sense since it doesn’t make much of a difference.
- Salt: Really good chocolate chip cookies need a little salt to balance out the sweet.
- Eggs: These are what help make the cookies nice and chewy.
- Vanilla extract: I love using my homemade vanilla extract in recipes.
- Semisweet chocolate chips: This classic recipe has a nice balance of cookie to chocolate chips. Although you could use milk or dark chips, the original Toll House cookies are made with semisweet.
- Walnuts: I LOVE walnuts in cookies and Ms. Wakefield included them in her original recipe. They are optional, though, if you have allergies or just prefer to leave them out.
Toll House Cookie Substitutions and Variations
- Chocolate: Try switching out the semisweet chocolate chips for milk chocolate chips. Or use half semisweet and half milk chocolate or half regular semisweet chocolate chips and half mini chocolate chips for chocolate in every bite!
- Nuts: If you don’t have walnuts on hand, chopped pecans are an excellent alternative.

How to make Toll House Cookies
- Cream butter and sugars: You can do this in a stand mixer, with a hand mixer, or even by hand if your butter is room temperature and you don’t mind getting an arm workout. Add the eggs, vanilla, and baking soda dissolved in water and mix well, scraping down the sides and bottom of the bowl.


- Add dry ingredients: Add the flour and salt. Pulse your mixer until the flour starts to combine then mix until no streaks of flour remain.
- Stir in chocolate chips and walnuts: Mix in the chocolate chips and walnuts until they are evenly dispersed throughout the dough. At this point you can cover and chill the dough in your fridge for 5 days or even freeze it for future baking.


- Scoop and bake: Use a small cookie scoop to place rounded balls of dough onto a baking sheet lined with parchment paper. You can add some additional chocolate chips on to he ops of each cookie, if desired. Bake at 375 degrees F for 10-12 minutes just until browned around the edges and set in the centers. Cool on wire racks.


Toll House Chocolate Chip Cookies Tips for Success
- Don’t overbake. We like to slightly underbake these cookies so they stay soft and chewy longer. Overbaking results in a more crisp, dry cookie.
- Use parchment paper to line your baking sheets. It makes clean up a breeze and prevents the cookies from sticking to the baking sheets.
- Don’t skip creaming the butter and sugar. The two ingredients need to be combined well for the cookies to bake properly.
Storing Toll House Chocolate Chip Cookies
These cookies will keep well on the counter for about 5 days when stored in an airtight container. They also freeze really well for about 3 months.
You can also freeze the dough, if you don’t want to bake an entire batch at once. We prefer scooping the cookies out into individual mounds and flash freezing them on a baking sheet lined with parchment paper, then transferring the frozen balls of dough to a freezer-safe bag for longer term (about 2-3 months) storage. That way you can bake only as many as you need and have fresh cookies any time you want.
There is no need to thaw the cookie dough before baking. Just place the frozen balls of dough on your baking sheet and bake them for an extra minute or two longer.


More Cookie Recipes
- The Best Snickerdoodle Cookies
- Oatmeal Chocolate Chip Cookies
- White Chocolate Cranberry Cookies
- Soft & Chewy Molasses Cookies
- Chocolate Peanut Butter No Bake Cookies
- Monster Cookies
Did you make this recipe?
Let me know what you thought with a comment and rating below. You can also take a picture and tag me on Instagram @houseofnasheats or share it on the Pinterest pin so I can see.
Toll House Chocolate Chip Cookies
Ingredients
- 1 cup unsalted butter softened
- 3/4 cup firmly packed light-brown sugar
- 3/4 cup granulated sugar
- 2 large eggs beaten
- 1 teaspoon baking soda dissolved into 1 teaspoon hot water
- 2 1/4 cups all-purpose flour
- 1 teaspoon table salt
- 1 cup chopped walnuts (optional)
- 2 cups semisweet chocolate chips
- 1 teaspoon vanilla extract

Instructions
- Preheat oven to 375°F. Line two baking sheets with parchment paper.
- In a large bowl, beat the butter, brown sugar, and granulated sugar until creamy and light, about 1-2 minutes using a stand mixer or electric mixer.1 cup unsalted butter, ¾ cup firmly packed light-brown sugar, ¾ cup granulated sugar
- Add the eggs, vanilla, and baking soda dissolved in water. Mix again, scraping the bottom and sides of the bowl.2 large eggs, 1 teaspoon vanilla extract, 1 teaspoon baking soda
- Add flour and salt, mixing until combined. Stir in the chocolate chips and walnuts.2 ¼ cups all-purpose flour, 1 teaspoon table salt, 2 cups semisweet chocolate chips, 1 cup chopped walnuts
- Drop tablespoonfuls of dough onto the prepared baking sheet using a small cookie scoop.
- Bake for 10-12 minutes until golden brown around the edges. Cool on wire racks.
Notes
- Storage: Keep cookies in an airtight container at room temperature for 5 days.
- Freezing cookies: Baked cookies can be cooled, then frozen and stored in a freezer-safe airtight container for up to 3 months.
- Freezing dough: This dough freezes well. You can freeze an entire batch for future use, or scoop the dough into balls and flash freeze them on a baking sheet lined with parchment paper for 1-2 hours before transferring to a freezer-safe bag for up to 3 months. Bake like normal, just adding an additional minute or two to your baking time.


This is a great recipe and it was very easy and delicious. I will make it again and again!
Great recipe! Very easy and delicious
Making my second batch today
Excellent cookies!
Your recipe calls for vanilla…does that mean vanilla extract? Sorry, I’m not a baker…just trying to find a way to impress my kids! Haha! This recipe doesn’t seem too complicated and the cookies in your pictures look delicious!
Ugh! I meant to put this comment on your “The BEST Soft & Chewy Chocolate Chip Cookies.” Had too many of your recipes open at the same time! Haha! The recipe on this page clearly says vanilla extract, but the other one just says vanilla.
Hi! Good question! I almost always mean vanilla extract when I say vanilla. But I will go in and fix it to avoid any more confusion. It’s a good recipe and I know the kids will think you are an amazing baker!
Thank you so much! 🙂
This recipe came out delicious! So soft and chewy on the inside and crunchy on the edges. The walnuts add a nice kick to it. 10/10 would recommend, I’ll definitely make these cookies for the holidays
Thank you! So glad you liked them!
I normally always burn cookies and can’t figure out why, so if my cookies don’t burn, then this is an absolute 5 star recipe. Will update you on it!
Hi! I hope this works for you! It’s a classic recipe! I will say sometimes ovens cook very differently? To make sure my oven cooks at the right temperature I will stick an oven thermometer in there to make sure its the right temperature. You’ve got this!
My family loved them.
Great Cheryl!