
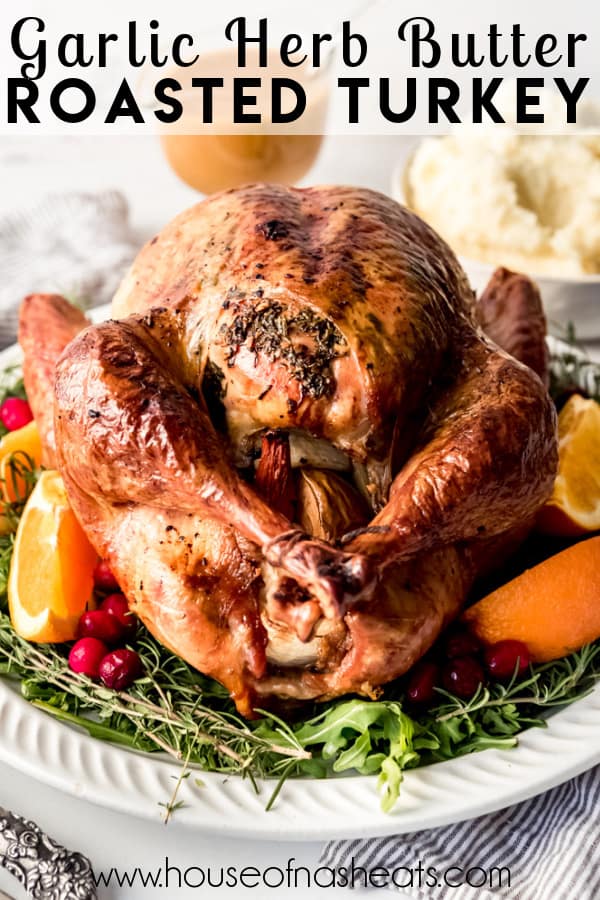
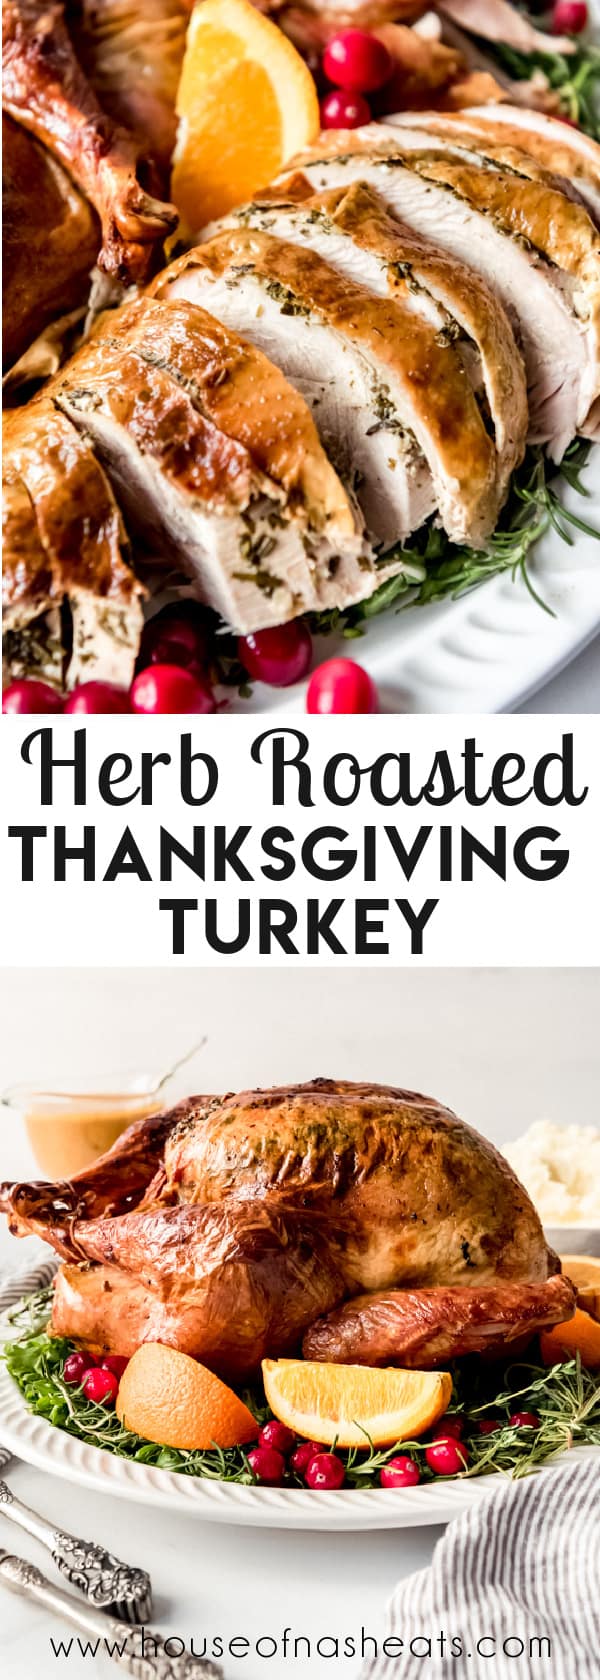
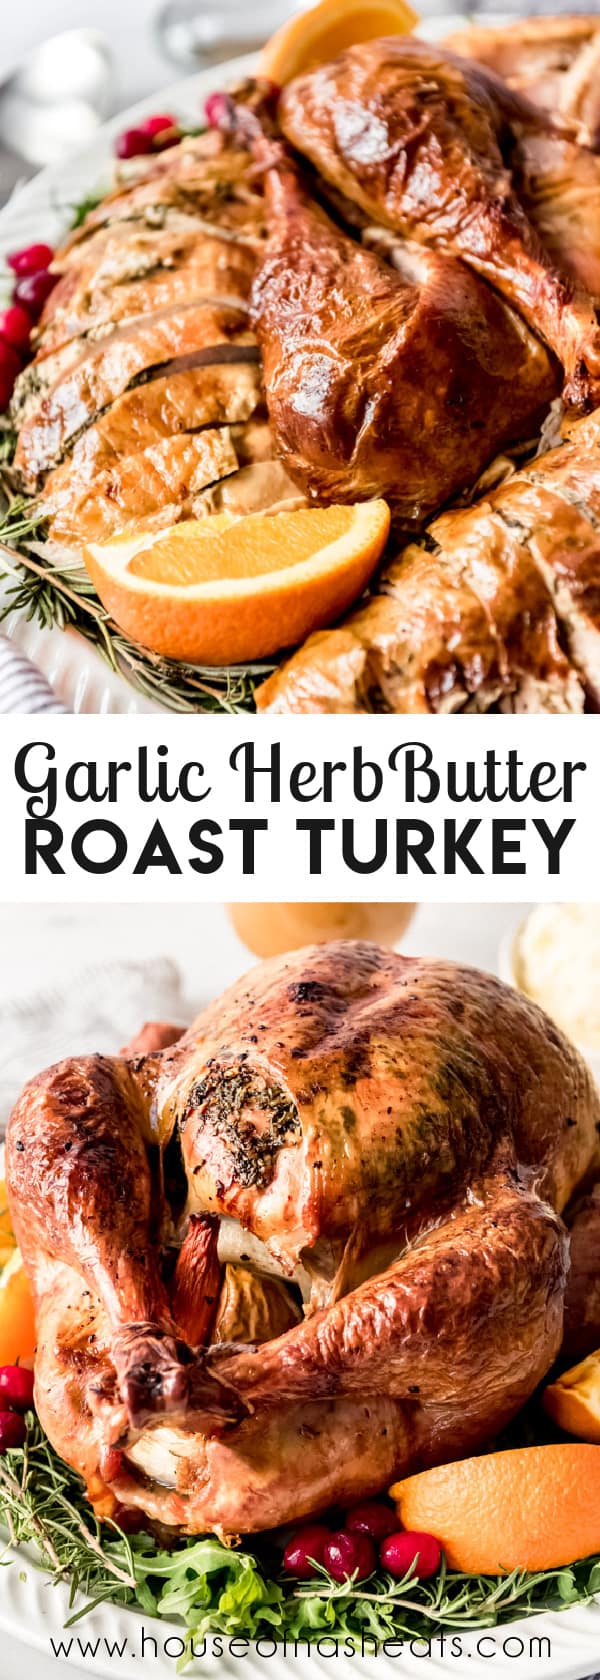


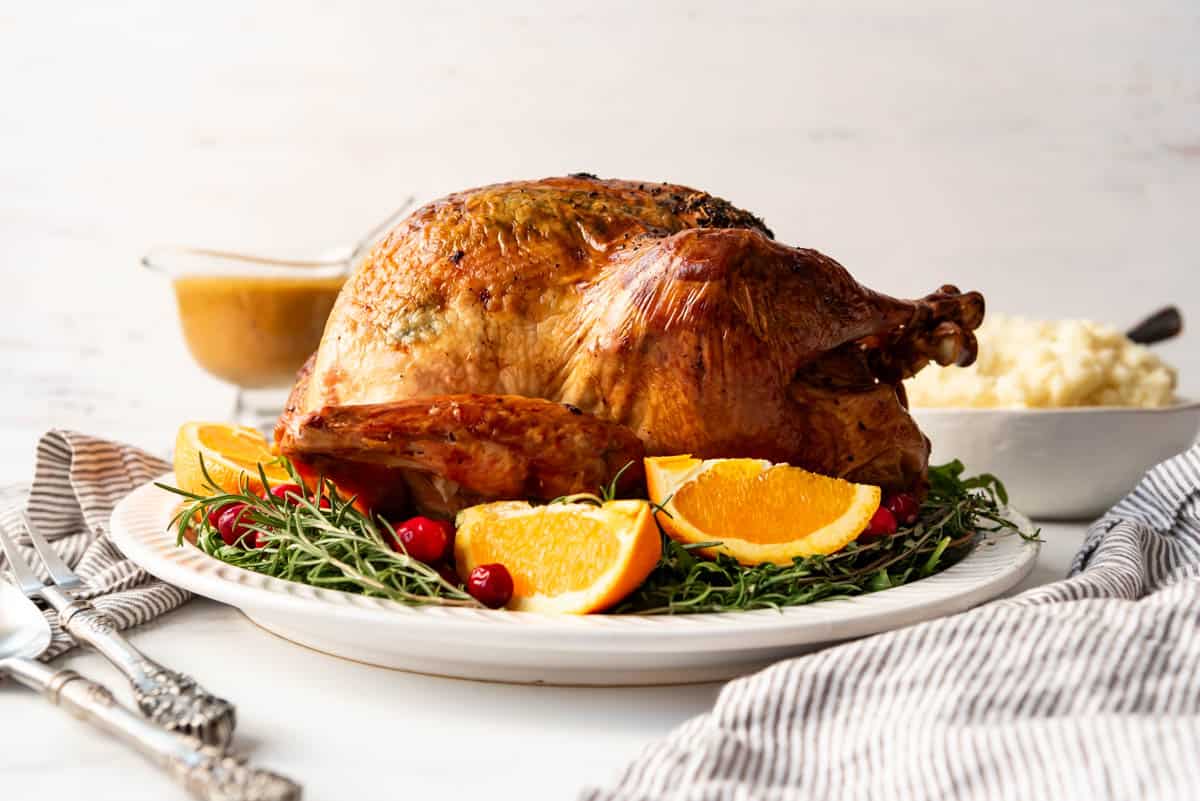
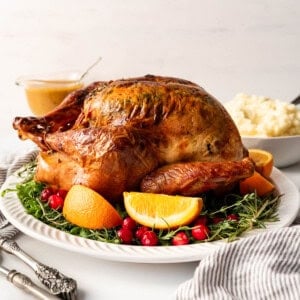
A classic Roast Turkey is a holiday centerpiece that has everyone’s mouths watering when it’s finally time to sit up to the table and feast. This roast turkey recipe is hands down the best I’ve ever had, with a butter, herb, and garlic rub that results in crispy skin and juicy, perfectly flavored meat that will have everyone asking you how you did it!
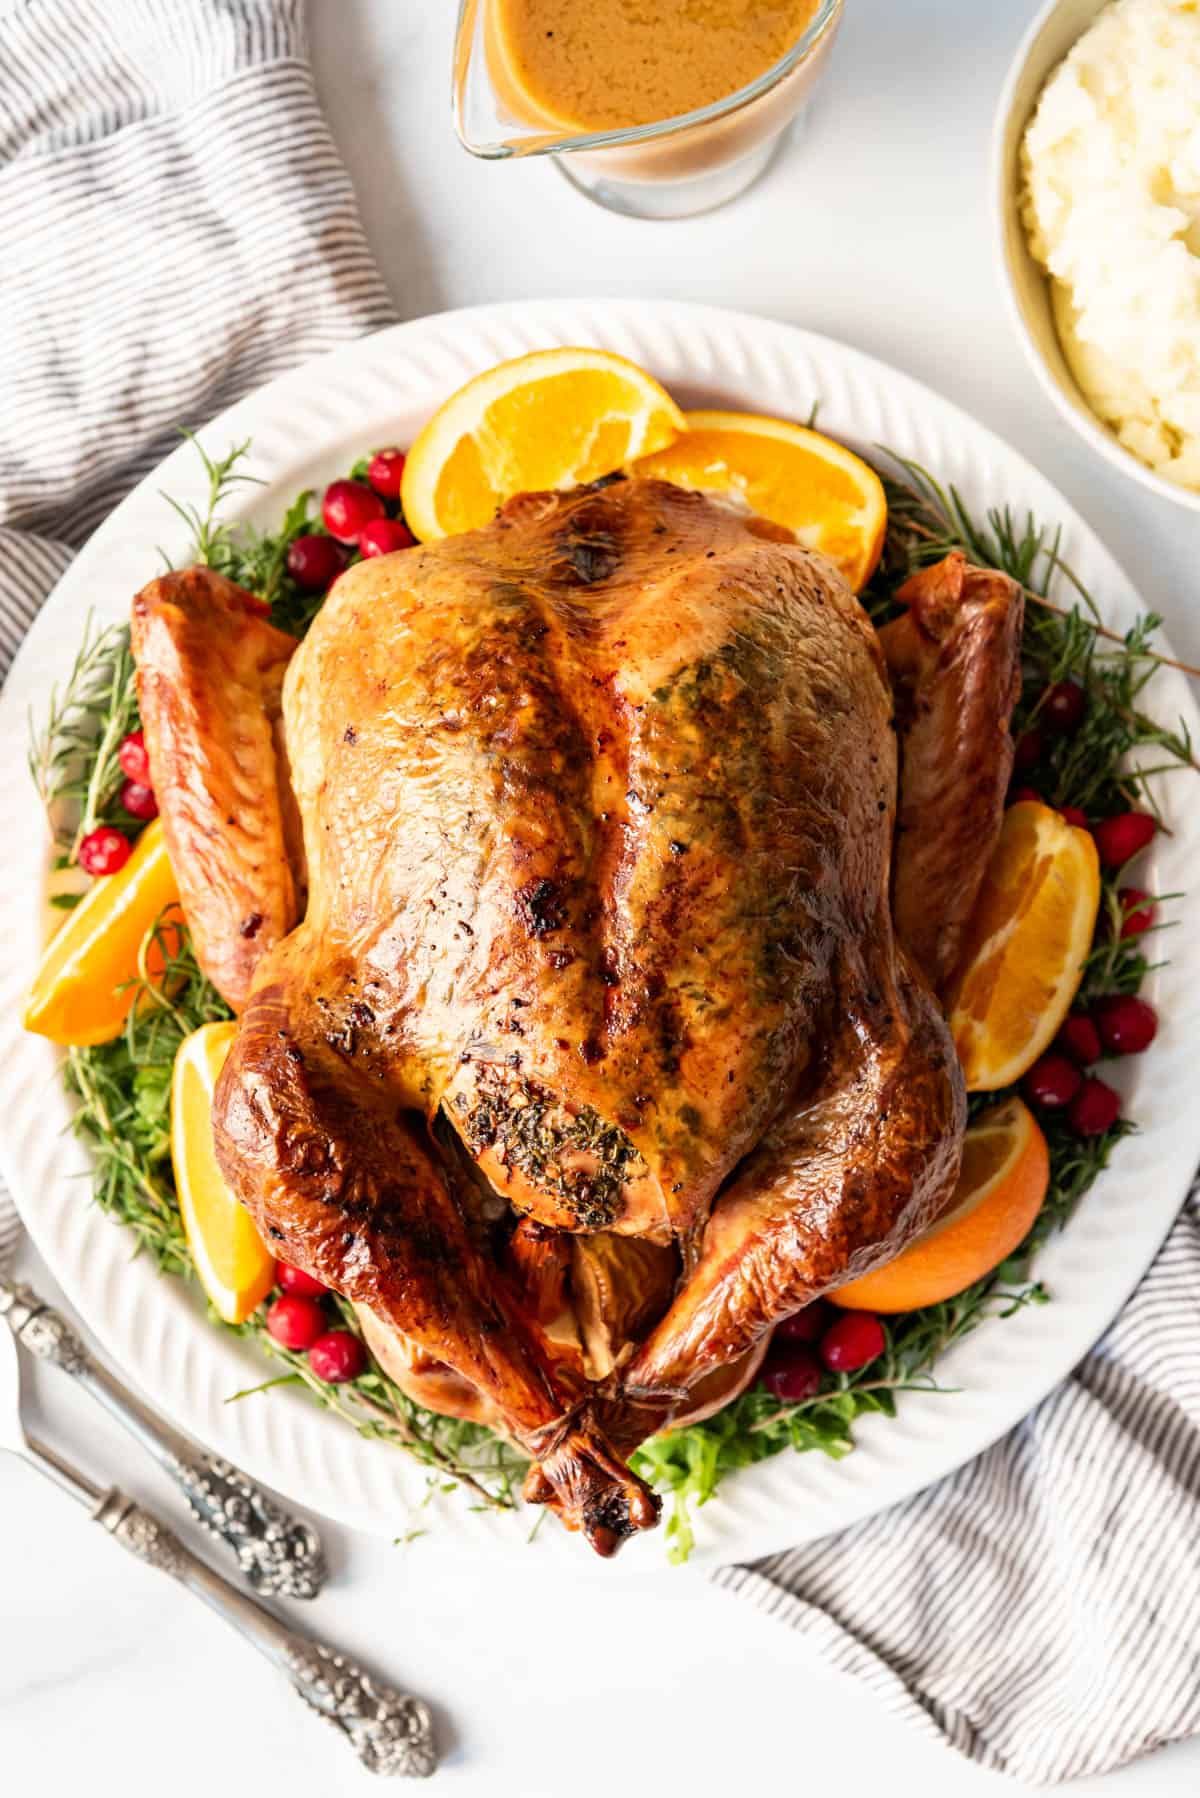
Table of Contents
I spent hours and hours pouring over all the best turkey recipes online and in my cookbook collection, as well as talking with family members and friends about their favorite turkey techniques to develop this roast turkey recipe.
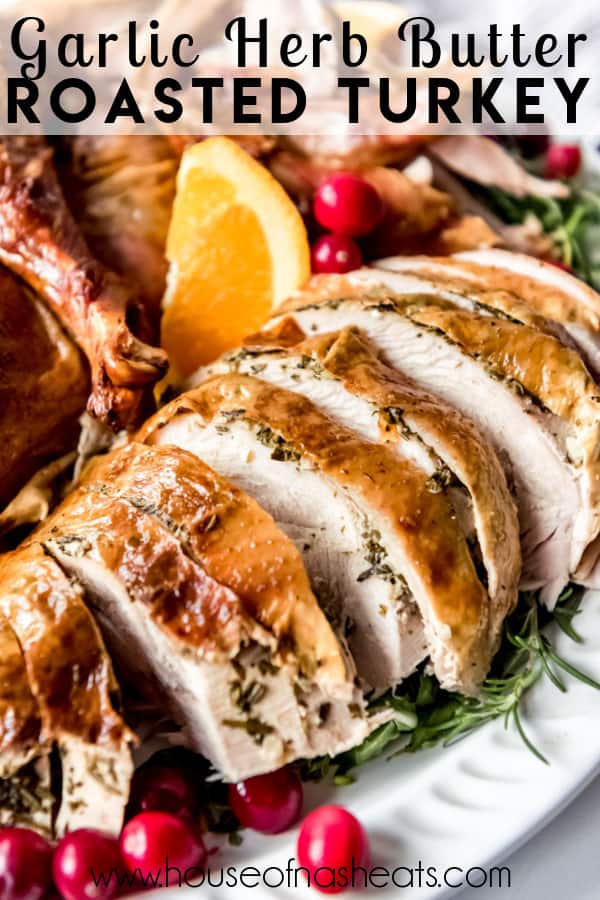
I knew it had to be supremely juicy, with mouthwateringly tender bites of light and dark meat that were seasoned well, without relying on a river of gravy for flavor and moisture. It also had to have perfectly crispy, seasoned skin and a beautiful presentation. And finally, I wanted a turkey recipe that was easy and didn’t require any special techniques or equipment (like turkey injectors or deep fryers).
Then we invited friends over to help us with the taste-testing and everyone agreed that it was easily the best roast turkey any of us had ever had!
We love to entertain during the holiday season, and a succulent herb roasted turkey is always a hit. But if you are looking for other holiday centerpiece ideas, you might want to try our Garlic Herb Butter Beef Tenderloin, Rosemary & Garlic Oven Roasted Rack of Lamb, Honey Roast Duck, or Brown Sugar Glazed Ham.

Being in charge of the Thanksgiving turkey can be intimidating for many home cooks, especially if this is your first time roasting a turkey. But it doesn’t need to be!
Think of roasting a turkey just like roasting a chicken, only on a slightly larger scale. You can totally do this and have your turkey turn out amazing even if this is your very first try!

This is hands-down the best roast turkey I have ever had, and I’ve had some pretty amazing ones over the years. But this is the only one that can rival our favorite smoked turkey and make me question which approach is right for our Thanksgiving meal.
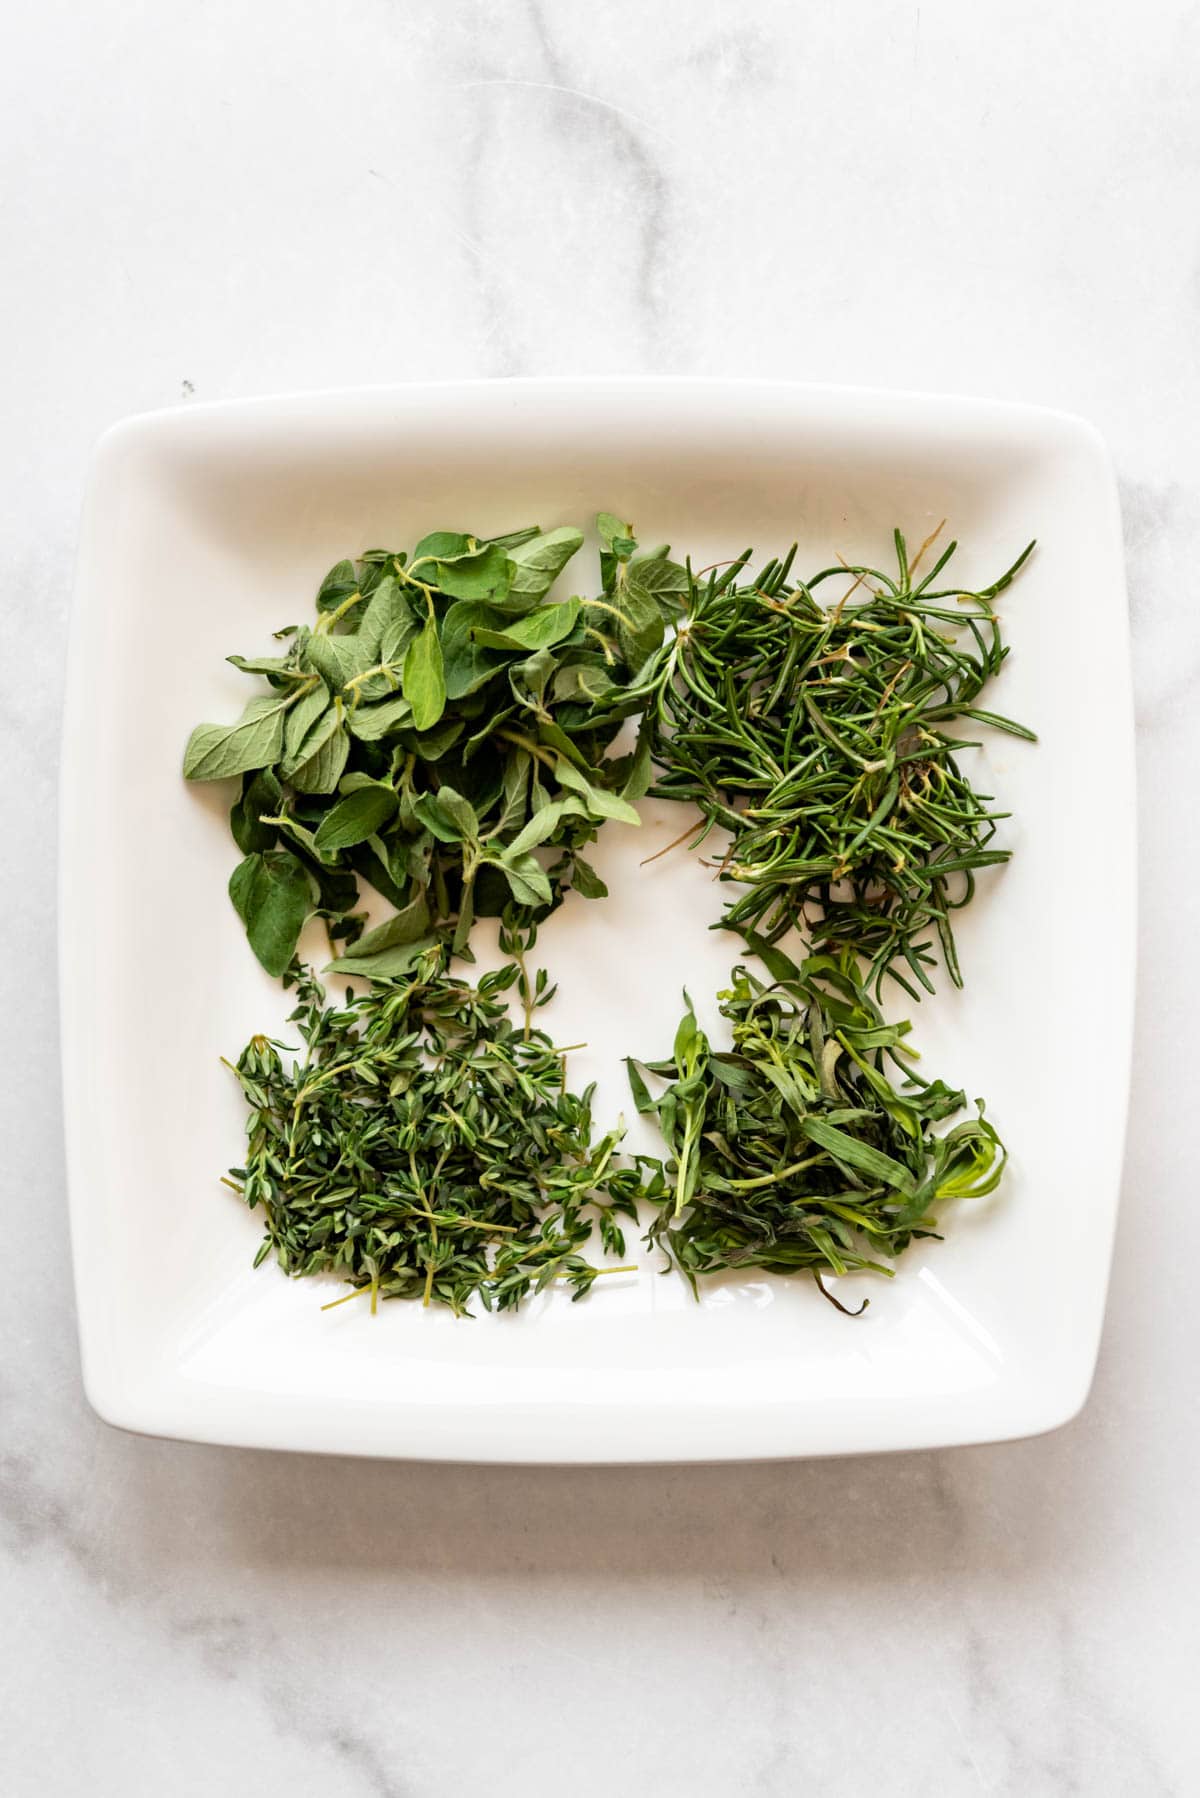
I ditched the traditional sage that is used in so many turkey recipes and went looking for a flavor profile that is more suited to my personal tastes since I don’t love sage. The combination of fresh rosemary and thyme is pretty standard for a lot of roast meats, but I added chopped fresh oregano and tarragon, which resulted in an explosion of flavor that made my tastebuds extremely happy!
Whether you are a seasoned cook who, like me, has spent years searching for the BEST roast turkey recipe, or a first-timer about to try your hand at cooking a turkey on your own, my roast turkey recipe always gets rave reviews and is much easier to accomplish than you might think.
Tools for roasting a turkey
- Kitchen string (also known as butcher’s twine) for tying up the turkey legs: Just about two feet is all you need to tie the legs and hold all the aromatics inside the bird while it roasts.
- A large roasting pan: You don’t want your turkey sitting right on the bottom of the pan in it’s juices while it slowly roasts, so a roasting pan with a rack is your best friend for the most even cooking. But if you don’t have one, never fear! Just tear off a bunch of aluminum foil and roll it into a coil, then arrange it in the bottom of whatever large pan you have and set the turkey on top.
- Digital meat thermometer (affiliate link): An oven safe one that can stay inside the turkey as it cooks is your best bet, although any good meat thermometer will do.
- Heavy duty aluminum foil: This is for making a shield to protect the turkey breasts during part of the roasting process so they don’t get overdone while the leg and thigh meat is finishing off.
- Turkey baster: There is nothing so satisfying as basting a gloriously brown turkey in the oven with it’s own juices to give it a crispy, flavorful skin.
How to Cook a Turkey
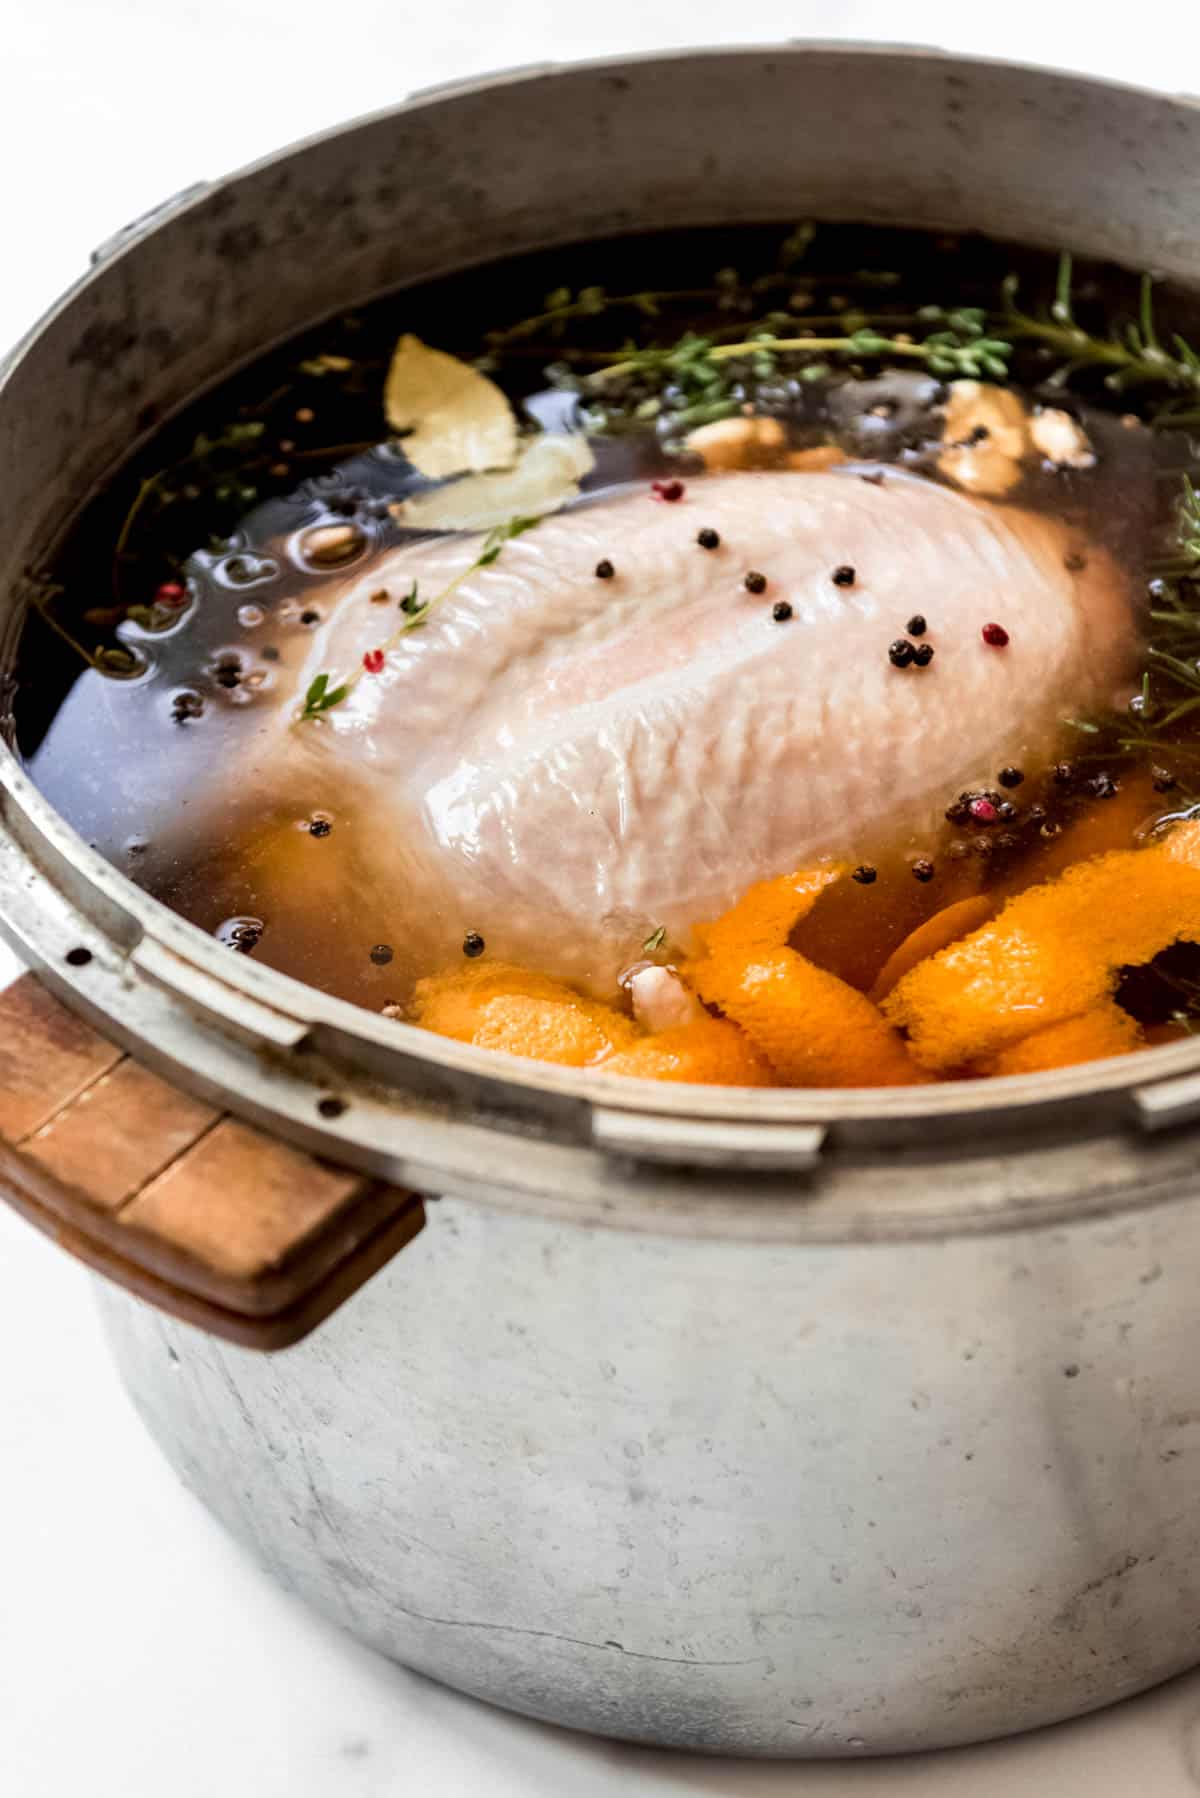
- Brine the turkey: I always use my favorite turkey brine recipe and have more details in that post, but the process is actually very simple. Just combine the water, kosher salt, brown sugar, peppercorns, allspice, fresh herbs, garlic, orange peel, and bay leaves in a large food-safe 5-gallon bucket or large pot. Remove the neck and giblets from the thawed turkey and discard or set aside for later use. Remove any plastic or wire holding the turkey legs together. Gently lower the turkey into the brine, making sure it is fully immersed. Either place in the fridge or set a bag of ice on top of the turkey to keep it fully submerged in the bucket. Cover the bucket with a lid or a thick, tight layer of aluminum foil and set aside to brine overnight or up to 24 hours.
- Pat dry: Remove the turkey from the brine and pat completely dry both inside and out using plenty of paper towels. There is no need to rinse the turkey first. Let the turkey air-dry for at least 30 minutes or up to overnight in the fridge.
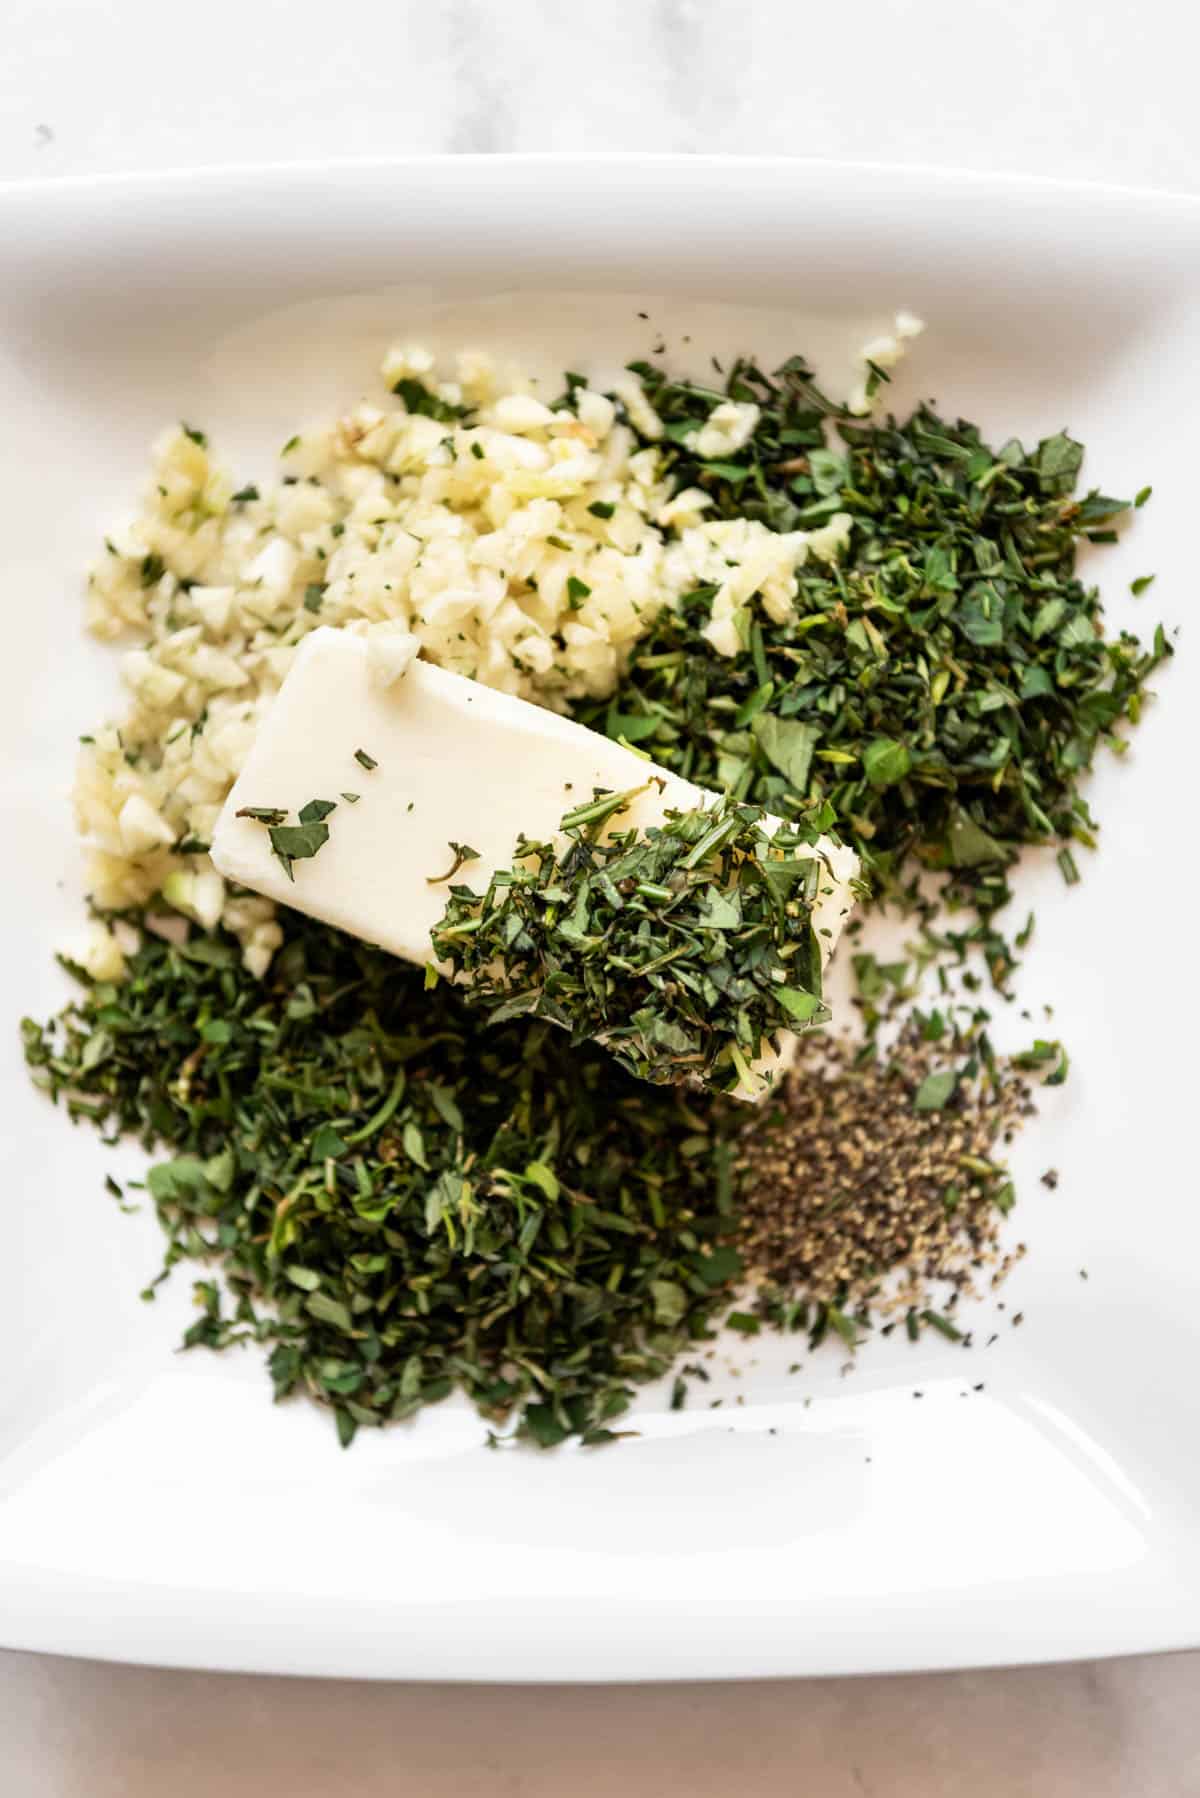
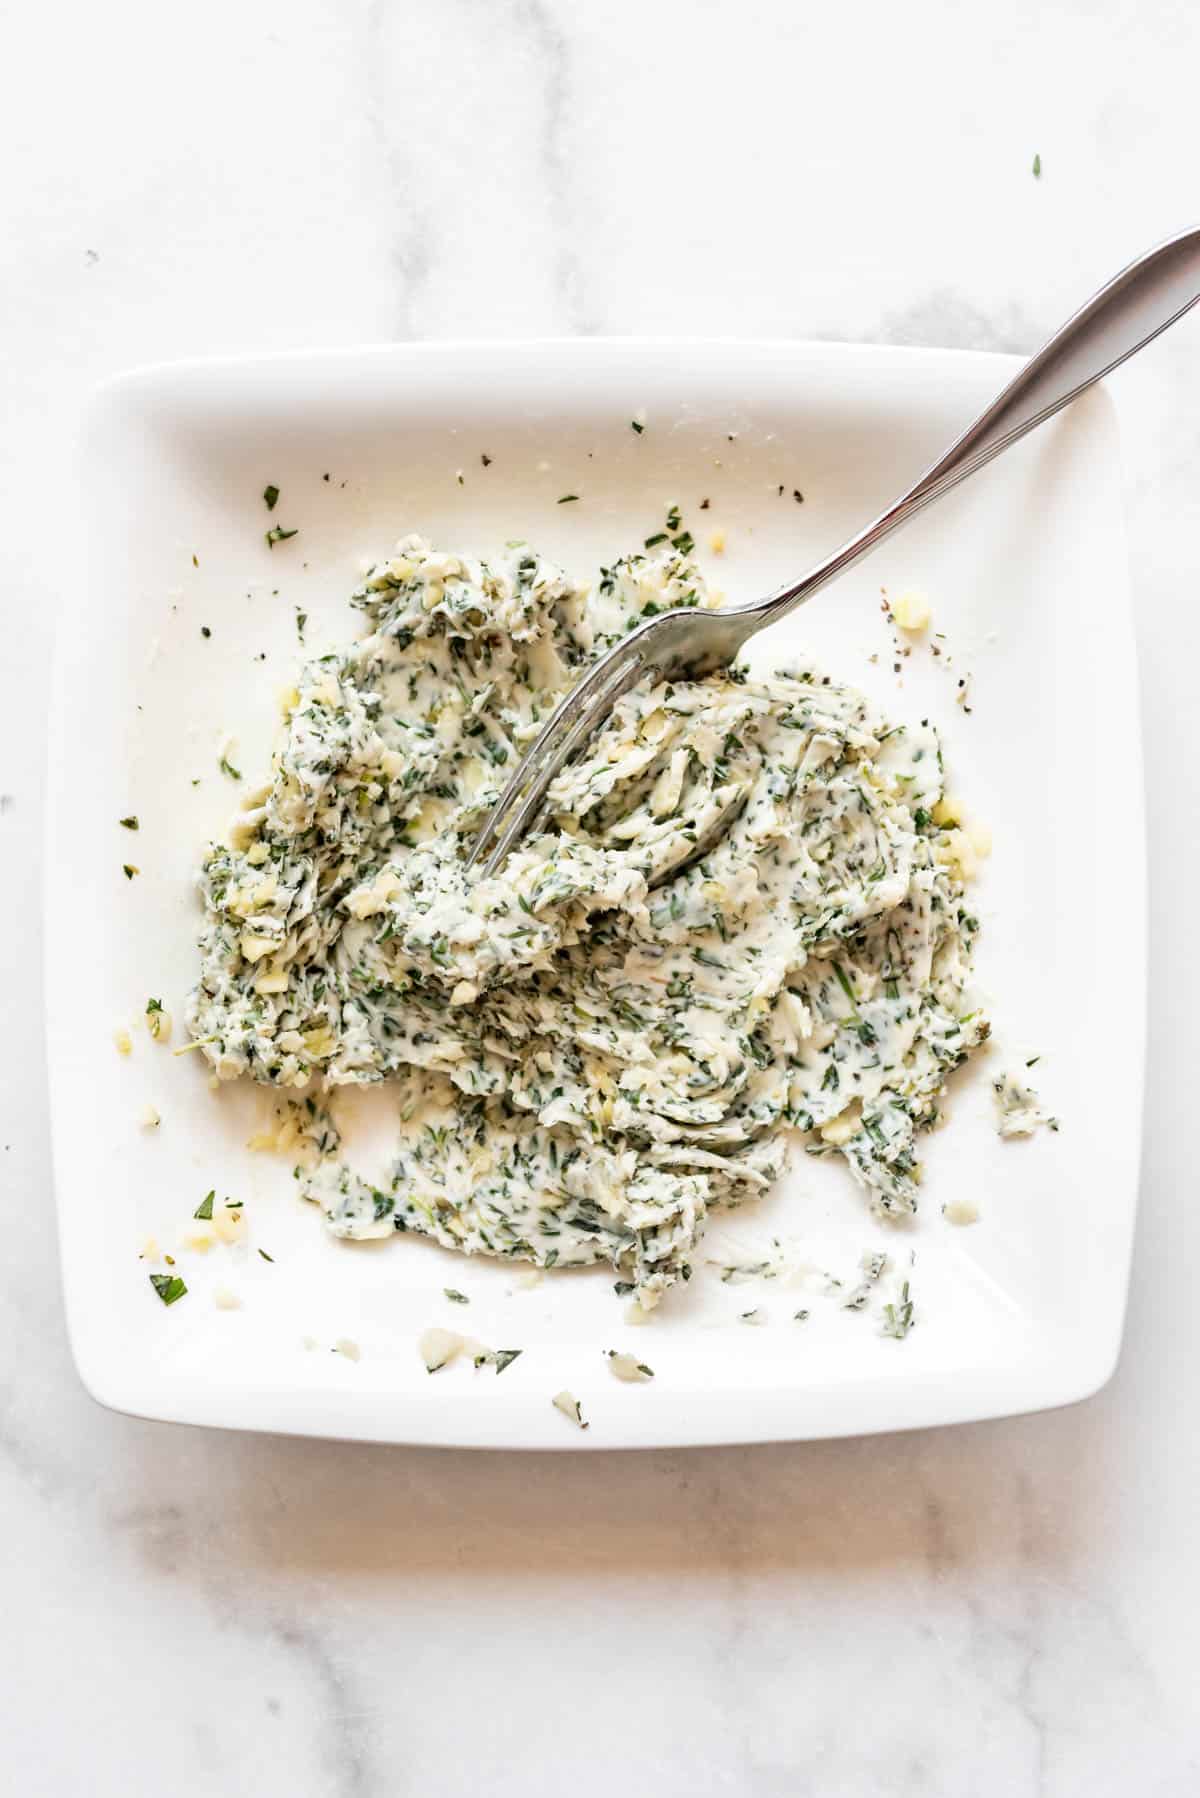
- Make the garlic herb butter rub: Combine softened butter with chopped fresh rosemary, thyme, oregano, tarragon, garlic, kosher salt, and pepper, mashing into a paste with a fork or using a food processor (affiliate link).
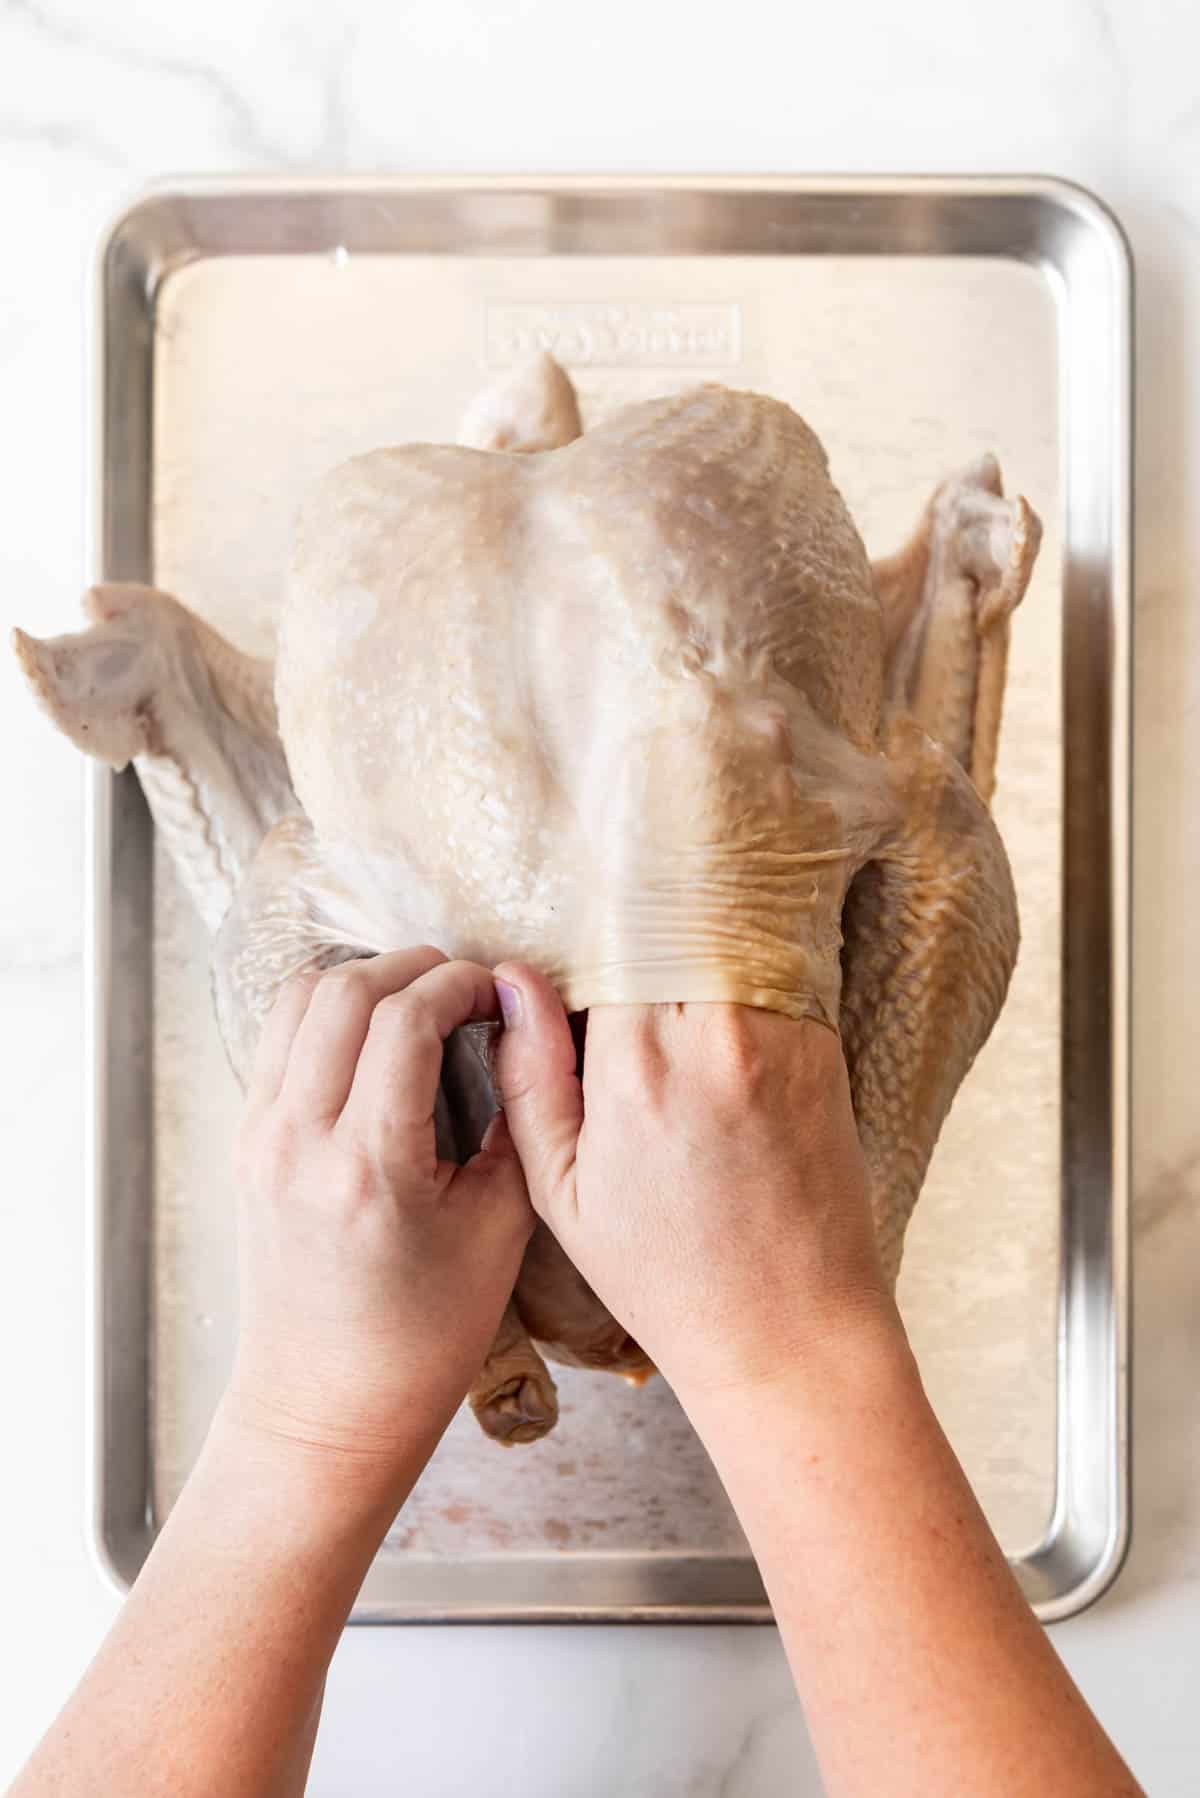
- Loosen the skin of the turkey: First, remove any jewelry so as not to tear the skin, then use your fingers to gently separate and loosen the skin from the breast meat.
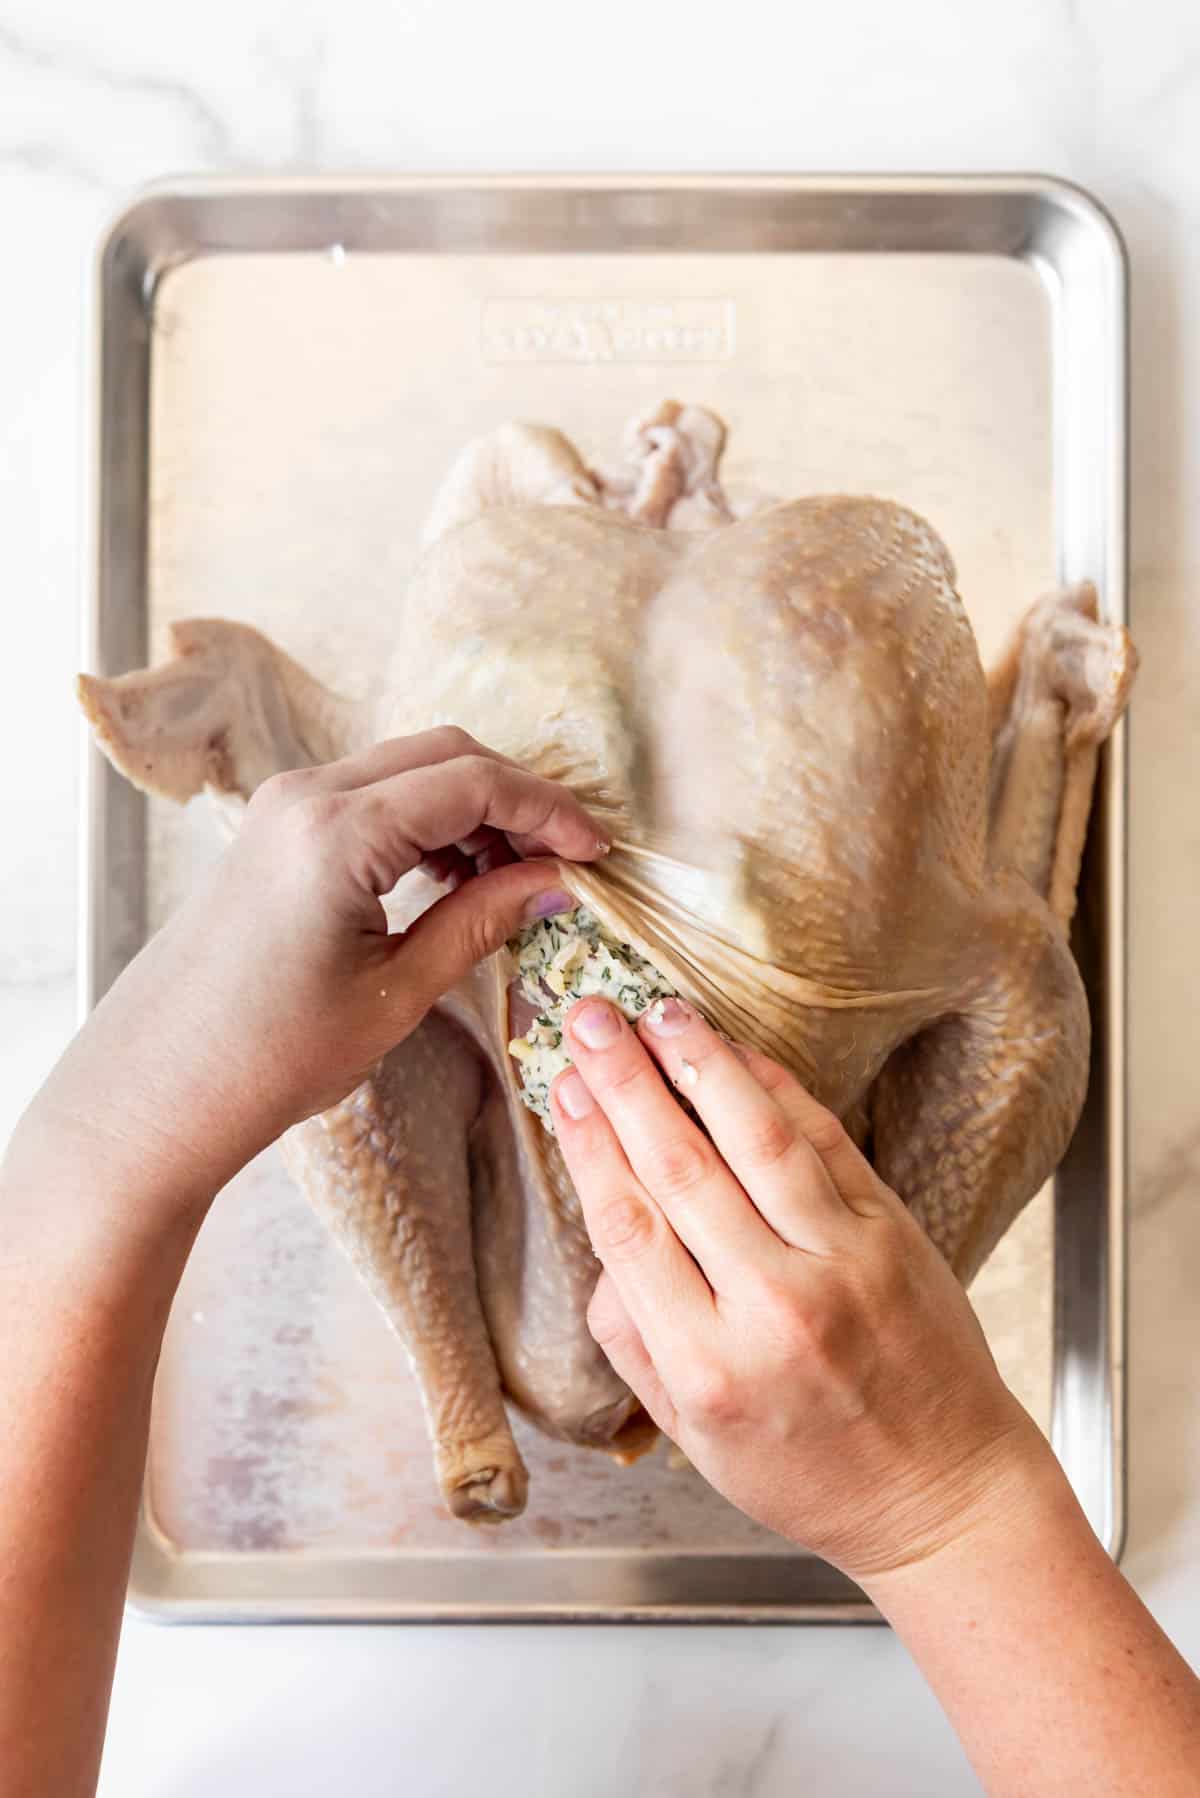
- Rub the turkey all over with the garlic herb butter: Use your hands to stuff about 2/3 of the garlic herb butter between the skin and the breast meat, massaging it to create an even layer. Rub the remaining ⅓ of the butter mixture inside the cavity of the turkey.
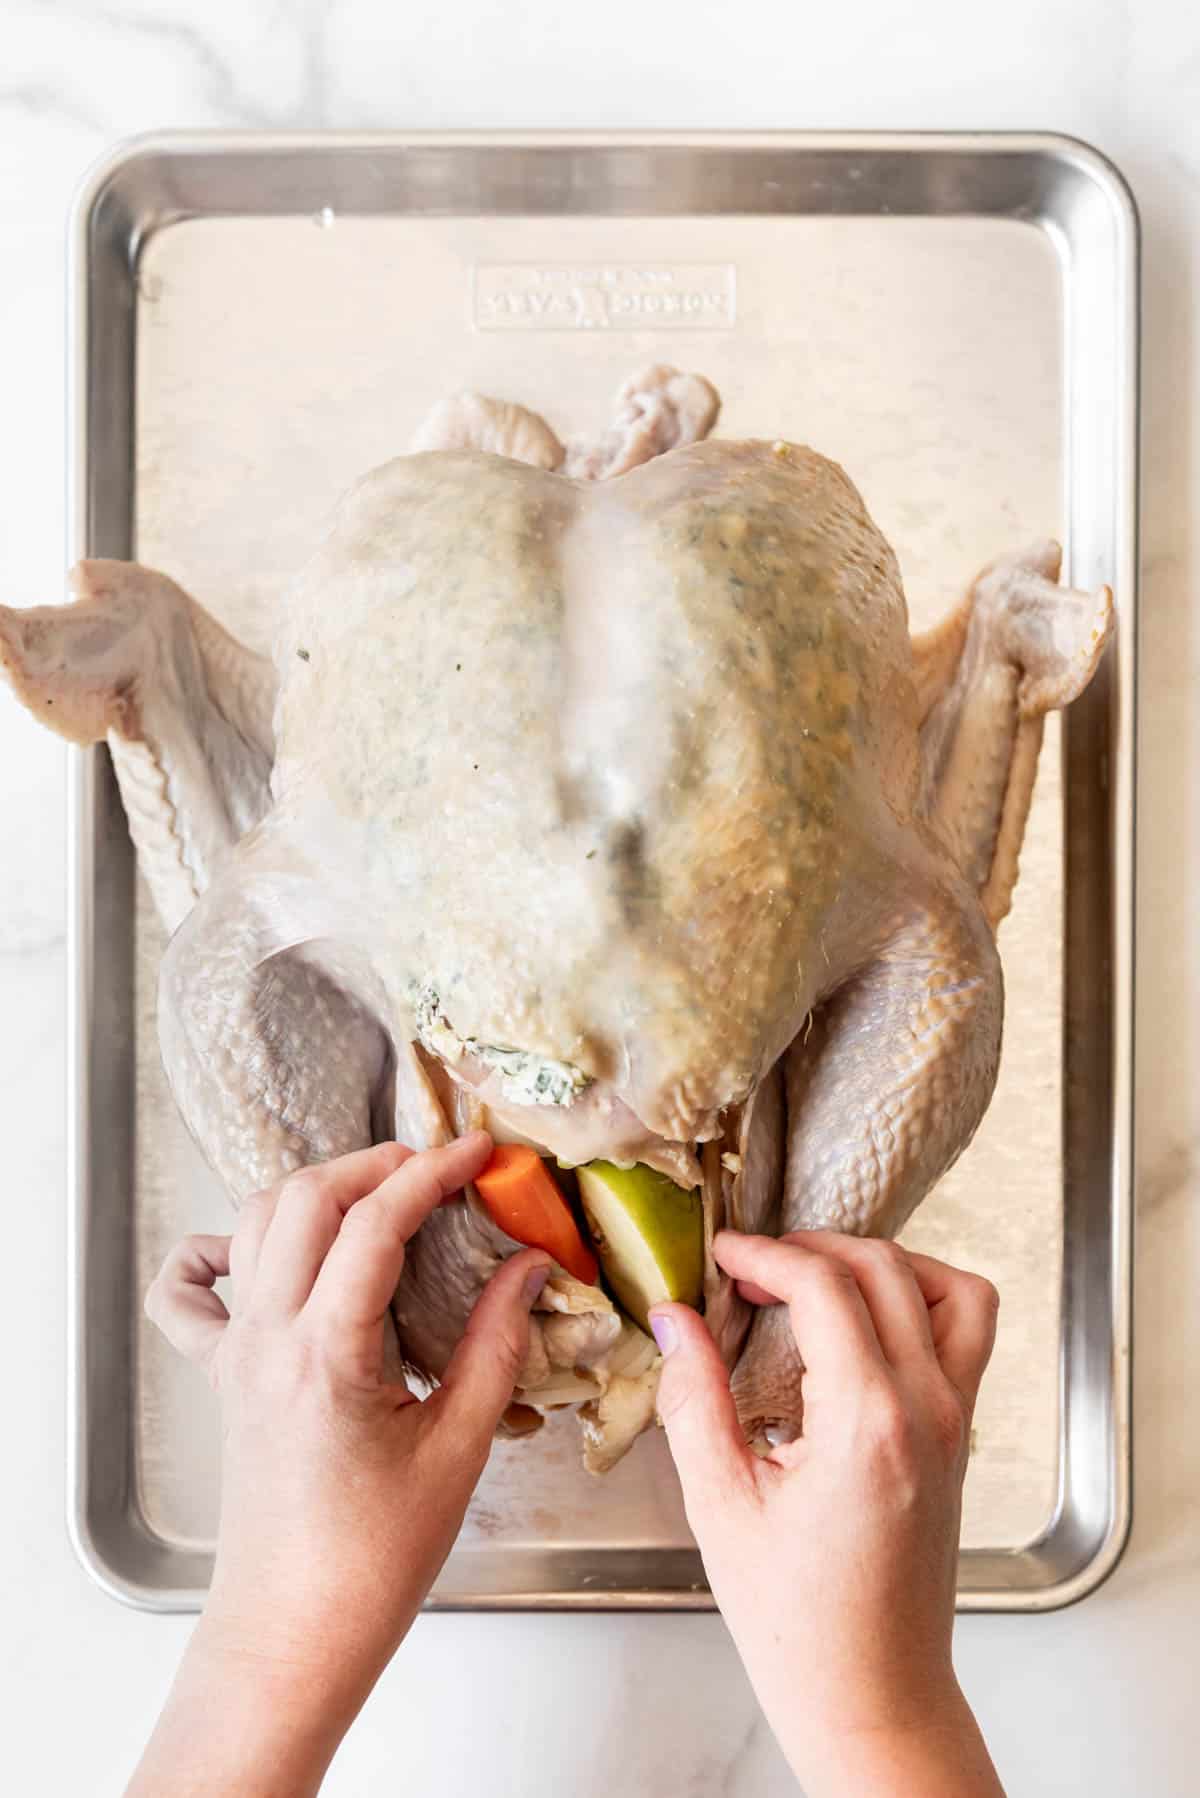
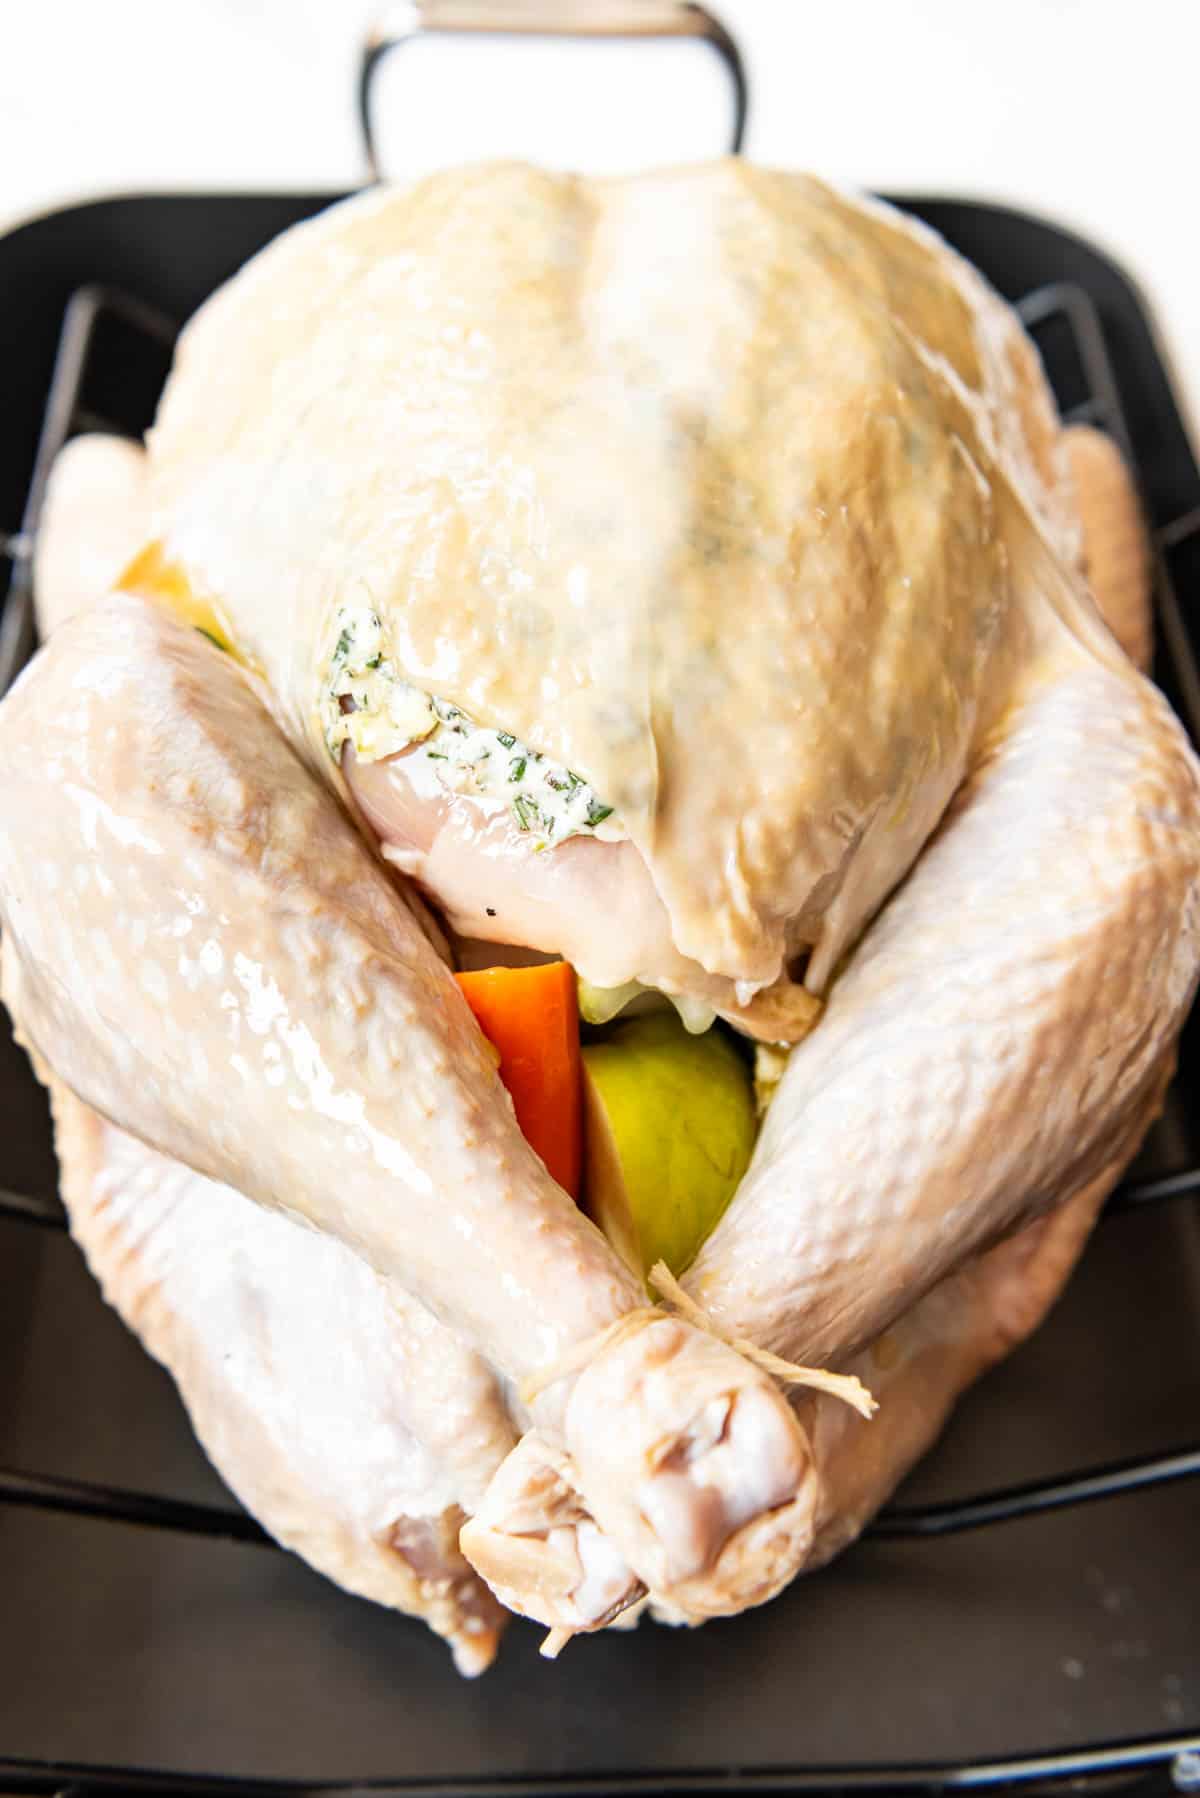
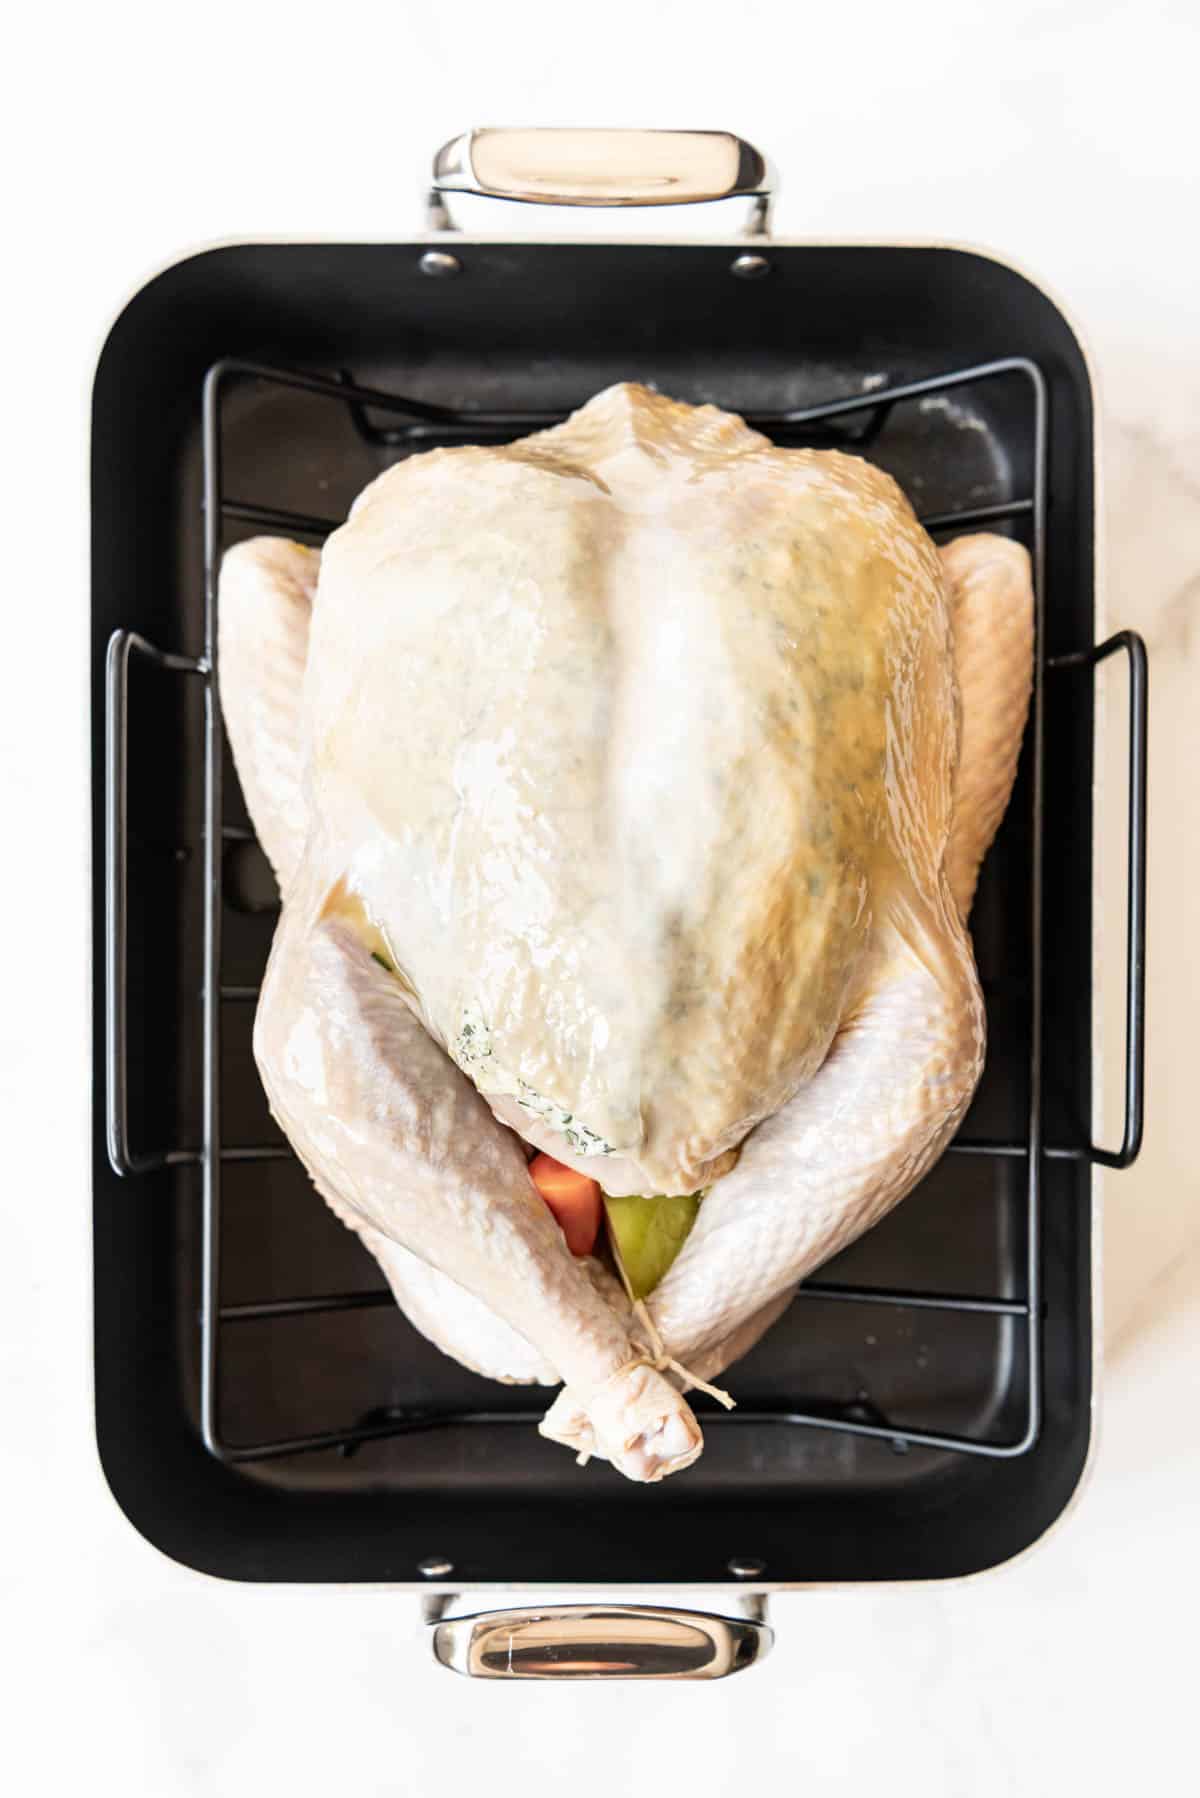
- Stuff & truss: Add aromatics like apple, onion, carrot, and celery to the cavity of the turkey. Quartered lemons or oranges, as well as bundles of herbs or whole cloves of garlic are also good options. Tie the legs together and fold the wings under the turkey to protect them while the rest of the turkey is cooking so they don’t dry out and burn. Transfer the turkey to a roasting pan with the breast side up. At this point, the turkey can go back into the fridge for 24 hours.
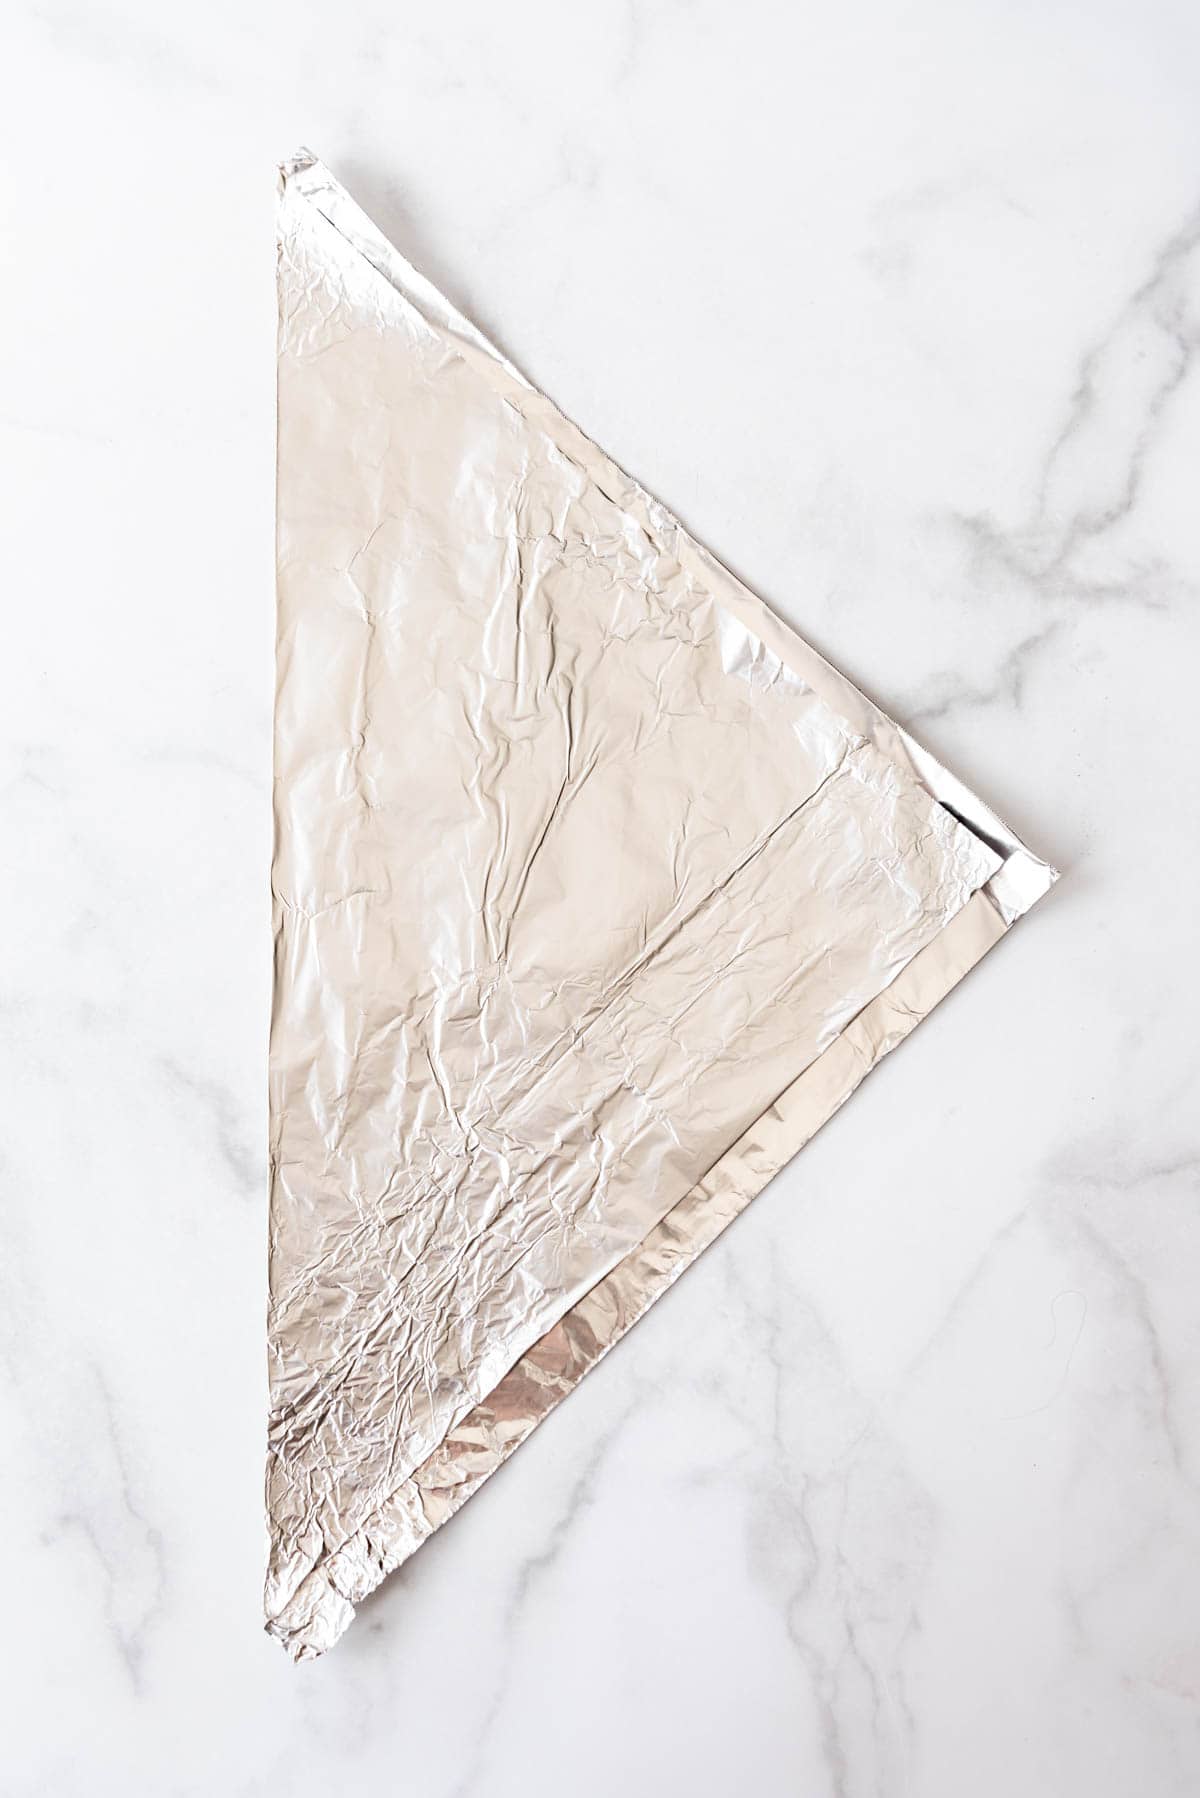
- Final prep before cooking: Remove the turkey from the fridge 30 to 60 minutes before cooking, if it was prepared the day before. Preheat the oven to 450 degrees F. Take a large square of aluminum foil and fold it in half to make a triangle. Shape the triangle over the breast of the turkey (with the point towards the legs) to create a shield, then set aside. Rub the turkey all over with a drizzle of olive oil.
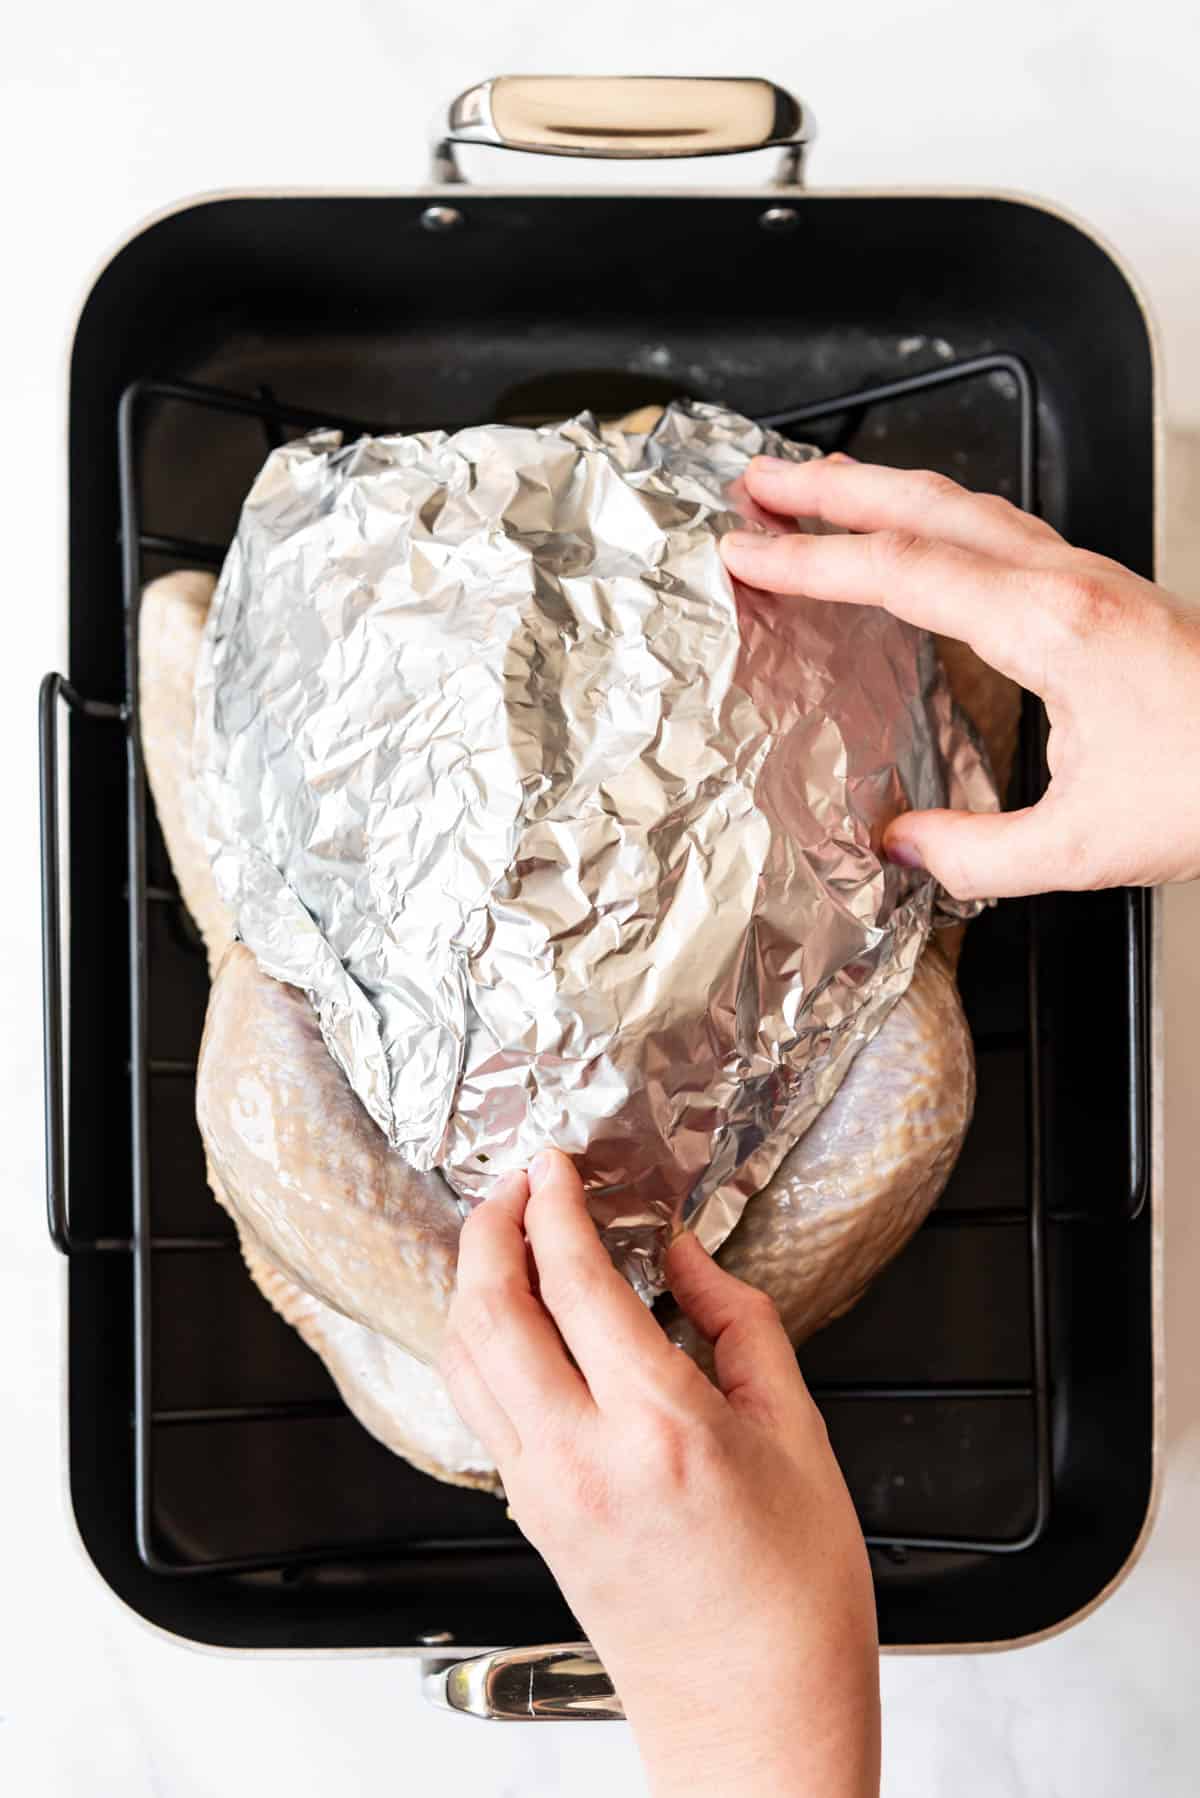
- Cook the turkey, starting with high heat, then dropping to a lower temperature for a slow roast: Transfer the roasting pan to the oven and cook for 20 minutes at 450 degrees F. This is what is going to help the skin immediately start to crisp up and brown. Then decrease the oven temperature to 350 degrees F and place the shield on top of the turkey. Roast for 13 minutes per pound of turkey (another 2 hours 30 minutes for a 12-pound bird), removing the shield and basting the turkey with the juices in the bottom of the pan every 30 minutes or so. Remove the shield during the last 30 minutes, unless the turkey is already looking evenly browned all over. Cook until the internal temperature reaches 170 degrees F when tested on the meatiest part of the thigh and 160 degrees F when tested on the breast.
PRO TIP: The temperature will continue to rise about 5 to 10 degrees after removing the turkey from the oven.
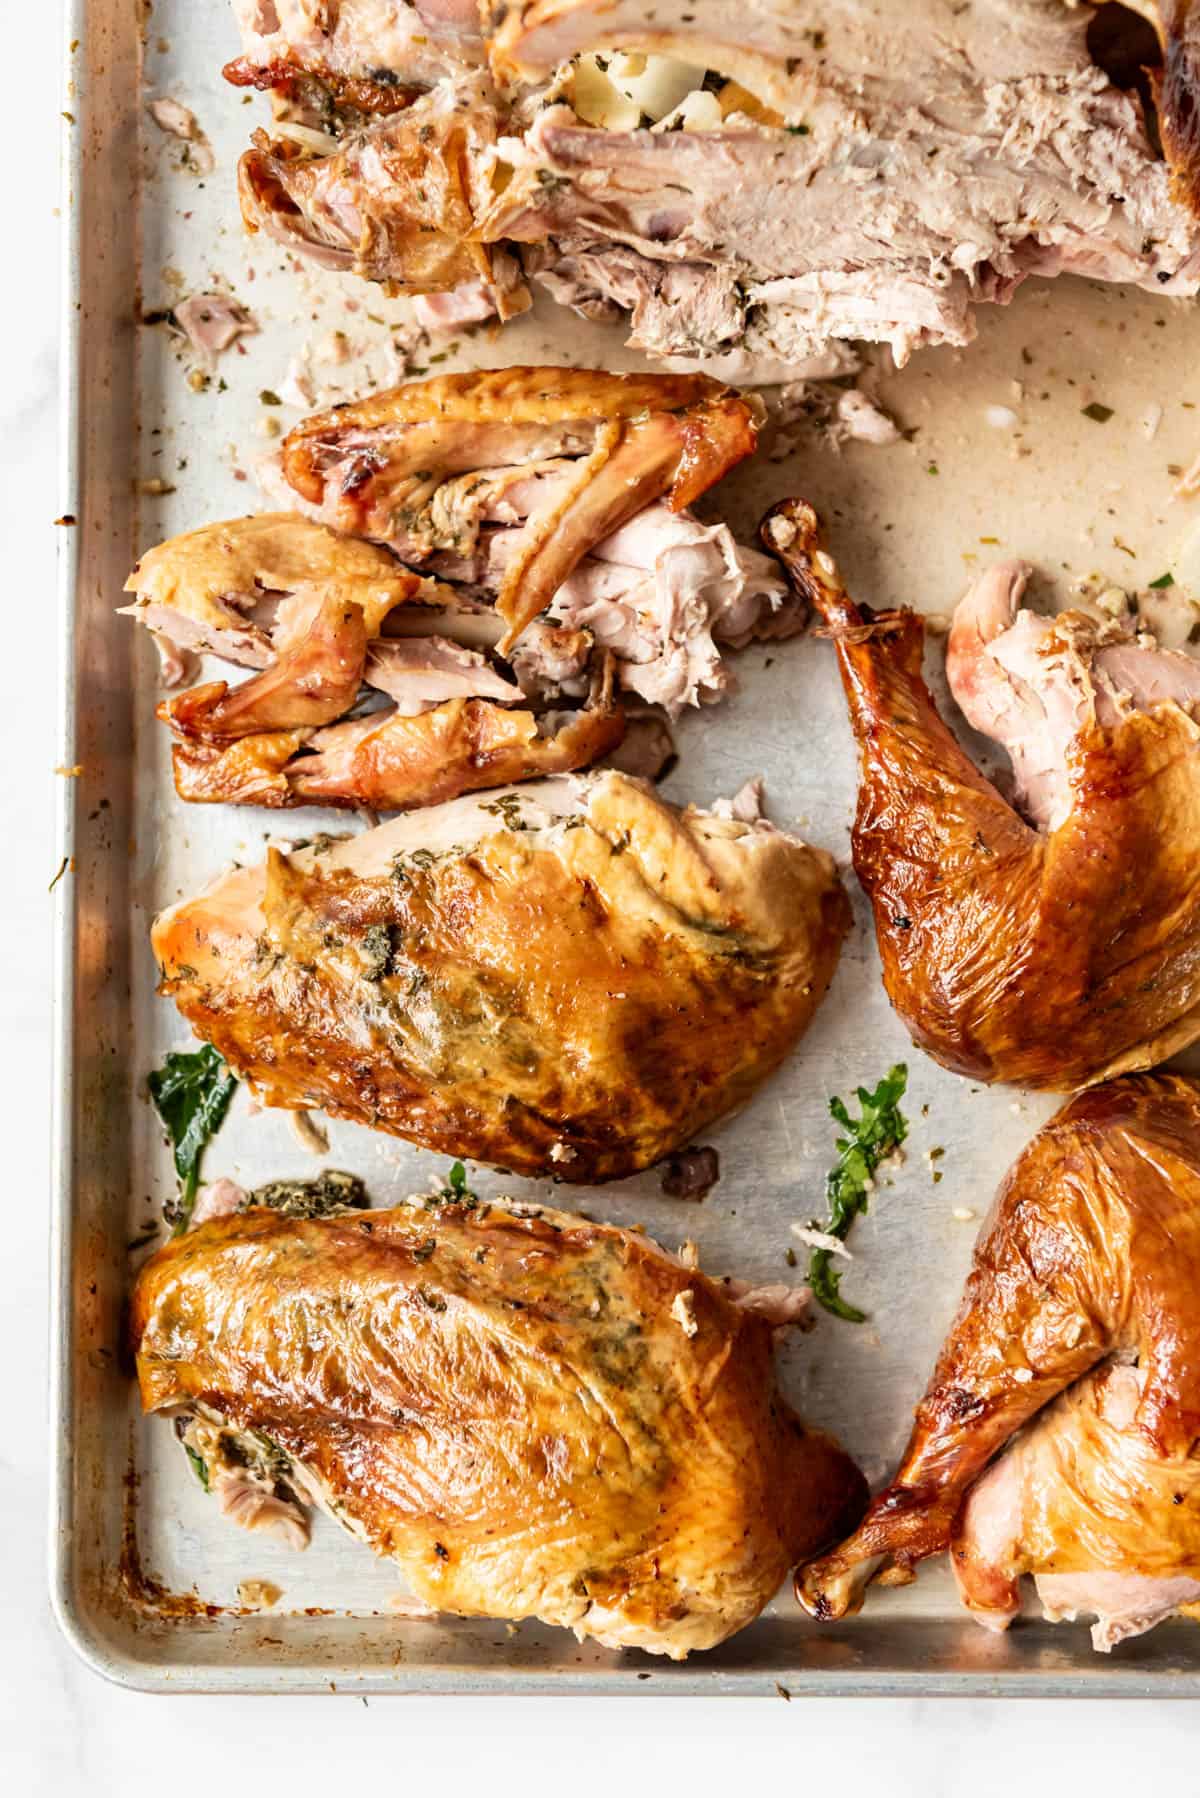
- Let rest before carving: Remove from turkey from the oven and tent loosely with foil. Let it rest for 30 to 60 minutes before carving. Save the drippings for turkey gravy and the wishbone for the kids!
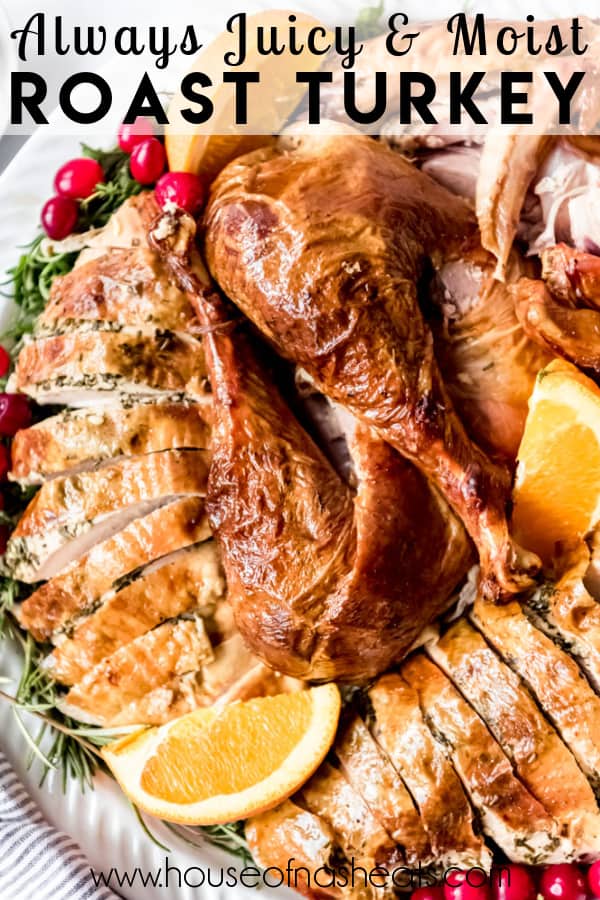
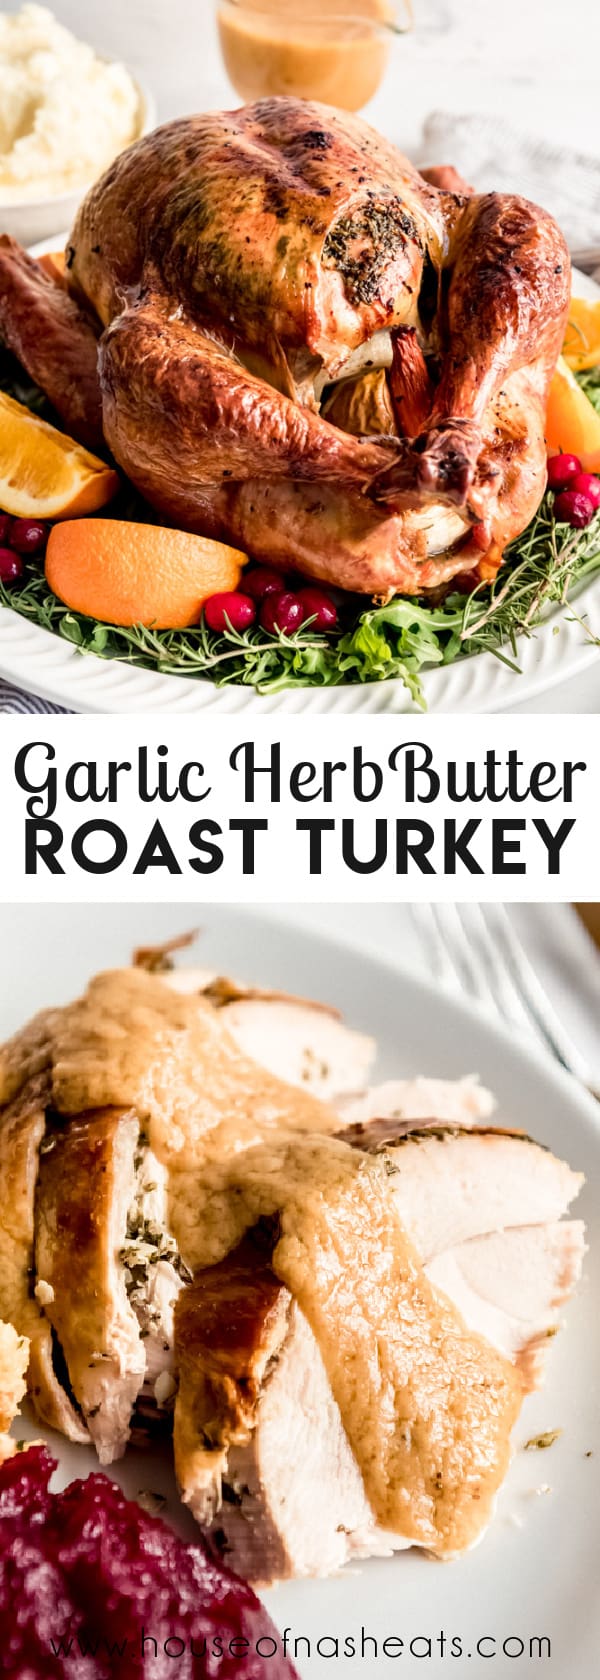
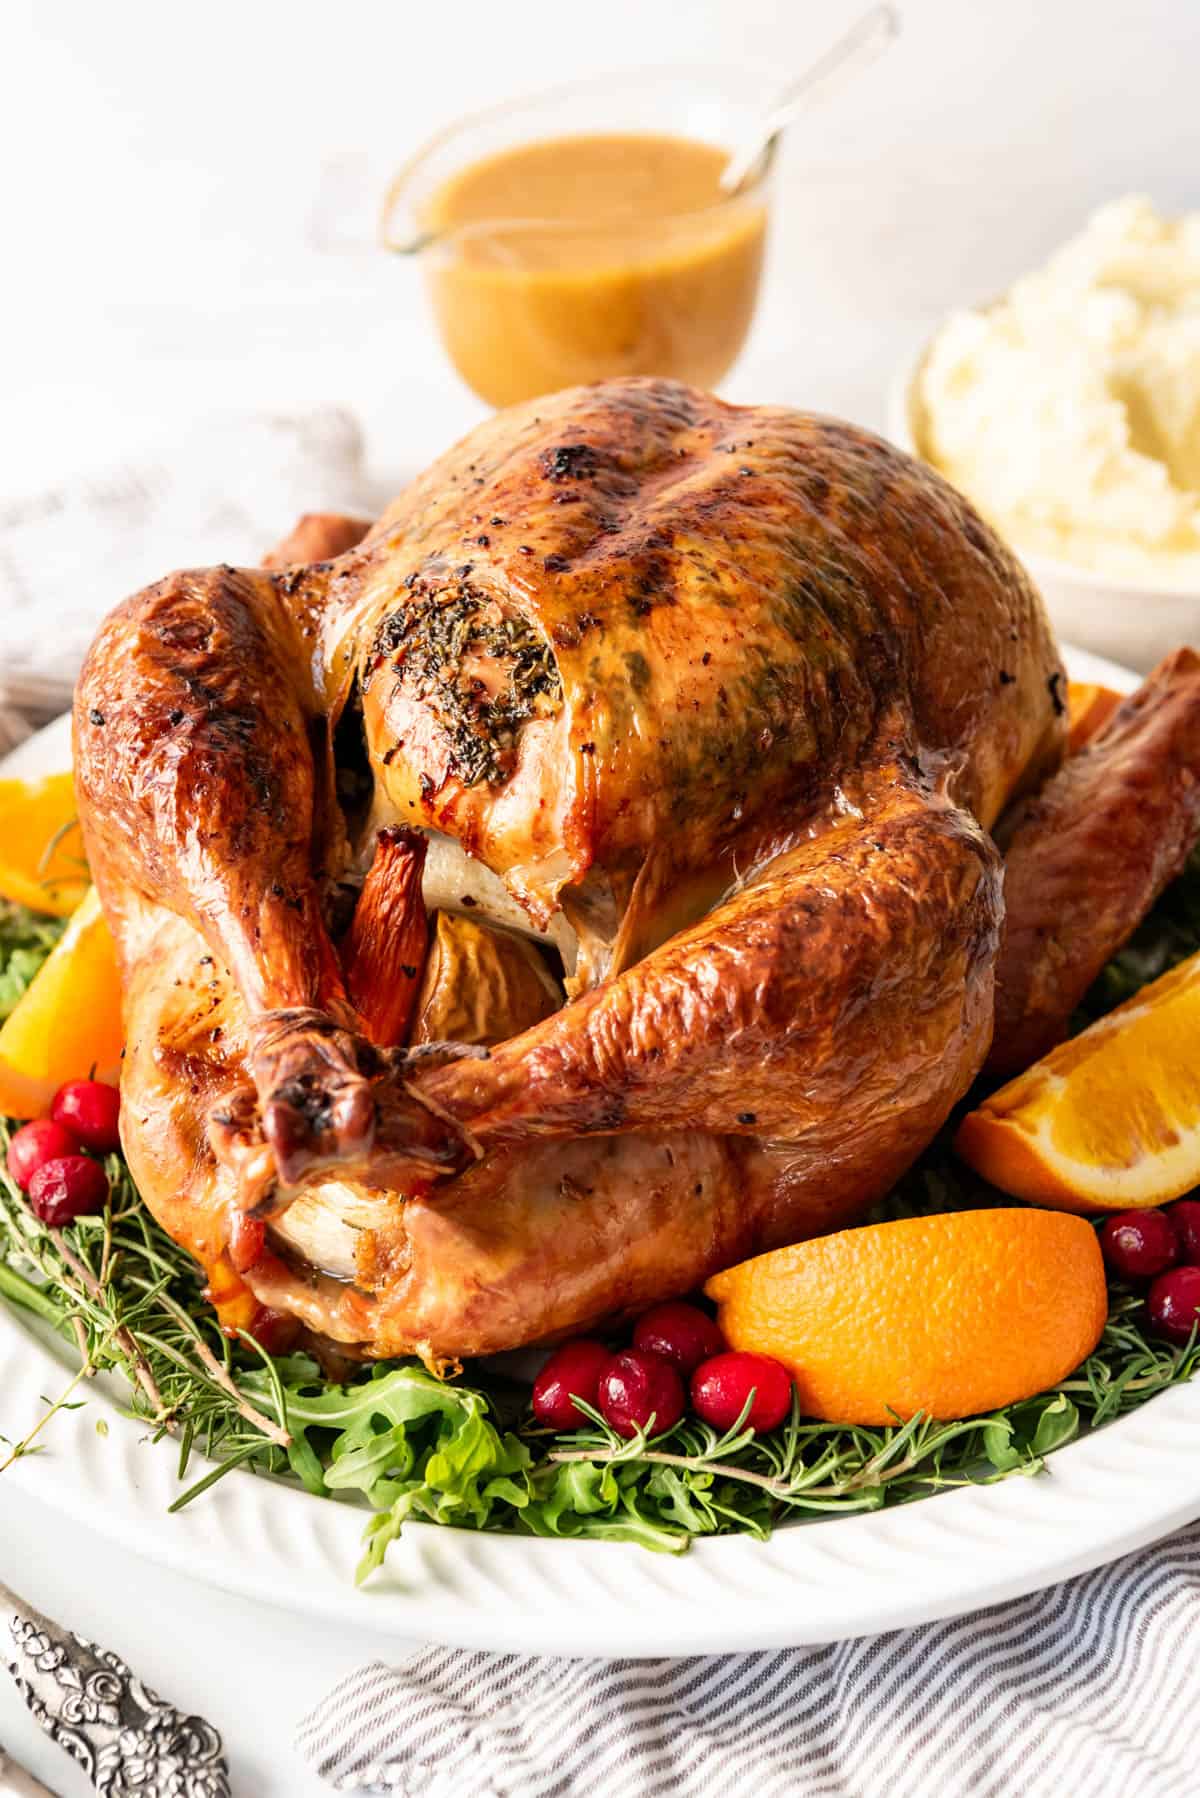
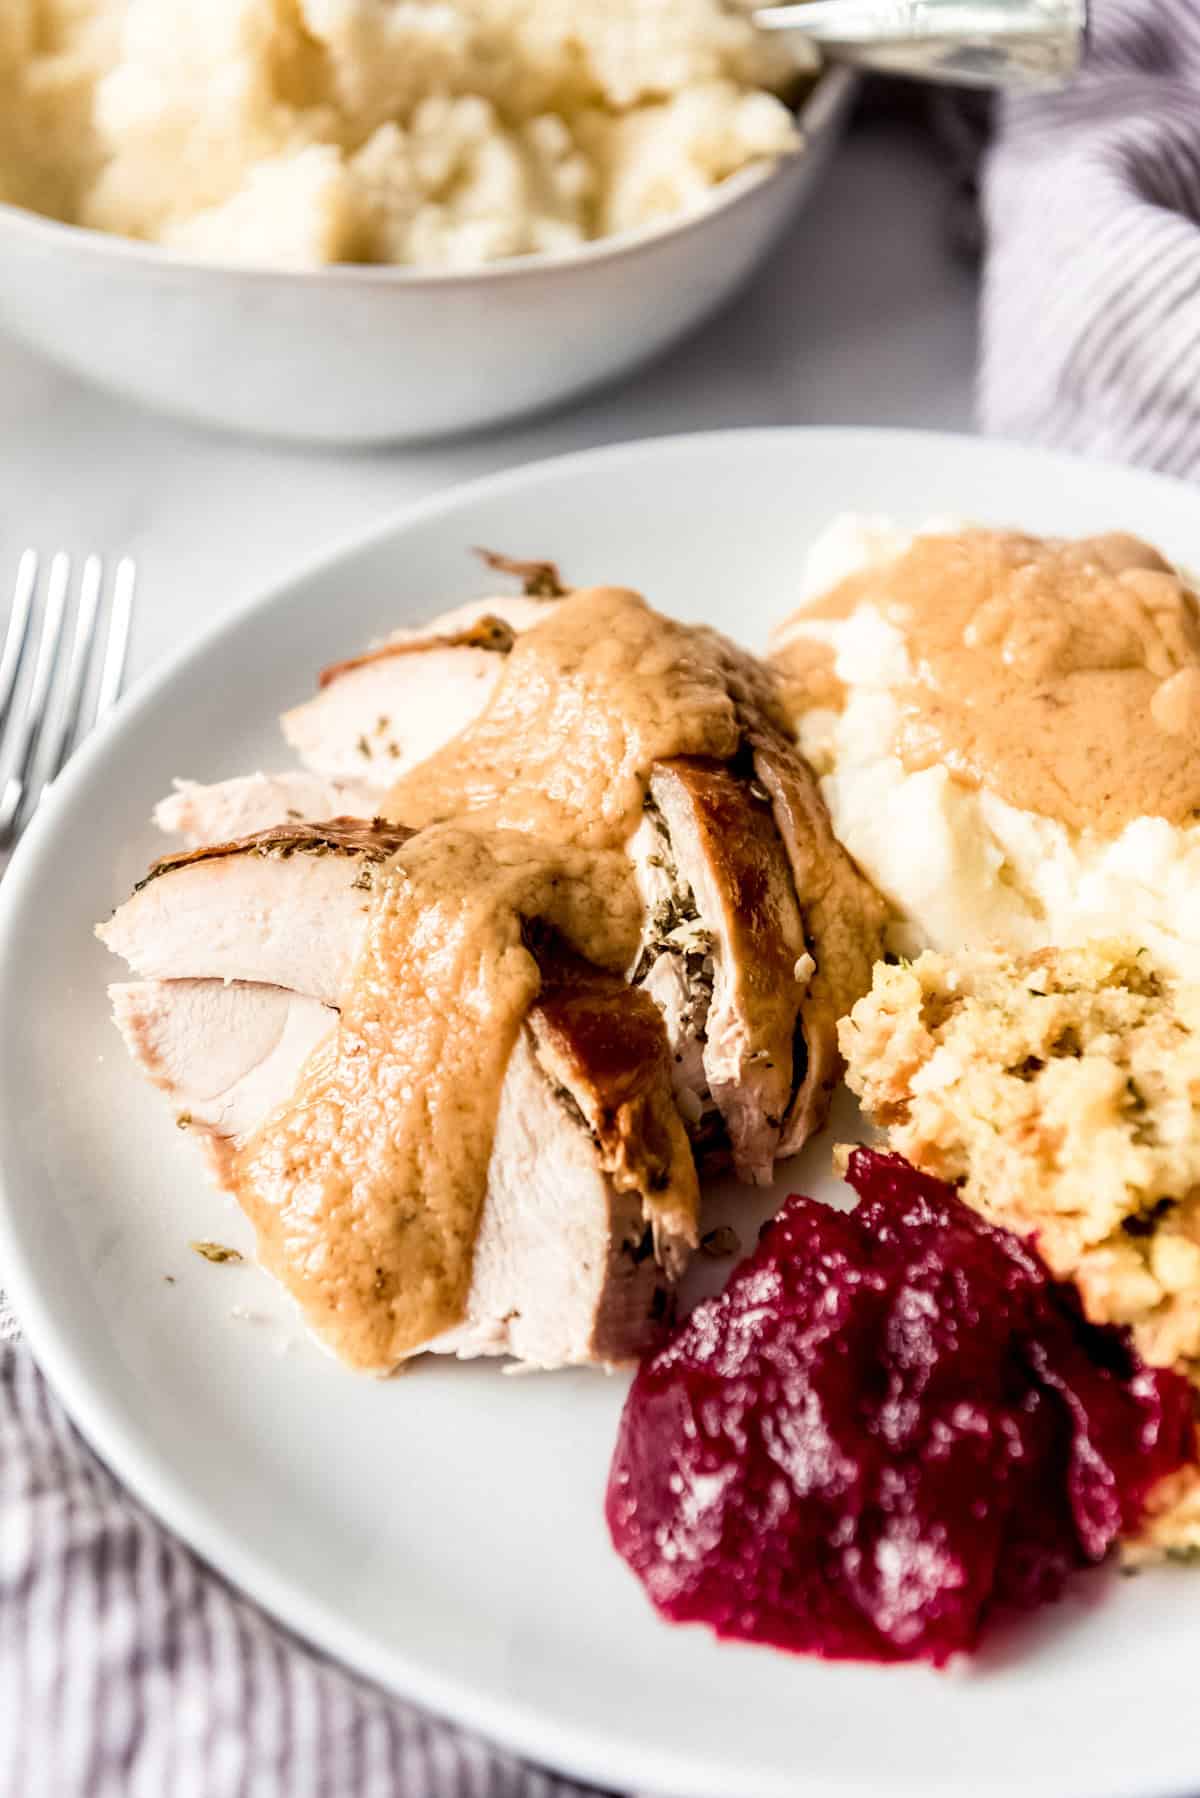
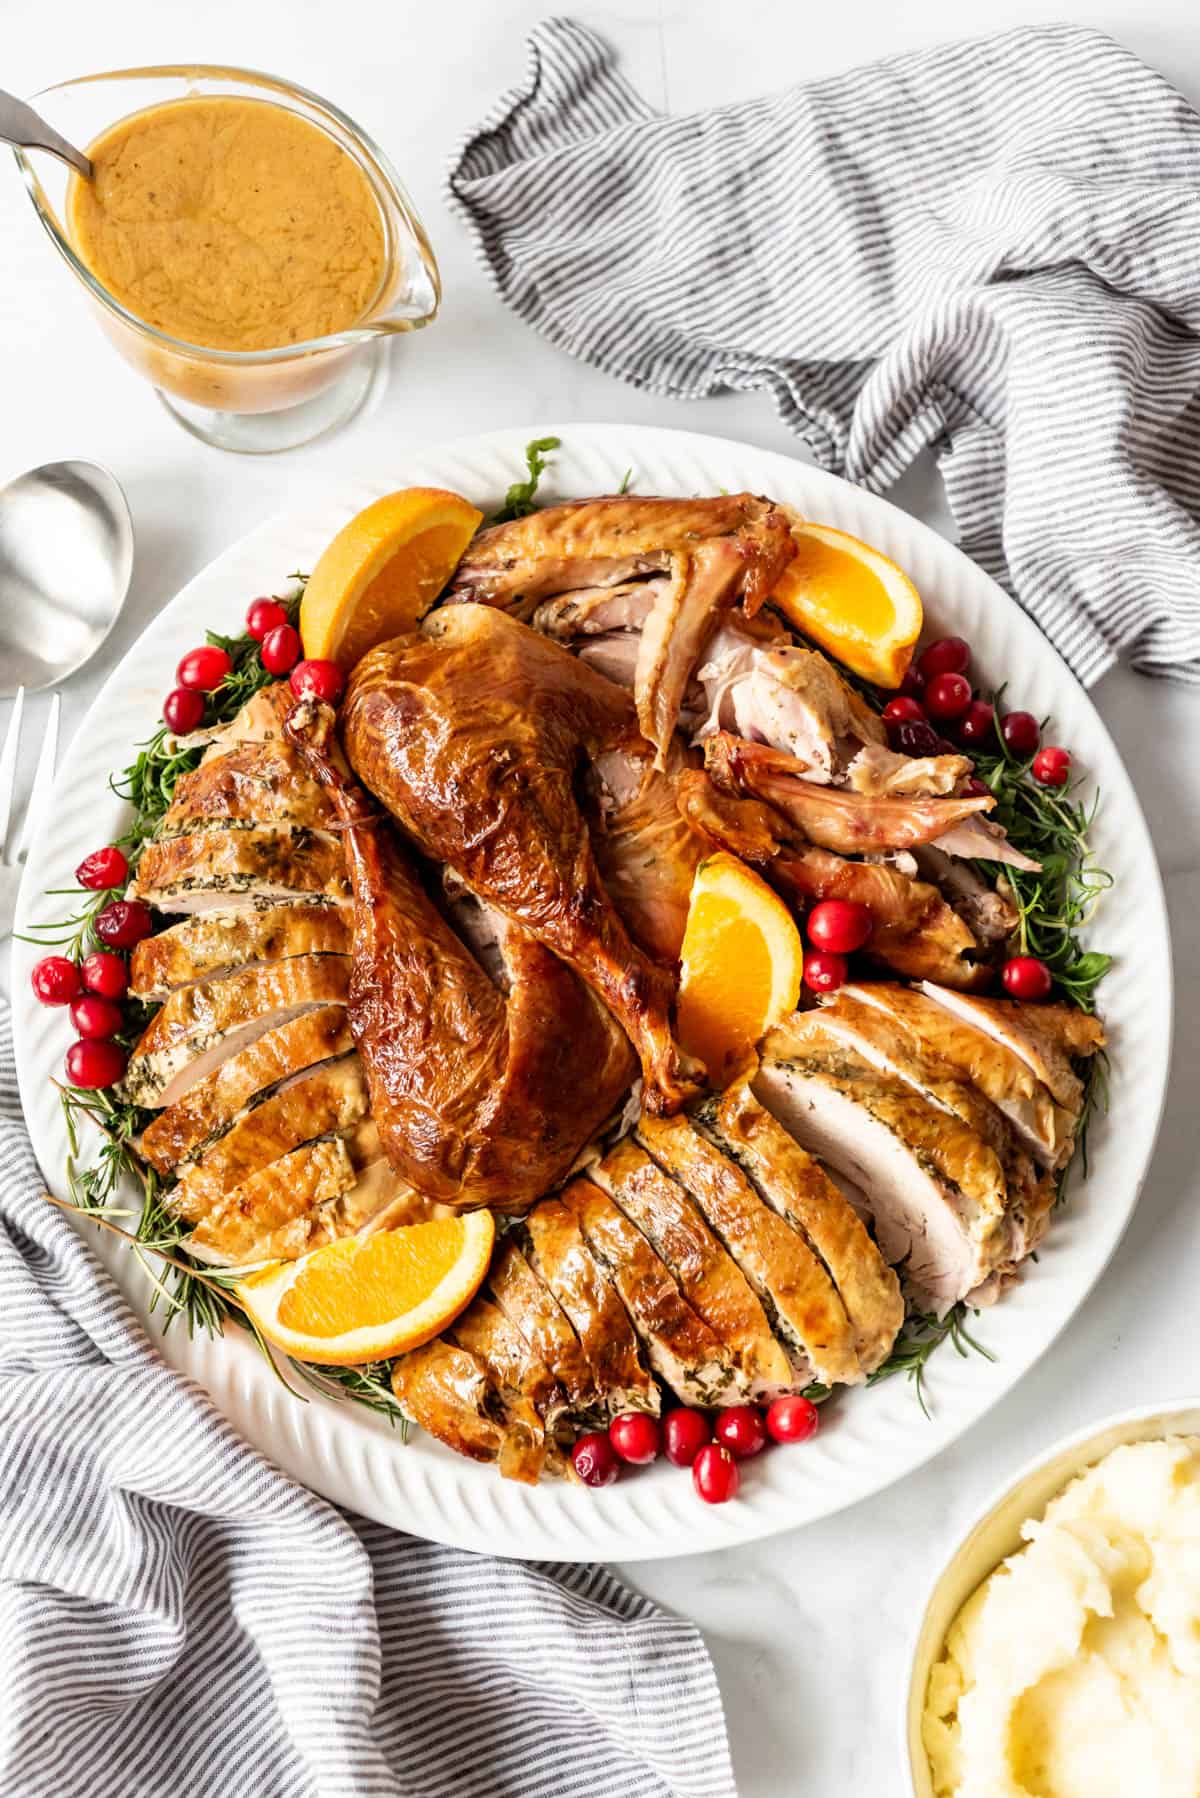
- Plate and serve: Arrange the carved meat on a large platter with sprigs of fresh herbs and fresh cranberries or other fruit as a garnish, then serve.
How long to roast a turkey
The number one question I get asked is how long it takes to roast a turkey in the oven. The answer will really depend on the size of your turkey, so make sure to take note of your turkey’s weight, especially if you are prepping it a day or two ahead with my turkey brine.
Turkey Timeline: Prep for a stress-free holiday dinner
A little advance planning is a huge help when making a turkey dinner. Here is a timeline to help you better prepare so the process is less stressful.
- 5-7 days before dinner: Buy your turkey if you haven’t already. If it’s frozen, a 12 to 16-pound turkey will take 3-4 days to thaw in the fridge, while larger 16 to 24-pound birds can take more like 5-6 days to fully thaw. The general approach is to plan on 1 day of thawing time in the fridge for every 4 pounds of turkey.
- 2-3 days before dinner: Brine your turkey (this is my go-to turkey brine recipe). This step is key to making sure every single bite of turkey is deliciously seasoned and juicy! Plus, even if you forgot to stick your turkey in the fridge and it’s still partially frozen, the cold water in the brine will help finish the thawing process for you. Plan on 24 hours for a 12-16 pound turkey, and up to 2 days for larger turkeys.
- 1 day before dinner or same day of the meal: Remove the turkey from the brine and pat completely dry inside and out. Stuff the cavities with aromatics like chopped onion, carrots, celery, apple, lemon, garlic, or orange. I usually just use a combination of whatever I have on hand that isn’t getting used in other dishes. Maybe the garlic herb butter and rub it under the skin. Tie up the legs using butcher’s twine. Stick the turkey back in the fridge until ready to roast, up to 24 hours.
- 4 ½ to 5 hours before dinner: Remove the turkey from the fridge so it has some time to take off the chill. This will help it cook more evenly. This is also when you can rub the bird with the garlic herb butter and tie up the legs with twine if you didn’t do that the day before.
- About 4 hours before dinner (for a 12-pound turkey): This is when the turkey goes in the oven. It will take about 3 hours to roast, followed by 30-60 minutes to rest before carving and serving. Obviously the time will depend on the size of your turkey, but you should plan on 20 minutes at 450 degrees F, followed by 13 minutes per pound at 375 degrees F for the rest of the roasting time, with 30 minutes to 1 hour to rest so the juices can redistribute for the most moist meat.
How much turkey per person?
A good rule of thumb is to plan on about 1 ¼ to 1 ½ pounds of turkey per person prior to cooking. This is enough for everyone to have plenty of their favorite roast meat, whether that’s light or dark, and still have some leftovers for the next day.
My best tip for a successful holiday meal? Don’t try to do it all yourself!
The key to a success holiday meal is to (A) ask guests to each bring a side dish so there is less work for you to do, and/or (B) make as much in advance as you can.
You can make your turkey a day in advance so all you have to do the day you plan to eat it is stick it in the oven! Just stuff it with the aromatics, rub it with the herb butter, then cover it up and let it sit in the fridge overnight so it’s ready to go for the big day!
Did you make this recipe?
Let me know what you thought with a comment and rating below. You can also take a picture and tag me on Instagram @houseofnasheats or share it on the Pinterest pin so I can see.
Best Garlic Herb Roasted Turkey
Ingredients
Turkey
- 12-16 pound turkey thawed for 3-4 days in the fridge if previously frozen
Turkey Brine
- 2 gallons cold water (8 quarts or 32 cups of water)
- 1 1/2 cups coarse kosher salt or 1 cup table salt
- 1 1/4 cups dark brown sugar packed
- 2 Tablespoons whole black peppercorns
- 2 Tablespoons allspice berries
- 3-5 sprigs fresh thyme
- 2-3 sprigs fresh rosemary
- 5 cloves garlic smashed
- 1-2 oranges rind peeled off in ribbons
- 2 bay leaves
- 1 clean 5-gallon bucket pot, or other large container
Garlic Herb Butter
- 1/2 cup salted butter softened
- 2 Tablespoons fresh rosemary finely chopped
- 2 Tablespoons fresh thyme finely chopped
- 2 Tablespoons fresh oregano finely chopped
- 2 Tablespoons fresh tarragon finely chopped
- 5-6 cloves garlic minced
- 1 teaspoon kosher salt
- 1 teaspoon coarsely ground black pepper
Aromatics
- 1 apple quartered
- 1 medium onion peeled and quartered
- 1 large carrot roughly chopped
- 1 celery stick roughly chopped
- 2-3 Tablespoons olive oil
Instructions
Brine
- In a 5-gallon food-grade bucket, combine the water, salt, brown sugar, peppercorns, allspice, fresh herbs, garlic, orange peel, and bay leaves.2 gallons cold water, 1 ½ cups coarse kosher salt, 1 ¼ cups dark brown sugar, 2 Tablespoons whole black peppercorns, 2 Tablespoons allspice berries, 3-5 sprigs fresh thyme, 2-3 sprigs fresh rosemary, 5 cloves garlic, 1-2 oranges, 2 bay leaves, 1 clean 5-gallon bucket
- Remove the neck and giblets from the thawed turkey and discard or set aside for later use. Remove any plastic or wire holding the turkey legs together and discard. Gently lower the turkey into the bucket of brine, making sure it is fully immersed. Place in the fridge or cover with a bag of ice placed directly on top of the turkey to keep it submerged fully in the bucket. Cover the bucket a lid or a thick, tight layer of aluminum foil and set aside to brine overnight or up to 24 hours.12-16 pound turkey
- Remove the turkey from the brine and pat completely dry both inside and out using plenty of paper towels. Let the turkey air-dry for at least 30 minutes or overnight in the fridge.
Garlic Herb Butter Rub
- Combine the softened butter with the fresh herbs, garlic, salt, and pepper, mashing into a paste with a fork or with a food processor (affiliate link).½ cup salted butter, 2 Tablespoons fresh rosemary, 2 Tablespoons fresh thyme, 2 Tablespoons fresh oregano, 2 Tablespoons fresh tarragon, 5-6 cloves garlic, 1 teaspoon kosher salt, 1 teaspoon coarsely ground black pepper
- Carefully use your fingers to separate and loosen the skin from the breast meat by sliding one hand in to gently stretch and separate them on both sides of the turkey. Be sure to remove any rings first so as not to tear the skin.
- Use your hands to stuff about 2/3 of the garlic herb butter between the skin and the breast meat, massaging it to create a thin, even layer over the entire breast on both sides of the turkey. Rub the remaining ⅓ of the butter mixture inside the cavity of the turkey.
- Stuff the cavity with the apple, onion, carrot, and celery. Other good aromatics are quartered lemons or oranges. I do not recommend cooking stuffing or dressing inside your turkey.1 apple, 1 medium onion, 1 large carrot, 1 celery stick
- Truss the turkey by tying a piece of kitchen string around one leg, then crossing the legs and wrapping the string around both legs before tying it off, securing the legs together. Fold the wings under the turkey.
- Transfer the turkey to a roasting pan with the breast side up. At this point, the turkey can go back into the fridge for 24 hours.
Roasting the Turkey
- Remove the turkey from the fridge 30 to 60 minutes before cooking, if it was prepared the day before. Preheat the oven to 450°F.
- Take a large square of aluminum foil and fold it in half to make a triangle. Shape the triangle over the breast of the turkey to create a shield, then set aside. Rub the turkey all over with a drizzle of olive oil.2-3 Tablespoons olive oil
- Transfer the roasting pan to the oven and cook for 20 minutes.
- Decrease the oven temperature to 350° F and place the shield on top of the turkey. Roast for 13 minutes per pound of turkey (an additional 2 hours 30 minutes for a 12-pound bird), removing the shield and basting the turkey with the juices in the bottom of the pan every 30 minutes or so. Remove the shield during the last 30 minutes, unless the turkey is already looking evenly browned all over.
- Cook until the internal temperature reaches 170° F when tested on the meatiest part of the thigh and 160° F when tested on the breast. The temperature will continue to rise about 5 degrees after removing the turkey from the oven.
- Remove from oven and tent loosely with foil. Let the turkey rest for 30 to 60 minutes before carving. Save the drippings for turkey gravy!
- Arrange the carved meat on a large platter with sprigs of fresh herbs and fresh cranberries or other fruit as a garnish, then serve.
Notes
- This recipe will work for a 12- to 16-pound turkey. Larger turkeys may need additional butter and herbs and will require longer roasting time.
Nutrition
More Turkey Recipes
- Bacon Roasted Thanksgiving Turkey
- How to Make a Smoked Turkey
- Turkey Brine Recipe
- Homemade Turkey Gravy
- Air Fryer Turkey Breast and Gravy


Hi, you mention 450*/350* in the first section and the instructions but 425*/375* in the second section. Curious which you recommend?
Sorry! That should have read 450 like in the other sections.
This turkey was so flavorful and juicy! We be making again.
I’m so glad you loved it! Happy Thanksgiving!
Hi Amy
What’s the purpose of not using the herb butter on the outside of the turkey
along with using it only under the skin.
You can definitely use herb button on the outside of the skin also, if you like. I just prefer it flavoring the meat itself from underneath because it makes the turkey juicier.
Is it 350 or 375 after the first 20 minutes at 450?
It’s 350°F.
You mentioned cover the breast part of the turkey when baking. Does this mean we are leaving the wings and legs exposed the whole time of baking?
Yep, just cover the breast portion of the turkey.
I made this turkey for my family and they said it was the best they had. I cooked breast only so dropped the aromatics in the roasting pan, but the turkey was very flavorful and juicy! Will definitely pin this one to cook again!!
I’m so glad to hear it!
This was probably the best turkey I’ve ever made. My family all claim they like ham better (which I did make your brown sugar glazed ham as well. It was also a hit) but all of them said this was a juicey turkey and it was very much enjoyed. Thanx for the great recipe.
I’m so glad your family enjoyed this turkey! It makes me so happy when I can help you win over naysayers with a really good recipe! Kudos to you on making such a juicy bird and thanks for leaving a comment!
Made a turkey for the first time today (thanksgiving 2025) and this is the recipe I used. Everyone agreed it was the best turkey they ever had.