
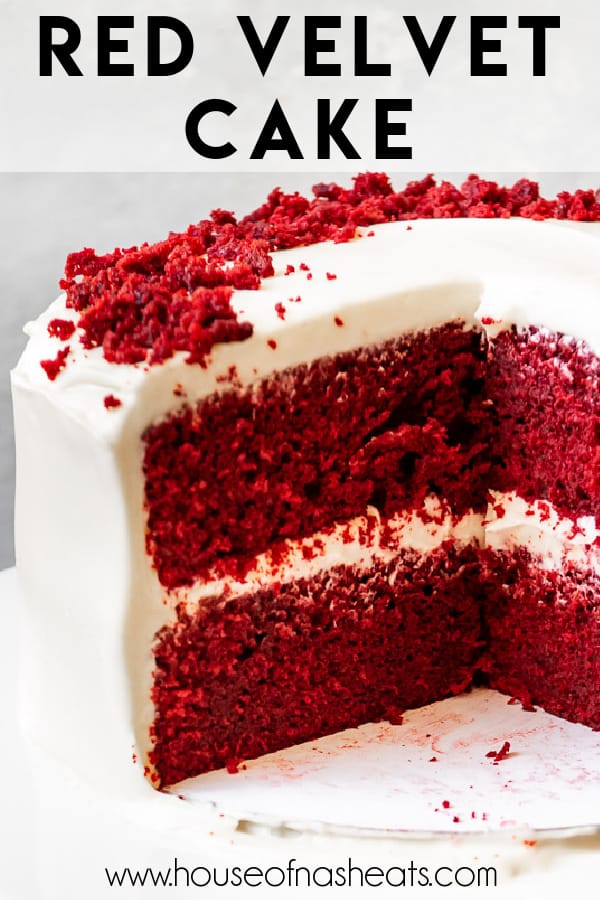
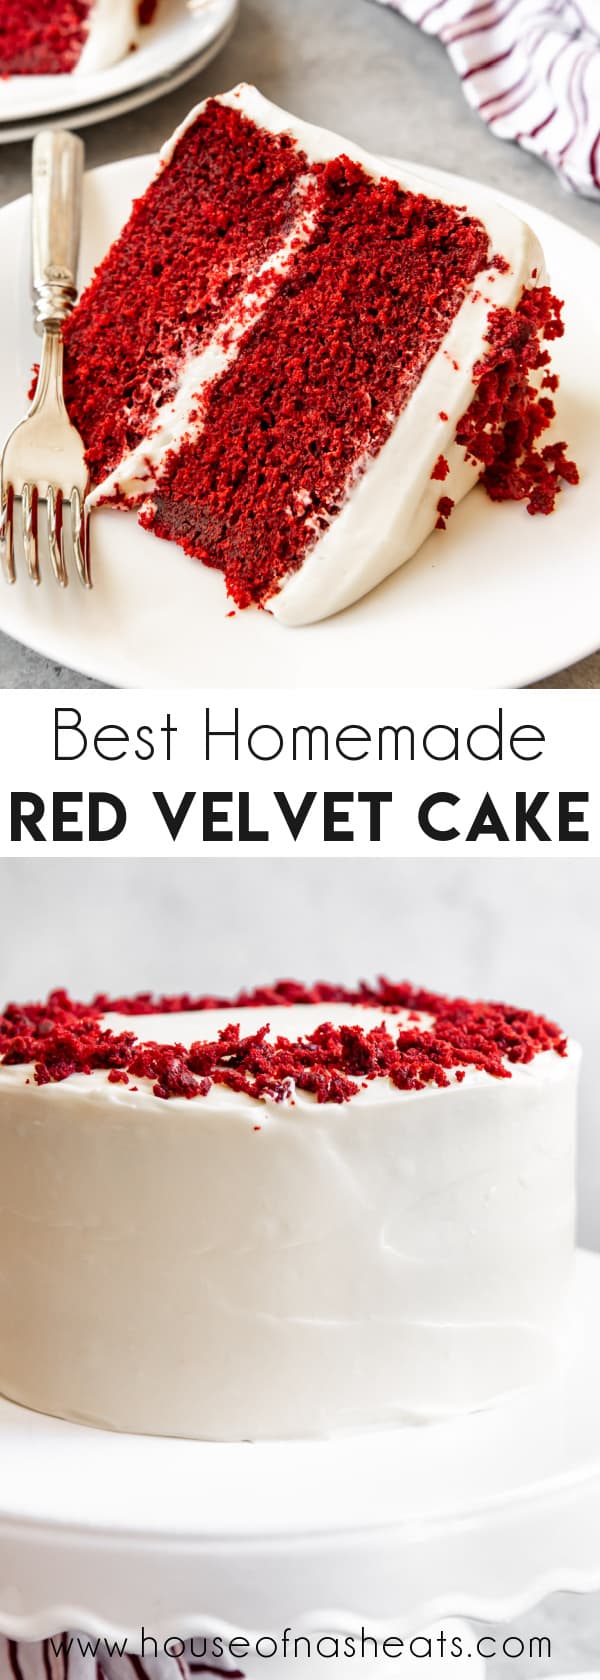
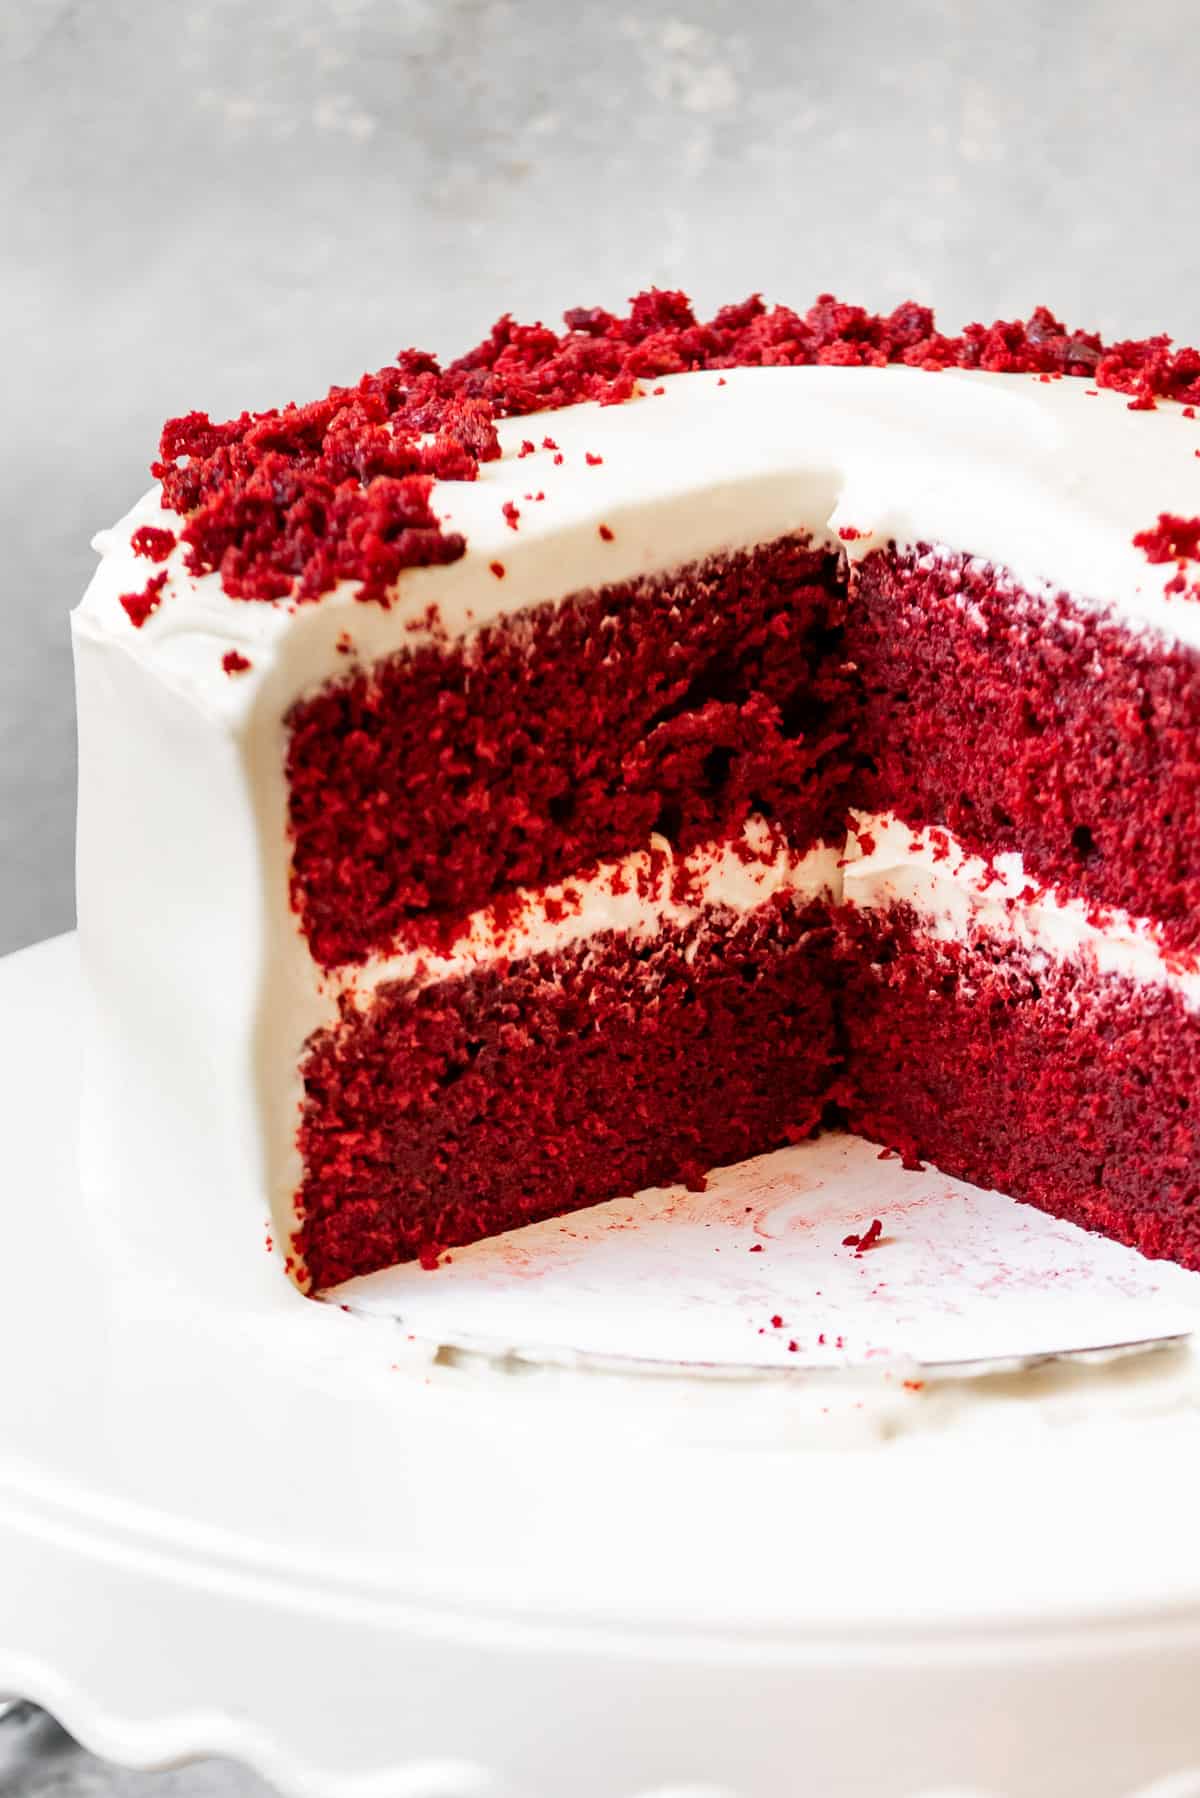
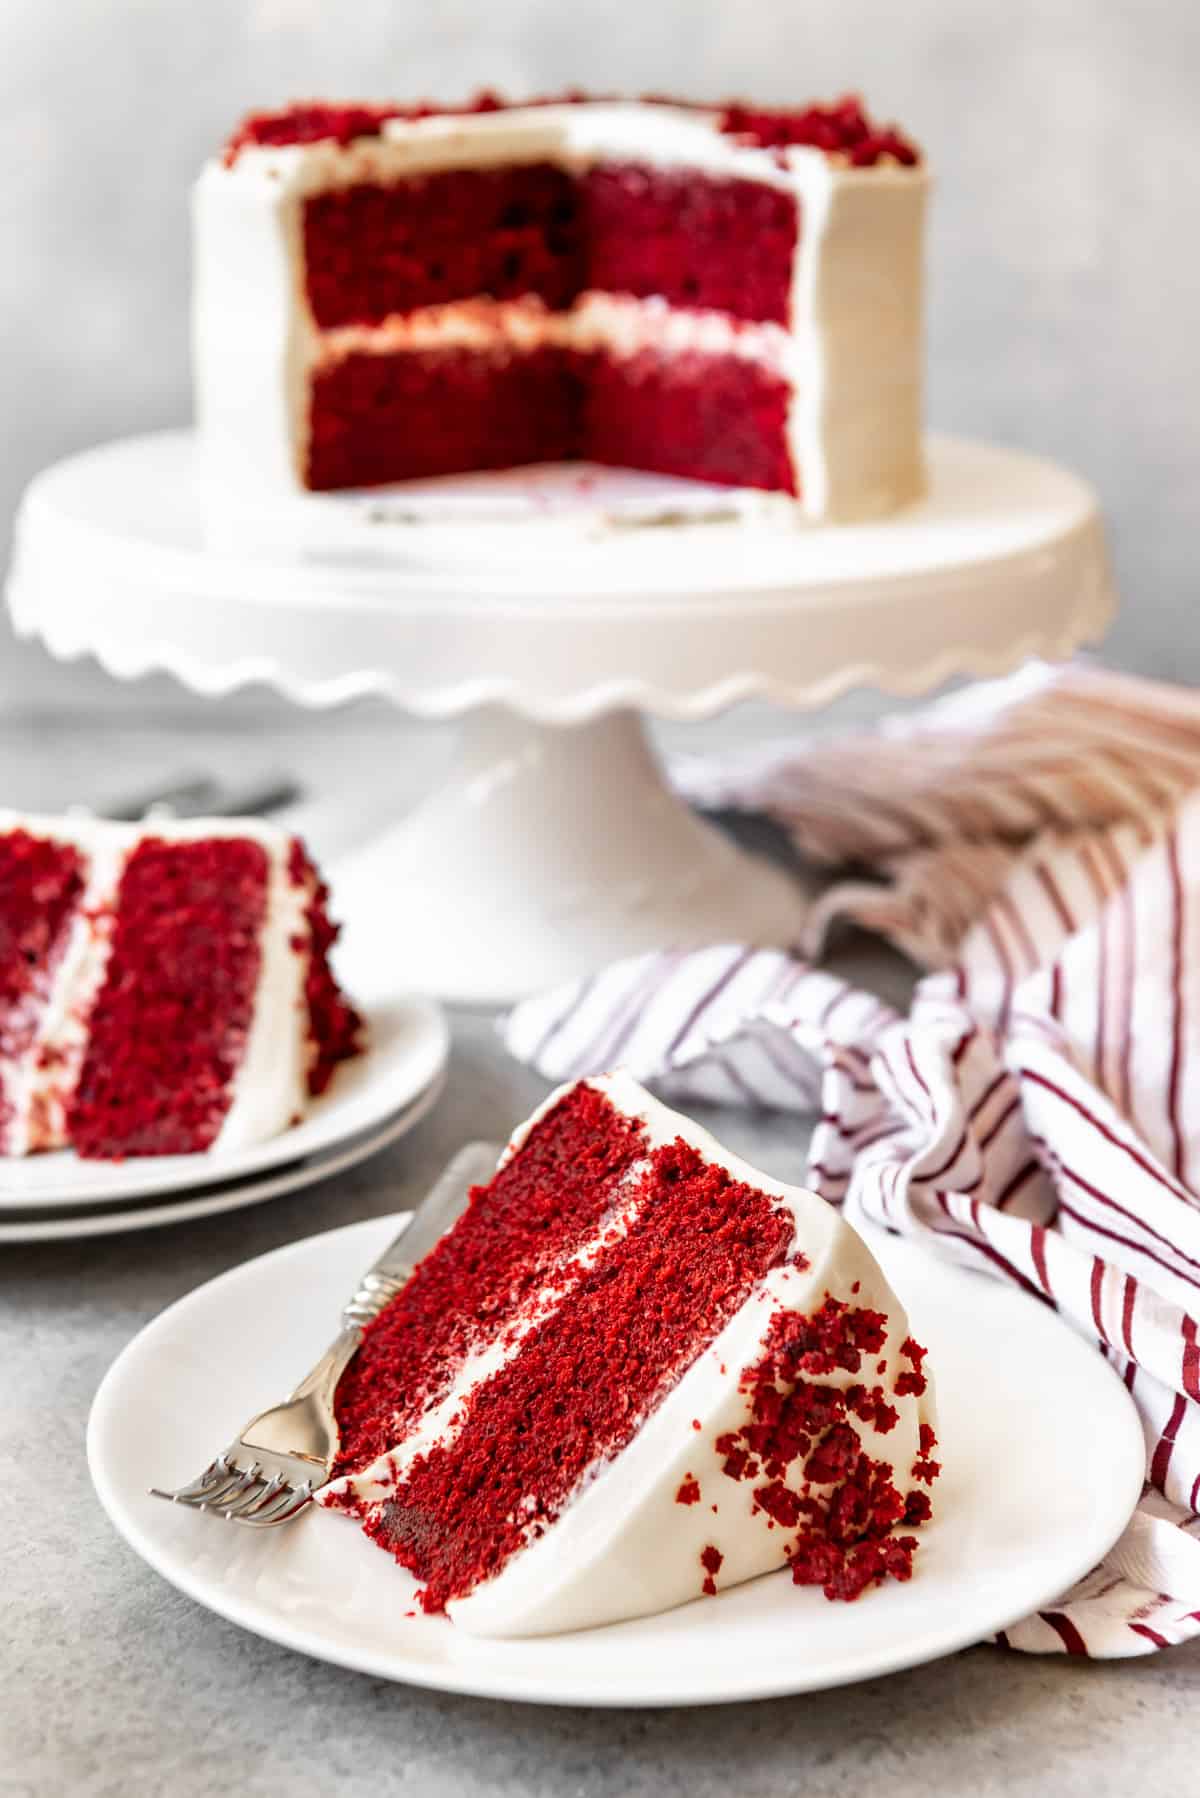
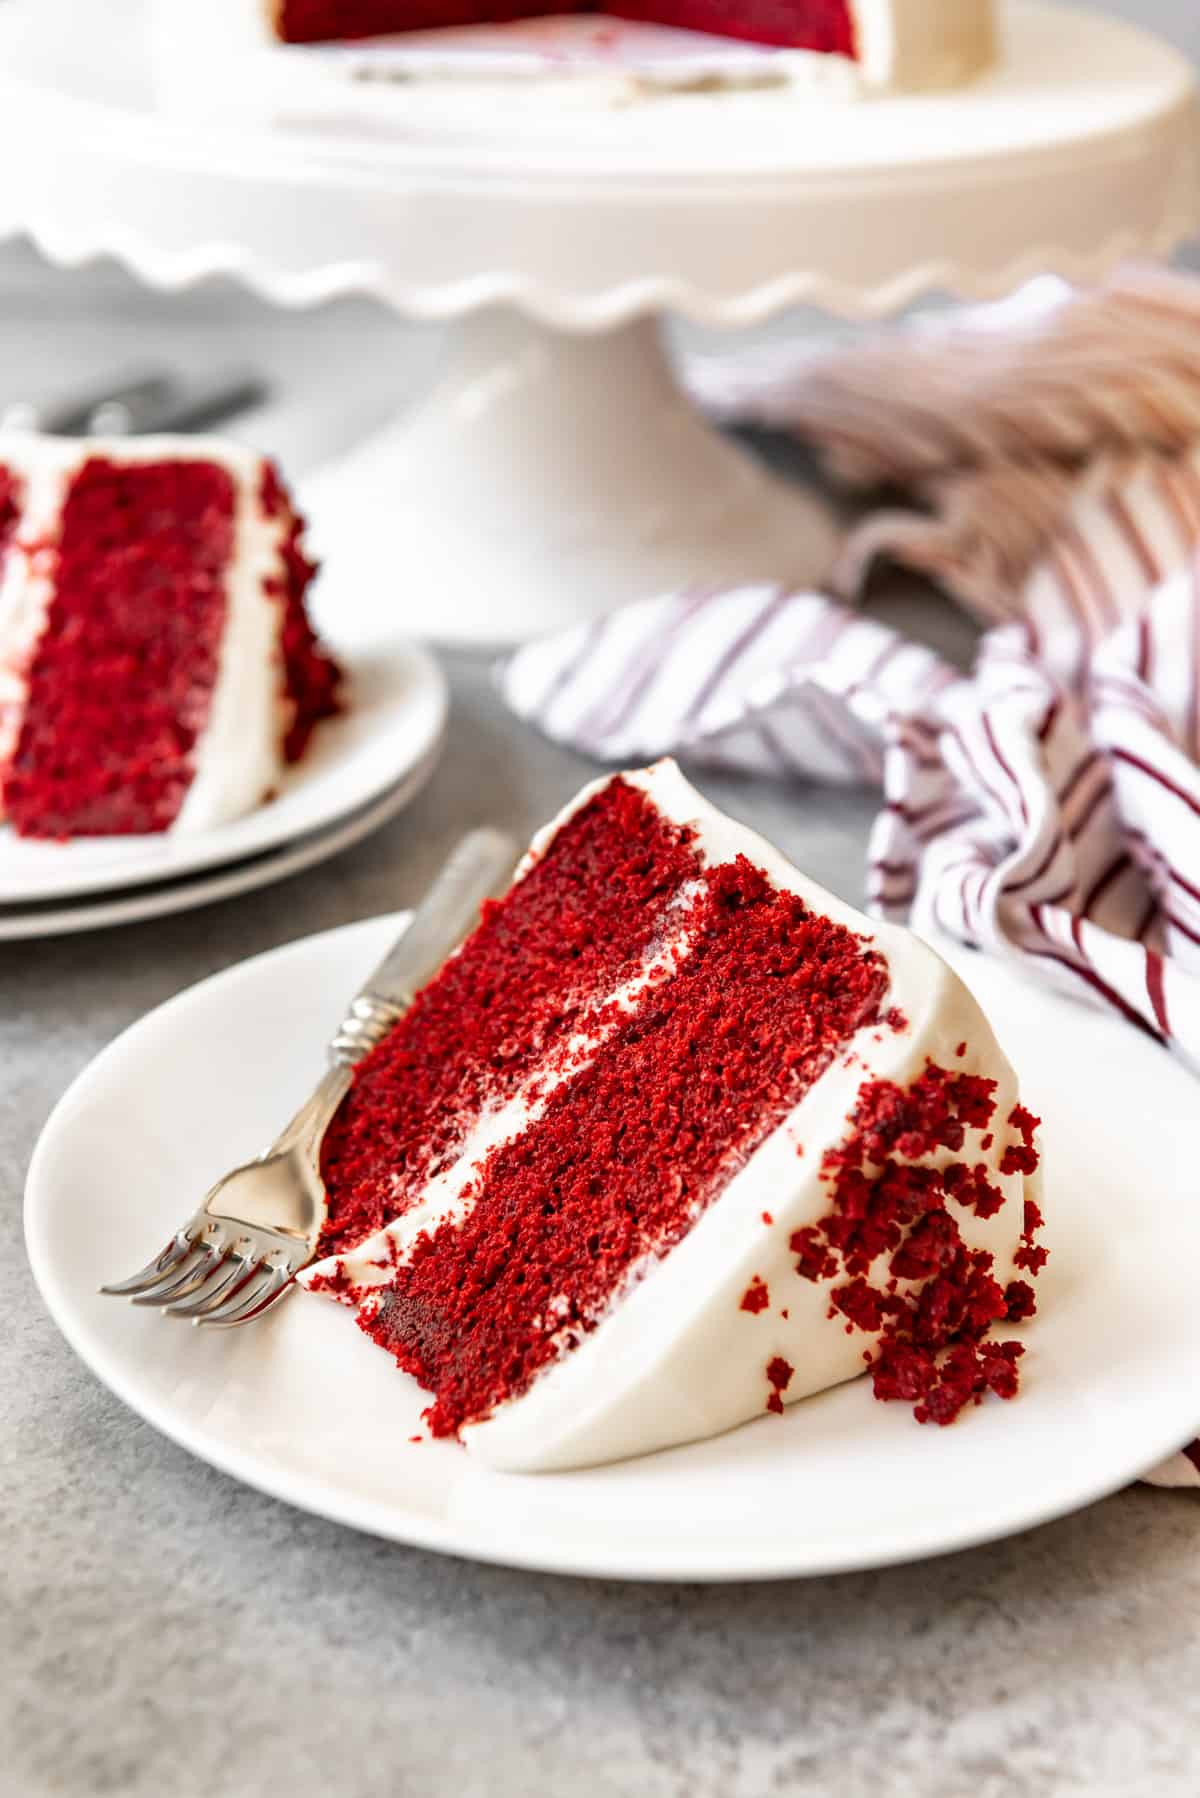
This Red Velvet Cake recipe is a Southern classic made completely from scratch with real butter, tangy buttermilk, and a touch of cocoa powder for that rich, velvety crumb. Topped with smooth cream cheese frosting, it’s the perfect cake for any time you want an elegant, homemade dessert that never goes out of style.
This is the best Red Velvet Cake recipe I’ve ever made. So moist, tangy and perfect! I make one every year and each year try a different recipe, but I found this is the keeper.
Red velvet cake has roots in the early 1900s, where it first appeared in Southern kitchens and became famous for its soft texture and subtle cocoa flavor. The original recipe used natural cocoa powder, which reacted with vinegar and buttermilk to create a faint red hue long before food coloring was added. Over time, this elegant cake became a bakery favorite, celebrated for its light chocolate notes, creamy frosting, and classic red color that still feels timeless today.
I tested so many versions of this recipe before landing on the one that finally hit all the right notes: soft, tangy, and perfectly balanced with that hint of cocoa that makes red velvet so special. It’s been a reader favorite ever since!
For more of that irresistable red velvet flavor, check out my Red Velvet Cupcakes, Red Velvet Kiss Cookies, Red Velvet Chocolate Chip Cookies, Red Velvet Whoopie Pies, and my Red Velvet Earthquake Cake.
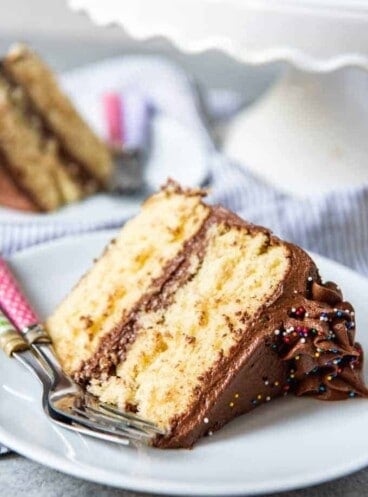
If you want to learn how to make more cakes from scratch rather than use a boxed mix, try my Homemade German Chocolate Cake, Homemade Funfetti Cake, and Yellow Cake with Chocolate Frosting!
Why you’ll love this reader favorite recipe!

- The mix of butter and oil gives this cake the perfect texture – soft, moist, and rich without feeling heavy.
- Using a generous amount of cocoa powder adds depth and richness while still keeping that signature red velvet flavor instead of full chocolate.
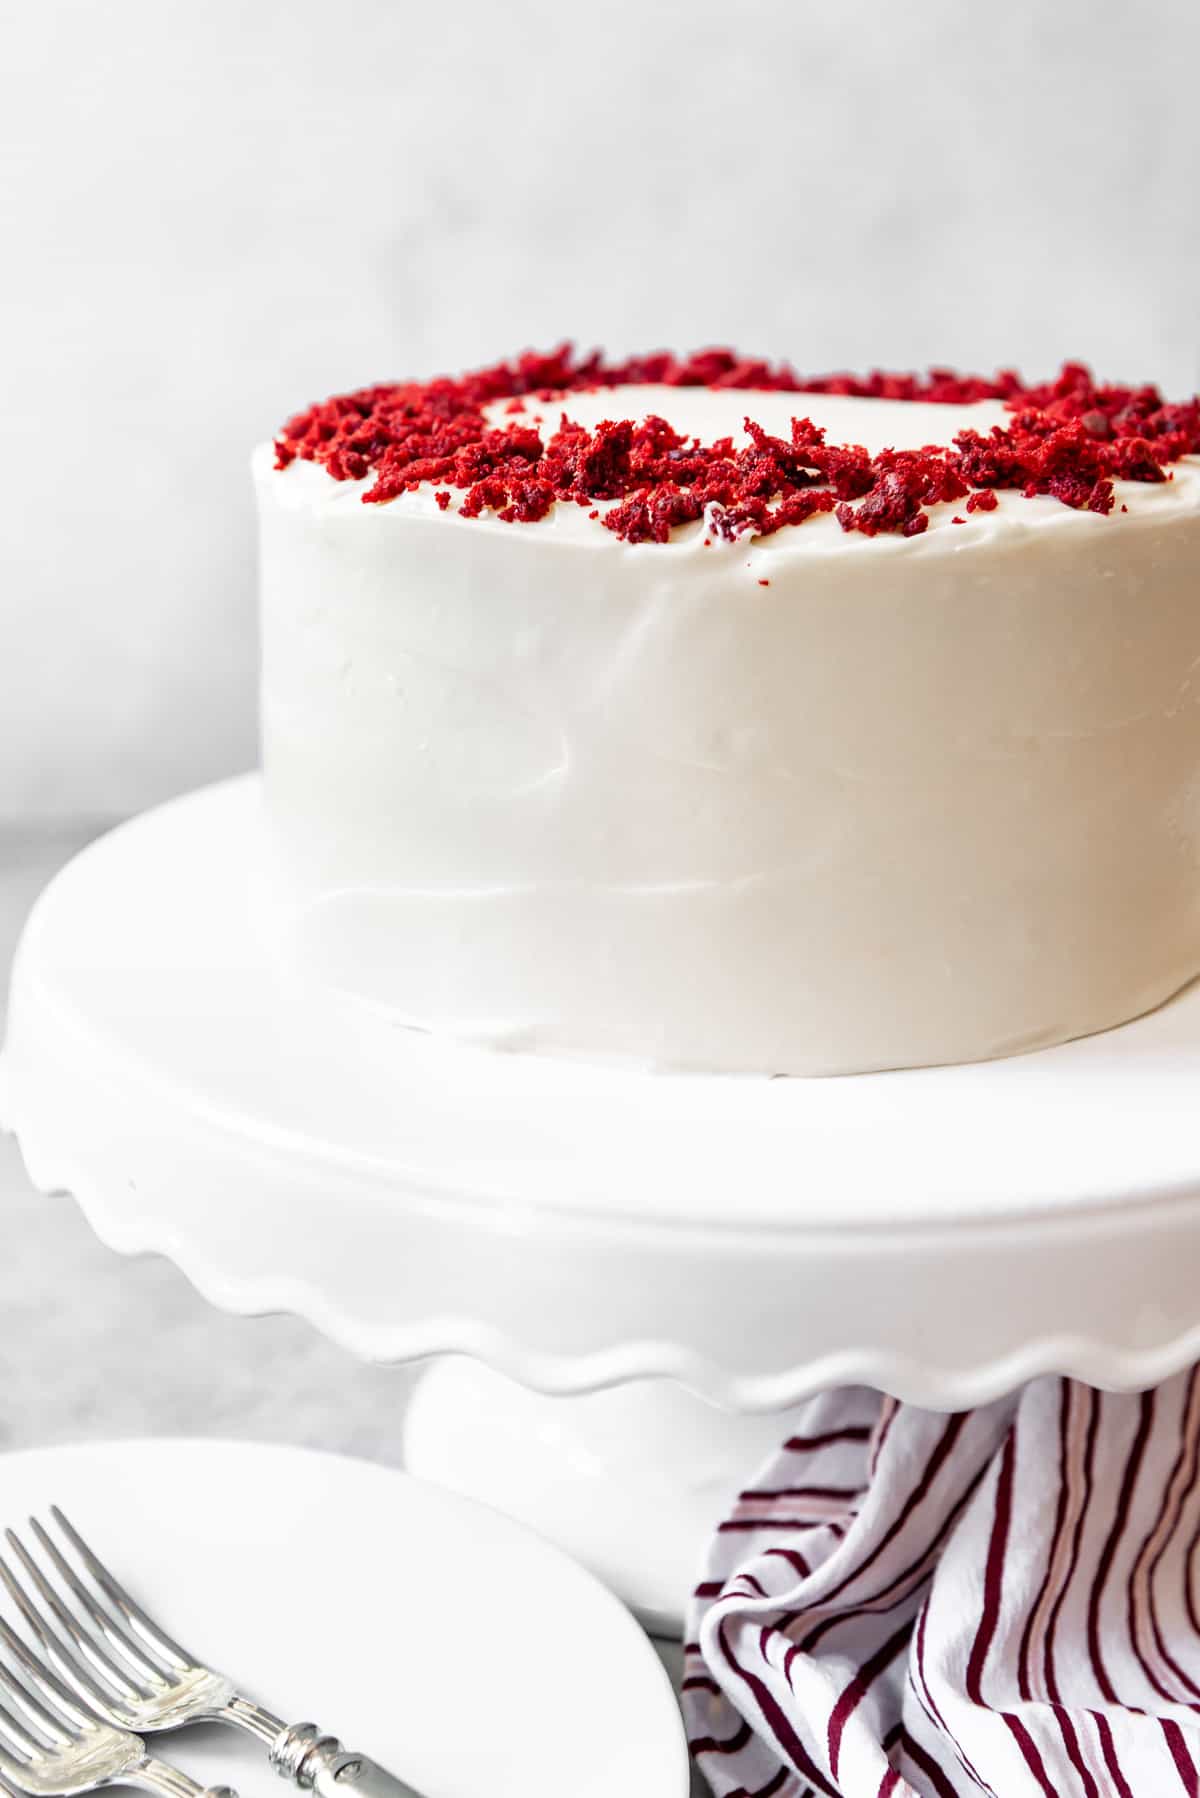
- The vibrant red color and creamy frosting make it a showstopper for holidays like Christmas, Valentine’s Day, or any special celebration.
What You’ll Need
Scroll down to the recipe card below this post for ingredient quantities and full instructions.
- Cake Flour – This is what gives red velvet cake its signature crumb. Cake flour has a lower protein content than all-purpose flour, which helps the cake stay light and tender.
- Cocoa Powder – I use 3 tablespoons for a slightly more noticeable chocolate taste, but 2 is more standard. Either natural or Dutch-process cocoa works perfectly here.
- Butter and Vegetable Oil – Butter adds rich flavor while the oil keeps the cake moist for days. Using both gives you the best combination of taste and texture.
- Granulated Sugar – Sweetens the cake and helps create a soft, even crumb.
- Eggs – Add richness and structure so the layers hold together beautifully once frosted.
- Buttermilk – Essential for that subtle tang and the moist, tender texture that red velvet is known for.
- Baking Soda and White Vinegar – These two react together to help the cake rise evenly with the perfect crumb. They also enhance the red color when mixed with cocoa powder.
- Red Food Coloring – What gives this cake its bold, classic hue. Gel food coloring (affiliate link) is easiest to find and gives that deep red color red velvet is famous for.
- Vanilla Extract – Adds warmth and rounds out the flavors beautifully.
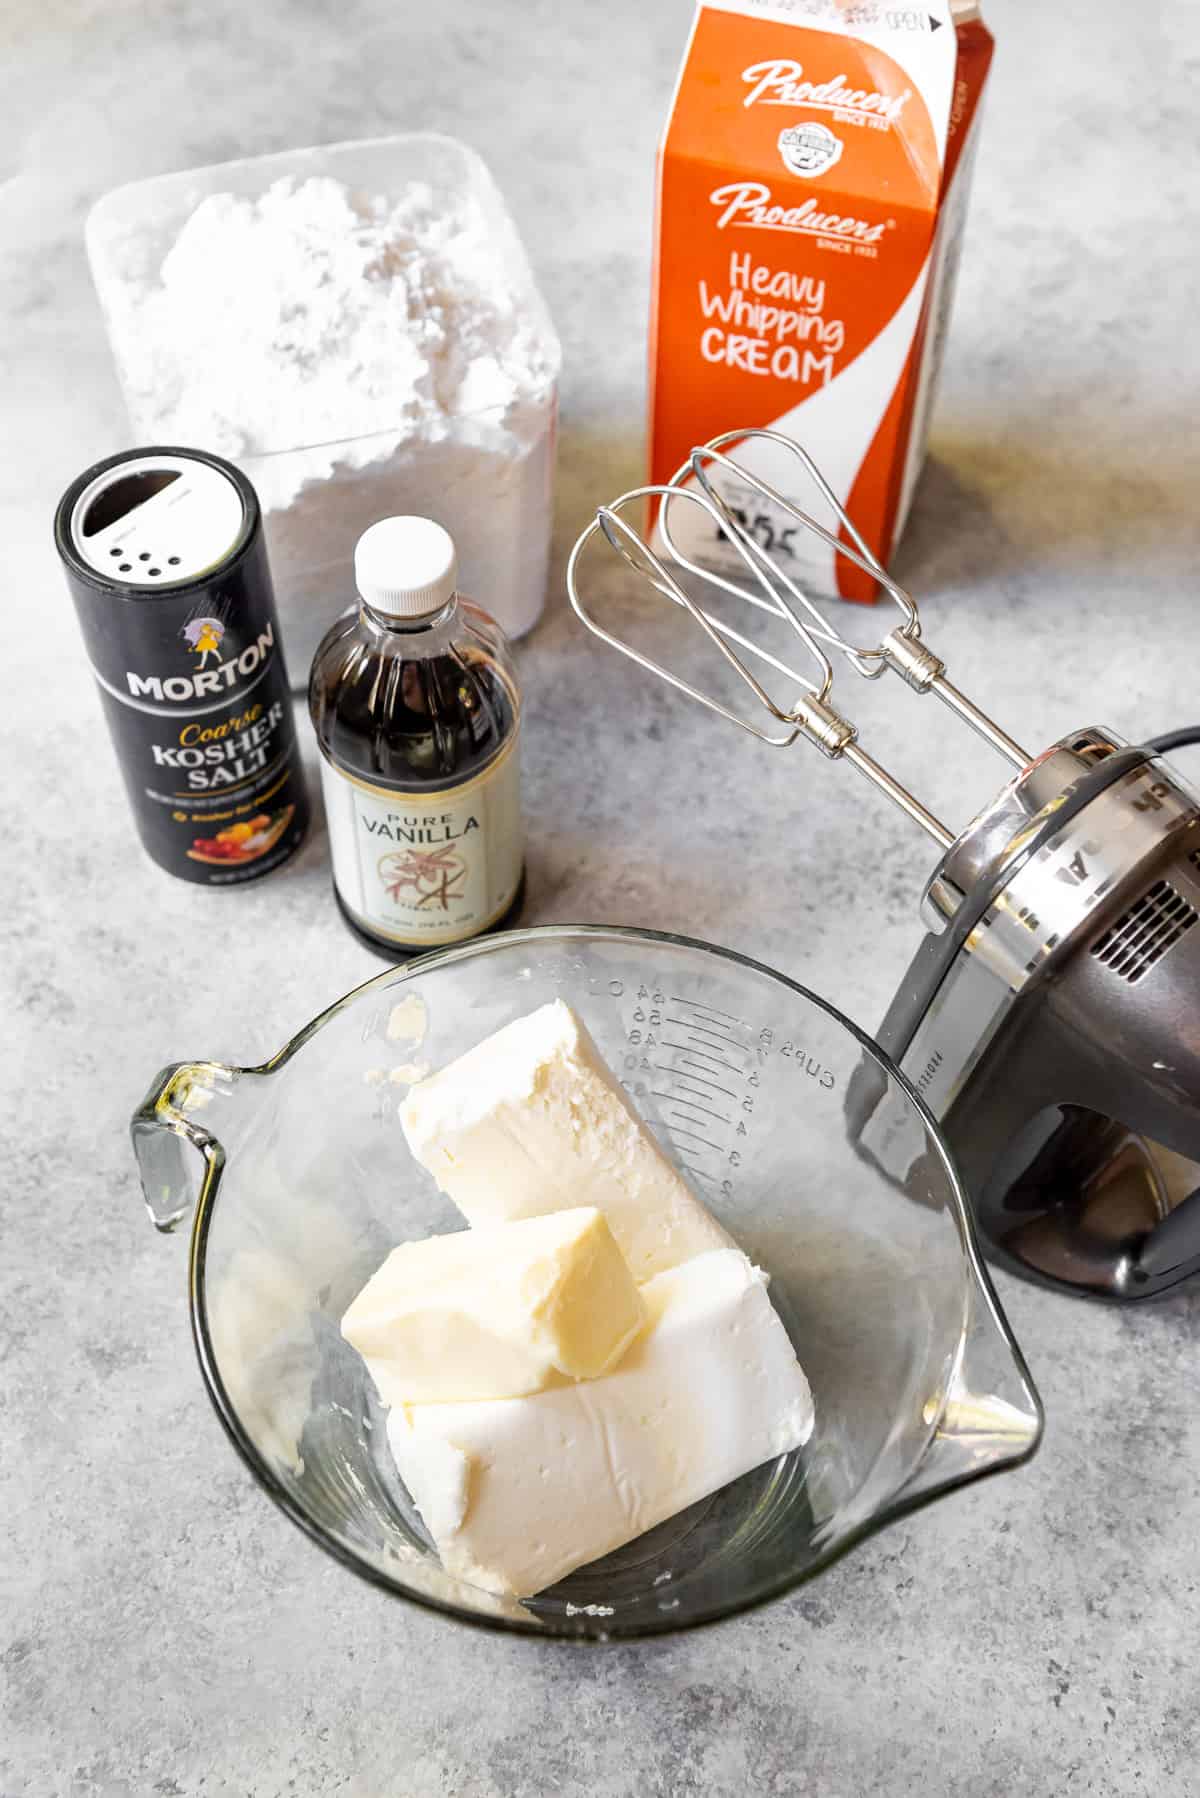
- Cream Cheese – The heart of the frosting, adding a creamy, tangy contrast to the sweet cake layers.
- Powdered Sugar – Sweetens and thickens the frosting while keeping it smooth and spreadable.
- Cream or Milk – Softens the frosting to your preferred consistency for easy spreading.
How to Make Red Velvet Cake
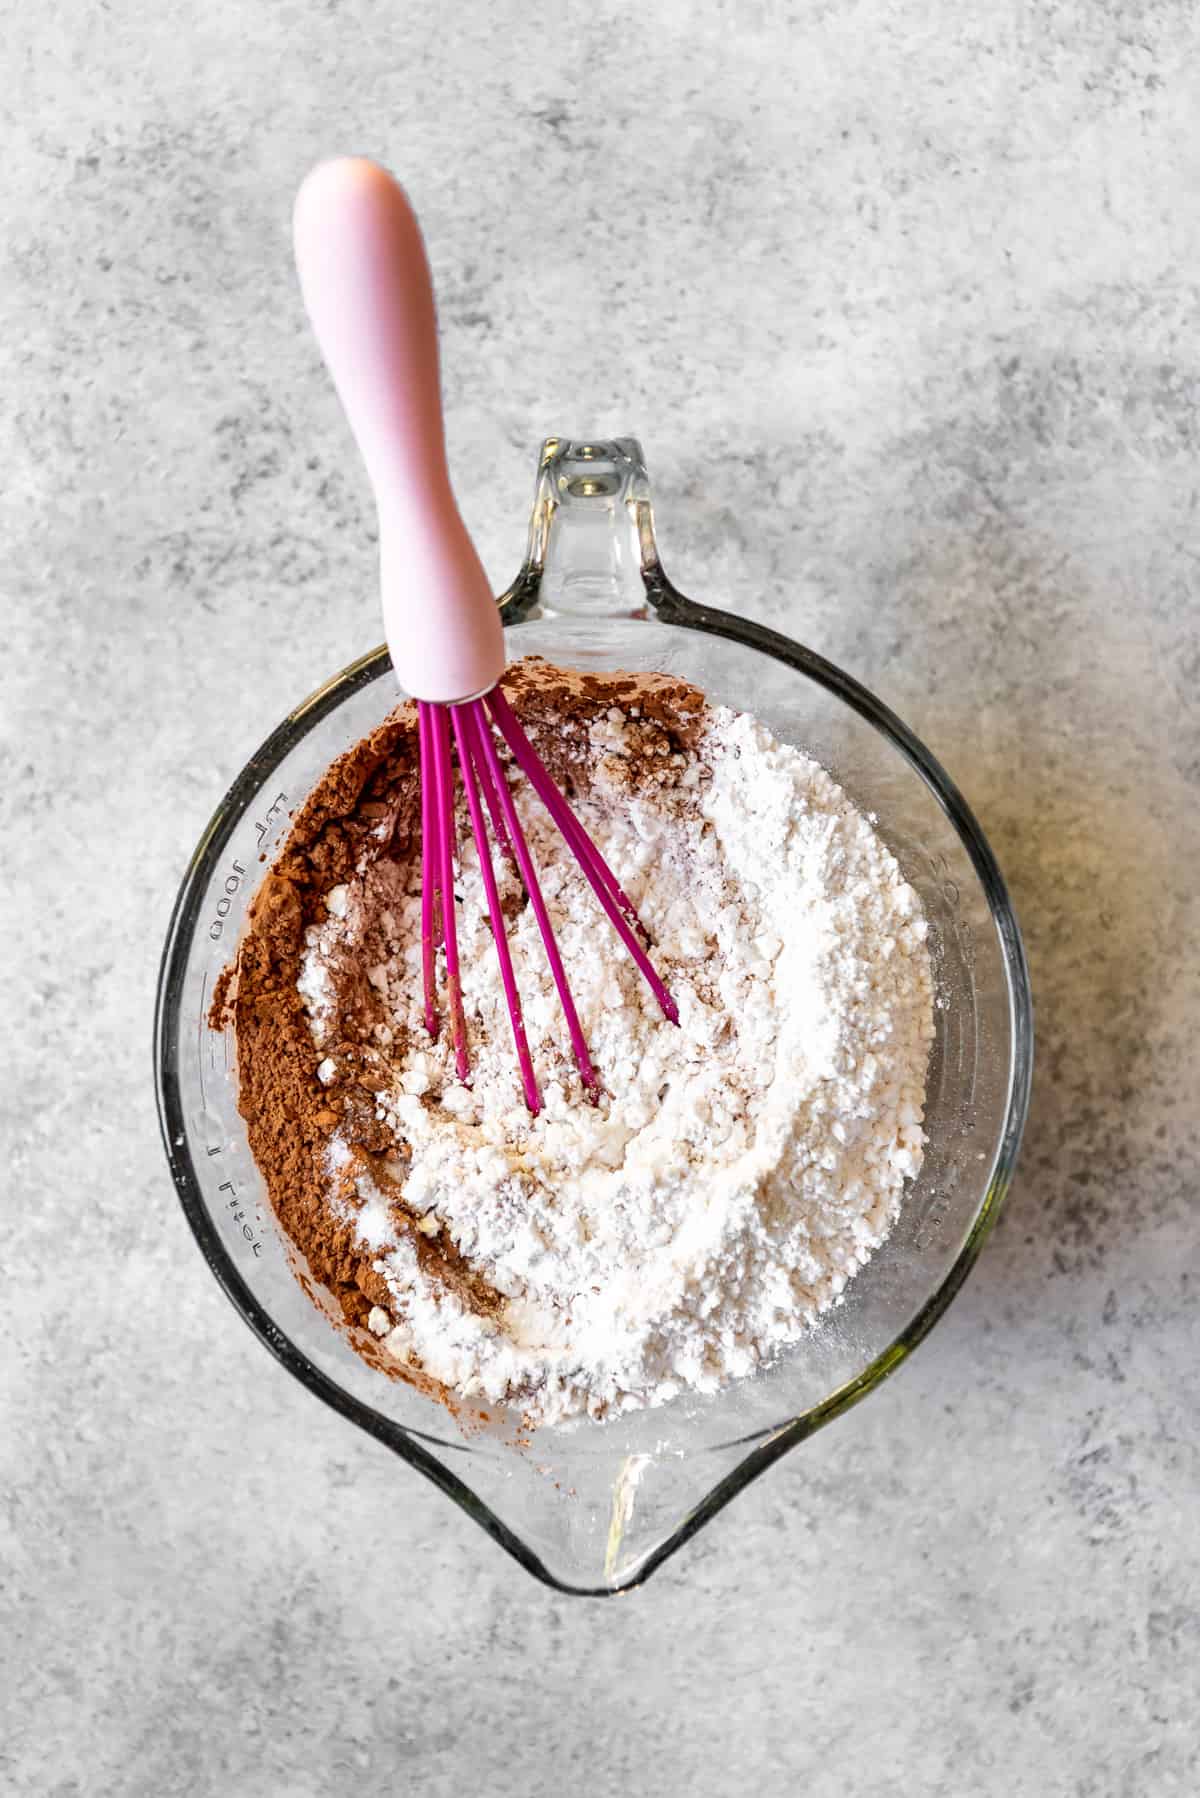
- Prep. Preheat your oven to 350°F (177°C). Line two 8-inch or 9-inch round cake pans with parchment circles, then lightly grease the bottoms and sides with cooking spray. In a medium bowl, whisk together the flour, baking soda, cocoa powder, and salt, and set aside.
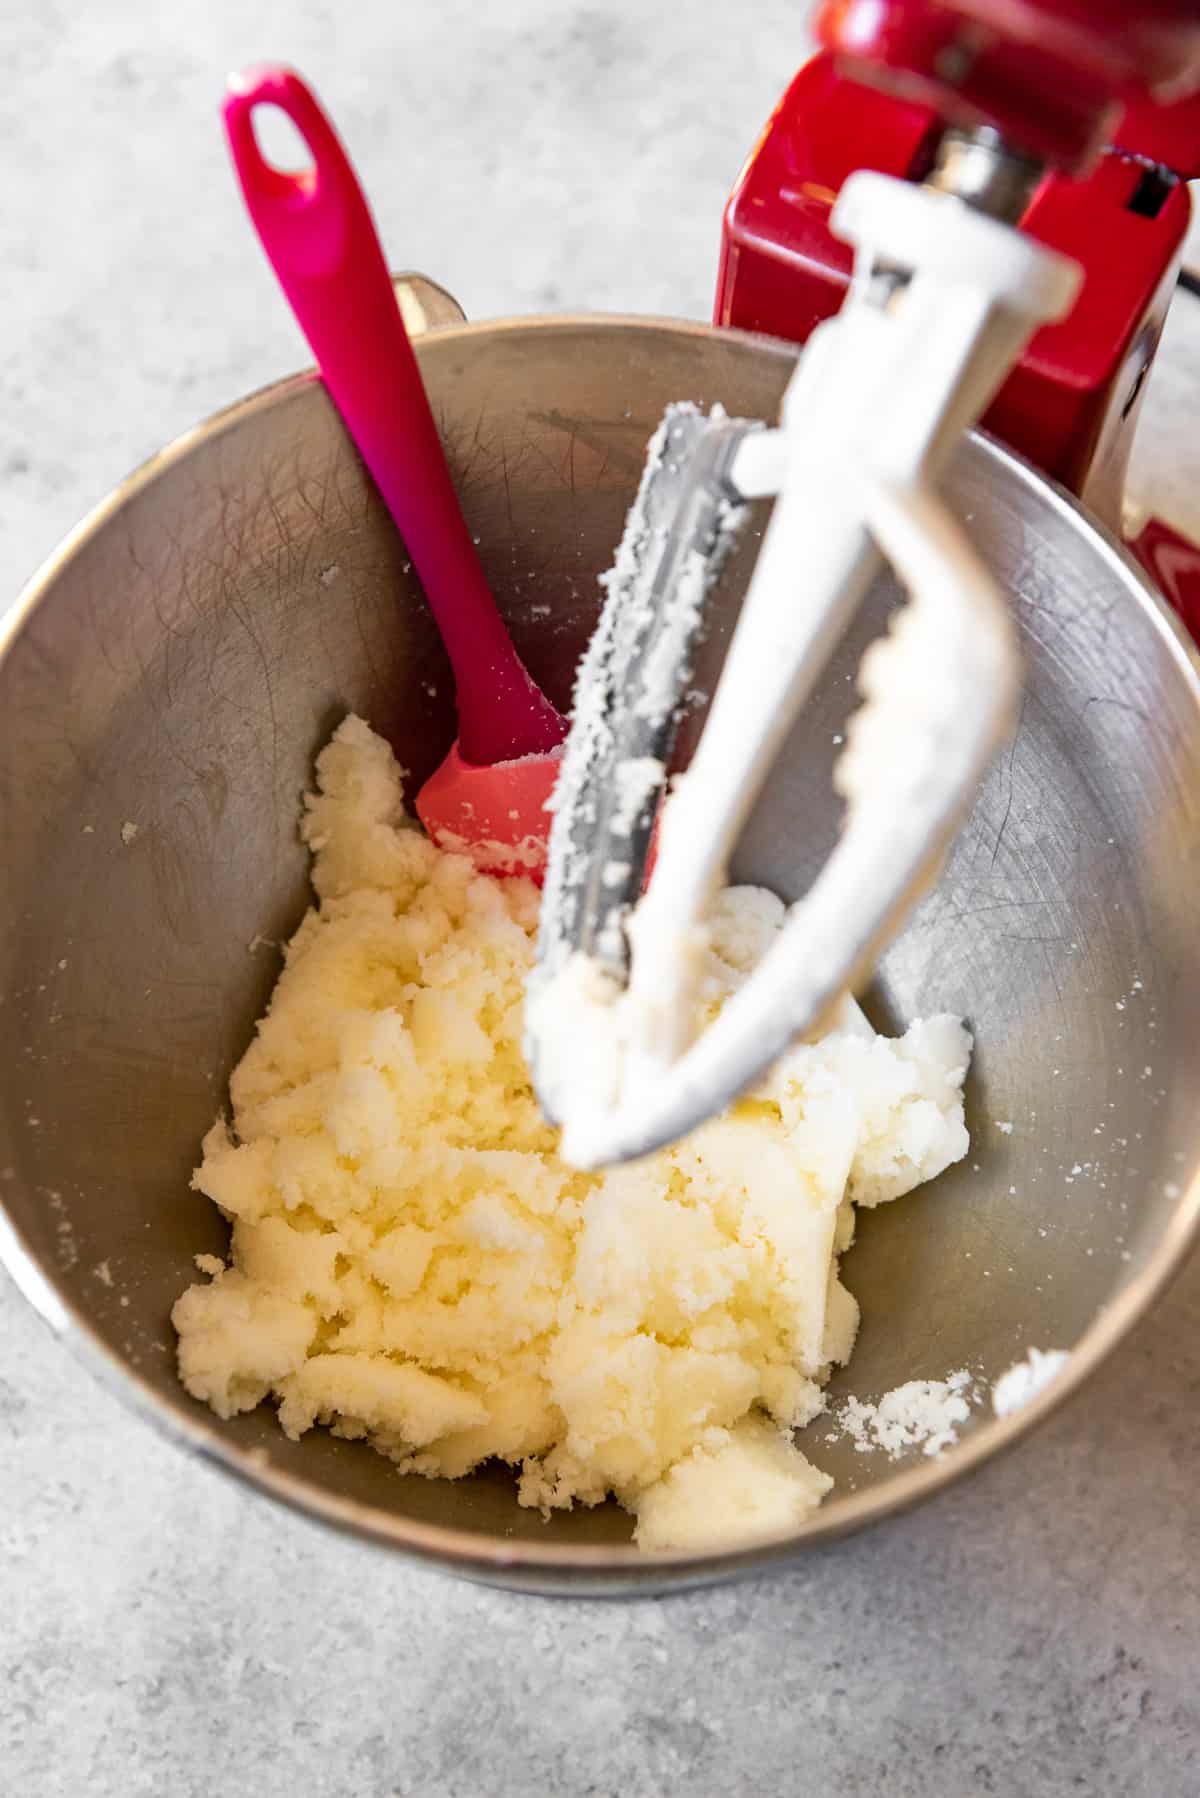
- Cream butter and sugar. Beat the softened butter and granulated sugar together for 3 to 4 minutes until light and fluffy. Add the vegetable oil and beat again, scraping down the sides of the bowl. The mixture may look slightly curdled, which is completely normal.
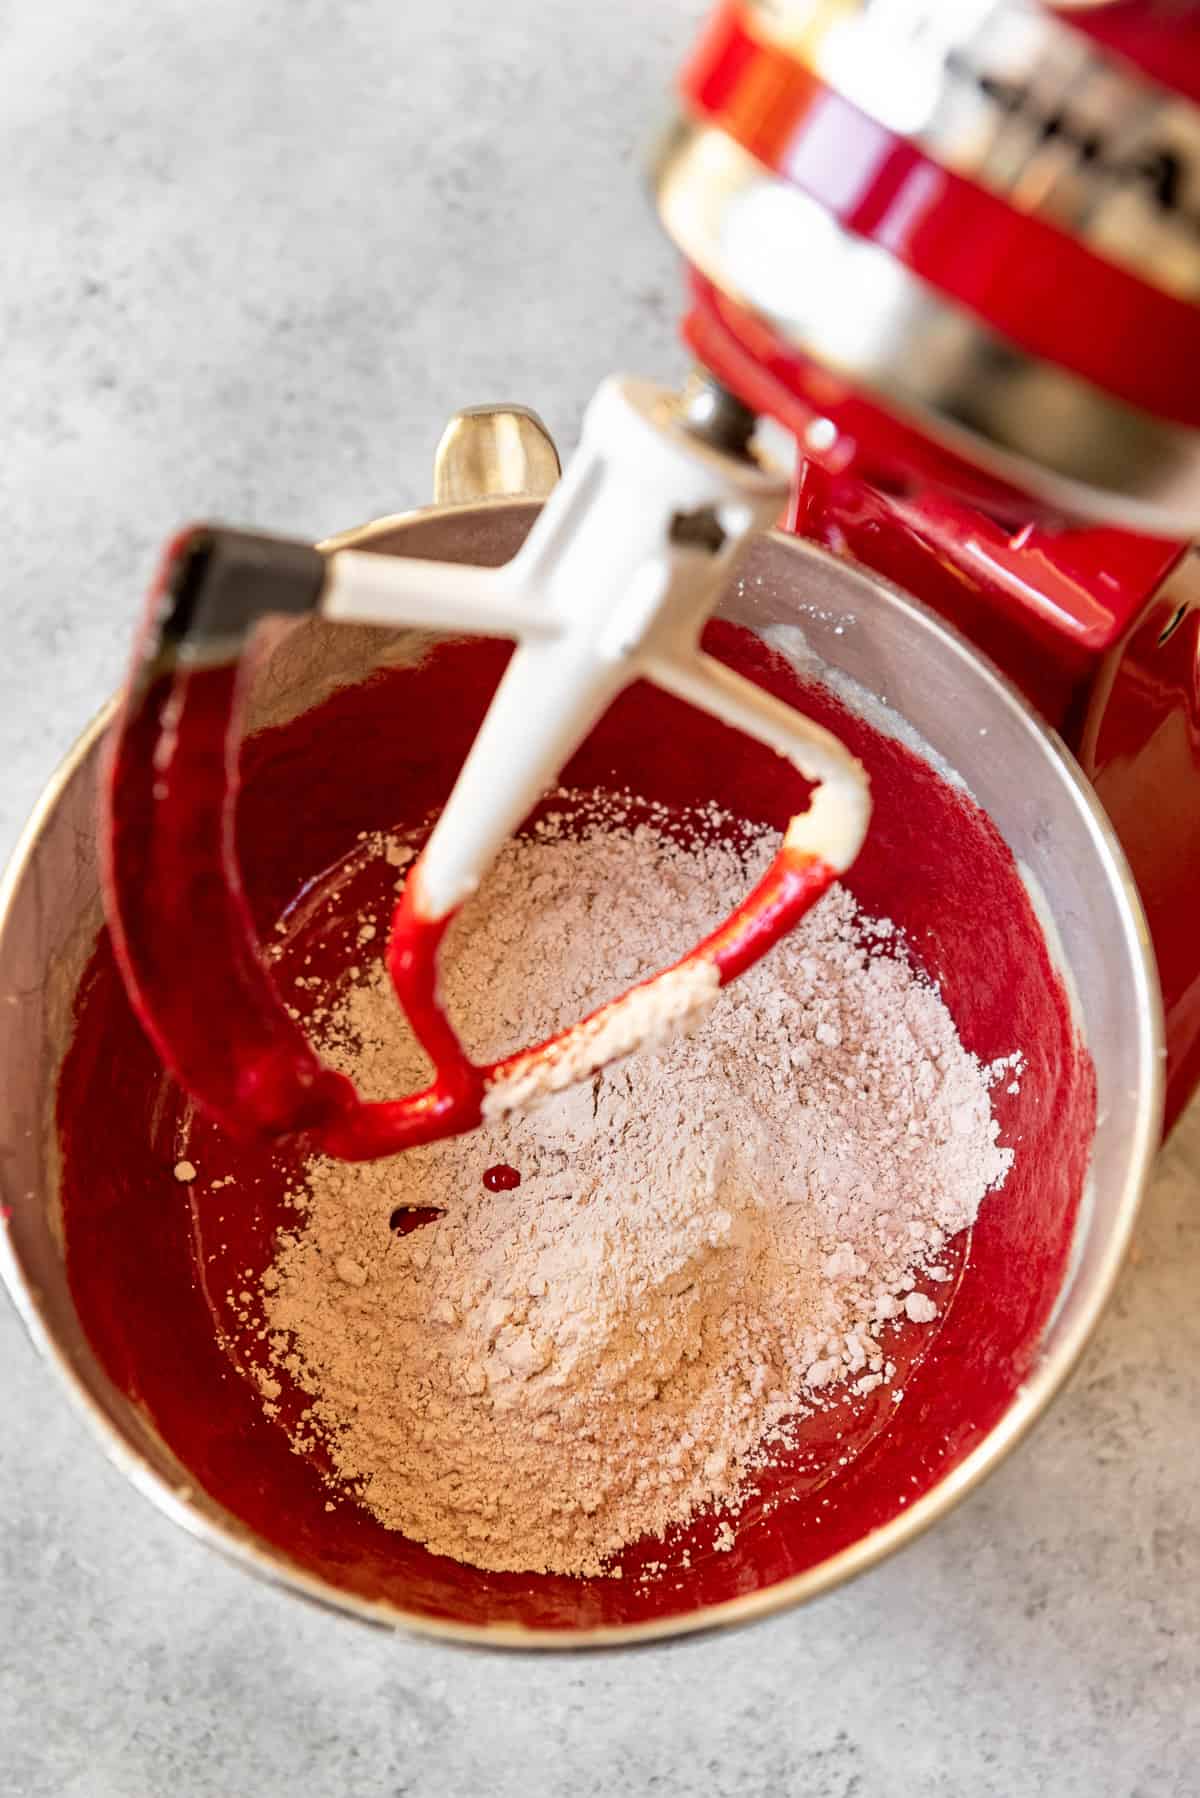
- Add eggs and color. Add the eggs one at a time, beating well after each addition, then mix in the vanilla extract. Stir in the vinegar and red food coloring (affiliate link) until the batter is evenly tinted. Alternate adding one-third of the dry ingredients with one-third of the buttermilk, mixing on low speed just until combined each time. Scrape the bowl as needed and repeat until everything is incorporated.
- Pour and bake. Divide the batter evenly between the prepared cake pans. Bake for 30 to 35 minutes for 9-inch pans or 38 to 43 minutes for 8-inch pans, or until a cake tester inserted in the center comes out clean with just a few moist crumbs attached. Do not overbake—the cake should stay soft and tender.

Make Cream Cheese Frosting
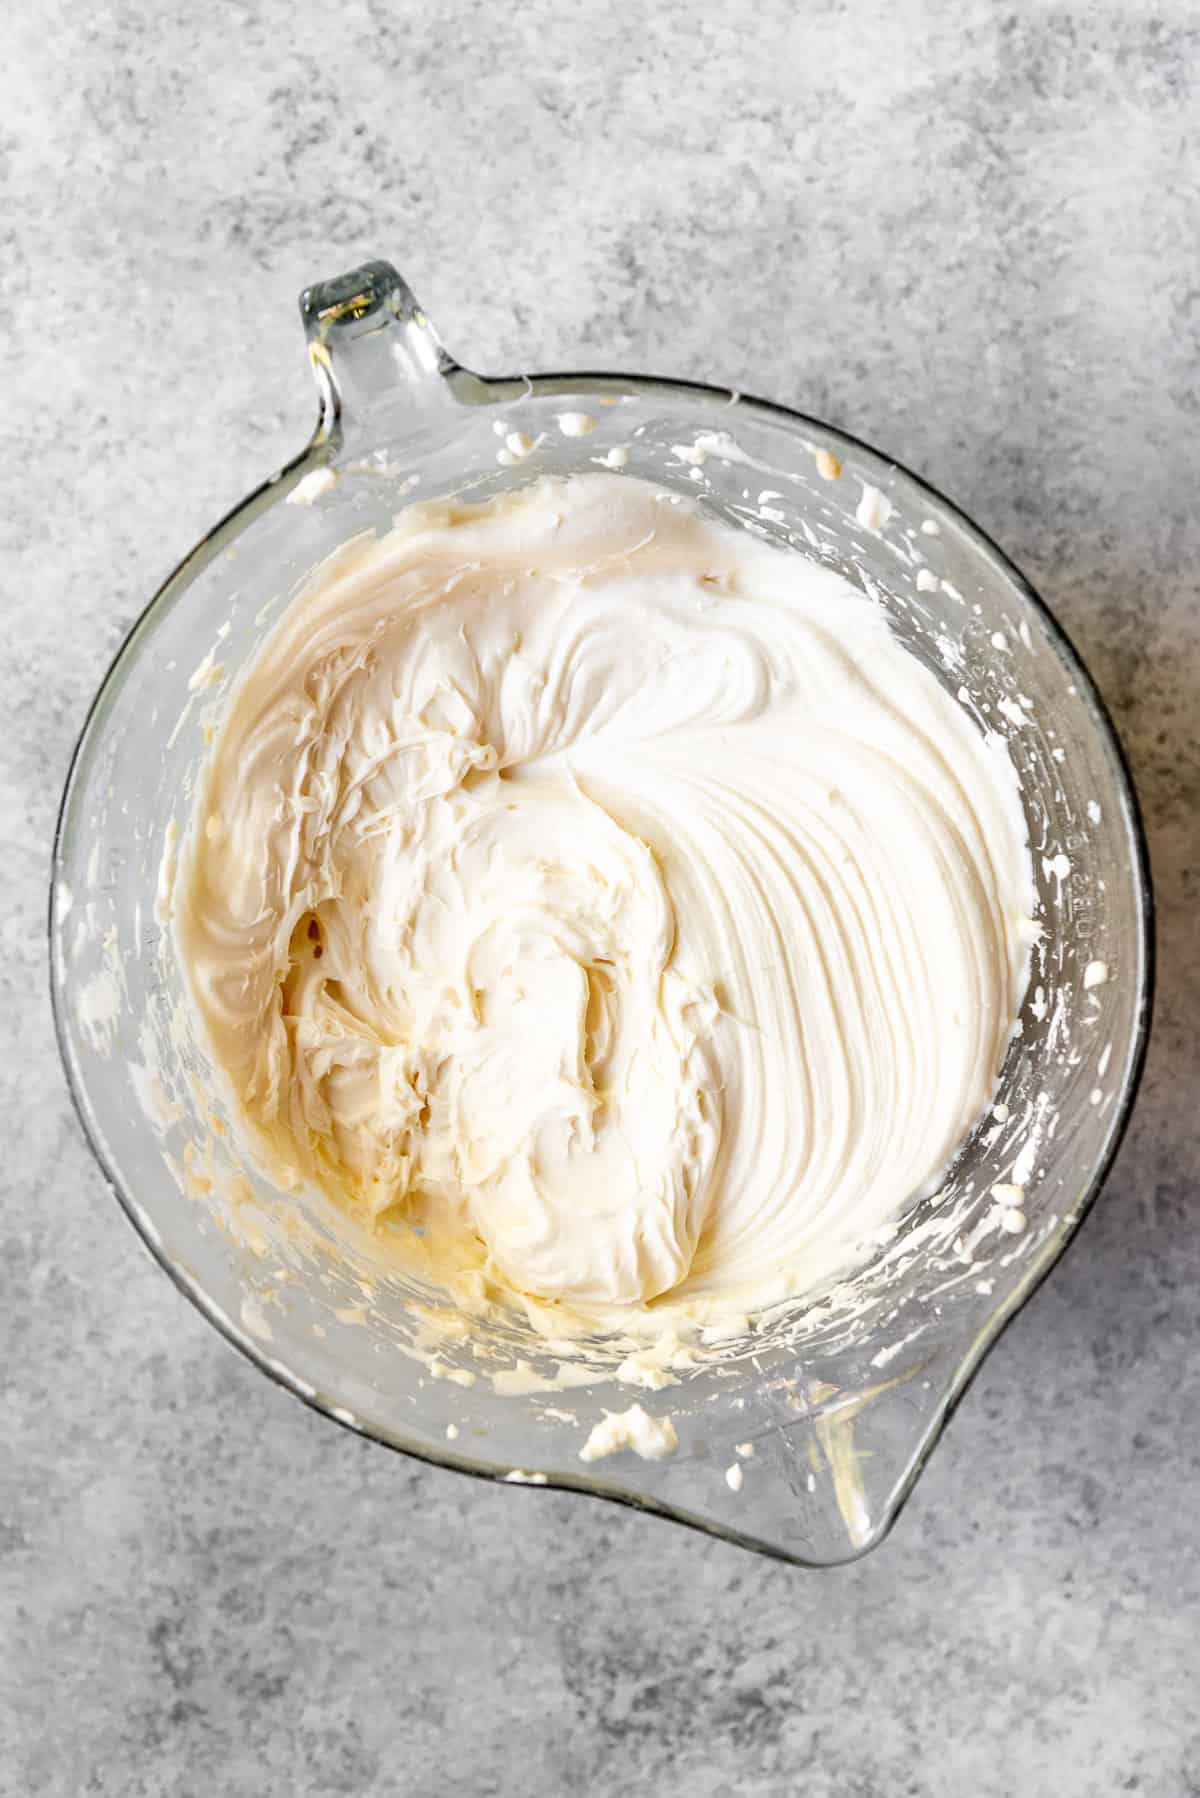
- Make frosting base. In a large bowl, beat the softened cream cheese and butter together using a handheld or stand mixer until smooth and creamy, about 1 to 2 minutes.
- Add sweetness. Add the powdered sugar and cream (or milk) on low speed until combined, then increase to medium-high and beat for 2 minutes until light and fluffy. Mix in the vanilla and salt until smooth.
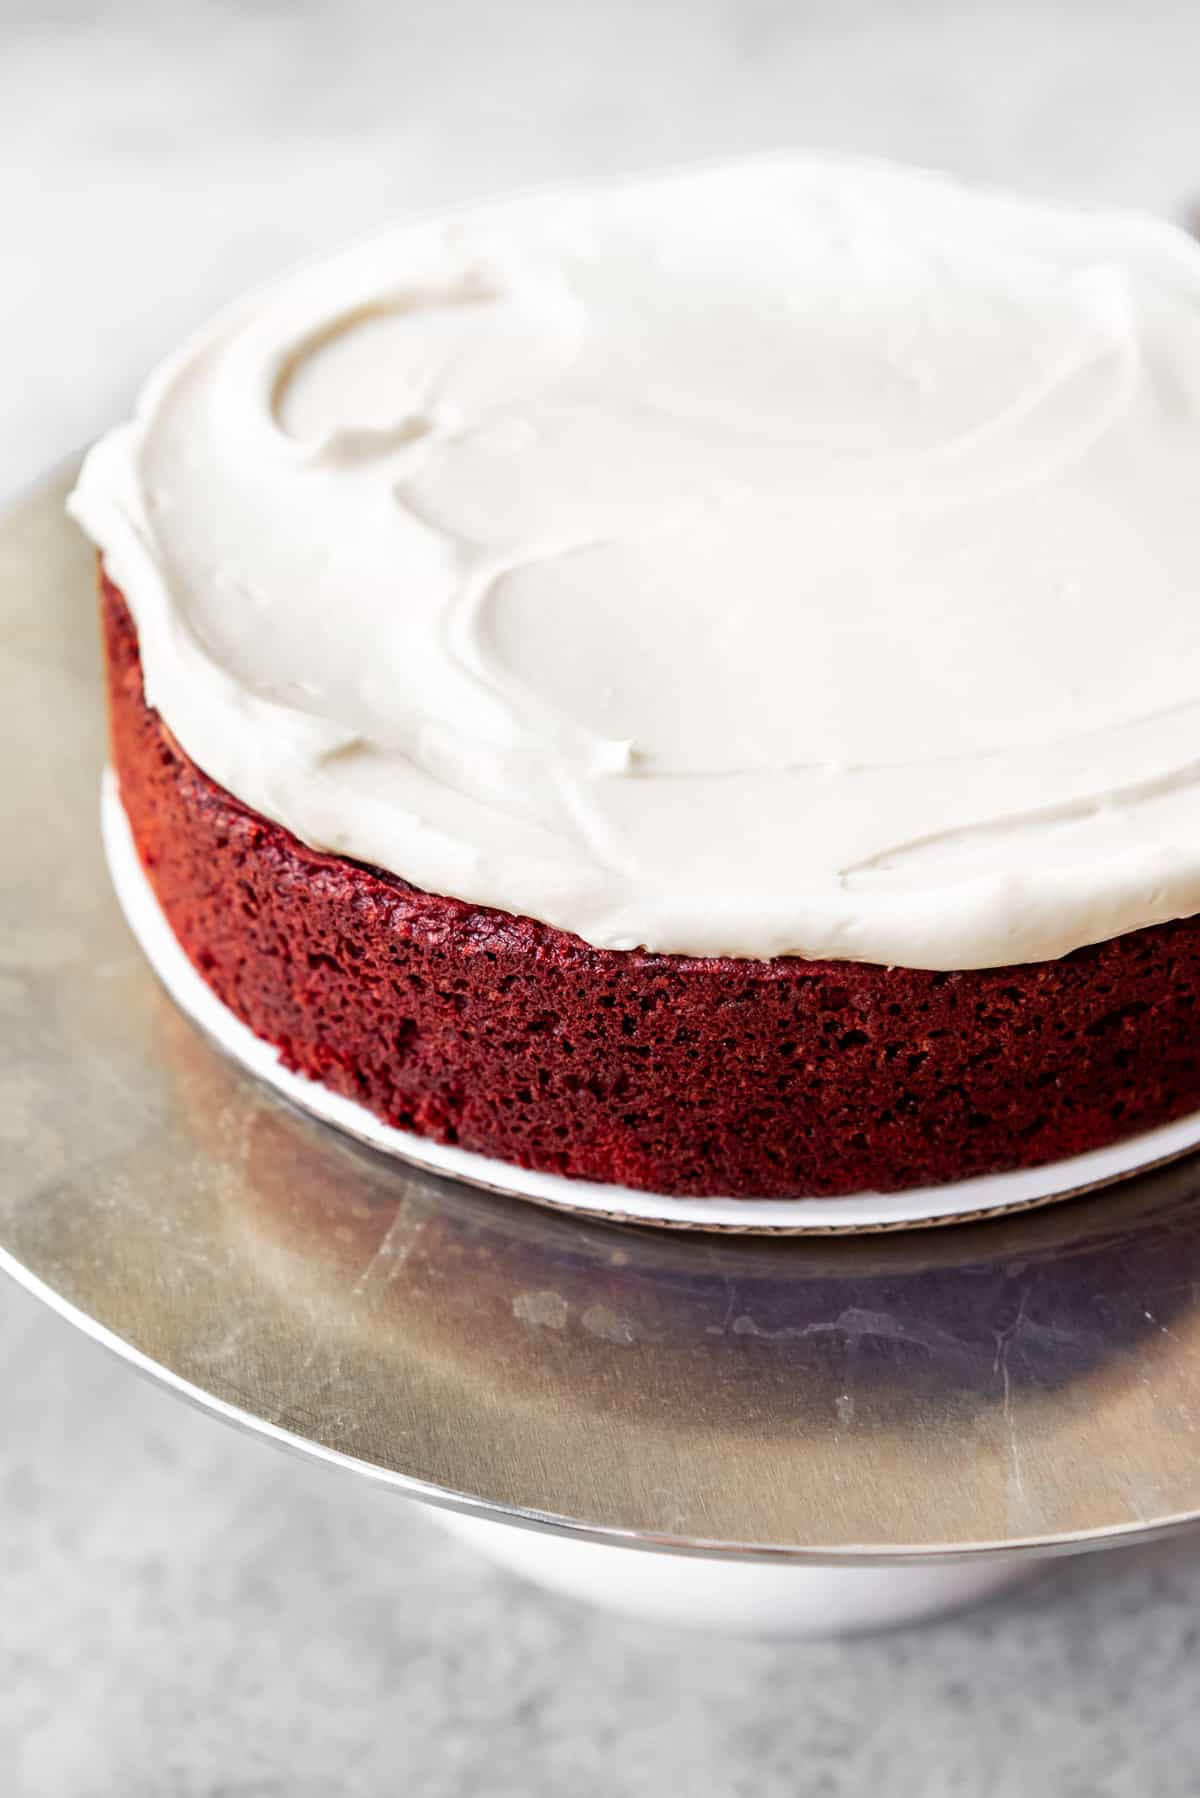
- Cool cakes. Allow the cakes to cool completely before removing them from the pans. Level the tops if needed to create even layers.
- Frost. Spread cream cheese frosting between the cake layers and over the top and sides. Ermine frosting also works beautifully if you prefer something a little lighter and less sweet.


Recipe FAQs
Cream Cheese Frosting is my go-to because that tangy flavor balances the cake perfectly. If you prefer something lighter and less sweet, Ermine Frosting (the original pairing) is wonderful too (I use it on my Black Forest Cake). Swiss Meringue Buttercream would work well without being too sweet.
Not really. There’s a little cocoa powder for flavor, but it’s not meant to taste like a full chocolate cake. The flavor is softer, buttery, and just slightly tangy with that hint of cocoa that makes red velvet so special.
Because of the cream cheese frosting, red velvet cake should be stored in the refrigerator. It will stay fresh for about 5 days, but I like to let it sit out for 1-2 hours before serving so it comes to room temperature and the texture softens again.
Yes! You can freeze the cake whole or as individual slices. I recommend freezing it bare for about an hour first until the frosting is firm, then wrap it in a couple of layers of plastic wrap. Thaw in the fridge or on the counter before serving. You can also bake the cake layers ahead of time and freeze them for up to 2-3 months, then thaw and frost with fresh cream cheese frosting when you’re ready to serve.
Tips for Success
- For even layers, use a kitchen scale to divide the batter between the pans so both bake evenly. I like using 8-inch pans for thicker, taller layers, but 9-inch pans work great too, just adjust the baking time to 30-35 minutes for 9-inch or 38-43 minutes for 8-inch.
- Don’t overbake! The cake is done when a toothpick inserted in the center comes out with just a few moist crumbs. Overbaking will dry it out and take away that soft, velvety texture.
- Make sure the cakes are completely cool before frosting. If they’re even slightly warm, the cream cheese frosting can start to melt and slide.
- For clean, neat slices, chill the cake for about 30 minutes before cutting. It helps the frosting firm up and gives you picture-perfect layers.
How to Decorate Red Velvet Cake
I like to keep decoration simple so the beauty of the cake itself shines through. Try using the extra cake crumbs from leveling your layers to sprinkle over the top, just like I do with my Carrot Cake. It gives a timeless finish and hints at the flavors inside.
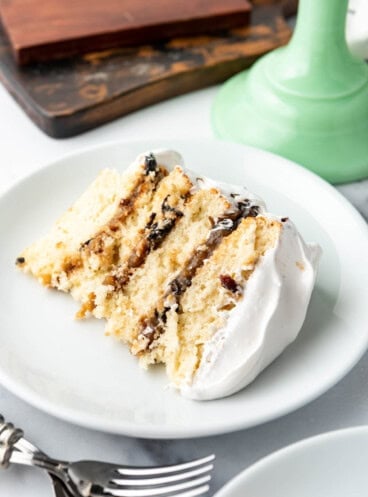
For a more playful touch, you can add frosting swirls around the edges or decorate with small candies or cookies like in my Chocolate Peanut Butter Cake. If you want something elegant for a special occasion, top each mound of frosting with red or white flowers, similar to the look of my Vintage Cherry Chip Layer Cake.
More Cake Recipes
- Chocolate Cake with Chocolate Frosting
- Raspberry Chocolate Cake
- Oreo Cookies & Cream Cake
- Best Carrot Cake
- Coca Cola Cake
- 3-Layer S’mores Cake
- Homemade Funfetti Cake


Classic Red Velvet Cake
Ingredients
Cake
- 3 cups cake flour scooped & leveled (354g)
- 1 teaspoon baking soda
- 3 Tablespoons unsweetened cocoa powder (22g)
- ½ teaspoon salt
- ½ cup salted butter softened (113g)
- 2 cups granulated sugar (400g)
- 1 cup vegetable oil (224g)
- 3 large eggs room temperature
- 1 Tablespoon vanilla extract
- 1 Tablespoon distilled white vinegar
- 2 Tablespoons red liquid food coloring (affiliate link) (or 1 Tablespoon gel food coloring (affiliate link))
- 1 cup buttermilk room temperature (240g)
Frosting
- 2 (8 ounce) packages cream cheese softened
- ½ cup salted butter softened (113g)
- 4 cups powdered sugar (520g)
- 2-3 Tablespoons cream or milk
- 2 teaspoons vanilla extract
- Pinch of salt

Instructions
For the cake
- Preheat oven to 350°F. Line two 9-inch or 8-inch cake pans with circles of parchment paper in the bottoms and spray the sides. Set aside.
- Whisk the flour, baking soda, cocoa powder, and salt together in a large bowl. Set aside.3 cups cake flour, 1 teaspoon baking soda, 3 Tablespoons unsweetened cocoa powder, ½ teaspoon salt
- Beat the butter and sugar together on high speed for 3-4 minutes in the bowl of a stand mixer with a paddle attachment until light and creamy. Add the oil and mix again, scraping the sides of the bowl.½ cup salted butter, 2 cups granulated sugar, 1 cup vegetable oil
- Add eggs, one at a time, and vanilla, beating on medium-high speed between each addition until combined. Add vinegar and food coloring (affiliate link), using as much food coloring (affiliate link) as needed to get the desired color.3 large eggs, 1 Tablespoon vanilla extract, 1 Tablespoon distilled white vinegar, 2 Tablespoons red liquid food coloring (affiliate link)
- Turn mixer to low speed and add the dry ingredients alternately with the buttermilk in 2-3 additions, mixing just until combined between each addition and scraping the bottom and sides of the bowl as needed.1 cup buttermilk
- Transfer batter to the prepared pans and bake for 30-35 minutes (for 9-inch pans) or 38-43 minutes (for 8-inch pans) until a cake tester inserted in the center comes out clean with just a few crumbs. Do not overbake. Remove from oven and cool completely.
For the frosting
- Beat the cream cheese and butter together in a large bowl using a handheld mixer until smooth, about 1-2 minutes. Add the powdered sugar and cream or milk and mix on low speed until incorporated, then increase speed and beat for 2 minutes. Add vanilla and salt and beat again.2 (8 ounce) packages cream cheese, ½ cup salted butter, 4 cups powdered sugar, 2-3 Tablespoons cream or milk, 2 teaspoons vanilla extract, Pinch of salt
Assembly
- Level the cakes (if needed) so the tops are flat. Save scraps to crumble and use for decorating. Frost with cream cheese frosting and sprinkle the top of the cake with the reserved crumbs. Slice and serve.
Video
Notes
- Cake Flour Substitute: If you don’t have cake flour, use 2 2/3 cups all-purpose flour with ⅓ cup cornstarch instead.
- Cupcakes: Fill cupcake liners ½ to ⅔ of the way full. Bake for 19-21 minutes until the tops spring back at a touch or a toothpick inserted into the center of one comes out clean.
- Cake Pans: This recipe can be made with either two 8-inch or 9-inch baking pans to create two layers. I like using my 8-inch pans for nice, thick layers like you see in these photos. The baking time is 30-35 minutes for 9-inch pans and 38-43 minutes for 8-inch pans.
Storage & Make Ahead
- Store: Keep covered in the fridge for up to 5 days. Bring to room temperature before serving.
- Freeze: Freeze whole or sliced for up to 2 months. Wrap well and thaw in the fridge or at room temp.
- Make Ahead: Bake cake layers up to 2-3 months ahead and freeze. Thaw and frost when ready to serve.
Nutrition
This post was originally published in January, 2019. The photos and content were updated in January, 2022.


Hello, hoping to try this recipe, I have 2 questions: can I use 10″ round pans as I want to make 2 layer cake. And can I substitute butter with applesauce in the cake recipe?
Thanks so much!
Yes, you could replace some of the butter with applesauce (I wouldn’t do more than half though or it can compromise the texture and lead to more of a rubbery sponge). And 10″ pans should work but the layers will be much thinner.
Easy to follow instructions and everyone said it’s the best they ever had. I wouldn’t change a thing. Thank you
Loved this recipe! Filled with white chocolate ganache (very thinly) and frosted with ermine buttercream instead of cream cheese. Incredible!
Amy thank you for this moth watering recipe. The first time I made it was for Christmas and OMG. Everyone loved it. Now, this is the most requested cake on my menu. God bless you and your family. Thanks again.
You are so very welcome! I love that it was part of your celebration and you have made it on repeat! It’s a favorite for sure.
Can I use this recipe for cupcakes? How long would I have to bake them for?
Yes you can but I also have a red velvet cupcake recipe! https://houseofnasheats.com/red-velvet-cupcakes/
Hello! Can I swap out red food colouring for green or blue? Made this recipe before, it’s great!
Thank you! You could try but I really don’t think it would show up very well. The red velvet cake has a natural red hue to it from the chemical reaction of the cocoa with the vinegar and buttermilk.
This was by far my husband’s favorite cake. I always had to make it for his birthday. The only difference is I made it with ermine frosting. Have you ever tried it with that frosting? It is AMAZING!
That is so fun Carolyn! He is in good company! So many people love red velvet. I have never tried this cake with ermine frosting. I will have to try it!
Cake just came out of the oven, looks great and smells great. I don’t see instructions on leaving it in the pan to cool completely, remove it in 10 minutes or something else? Does it need to stay in the pan for carry over cooking?
Hi Nancy, great question. I like to just leave it in the cake pans while they cool completely. Once cooled, I will take them out of the cake pan.