
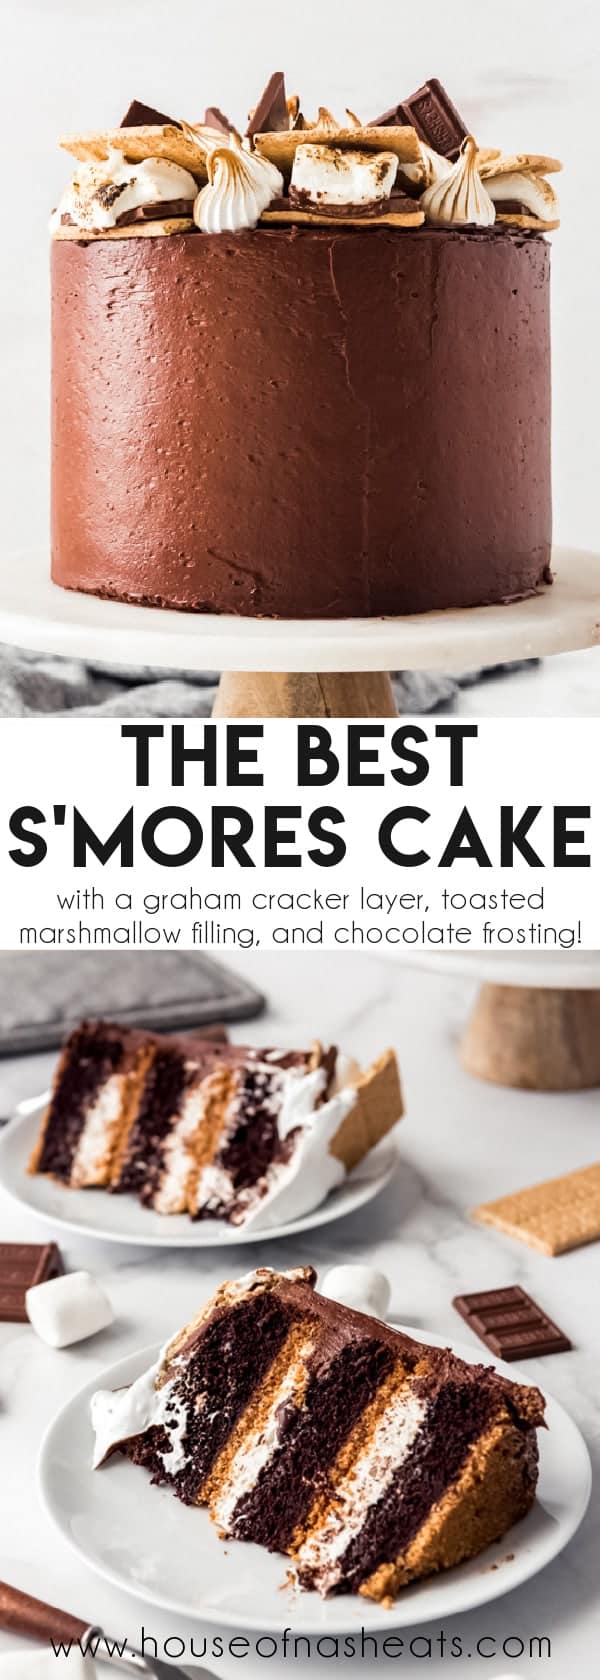
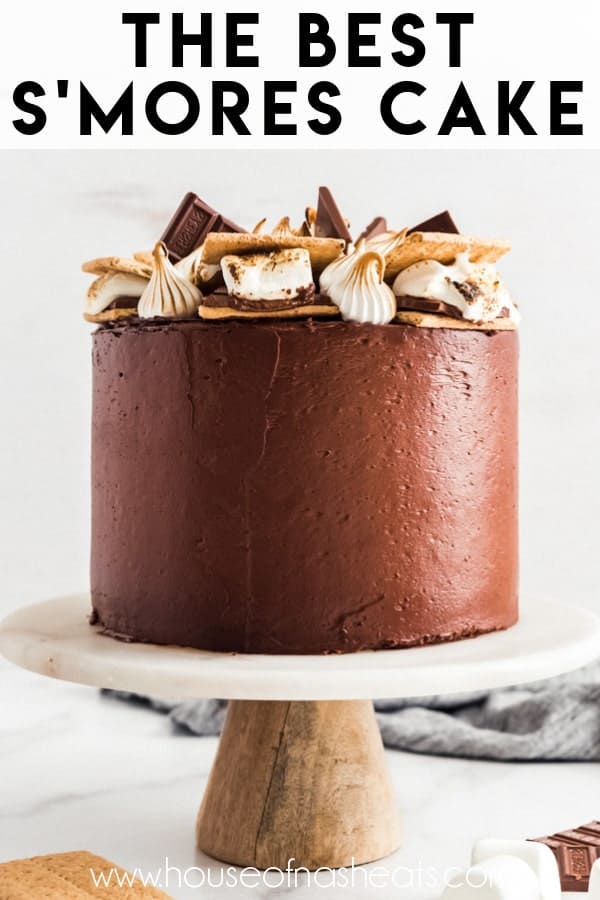
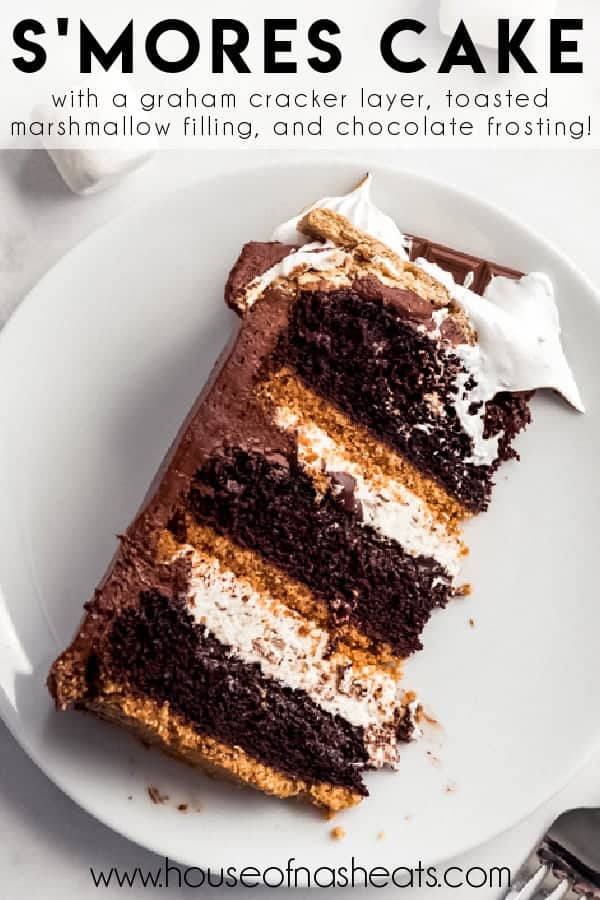
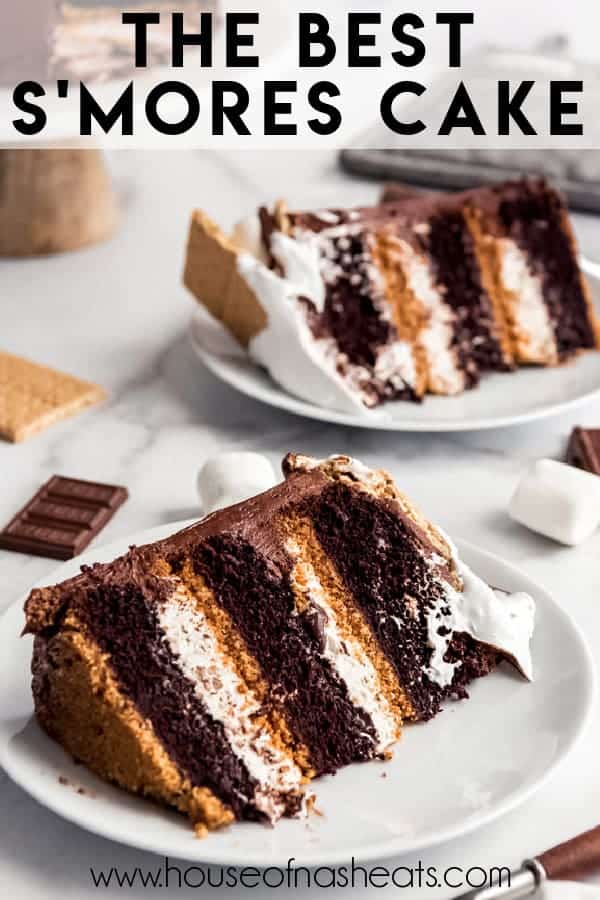
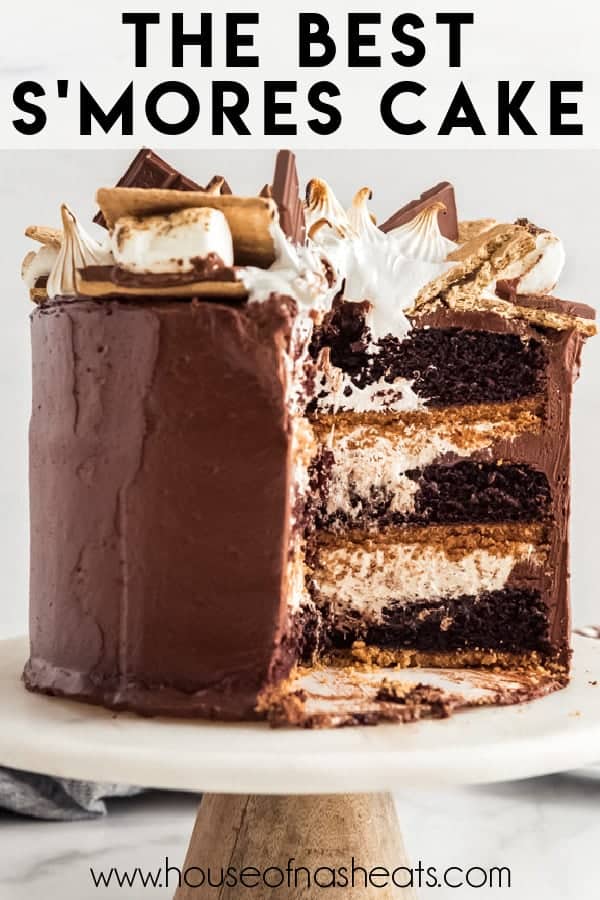
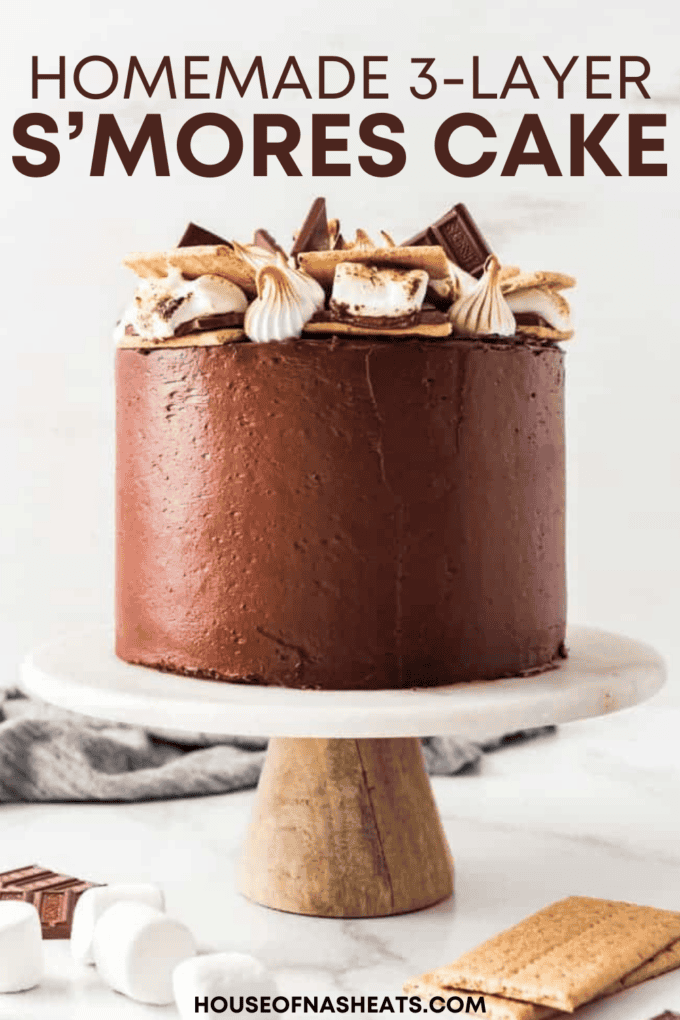
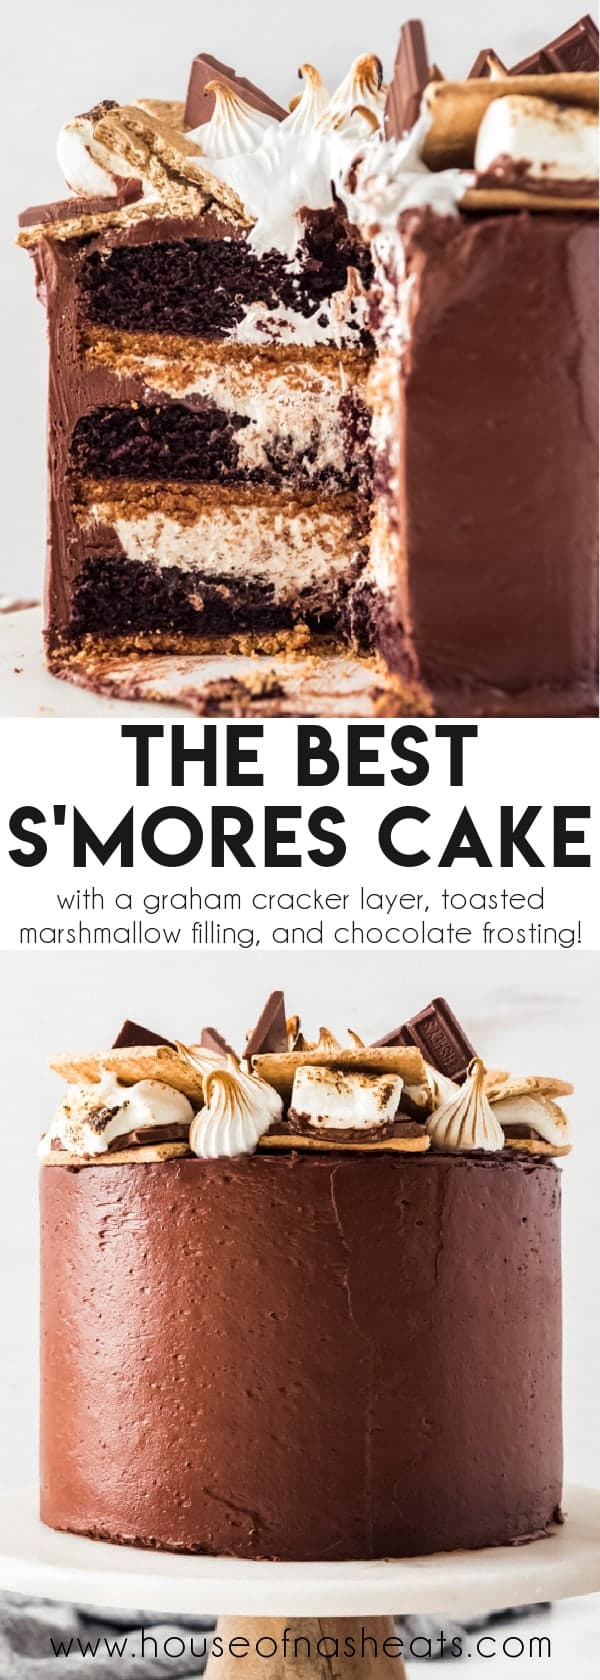
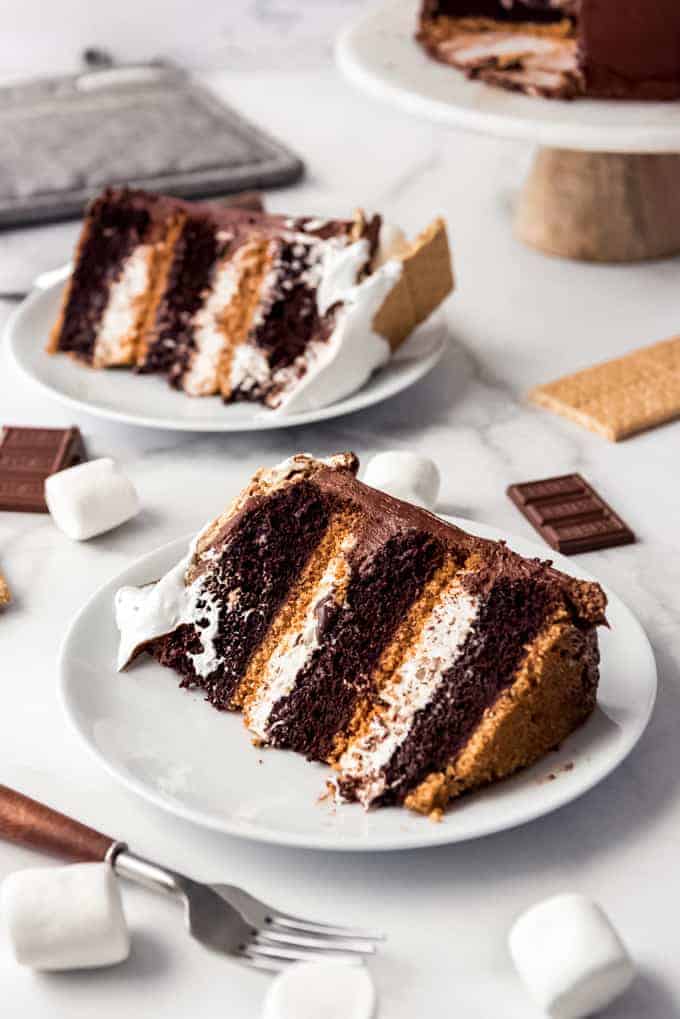
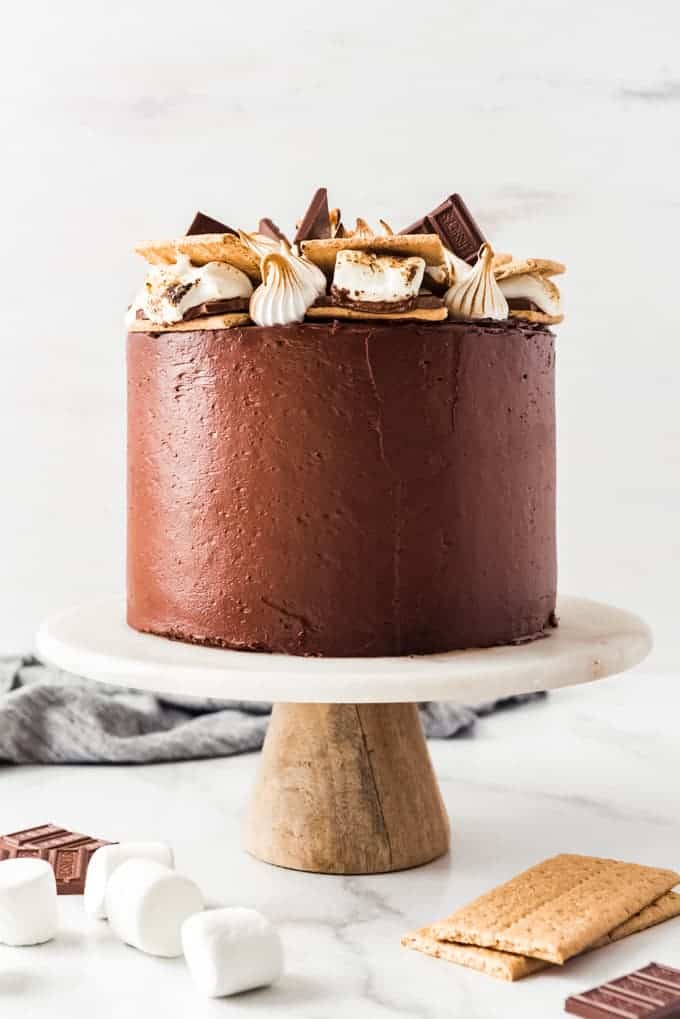
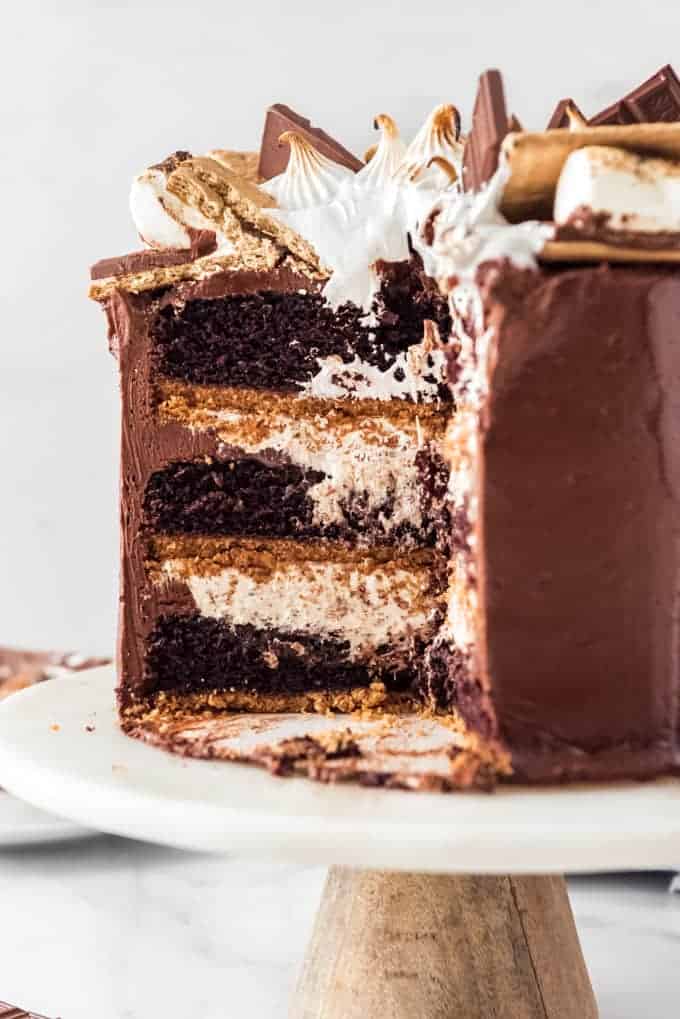
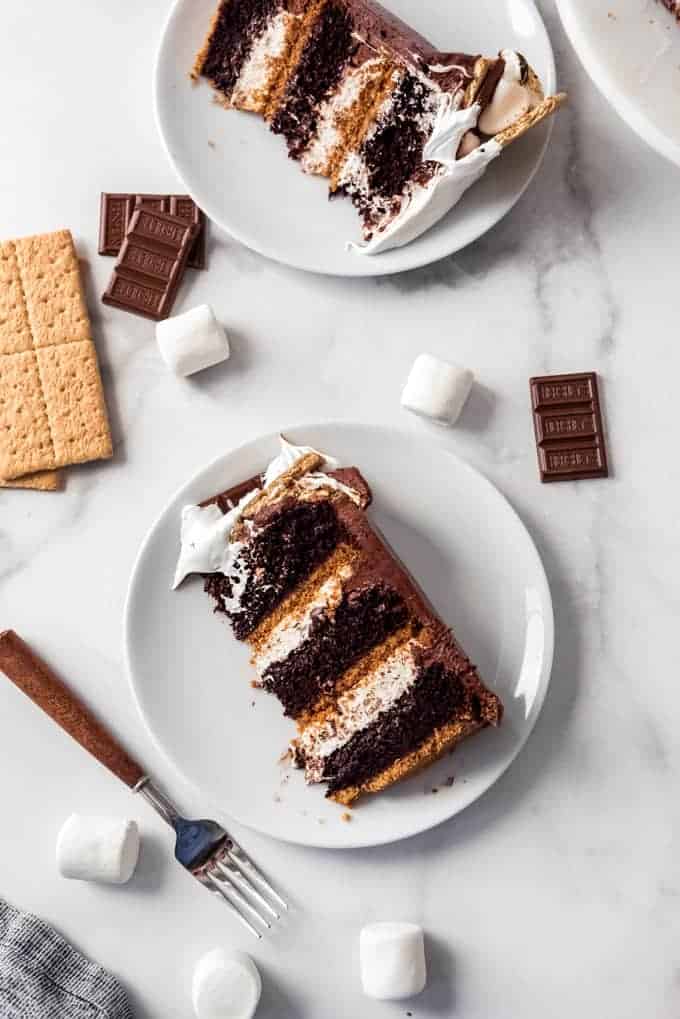
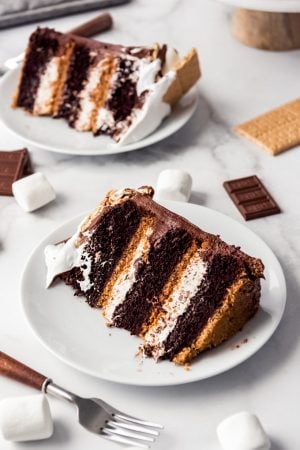
This S’mores Cake is an over the top decadent dessert with layers of moist chocolate cake, graham cracker crust, chocolate ganache, and homemade marshmallow filling, all surrounded by a luscious buttercream frosting. It’s a scrumptious, irresistible twist on one of summer’s most iconic desserts!
Don’t s’mores just make you feel like a kid again? I think that’s why we all love them so much! Some of our other favorite s’mores desserts are my much-loved S’mores Bars, the easy and munchable S’mores Snack Mix, S’mores Dip, handheld S’mores Cupcakes, and Chocolate Chip S’mores Cookies.
Table of Contents
You Will Love this S’mores Birthday Cake
It took me quite a few tries to find a s’mores cake that I loved. There were a couple of other iterations of this recipe that got only “meh” reactions, including one with a graham cracker cake instead of a chocolate one that I had high hopes for but that just didn’t deliver when it came to s’mores flavor.
My s’mores cupcake has graham cracker frosting that I’m kind of obsessed with, so my next thought was to go that direction. But again, it just wasn’t quite what I wanted in a tall layer cake that would be good for celebrations.
It wasn’t until I finally tried a thick layer of graham cracker crust as a base for the chocolate layers that things started to really come together. You can actually taste the graham cracker and there is a crunchy texture that stands up to the other elements of the cake.
The toasted marshmallow buttercream is made with marshmallows that you actually toast under the broiled until they are golden brown, then add them right to a classic butter and powdered sugar buttercream base. It’s crazy good and adds that toasty, almost burnt sugar flavor that I love about the original campfire s’mores.
There is even a layer of homemade marshmallow fluff that I toasted with my kitchen torch. I fully anticipated this being a total vanity move and was prepared to tell you it was unnecessary since the cake it still super delicious without it.
But no, it’s absolutely one of my very favorite parts of the over-the-top dessert. So even though it’s a bit of extra work right at the end when you are so close to being done, I encourage you to power through and make the marshmallow fluff. You won’t regret it!
True, there are a few components to this cake and it takes longer to assemble than most of the other dessert recipes on this site, but I promise it’s 1,000 percent worth it. I cut up slices and delivered them to friends who helped with the taste testing and everybody raved about this one.
I love researching cake recipes and definitely pulled inspiration from Life Love and Sugar, Cake By Courtney, and the Preppy Kitchen for my version. They are all such inspiring and creative bakers and if you haven’t checked them out, you really should!
Smore Cake ingredients
- Graham crackers – These are both for the graham cracker crust that the cake layers are baked on as well as the decorating the top of the finished cake.
- Sugar – You will need granulated sugar for the cake and powdered sugar for the frosting.
- Butter – I use salted butter for all of my buttercream frosting recipes.
- Oil – I find that oil keeps the cake layers even more moist than using butter.
- Large eggs – These help bind the ingredients together and gives a nice, fluffy cake texture.
Vanilla extract - Flour – I use regular all-purpose flour in this recipe, but you can use cake flour if you would rather.
- Cocoa powder – I used Hershey’s unsweetened natural cocoa powder but Ghirardelli is my other favorite brand that is readily available to most home bakers.
- Baking soda & baking powder – For light and fluffy layers.
- Salt
- Buttermilk – If you don’t have buttermilk on hand you can make an easy substitute by adding 1 tablespoon of vinegar or lemon juice to a 1 cup measuring cup and filling it the rest of the way with milk. Let this sit for 5 minutes before using in place of the buttermilk.
- Hot water
- Chocolate chips – These are for making the chocolate ganache and you can use milk chocolate or semisweet.
- Heavy cream
- Marshmallows – These will be toasted for that classic, slightly charred bitter notes that are part of the campfire s’mores experience.
- Marshmallow fluff
- Corn syrup
- Hershey’s bars – Just for decorating.
Smore Cake substitutions and additions
- Gourmet s’mores flavors. If you want to make this s’mores cake even more extra, you can think about replacing the graham cracker with Oreo cookies and the Hershey bar decorations with Reese’s peanut butter cups.
- Marshmallow fluff. Technically you could double the marshmallow fluff part of this s’mores cake recipe and use half of it for the jar of marshmallow fluff in the marshmallow buttercream frosting. Or you could replace the marshmallow fluff that is piped in swirls on top of the cake for decoration with a jar of store-bought marshmallow fluff (or omit making it altogether).
- Use a cake mix. If you are in a hurry, you could always replace the chocolate cake layer with your favorite chocolate cake mix.
How to make Smores Cake
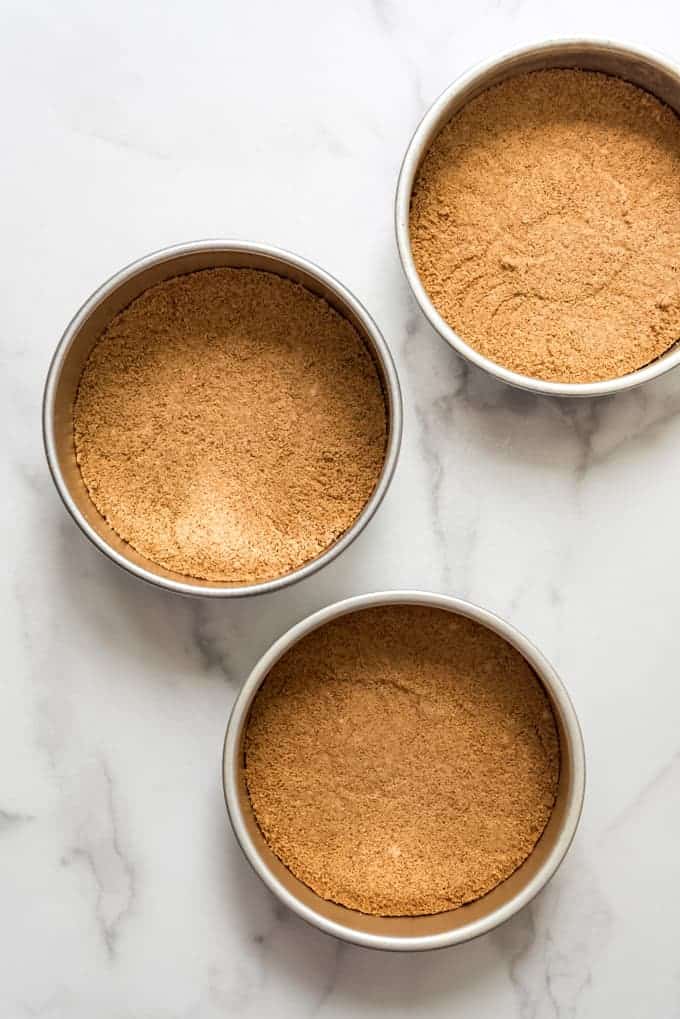
- Make the graham cracker crust base for the cake layers: If you have a food processor (affiliate link), just pulverize a bunch of graham crackers into crumbs, then mix in a little sugar and butter. Divide the buttery crumbs evenly between three 8-inch cake pans lined with circles of parchment paper on the bottom and press them down to compact into a base layer for the cakes.
- Make the chocolate cake batter: Mmmm, cake batter. In a large bowl, beat the sugar and oil until light, about 2 minutes. Then add the eggs and vanilla, and beat again. Add the flour, cocoa powder, baking soda, baking powder, and salt, mixing on low speed just until combined. Add the buttermilk and hot water, mixing again and scraping the sides of the bowl until combined. Divide the batter evenly between the three pans, pouring it directly over the graham cracker crumb layer.
- Bake for about 20 minutes until done: A toothpick or other tester inserted into the center of each cake should come out clean with just a few crumbs. Cool completely before assembling the cake. These layers can be wrapped in plastic wrap and frozen for up to 2 months, then thawed before assembling, if needed.
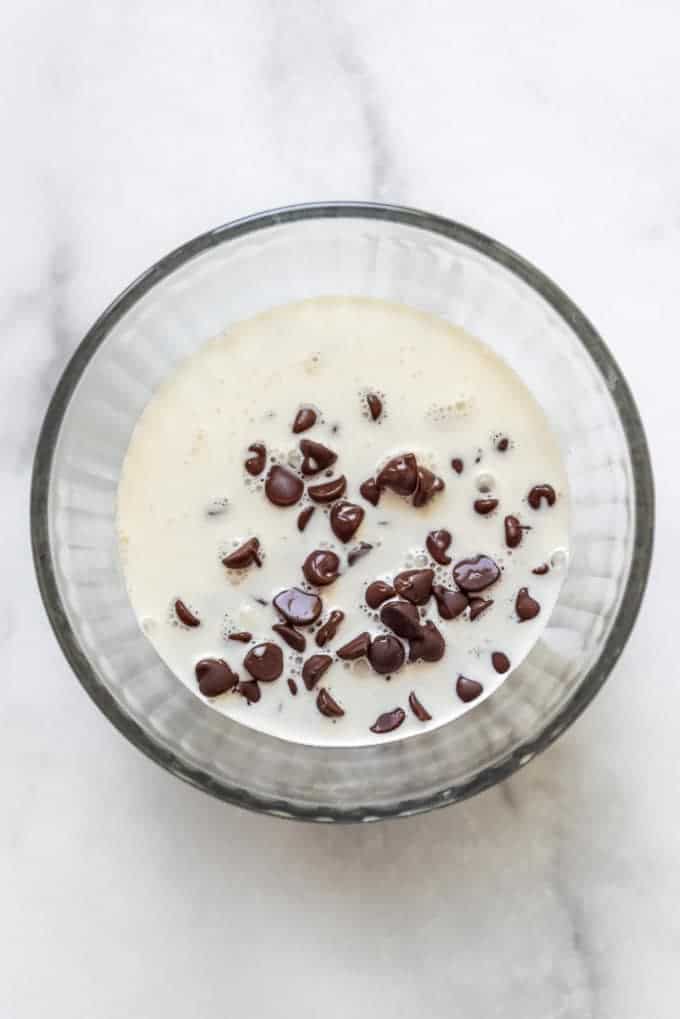
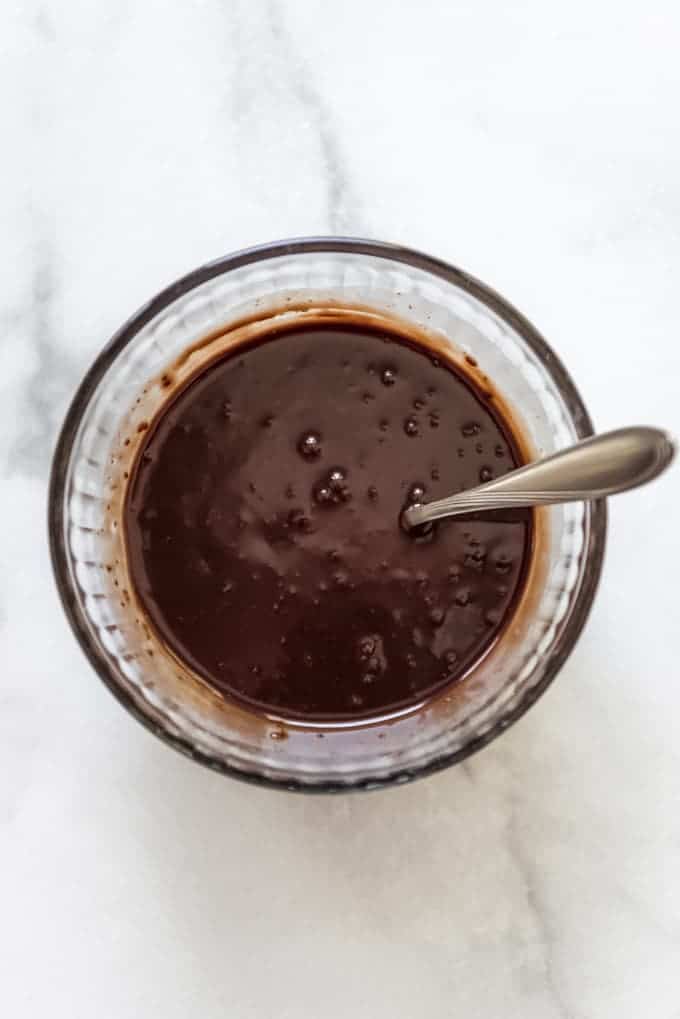
- Make the ganache: This part sounds fancy but if you have made ganache before you already know just how easy this is. Just heat some heavy cream in the microwave until very hot but not boiling (about 60-90 seconds will do it), then pour this over milk chocolate or semi-sweet chocolate chips in a bowl. DO NOT STIR. Let this sit for 4-5 minutes first, THEN stir and it will come together in a silky smooth chocolate ganache that is absolutely delicious!
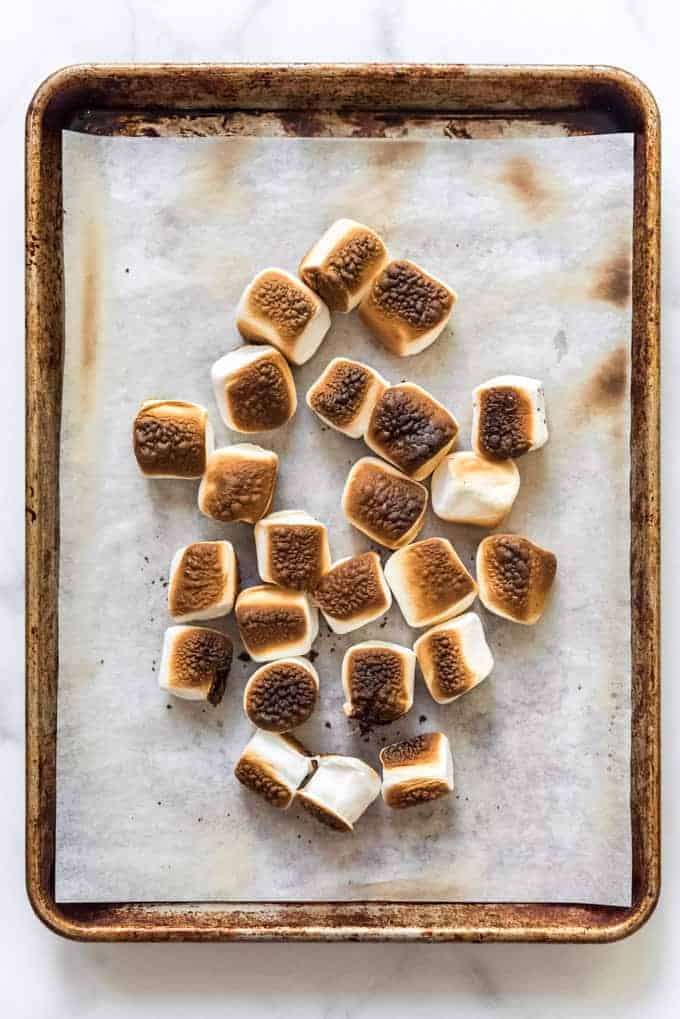
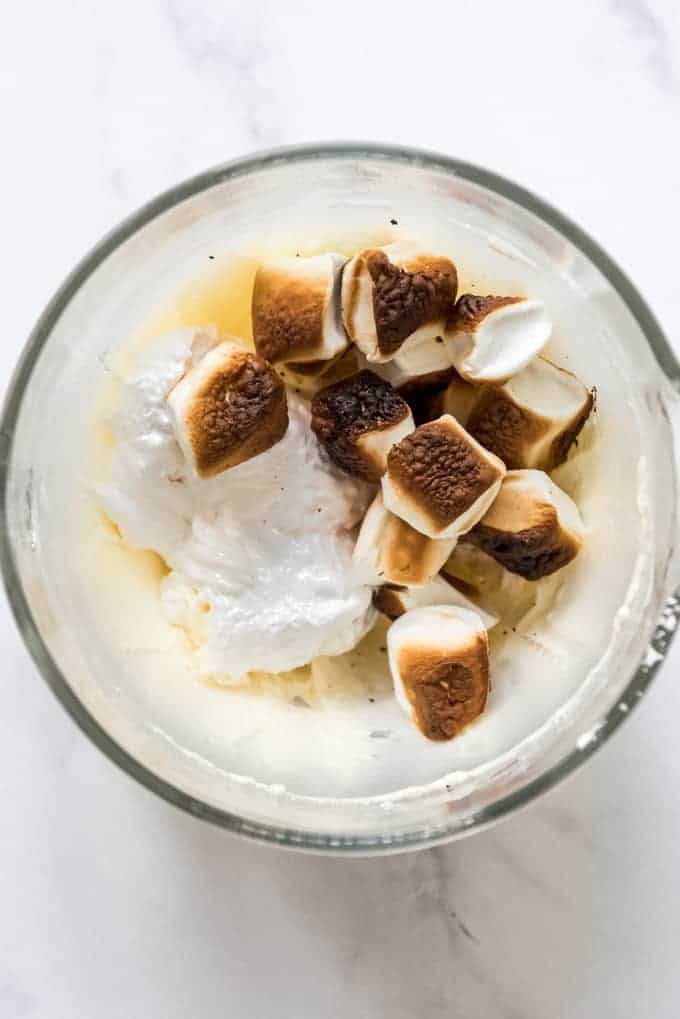
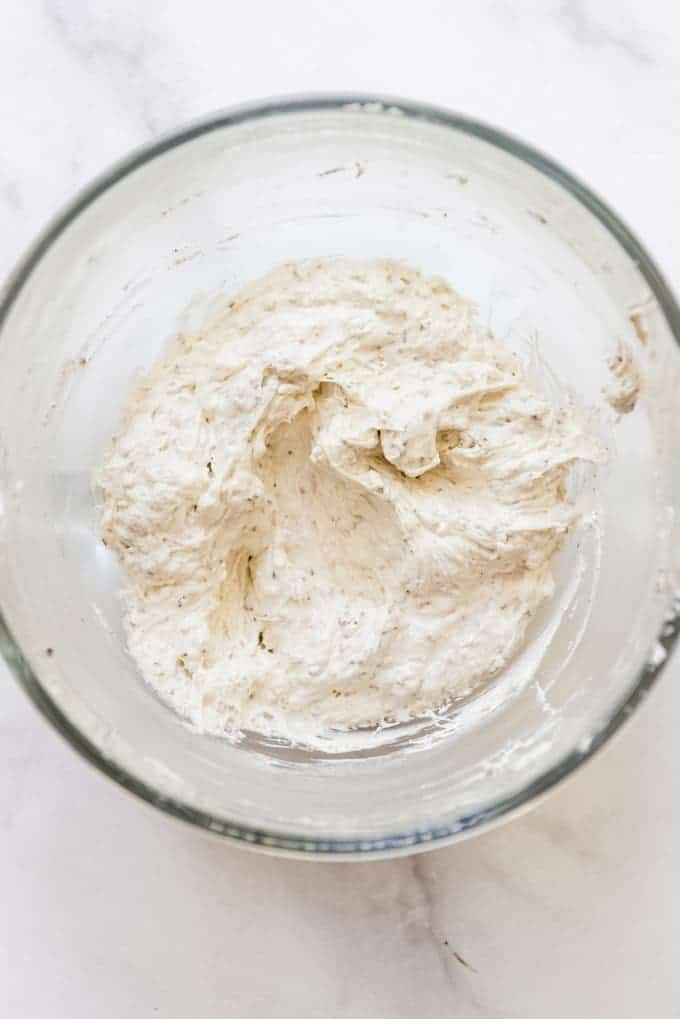
- Make the toasted marshmallow filling: Set the oven to broil, then scatter some marshmallows on a baking sheet lined with parchment paper. Stick them under the broiler just until the tops are nice and toasty brown. I almost went a little too far with mine – you really have to watch them! Then while the toasted marshmallows cool down a bit, beat butter and powdered sugar together in a bowl until blended, then add the vanilla and turn the mixer speed up to medium-high, beating for 2-3 minutes until creamy and light. Add the toasted marshmallows and marshmallow fluff, then beat again just until combined.
- Make the chocolate buttercream. I have a whole post dedicated to chocolate buttercream if you want more info on the hows and whys of making it. But you will just beat butter and cocoa powder together until smooth, then gradually add in the powdered sugar, vanilla, and a little salt. Add heavy cream (even milk will work in a pinch) and continue to beat until the frosting reaches a nice, smooth, pipeable consistency that you could easily spread but that will still hold its shape.
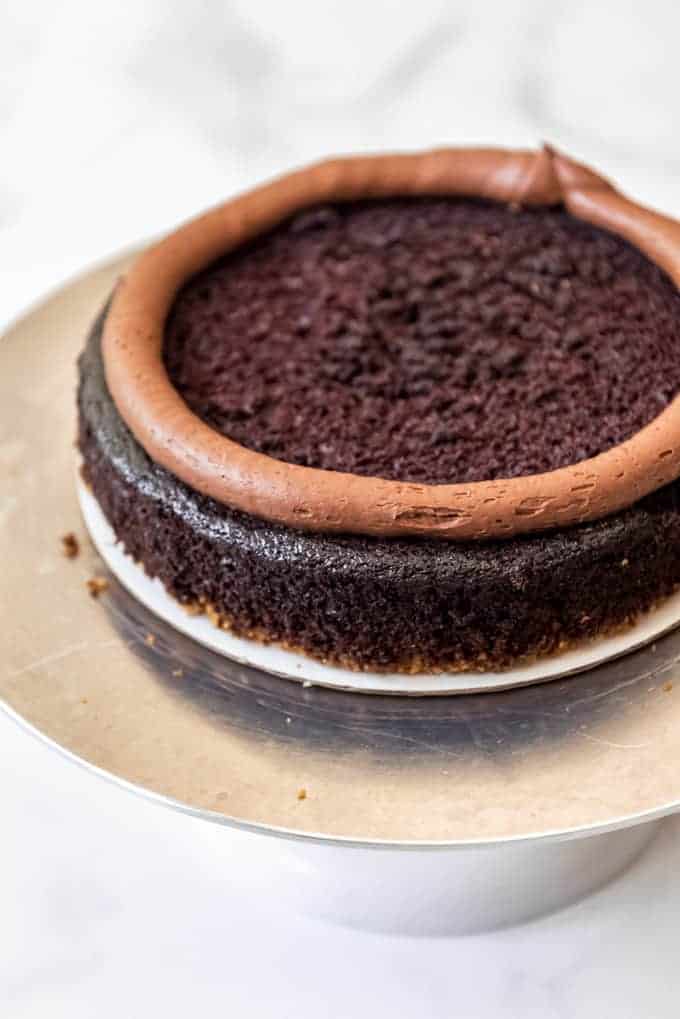
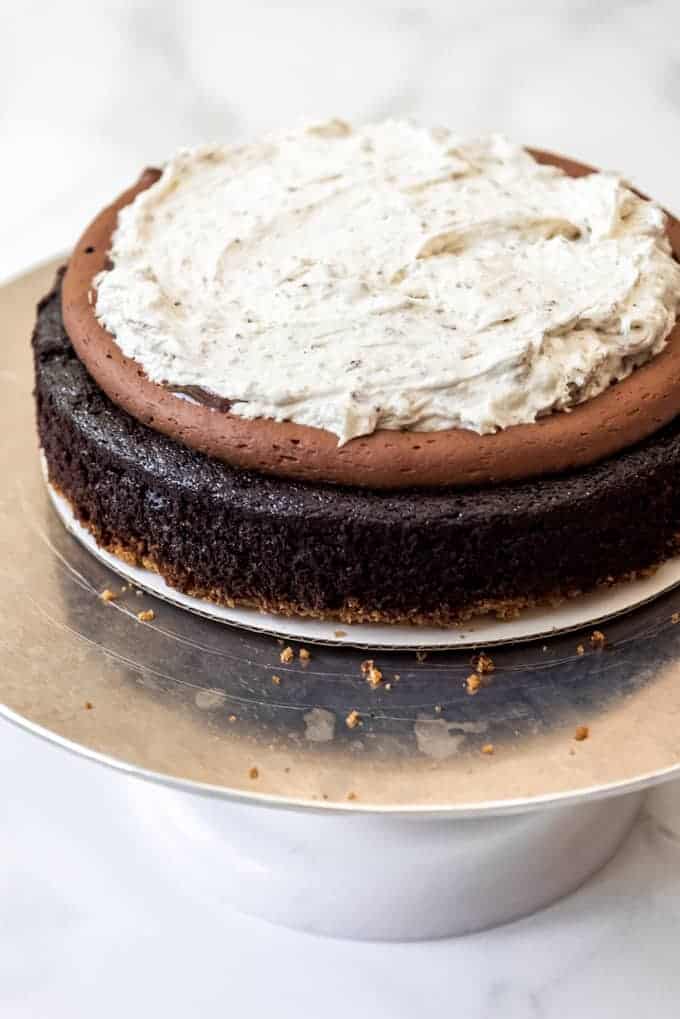
- The fun part! Assembly time! Level off the cake tops so they are nice and flat. Place the bottom layer on a cake plate or better yet, on a cardboard cake round. Transfer some of the chocolate buttercream to a piping bag fitted with a large round tip and pipe a thick border of frosting around the rim of the cake to create a wall to hold in the other filling so it doesn’t ooze out as the cake is assembled. Pour half of the ganache directly onto the chocolate cake, then stick the cake in the freezer for 5-10 minutes to set the ganache. Once it has had a chance to set a bit, gently spread half of the toasted marshmallow filling on top of the ganache. Repeat with the next layer of cake and remaining ganache and toasted marshmallow filling. Top with the final cake layer. Use some of the chocolate buttercream to create a thin crumb coat around the top and sides of the cake, then stick it in the freezer for 10-15 minutes.
- Frost the outside: Once the crumb coat is set, start applying the chocolate buttercream around the outside with another cardboard cake round or acrylic disc on top so that you have a top and bottom guide that will help you achieve an even 1/4-inch layer of frosting around the sides. Use a scraper to smooth the sides of the cake. It might take a few turns around holding the scraper at an angle against the sides to smooth them out, and you will likely need to fill in spots with additional frosting a time or two until you get a result that you like. Stick the cake in the freezer for 10 minutes to set, then use a thin, sharp knife to cut off the acrylic disc from the top and smooth out the top with a little extra buttercream.
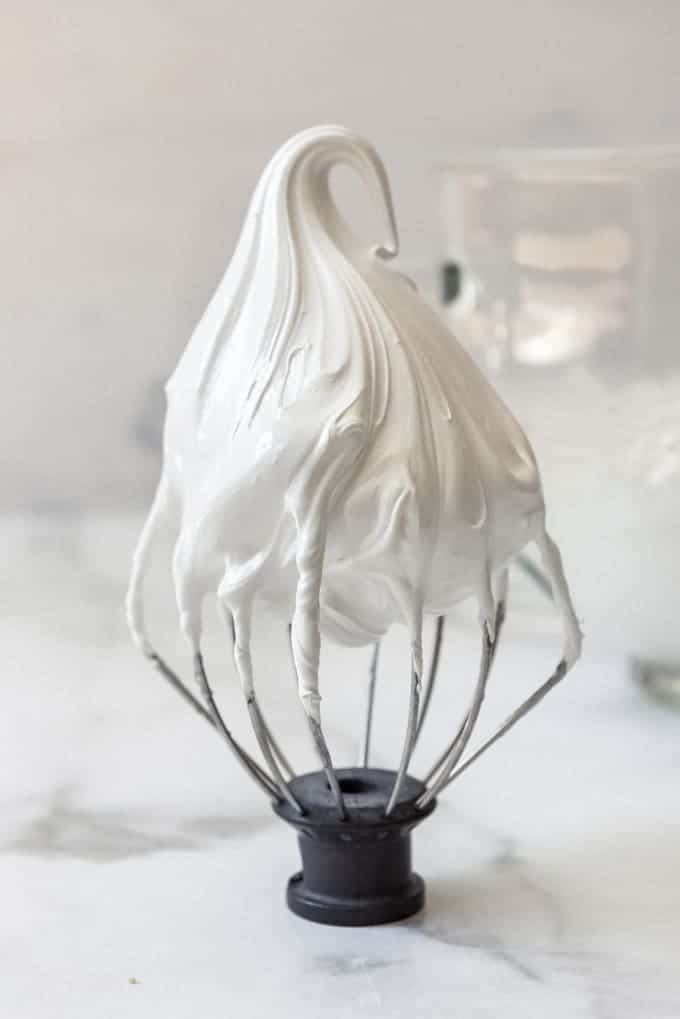
- Make the homemade marshmallow fluff: The final component is the marshmallow fluff that is made by whisking egg whites and salt together in a large bowl of a stand mixer fitted with the whisk attachment until frothy. Gradually add ⅓ cup of sugar to the egg whites while whisking, then continue to whisk until soft peaks form. Meanwhile, heat the remaining sugar and corn syrup in a small saucepan over medium-high heat, stirring occasionally, until it reaches 240°F on a candy thermometer (affiliate link). Set the mixer to medium-low speed, then slowly drizzle in the hot sugar mixture into the egg whites in a very thin stream over the course of a minute or two. Increase the mixer speed back to medium-high and whisk another 5-10 minutes or so until thick and the fluff has cooled quite a bit.
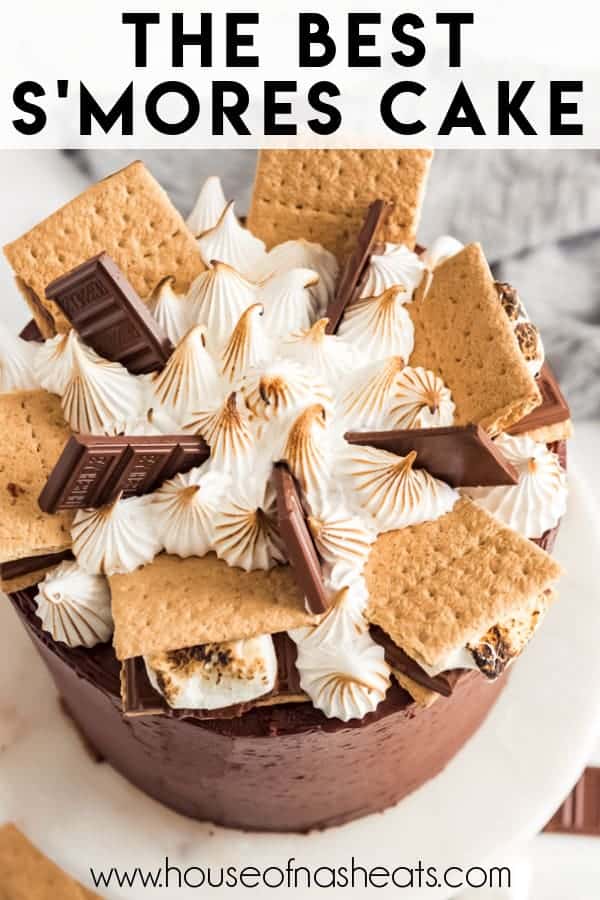
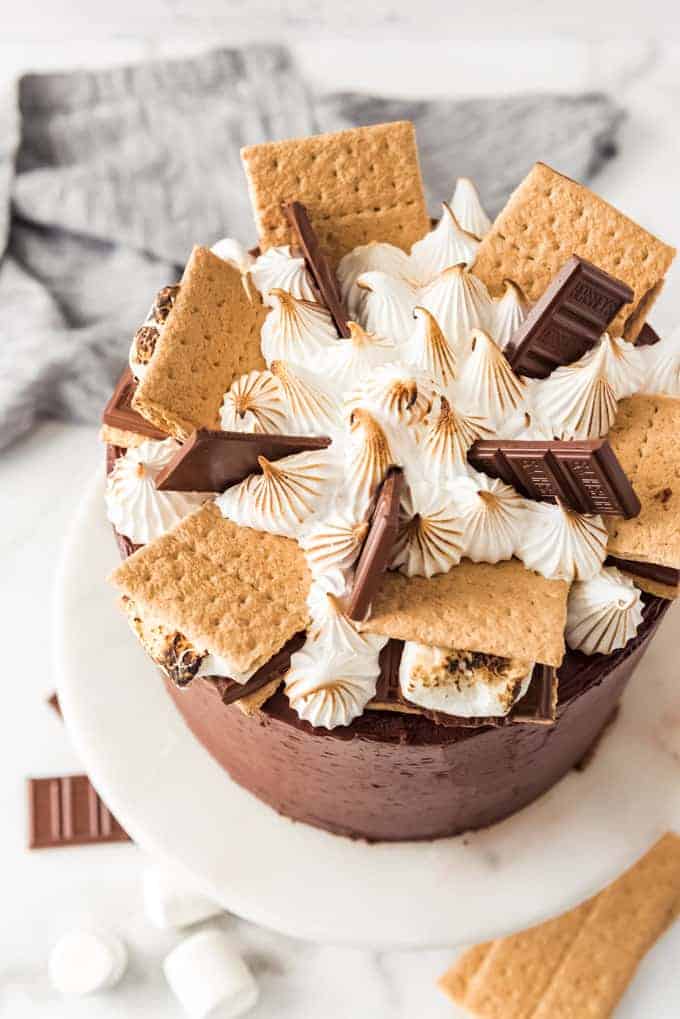
- Garnish & finish! We’re almost there! Transfer the marshmallow fluff to a piping bag fitted with a large tip. I like to assemble a couple of actual s’mores using graham cracker halves, broken up Hershey bars, and large marshmallows and arranging them on top of the cake, but you could instead just pipe the marshmallow fluff on top and stick broken up graham crackers and Hershey bar pieces into the top instead. Either way, pipe or spread mounds of marshmallow fluff on top, then use a kitchen torch to gently toast it.
Phew! That’s it! Now you can slice and serve your delicious creation! It’s a big cake and will feed a lot of people. If you have leftovers, I recommend slicing them and freezing individual slices wrapped well in plastic wrap so you can thaw and enjoy as much as you want at a time.
Tips for Making S’more Cake
Before we get started, there are a few things to know that will help take away a lot of the stress of making this recipe. None of the elements are very hard to make, but with a recipe like this where there are a number of different components, I want everyone to be successful on their first try! These are my best tips and tricks from an admittedly self-taught baker.
- Whenever I’m doing a major bake like this one, I find it’s always best to read through ALL of the ingredients and instructions first to make sure I have everything I need going into it. I hate to be in the middle of assembling a cake and realize I forgot to make a filling component, or worse yet, have to run to the store for an ingredient I didn’t realize I was running low on (I’m looking at you powdered sugar)!
- Clear out some freezer space. If you want really professional looking results, the trick is utilizing your freezer when assembling the cake layers and decorating. It takes a little time and yes, you are in and out of the freezer, but setting the layers will really help the cake be more firm and easier to assemble and decorate.
It’s amazing how much easier it is to work with cake layers and buttercream frosting when you give them 5-10 minutes to set in the freezer before moving on to the next step.
- Use cardboard cake rounds or acrylic cake discs for easier assembly and decorating. Once I started buying these inexpensive cardboard bases for my cakes, it made decorating so much easier! They are typically 1/4-inch larger in diameter than the cake pans, which gives you a perfect guide for applying the outer layer of frosting. And they provide much needed stability when transferring the cake in and out of the freezer rather than trying to figure out a way for your entire cake stand to fit. Then once the cake is finished, you can transfer the whole thing to a clean, beautiful cake stand by sliding a cake lifter under the cardboard round and setting the cake onto your cake stand.
- Give yourself time. A big cake like this one can be a nightmare if you try to rush it. I will usually make my cake layers and buttercream a day or more in advance. Both can be frozen for 1-2 months, if needed even. Then on the day I plan to assemble the cake, let them both come up to room temperature. Always transfer the buttercream back into a large bowl and beat it again for a couple of minutes to make sure it is smooth and spreadable before you start working with it.
How to Store S’mores Cake
You can store any uneaten cake covered with plastic wrap or in an airtight container on the counter at room temperature for up to 3 days. Or you can store it in the fridge for about 5 days. Keep in mind that decorations like whole s’mores made with graham crackers will soften quickly and not be crunchy by Day 2. I recommend letting the cake come to room temperature before serving as cold cake can sometimes taste stale when it really isn’t.
You can also freeze this cake for up to 2 months. Cake layers freeze really well if the cake is unassembled if you wrap them in plastic wrap and then keep them in a freezer-safe ziploc bag or other container. Or you can freeze the entire cake, although I recommend waiting to decorate until shortly before serving. Let it thaw completely for at least 3 to 4 hours at room temperature before serving.
Smores Cake Recipe FAQS
No one is entirely sure where the name s’mores originated. It has been a popular treat and the term has been around for decades as a contraction of the words “some more”, as in, “I want s’more of this!”.
Yes, you can toast marshmallow fluff. It is already cooked so all you have to do to toast it is hit it with a flame from a kitchen torch until lightly browned.
Yes, you can use an equal amount of cake flour in this recipe for an even more tender crumb. I enjoy using cake flour but find that most home bakers don’t always have it on hand, so I typically try to test and write my cake recipes using regular all-purpose flour.
More cake recipes that you’ll love

Did you make this recipe?
Let me know what you thought with a comment and rating below. You can also take a picture and tag me on Instagram @houseofnasheats or share it on the Pinterest pin so I can see.
Smores Cake Recipe
Ingredients
Graham Cracker Crust
- 2 1/2 cups graham cracker crumbs
- 1/3 cup granulated sugar
- 1/2 cup salted butter melted
Chocolate Cake
- 1 cup vegetable or canola oil
- 2 cups granulated sugar
- 3 large eggs
- 2 teaspoons vanilla extract
- 2 cups all-purpose flour
- 1 cup cocoa powder
- 2 teaspoons baking soda
- 1 teaspoon baking powder
- 1 teaspoon salt
- 1 cup buttermilk room temperature
- 1 cup hot water
Chocolate Ganache
- 1 cup milk chocolate or semisweet chocolate chips
- 1/2 cup heavy cream
Toasted Marshmallow Filling
- 24 large marshmallows
- 1 cup salted butter room temperature
- 1 cup powdered sugar
- 1/2 teaspoon vanilla extract
- 1 jar marshmallow fluff
Chocolate Buttercream
- 2 cups salted butter room temperature
- 1 1/3 cups unsweetened cocoa powder
- 5 cups powdered sugar
- 6 Tablespoons heavy cream
- 2 teaspoons vanilla extract
- Pinch of salt
Marshmallow Fluff
- 3 egg whites room temperature
- 1/4 teaspoon salt
- 1 cup granulated sugar divided
- 1/2 cup light corn syrup
- 1 teaspoon vanilla extract
For decoration (optional)
- Additional graham crackers
- Additional Hershey bars broken up
- Additional large marshmallows
Instructions
- Preheat oven to 350°F. Line three 8-inch baking pans with parchment paper circles and set aside.
Graham Cracker Crust
- Mix graham cracker crumbs, butter, and sugar together in a bowl, then divide evenly between the bottom of each pan. Press down, then bake for 8-10 minutes.2 ½ cups graham cracker crumbs, ⅓ cup granulated sugar, ½ cup salted butter
Chocolate Cake
- Beat the oil and sugar in the bowl of a stand mixer on medium speed until creamy and light, about 2 minutes.1 cup vegetable or canola oil, 2 cups granulated sugar
- Add the eggs and vanilla, mixing well until combined.3 large eggs, 2 teaspoons vanilla extract
- In a separate bowl, whisk the flour, cocoa powder, baking soda, baking powder and salt. Add the dry ingredients and buttermilk alternately, half at a time, mixing just until combined each time and scraping the sides of the bowl.2 cups all-purpose flour, 1 cup cocoa powder, 2 teaspoons baking soda, 1 teaspoon baking powder, 1 teaspoon salt, 1 cup buttermilk
- Add the hot water right at the end and mix well. Divide the batter evenly between the pans, pouring it right over the graham cracker crumbs.1 cup hot water
- Bake for 25-30 minutes at 350°F until a toothpick inserted into the center of the cakes comes out clean with just a few crumbs clinging to it.
- Cool the cake layers completely and level with a sharp serrated knife.
Chocolate Ganache
- Heat the cream in the microwave for 30-60 seconds until hot. Pour over the chocolate chips in a small bowl, then let sit for 5 minutes. Stir until melted and smooth. Let cool while preparing the marshmallow filling.1 cup milk chocolate or semisweet chocolate chips, ½ cup heavy cream
Toasted Marshmallow Filling
- Set oven to broil with a rack set 2/3 of the way up. Spread the marshmallows in an even layer on a baking sheet lined with parchment paper.24 large marshmallows
- Toast the marshmallows until they start to brown (watch them closely! This can happen in just a few seconds!), then remove them from the oven and flip. Toast again on the other side. Let them cool for a few minutes.
- Meanwhile, beat butter, powdered sugar, and vanilla in a large mixing bowl until creamy and smooth.1 cup salted butter, 1 cup powdered sugar, ½ teaspoon vanilla extract
- Add the cooled marshmallows and jar of marshmallow fluff, then beat well until combined.1 jar marshmallow fluff
Chocolate Buttercream Frosting
- In a large bowl, beat the butter and cocoa powder until smooth. Gradually add the powdered sugar, mixing on low speed to combine.2 cups salted butter, 1 ⅓ cups unsweetened cocoa powder, 5 cups powdered sugar
- Add the vanilla, heavy cream, and pinch of salt and beat well for 3-4 minutes until creamy and smooth. The frosting should be a nice, thick consistency that is spreadable but also holds its shape. Add a little more cream, a teaspoon or two at a time, to get it to the desired consistency.6 Tablespoons heavy cream, Pinch of salt, 2 teaspoons vanilla extract
- Use a sturdy spoon or spatula to stir the frosting, pressing it against the sides of the bowl for a few minutes, to knock out some of the air bubbles for a smoother appearance on the sides of the cake.
Marshmallow Fluff
- Whisk egg whites and salt on medium speed in a mixer until frothy. Add ⅓ cup of the sugar, 1 tablespoon at a time, whisking for 20 seconds between each addition.3 egg whites, ¼ teaspoon salt, 1 cup granulated sugar
- Add 2/3 cup of the sugar to a small saucepan along with the corn syrup. Heat over medium-high heat until it reaches 240°F.½ cup light corn syrup
- With mixer running on medium-low speed, very slow pour the hot sugar mixture in a thin stream over 1-2 minutes until it has all been added. Add the vanilla extract.1 teaspoon vanilla extract
- Whisk on medium-high speed for 5-10 minutes until thickened and cooled.
Assembly
- Set bottom cake layer, graham cracker crust side down, on a cardboard or acrylic cake disc for easier decorating, or directly onto a cake plate.
- Transfer some of the chocolate buttercream to a piping bag fitted with a wide tip and pipe a thick ring of frosting around the rim of the cake.
- Spread half of the chocolate ganache on top of the cake inside the ring of frosting. Transfer to the freezer for 5 minutes to set the ganache layer.
- Spread half of the toasted marshmallow filling on top of the ganache layer. Gently place the next layer of cake on top of the marshmallow filling, then repeat piping a ring of chocolate buttercream, filling with the remaining ganche, chilling to set, then adding the remaining toasted marshmallow filling.
- Place the final cake layer on top and frost the outside of the cake with a thin crumb coat of chocolate buttercream frosting. Transfer the whole cake to the freezer for 15-30 minutes to set up.
- Remove the cake from the freezer and top with another acrylic cake disc or cardboard cake round. Frost the outside edges of the cake with the chocolate frosting, using a cake scraper to scrape the sides smooth. You may need to fill in holes with additional frosting and repeat the process of dragging the cake scraper around the cake to get a smooth finish. Place the cake back in the freezer for another 10-15 minutes.
- Use a thin, sharp knife to separate the cake disc or board from the top of the cake. Spread the remaining chocolate frosting on top.
- Assemble graham cracker halves, squares of Hershey’s chocolate, and large marshmallows into s’mores and place them on top of the cake, if desired.Additional graham crackers, Additional Hershey bars, Additional large marshmallows
- Fill a large piping bag fitted with a large tip with wide teeth with the marshmallow fluff. Pipe the marshmallow fluff all over the top of the cake.
- Use a kitchen torch to toast the marshmallow fluff and marshmallows in the s’mores decorating the top of the cake, then slice and serve.
Notes
- Leftover cake can be sliced into individual servings and frozen wrapped in plastic wrap. Thaw at room temperature before serving.


Plan to make this weekend. What size jar of marshmallow fluff should be used?
Just a 7-ounce jar.
Is there a reason you use a jar of marshmallow fluff for one part of the recipe and use homemade for another part? I don’t eat gelatin so wondering if I can substitute the homemade fluff for the jar needed in the toasted marshmallow filling.
Yes, you can definitely substitute either.
Marshmallow Fluff doesn’t have gelatin in it.
I am assembling this tomorrow for my mom’s birthday. So excited! Is it a challenge to cut slices with the crisp graham cracker crust? I generally serve cake at room temp, but am concerned that it will be hard to cut through the crust and not have soft cake and filling ooze out. Is it best to slice cold, use a serrated knife, or is this not a thing? Thanks for the awesome recipe!
I didn’t have any trouble at all actually! Just make sure your knife is nice and sharp and you should be just fine!
This cake was amazing! I made this today for my daughter’s 25th birthday and it was a huge success. She said it was the best cake she has ever had, and put in a request for the same cake next year ♡. Well worth the three hours it took me to put it together! Thank you!
I’m so happy to hear that! Happy birthday to your daughter!
Is it possible to make the different components on different days and assemble closer to the date you want eaten?
Just wondering, could we use vegan marshmallows In replace of regular marshmallows ??
Sure, I don’t see why not!
I am wanting to make this for a small wedding. The bride and groom love to camp and this will fit well into their rustic country theme. I would love your advice… can I make any or all of the components a week ahead and freeze them? I’d like to bring everything to room temp the morning of or day before and then put it together. Are there any components you would definitely NOT freeze or any special advice? PLEASE AND THANK YOU for what seems to be the perfect recipe!
What a great idea for a themed wedding cake! You can definitely make the cake layers (chocolate cake with graham cracker crust) and freeze them. Same with the chocolate buttercream. Just let the buttercream thaw completely, then beat it again to make it smooth and spreadable. I would not freeze the marshmallow filling, fluff, or chocolate ganache and instead make those the day of. Best of luck! I would love to see how it turns out so if you take a pic please send it to me on IG!
This cake is to die for! Made it for a friends birthday and it was a HUGE hit!
I will say be careful while making the marshmellows frosting. My oven caught fire while broiling the marshmellows on the parchment paper (everyone was safe!). We had much better luck with the marshmellows in the toaster oven (yes I attempted even after a small fire).
Can’t wait to try this! Do you torch the marshmallow fluff before or after adding the graham cracker and chocolates on top?
I torched it after adding the other elements. It’s usually the very last thing I do.
Excellent cake. I overbaked the crusts and my cake fell apart after cutting because it was hard to get through the crusts. However. Even a melted mess, it’s still amazing.
Photographed great pre cut 😂
Hi ! Can i use your mashmallow fluff recipe To make the mashmallow filling . Thanks!
Yes, you can.
Hi! I’m about to make this for my boyfriends birthday. I’m going through the ingredients and want to make sure it’s 2 CUPS of all purpose flour? It just says 2 next to it with no unit of measurement, just want to make sure before I get started! Thanks!
Thanks for pointing that out, Sierra. Yes, it should say 2 cups of flour. Sorry for that omission – it’s been updated in the post.
Hi, making this right now. I noticed vanilla is called for in the marshmellow fluff ingredients but it’s not indicated in the recipe when to add the vanilla – can you clarify please?
Also, I’m making the fluff right now and a lot of the sugar crystalized on the side of my mixing bowl when I was pouring in the stream of hot sugar – any tips on how to avoid this? Also, is this salvagable or can’t be used since so much sugar is crystalized on the side of the bowl and even some on the whisk attachment? Thank for sharing the recipe!!!!
Add the vanilla after adding in all of the hot syrup mixture. As long as the fluff portion isn’t gritty from crystallized sugar you should be just fine using it. My guess is that it was poured over the whisk attachment while you were mixing. I try to almost pour it against the side of the bowl so it goes directly down into the mixture without hitting the whisk first and being thrown off to the side. I hope that helps!
Thanks! Will avoid the whisk attachment next time. I was able to use the fluffy part and avoided the hardened sugar.
I made the full cake and tagged you in social media so hopefully you saw. The cake was such a huge hit – everyone raved about it. Thank you so much for the recipe!!
Next time, I will use the fluff that’s on the top on the inside of the cake as well and not use the toasted marshmallow frosting because that sounded better than it tasted. But the fluff on the top was heavenly and I could just put that on everything!
Excited to make this cake for my daughter’s birthday- once assembled, how should the cake be stored until ready to serve? Refrigerator?
You can refrigerate it, but be sure to give it time to come up to room temperature before serving. Or it can stay on the counter for a day or two as long as it is covered.
Hi there,
I am really interested in making this cake. There is one ingredient which I’m struggling to find and that’s the light corn syrup. It’s not readily available here (I’m based in the UK). Is there anything I can substitute this with?
Great! It’s such a fun cake to make and eat 😉 Do you have any light treacle or golden syrup? You could use those or even honey.
Great, I do have golden syrup so I will give that a shot. Thank you for the suggested substitutions. 😊
I absolutely love this recipe. I’ve made it multiple times— it’s absolutely delicious and dependable. I’ve never had an issue before, and for a young baker, it’s honestly pretty easy as well. I always get loads of compliments every time I make it!! Thank you for such a great recipe!
I’m so glad you love this recipe as much as we do! Thank you so much for your comment!
my friend and i made this yesterday and it was horrid, were both 16 and was jsut having fun but it is definitely not a starters cake it fell apart when the second layer was put on (thats on us tbh) but it was a fun experience and we ended up winging it in the end cuz we still had a third cake left so its just one layer unfortunately
Oh no! I have definitely had my fair share of failed cakes! Ha ha a lot of trial and error and practice! Glad you still had fun though 🙂
I just did this cake this week for my daughters birthday. It’s definitely a big cake meant to be shared! My daughter loved it and said it was much better than a store purchased cake, worth the time and my frustration frosting it-haha!
Thank you for the recipe 🙂
Hello Amy, I’m planning on making this in a couple weeks for my daughter’s 3rd birthday party but I had a quick question. Instead of the marshmallow fluff and garnishes on top, I’d like to just do either the chocolate buttercream or the toasted marshmallow icing (because I have decorative toppers to put on top). Will there be enough left over of either of these or should I make extra? Thanks so much!
I would probably make a batch and a half to have plenty. You can always freeze what you don’t use for topping cupcakes or spreading between graham crackers later!
I’m using three 9” round cake pans. Should I increase any parts of this recipe? I’m planning to make a batch and a half of the buttercream frosting. Should I do the same for the cake batter or do you think I can stretch it?
You should be totally fine for the cake layers. They just won’t be quite as thick and will bake in a shorter amount of time, but it will work.
Question:
Is the marshmallow filling the sticky consistency of actual marshmallows?
Hi! It’s not quite as sticky because it is mixed with the buttercream frosting. I wanted to be able to spread the filling like frosting so I can layer the cake on top of it. It’s so good! Let me know if you make it!
Delicious! Made for a family get together and was told it must become a “repeat.” I didn’t have time for the homemade marshmallow fluff for the top, so I decorated the sides and edge of the top with graham cracker crumbs and it was very simple and pretty.
Is the chocolate buttercream good for piping?
Yes.
Can melted and cooled butter be used in the cake batter instead of vegetable oil?
Yep! Just let it cool and measure it out just as you would the vegetable oil.
Made this for a coworker’s birthday. It was a big hit only crumbs left in the hour after we cut it! Thanks for the great recipe. I didn’t do the fluff I just browned marshmallows and used those for decorations. A little work, don’t forget to set up the ganache, but worth it.
Good job! What a fun treat to bring for your coworker!
this recipe looks amazing! You said one jar of fluff how many ounces is that?
Hi! Usually the jar is 7 oz.
I worked so hard on this cake and it was SO good. Even better than I thought it’d be. And with the right pre-planning it really wasn’t that hard to make. Like another commenter I also over baked my graham cracker crust. It wasn’t done when I checked it at 8 minutes so I checked at 10 and it was over done. However it held up in the cake when I cut it and still tasted amazing! The marshmallow buttercream is the best part of it all. It brings the flavors together so well. Everyone was very impressed!
Wow Good job! Sometimes these cakes can seem a little daunting to make but they really aren’t too bad! I also like the marshmallow buttercream, it’s so good!
I made two 6” cakes (still 3 layer) and it was the best cake I’ve ever made.
I love hearing that Emily! Thanks for making the cake!