
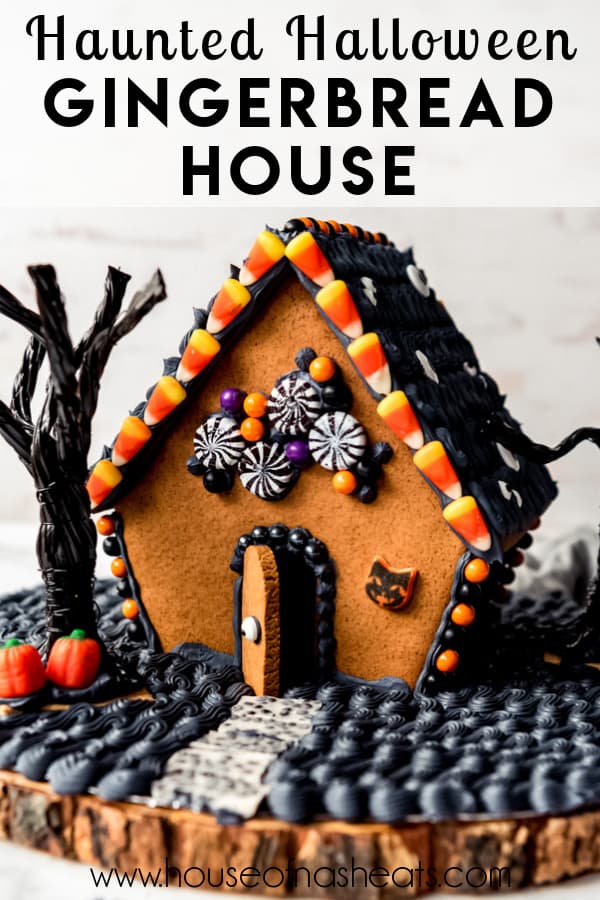
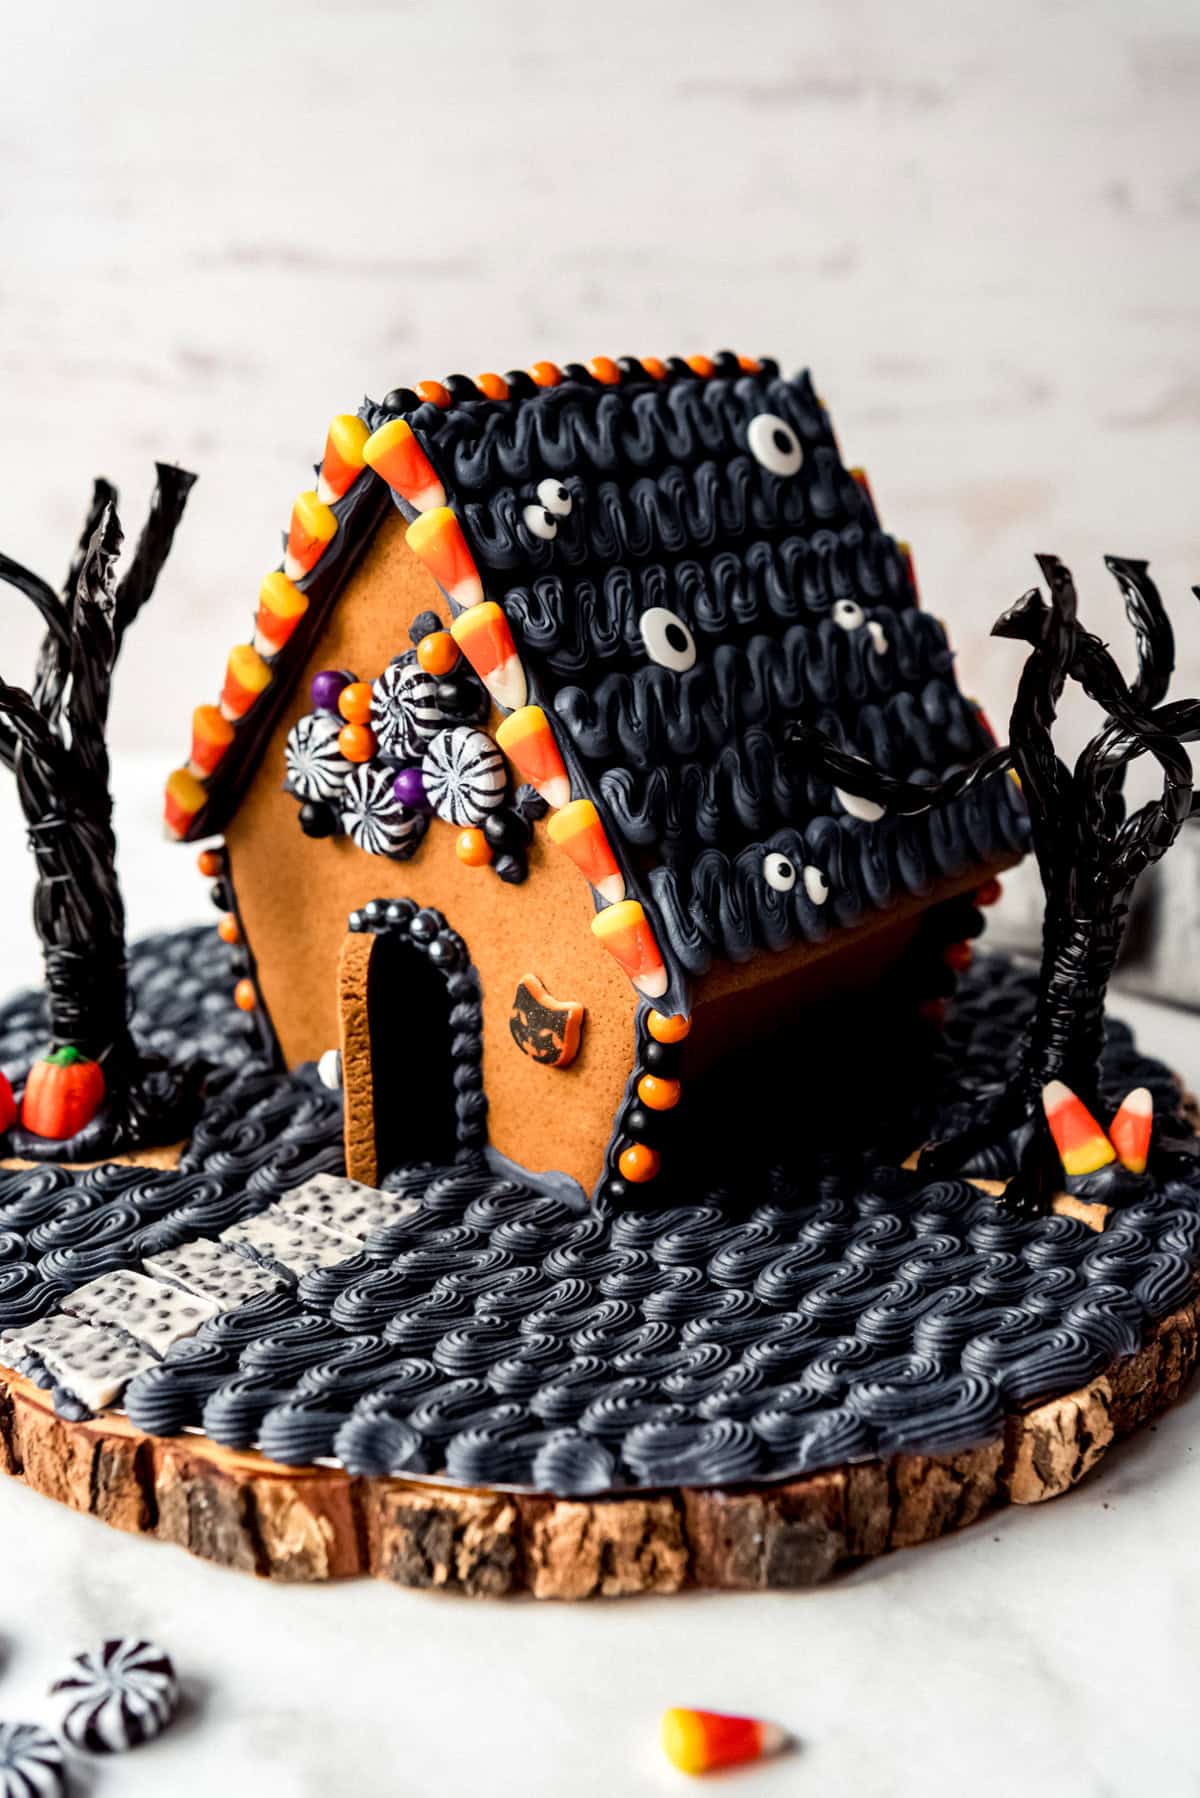
A Halloween Gingerbread House is a fun, festive way to get in the spooky spirit! Make it haunted or happy with your favorite candy decorations and black, orange, or white gingerbread house icing!
Start a new Halloween tradition
Making gingerbread houses is a holiday tradition in our family! This was our first year making a Halloween version. But it definitely won’t be the last!
With things feeling very different this year and many of our typical Halloween festivities being tabled, I wanted to come up with some other fun ideas to make things feel special. Decorating a haunted version of a gingerbread house turned out to be so much fun!
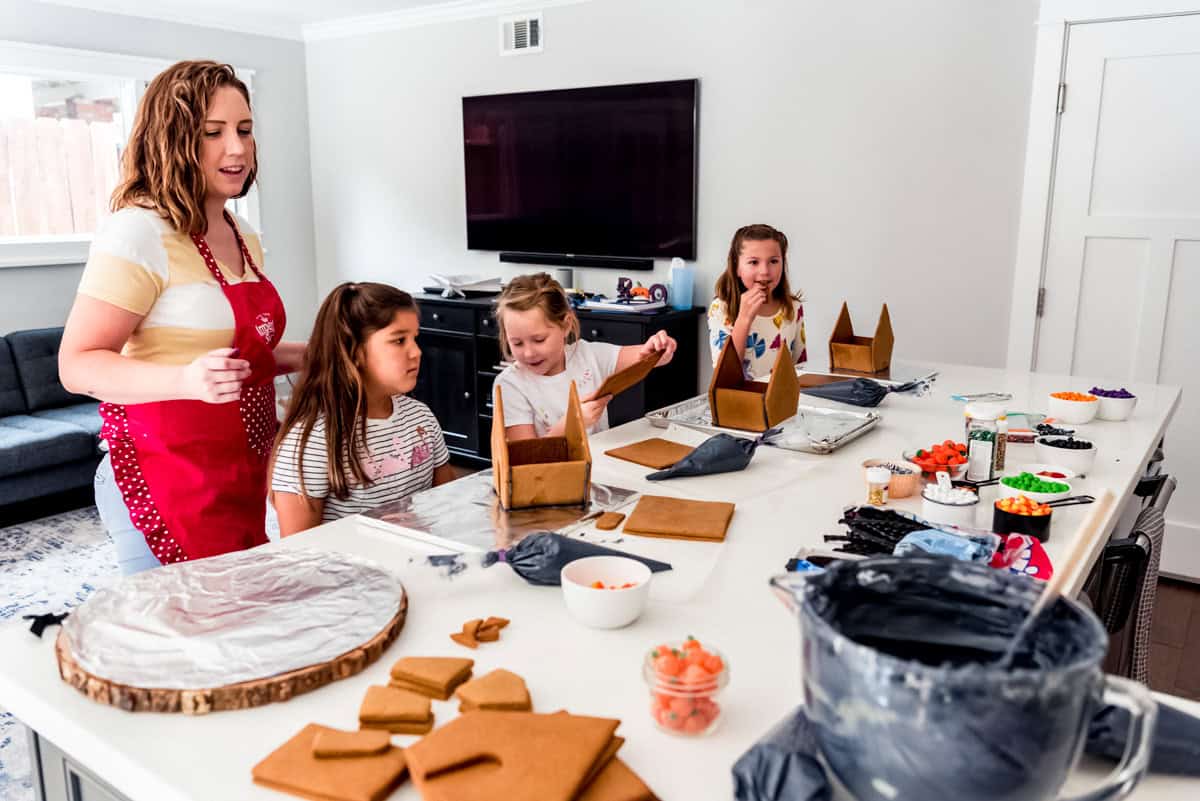
There were sprinkles and icing everywhere, but my kids and I had a blast doing these and it was so fun to be creative together! Totally worth the mess.
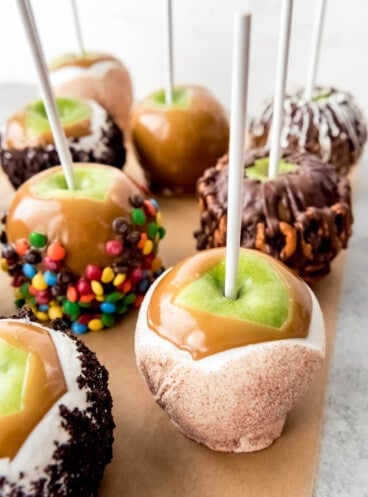
If you are looking for more Halloween fun, be sure to check out my Homemade Caramel Apples, Graveyard Dirt Cake, Apple Cider Donuts, and Halloween Chocolate Cherry Hand Pies!
Sure, you can always pick up a gingerbread house kit, which I have done a time or two, but they are always so disappointing! There is never enough candy in those things, the “glue” icing is always a pain to work with, and the gingerbread pieces themselves don’t even smell like gingerbread!
The answer: Learn how to make a gingerbread house yourself at home! It’s really no more difficult than making cut-out sugar cookies! Plus, then you get to adjust your house design to be the shape or size you want, your house will smell like gingerbread for days, and it’s way more fun to decorate with better (and more) candy than the basic ones that come in the box kit.
So turn on some Halloween music (we LOVE the “Nightmare Before Christmas” soundtrack) and let your spooky side show!
It would even be fun to throw a gingerbread house decorating party with friends and make it a contest to see who can decorate the creepiest, most creative, or best all around gingerbread house! You can bake the gingerbread house pieces well in advance so everyone gets their own, or divide up into couple or teams and make it a joint effort!
The nice thing about Halloween gingerbread houses is that there is even less pressure to make them look “perfect” than with their Christmas counterparts. If things fall off or look wonky, it just makes the house look more dilapidated and spooky!
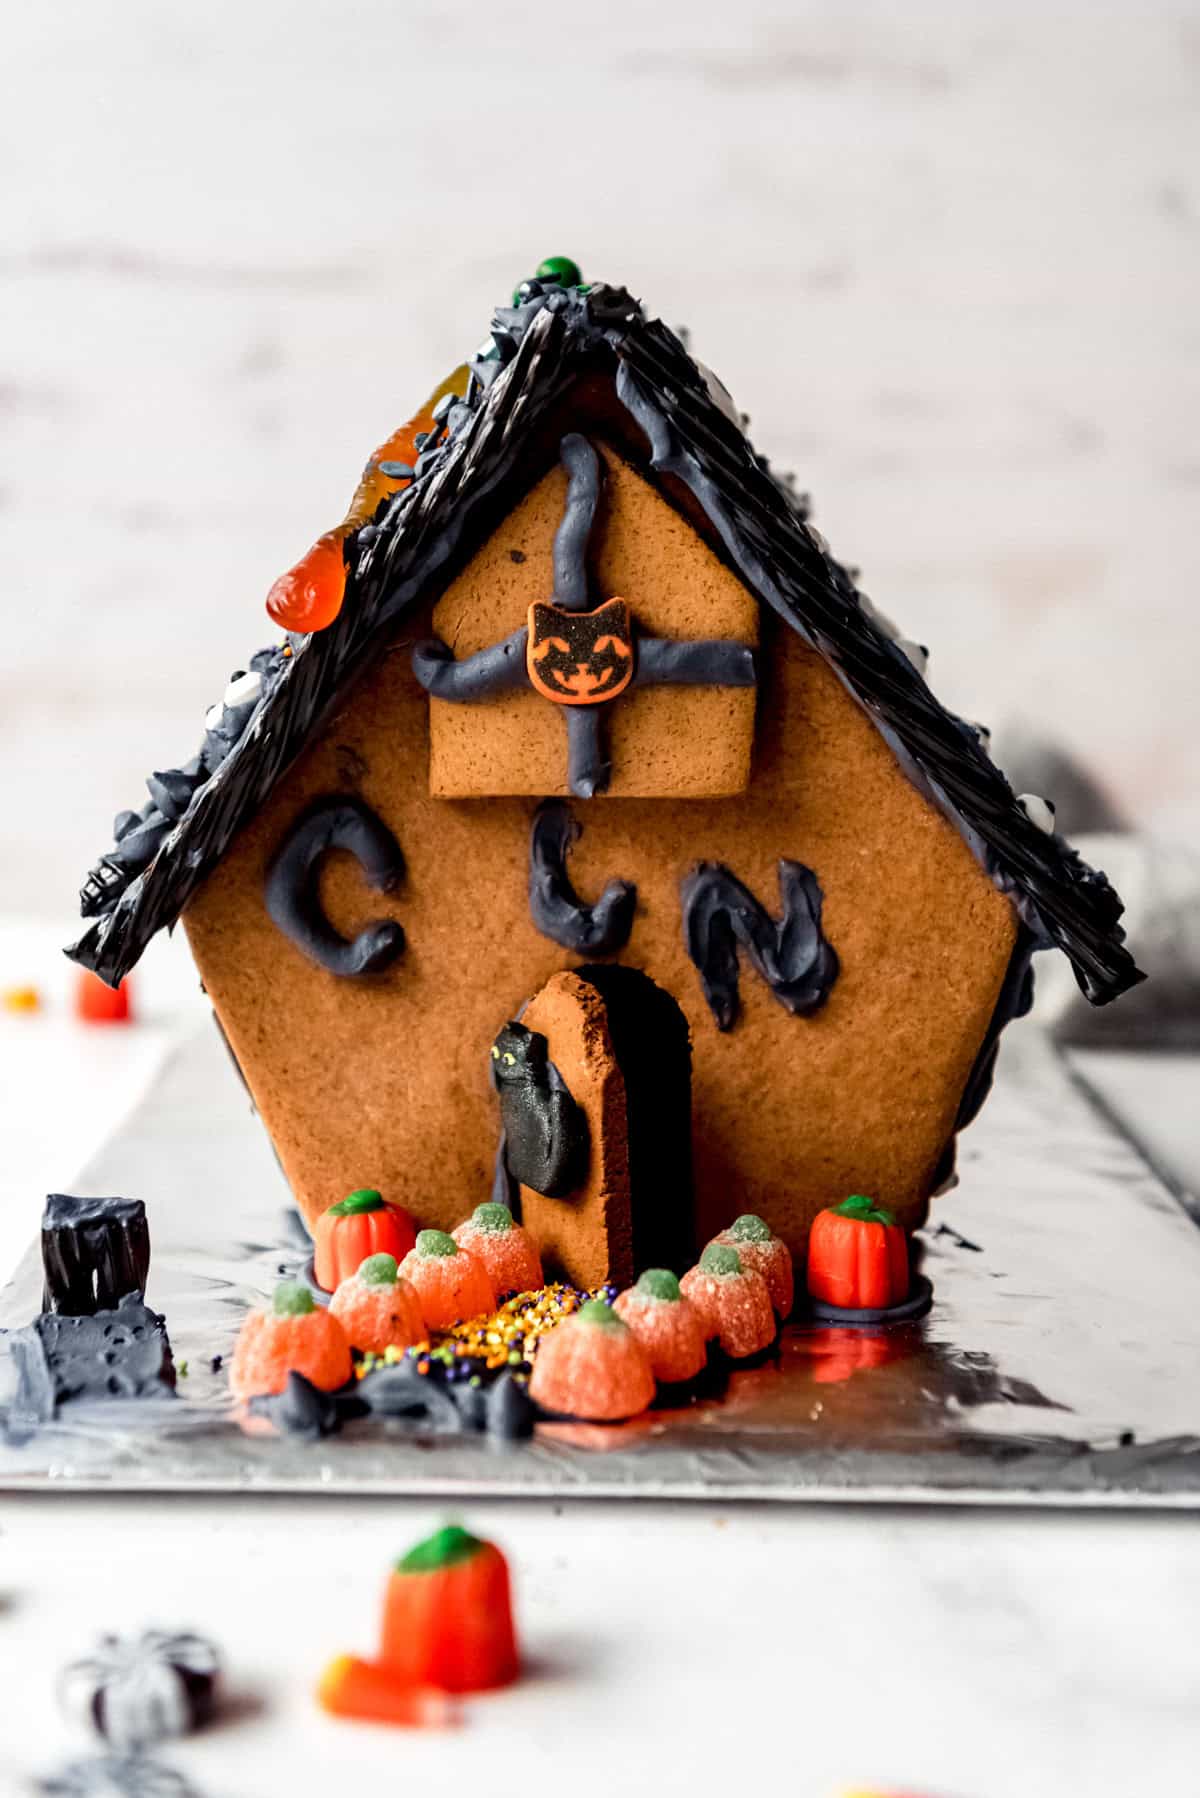
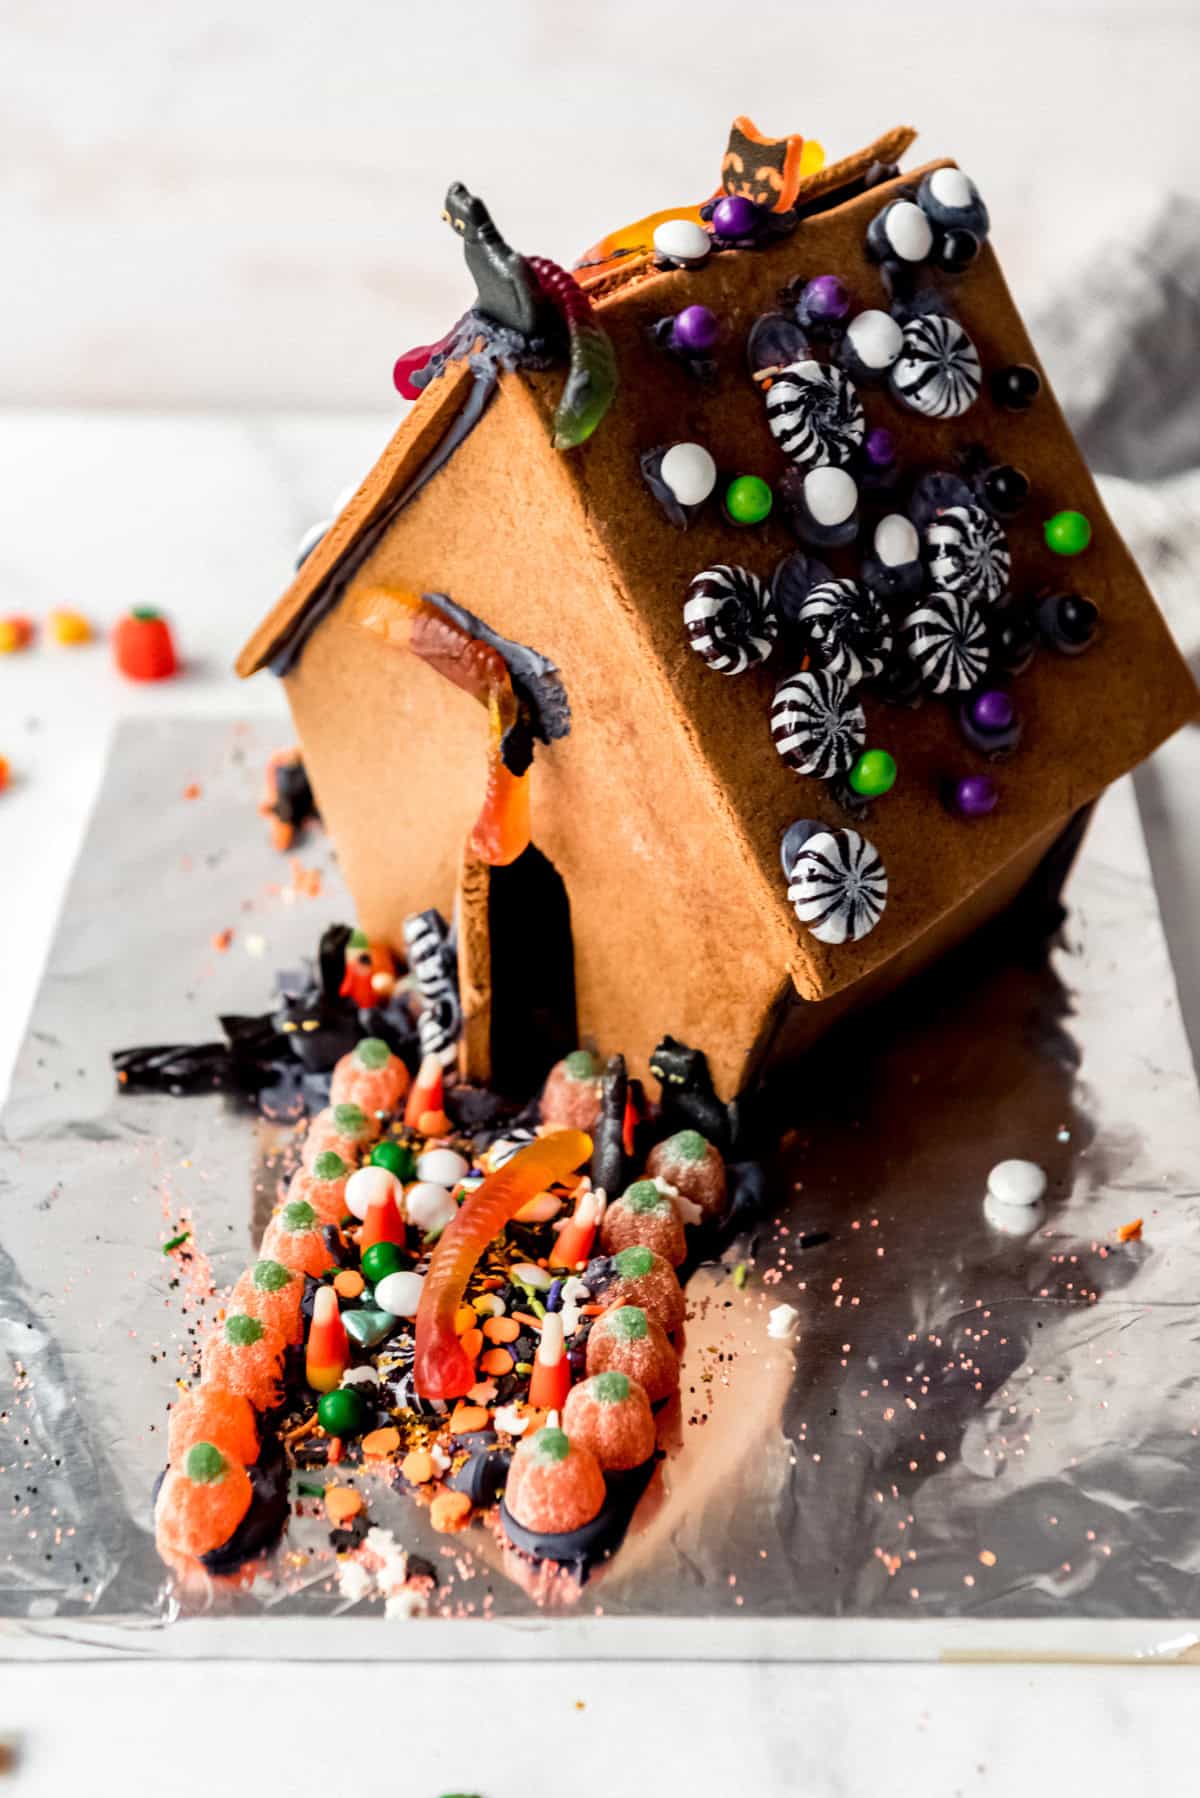
Here are the Halloween gingerbread house creations made by my 9 and 6 year olds. I wasn’t planning on photographing them for this post, but decided that nobody cares about “pinterest perfect” and they were so pleased when I said their houses should be photographed so I could put them on the blog.
My go-to gingerbread house recipe
I feel like I need to disclaim that this is construction gingerbread. It’s 100% edible, but I’m not making any promises about it tasting amazing. It’s pretty hard once its baked and made to hold up to humidity and sitting out for a few weeks. If you want delicious gingerbread cookies, this recipe is my favorite! That said, my kids kept nibbling on spare pieces of the gingerbread whenever I wasn’t looking.
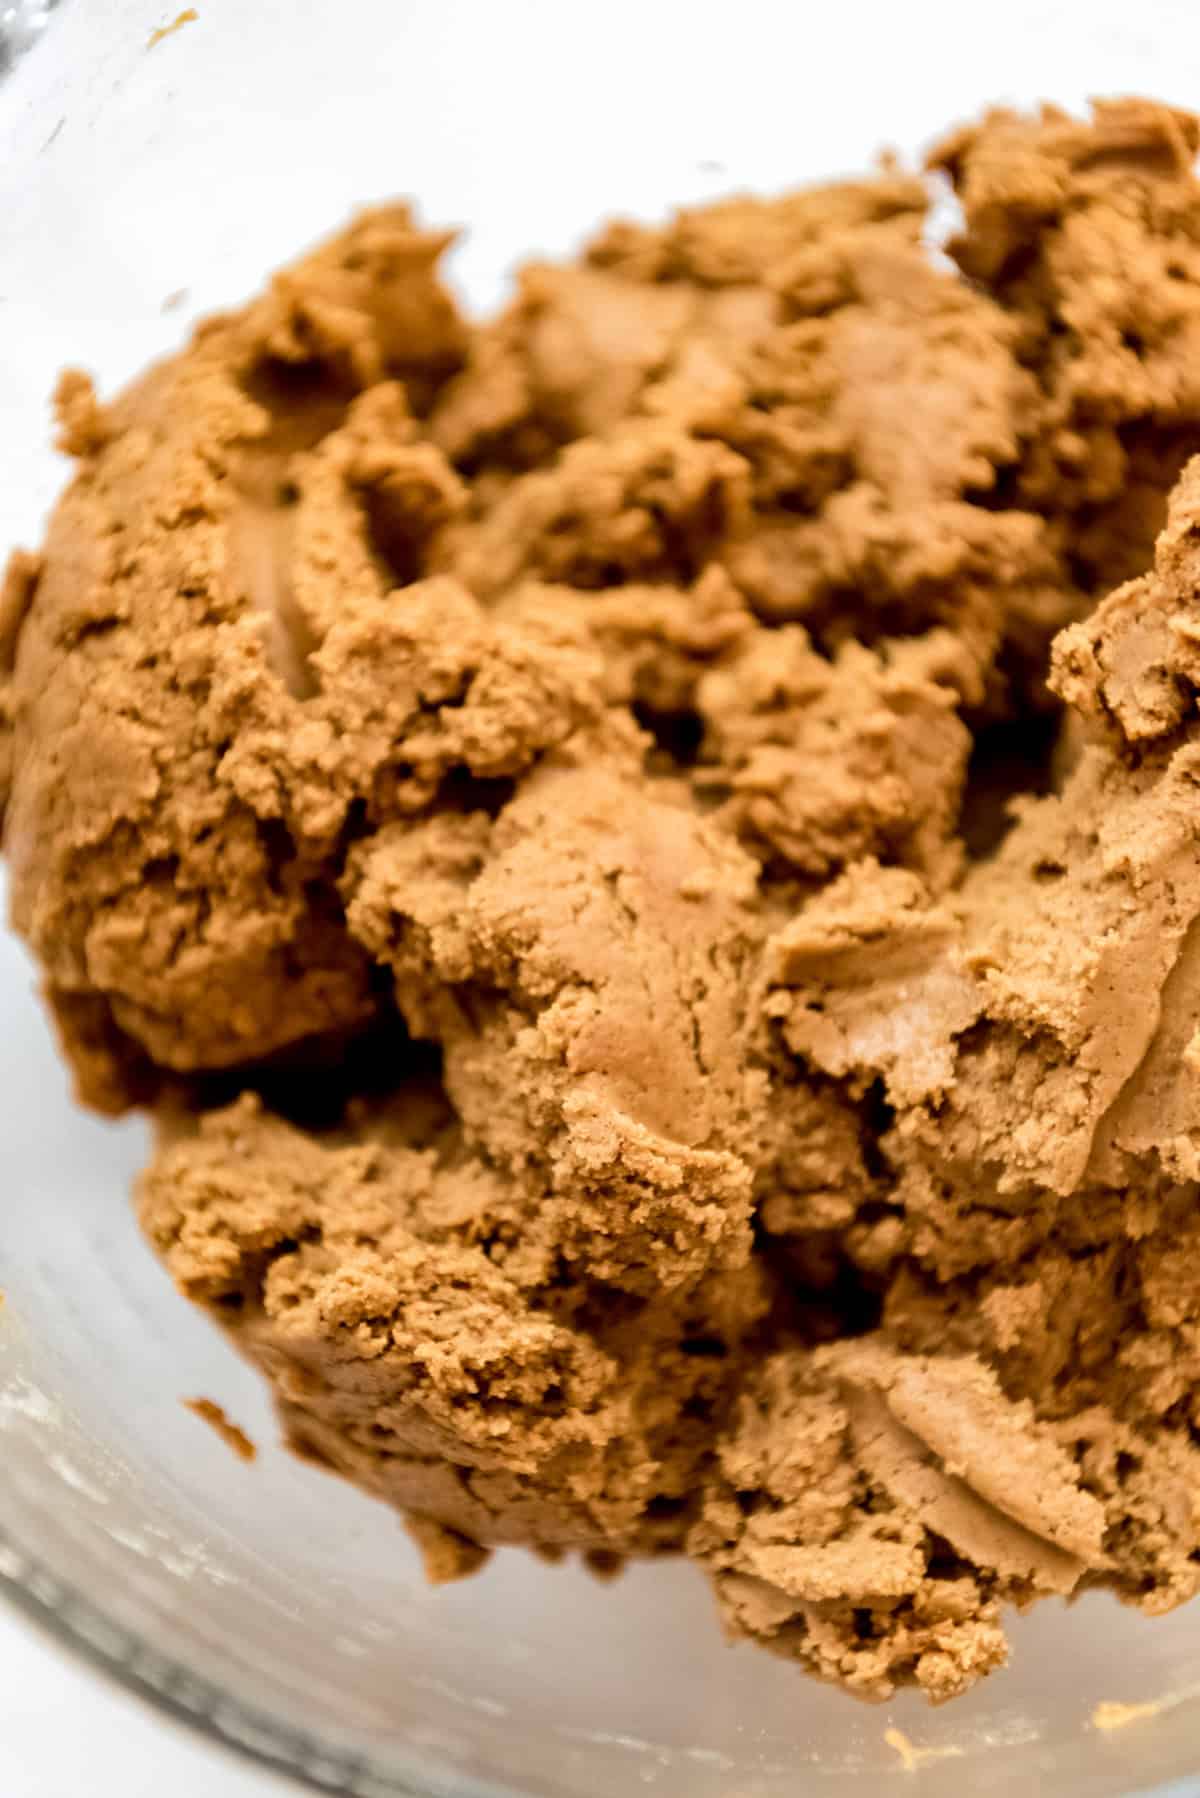
Instead, this recipe is made to hold up to being on display and bearing the weight of loads of frosting and candy. It’s a very thick dough and doesn’t need to be chilled before baking. But it still holds its shape well and doesn’t puff up around the edges. I’ve been using this recipe for more than 15 years of baking homemade gingerbread houses and it’s definitely a keeper!
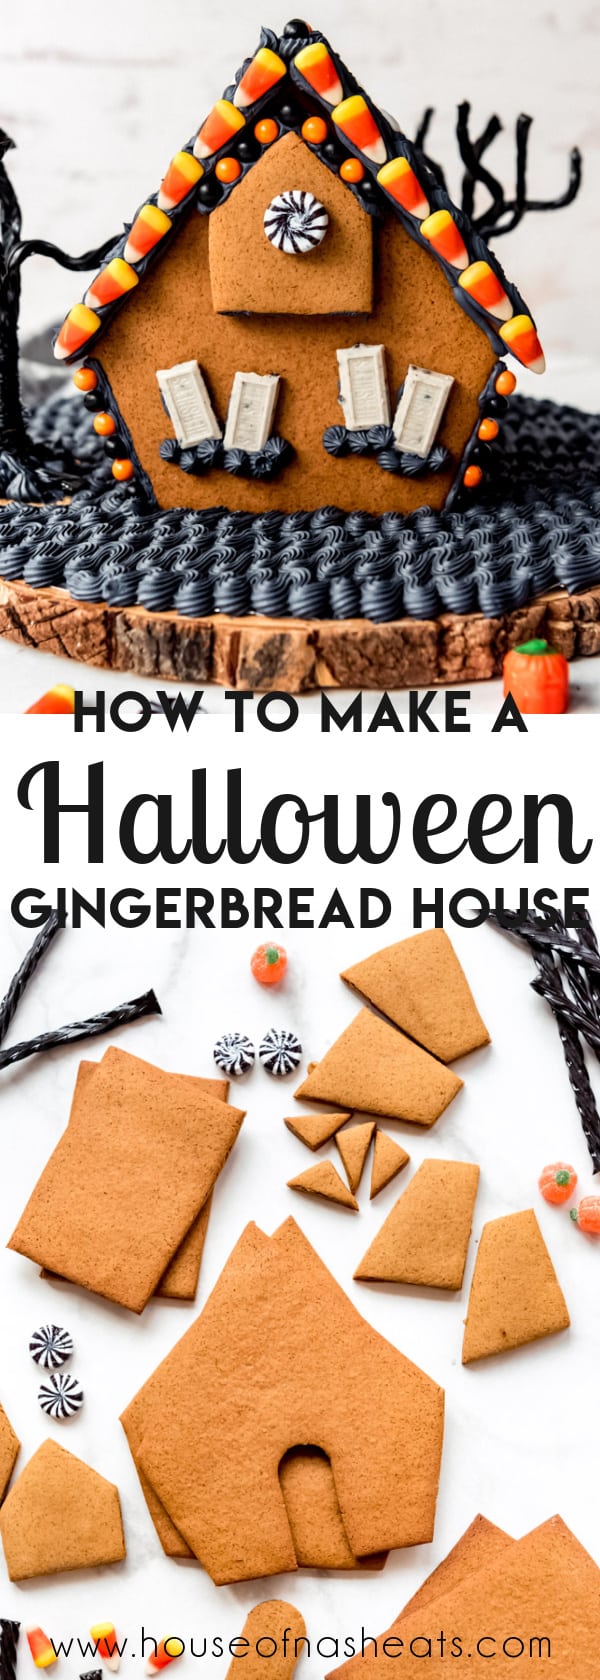
How to make a Halloween gingerbread house
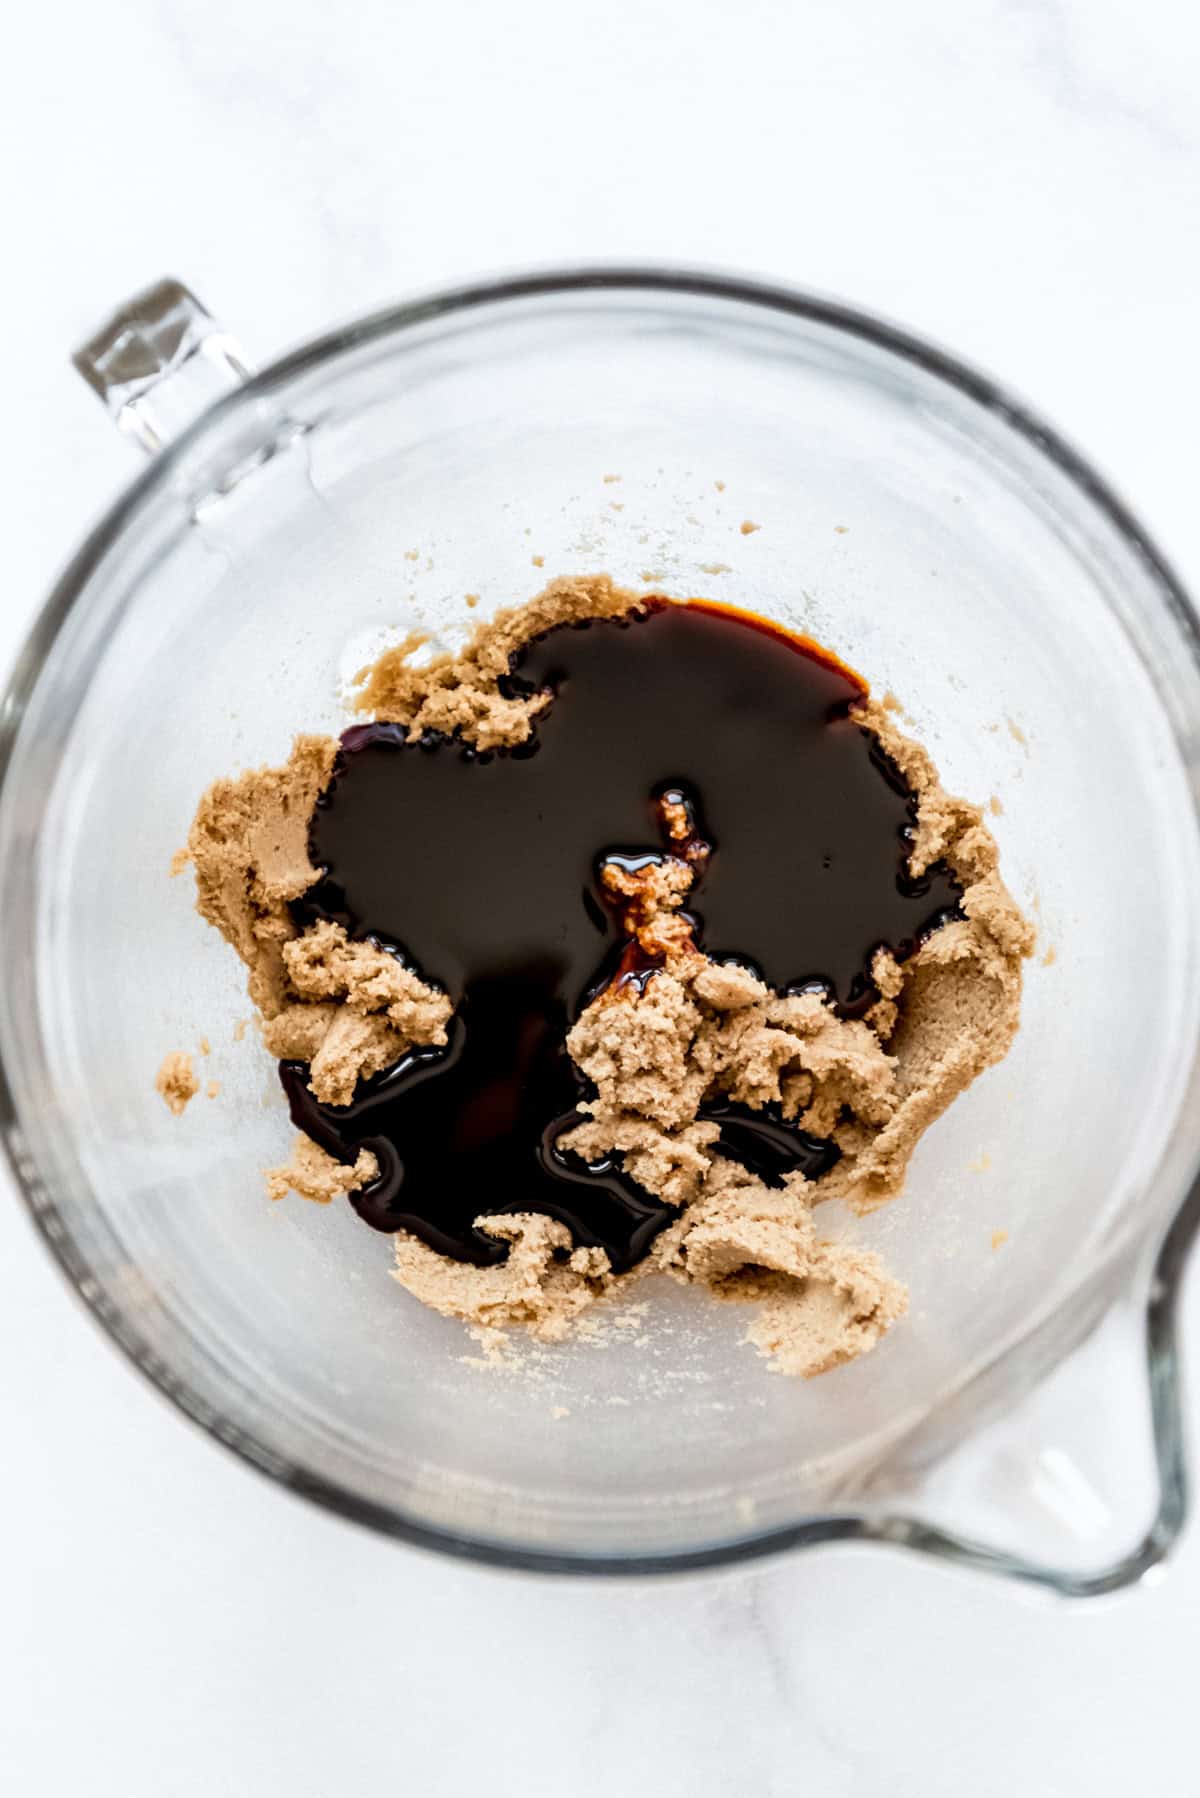
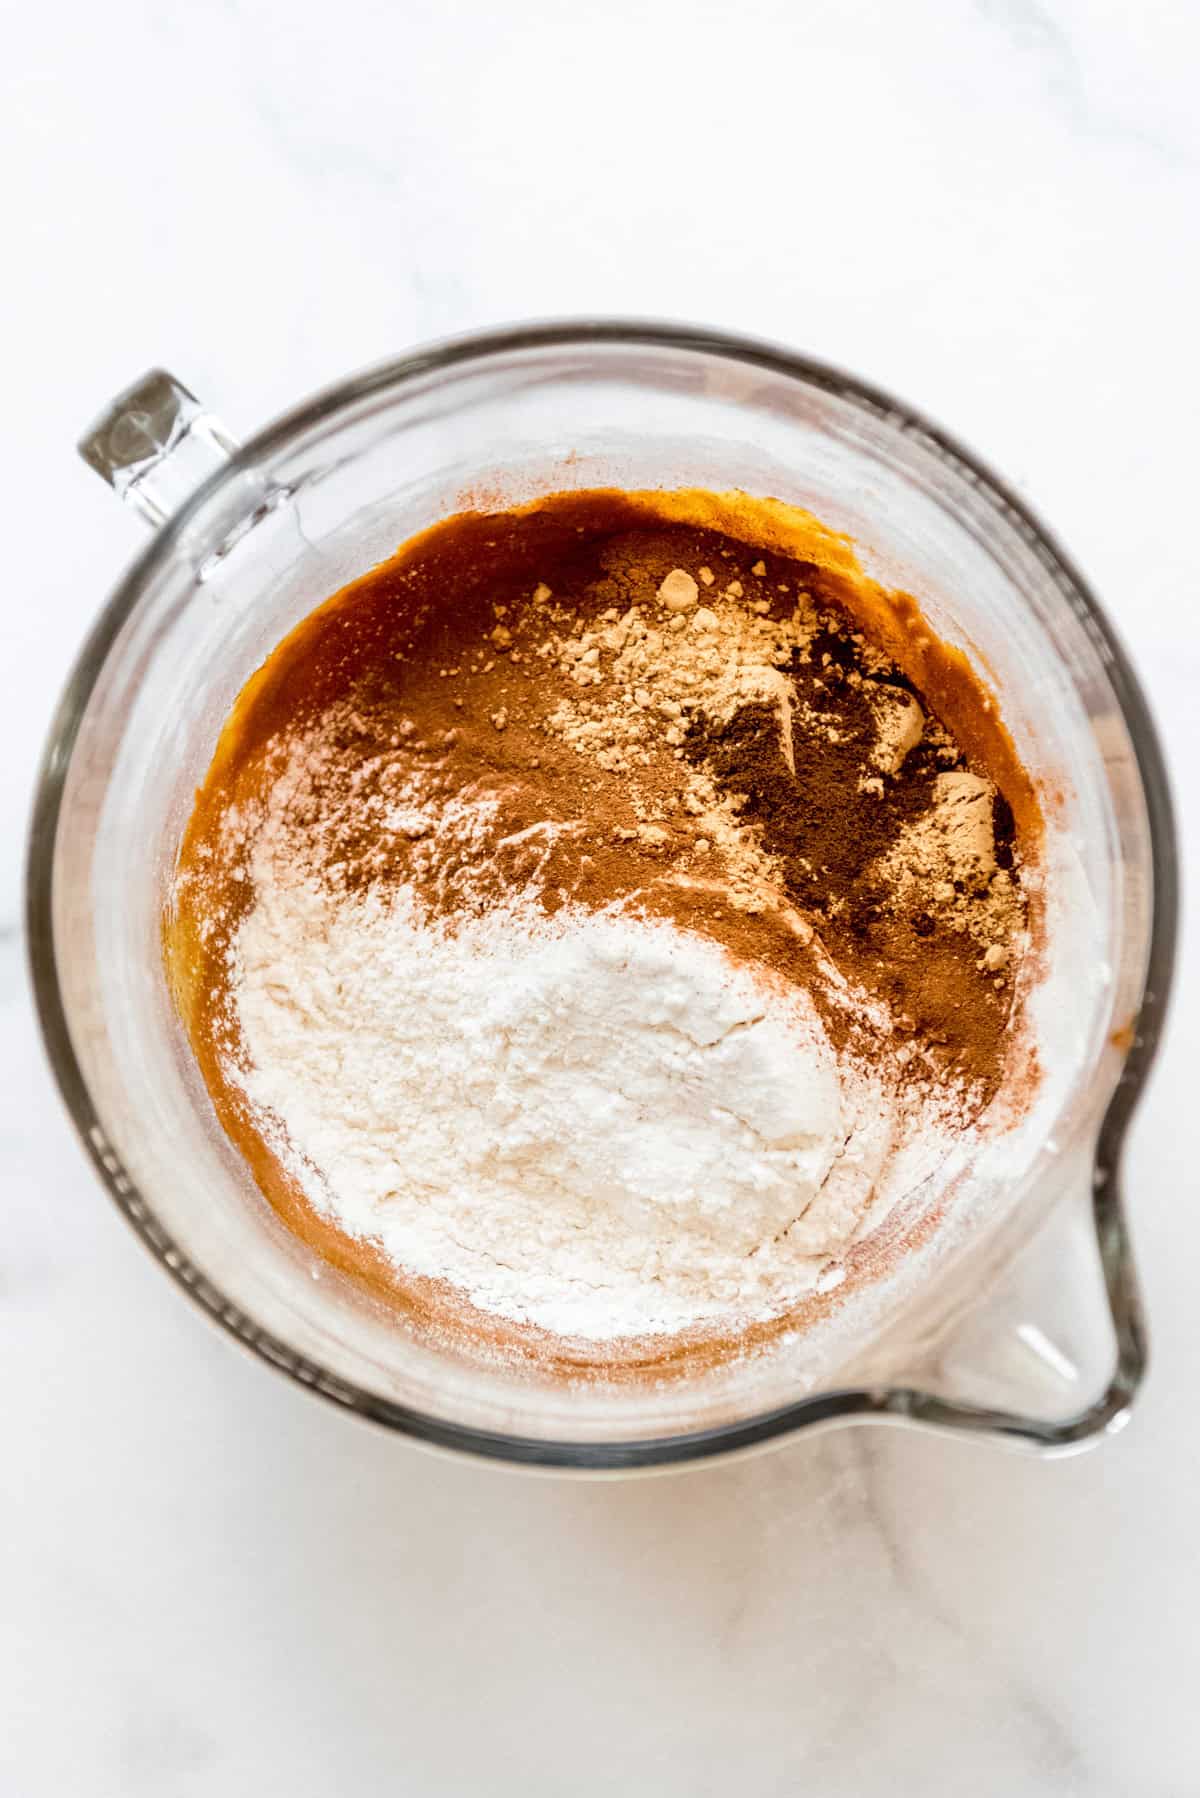
- Make your construction gingerbread dough: Combine butter and brown sugar in the large bowl of a stand mixer. Beat well using the paddle attachment until creamy and light. Add the molasses and mix again. Add the cinnamon, ginger, cloves, and salt along with 1 of the flour. Mix well, then continue adding the remaining flour, 1 cup at a time, and the water a couple tablespoons at a time, alternating between each addition. Be sure to stop and scrape the bottom and sides of the bowl partway through. The dough will be very thick. You can wrap and chill the dough at this point, but you really don’t need to.
- Roll out the dough: Roll out the gingerbread 1/4-inch thick on parchment paper (even with flour, this dough will stick to your counter) by starting in the center and rolling it in one direction, then rotate the dough a quarter turn and roll in one direction again, repeating until the dough is rolled out. Be sure to flour the top of the dough periodically so it doesn’t start sticking to the rolling pin (affiliate link). I have a rolling pin (affiliate link) with height guides on the side that I LOVE for things like gingerbread and sugar cookies. But an inexpensive alternative is to pick up 1/4-inch thick wooden dowels at the craft store and set them on either side of your dough as your guide to roll it out. For purposes of this post, I also made 1/8-inch and 3/8-inch thick batches. Both work, although the 1/8-inch pieces didn’t have the nice, sturdy feel that 1/4-inch thick did, and the 3/8-inch walls, while nice and substantial, make it impossible to get 2 full houses (at least the size of my design) out of one batch of dough. Which is saying something since a single batch of dough takes 6 cups of flour! Also, you will need to adjust your bake time if you do thicker or thinner pieces.
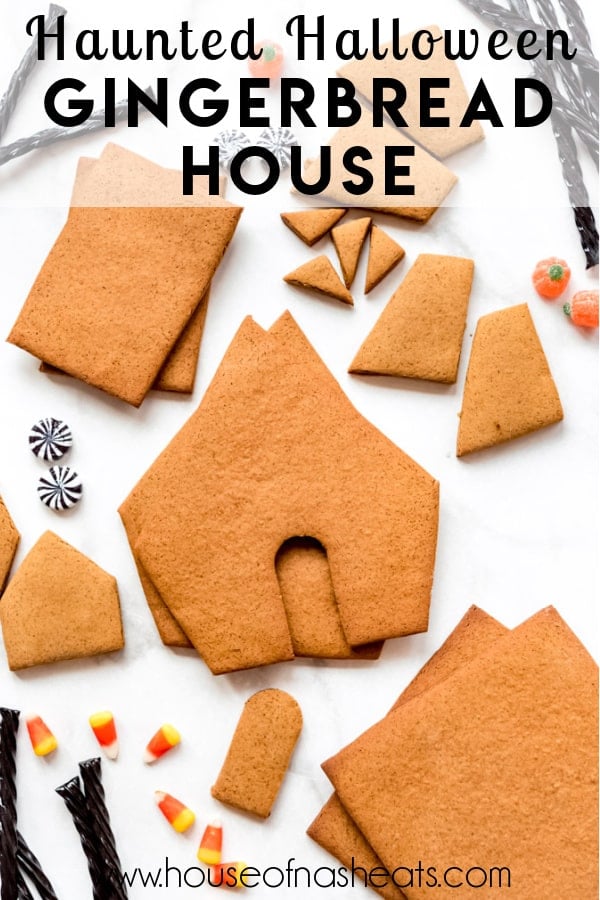
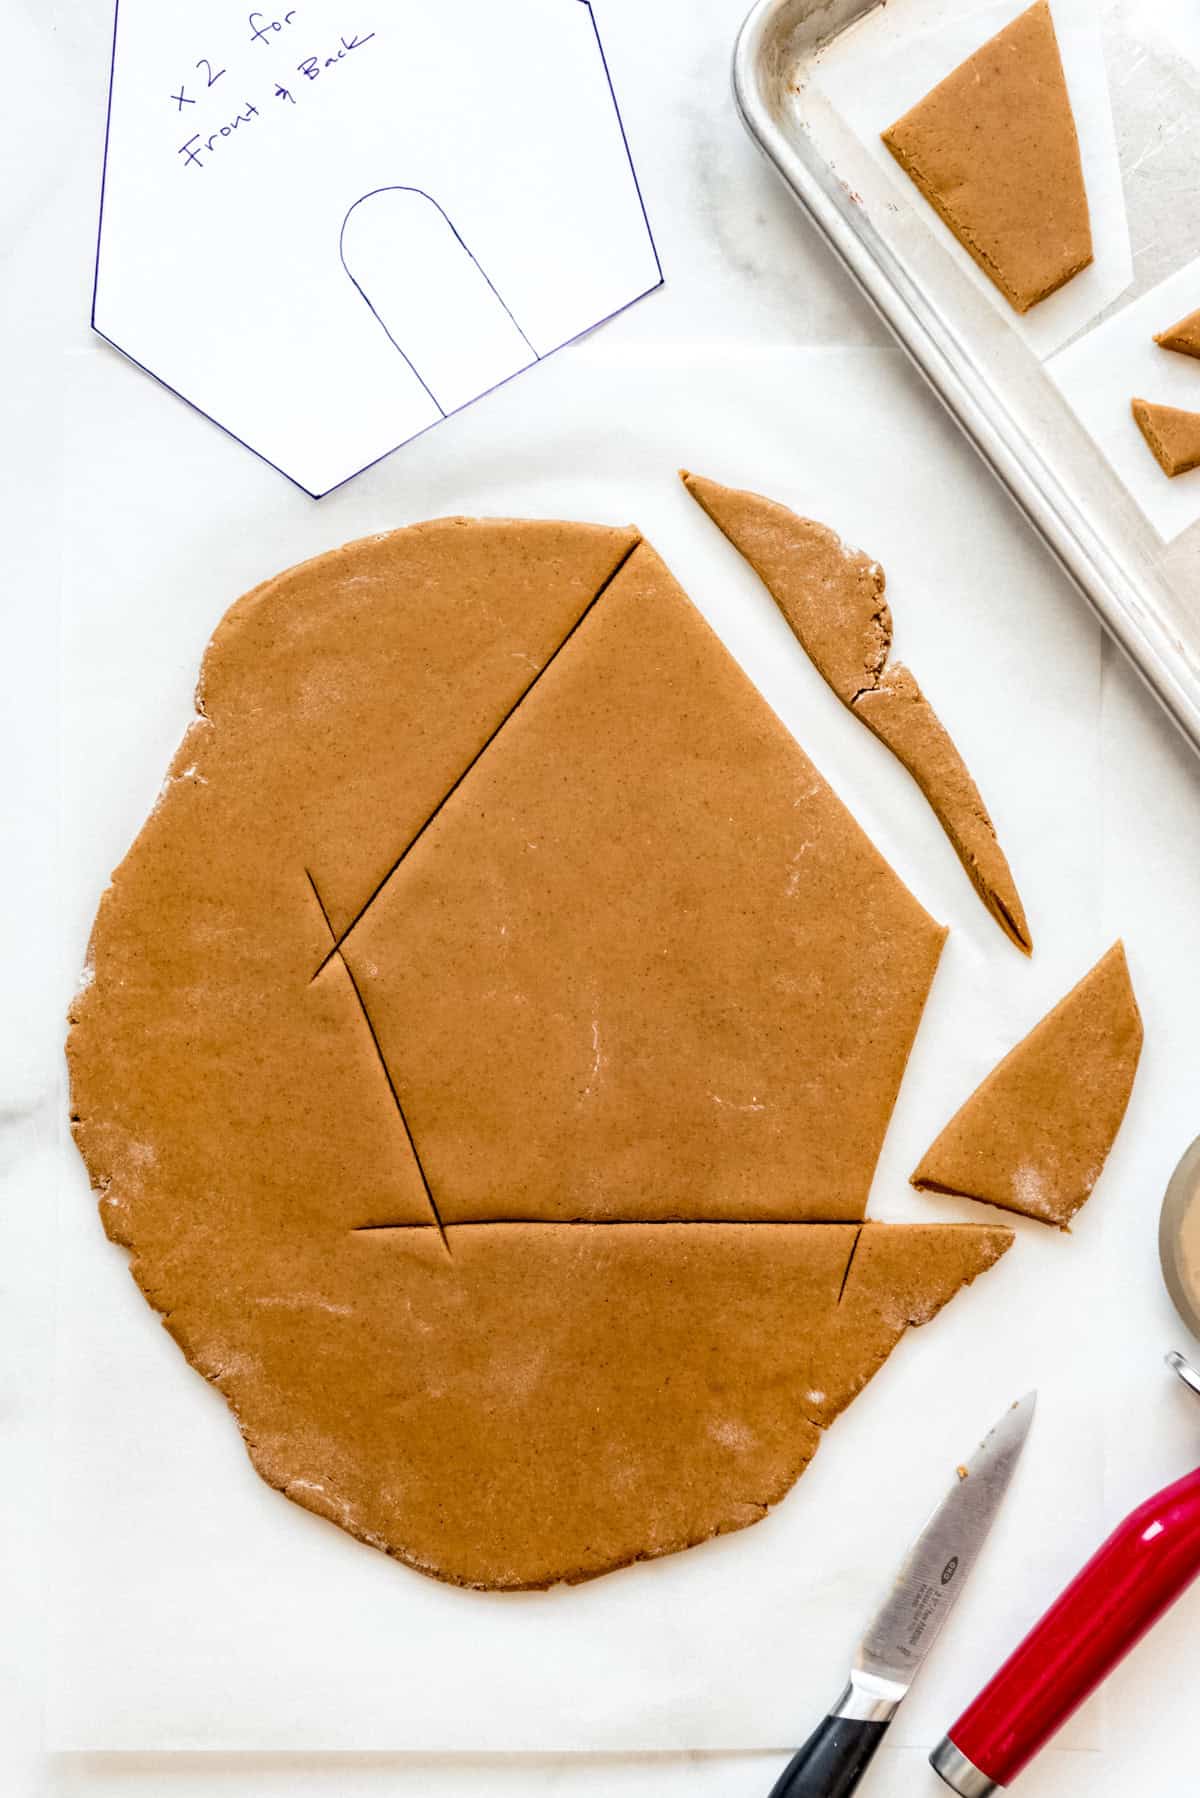
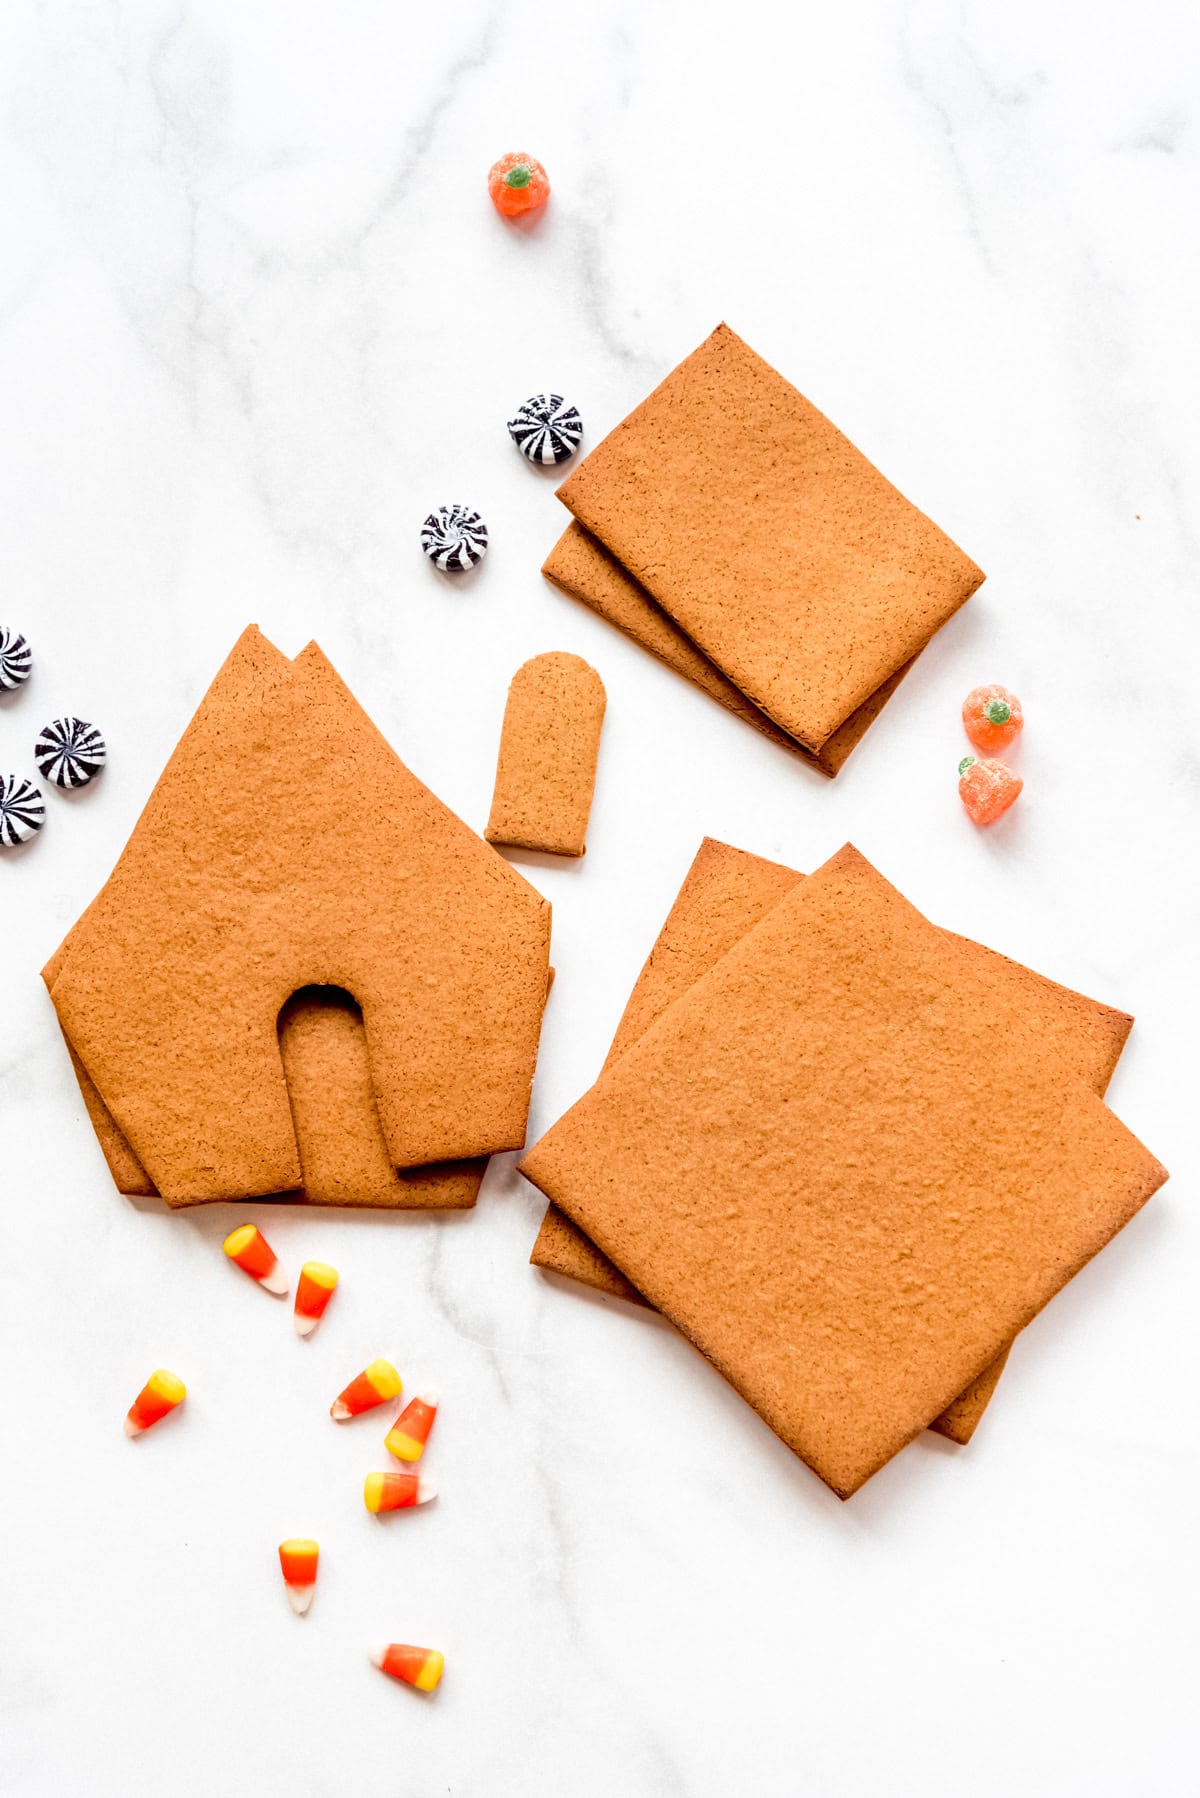
- Cut out your gingerbread house design: There are lots of great ideas online, but I’m including a simple, classic design that I especially love for Halloween gingerbread houses. For a much more intricate and advanced design, I think this one looks amazing and it has a free pdf that you can download as well. Bravetart did a really advanced version over on Serious Eats that explores some really cool techniques like making the walls look like aged bricks, but it requires a lot more patience and skill than I possess. My pattern is about the same size as most of the houses that come in the kits I have tried in the past. You can make the houses larger or smaller by using the print option of most printers to increase or decrease the percentage size that the document will print as. Use a pizza cuter for cutting out most of the design and a small, sharp knife for more intricate pieces like windows and doors. Because we aren’t planning on eating the gingerbread, it’s not big deal to gather and re-roll scraps to cut out all the pieces. Use small Halloween cookie cutters to cut out fun shapes of extra dough to use to decorate your house or its surroundings!
- Transfer the pieces to two baking sheets: The best way to transfer the pieces is by lifting them with the parchment paper so they don’t stretch their shape too much. I bake the larger roof, front, and back pieces on a separate baking sheet from the smaller side and door pieces so I can pull them out at different times.
- Bake the gingerbread: The amount of time will depend on the size of your pieces and the thickness of your dough. That said, larger pieces like the roof and front and back of the house typically take 25-30 minutes to bake while smaller pieces like the sides and door are usually done in about 20 minutes. The pieces will continue to harden while they cool. If they still feel too soft once cooled, you can always turn the oven back on and bake them for another 10 minutes to cook them a bit longer and dry them out a bit.
- Make the royal icing “glue”: This type of icing will dry and harden after a few hours, acting as a cement to hold the gingerbread house together. You can leave it white, or use gel food coloring (affiliate link) to dye it Halloween colors. I prefer making it with meringue powder and water, but you can also use egg whites instead. I’ll be sure to include instructions in the recipe notes for how to do this! Transfer the icing into piping bags. You can use decorative piping tips if you want, or just snip off the ends of disposable bags. My favorite tip that I used to decorate the roof and ground on my house is the Ateco 32 (which is the same as the Wilton 32).
- Choose a sturdy base: I don’t recommend using cardboard for the base of your gingerbread house. It usually isn’t sturdy enough to support the weight of a decent-sized house. Instead, I recommend wrapping a piece of wood or a cutting board in foil and using that as your gingerbread house base. A baking sheet is another good option. The base in these photos is a fun circular board that I picked up at Target a few years ago and frequently use for fruit and cheese platters! I still covered it with a piece of foil to protect it from the royal icing though and make my clean-up easier.
- Assemble the walls: If you have a friend or family member, have them help you hold the pieces in place while you glue the front, sides, and back of the house together. Or just grab some cans of beans or vegetables and use them to prop the sides in place while the icing firms up. I usually wait 5-10 minutes for the walls to set a bit before placing the roof on, then I give my house 20 minutes before proceeding with the decorating, just to make sure it doesn’t fall apart in the middle of covering the roof or something.
- Decorate! This is the fun part where you can let your imagination run wild! Use your royal icing, piping tips, and lots of decorating candy to make a fun design that can be spooky or sweet!
Gingerbread house icing
This gingerbread house icing is really just my easy royal icing recipe with the vanilla left out. We typically don’t eat our gingerbread houses, even if it is totally edible, so I don’t worry about flavoring the royal icing with vanilla.
The key is getting it just the right consistency. You want it thick enough that you can pipe it and it will hold it’s shape. But not so thick that it’s super dry, hard to pipe, and not really sticky enough to hold the house pieces together. I recommend starting with the minimum amount of water, then adding more a little at a time until you get it just where you like it.
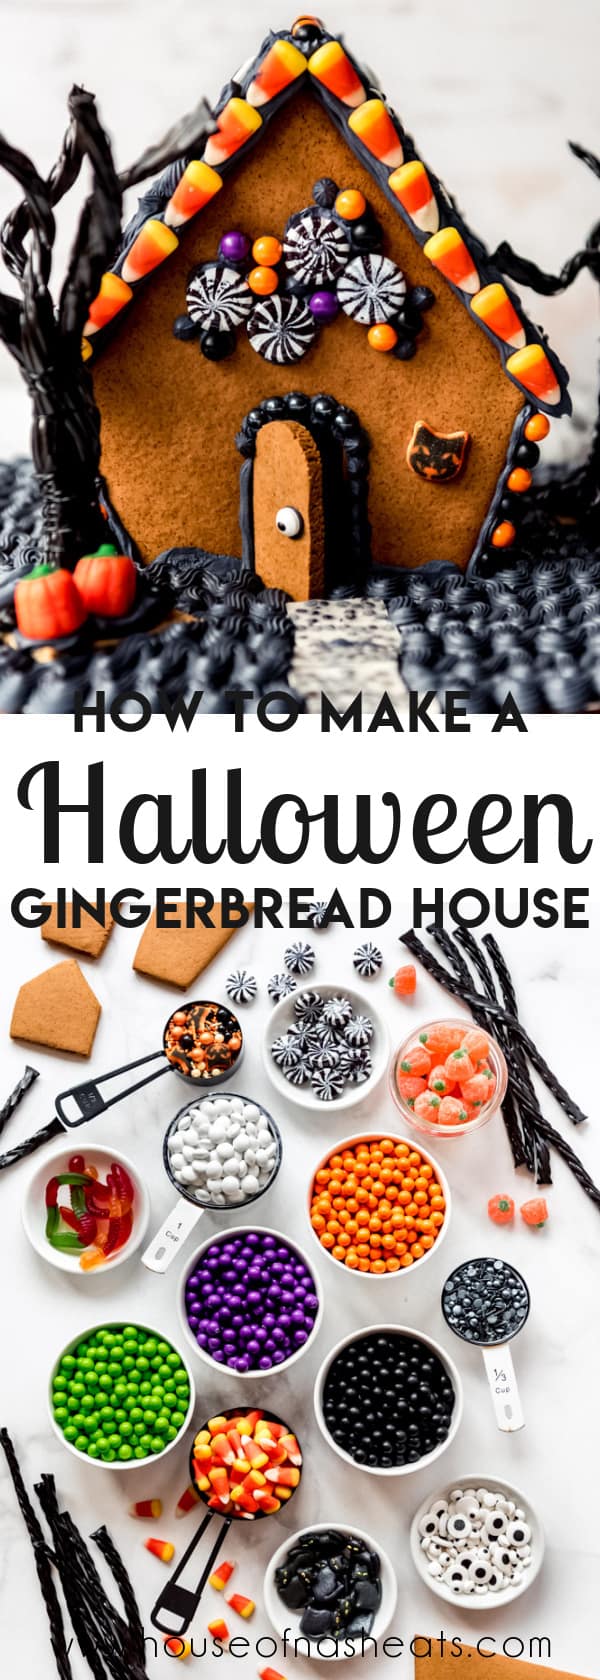
Halloween gingerbread house decorations
If you plan on piping on windows, spiderwebs, or other decorations with royal icing, you will want to do that BEFORE assembling the house. That will give them time to dry and make it so much easier than piping on vertical walls.
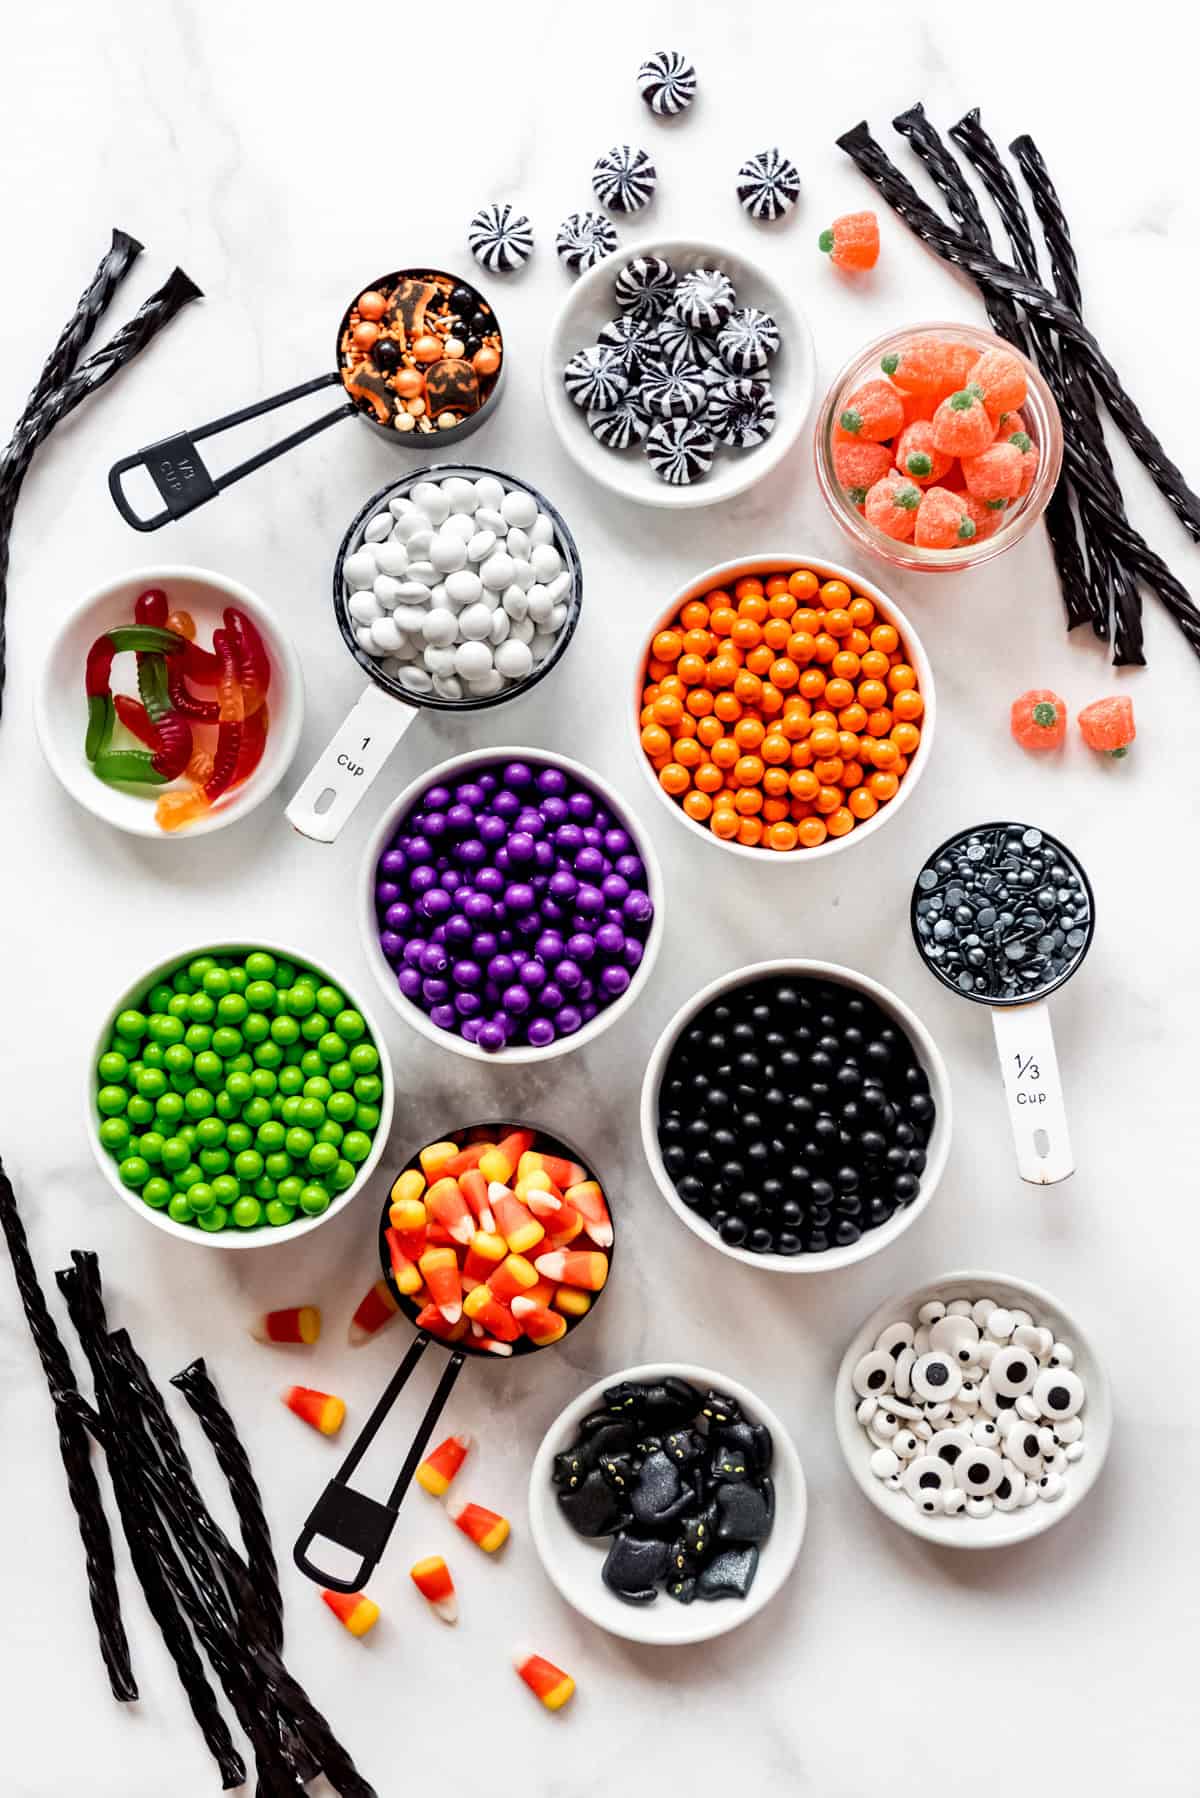
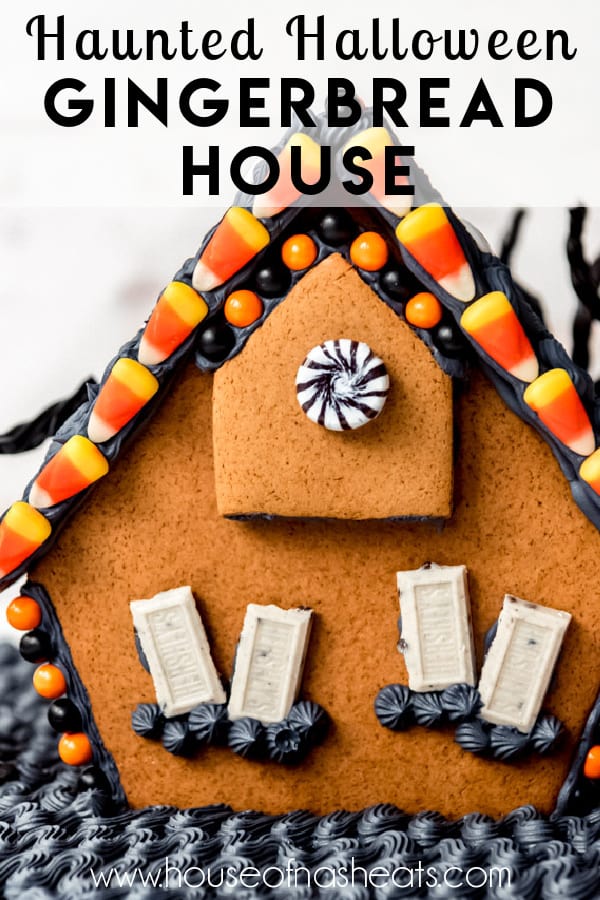
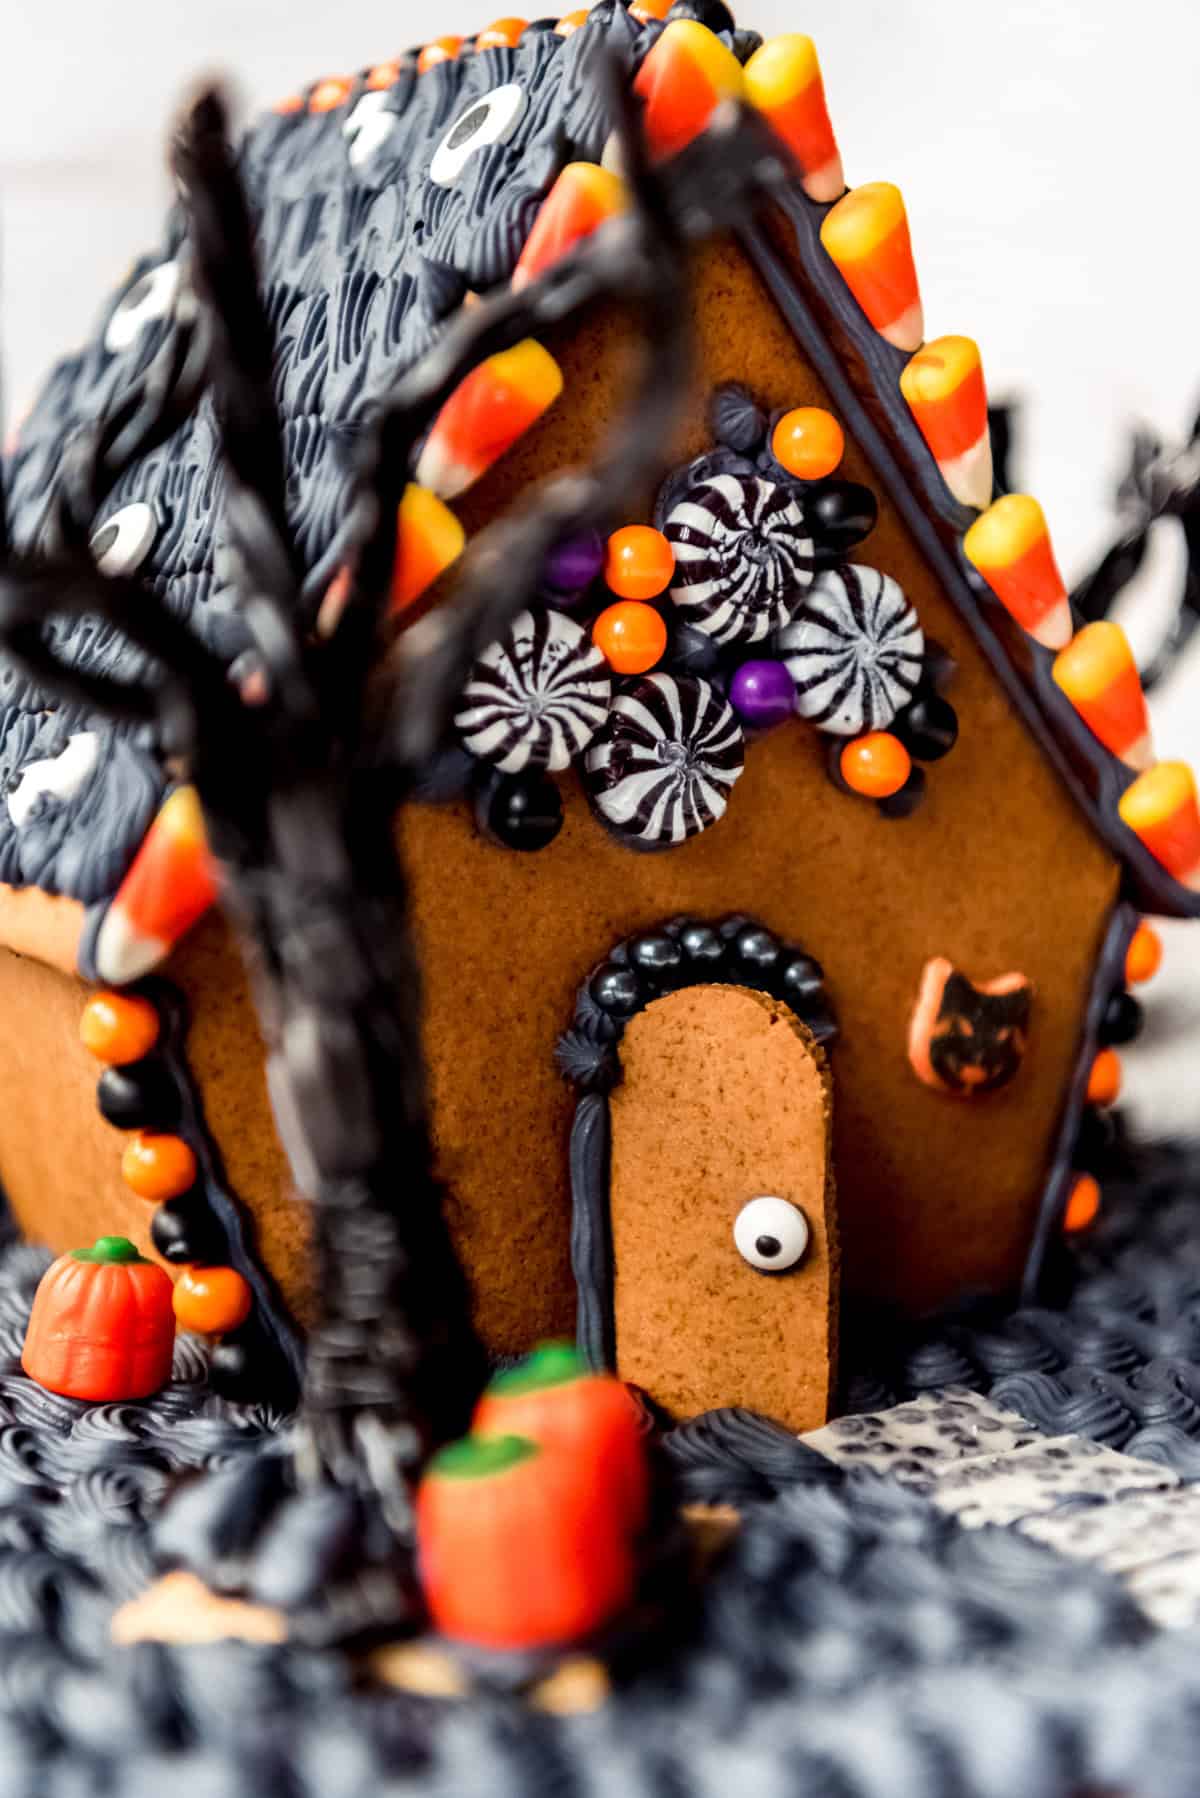
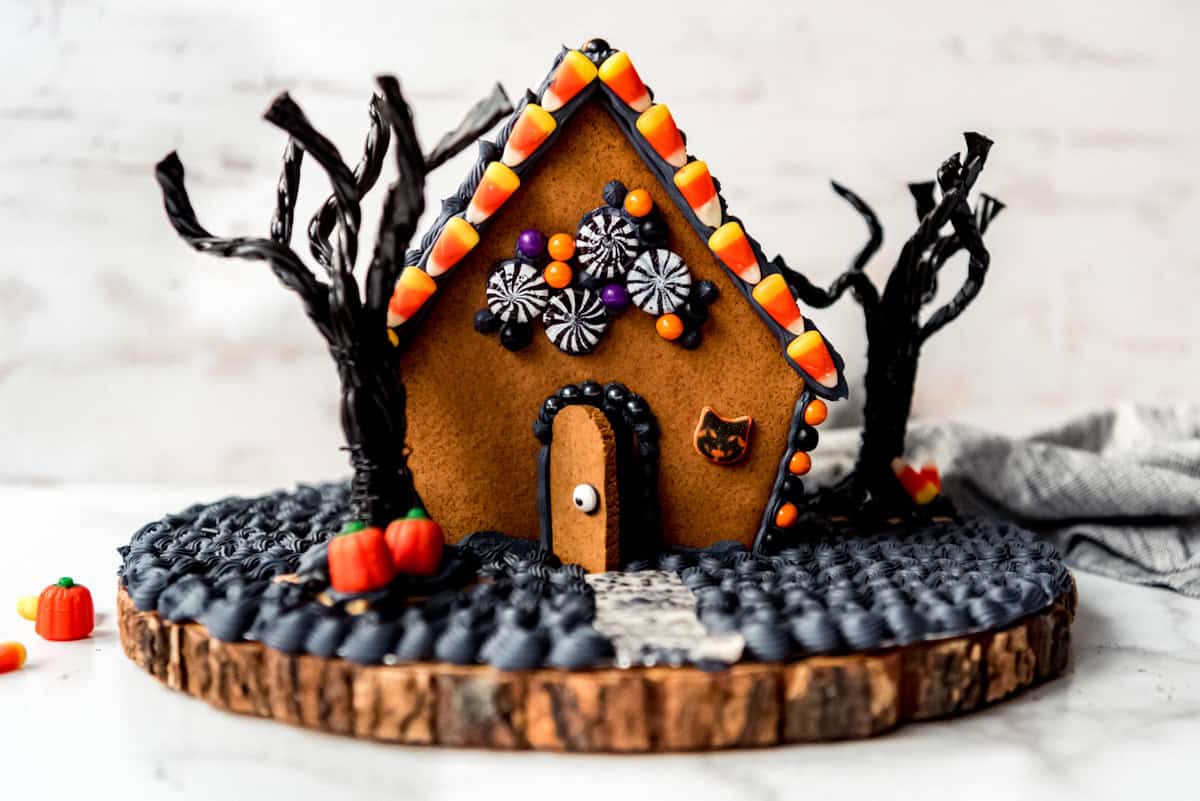
I think Halloween has some of the best candy options for decorating gingerbread houses! Candy corn, pumpkins, and black licorice are so festive and fun! I even found black licorice swirl hard candies on Amazon that give a spooky twist on the look of classic Christmas peppermint candies.
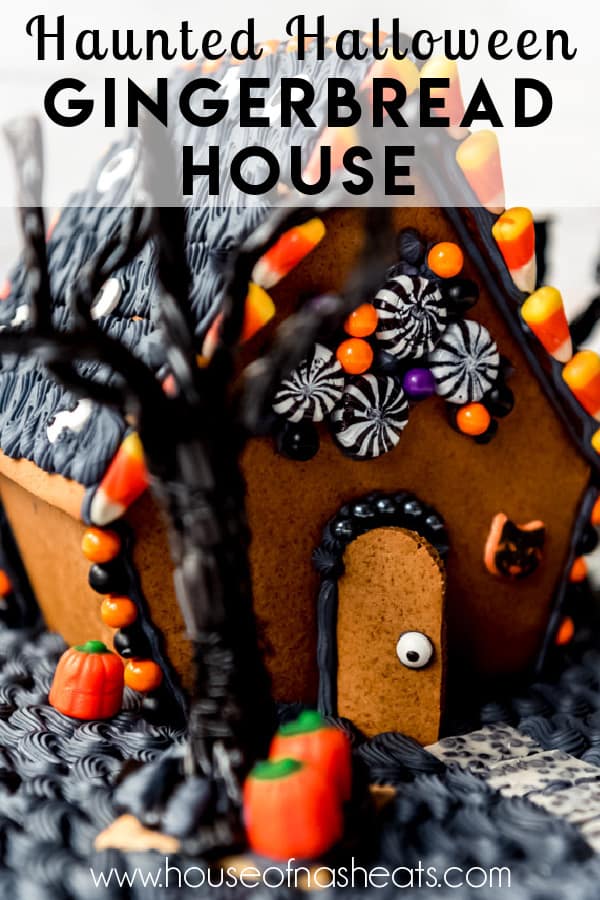
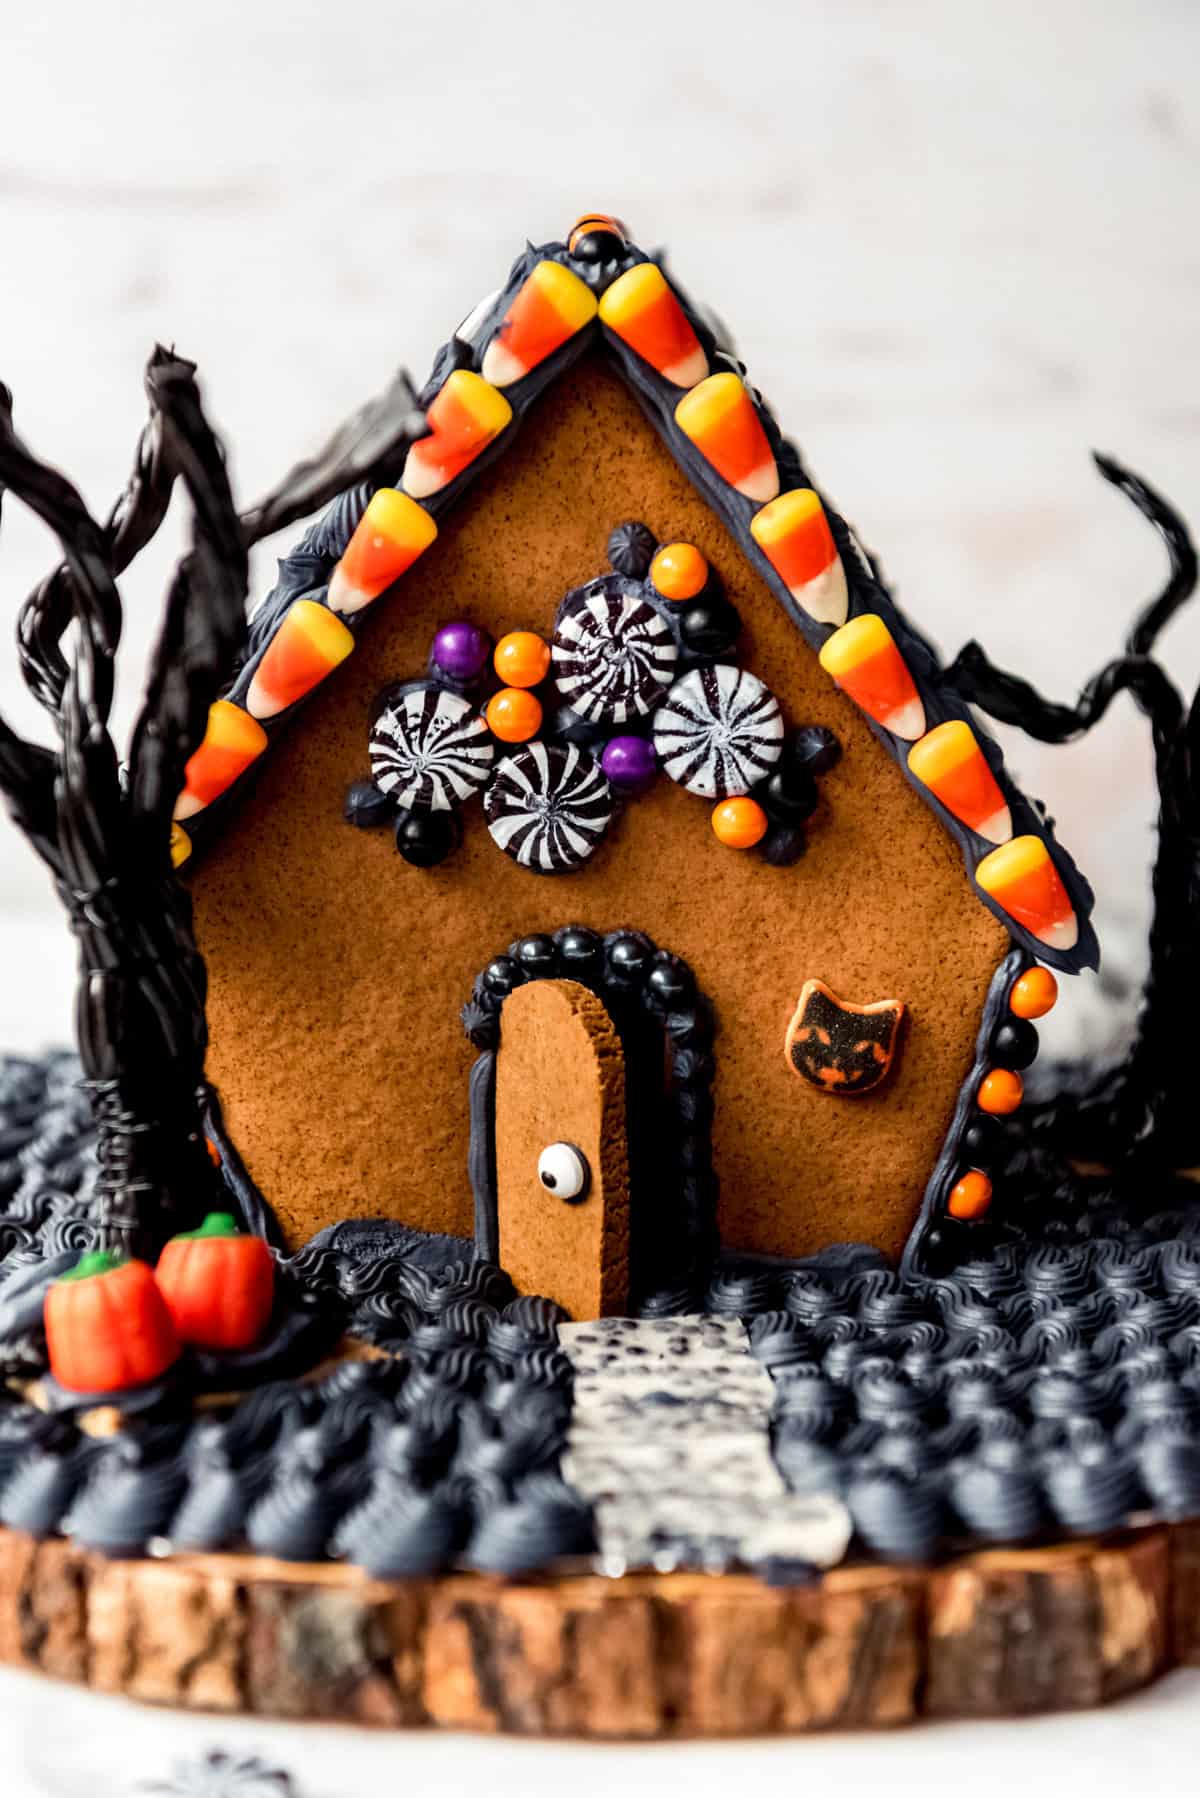
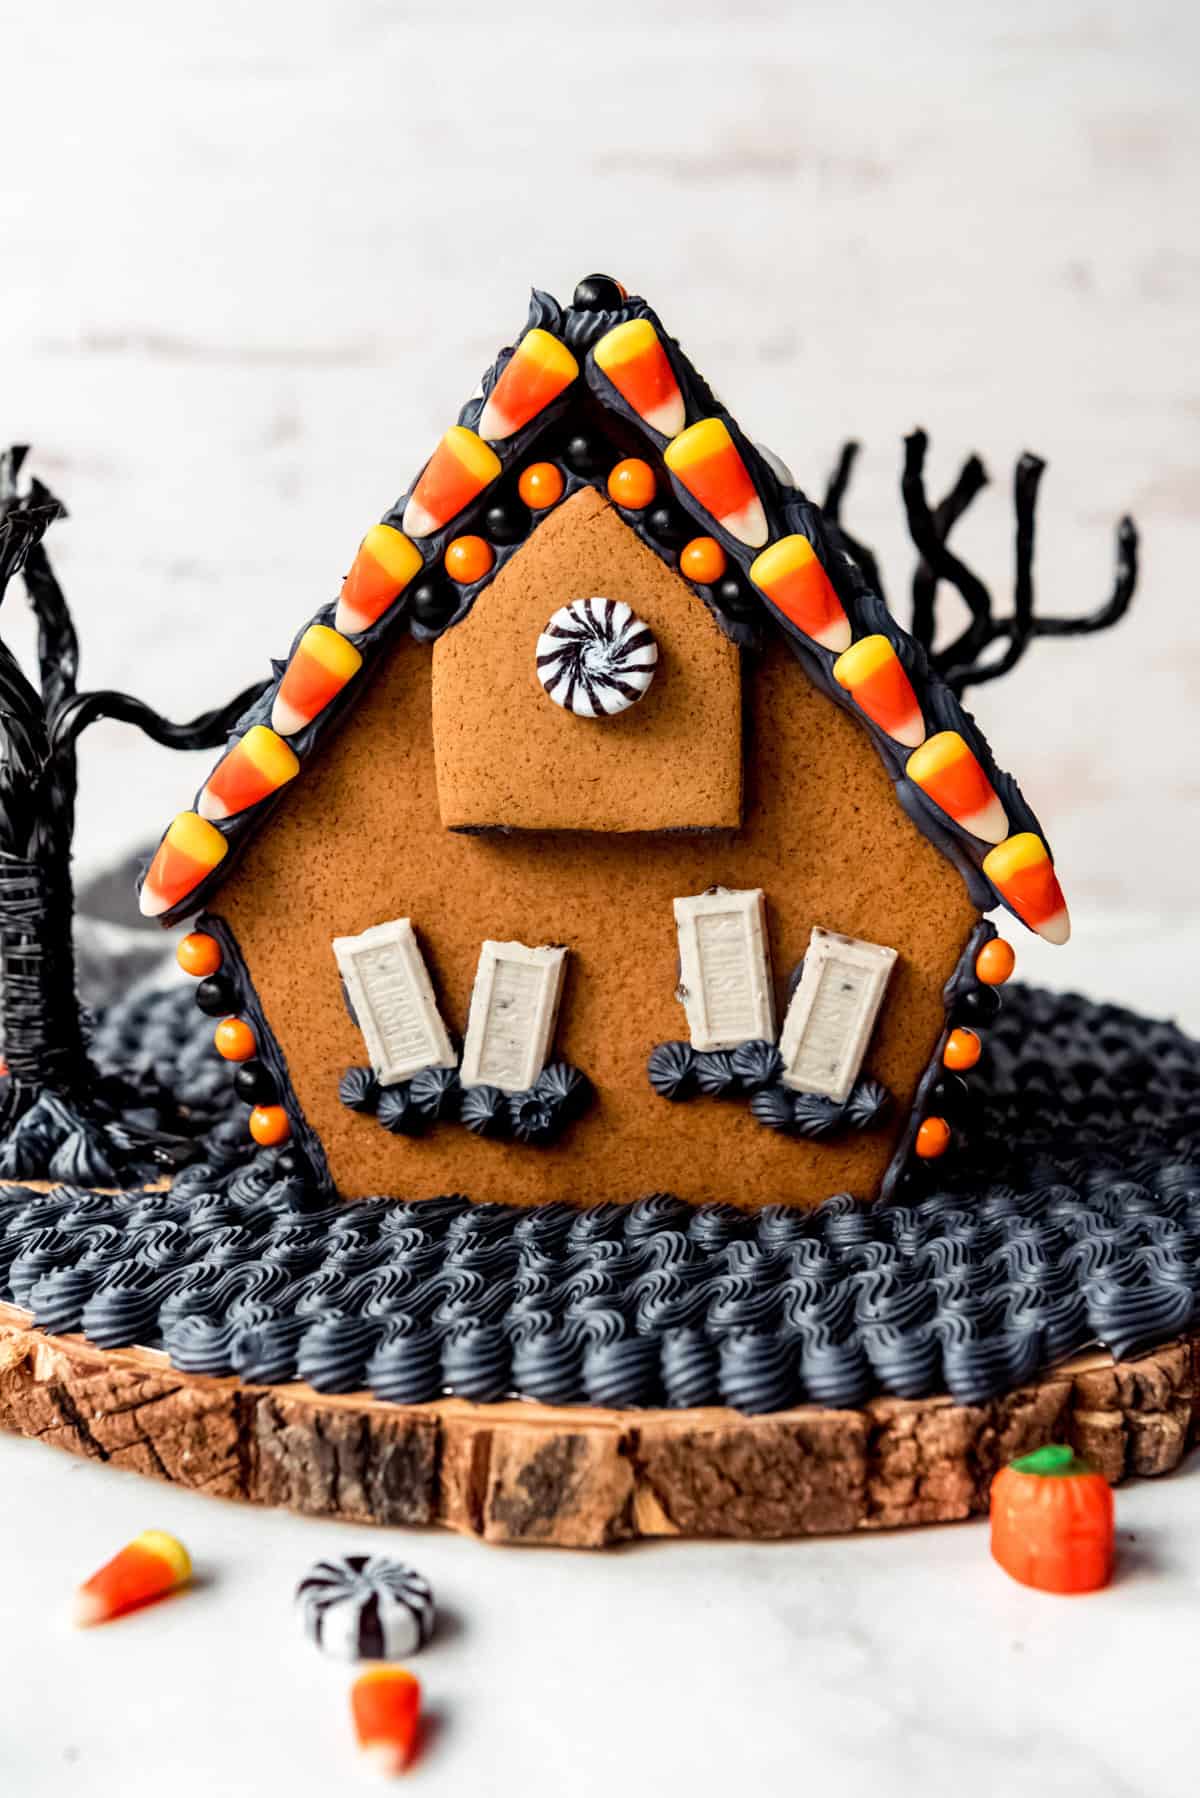
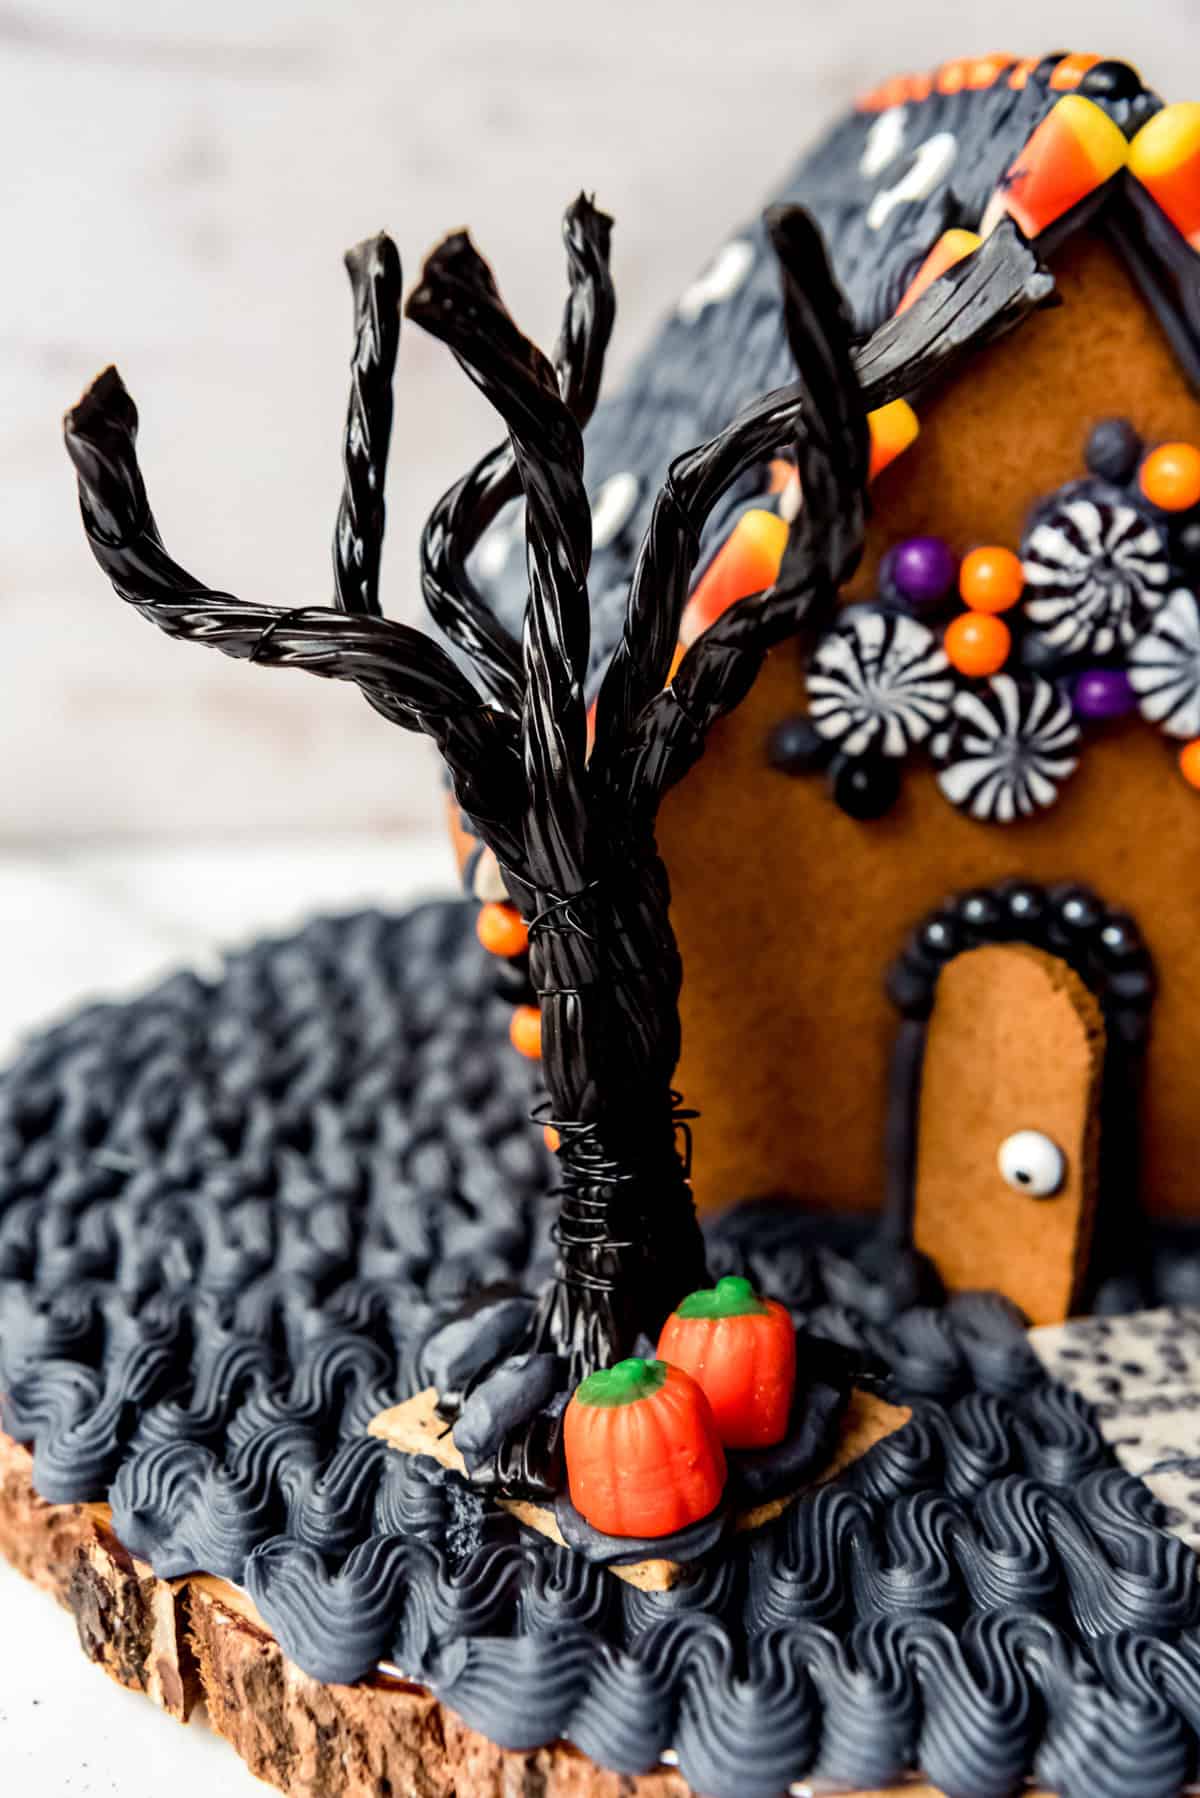
- Black licorice: I’m not a fan of eating black licorice, but it’s great for decorating gingerbread houses! Wrap each piece in thin black wire, then twist a few of them together to form haunted trees. Or use them to decorate eaves, doors, paths, or outline windows or other house features!
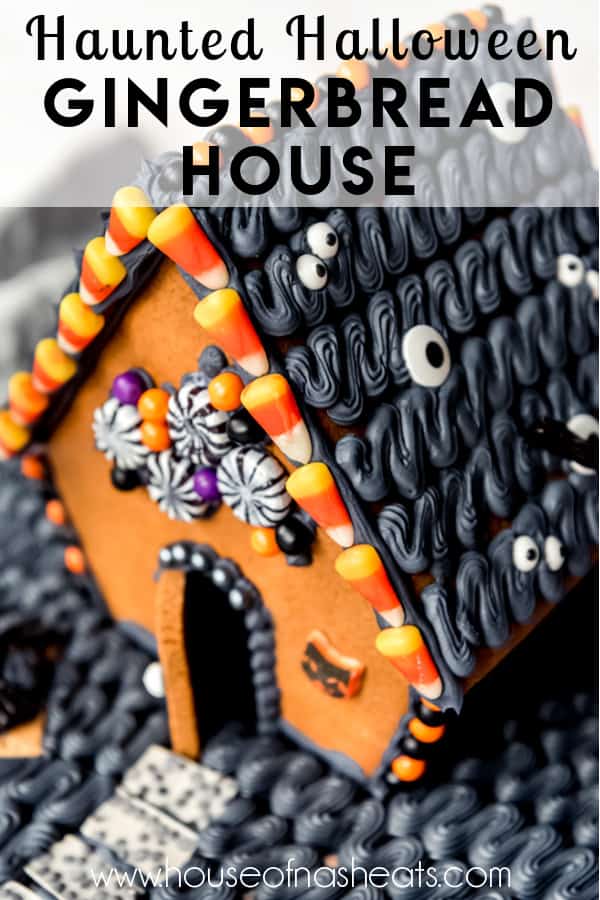
- Candy corn: I’ll admit that I DO love eating candy corn. These add a classic October element to your gingerbread houses. Use them to make picket fences, as “teeth” around doors or windows, or to shingle the roof!
- Pumpkin candies: These are another Halloween classic that are so fun to use to decorate around your Halloween gingerbread house. But be warned, kids will probably eat as many of these as they use on their houses.
- Colored sixlets or M&Ms: You can buy bags of sixlets in any color at most party stores and they are great for decorating gingerbread houses! The colors are vibrant, the shape and size are perfect, they stick well, and can be used in so many ways!
- Hershey’s Cookies & Cream bars: This is one of my FAVORITE elements of my Halloween gingerbread house. Cut or break apart squares and use them as cobblestone pavers or shutters!
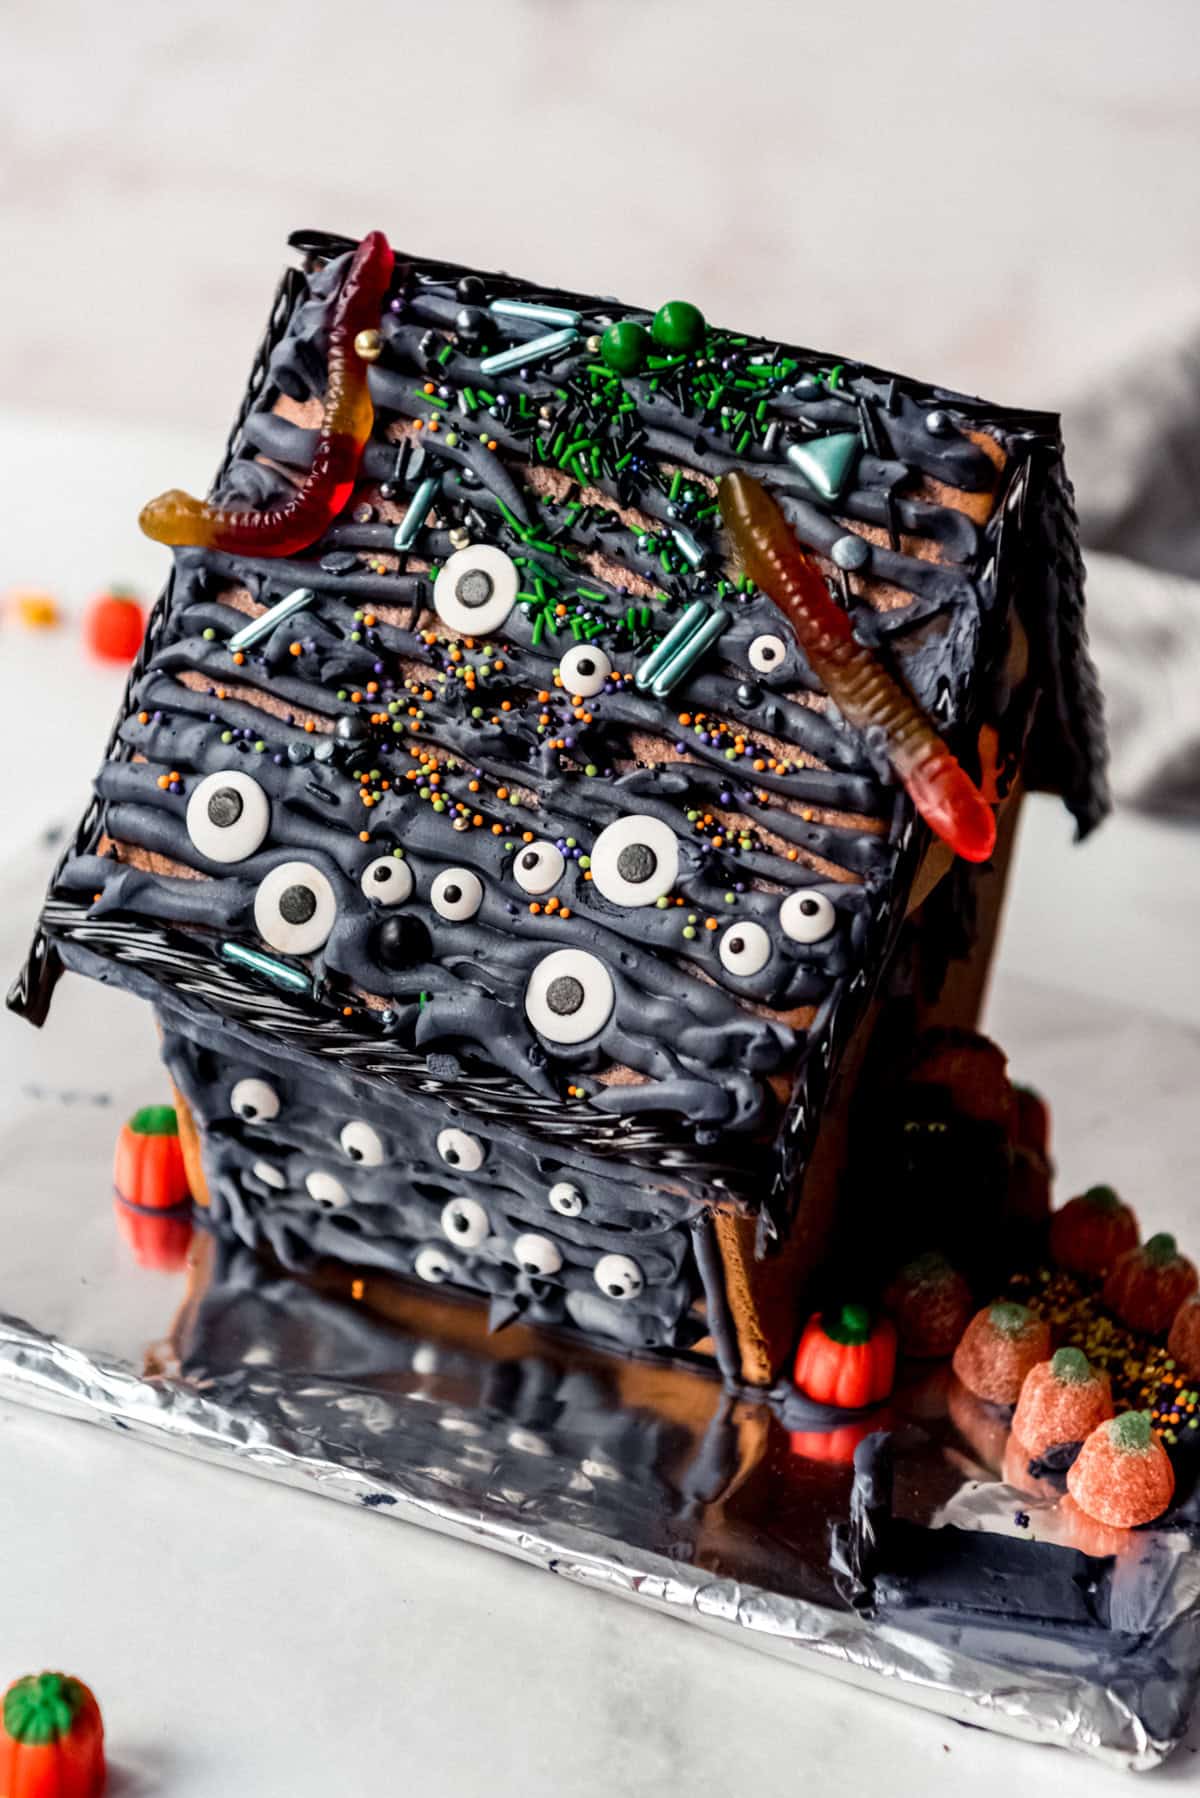
- Googly eye sprinkles: These were a favorite element at our gingerbread house decorating party! I had three different sizes of googly eyes that I grabbed at my local craft store. Or you can even make your own!
- Halloween sprinkles or decorations: There are so many of these to choose from at Halloween and they always add a big impact. Some brands make fun, larger candy decorations like ghosts, bats, and black cats that are fun decorating elements.
Decorating Tips
- If your pieces break, which can happen every now and then (especially if you drop them), you can always glue them back together with royal icing and cover up the flaws with candy!
- If your house isn’t holding together, you could always break out the glue gun and just glue the thing together. I know it’s cheating and gingerbread house purists will be aghast that I would suggest such a thing, but it’s better than stressing over a gingerbread house that won’t come together.
- Feel free to use your piping skills by decorating the walls with royal icing BEFORE assembling the house. Windows and other designs look so beautiful on gingerbread houses, but are crazy hard to pipe on vertical walls. Let them dry and harden overnight before assembling the house and finishing the design.
I would LOVE to see your gingerbread house creations! If you make one, please send me a pic or tag me on Instagram so I can see! Happy haunting!
More fun Halloween ideas
- Halloween Sugar Cookie Bars
- Graveyard Dirt Cake
- Homemade Caramel Apples
- Halloween Sugar Cookies
- Poison Apples
Did you make this recipe?
Let me know what you thought with a comment and rating below. You can also take a picture and tag me on Instagram @houseofnasheats or share it on the Pinterest pin so I can see.
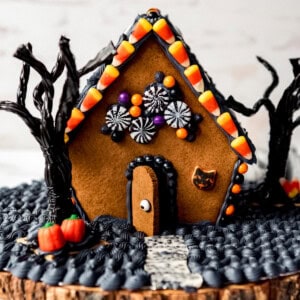
Haunted Halloween Gingerbread House
Ingredients
Construction Gingerbread
- ½ cup salted butter
- 1 cup brown sugar
- 1 cup molasses*
- 2 Tablespoons ground cinnamon
- 1 Tablespoon ground ginger
- ½ teaspoon ground cloves
- 1 teaspoon salt
- ½ cup water
- 6 cups all-purpose flour
Gingerbread House Royal Icing
- 2 pounds powdered sugar about 8 cups
- ½ cup meringue powder
- ½ to ¾ cup water
Instructions
- Print out my Gingerbread House Template and cut out the shapes or design your own house. Set aside. Preheat oven to 350°F.
- Cream butter and sugar in a large bowl of a stand mixer fitted with a paddle attachment. Add the molasses and mix well.½ cup salted butter, 1 cup brown sugar, 1 cup molasses*
- Add the cinnamon, ginger, cloves, salt and 1 cup of the flour, mixing until combined. Continue to add the remaining flour, 1 cup at time, alternating with the water until a thick dough comes together. Be sure to stop and scrape the bottom and sides of the bowl partway through. The dough should be stiff enough for rolling right away, although you can chill it in the fridge for up to 3 days, if desired.2 Tablespoons ground cinnamon, 1 Tablespoon ground ginger, ½ teaspoon ground cloves, 1 teaspoon salt, 6 cups all-purpose flour, ½ cup water
- Roll out the dough on parchment paper to 1/4-inch thickness. This dough tends to stick even to floured counter tops, so parchment paper is pretty much crucial to your success. Be sure to flour the top of the dough and your rolling pin (affiliate link) periodically so it doesn't stick.
- Place the pattern shapes on the gingerbread dough and cut out individual pieces using a pizza cutter for longer lines and a small, sharp knife for smaller shapes like doors or windows. Re-roll the dough scraps as needed until you have cut out all the pieces for your houses. If your dough is 1/4-inch thick, you should have just enough dough for 2 basic houses. Carefully transfer the pieces to baking sheets lined with parchment paper.
- Bake on parchment paper on two to three large baking sheets. Baking time depends on thickness of each piece, but generally the larger roof, front, and back pieces will take about 25 to 30 minutes. Smaller pieces like the side walls and doors will take around 20 minutes. The edges will be lightly browned when done and the pieces may still feel somewhat soft, but will continue to harden as they cool.
- Cool pieces completely before decorating. The gingerbread pieces can be made a week in advance and stored on the counter. Or you can freeze them for 2-3 months and thaw at room temperature before decorating.
Icing
- Combine the powdered sugar and meringue powder in a large bowl. Gradually add the water, mixing on medium-low speed until stiff peaks form, about five minutes. The icing should be pipeable and hold it’s shape.2 pounds powdered sugar, ½ cup meringue powder, ½ to ¾ cup water
Assembly
- Cover a sturdy board or surface with aluminum foil. "Glue" the front, sides, and back of the house together by piping thick lines of icing onto the pieces and holding them in place, propping them with canned goods if needed until the frosting sets, usually within just a few minutes. This is usually enough to continue decorating. The icing will continue to harden overnight.
- Add the roof after the walls have set up a bit and hold it in place for a couple of minutes until it seems solid. It’s best to wait 10-20 minutes for the house to set up before proceeding with decorating.
- Once the house seems fairly sturdy, go ahead and decorate with remaining icing and candy.
- Display your finished house!
Notes
- *For lighter gingerbread, use ⅓ cup light corn syrup, ⅓ cup molasses, and ⅓ cup honey in place of the full 1 cup of molasses. For the lightest possible color, use all corn syrup instead of molasses and honey.
- Meringue powder alternative: If meringue powder isn’t available, omit it and the water and replace with 6 egg whites.
- Yields 1-2 houses


I absolutely LOVE this! It’s so creative and really, really cute. Great instructions too.
Sharing the eyeball house on FB Gingerbread Headquarters Oct 11th! Love all your houses but the eyeball house is my fave!
Looks AWESOME! How did you get the licorice trees to stand up???
This really was so much fun to make! You wrap the trees in wire and just “glue” them down with the frosting. You can put them on a piece of gingerbread or graham cracker or straight on to the surface you are using. If your trees are bigger and too heavy, using a hot glue gun will help. Let me know if you make one! I would love to see it!