
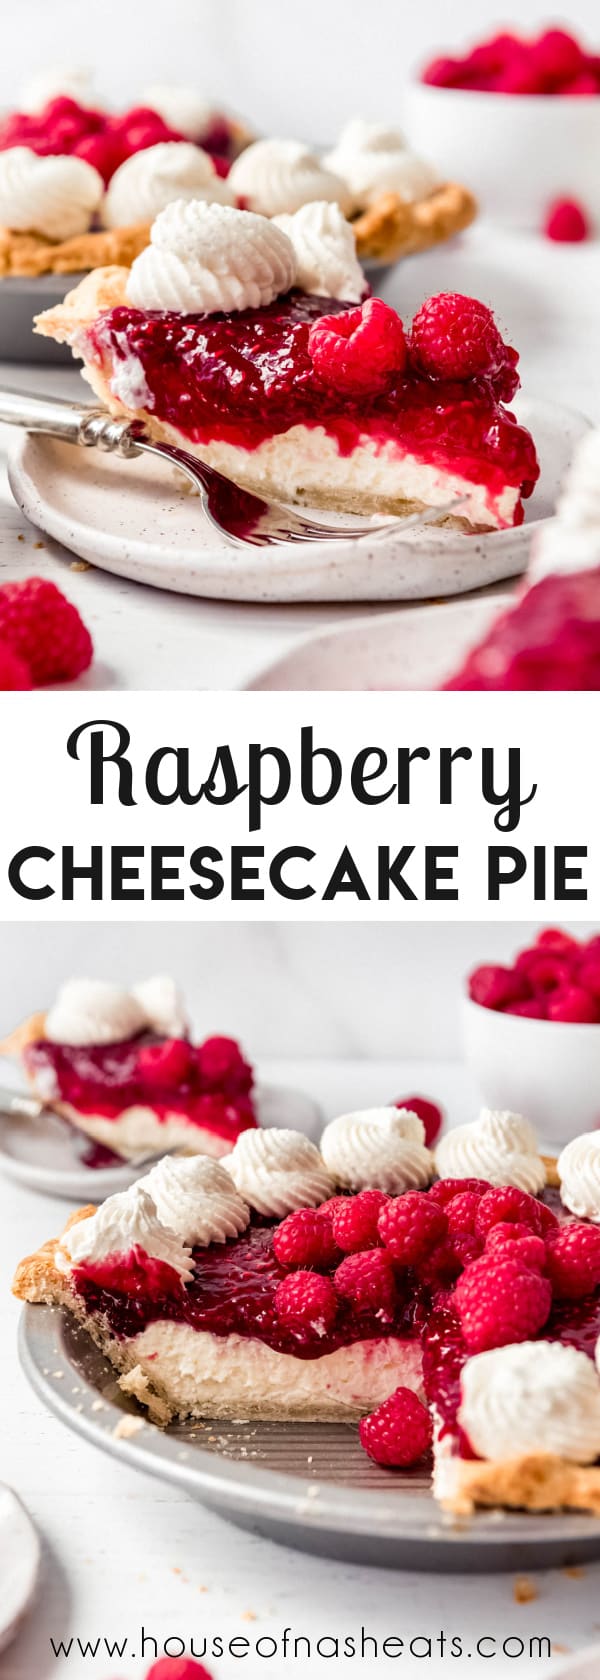
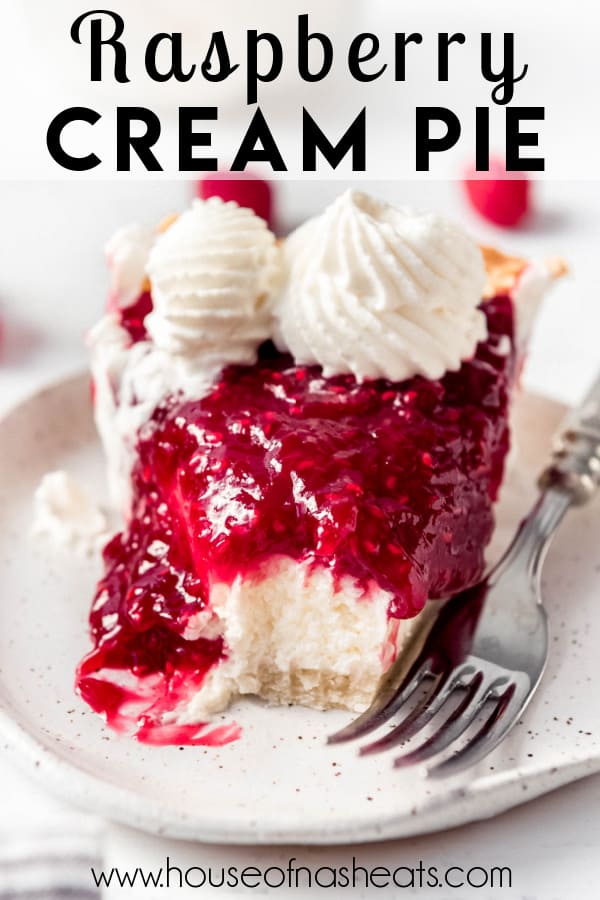
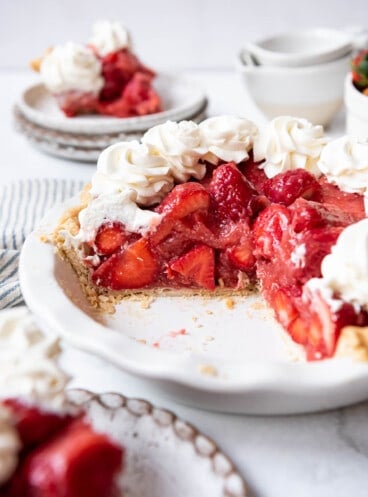
Raspberry Cream Pie has layers of sweet cream cheese filling underneath a sweet-tart raspberry jam topping, tucked into a flaky, buttery pie crust with whipped cream on top! It’s perfect all year round and can be made with fresh or frozen raspberries!
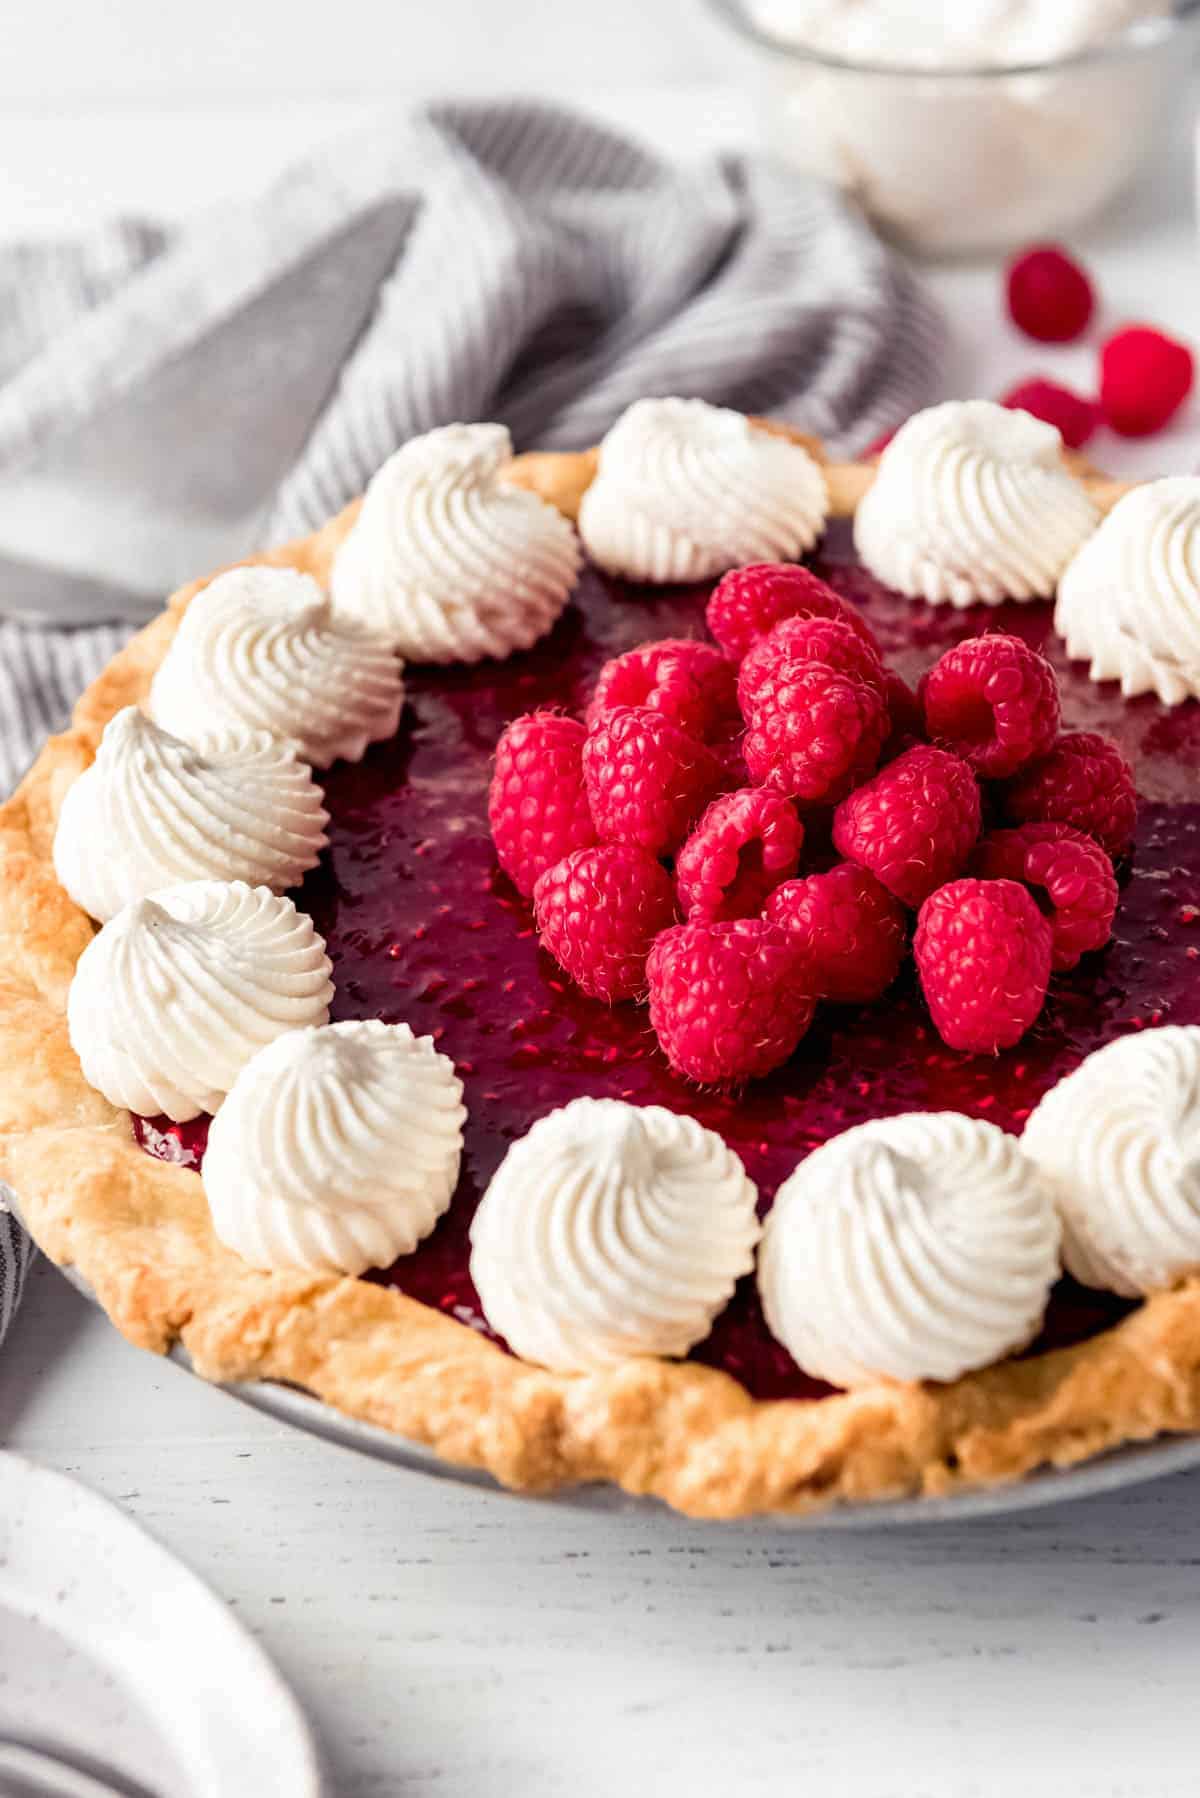
Table of Contents
My friend Jana brought this divine raspberry cream pie to our annual Pi Day celebration this year. It, along with my No-Bake Oreo Pie, were the standouts from over a dozen options that were available to choose from, which is definitely a testament to how popular this pie was among our friends.
One of my favorite bakery cafes in Utah, Kneaders, actually makes a raspberry cream pie just like this that sells out all the time, so it’s no surprise that it was a hit. If you love Kneaders like we do, you might also want to try my cream cheese brownies, which are another recreation of one of my favorite desserts there. Or my Turkey Bacon Avocado Sandwich which has a copycat Kneaders sauce. I’m kind of obsessed with that place and it’s always at the top of my list whenever I go visit family who live in Utah.
We love fresh raspberry desserts and have shared a bunch of them on here. Some of the most popular recipes with readers are our Raspberry Macarons, Raspberry Pretzel Salad, and Raspberry Chocolate Tart.
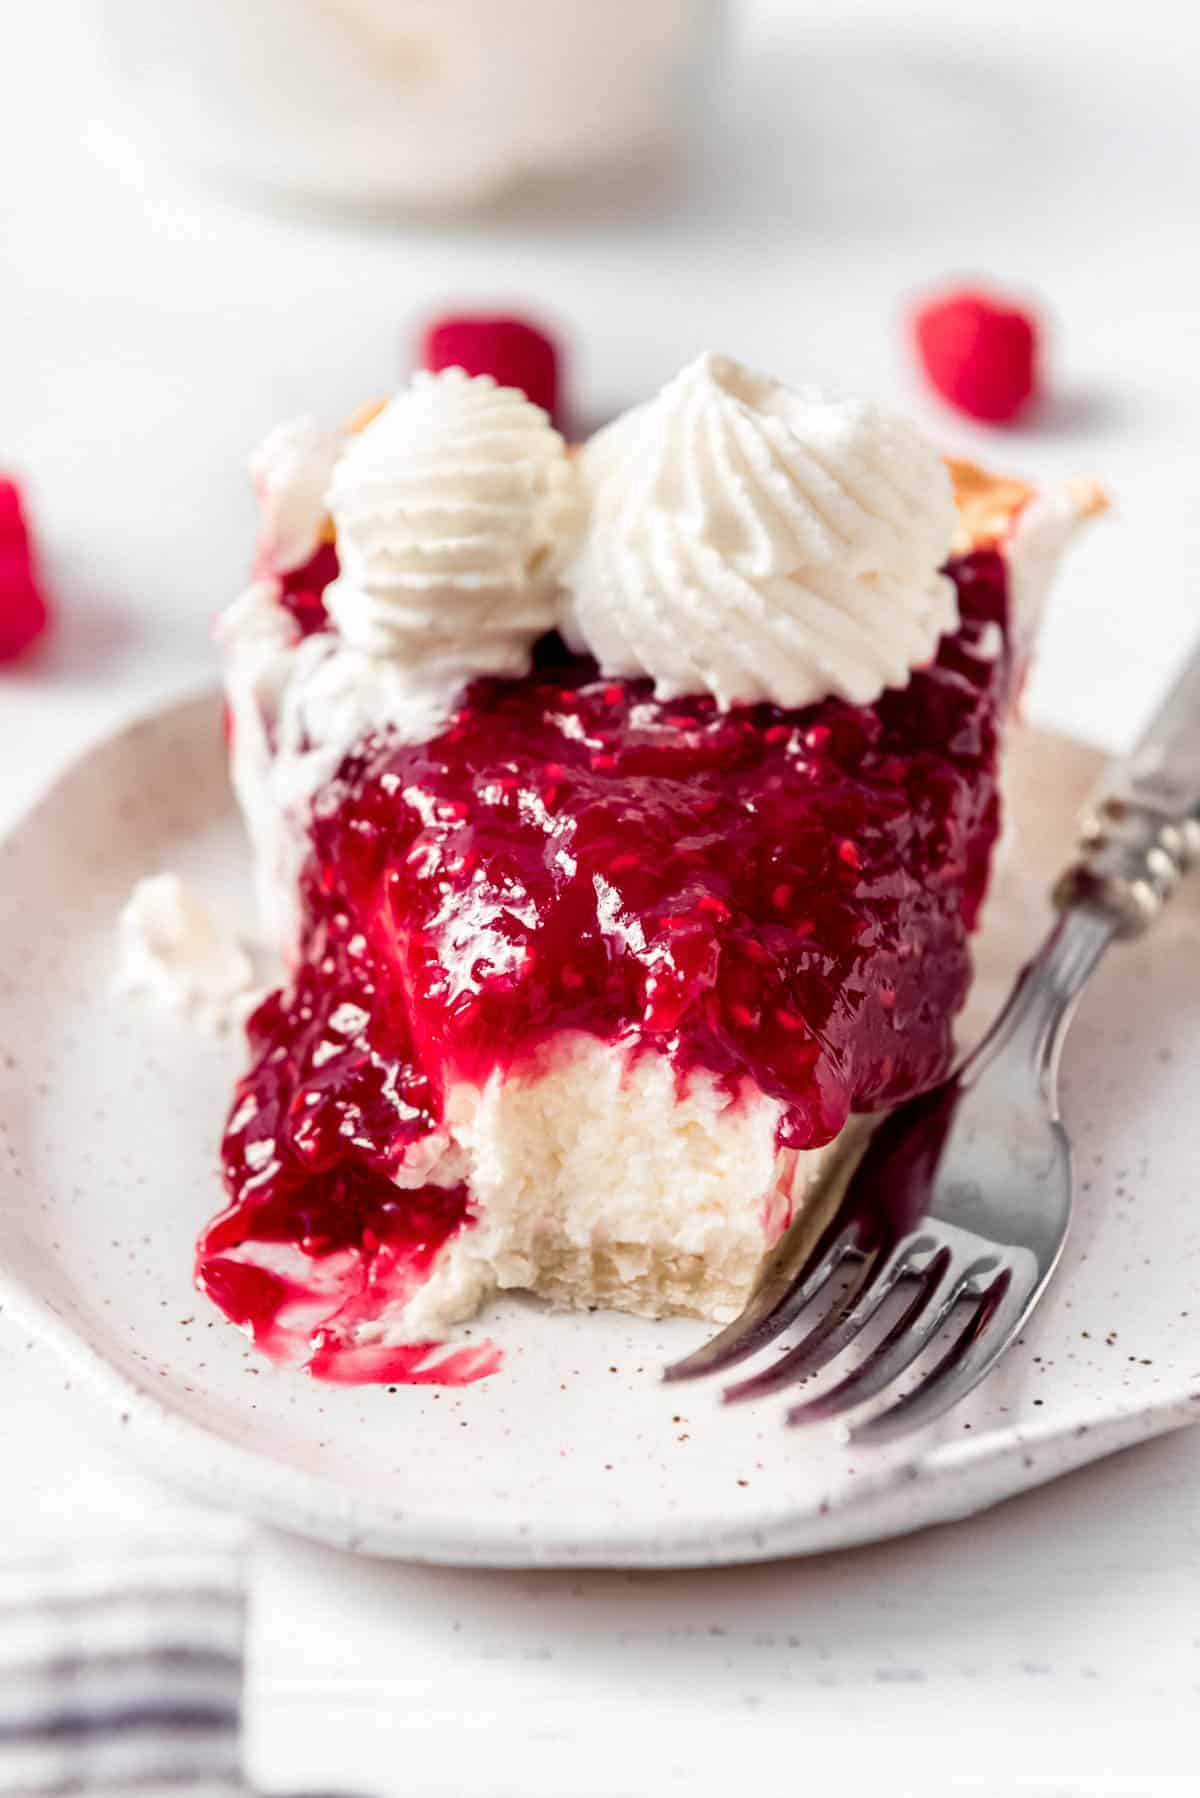
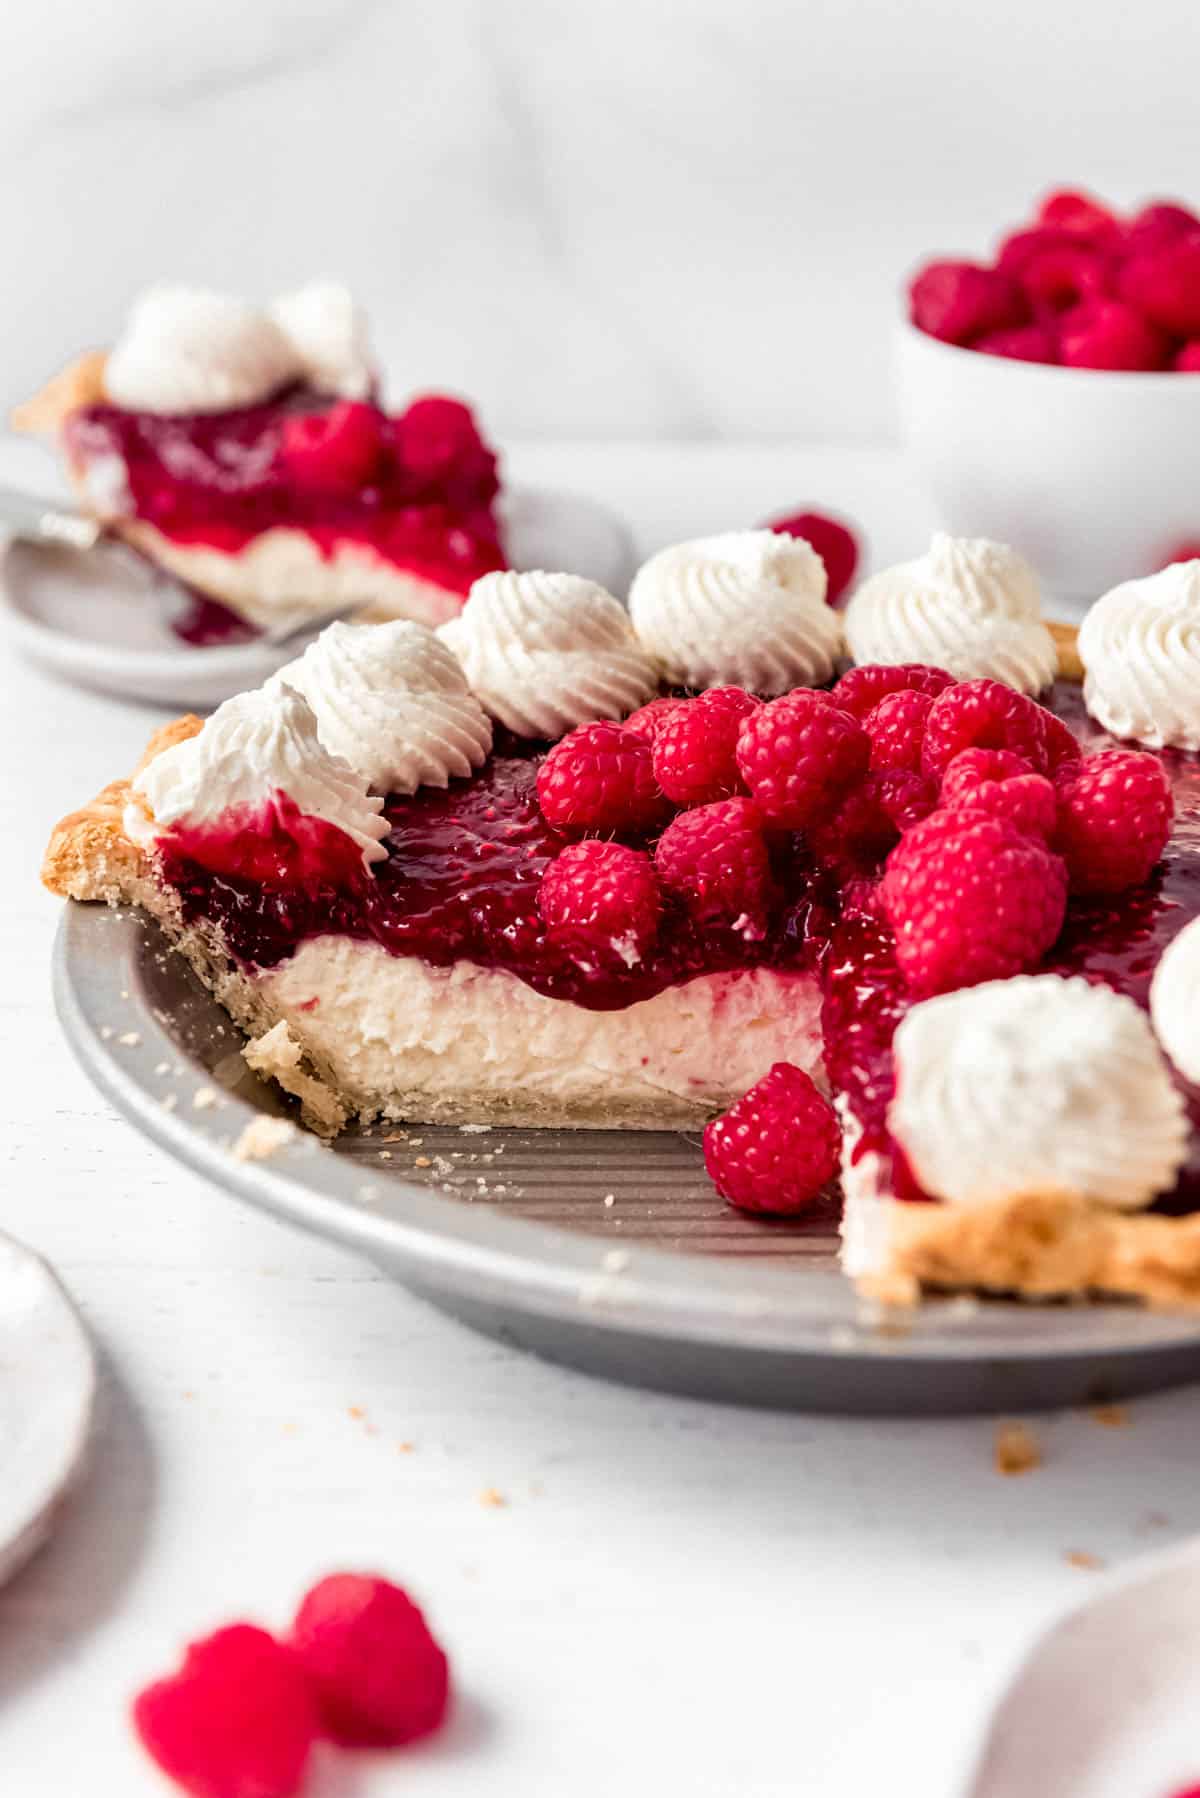
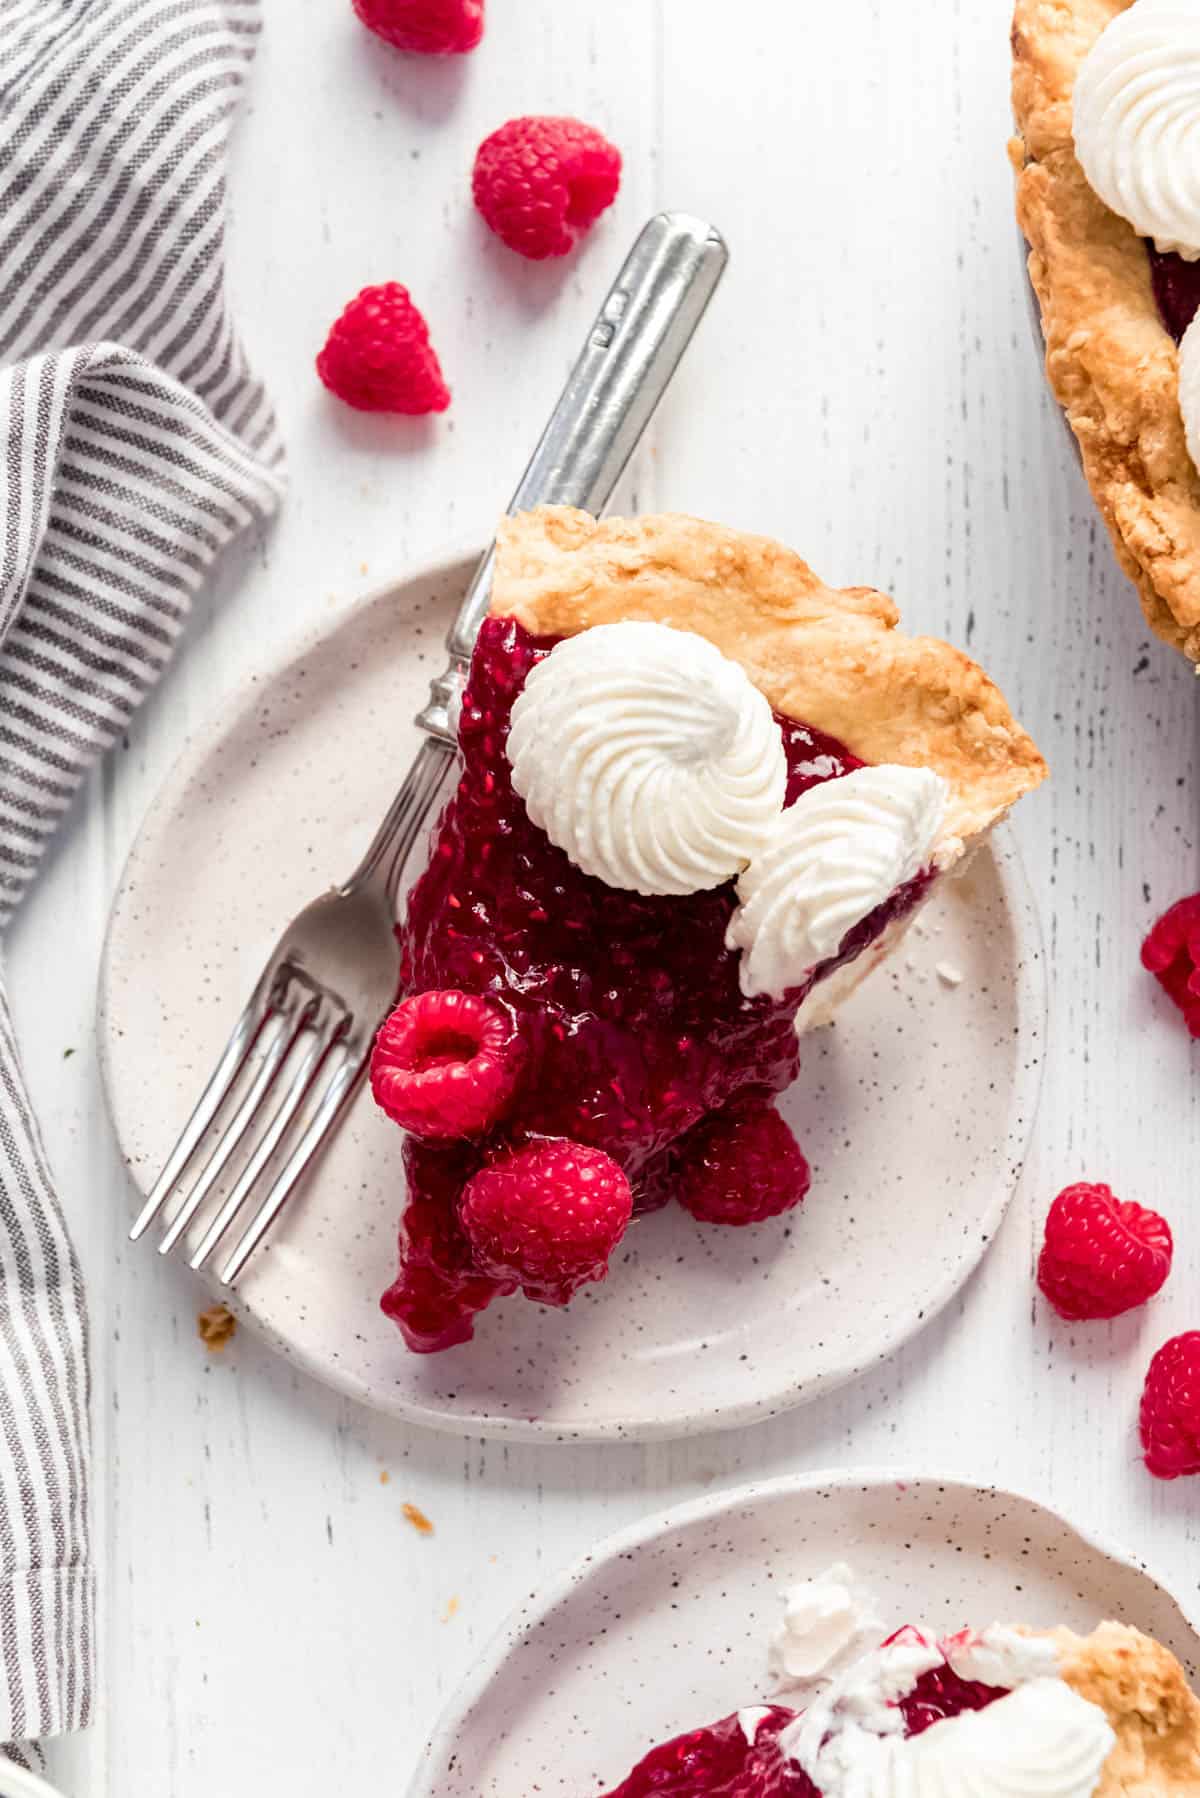
The cream cheese filling is the perfect compliment to the punchy, in-your-faceness of the raspberry jam-like layer on top. It’s kind of no-bake cheesecake meets raspberry pie kind of hybrid situation that’s pretty much irresistible.
I can definitely see how people would love this dessert just as much with a graham cracker crust as a traditional pie crust, so feel free to go with whichever you prefer most.
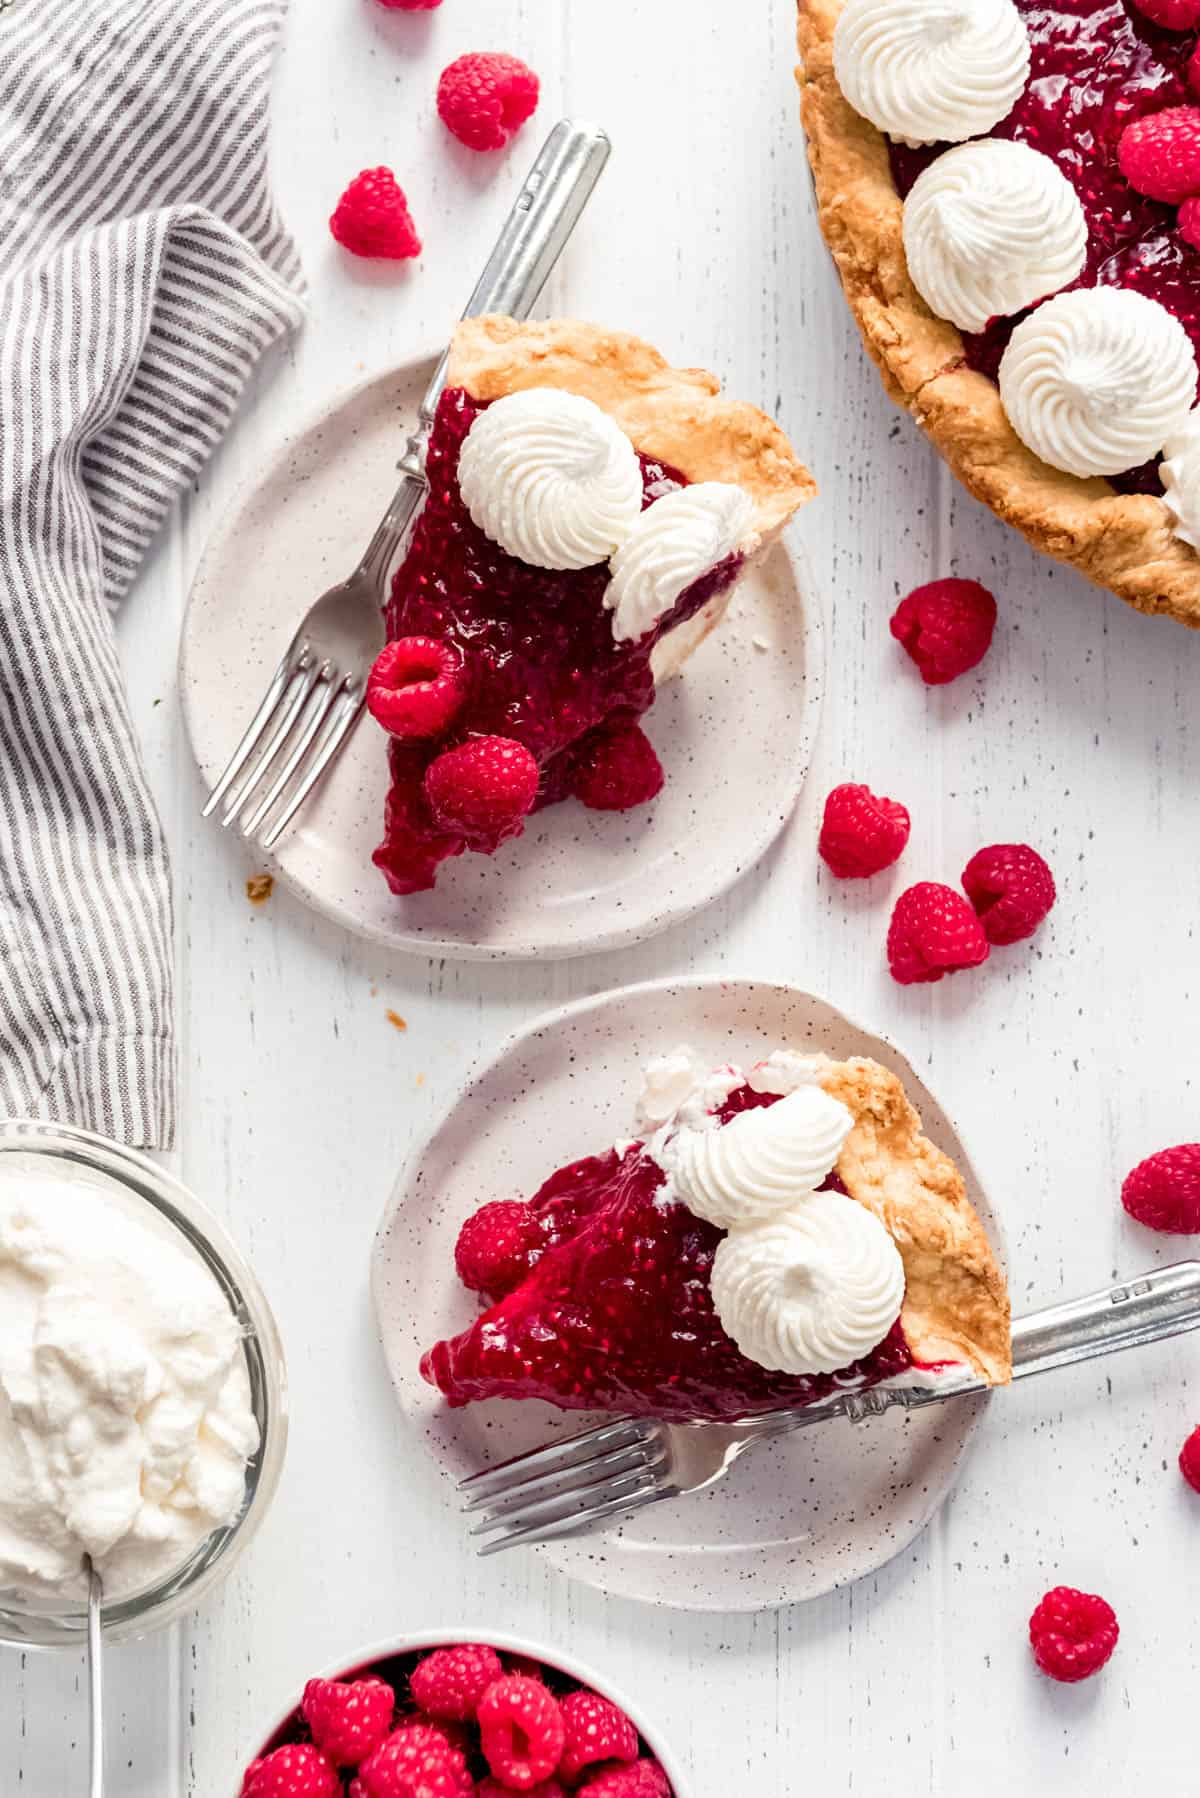
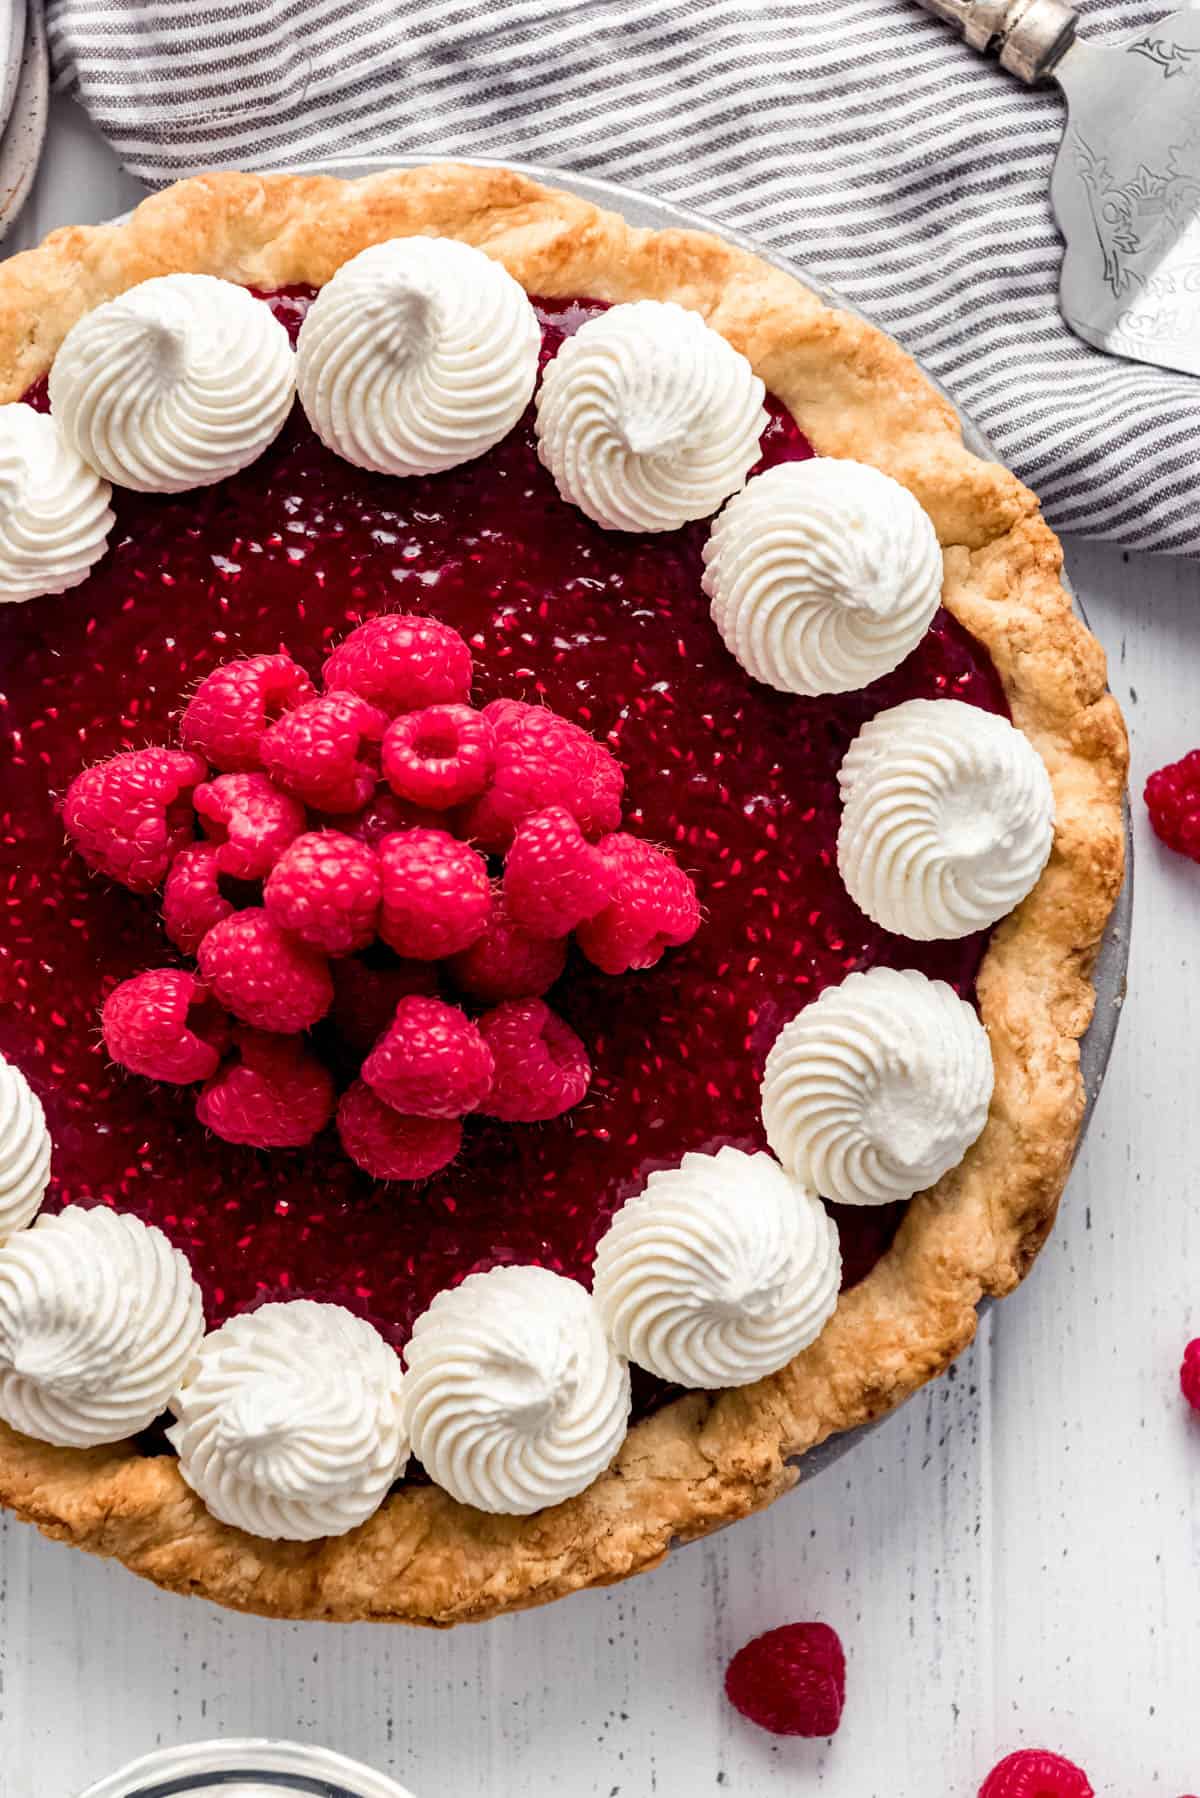
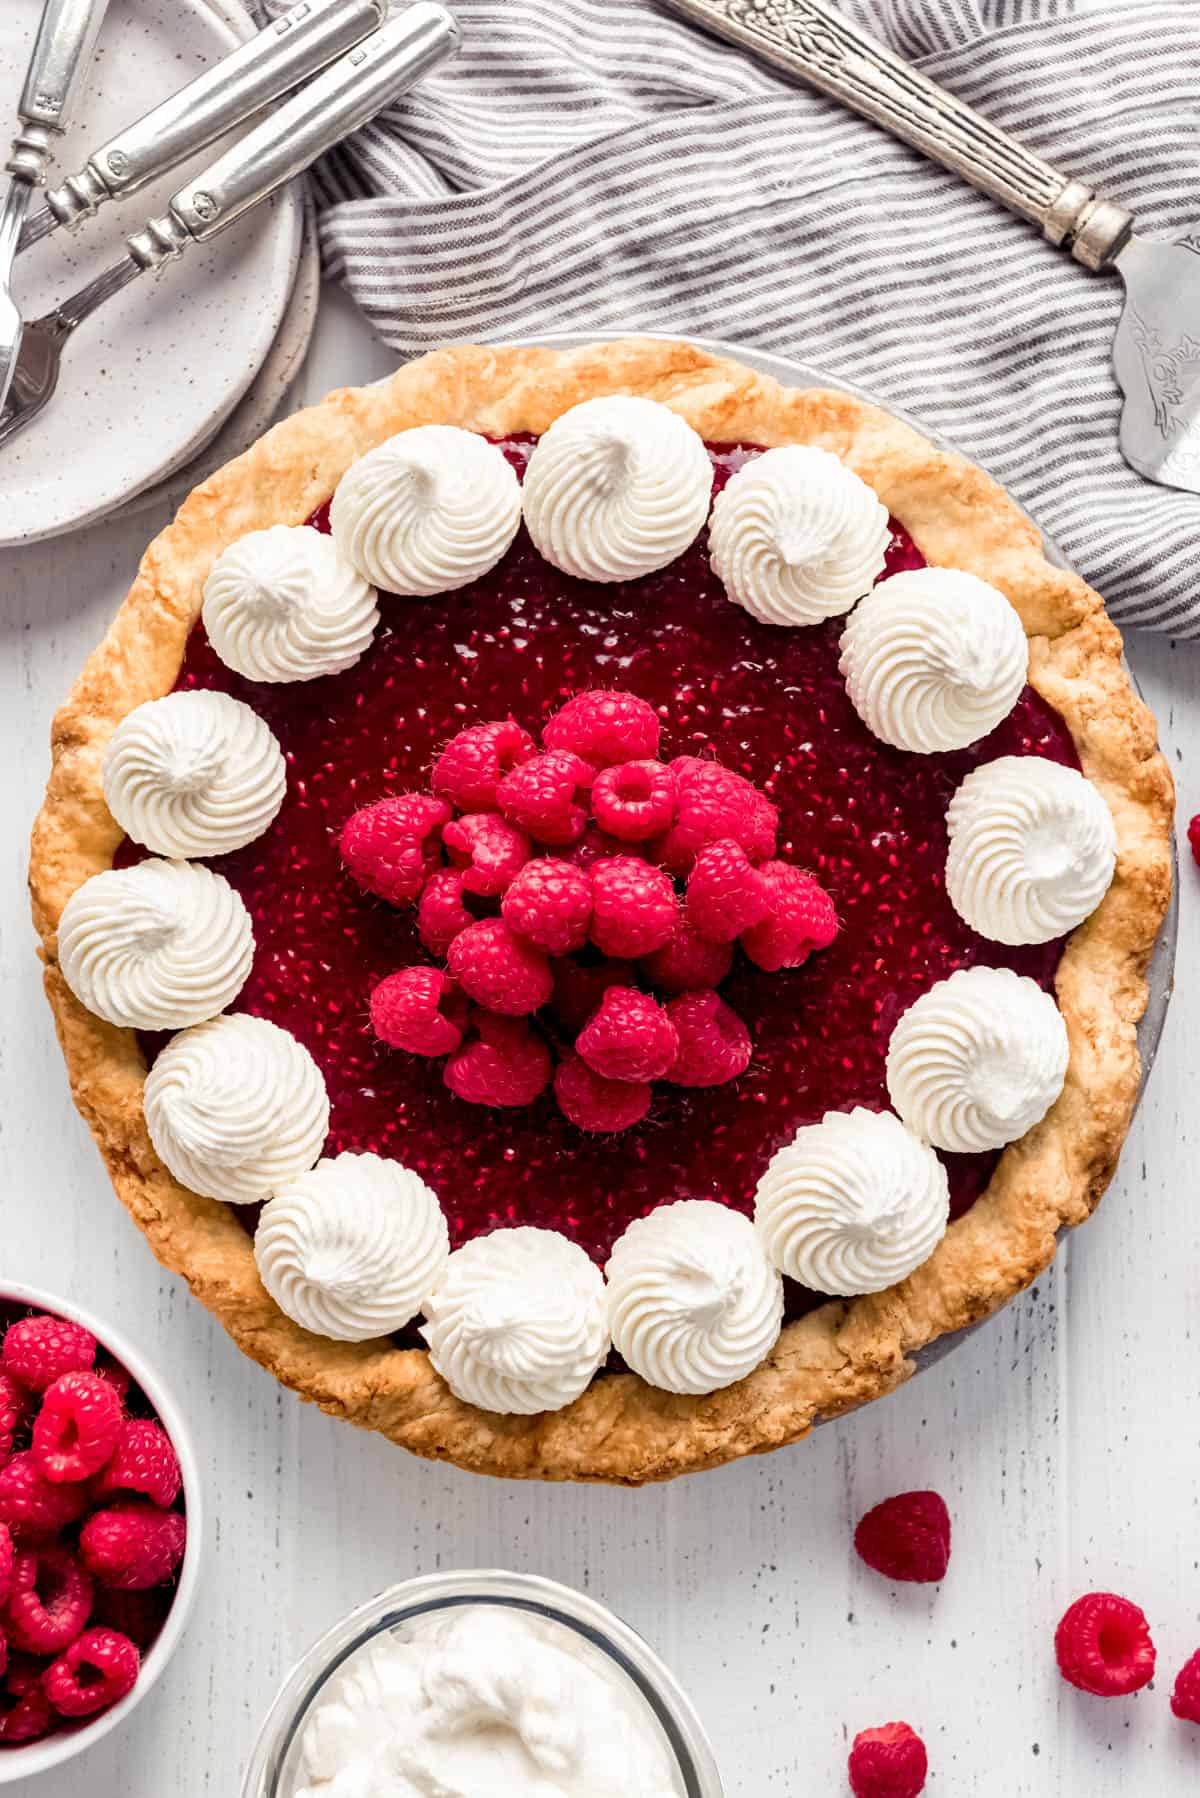
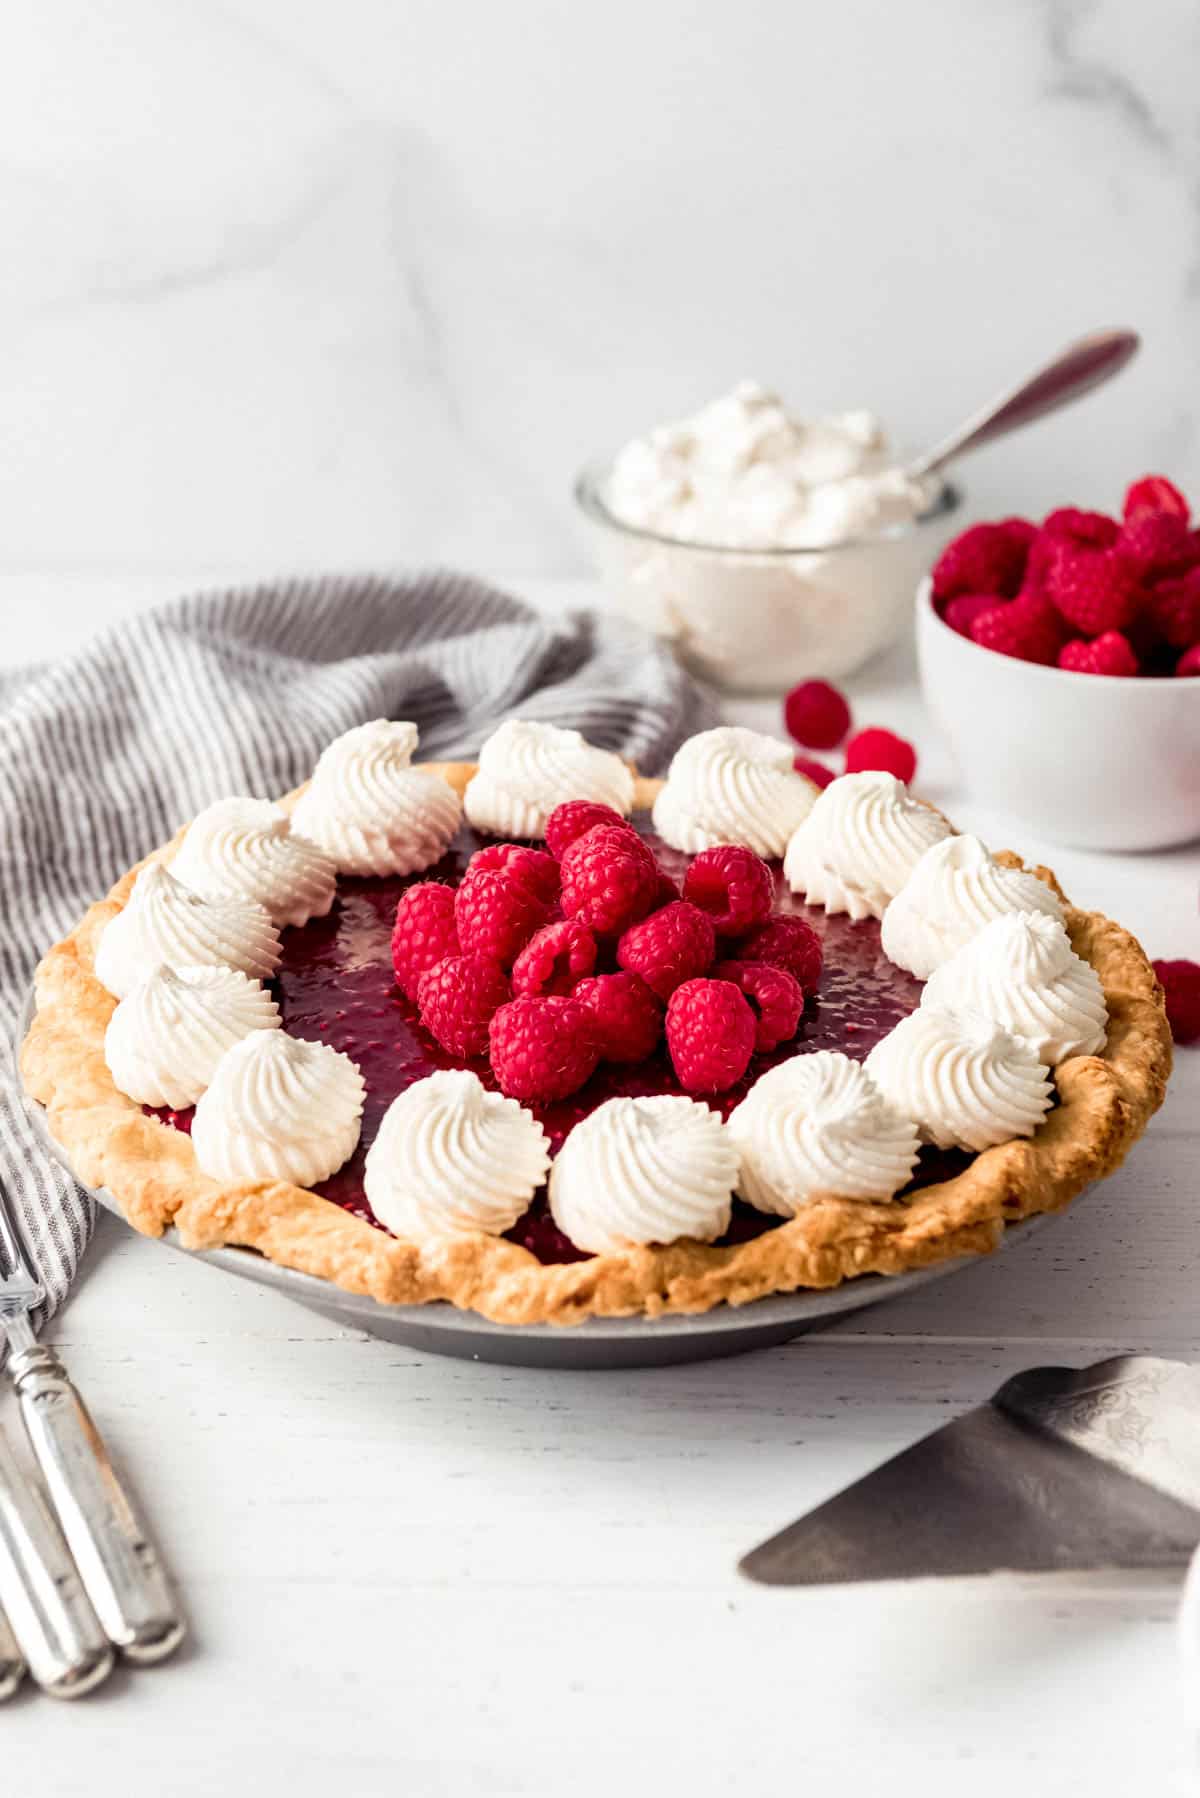
The recipe itself is pretty simple, although it takes a bit of prep work to blind-bake the pie crust, then let the filling set while making and cooling the raspberry layer. The good news is that the pie keeps well in the fridge and most of the work can be done in advance. Then when you are ready to serve, you can pipe on whipped cream swirls and pile some fresh raspberries in the center of the pie for visual impact.
This pie would be perfect in your Thanksgiving pie line-up this year for something new and different that will have everybody talking! But it is also a great summer pie since it is delicious served chilled.
Recipe Ingredients
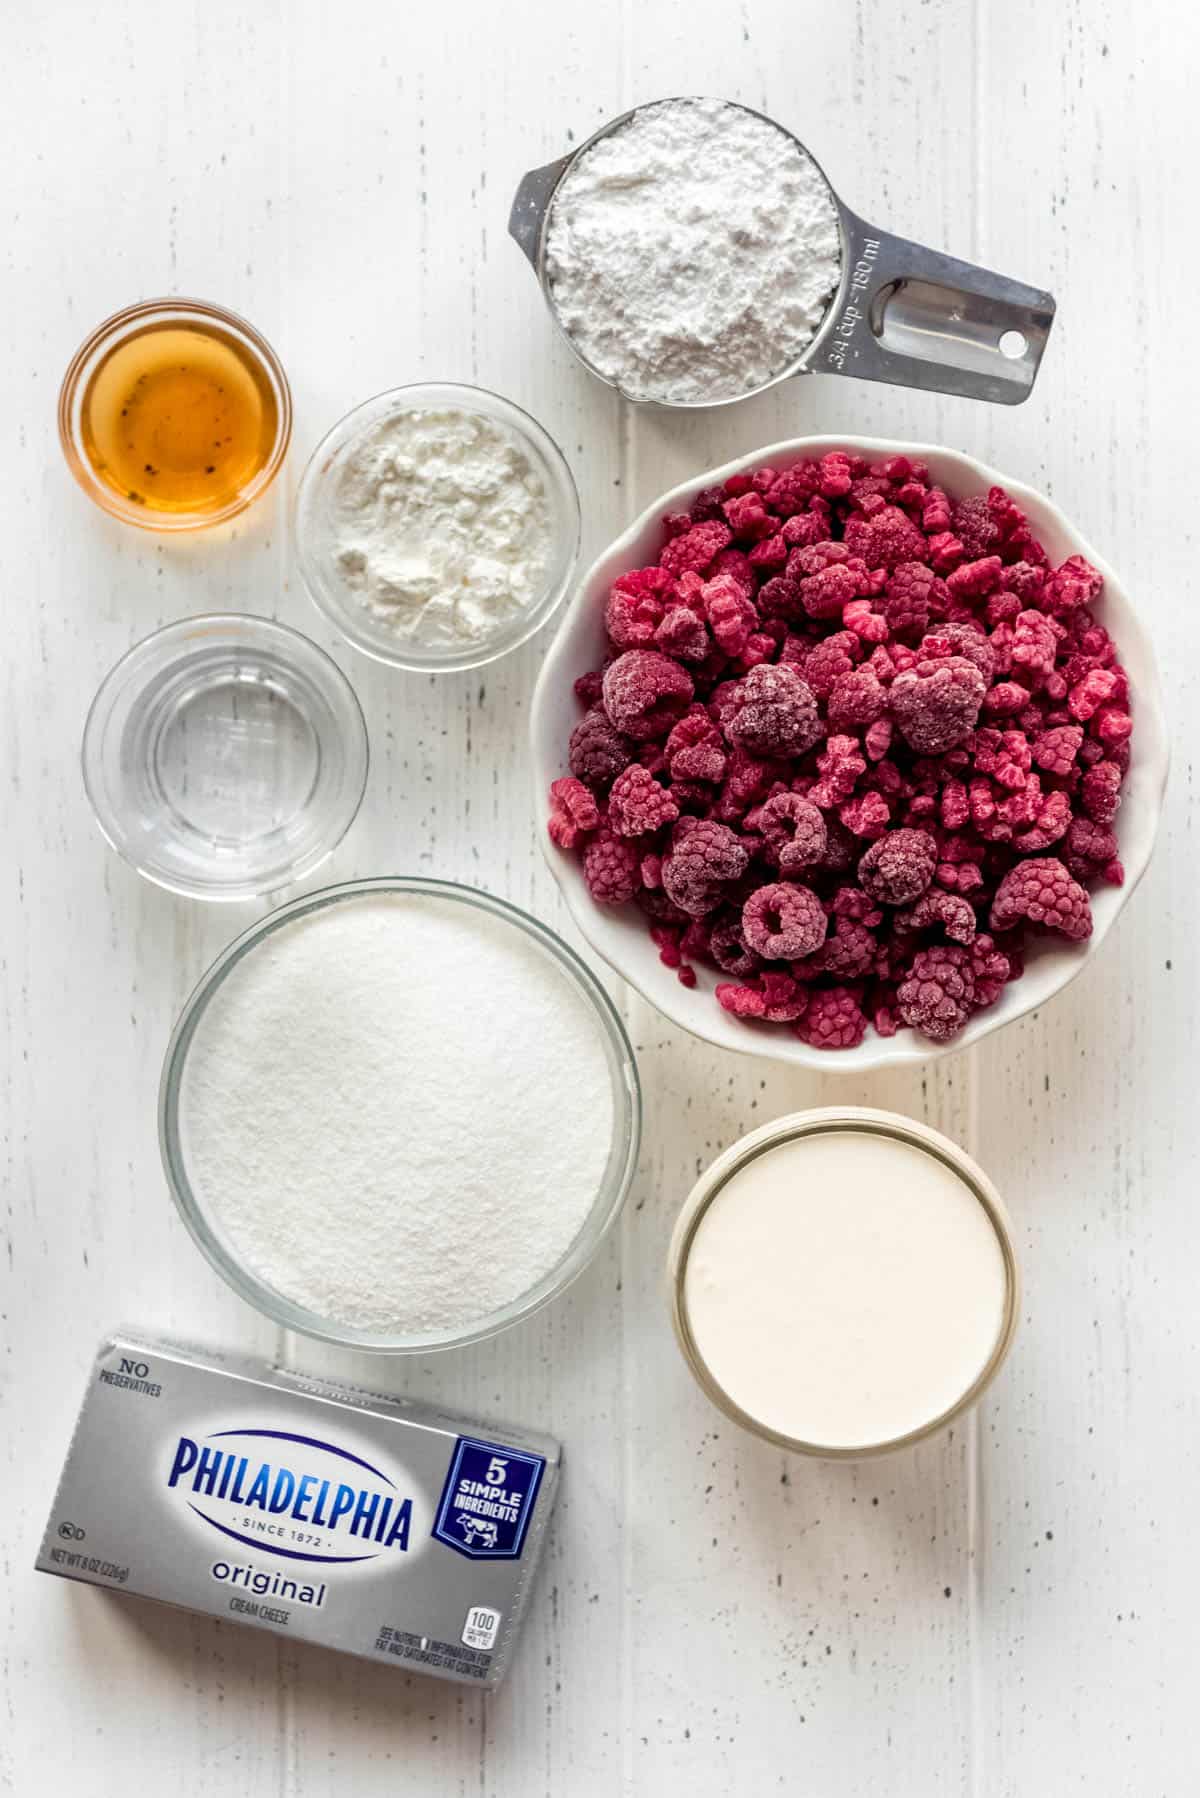
- Pie Crust: I always use my favorite homemade pie crust recipe which has a combination of butter and shortening for the best flavor and texture. It makes enough for 2 crusts, but you can always freeze on to have on hand for the future.
- Raspberries: I actually prefer using frozen raspberries to make the raspberry jam layer that goes on top of this pie. Frozen raspberries are often less expensive and picked at the peak of freshness, so they work great. I will save my fresh raspberries to decorate the top of the pie if I want to be all fancy.
- Cream cheese: I recommend using full fat cream cheese for the best flavor and texture.
- Sugar: A little sugar sweetens both the cream cheese layer as well as the raspberry jam layer on top, without making either of them overly sweet.
- Cornstarch: This ingredient helps thicken the raspberry layer so it is more like a jam than a syrup.
- Vanilla extract: I love using my homemade vanilla extract when I’m baking. It adds such great flavor and depth to baked goods.
- Heavy cream: This is used both in the cream cheese layer, as well as for decorating the top of the raspberry cream pie before serving.
How to Make Raspberry Cream Pie
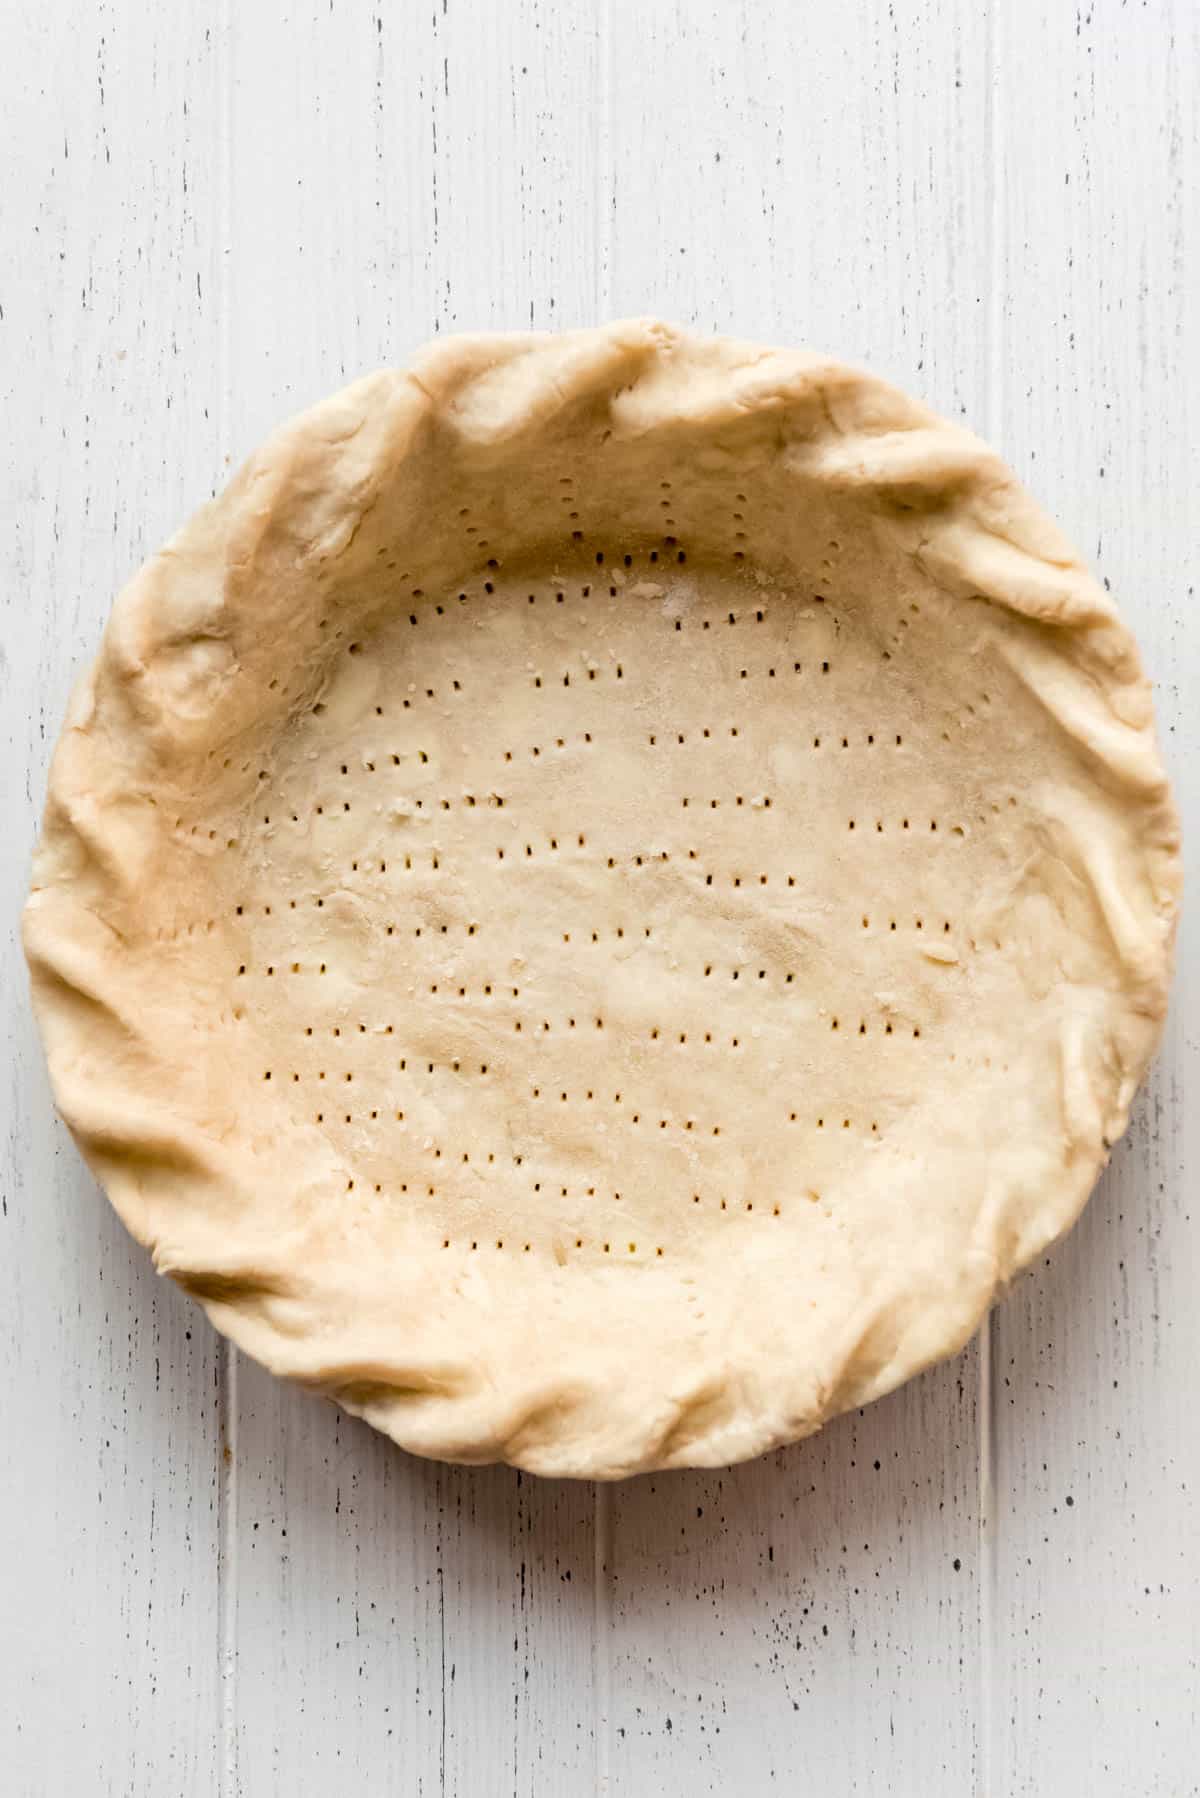
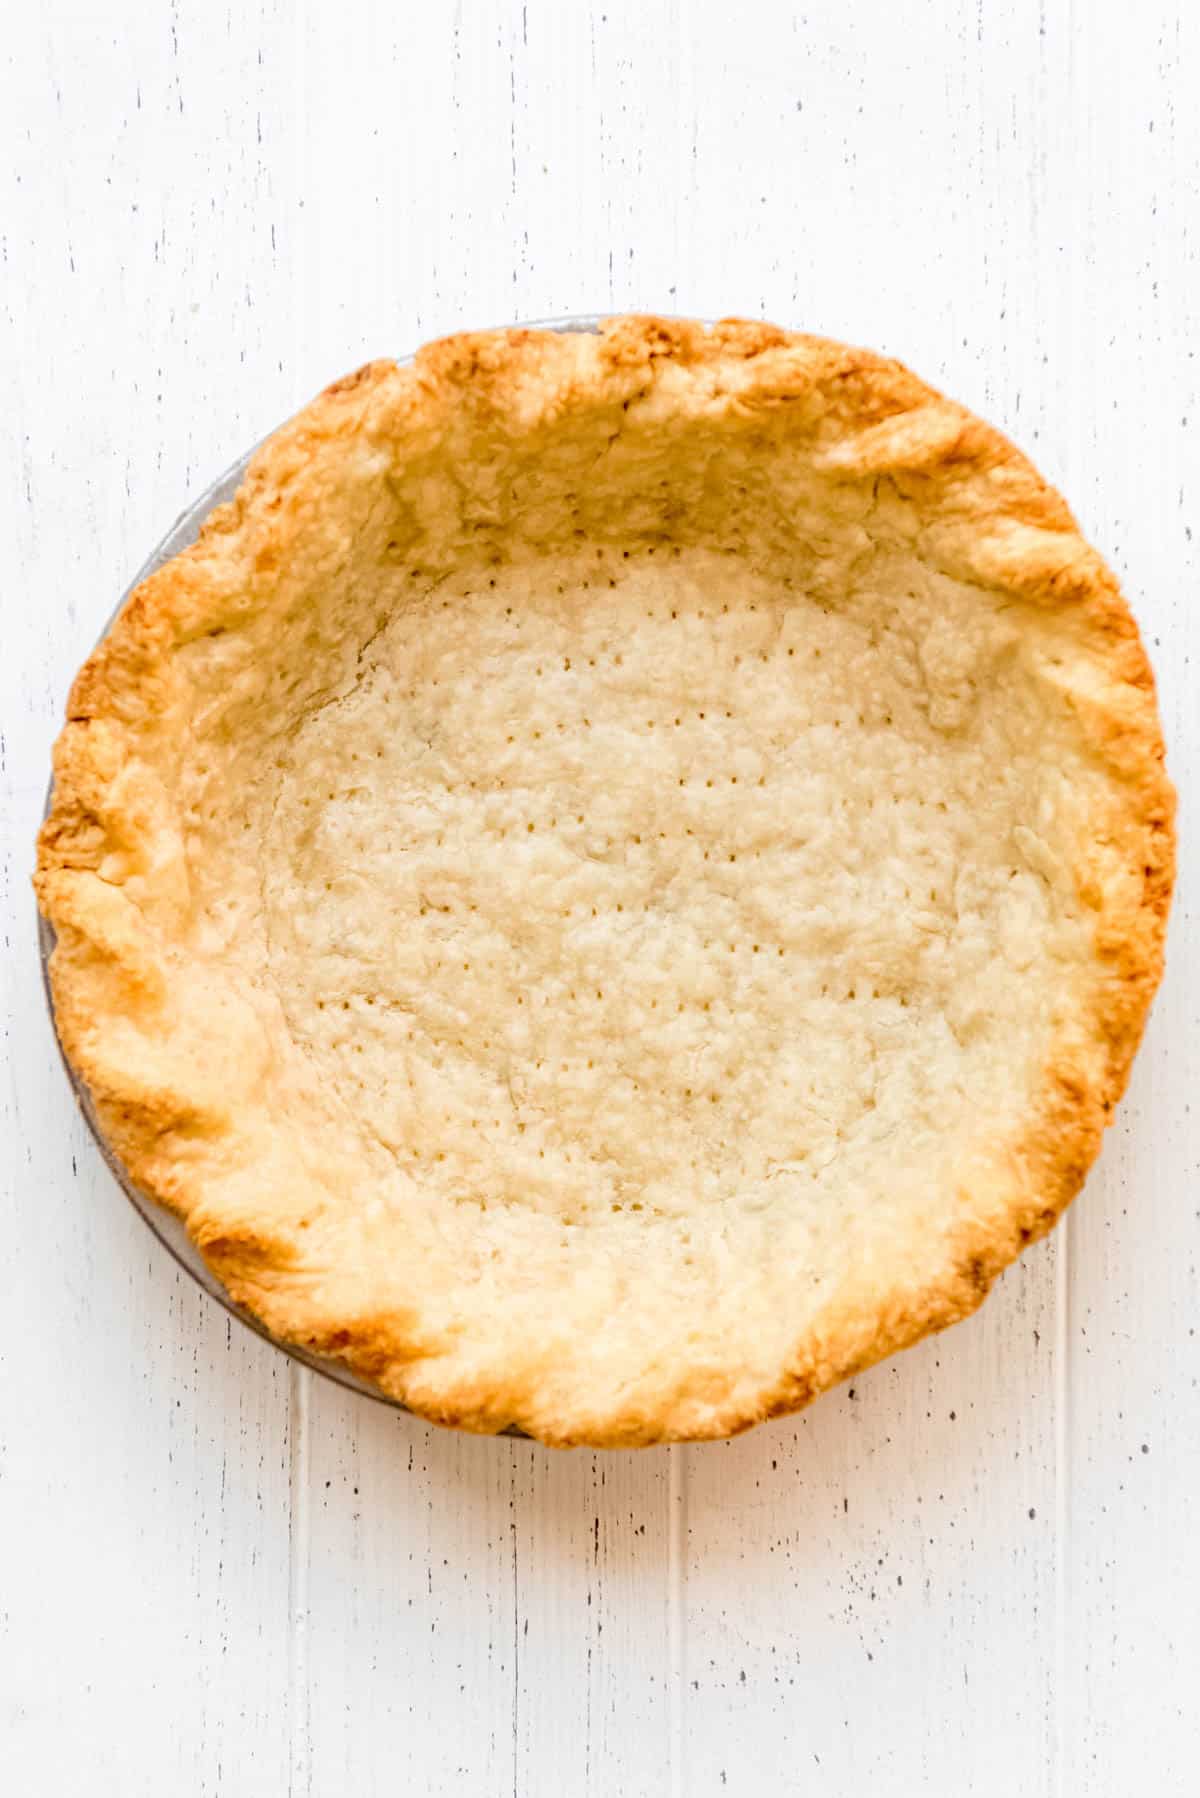
- Blind-bake a pie crust: Start out by making and rolling out your favorite pie crust recipe. Lay it in the bottom of a 9-inch pie plate (affiliate link) and dock (a fancy baking term for “poke”) the bottom and edges with a fork to prevent bubbles. Line the pie crust with parchment paper or aluminum foil and fill with ceramic pie weights, dried beans, rice, sugar, or even pennies. Parbake the crust for 15-18 minutes at 400 degrees F, then remove the liner and weights and return the crust to the oven to finish baking all the way for another 15 minutes or so until golden brown and fully baked.
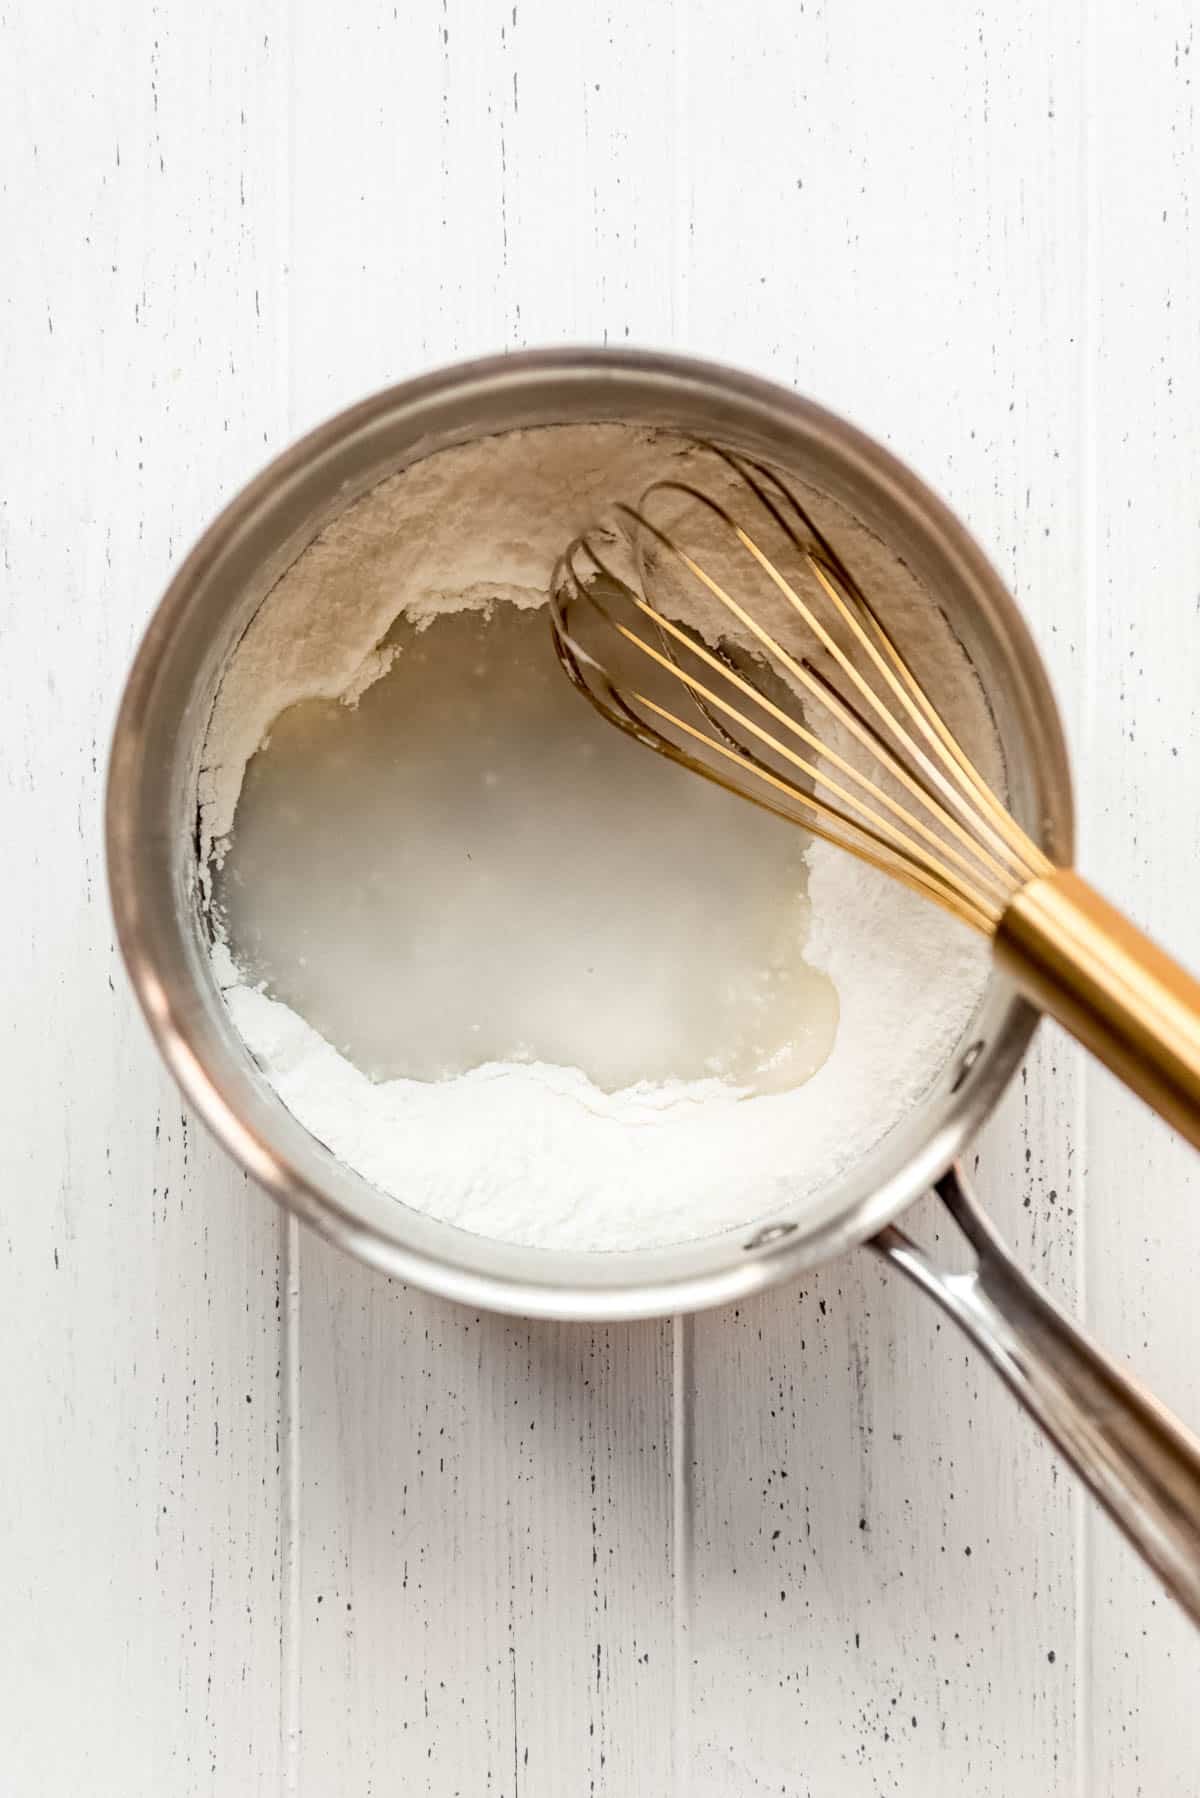
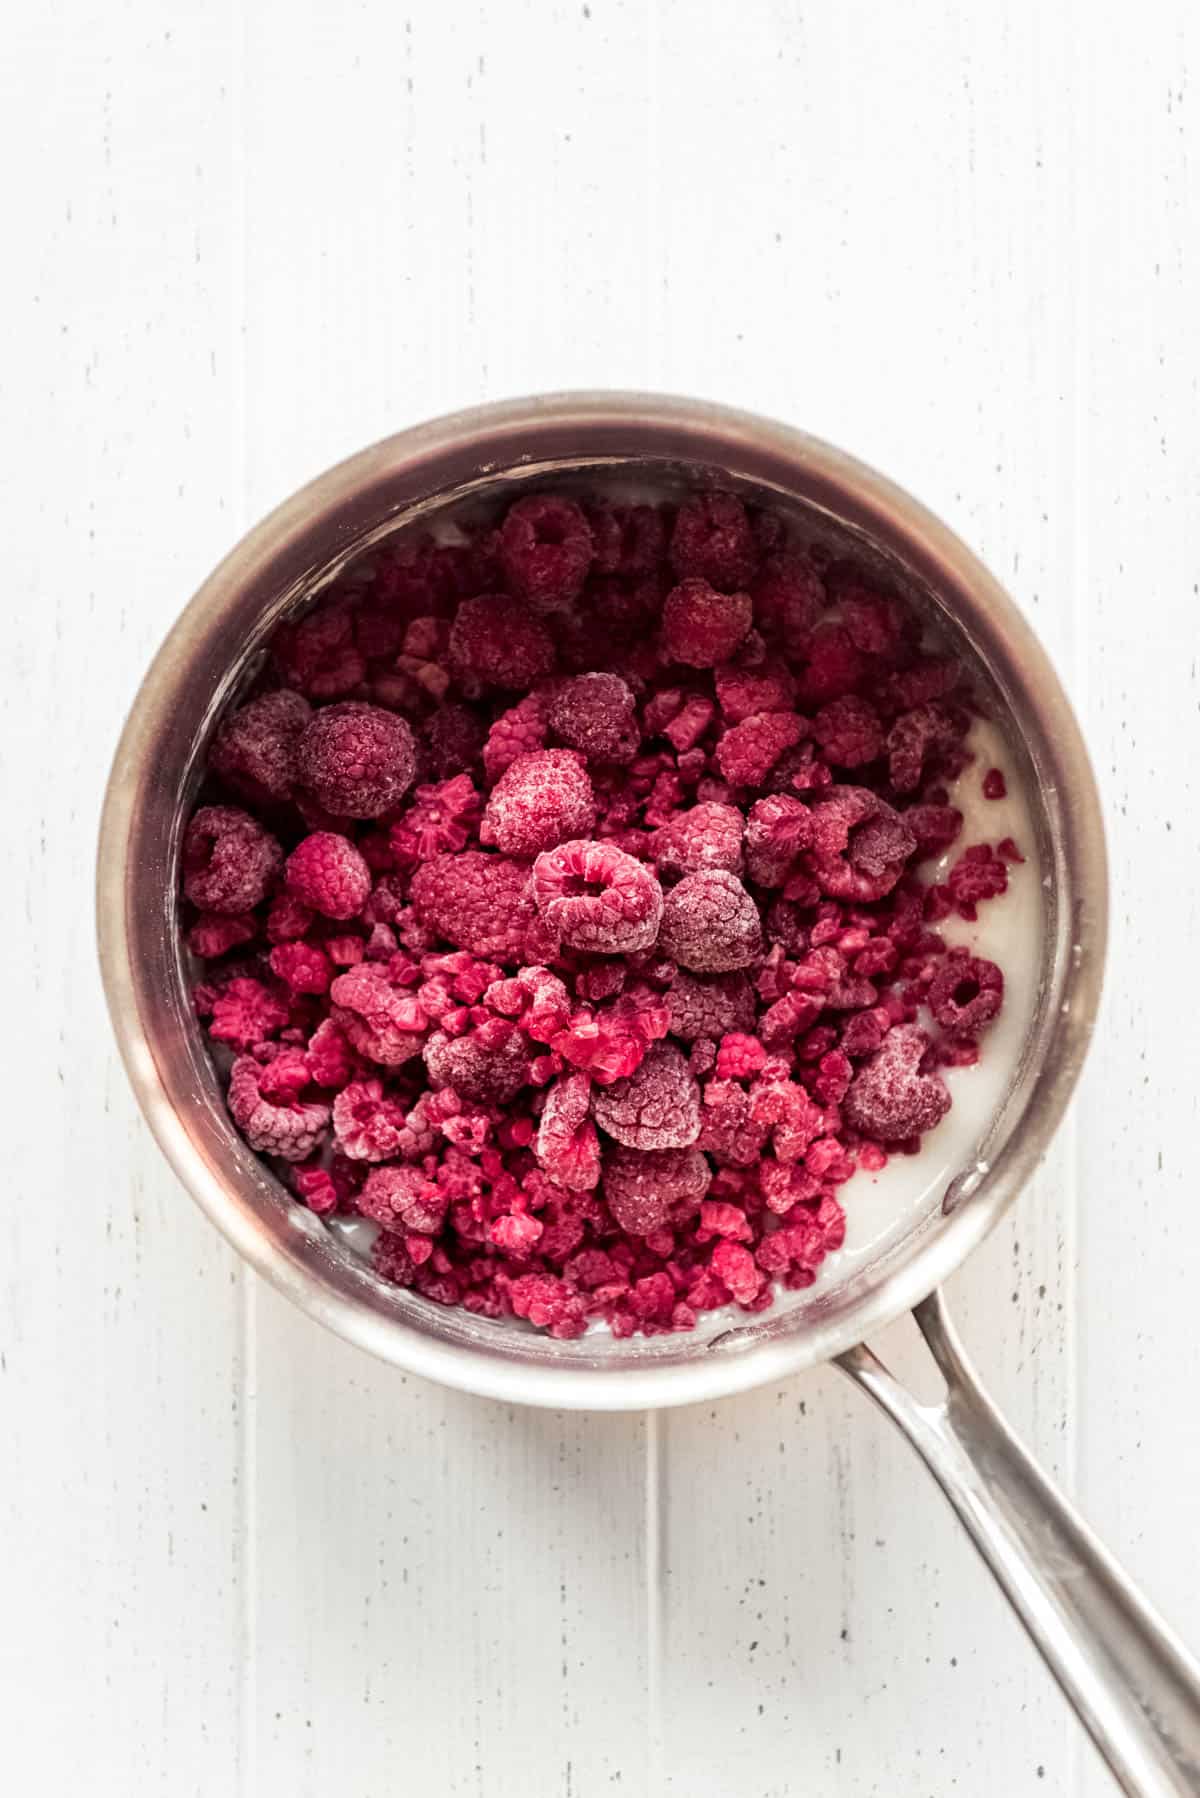
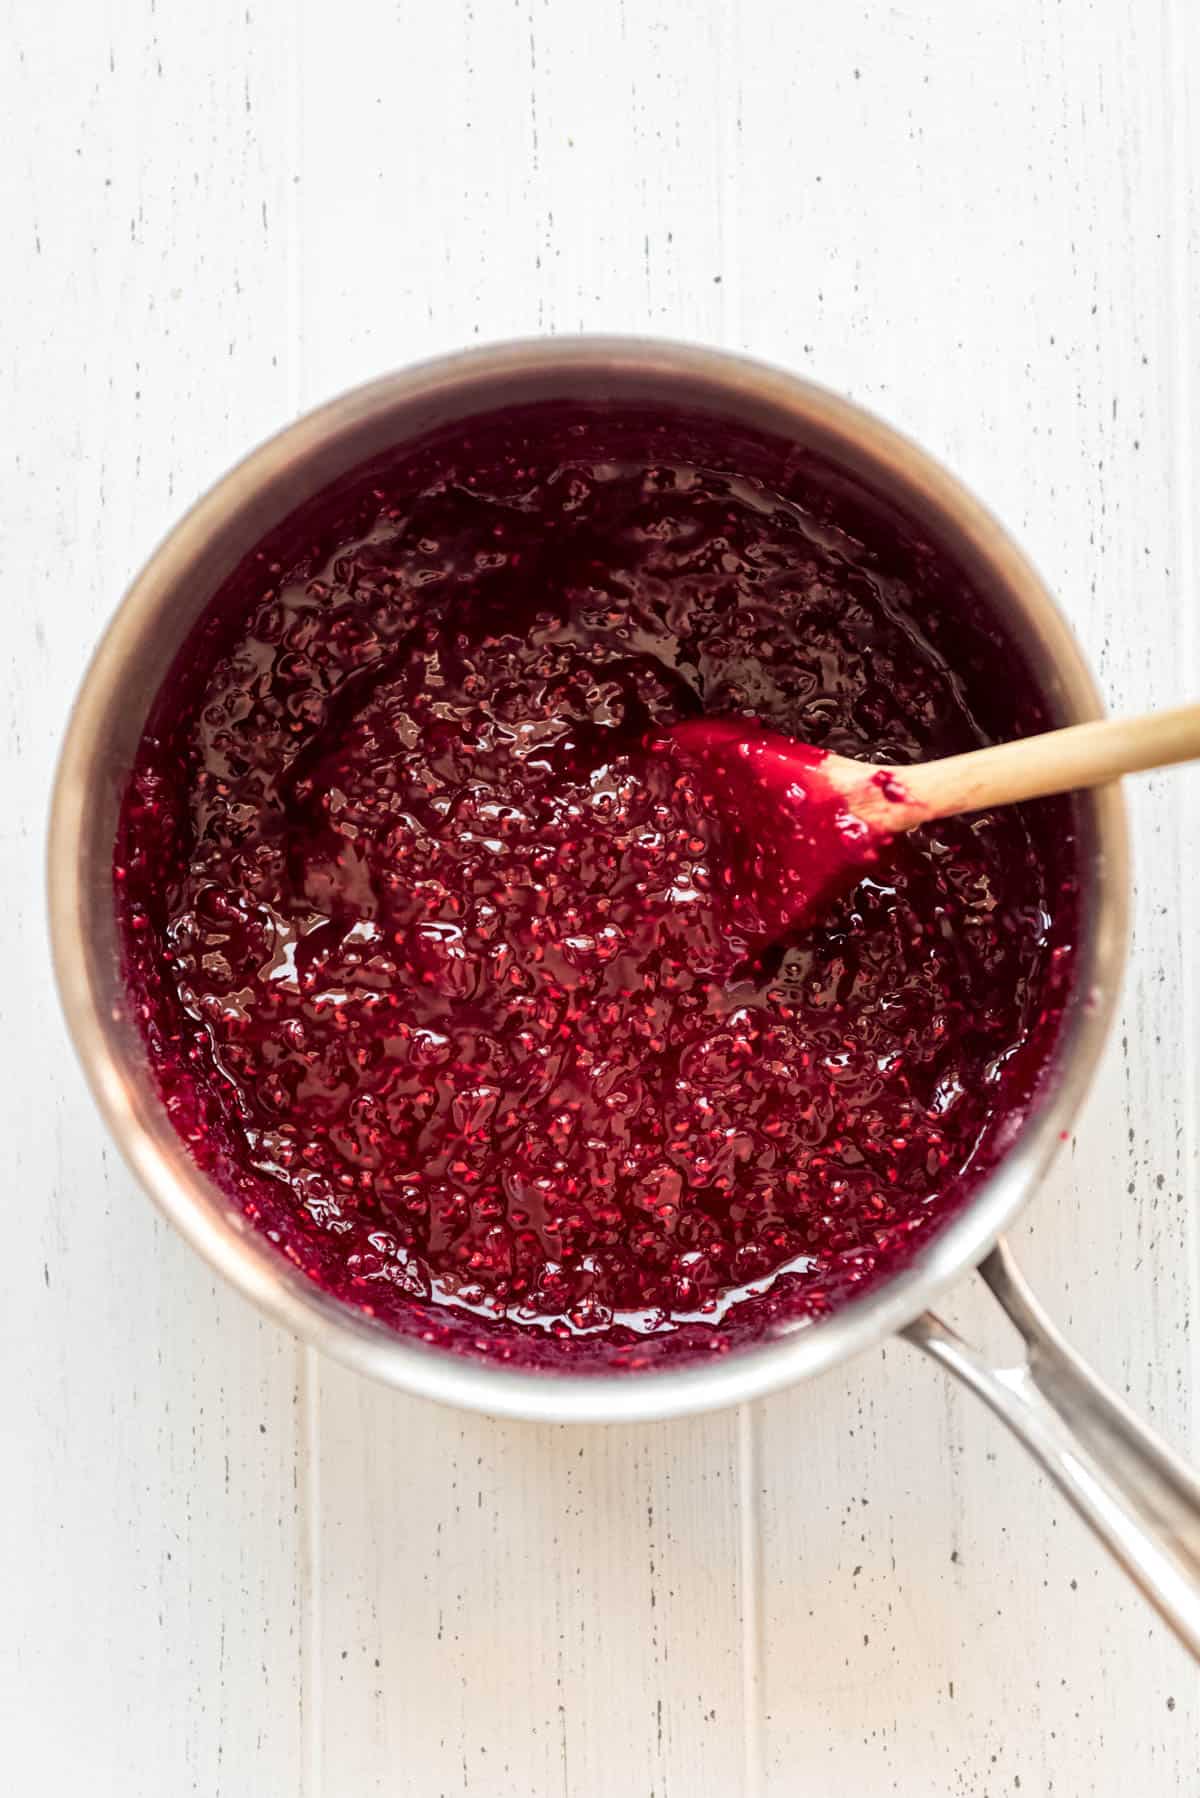
- Make the raspberry layer: While the crust cools, make the raspberry layer by whisking sugar and cornstarch together in a medium saucepan. Add water and frozen raspberries (no need to thaw), then cook over medium heat until the raspberries break down and the ingredients thicken a bit. You will know it’s down when the color goes from cloudy to translucent and the raspberry mixture has thickened somewhat. Set this aside in the fridge to chill for a while. It will continue to thicken more as it cools.
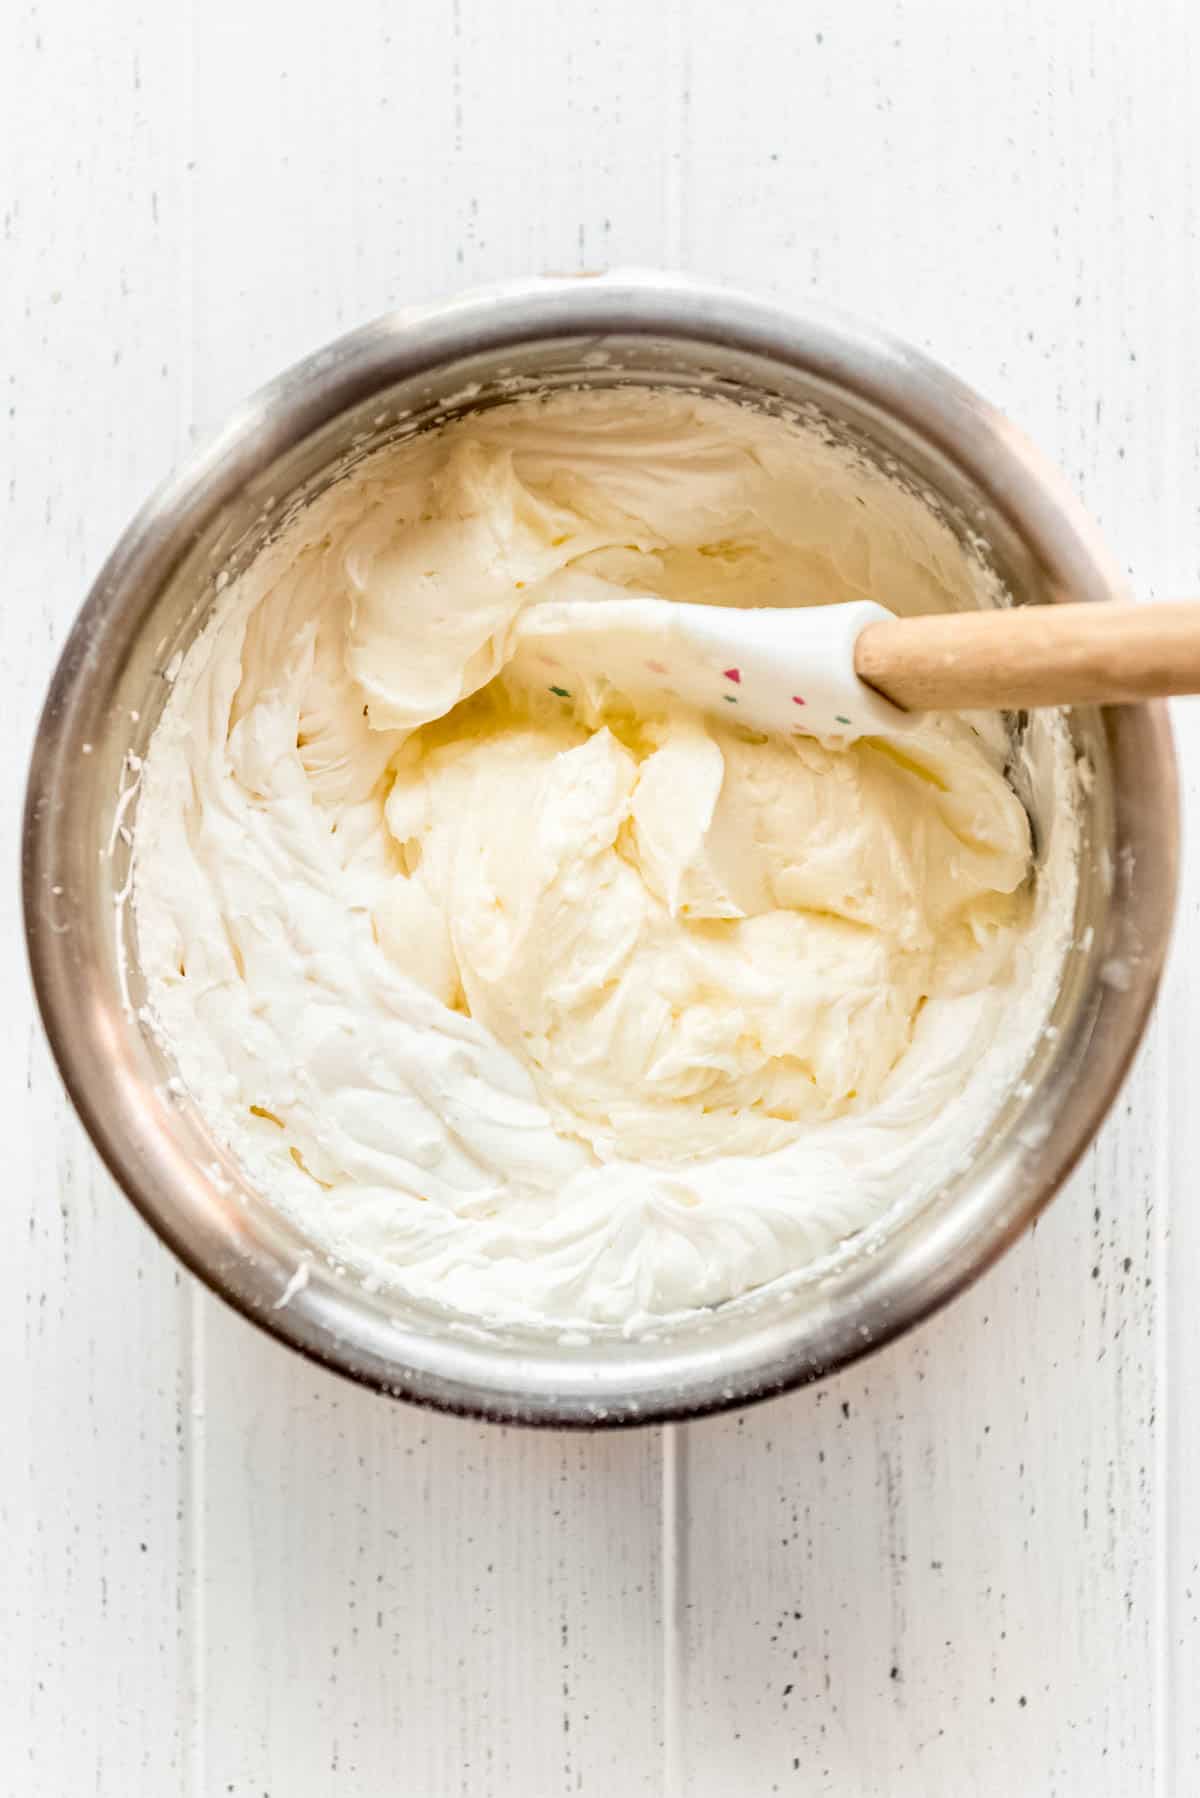
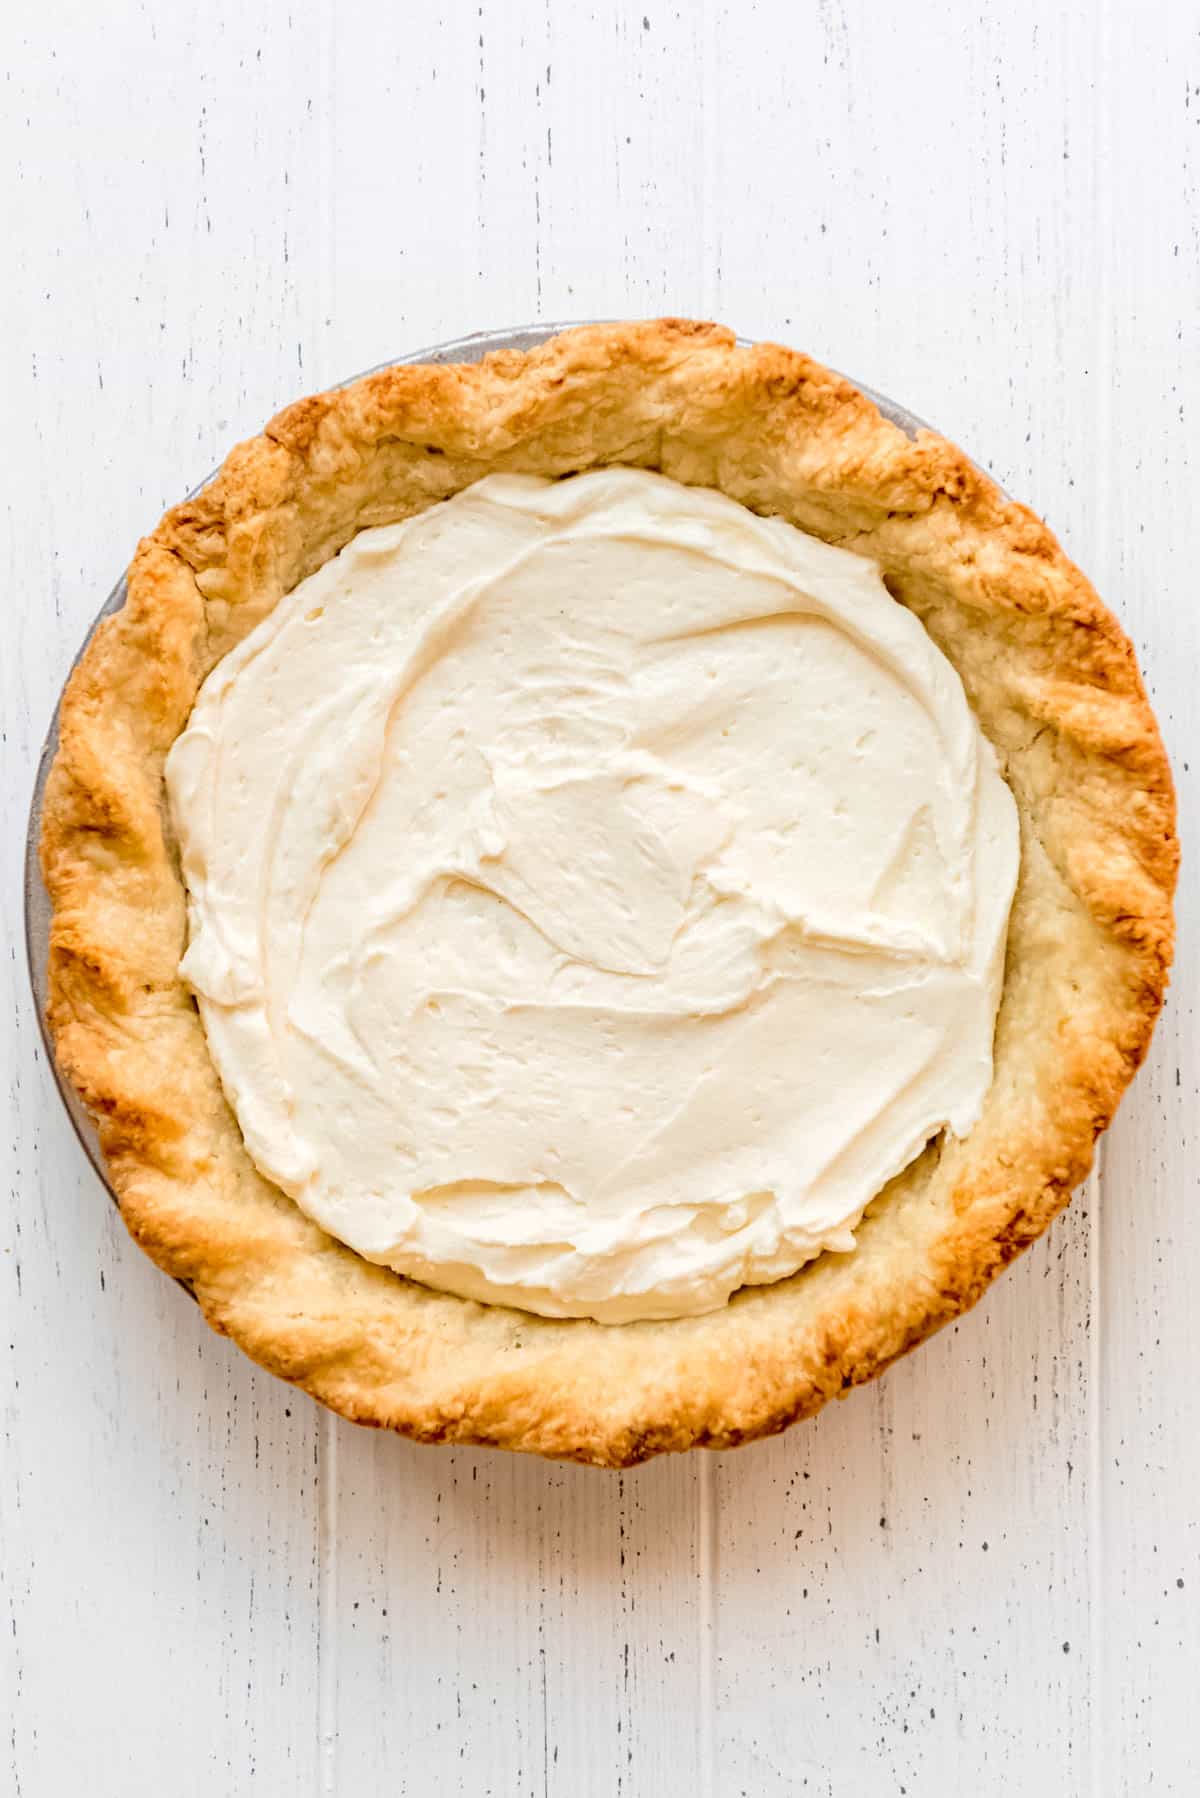
- Make the creamy layer: While the raspberry layer cools, beat the cream cheese really well with an electric mixer until smooth. Add the powdered sugar and vanilla and beat again. In a separate bowl, beat the heavy cream until stiff peaks form, then fold the cream cheese mixture and whipped cream cream together with a spatula and spread it into the bottom of the cooled pie crust.
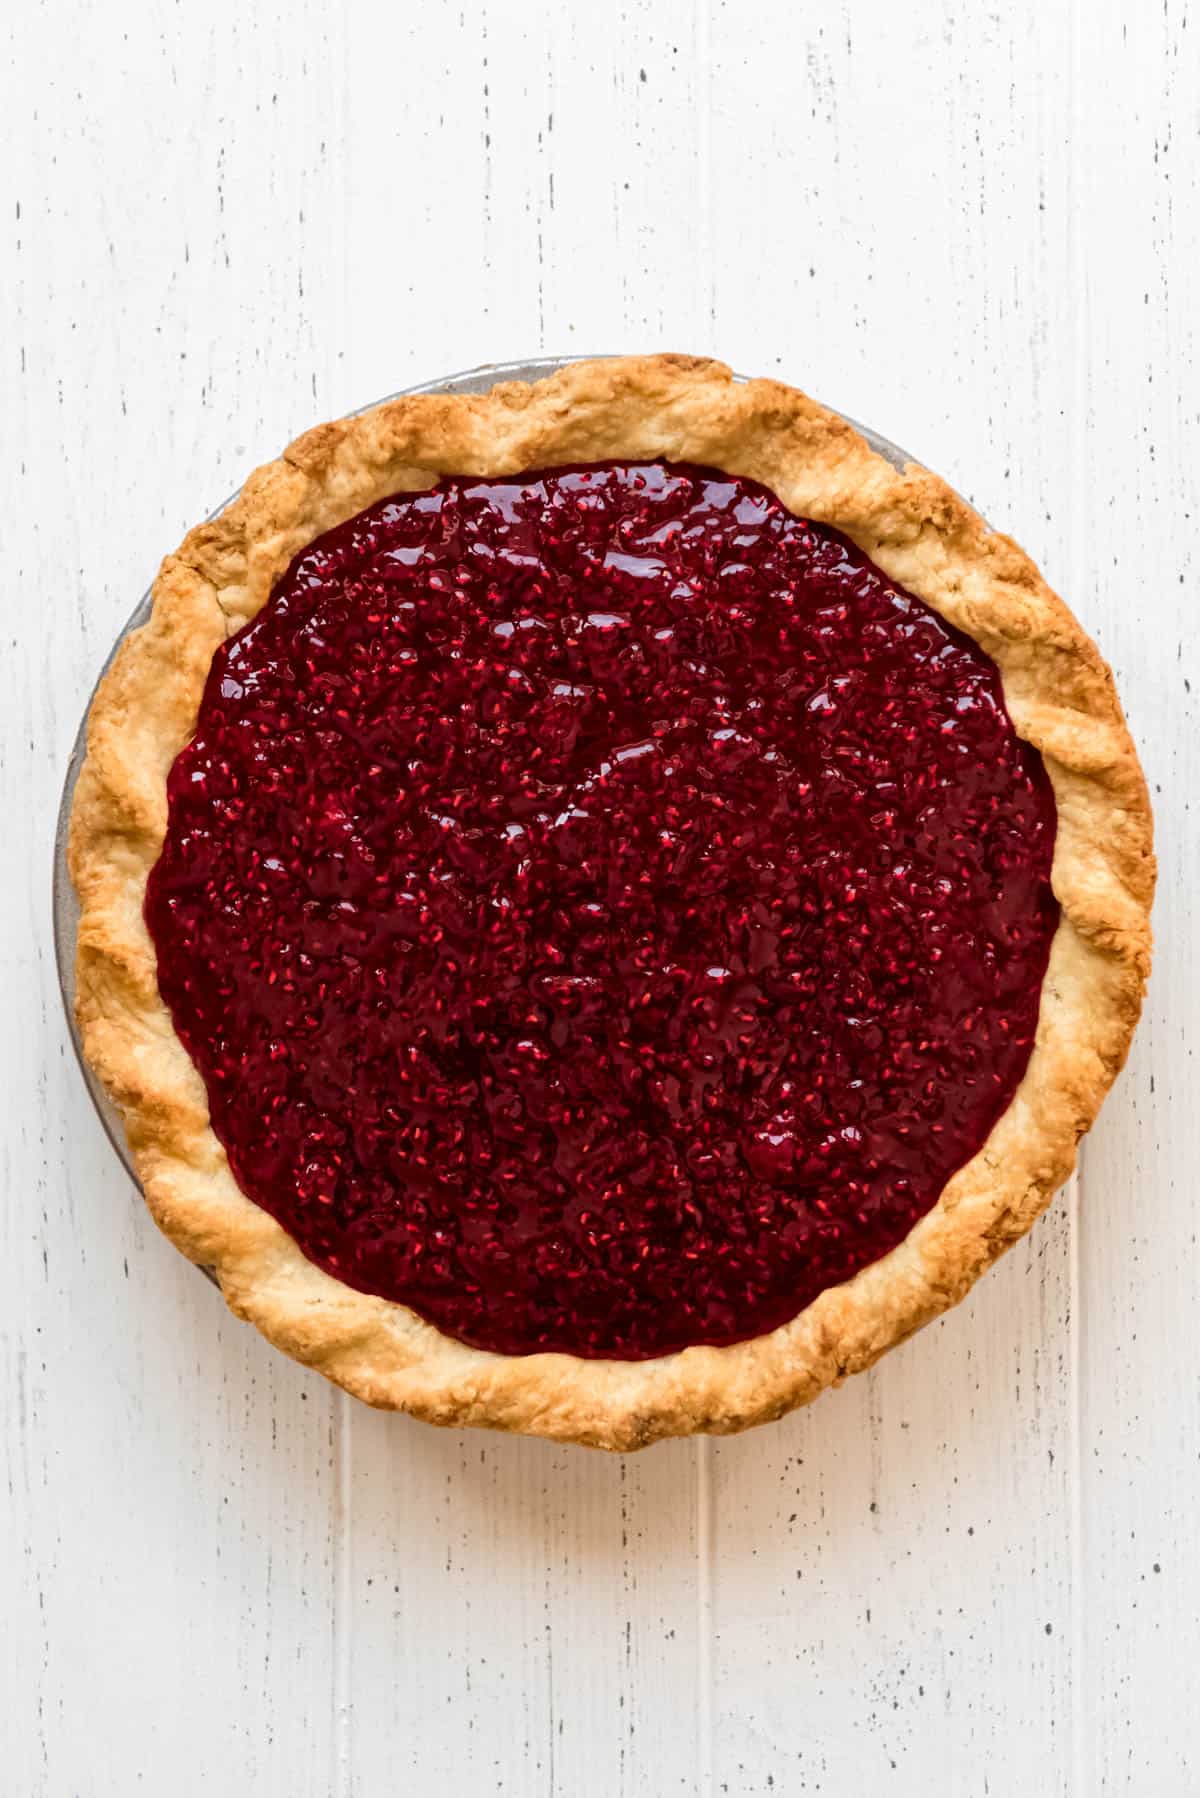
- Add the raspberry jam layer: Once the raspberry layer has cooled, pour or spoon it over the cream cheese layer. Transfer the pie to the fridge to set up completely, about 4 hours.
- Garnish and serve: You can serve the pie as is, but I like to use a piping bag fitted with a decorative tip to pipe swirls of sweetened whipped cream around the top and pile a mound of fresh raspberries in the center before serving.
Recipe Tips & Tricks
- Raspberry seeds: I actually enjoy the texture of the raspberry seeds in this dessert, but if you happen to really hate them you can strain the raspberry layer as soon as it has thickened while it is still hot. Use a fine mesh strainer and the back of a spoon or spatula to push the raspberry filling through, then discard the seeds.
- Soften your cream cheese: It’s important to let the cream cheese sit out at room temperature for 30-60 minutes before using it so that it has some time to soften. Otherwise you might end up with small bits of unmixed cream cheese in your filling.
- Give yourself enough time: This recipe isn’t hard, but it has a few different pieces that require chilling time. You can make the whole thing in one day, or work ahead by making the pie crust a day in advance, then filling and chilling for 4-6 hours before serving.
Variations
- Crust: If you don’t like traditional pastry crust, this pie is absolutely delicious with a graham cracker crust as well! Or try using biscoff cookies or Oreos instead of graham crackers to switch things up even more.
- Fruit: Although we love the tartness of the raspberries in this pie, you could easily swap them out for blueberries, peaches, strawberries, blackberries, or a number of other fruits. Just keep in mind that you might need to adjust the sugar a bit to account for sweetness and add some additional cornstarch if the fruit is juicier.
- Filling: Craving chocolate? Try melted 4 ounces of semisweet chocolate and mixing it into the cream cheese layer for a different kind of pie altogether!
Recipe FAQ’s
Yes, you will want to refrigerate your raspberry cream pie because of the cream cheese in the filling layer. It shouldn’t sit out of the fridge for longer than 2 hours.
You sure can! Although if you haven’t tried my homemade pie crust recipe yet, you should really give it a shot! It just might change the way you feel about making pie crust from scratch!
Yes, you can use a 1-to-1 gluten-free flour substitute to make your pie crust, which works great. Everything else about the recipe is already gluten-free!
You can make the pie up to 3 days in advance, although you should wait to decorate with whipped cream until just before serving. It can even be frozen and thawed in the fridge overnight before serving.
More Pie Recipes
- No-Bake Oreo Pie
- French Silk Pie
- Award-Winning Strawberry Cream Cheese Pie
- Homemade Razzleberry Pie
- The Best Banoffee Pie
- Kentucky Chocolate Walnut Pie
- Homemade Blueberry Pie

Did you make this recipe?
Let me know what you thought with a comment and rating below. You can also take a picture and tag me on Instagram @houseofnasheats or share it on the Pinterest pin so I can see.

Raspberry Cream Pie Recipe
Ingredients
Crust
- 1 1/4 cups unbleached all-purpose flour plus extra for the work surface
- 1 Tablespoon granulated sugar
- 1/2 teaspoon table salt
- 6 Tablespoons salted butter cut into 1/4-inch pieces and chilled
- 1/4 cup vegetable shortening chilled
- 3-4 Tablespoons ice water
Raspberry Layer
- 1 cup granulated sugar
- 3 Tablespoons cornstarch
- 12 ounces frozen raspberries
- 3 Tablespoons water
Cheesecake Layer
- 8 ounces cream cheese softened
- 3/4 cup powdered sugar
- 2 teaspoons vanilla extract
- 1 cup heavy whipping cream
To Garnish
- Additional raspberries
- Sweetened whipped cream
Instructions
Pie Crust
- Stir together the flour, sugar, and salt. Using a pastry cutter or a food processor (affiliate link) (if I had one I would use it!), cut the shortening and butter into the flour until the mixture resembles coarse crumbs. It is only about 10 pulses with a food processor (affiliate link) but a bit more work by hand. One trick to make the process a little easier is to freeze your butter beforehand, then grate it into the flour mixture before cutting it in with the pastry cutter if not using a food processor (affiliate link).1 ¼ cups unbleached all-purpose flour, 1 Tablespoon granulated sugar, ½ teaspoon table salt, 6 Tablespoons salted butter, ¼ cup vegetable shortening
- Sprinkle 2 tablespoons of the ice water over the mixture. Using a fork, gently stir the water in to the flour mixture, then repeat with the remaining water, adding only 2 tablespoons at a time, just until the dough starts to come together.3-4 Tablespoons ice water
- Divide the dough into two even pieces (if making a double-crust recipe). Turn each piece of dough onto a sheet of plastic wrap and flatten each into a disc and wrap tightly in plastic wrap. Refrigerate for 1 hour, then allow the chilled dough to sit on the counter to soften slightly for 10 minutes before rolling out.
- Preheat oven to 400 degrees F.
- Gently lay the rolled pie crust in the bottom of a 9-inch pie plate (affiliate link) and prick the bottom and sides with a fork to prevent bubbles. Line the pie crust with parchment paper or aluminum foil and fill with ceramic pie weights, dried beans, rice, sugar, or even pennies.
- Parbake the crust for 15-18 minutes, then remove the liner and weights and return the crust to the oven to finish baking all the way for another 15 minutes or so until golden brown and fully baked.
Raspberry Layer
- Whisk the sugar and cornstarch together in a medium saucepan. Add the frozen raspberries and water and heat over medium heat, stirring frequently, until raspberries break down and the mixture begins to thicken. It should turn from cloudy to clear. Remove from heat and cool for 30-45 minutes.1 cup granulated sugar, 3 Tablespoons cornstarch, 12 ounces frozen raspberries, 3 Tablespoons water
Cream Cheese Layer
- While the raspberry layer cools, beat the cream cheese in a large bowl using a hand mixer until creamy and smooth, about 2 minutes. Add the powdered sugar and vanilla extract. Beat again. In a separate bowl, beat the heavy cream until stiff peaks form. Add the whipped cream to the cream cheese mixture, stirring just until combined.8 ounces cream cheese, ¾ cup powdered sugar, 2 teaspoons vanilla extract, 1 cup heavy whipping cream
Assembly
- Spread the cream cheese layer into the cooled pie crust, smoothing out the top.
- Pour the cooled raspberry layer over the top and spread it to the edges. Transfer the pie to the fridge to cool completely for at least 3-4 hours.
- Decorate with sweetened whipped cream piped into swirls on top or dolloped on individual slices and fresh raspberries as a garnish.Additional raspberries, Sweetened whipped cream
Notes
- Crust: If you prefer, you can make a Graham Cracker Crust instead.
- Fruit: This recipe will also work with strawberries, blackberries, blueberries, or other fruit, although you may need to adjust the sugar slightly up or down depending on the natural sweetness of the fruit.
- Storage and Freezing Instructions: The finished pie can be kept in the fridge for 3-5 days. Or it can be frozen for up to 2 months. Thaw overnight in the fridge before serving.


I love this pie. The raspberries and the cream cheese go so well together. Will be making again and again!
I can see why this pie was a standout! So pretty and how can you not love a raspberry dessert? My family will love this!
Did i miss the amounts of ingredients to use?
I think you must have! It’s right in the recipe card at the end of the post. If you have a hard time finding it you can always click the “jump to recipe” button at the top of the page and it will take you straight there.
We’ve made it several times, it’s a favorite around here and is always a hit at gatherings.
Oh I am so glad! This is also one of our favorites! It’s so good!
We made this pie for Thanksgiving today. It was the best pie of the day! So easy to make and delicious! Thanks for a great recipe!