
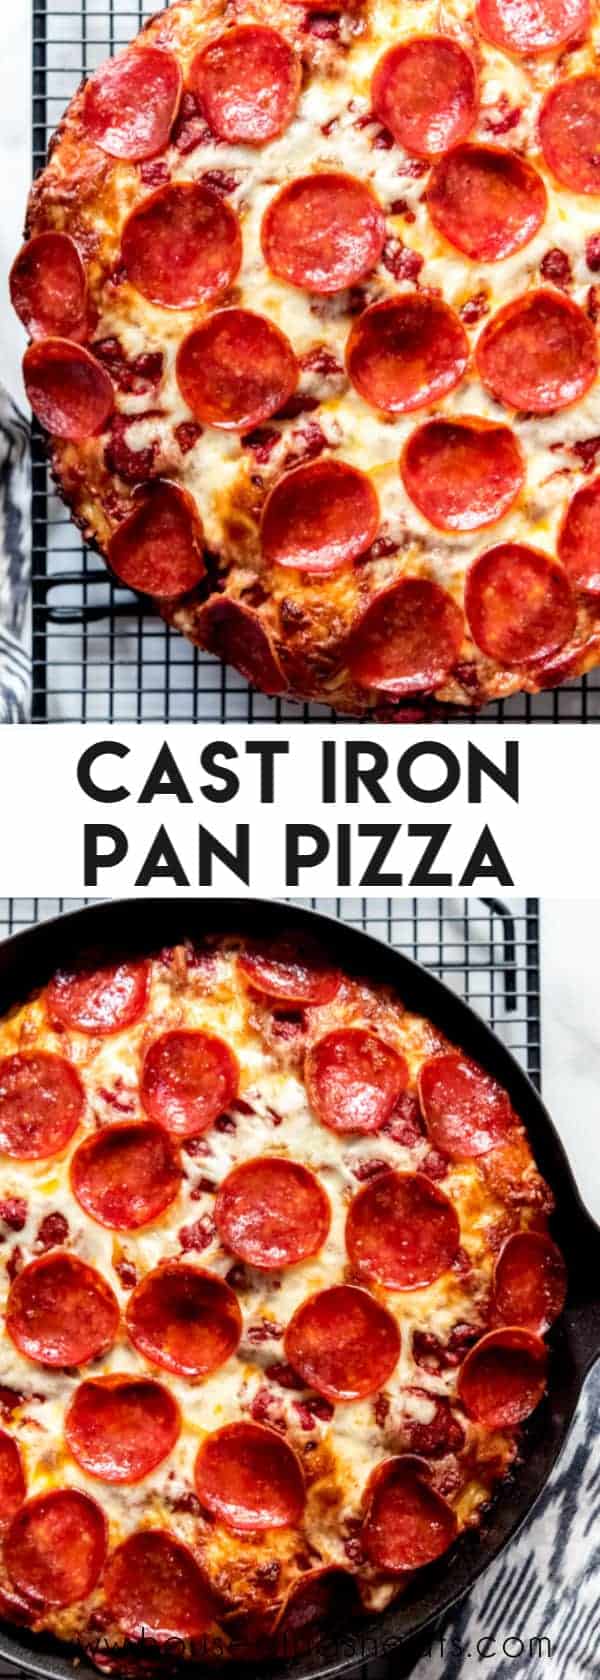


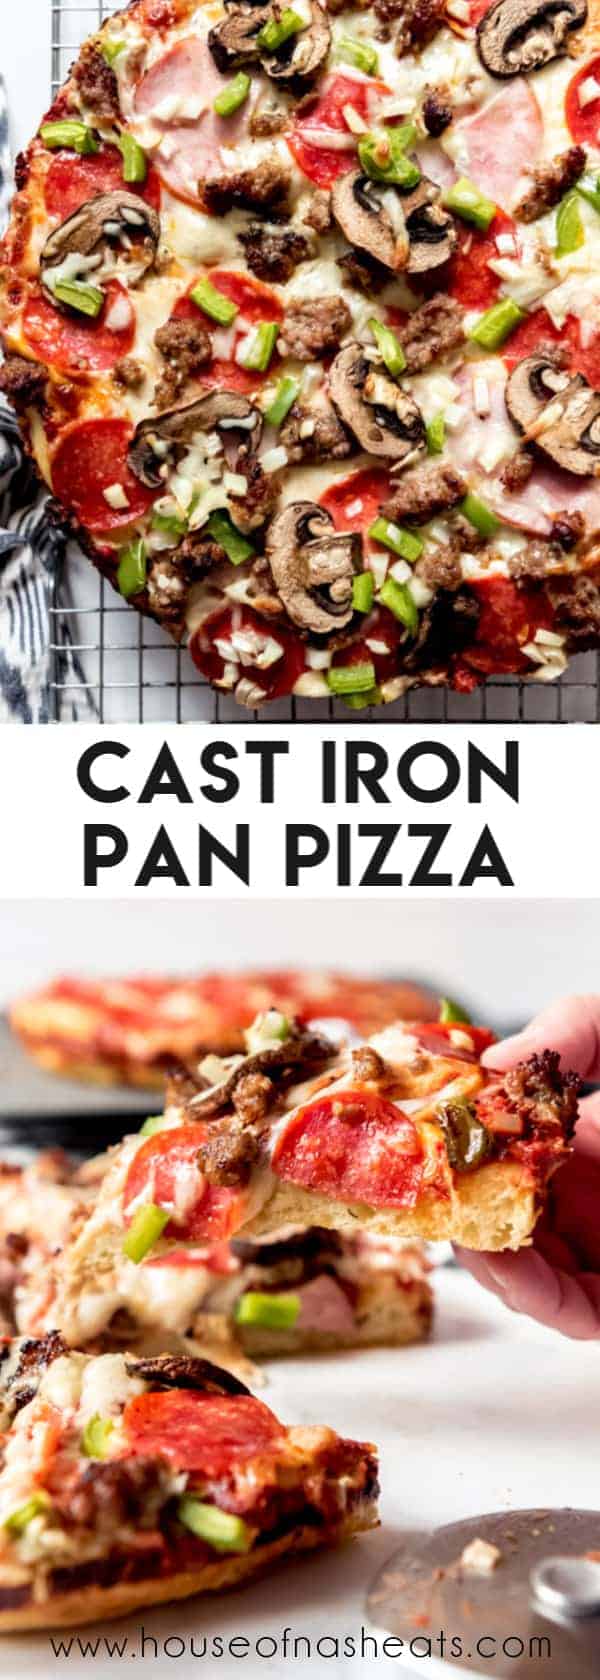
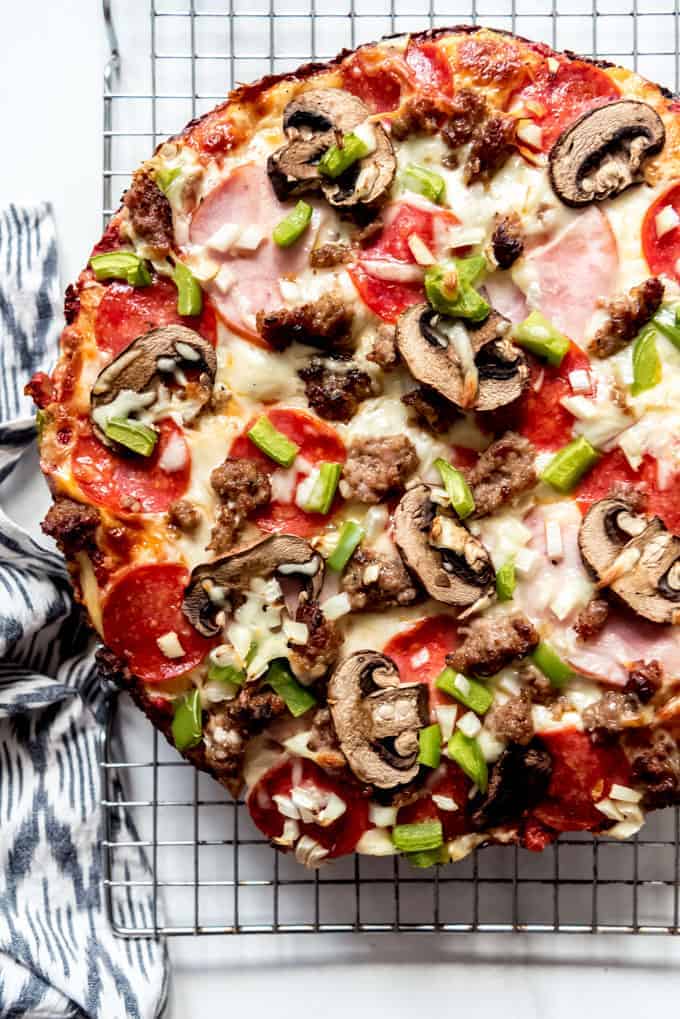
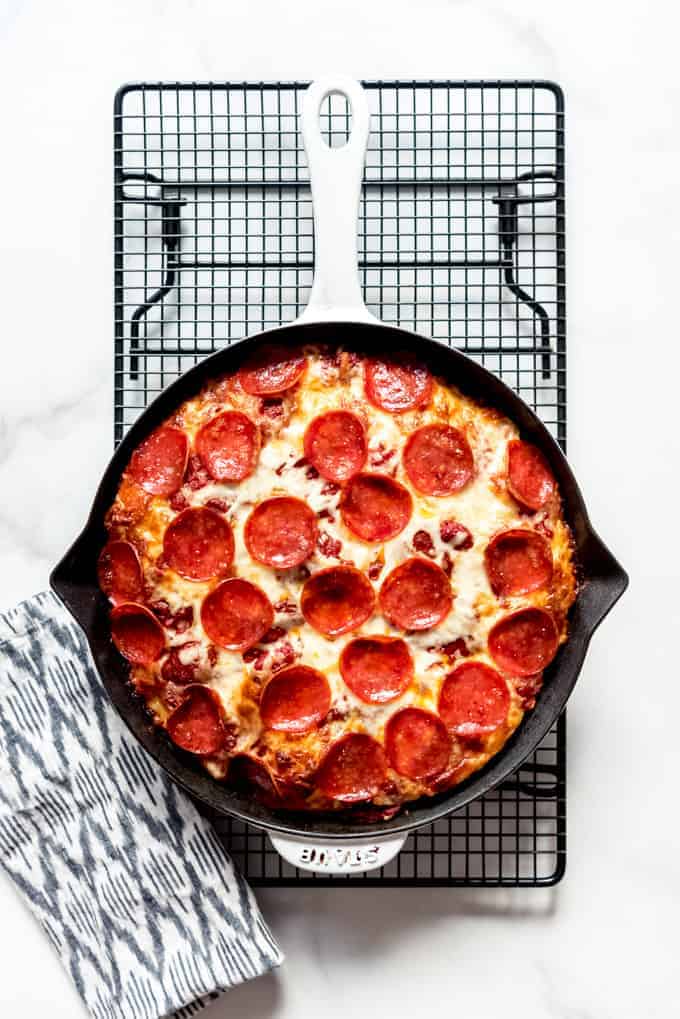
Hellooooo crispy, fried crust and a thick, almost focaccia-like puffy interior with all your favorite toppings! This Cast Iron Pan Pizza recipe doesn’t taste just like Pizza Hut: it tastes 1,000x better.
I love making pizza at home for my family. It’s one of the easiest yeast-doughs to work with, if that sort of thing intimidates you and has caused you to shy away from making loaves of bread.
Not only is making pizza a fun tradition that gets the whole family involved (what kid doesn’t want to have a say in which toppings go on the pie and helping to spread sauce and sprinkle cheese), but it also straight-up tastes better and is much less expensive than ordering takeout!
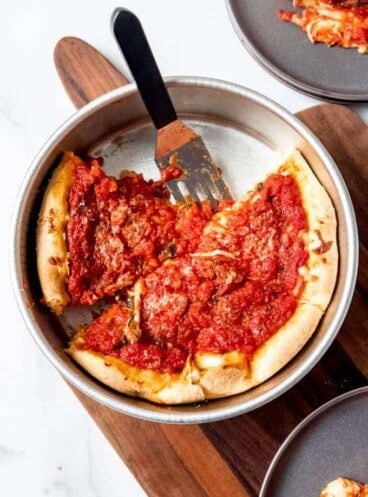
It’s a toss-up whether we love pizza or tacos more around here. But we definitely enjoy pizza night at home, especially on Fridays nights. Some of our other popular pizza recipes are Chicago Deep Dish Pizza, Four Cheese Pizza with Tomato Basil Arugula Salad, and Grilled BBQ Chicken Pizza.
Get ready for the best pan pizza of your life!
I grew up on Pizza Hut pizza thanks to their Book-It program in the 80’s and 90’s and my incurable bookishness and love of reading.
The Book-It program started in Wichita, Kansas in 1984 after President Ronald Reagan asked American businesses to get involved in education. Kids could earn 1-topping personal pan pizzas and a badge (remember those?) for reading books.
So I decided to include a Pizza-Hut style cast iron pan pizza recipe in my collection of foods that Kansas is known for as part of my American Eats series. Which was a bit of a risk since, if I’m being totally honest, Pizza Hut hasn’t my favorite pizza for a long time. Like, probably since I got the free personal pan pizzas with my book-it coupons as a kid.
But this cast iron pizza recipe has forever changed they way I feel about pan pizza and we will be making this over and over again from now on!
How to make pizza in a cast iron pan
When it comes down to it, the recipe below is almost exactly the same as my basic pizza dough recipe that is HUGELY popular on here and gets thousands of visits a day! But it’s the tiniest change to the recipe and some specific differences in the technique that create a whole different pizza experience that is a game-changer if you love deep dish pizza like I do.
- We’re going to dial back the yeast to just 1 teaspoon. The thing most people don’t know about yeast is that you can get away with less yeast than most recipes call for, as long as you compensate with an increased rise time. If you need things to rise faster, adding more yeast can help. This isn’t the approach if you want pizza in, say, 2 hours. It’s the approach you take on Thursday night when you know you want pizza for dinner the next day.
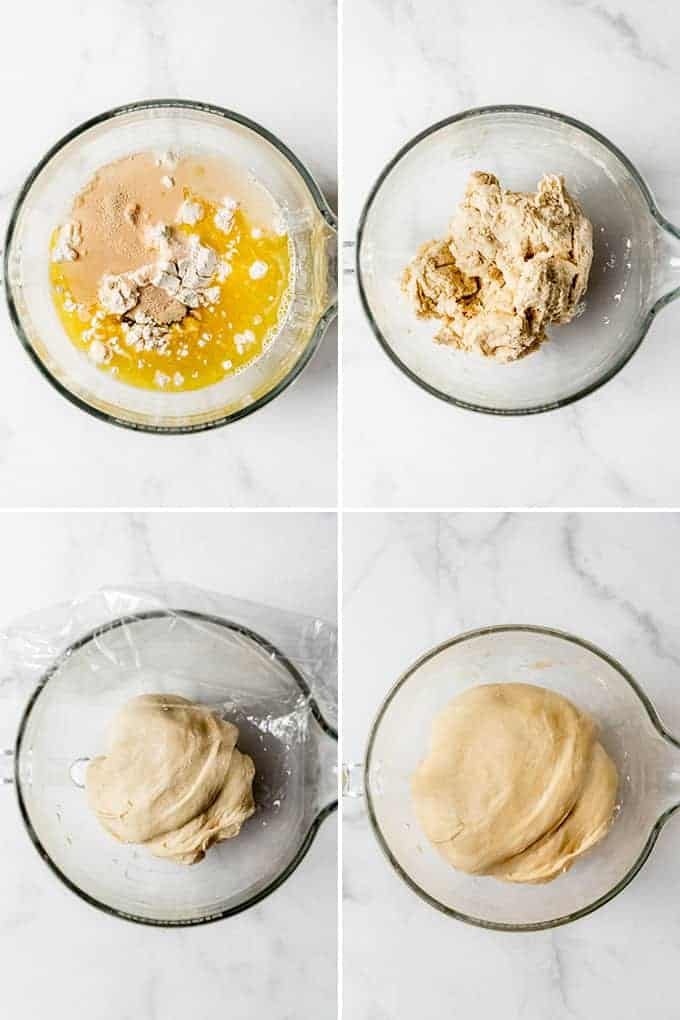
- This is practically a no-knead pizza dough. Instead of kneading the dough until it’s smooth, you just stir the ingredients together in a bowl until it’s a rough shaggy lump, then let it sit in the bowl on the counter for about an hour. Stretch and fold the dough every 15-20 minutes. Like, you literally just pull the dough away from the center in one direction, then fold it in half, turn the bowl a quarter turn and repeat, stretching, folding, and turning, for a total of 4 folds. Rest the dough for another 15-20 minutes and repeat 3 more times. It’s all of 5 minutes of work over the course of an hour. Do it once you put the kids to bed while you are watching a show whenever you get to the point where you need to fast-forward between commercials.
- Cover loosely with a piece of plastic wrap and do a long, slow rise in the fridge overnight. Or up to three days. Seriously, this dough can just hang out in the fridge for up to about 72 hours (longer than that and you will want to freeze it). Magic happens as the flavor of the dough develops over time.
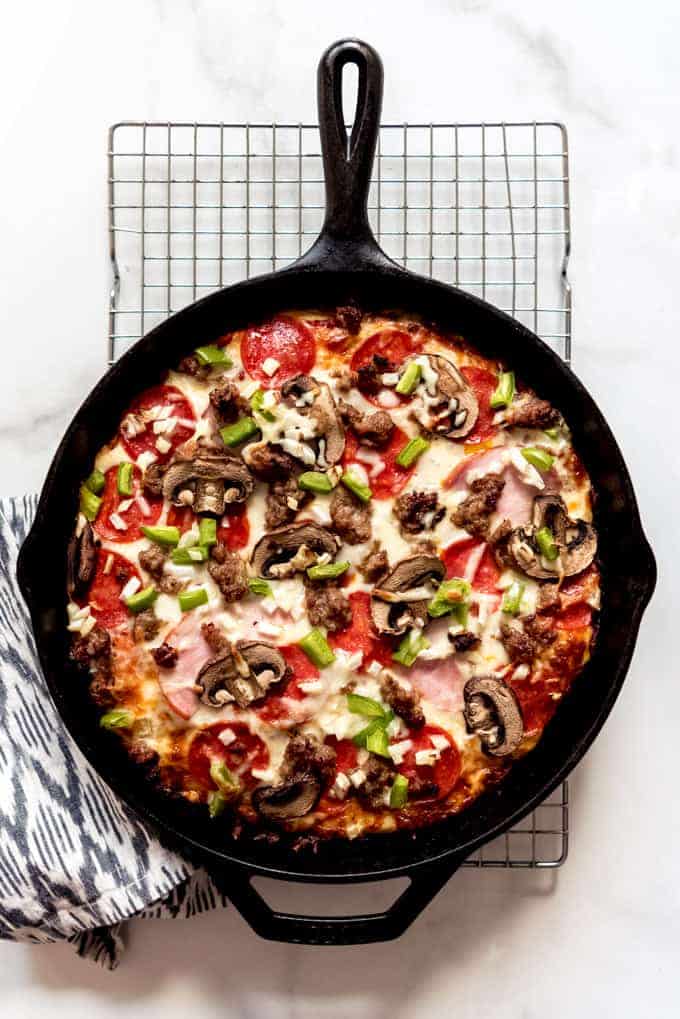
- THREE hours before you want to eat, pull the dough out of the fridge and generously oil TWO large cast iron skillets. This recipe makes enough dough for two 10″ to 12″ pizzas because our small family of four can easily handle one and we always want leftover pizza for lunch the next day anyway. You can always divide the recipe in half if you think one pizza will be enough and you don’t want leftovers.
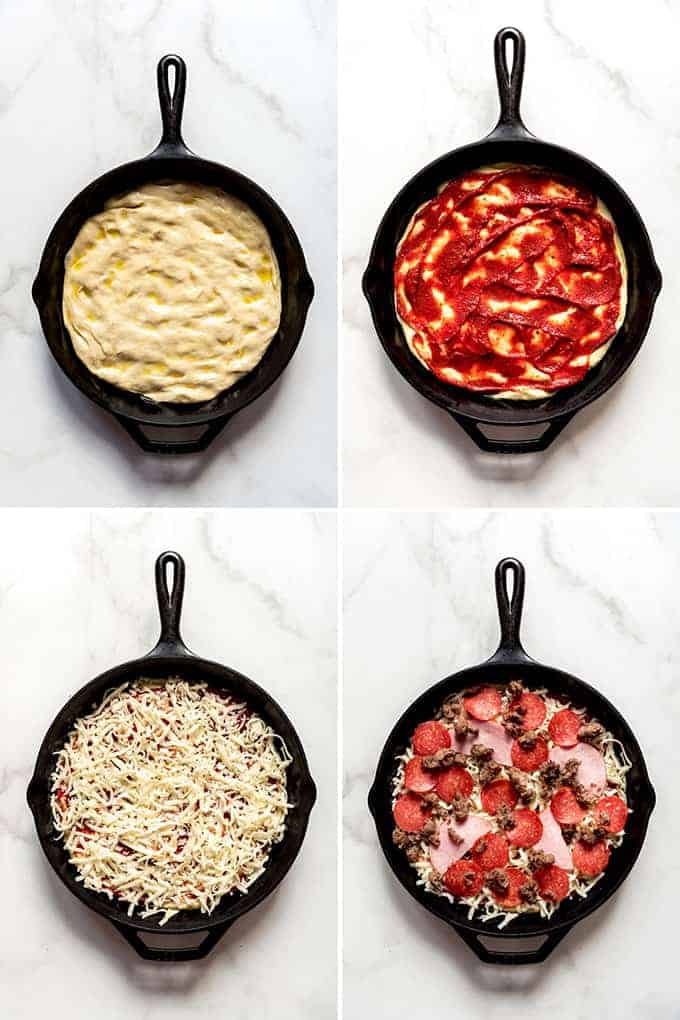
- Divide the dough in half and roll each piece in the pan so that the dough is evenly coated in oil. Then use your fingers to press the dough toward the edges of the pan. Don’t worry about stretching it all the way or if it wants to shrink back from the edges a bit. That’s totally normal! Just cover it loosely and let it rest for 15 minutes, then use your fingers to press it towards the edges of the pan again. Chances are it will stay put this second time around, but if not, give it another 15 minute rest then press it out again and call it good.
- Let the dough rise for 2 hours. The dough will still be cold from the fridge at this point, so give it a couple hours sitting on the counter to come up to room temperature and rise a bit. It will fill the pan all the way to the edges without any extra work.
- Preheat your oven to 550°F or 525°F or as high as your oven will go. The key to quality pizza at home is a really hot oven. I always preheat mine for at least 20-30 minutes before I put the pizzas in to bake.
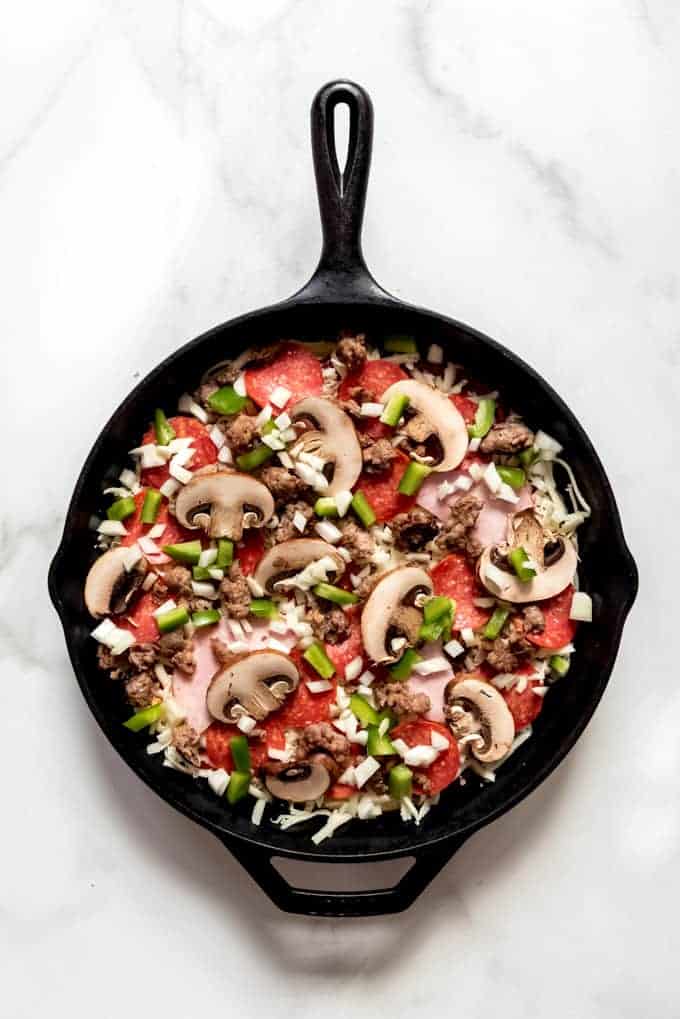
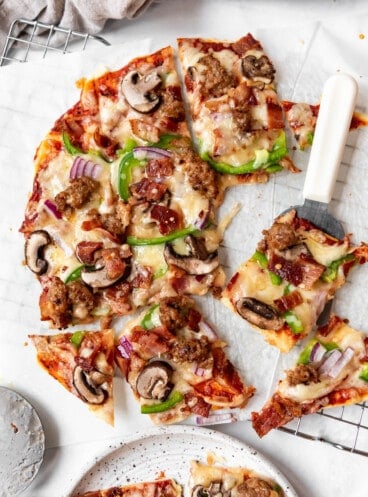
- Now for the fun part! It’s time to top your pizzas. Spread about ½ to ¾ cup of pizza sauce all the way to the edges of the dough. Sprinkle each pizza with 1 ½ cups of freshly grated mozzarella cheese, then top with your favorite toppings and they are ready to bake! Don’t go overboard on the toppings, which can weigh down the crust and make it more difficult to cook through evenly.
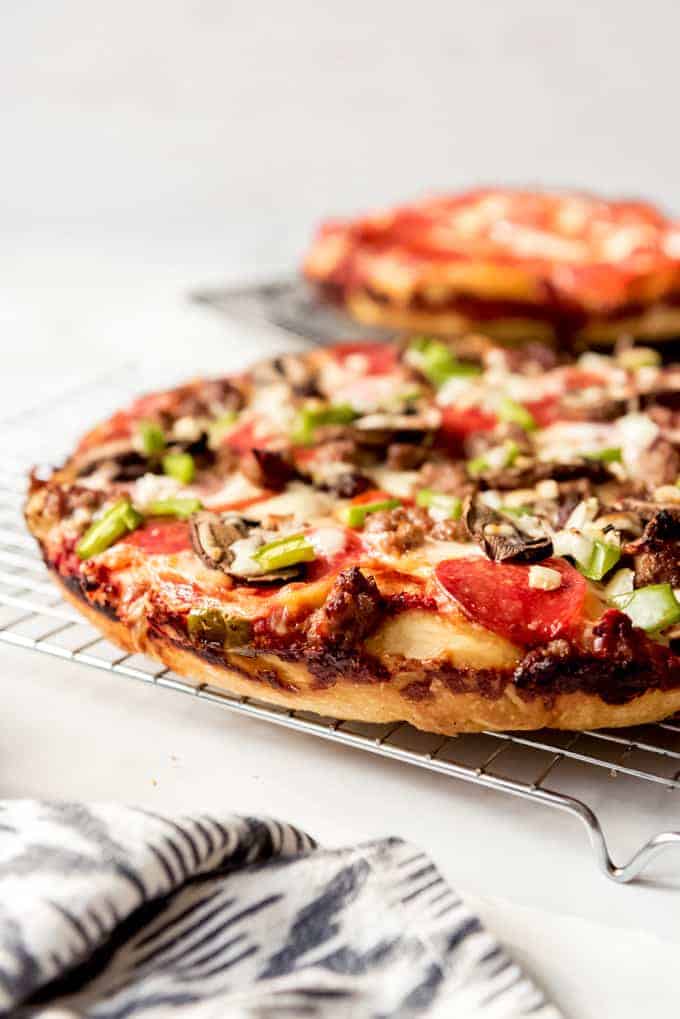
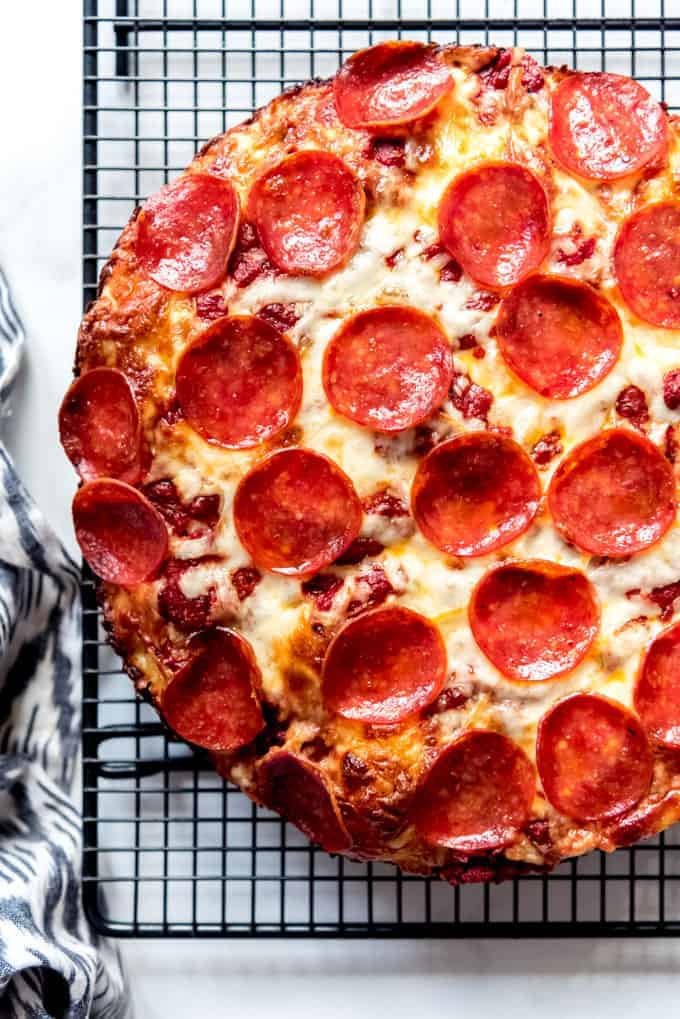
- Pop the pizzas in the oven and bake for about 12-15 minutes until crispy on the bottom. Use a spatula to lift the pizza from the pan a bit to check on whether the bottom crust is done yet or not. It should be a beautiful golden brown. You might need to pry the edges away just a bit if there wasn’t quite enough oil to prevent the cheese from sticking, but otherwise the pizza should pretty much be ready to just slide right out at this point.
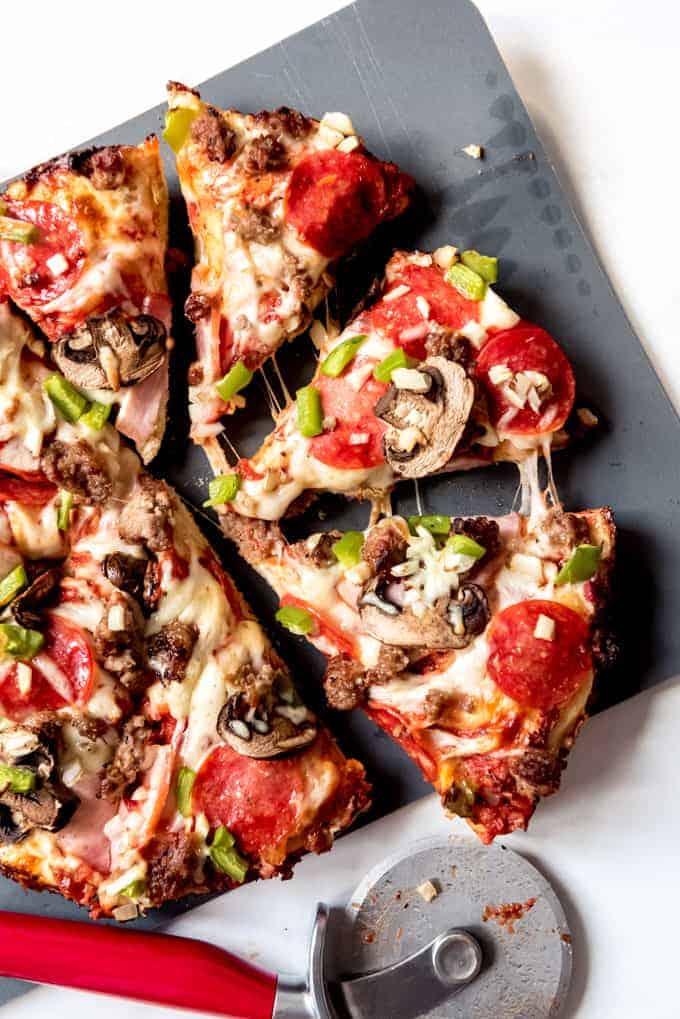
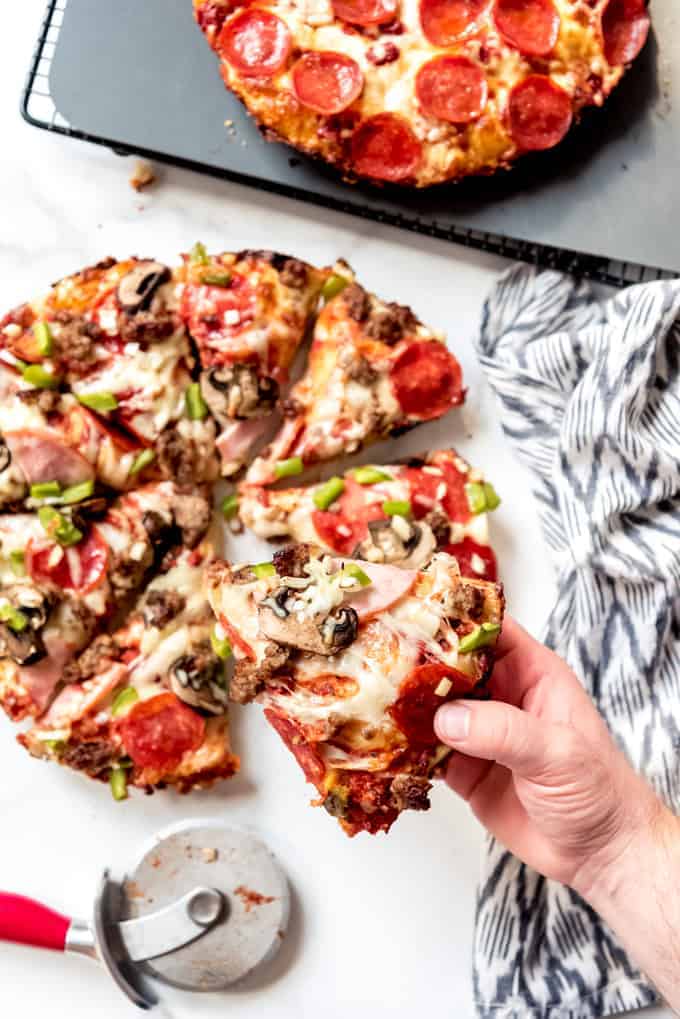
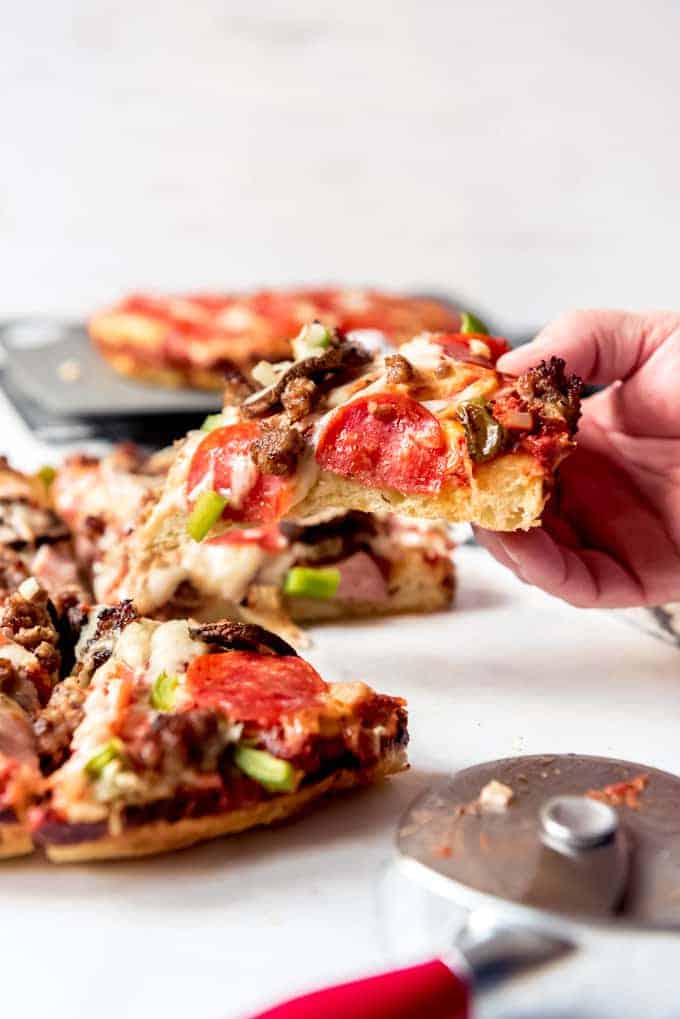
- Do NOT cut the pizza in your cast iron pan! This could easily damage your pan, and frankly, it’s much easier to slice pizza with a pizza cutter or a large sharp knife when you slide it out onto a cutting board. Let the pizza rest for a minute or two, then run a knife around the edges and slide the pizzas out of the pan onto a cutting board within 2-3 minutes of removing from the oven so they don’t start to steam in the pan and lose some of that wonderful crispiness.
What if I want pan pizza but don’t want to wait overnight?
If you find the method of folding tedious or you just want pan pizza today, that’s okay too! Go right ahead and make my regular pizza dough recipe which is ready to go into the pan after about an hour long rise and use that instead. It doesn’t have quite the same flavor because it doesn’t have the same time to develop overnight, but you will still get excellent, crispy crust pizza in the end.
You could even use store-bought pizza dough and still have pretty great pizza thanks to the magic of a well-oiled cast iron pan.
Should I use a 10-inch or 12-inch cast iron pan?
Either size skillet will work with this recipe. A larger pan will result in a still puff and thick crust, but it won’t be as bread-y as the smaller 10-inch pan. I have one of each size and honestly the pizza is delicious either way.
If you don’t have an oven-safe cast iron pan to use, you could also use a baking dish or even a 10-inch cake pan.
Do you have to preheat a cast iron pizza pan?
You don’t need to preheat your cast iron for this recipe. In fact, doing so would be problematic since we are just stretching and pressing out the dough in the pan and letting it rest until it fills the pan, rather than rolling it out to fit. A hot pan would start to cook the pizza too soon.
Some of our favorite topping combinations for pan pizza
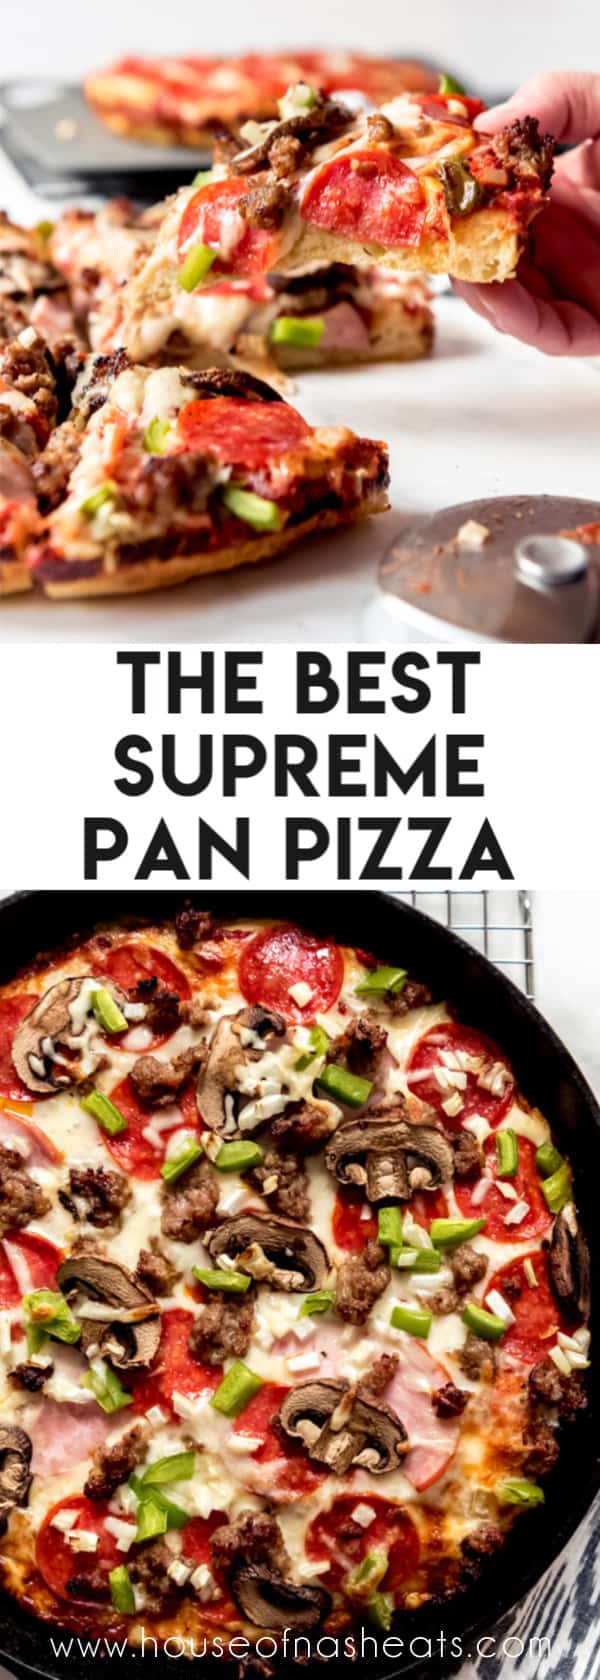
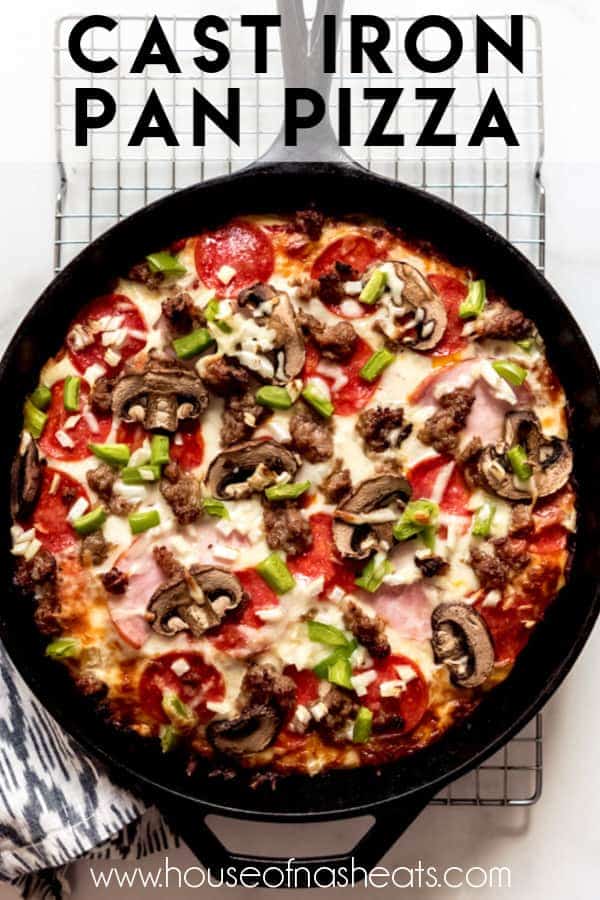
Supreme: pepperoni, canadian bacon, cooked mild Italian sausage, chopped green peppers, chopped onions, sliced mushrooms, and olives
Pepperoni: It’s so simple and basic, but always a favorite.
Hawaiian: canadian bacon & pineapple
Meat Lovers: pepperoni, canadian bacon, cooked mild Italian sausage, salami, and crumbled cooked bacon
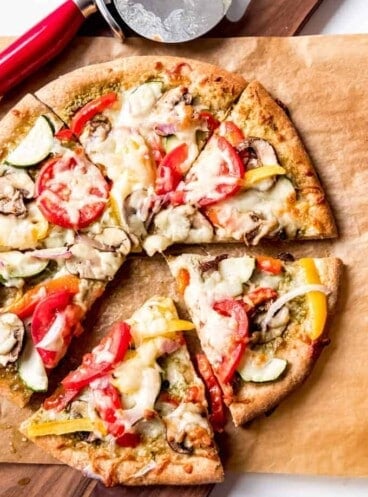
Garden Veggie: green peppers, red onions, spinach, mushrooms, artichoke hearts
More restaurant-quality recipes you’ll want to make at home
- Olive Garden Salad Dressing
- Bombay House Chicken Tikka Masala
- Chicken Madeira
- Chicken Marsala
- Honey Walnut Shrimp
- Crispy Egg Rolls
Did you make this recipe?
Let me know what you thought with a comment and rating below. You can also take a picture and tag me on Instagram @houseofnasheats or share it on the Pinterest pin so I can see.

Cast Iron Pizza (Pizza Hut Pizza Recipe)
Ingredients
Dough
- 3 3/4 cups bread flour
- 1 1/2 cups lukewarm water
- 1 teaspoon instant or active dry yeast
- 2 teaspoons kosher salt
- 2 Tablespoons olive oil + 4 tablespoons olive oil for the pan
Assembly
- 1 to 1 1/2 cups [pizza sauce] divided
- 3 cups shredded mozzarella cheese divided
- Any desired toppings like pepperoni cooked Italian sausage, sliced mushrooms, onions, peppers, olives, pineapple, etc.
- 2 Tablespoons freshly grated Parmesan cheese divided
Instructions
- Combine flour, water, yeast, salt, and olive oil in the bowl of a stand mixer. Mix with the paddle attachment for 30-45 seconds, just until everything comes together in a shaggy dough. This can also be done by hand with a spoon by stirring for 1 minute. Scrape down sides of bowl to gather the dough into a rough ball, then cover loosely with a piece of plastic wrap and let it rest for 5 minutes.3 ¾ cups bread flour, 1 ½ cups lukewarm water, 1 teaspoon instant or active dry yeast, 2 teaspoons kosher salt, 2 Tablespoons olive oil
- After 5 minutes, use wet hands to stretch the dough out, pulling from the bottom, and laying it over the top of itself, sort of folding it in half. Rotate the bowl 90 degrees and repeat the motion of stretching the dough out and folding it on top of itself 3 more time for a total of 4 folds. If the dough is sticking to your hands, moisten them again or use a wet bowl scraper to scrape the dough away from the side of the bowl so you can pull the dough from the bottom. Cover and let rest for another 15-20 minutes.
- Repeat the process of making the four folds, then covering and resting for the dough for 15-20 more minutes between each set of folds, three more times, for a total of four rounds of folding that take the place of kneading the dough. After that, cover with plastic wrap and let rest for 40 minutes at room temperature before sticking the dough in the fridge to slowly rise overnight. Let the dough rise at least 12 hours, but up to 72 to develop flavor.
- Three hours before you want to serve the pizza, take the dough out of the fridge. Divide the remaining olive oil between two 10" or 12" cast iron pans (2 tablespoons per pan), swirling to coat the pans well and using your fingers to use some of the oil to grease up the sides a bit as well. If you don’t have a cast iron pan, another oven-safe skillet, 10-inch cake pan, or even a 9×9-inch square baking dish will work.
- Divide the dough between the two pans, turning to coat both sides with oil. Gently press the dough towards the edges of the pan, dimpling it with your fingers as you do so. If the dough shrinks back, that’s okay. Let it rest for 15 minutes, then stretch it again until it reaches the sides of the pan. If it still doesn’t reach the edges, give it a final 15 minutes rest and then stretch it one more time.
- Cover the crust loosely with a piece of plastic wrap and let it rise at room temperature for 2 hours. 30 minutes before baking, preheat the oven to 550°F (or as hot as your oven will go).
- Top each pizza with about ½ to ¾ cup of pizza sauce, spreading it all the way to the edges of the crust. Sprinkle with the shredded mozzarella cheese all the way to the edges of the pizza to create a caramelized edge crust. Top with the your favorite toppings and sprinkle each pizza with Parmesan cheese.1 to 1 ½ cups [pizza sauce], 3 cups shredded mozzarella cheese, Any desired toppings like pepperoni, 2 Tablespoons freshly grated Parmesan cheese
- Bake on the bottom rack of the oven for 12 to 15 minutes until the cheese is bubbling and the bottom and edges of the crust are golden brown. You can use a metal spatula to lift and check the bottom. If your oven doesn't go all the way to 550°F, you will need to increase the baking time to more like 18 to 20 minutes for a lower temperature like 450°F.
- Run a knife around the edges to keep the cheese from sticking as it cools, but let the pizzas rest for 2 minutes. Use a metal spatula to slide the pizzas out of the pans onto cooling racks so the crust stays crisp. If you leave the pizzas in the pan too long, the crust will start to go soggy. Slice and serve.
Notes
- If you want to make the process go a little faster, you can wait 5 minutes instead of 15-20 minutes in between each set of folds.
- Be careful not to overload the dough with too many toppings, which can make it difficult for the pizza to cook through.
Nutrition
Sources: adapted from King Arthur Flour
More States I Have Visited in my American Eats Series
Alabama • Alaska • Arizona • Arkansas • California • Colorado • Connecticut • Delaware • Florida • Georgia • Hawaii • Idaho • Illinois • Indiana • Iowa • Kansas • Kentucky • Louisiana • Maine • Maryland • Massachusetts • Michigan • Minnesota • Mississippi • Missouri • Montana • Nebraska • New Jersey • New York • Oregon • Puerto Rico • South Carolina • South Dakota • Texas • Utah • Wisconsin


Whoa, you nailed it! I was also a Book-It child and still crave this pizza.
Lol, thanks! Yay for the Book-It program!
Can you freeze the other half of the pizza dough (for the second pizza) for another day?
Yes! You sure can! Pizza dough does well in the freezer. Just plan ahead so it has enough time to come completely to room temperature and rise a bit on the counter.
I love making homemade pizza so much, I actually bought 2 cast iron pizza pans last year. The problem was, I could never find a crust recipe I liked. Until yours! It is wonderful. I made the dough yesterday and the pizzas tonight. The crust really does taste buttery. The only thing I did a tiny bit differently was, I used garlic infused olive oil in the crust because that’s what I use in my pasta dough. Regular olive oil for the pan. Thank you!
i guess you haven’t had any problems, but does putting a room temperature skillet into a red hot oven come with the risk of cracking it?
No, not if it is cast iron.
Made this a few weeks ago turned out fantastic!!! However we didn’t eat both pizzas so I froze one. Used my limited ides on how to reheat the second pie. I used some olive oil to grease my frying pan and heated my oven to 500. Placed my already perfectly cooked pizza in pan in oven and heated for 17 min. The edges got a little dark but the center fell. I was left with a greasy gooey center. What did I do wrong? Ideally I would like to freeze one pie before cooking at all. Do I need to freeze the dough alone then thaw and then dress the pie? Or can I get it all to the point of putting it in the oven and freeze the whole thing before actually cooking. Any idea would be most helpful. I must say the first pie was the best we’ve ever eaten and my wife says it’s the only recipe she ever wants me to make again.
I think you would be just fine to freeze the entire pie and bake from frozen. But yes, you can definitely freeze the dough, then thaw and proceed from there like normal. So glad you guys loved this one so much!
Best homemade pizza ever. My husband and I don’t really order out for pizza anymore.
If using active yeast you need to activate it in water before adding to the dry ingredients?
I don’t bother activating it in this recipe as long as I know it’s fresh because of the repeating kneading process and long, slow rise in the fridge. It won’t hurt to activate first though.
i dont have bread dough
Hi Cindi. Do you mean bread flour? You can use regular all purpose, you may just need to add a bit more. It will still work! Hope this helps.
Omg! Cyndi..buy bread FLOUR…LOLOL
Several months back I began looking for a good pizza dough recipe, and found yours. This quickly became a favorite go to pizza. I love the flavor it develops and try to shoot for 72 hours but, usually make it within 48. So good. With a good homemade sauce and all our favorite toppings. I then fire up my smoker and bake it. Local pizza places can’t touch this. Thanks so much~
Oh I am so glad you enjoy this pizza dough! Making a good pizza at home really is so much better than going out (unless it is a night where you really don’t feel like cooking ;)!
This is the best pizza I have ever had at home. I used part of the dough to make cinnamon sticks.
Oh thank you so much! Making cinnamon sticks sounds so good! Glad you enjoyed the pizza!
Can I freeze the other half of dough
Yes, you can!
So..I did..thanks a bunch!!! Getting ready to top abd bake…wish I could post a pic!!! I love your recipes Amy!!!
Yay! You can always post a pic and tag me on IG! So glad you love this one!
Omg!!! Fantastic!!!! I sure wish I could add a pic!!! Best pizza I’ve made yet!!!
This makes me so happy!
This turned out so well for me! Delicious!
So I made today for the first time yesterday and it was pretty good. The bottom didn’t get crisp like I had hoped. I’m not sure why. Can you clarify one thing for me please? The top of the instructions say to let the dough rest five minutes after each stretch and fold however, the bottom instructions say to let it rest 15 to 20 minutes between each stretch and fold. What is your recommendation?
I give this recipe five stars. It is awesome. I do have a question though in the upper body of the post, the instructions say to stretch and fold every 15 to 20 minutes yet in the recipe at the bottom, it indicates every five minutes. Can you clarify please?
Hi! To be honest I usually just do 15-20 minutes. Every five minutes will work too but the difference is subtle. I’ll change the recipe card to match so they both say 15-20 minutes! I am glad you enjoyed the pizza.
Hi Amy,
I am wondering if you have suggestions on how to prepare this pizza for freezing. Should I par-bake the crust, then add toppings and bake? Any suggestions would be appreciated. This is the only pizza I make now but, it sure would be helpful if I could make it ahead of time so someone else could just bake it, or even to make a quick to grab dinner 🙂 Thank you!
Rebecca
This is a great question and I should probably go back and do some testing. The one thing I know works because I have done it a bunch is to make the dough through the long fridge rise to develop the flavor, then freeze the dough for 2-3 months. When I know I want to make pizza I can pull it out and let it thaw on the counter or in the fridge. If you wanted to assemble the pizza and freeze, I’m thinking it could be possible to freeze by par-baking the crust for 5-10 minutes, top it, then freeze the pizza. Then when you wanted to bake it, you could maybe just bake from frozen like the freezer pizzas you see. I haven’t tried it yet though so I can’t say for sure whether that will work but I would love to hear your experience if you get to it before I do!
This recipe is absolutely worth fighting your way through all the pop-up bats. The crust was so easy to make an incredible. I will make this again and again and again. Please excuse the spelling errors, my iPhone will not let the cursor get up to the words to fix them. 😂
Hi
I have only used my bread machine to make the dough. There is a setting for plain pizza dough. I will try to hand mix the dough with the folding technique and compare the texture and taste. The bread machine recipe calls for olive olive added to the liquid portions. Along with the salt and sugar. Then to add the flour and yeast. I hour and 55 minutes later, the dough is set out to rise. If I’m having that evening, I do not refrigerate. I then spread it out in the cast iron .. set the oven for 450 for 12-15 minutes. I tend not to top it with anything but sauce , parm and Moutz. Not bad…
Can’t edit to try your recipe.
Thank you . I will let you know,
Sounds delicious. Yes, can’t wait for you to try it! Let me know how it goes!
Hi .just sent a comment . I forgot to ask…. How about a good baguette recipe.
Thanks
Yes I need to make one!
Love this recipe. If I feel like my pizza is done but not browned enough on the bottom, I simply place on the stovetop for a could of minutes and it turns out beautiful. Also, I don’t like the bottom to get soggy so I let it cool on a baking rack for a few minutes before placing it onto a cutting board to slice.
Thanks Camilla! Great tips for a perfect crust!
This is the best homemade pizza I have ever had! No joke!!! I have tested many recipes and most the time they are good, but fall far short of what I am actually looking for in a pizza. This recipe, however, did not disappoint!!! I feel like it is the pinnacle of pizza perfection!
Well done!! This is a FANTASTIC recipe! Thank you!!!
Thank you so much!
Dough takes work, but well worth it 🍕😋👍🏼
I’ve made this recipe many times. It’s absolutely perfect. It takes me back to my childhood.
Yes! It’s a bit nostalgic for me too!
My dough is wet and sticky. Is it supposed to be like that? Followed the directions exactly as stated.